remote control AUDI Q7 2009 Owner´s Manual
[x] Cancel search | Manufacturer: AUDI, Model Year: 2009, Model line: Q7, Model: AUDI Q7 2009Pages: 426, PDF Size: 97.13 MB
Page 62 of 426
Opening and closing
• If the rear l id on a locked vehicle is unlocked with the middle
button
~ on the remote key, the rear lid is automatically locked
again immediately after closing . This is indicated by the turn signals
blinking.
• The following applies to vehicles equipped with the Convenience
key* feature: if the remote control key is left in the luggage compart
ment, luggage compartment will automatically unlock itself after
you lock the vehicle . This prevents you from unintentionally locking
your key in the luggage compartment.
• If the vehicle battery charge drops below a certain level , you can
still open or close the rear lid manually , however , you will need to
apply more force to close it.
• As soon as the electrical connection to the trailer so cke t is
completed on vehicles with a factory installed towing hitch, or a
trailer hitch tha t was installed later according to factory specifica
tions, the automatic rear lid function can only be operated via the
handle in the rear lid. •
Rear lid emergency unlocking
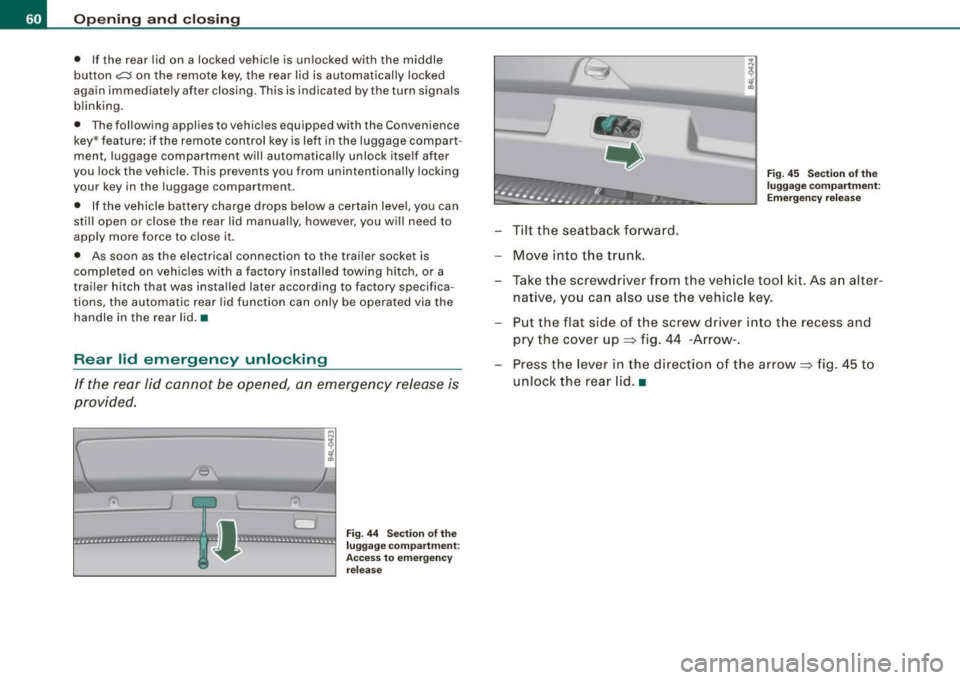
If the rear lid cannot be opened, an emergency release is
provided.
------------------! ~
:
'
Fig. 44 Section of the
luggage compartme nt:
Access to emergency
relea se
- Tilt the seatback forward.
Move into the trunk.
Fig. 45 Section of the
luggage compartme nt:
Emergency release
-Take the screwdriver from the vehicle tool kit. As an alter
native, you can also use the vehicle key.
Put the flat side of the screw driver into the recess and
pry the cover up=> fig. 44 -Arrow-.
Press the lever in the direct ion of the arrow => fig. 45 to
unlock the rear lid.•
Page 66 of 426
Opening and closing
H ow is th e a nti-th eft alarm s yste m swi tched off ?
The anti -theft alarm sys tem is switched off only whe n you un lock
your vehicle. If you do not open a door within 60 seconds after you have un locked with the remote control , the vehicle will lock itself
again automatically.
When will the anti -th eft alarm syst em be trigg ered ?
When the vehicle is locked, the alarm system monitors and protects
the following parts of the vehic le:
• engine compartment
• luggage compartment
• doors
• ignition
When the system is activated, the alarm will be triggered if one of
the doors, the engine hood or the rear lid are opened, or if the igni
tion is turned on. The anti-theft alarm system will also go off when
the battery is disconnected.
You can also trigger the alarm by pressing the PANIC button on your remote control. This will alert other peop le in case of emergency .
Press the
PANIC button again to turn off the alarm.
How i s the anti-theft ala rm switched off w hen
triggered ?
The alarm system is switched off when you unlock the vehicle or
when the ignition is swi tched on . The alarm w ill a lso switch itself off
when it comes to the end of its cycle.
Emergen cy flasher and h orn
The emergency flasher will blink briefly and the horn sounds when
the doors, engine hood and rear lid are properly closed .
If the emergency flashers do not b link, or the horn does not sound,
check the doors, engine hood and rear lid to make sure they are
properly closed . If you close a door, the hood or the rear lid with the
anti -t heft a larm switched on, the e mergency flashers wi ll blink and
the horn will sound only after you have closed the door or lid .
[ i ] Tips
Fo r the anti-theft a larm system to function proper ly, make sure a ll
vehic le doors and windows are closed before leaving the vehicle. •
Power windows
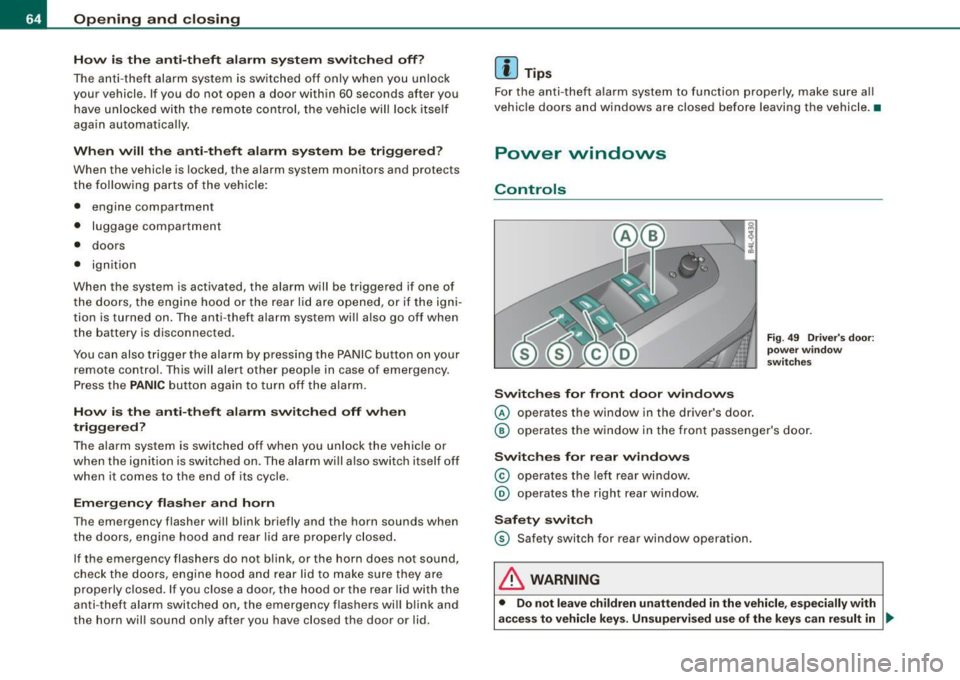
Controls
Switch es for fr ont do or wind ows
© operates the window in the driver 's door .
Fig . 4 9 Driv er's do or:
po we r win dow
sw itch es
@ operates the window in the front passe nger's door .
Swit c hes for r ear win dows
© operates the left rear window .
@ operates the righ t rear w indow.
Safet y switch
© Safety switch for rear window operation .
& WARNING
• Do not le ave children un attended i n the vehicle , e speci ally with
ac ces s to vehicle key s. Un sup ervi sed use of the key s ca n re sult in .,_
Page 92 of 426

Clear vision
- To activate or deactivate, hold the@ button down until
the red display appears or disappears.
The digital compass only works with the ignition turned on. The
directions are displayed as initials:
N (North), NE (Northeast), E
(East), SE (Southeast), S (South), SW (Southwest), W (West), NW
(Northwest).
[ i ] Tips
To avoid inaccurate directions, do not allow any remote controls,
e lectrical systems, or metal parts close to the mirror. •
Applies to vehicle s: wi th digi ta l compass
Setting the magnetic deflection zone
The correct magnetic deflection zone must be set in order
to display the directions correctly.
®
Fig. 84 North America: magnetic deflection zone boundaries
Hold the@=> page 89, fig. 83 button down until the
number of the set magnetic deflection zone appears on
the interior rear view mirror.
Adjust the magnetic deflection zone by repeatedly
pressing on the@ button. The set mode automatically
deactivates after a few seconds. •
Page 99 of 426
Seat memory
Applies to vehicles: w ith seat memory
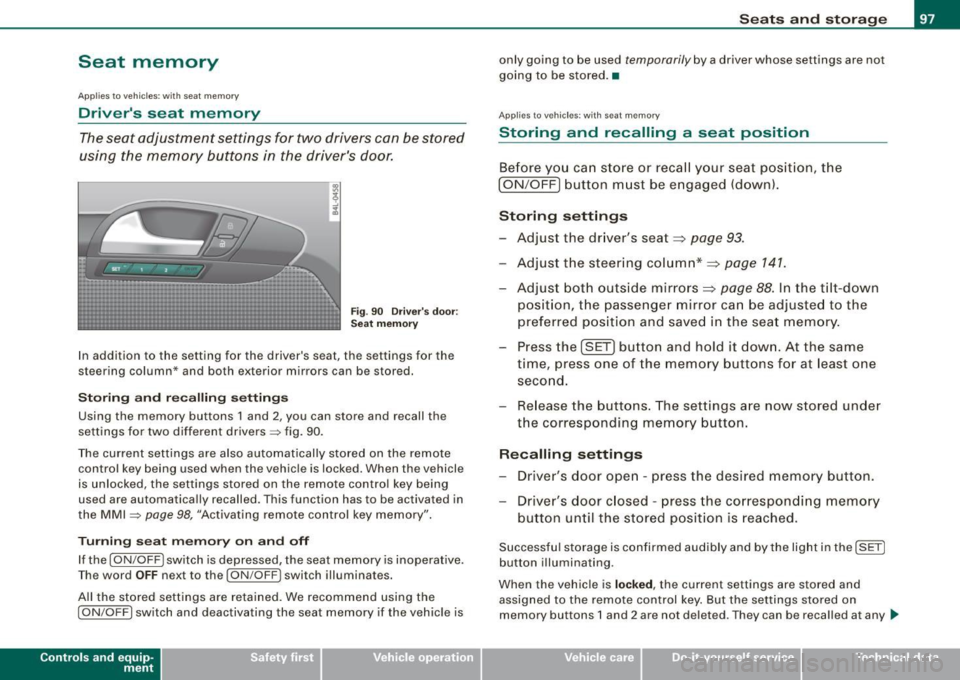
Driver's seat memory
The seat adjustment settings for two drivers con be stored
using the memory buttons in the driver's door.
Fig . 90 Driver's door :
Seat memory
In addition to the setting for the driver's seat, the settings for the
steering column* and both exterior mirrors can be stored.
Storing and recalling settings
Using the memory buttons 1 and 2, you can store and recall the
settings for two different drivers=> fig. 90.
The current settings are also automatically stored on the remote control key being used when the vehicle is locked. When the vehicle
is unlocked, the settings stored on the remote control key being
used are automatically recalled. This function has to be activated in
the MMI =>
page 98, "Activating remote control key memory".
Turning seat memory on and off
If the [ ON/OFF ! switch is depressed, the seat memory is inoperative.
Th e word OFF next to the [ON/OFF) switch illuminates.
All the stored settings are retained. We recommend using the
I ON/OFF] switch and deactivating the seat memory if the vehicle is
Con tro ls and eq uip
ment
Seats and storage
only going to be used temporarily by a driver whose settings are not
going to be stored. •
Applies to veh icles: w ith seat memory
Storing and recalling a seat position
Before you can store or recall your seat position, the
I ON/OFF] button must be engaged (down).
Storing settings
- Adjust the driver's seat~
page 93.
-Adjust the steering column*~ page 141.
Adjust both outside mirrors~ page 88. In the tilt-down
position, the passenger mirror can be adjusted to the
preferred position and saved in the seat memory.
- Press the
!SET) button and hold it down. At the same
time, press one of the memory buttons for at least one
second.
- Release the buttons. The settings are now stored under
the corresponding memory button.
Recalling settings
- Driver's door open -press the desired memory button.
- Driver's door closed -press the corresponding memory
button until the stored position is reached.
Successful storage is confirmed audibly and by the light in the [ SET]
button illuminating.
When the vehicle is
locked , the current settings are stored and
assigned to the remote control key. But the settings stored on
memory buttons 1 and 2 are not deleted. They can be recalled at any
~
Vehicle care I I irechnical data
Page 100 of 426
Seats and storage
time. When the vehicle is unlocked , the settings stored on the
remote control key are restored.
If your vehicle is driven by other persons using your remote control
key, you should save your individual seat position on one of the
memory buttons. You can recall your settings again simply and
conveniently by pressing the corresponding memory button. When
the vehicle is locked, these settings are automatically re-assigned to
the remote control key and stored.
& WARNING
• For safety reasons , the seat setting can only be recalled when
the vehicle is stationary -otherwise you risk having an accident.
• In an emergency, the recall operation can be stopped by
pressing the [
ON/OFF l button or by briefly pressing any given
memory button. •
Applies to vehic les: w ith seat memory
Activating remote control key memory
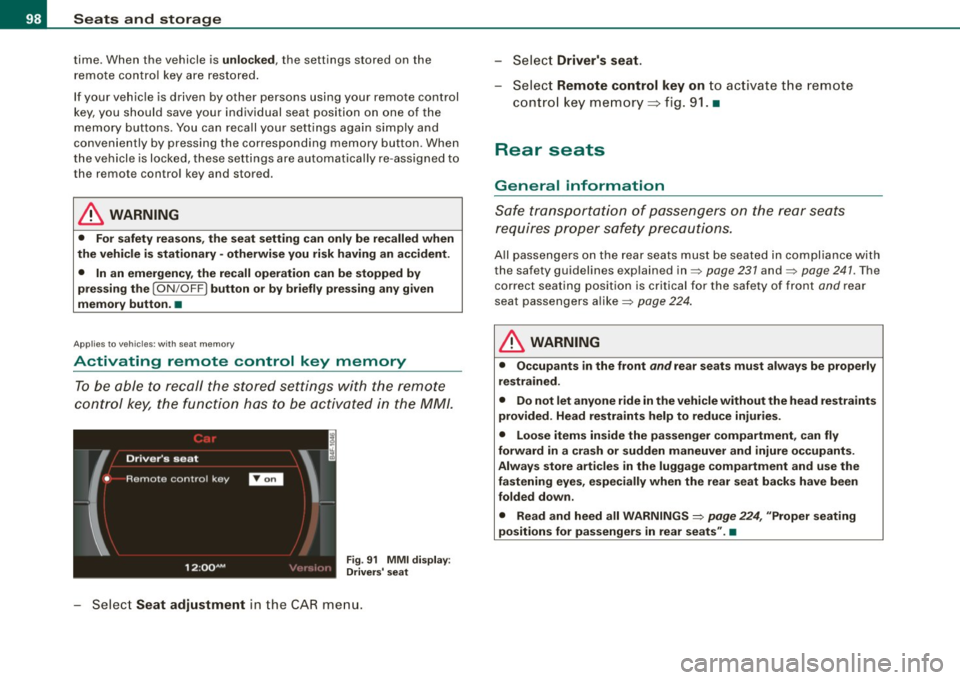
To be able to recall the stored settings with the remote
control key, the function has to be activated in the MM/.
Fig. 91 MMI display :
Drivers' seat
Select Seat adjustment in the CAR menu. -
Select
Driver's seat.
-Select Remote control key on to activate the remote
control key memory=> fig. 91. •
Rear seats
General information
Safe transportation of passengers on the rear seats
requires proper safety precautions.
All passengers on the rear seats must be seated in compliance with
the safety guidelines explained in=> page 231 and=> page 241. The
correct seating position is critical for the safety of front and rear
seat passengers alike=> page 224.
& WARNING
• Occupants in the front and rear seats must always be properly
restrained.
• Do not let anyone ride in the vehicle without the head restraints
provided. Head restraints help to reduce injuries.
• Loose items inside the passenger compartment, can fly
forward in a crash or sudden maneuver and injure occupants.
Always store articles in the luggage compartment and use the
fastening eyes, especially when the rear seat backs have been
folded down .
• Read and heed all WARNINGS =>
page 224, "Proper seating
positions for passengers in rear seats" .•
Page 141 of 426
_________________________________________________ w_ a_ r_ m __ a_n_ d_ c_ o_ld __ lllll
When the steering wheel heating is switched on, the steering wheel
is heated to about 82 °F (28 °C) and held there.
The last setting se lected for the steering wheel heating (on or off) is
automatically saved when the vehicle is shut off and is assigned to
the remote key. •
Controls and equip
ment I • •
Page 167 of 426
![AUDI Q7 2009 Owner´s Manual _____________________________________________ A_ d_a ...: pc.. t _i_ v _e_ C_ ru_ is_ e_ C_ o_n_ t_ r_ o _ l __ lllll
[ i ] Tip s
• Adaptive Cruise Contro l is switched off after pressing t AUDI Q7 2009 Owner´s Manual _____________________________________________ A_ d_a ...: pc.. t _i_ v _e_ C_ ru_ is_ e_ C_ o_n_ t_ r_ o _ l __ lllll
[ i ] Tip s
• Adaptive Cruise Contro l is switched off after pressing t](/img/6/40274/w960_40274-166.png)
_____________________________________________ A_ d_a ...: pc.. t _i_ v _e_ C_ ru_ is_ e_ C_ o_n_ t_ r_ o _ l __ lllll
[ i ] Tip s
• Adaptive Cruise Contro l is switched off after pressing the foot
brake . The speed saved up this point can be resumed.
• To resume the saved speed, release the brake pedal and press
the control lever=>
page 157, "Turning Adaptive Cruise Control off
temporarily".
• If you use the accelerator to go faster than the speed of the
vehicle ahead of you , the
dr iver i nterve ntion pr ompt will not be
accompanied by a warning signal.
• If the speed you previously set is exceeded , the indica tor light in
the speedometer wi ll switch off. •
Applies to v ehi cles: with Ad aptive Crui se Co nt rol
MMI settings
Individual settings for Adaptive Cruise Control can be
selected in the MM/ .
Fig. 172 M MI Display:
A dapti ve C ruise
Co ntrol
Settings for the driving program can be adjusted indiv idu
ally to the particular user and saved in the MMI. This can
only be done with the eng ine running.
- Press the
I CAR] funct ion button.
Controls and equip
ment
Select Sy stem s* in the CAR menu.
- Select
Adaptive Crui se Control . The Adaptive C ruise
Control
menu appears.
Select
driving program .
Select the desired driv ing program .
Sett in g t he d riving p rogram
In the driving progr am menu you can adjust the characteristics of
Adaptive Cruise Contro l to your own preferences using
d yn ami c,
s ta nd ard
or comfort .
Sav ing sett ing s
Your individua l settings are automatical ly saved and assigned to the
remote control key being used (remote key storage). If the key is
given to another person, the saved settings remain as they are. •
System limitations
Applies to veh ic les : w ith Ada ptiv e Crui se Cont ro l
General information
The radar sensor has limits that the driver must know to
be able to use ACC properly.
The Adaptive Cruise Control works within limits that ar e also related
to radar sensor range and sight distance . In some situations ACC
may react unusually or late from the driver's point of view . There
fore, always be attentive to what is happening around you and always be ready to intervene, if necessary :
• when driving around curves=>
page 166
• when vehicles up front are not in line with your vehicle
=>
page 166
• when other vehic le s are changing lanes=> page 167
I • •
Page 175 of 426
Audi lane a ssist -
----------------
-Sele ct Warning early , adaptive or late ~ page 172,
fig. 184 .
Setting th e st eering wheel vibration
- Press the
I CAR I function button.
- Selec t
Systems ·* in t he CAR me nu.
- Selec t
Audi lane a ssis t.
- Selec t Steering vibrat ion weak , medium or strong.
Setting th e warning tim e
Earl y:
This setting warns the driver before a wheel touches the
detected lane boundary line. The warning depends on the vehicle's
angle as it approaches the boundary line . If you approach a
boundary l ine gradua lly, the warning will occur ear lier. If you
approach the boundary line at a very sharp angle, the warning wi ll
occur just before a whee l touches the line.
Adapti ve : In this setting, the warning time adjusts to the character
istics of the road and the vehicle speed. The warning occurs later for
curves and occurs earlier for straight stretches of road. The warning
occurs later on narrow roads than on wide roads.
Late: This setting warns the driver when a whee l drives over the
detected lane boundary line.
Se ttin g th e steering wheel vibration
When adjusting the steering wheel vibration, the steering wheel
vibrates so that you can check the intensity you have set.
[ i ] Tips
• When making the adjustment, lane assist is not activated . The
steering whee l vibrates briefly only to assist you in changing the
setting .
• Your settings are automatically stored and assigned to the
remote contro l key being used. •
Controls and equip
ment I • •
Page 182 of 426
• ..__A_ u_ d_ i _s _i_d _e_ a_ s_ s _ is_ t __________________________________________________ _
G) Signal on outside mirror does not light up
If you activate your turn signal in driving situation@, the signal still
does not ligh t up on the outside mirror::::;,
& in "Safety tips" on
page 782 . •
A pplies t o vehi cles : w it h side assist
MMI settings
The basic brightness setting of the signal on the outside
mirror can be adjusted via the MM/.
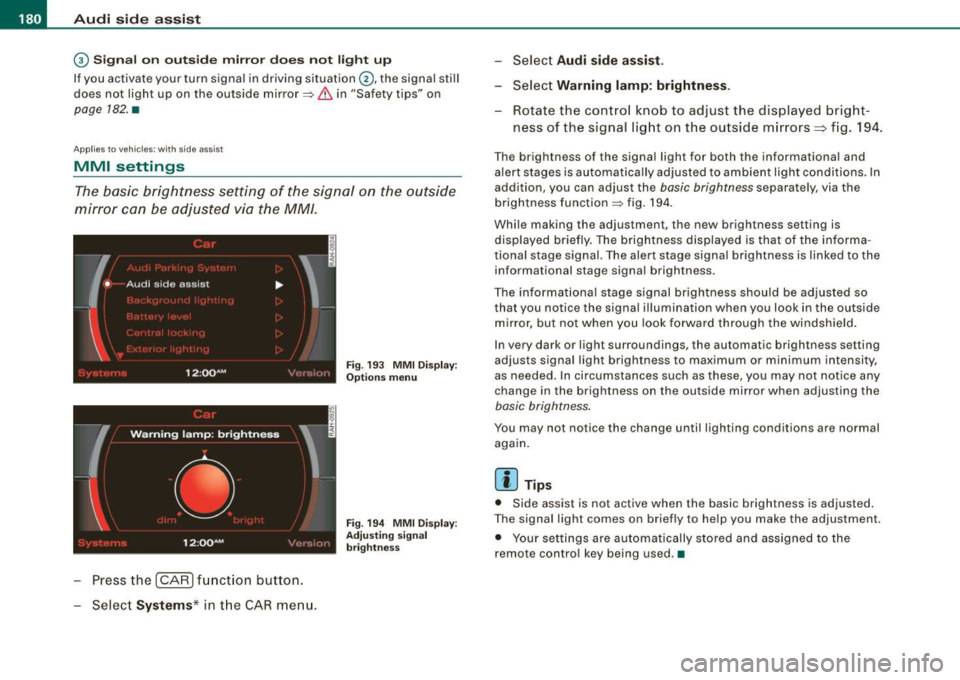
- Pressthe!CAR)function button.
Select Systems* in the
CAR menu.
Fig. 193 MMI Display:
Options menu
Fig . 194 MMI Display :
Adjusting signal
brightness
Select Audi side assist.
- Select Warning lamp: brightness .
Rotate the control knob to adjust the displayed bright
ness of the signal light on the outside mirrors:::::, fig. 194 .
The brightness of the signal light for both the informational and
alert stages is automatically adjusted to ambient light conditions . In
addition, you can adjust the
basic brightness separat ely, via th e
brightness function::::;, fig. 194.
While making the adjustment, the new brightness setting is displayed briefly. The brightness displayed is that of the informa
tional stage signal. The alert stage signal brightness is linked to the
informational stage signal brightness.
The informational stage signal brightness should be adjusted so
that you notice the signal illumination wh en you look in the outside
mirror, but not when you look forward through the windshield.
In very dark or light surroundings, the automatic brightness setting
adjusts signal light brightness to maximum or minimum intensity,
as needed . In circumstances such as these, you may not notice any
change in the brightness on the outside mirror when adjusting the
basic brightness.
You may not notice the change until lighting conditions are normal
again.
[ i ] Tips
• Side assist is not active when the basic brightness is adjusted.
The signal light comes on briefly to help you make the adjustment .
• Your settings are automatically stored and assigned to the
remote con trol key being used .•
Page 204 of 426
IIIII..__A_ d_v _ a_ n_c _e _ d_ P_ a_r _k _in ---== g'-- S...:y _ s_ t_ e_ m ___________________________________________ _
The volume and frequency settings are automatically stored and
assigned to the remote master key.
& WARNING
Always make sure that the volume and frequency of the chimes is
adjusted so that you can easily hear the acoustic distance signal
even if the radio is playing, the air-conditioner blower is on High or
there is a high level of outside noise. Check the settings whenever
someone else has driven the vehicle before you. •
Applies to veh icles: with Advanced Parking System with rear view ca me ra
Adjusting the chimes -option 2
The menu for adjusting signal sounds can also be called
up via the control button with the "settings" function.
Fig . 220 MMI Display:
Rear-view camera
picture Fig
. 221 MMI Display:
Audi parking system
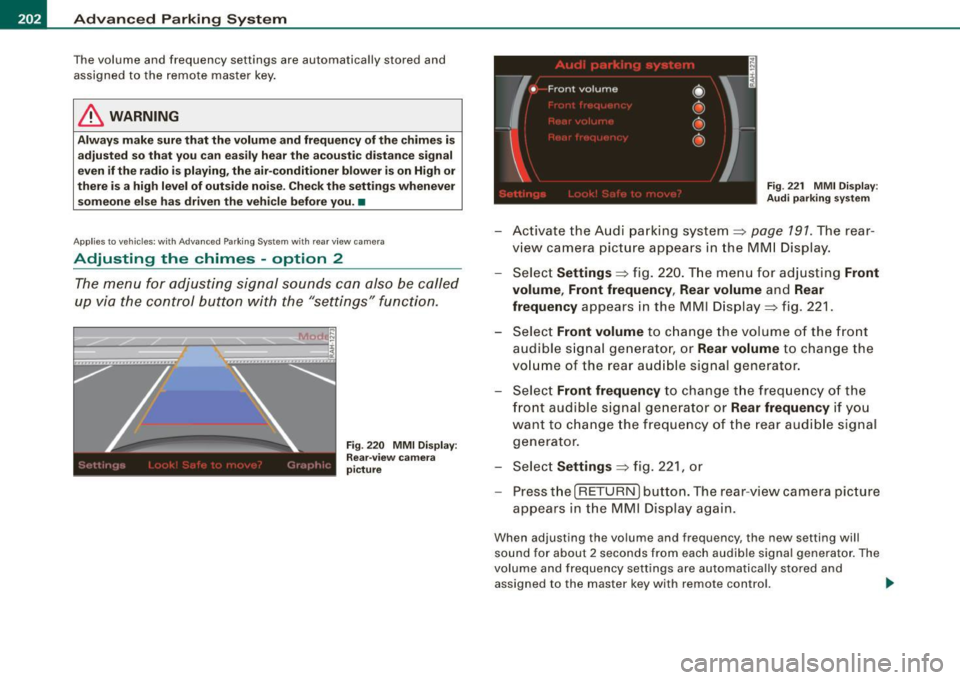
-Activate the Audi parking system:::::, page 791 . The rear
view camera picture appears in the MMI Display.
- Select
Settings :::::, fig. 220. The menu for adjusting Front
volume, Front frequency , Rear volume
and Rear
frequency
appears in the MMI Display:::::, fig. 221.
Select
Front volume to change the volume of the front
audible signal generator, or
Rear volume to change the
volume of the rear audible signal generator.
- Select
Front frequency to change the frequency of the
front audible signal generator or
Rear frequency if you
want to change the frequency of the rear audible signal
generator.
- Select
Settings :::::, fig. 221, or
- Pressthe[RETURN]button. The rear -view camera picture
appears in the MMI Display again.
When adjusting the volume and frequency, the new setting will
sound for about 2 seconds from each audible signal generator. The
volume and frequency settings are automatically stored and
assigned to the master key with remote control. _..