roof rack AUDI Q7 2009 Owner´s Manual
[x] Cancel search | Manufacturer: AUDI, Model Year: 2009, Model line: Q7, Model: AUDI Q7 2009Pages: 426, PDF Size: 97.13 MB
Page 4 of 426

Table of contents
Table of contents
Vehicle literature ... ..... .
About this Owner's Manual .............. ...... . .
Controls and
equipment .. .. .... ..... ... . .
Inst rumen ts and con trols ..... .
Genera l ill ustration ............. .
Instruments and
warning/indica tor lig hts ....... .
Instruments .............. ..... .
Warning/indicator lights ... ..... .
Driver in forma tio n d isplay ..... .
Introduct ion ..... ...... ... ..... .
On-Board Diagnostic system (OBD)
Auto Check Control ............ .
Speed warning system ... ...... .
Trip computer ................. .
Tire pressure monitoring system ..
Op ening and closing .......... .
Keys ... ......... ... .. .... .. ... .
Powe r locking system .......... .
Rear lid ....................... .
Ch ild safe ty lock . ... ..... ... ... .
5
6
9
11
11
1 3
1 3
1 7
25
25
29
30
38
40
42
48
48 52
57
61
Convenience key .... ... .... ... .
Ant i-theft a larm system ........ .
Power w indows
Panoram ic s lid in g sunroof ..... .
Clear vision ... .... .. ... .. ... .. .
Lights ................ ... ... .. .
Interior lights ...... .. ... .... .. .
V is ion ... .. ............. ... .. . .
W iper and washer system ...... .
Mirrors .... ... ......... ..... . . .
Digital compass ............... .
Seats and sto rage .. ... ..... .. .
Genera l recommendat ions ..... .
Power seat ...... . .. ......... . .
Adjusting front passenger 's seat
manually .......... ........... .
Seat memory ...... ........... .
Rear seats .. ............... ... .
H ead res train ts ... ......... ... .
Arm res t .......... ........... .
Long center console ... ... .... . .
Luggage compartment .. ... .. . .
Roof rack ..................... .
Cup holder . ... ... ... ... ... .... .
As htray .... ... ............ ... .
Cigarette lighter/socket ....... . .
Storage .... ............... ... .
Warm and cold ............ .. . .
Climate control .. .. ....... .• ...
Rear A ir Condition ing ....... ... .
Basic settings . ... ... ... ... ... . .
Hea ted Sea ts ......... ... .... . .
On the road . ... ............ ... .
Stee ring ... .. .......... ..... .. .
Ignition lock and ignition sw itch .
61
63
64
67
73
7 3
78
80
81
86
89
92
92
93
96
97
98
101
103
103
10 4
1 12
1 14
1 16
1 17
119
123
123
131
134
136
140
140
142 Starting and stopping the engine
Sta rting and stopping the eng ine
w ith Convenience key .... ..... . .
Parking brake ................. .
S ta rt ing on h ills ..... .. ... ... .. .
Cruise control .......... ... ... . .
A dap tive Cruise Control ....... .
Speed and dis tance con trol system
Driver information ............. .
System limitations .. ...... .... . .
Audi brak ing guard ........... . .
A udi lane assist ............... .
Lane assist ...... ... ... ...... . .
Audi side ass is t .. .. ... .... .... .
Lane Change Assistant .. ..... .. .
Notes ..... ........ .... ...... . .
Automatic transmission ....... .
tiptronic® (6 -speed automatic
transm ission) .......... ....... .
Advanced Pa rking System .... .
Advanced Parking System with rea r
view camera .................. .
Specia l par king sit uations ..... . .
Towing hitch .. ..... .... ... ... . .
Settings in the MMI .. ... .. ..... .
Safety t ips ................... . .
Adaptive Air Suspension ... .. . .
Air suspension and damping
Home link® .... .... ... .. ...... . .
Universa l remote control ... .... .
143
144
147
148
149
152
152
160
165
168
171
171
174
17 4
181
18 4
184
191
191
199
201 201
20 4
206 206
2 14
2 14
Page 74 of 426

Opening and closing
Fig. 59 Section of front
headliner: Crank for
emergency operation
- Take the screwdriver from the vehicle tool kit
=>
page 371.
- Remove the two screws=> page 71, fig. 58 -Arrows- from
the light unit.
- Carefully remove the light unit.
- Remove the crank from the bracket on the fuse cover on
the left front of the instrument panel=>
page 381, fig. 308
®·
- Push the crank into the hexagonal hole as far as it can go
=> fig.
59.
- Hold the crank down and turn it to close the roof.
- Re-install the l ight unit. For installation, reverse the
removal sequence.
- Return the crank to its location in the fuse box cover
=>
page 381, fig. 308 and install the cover.
Have the problem corrected.
[ i ] Tips
To turn the crank for emergency closing more easily, you should use
the screwdr iver handle as an aid=> fig. 59 . First,
remove the screw
driver from the handle, then push the handle onto the crank .•
A pplies to vehicle s: with Panoram ic sli ding su nroof
Mechanical emergency closing for rear roof
segment
- Carefully remove the cover for the rear roof segment
drive in the rear area of the headliner.
- Remove the crank from the bracket on the fuse cover on
the left front of the instrument panel=>
page 381 , fig. 308
®·
- Press the crank into the hexagonal hole in the drive as far
as it will go (basically, as shown in=> fig.
59).
- Hold the crank down and turn it to close the roof.
- Re-install the cover.
- Return the crank to its location in the fuse box cover
=>
page 381, fig. 308 and install the cover.
- Have the problem corrected.
[ i ] Tips
To turn the crank for emergency closing more easily, you should use
the screwdriver handle from the tool kit=>
page 371 as an aid. First,
remove the screwdriver from the handle, then push the handle onto
the crank. •
Page 114 of 426
_L-_S::..:: e..:a :..:t:.:s :....:: a:.:.n .:.. d::....: s:.. t.:.. o::..:.. ra= g:..:e :...._ _____________________________________________ _
- Vehicles with 6 seats*: The ski sack has two straps with
hooks on the underside. Hang the hooks into the luggage
compartment by the rear fastening eyes and pull the
securing strap tight by the free end@.
Storage
- Release the securing strap for the sack.
- Pull the sack to the rear over the folded down seatback .
- Raise the seatback until it is securely latched.
- Fold up the empty sack.
- Stow the ski sack in the luggage compartment so that it
cannot slide around .
& WARNING
• The ski sack is intended only for the transportation of skis,
snowboards and other light objects. To reduce the risk of serious
personal injury never transport heavy or pointed objects in the ski
sack.
• When braking rapidly or during an accident the load could be
displaced and cause injury to occupants.
• Sharp edges on the load must be covered for protection.
Always fasten the belt tightly around the sack and its contents
=> page 111, fig . 114.
[ i] Tips
Never stow the ski sack away if it 's wet or damp (for example, snow
melting from skis). Let it dry completely before you stow it away. •
Roof rack
First things first
A roof rack can be fitted to carry additional luggage on
the roof.
Always read and follow the instructions provided by the
roof rack manufacturer when the roof rack system must
be installed.
If you are transporting luggage or other objects on the roof, please
note the following :
• Your vehicle has specially designed aerodynamic roof rails. Only
install a roof rack specifically designed for your model. Contact the
nearest authorized Audi dealer for information on approved
modular roof racks for your vehicle.
• These approved roof racks are the basis for a complete roof rack
system. Additional attachments for the basic roof rack are neces
sary to safely transport luggage, bicycles, surf boards, skis or small
boats . All necessary hardware for these systems is available at your
authori zed Audi dealer .
• We recommend that you keep the installation instructions for
your roof rack system together with your Owner's literature in the
vehicle.
When should the roof rack be removed?
• Before going through an automatic car wash (it is best to ask the
car wash operator for advice).
• When not in use , to reduce fuel consump tion, wind noise and to
guard against theft. _.,,
Page 115 of 426
Seats and storage -
-----------------=-----'
& WARNING
• Use of an un appr oved roof ra ck or in correct mounting of an
approved roof ra ck can c aus e the roof ra ck or the item s attached
to it to fall off the r oof ont o the ro ad .
• Object s falling fr om the roof of a vehi cle can c ause a crash and
p ers onal inju ry.
• Only mount the sy ste m between the marking s shown
in
=> fig. 115 .
• The roof rack sy ste m mu st b e in sta lled e xactly a ccording to the
instructions prov ided .
0 Note
• Your vehicle warranty does not cover any damages to the vehicle
caused by using roof racks or moun ting structures no t approved by
Audi for your vehicle . T he same app lies to damage resulting from
incorrect roof rack installation .
• Always check the roof rack mountings and hardware before each
t rip and during a trip to make sure everything is securely tightened.
If necessary, retighten the mountings and check the entire system
from time to time.
• After mounting a roof rack system, or when you transport
objects on the roof of your vehicle, the height of the vehicle is natu
ra lly increased . Be carefu l when driving under low bridges or in
parking garages for exa mple . This cou ld cause damage to the load
and even the vehicle itself .•
Con tro ls and eq uip
ment
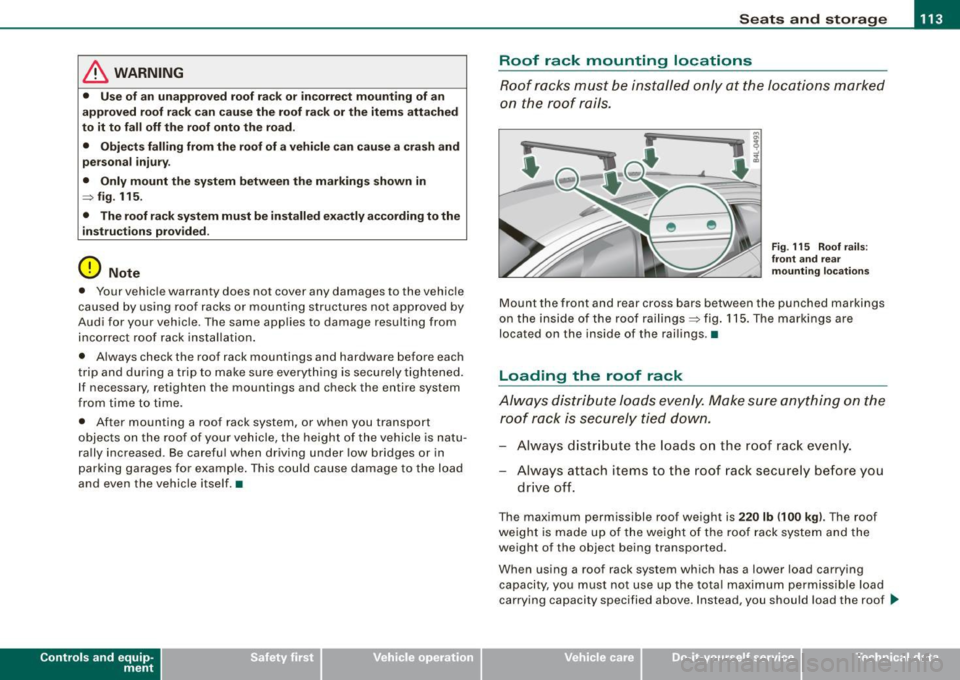
Roof rack mounting locations
Roof racks must be installed only at the locati ons marked
on t he roof rails .
Fig . 115 Ro of r ails:
fr ont a nd r ear
mountin g locations
Mount the front and rear cross bars between the punched markings
on the inside of the roof railings => fig . 115. The markings are
located on the inside of the rail ings .•
Loading the roof rack
Always di stribute loads evenly. Make sure anything on the
ro of ra ck is securel y tied down.
Always d istr ibute the loads o n the roof rack even ly .
Always attach items to the roof rack secure ly before you
drive off .
The maximum permissible roof weight is 220 lb 1100 kg ). The roof
we ight is made up of the weight of the roof rack system and the
weight of the object being transported .
When using a roof rack system which has a lower load carrying capacity, you must not use up the tota l maximum permissible load
carrying capacity specified above. Instead, you should load the roof
~
Vehicle care I I irechnical data
Page 116 of 426
• ..__S_ e_a _ t_ s_ a_ n_ d_ s_t _o _r_ a-' g==- e ________________________________________________ _
rack syst em only to the maximum capaci ty spec ified by the manu
f actu rer of the roo f ra ck sy stem.
& WARNING
Weak , damaged or improper straps used to secure items to the
roof rack can fail during hard brak ing or in a collision and cause
serious personal injury.
• Make sure the roof rack is installed exactly as spe cified above
~ page 113 .
• Always use suitable mounting straps for securing items to the
roof rack to help prevent items from shifting or flying forward .
• Items on the roof rack must always be securely mounted .
• The use of a roof rack can negatively affect the way a vehicle
handles. Cargo that is large, heavy , bulky, long or flat will have a
greater negative influence on the vehicle's aerodynamics , center
of gravity and overall handling . Always drive slowly, avoid sudden
braking and maneuvers when t ransporting cargo on the roof of
your vehicle.
• Never exceed the maximum permissible load carrying capacity
of the roof of your vehicle , the permissible axle weights and the
perm issible total weight of your vehicle~
page 397, "Weights ".
• Always drive slowly , avoid sudden braking and maneuvers
when transporting cargo on the roof of your vehicle.
0 Note
M ake sure that the opened rear lid does not come in contact with
the ca rgo on the roof.
~ For the sake of the environment
Sometimes it may be easier to leave a roof rack installed eve n
th ough you a re not usi ng it. Due to th e increased a ir resis tanc e your
veh ic le wi ll unnecessarily u se more fue l. Remove the roof rack if you
are no t go in g to us e it.•
Cupholder
Front cupholders
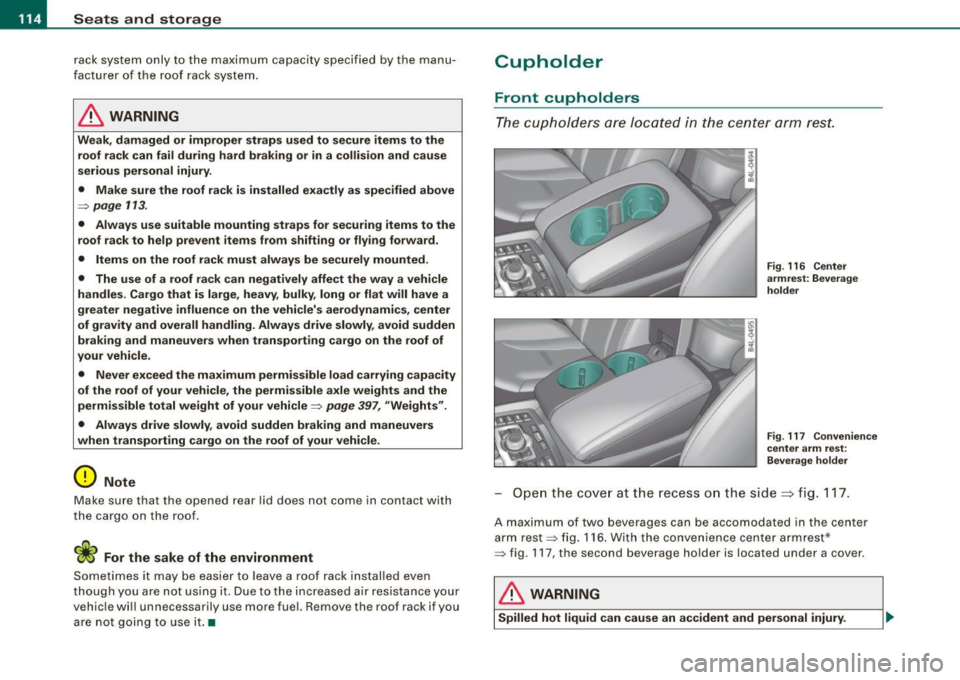
The cupho/d ers ar e l oca ted in the c en te r a rm res t.
Fig . 116 Center
armrest : Beverage
holde r
F ig . 117 Convenience
center arm rest:
Bever age h older
O pen th e cove r at t he recess o n the side ~ fig . 11 7.
A maximum of two beverages can be accomodated in the center
ar m re st ~ fig. 116 . W ith t he c on ve nie nce cent er a rm res t*
~ fig. 117 , the second beverage ho lder is located under a cover.
& WARNING
Spilled hot liquid can cause an accident and personal injury .
Page 253 of 426
Airbag system -----------------=---=---
or the lower parts of the body. Front airbags suppl em ent the three
poi nt s afet y be lts o nly in s ome fro ntal c oll isi ons i n whi ch the v ehicl e
deceleration is hi gh enough to d eploy the airbags .
Front airbags will not deploy:
• if the ignition is switched off when a crash occurs
• i n sid e collisi ons
• i n rea r- e nd collisi ons
• in ro llovers
• when the cras h de celer ation me asured b y th e a ir bag sy ste m i s
less than the minimum threshold nee ded for airbag dep loyment as
r egi stere d by t he ele ctronic control un it
The front passenger airbag also will not deploy :
• when the front p assenger s eat i s not o cc up ied
• whe n the weig ht on th e front pass enger seat as se nsed by t he
Adva nced A irb ag System indi cate s that the fr ont airba g on the
p as se n ge r side h as to be turned off b y the e lectronic cont rol unit
(the PASSENGER AIR BAG OFF l ig ht co me s on and stays on )
& WARNING
Sitting in the wrong position can increase the risk of serious injury
in crashes .
• To reduce the risk of injury when the airbags inflate , the driver
and passengers must always sit in an upright position , must not
lean against or place any part of their body too close to the area
where the airbags are located .
• Occupants who are unbelted , out of position or too close to the
airbag can be seriously injured by an airbag as it unfolds with
great force in the blink of an eye
~ page 243.
Controls and equip ment Safety first
Vehicle operation
& WARNING
A child in a rearward-facing child safety seat installed on the front
passenger seat will be seriously injured and can be killed if the
front airbag inflates - even with an Advanced Airbag System .
• The inflating airbag will hit the child safety seat or infant
carrier with great force and will smash the child safety seat and
child against the backrest , center arm rest , door or roof.
• Always install rear-facing child safety seats on the rear seat .
• If you must install a rearward -facing child safety seat on the
front passenger seat because of exceptional circumstances and
the PASSENGER AIR BAG OFF light does not come on and stay on, immediately install the rear-facing child safety seat in a rear
seating position and have the airbag system inspected by your
authorized Audi dealer .
& WARNING
Objects between you and the airbag will in crease the risk of injury
in a crash by interfering with the way the airbag unfolds or by
being pushed into you as the airbag inflates .
• Never hold things in your hands or on your lap when the vehicle
is in use.
• Never transport items on or in the area of the front passenger
seat. Objects could move into the area of the front airbags during
braking or other sudden maneuvers and become dangerous
projectiles that can cause serious personal injury if the airbags
inflate .
• Never place or attach accessories or other objects (such as
cupholders , telephone brackets, large, heavy or bulky objects) on
the doors, over or near the area marked "AIRBAG" on the steering
wheel , instrument panel , seat backrests or between those areas
and yourself . These objects could cause injury in a crash , espe-
cially when the airbags inflate . ...
Vehicle care Do-it-yourself service Technical data
Page 262 of 426
___ A_ ir_b _a_ g;:::;_ s--:.. y_s _t _e _m _________________________________________________ _
& WARNING (continued)
-Never carry any objects or pets in the deployment space
between them and the airbags or allow children or other
passengers to travel in this position .
• Always use the built-in coat hooks only for lightweight
clothing. Never leave any heavy or sharp-edged objects in the
pockets that may interfere with side airbag deployment and can
cause personal injury in an accident .
• Always prevent the side airbags from being damaged by heavy
objects knocking against or hitting the sides of the seatbacks.
• The airbag system can only be triggered once . If the airbag has
been triggered, the system must be replaced by an authorized
Audi dealership .
• Damage (cracks, deep scratches etc.) to the original seat covers
or to the seam in the area of the side airbag module must always
be repaired immediately by an authorized Audi dealer.
• If chi ldren are seated improperly, their risk of injury increases
in the case of an accident:::::,
page 263, "Child Safety".
• Never attempt to modify any components of the airbag system
in any way.
• In a side collision , side airbags will not function properly if
sensors cannot correctly measure increasing air pressure inside
the doors when air escapes through larger, unclosed openings in
the door panel.
-Never drive with interior door trim panels removed.
- Never drive when parts have been removed from the inside
door panel and the openings they leave have not been properly
closed.
- Never drive when loudspeakers in the doors have been
removed unless the speaker holes have been properly closed .
- Always make certain that openings are covered or filled if
additional speakers or other equipment is installed in the
inside door panels .
& WARNING (continued)
-Always have work on the doors done by an authorized Audi
dealer or qualified workshop . •
Side curtain airbags
Description of side curtain airbags
The side curtain airbags can provide supplemental
protection to properly restrained occupants.
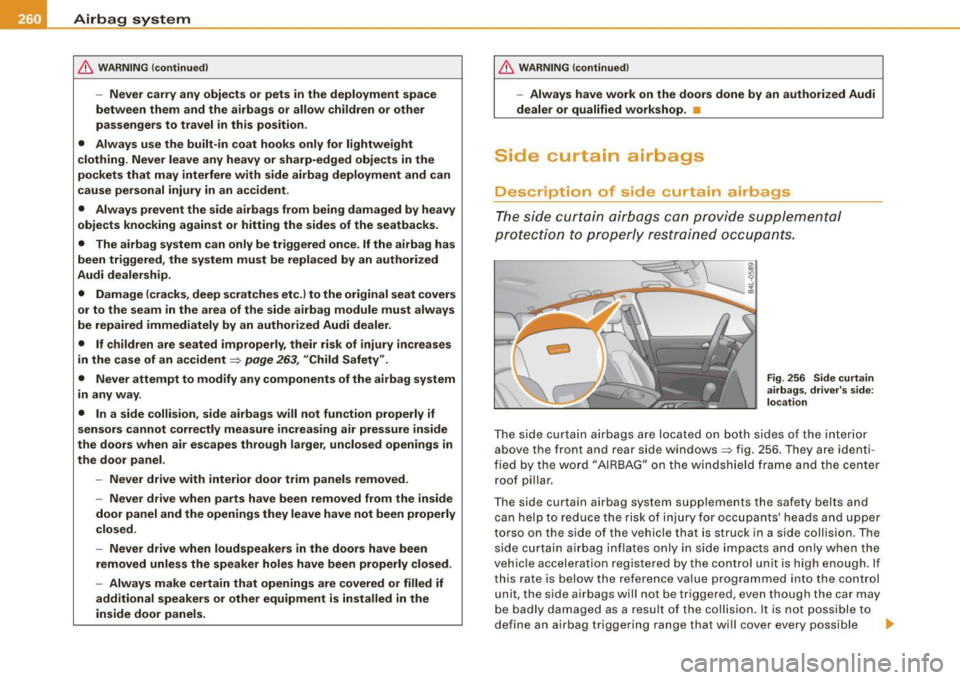
Fig. 256 Side curtain
airbags , driver 's side:
location
The side curtain airbags are located on both sides of the interior
above the front and rear side windows:::::, fig. 256 . They are identi
fied by the word "AIRBAG" on the windshield frame and the center
roof pillar.
The side curtain airbag system supplements the safety belts and can help to reduce the risk of injury for occupants' heads and upper
torso on the side of the vehicle that is struck in a side collision. The
side curtain airbag inflates only in side impacts and only when the
vehicle acceleration registered by the control unit is high enough. If
this rate is below the reference value programmed into the control
unit, the side airbags will not be triggered, even though the car may
be badly damaged as a result of the collision. It is not possible to
define an airbag triggering range that will cover every possible ..,
Page 315 of 426
Cleaning and protection -
----------------
•
Under certain circumstances, weekly washing may be necessary.
Under other conditions , a monthly washing and waxing may be
adequate .
After the winter, the
underside of the vehicle should be thoroughly
washed, preferably in a professional car wash.
& WARNING
Always read and heed all WARNINGS and other information
~ page 312. •
Automatic car wash
The vehicle can be washed in almost any modern auto
matic car wash.
The vehicle paint is so durable that the vehicle can normally be
washed without problems in an automatic car wash . However, the
effect on the paint depends to a large extent on the design of the
facility, the filtering of the wash water , the type of wash and care
material, etc. If the paint has a dull appearance after going through
the car wash or is scratched , bring this to the attention of the oper
ator immediately . If necessary, use a different car wash .
Before going through a car wash, be sure to take the usual precau
tions such as closing the windows and the Panoramic sliding
sunroof. Factory installed antennas must not be removed.
If you have installed additional accessories on the vehicle - such as
spoilers, roof rack, etc. -it is best to ask the car wash operator if
these should be removed .
& WARNING
Please take note of the following points before going through an
automatic car wash with your vehicle, so that you can avoid
damage to your vehicle.
& WARNING (continued)
• Compare the track of your vehicle with the distance between
the guide rails of the facility -there is a risk of damage to the
wheels and tires .
• Compare the height and width of your vehicle with the height
and width of the tunnel at the facility.
• Fold the exterior mirrors flat -there is a risk of damaging the
exterior mirrors. Power folding exterior mirrors* must not be
folded in or out by hand. Use the power function!
• Do not allow the wiper blade to fall onto the windshield after
the vehicle is dried -there is a risk of damaging the paint on the
hood.
• Always read and heed all WARNINGS and other information
~ page312. •
Washing the vehicle by hand
A lot of water is needed when washing a vehicle by hand.
Before you start washing, make sure you have read and
understood the WARNINGS ::::>
& in "General informa
tion" on page 312.
- First soak all dried dirt until it is soft, then rinse it off.
- As you clean your vehicle, start with the roof and work
your way down to the bottom, using a sponge, a sponge
glove or a clean brush.
Rinse the sponge or the sponge glove often, flushing it
clean each time.
- Use special car shampoo only for very persistent dirt.
Rinse the car thoroughly with water.
Use a chamois leather to gently wipe the exterior dry.
Vehicle care I t •
Page 351 of 426
________________________________________________ T_ i _r_e _s_ a_n_ d_ w_ h_ e_e _ l_s __ lllll
•
Groove
means the space between two adjacent tread ribs.
L oad ra ting (code)
means the maximum load that a tire is rated to carry for a given
inflation pressure. You may not find this information on all tires
because it is not required by law.
M ax im um l oad ra tin g
means the load rating for a tire at the maximum permissib le infla
tion pressure for that tire.
Ma ximum l oaded v ehi cle weigh t
means the sum of:
(a) Curb weight
(b) Accessory weight
(c) Vehic le capacity weight, and
(ct) Production options weight
M ax im um (p er mi ssibl e) infl ati on pr essur e
means the maximum cold inflation pressure to wh ich a tire may be
inflated. Also ca lled "maximum inflation pressure."
Normal occ upa nt wei ght
means 150 lbs. (68 kilograms) times the number of occupants
seated in the vehicle up to the to tal seating capacity of your vehicle.
O ccupant di stributi on
means distribution of occupants in a vehicle .
Outer di am eter
means the overall diameter of an inflated new tire.
O ve rall wi dth
means the linear distance between the exteriors of the sidewa lls of
an inflated tire, includ ing elevations due to labeling, decorations, or
protective bands or ribs.
Pl y
means a layer of rubber -coated para lle l cords.
P rodu ction opt io ns wei ght
means the combined weight of those installed regular production
options weighing over 5 lbs . (2.3 kg) in excess of those standard
i t ems wh ich they replace, not previously considered in curb weigh t
or accessory weight, including heavy duty brakes, ride levelers, roof
rack, heavy duty battery, and specia l trim .
Radi al p ly tire
means a pneumatic tire in which the ply cords that extend to the
beads are laid at substantially 90 degrees to the centerline of the
tread .
Reco mm ended infl ati on pr essu re
see => page 348, "Cold tire inflation pressure".
Rein force d tir e
means a tire des ign to operate at higher loads and at higher infla
tion pressures than the corresponding standard tire. Reinforced
t ires may be identi fied as "XL", "x i", "EXTRA LOAD", or "RF" on the
sidewall.
R im
means a metal support for a tire or a tire and tube assembly upon
wh ich the t ire beads are seated.
Rim di amet er
means nominal diameter of the bead seat. If you change your whee l
size, you wi ll have to purchase new tires to match the new rim diam
eter .
Rim siz e de sig nation
means rim diameter and width.
Rim wid th
means nominal distance between rim flanges.
Vehicle care I t •
Page 399 of 426
_________________________________________________ G_ e_ n_ e_r _a _l_ i_n _f_o _ r_ m_ a_ t _i _o _ n __ ll'II
v e hic le identificatio n number of your vehic le (p erforation) as well as
th e G ro ss V ehic le We ight Rat ing (GVWR) an d the Gro ss A xle We ig ht
R ating (GAWRl .
The high voltage warning label is located on the lock carrier.
The spark ignition system complies with the Canadian standard ICES-002 . •
Displaying Vehicle Identification
Number in the MMI
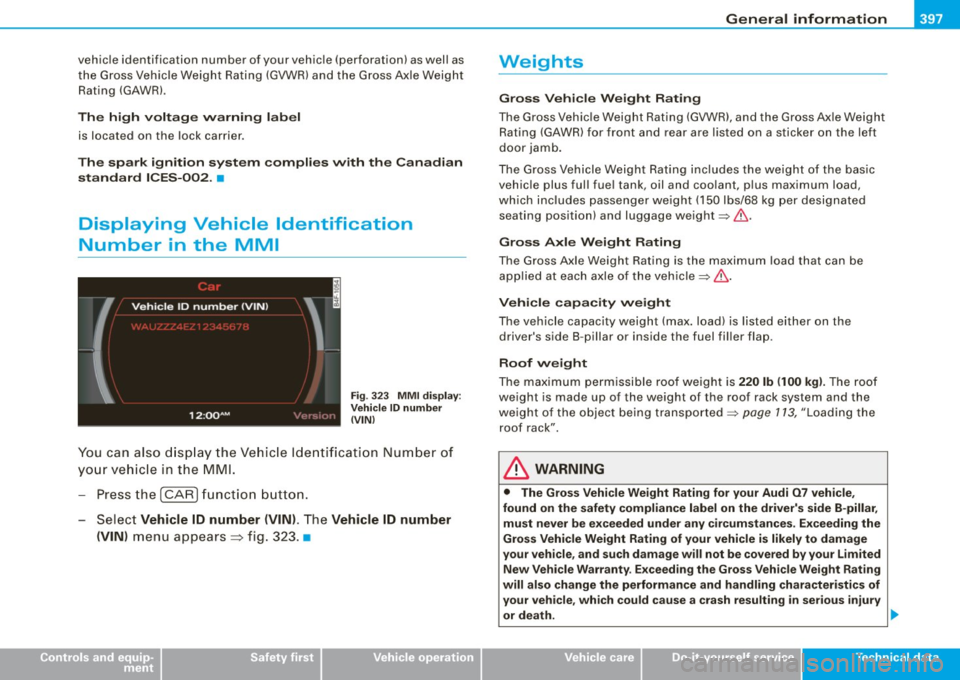
Fig . 323 MMI di splay :
Vehicle ID number
(VIN)
Y ou can also display t he Vehi cle Id ent ifi catio n Num ber of
y o ur vehi cle in the MM I.
- Pre ss th e
(CA RI fun ctio n bu tton.
- Selec t
Vehicle ID number (VIN) . The Vehicle ID number
(VIN)
m enu appea rs=> fig. 3 23 . •
Controls and equip
ment Safety first Vehicle operation
Weights
Gross Vehicle Weight Rating
The G ross Ve hicle We ight Rating (GVWR), a nd the Gross A xle Weight
R ating (GAW R) for front and rear are l isted on a stic ker on the left
doo r jamb .
T he G ross Ve hicle We igh t R ating includes t he weight o f the bas ic
vehic le plus full fue l tank , oil and coo lant, p lus maximum load,
w hi ch includes passe nger we ight (1 50 lbs/68 kg per des ignat ed
seat ing position) and luggage weight:::::,&.
Gross Axle Weight Rating
The Gross Axle Weight Rating is the maximum load that can be
ap plied at each axl e of the vehicle:::::, .&,.
Vehicle capacity weight
The vehic le capacity weig ht (max. load) is list ed e ither on the
driver's side B -pillar or ins ide the fuel fi ller flap.
Roof weight
The maxi mum pe rm is s ible roof we ig ht i s 220 lb (100 kg ). The ro of
we ight is made up of th e wei ght of t he roof rack system an d the
we igh t of t he o bjec t being tra nspo rted :::::, page 1 13, "Lo adi ng the
roo f rack".
& WARNING
• The Gross Vehi cle Weight Rating for your Audi 07 vehi cle ,
found on the safety compliance label on the driver's side B -pillar ,
must never be exceeded under any circumstances . Exceeding the
Gross Vehicle Weight Rating of your vehicle is likely to damage
your vehicle , and such damage will not be covered by your Limited
New Vehicle Warranty . Exceeding the Gross Vehicle Weight Rating
will also change the performance and handling characteristics of
your veh icle , which could cause a crash resulting in serious injury
or death. .,_
Vehicle care Do-it-yourself service Tec hn ica l da ta