airbag off AUDI Q7 2011 Owner´s Manual
[x] Cancel search | Manufacturer: AUDI, Model Year: 2011, Model line: Q7, Model: AUDI Q7 2011Pages: 392, PDF Size: 93.29 MB
Page 5 of 392
Stowing Luggage ........... ... 197
Repo rting Safe ty Defects ....... 199
Safety be lts ................... 201
General no tes ........ ......... 201
Why safety belts? . . . . . . . . . . . . . 202
Safety belts . . . . . . . . . . . . . . . . . . 205
Safety belt pretensioners . . . . . . . 209
Airbag system ................ 211
Important th ings to know ...... 211
Front airbags ................. 215
Mon ito ring the Advanced A irbag
System ...................... 222
Side airbags .................. 227
Side curtain a irbags . . . . . . . . . . . . 230
Child Safety . . . . . . . . . . . . . . . . . . . 233
Impor tant th ings to know . . . . . . 233
Child safety seats . . . . . . . . . . . . . 238
Installing a child safety seat . . . . 243
LATCH Lowe r ancho rages and
tethers for children . . . . . . . . . . . . 246
Addit ional Information 254
Vehicle operation ...... 2s6
Intelligent techno logy ........ 256
Notice abou t data recorded by
vehicle control modules . . . . . . . . 256
E lectronic S tab ili z ati on Program
(ESP) ........................ 256
Braking . . . . . . . . . . . . . . . . . . . . . . 259
Se rvo tron ic ® -advanced power
steer ing system ....... ........ 261
Dr iving wi th your qua ttro ® . . . . . . 262
Energy management . . . . . . . . . . . 263
Driving and environment . ..... 265
The firs t 1,000 miles (1,500 km)
and af terwards . . . . . . . . . . . . . . . 265
Ca talytic conve rte r . . . . . . . . . . . . 266
Controls and equip
ment Safety first
Diesel pa
rticulate filter . . . . . . . . 267
Avoid damaging the veh icle 267
Operate your vehicle economically
and minimize pollution . . . . . . . . 267
Driving of f road ....... ........ 270
Dr ivi ng in diffic ult road cond itions
and offroad ................. .
Trailer towing
Driving with a trailer .......... .
Trailer tow ing t ips ......... ... . 270
273
273
276
Vehicle care
.............. 278
Clean ing and protection ...... 278
General informa tion . . . . . . . . . . . 278
Care of exterior . . . . . . . . . . . . . . . 278
Care of interior . . . . . . . . . . . . . . . 285
Fuel supply and filling your fuel
tank . . . . . . . . . . . . . . . . . . . . . . . . . . 291
Fuel supply . . . . . . . . . . . . . . . . . . . 291
Diesel fuel . . . . . . . . . . . . . . . . . . . 292
F u el tank . . . . . . . . . . . . . . . . . . . . . 293
T DI clean diesel . . . . . . . . . . . . . . . 296
Checking and filling . . . . . . . . . . . 300
Engine hood . . . . . . . . . . . . . . . . . . 300
Engine oil . . . . . . . . . . . . . . . . . . . . 303
Engine cooling system . . . . . . . . . 308
Brake fluid ................... 311
Bat tery ......... .... ......... 312
W indshie ld/head ligh t washer
containe r ....... .... ......... 316
Tires and wheels . . . . . . . . . . . . . . 318
Tires 318
Ti re pressure monitor ing system 337
Table of contents
Do-it-yourself service
What do I do now? .......... .
Jack, tools and infla table spare
tire ........................ .
Changing a wheel .... ........ .
Fuses and bulbs ............. .
Electrical fuses .............. .
Bulbs ......... ............ . .
Emergency situations ....... .
General ..................... .
S tarting by pushing or towing ..
Starting with jumper cables ... .
Use of jumper cables ......... .
Emergency towing with
commercial tow truck ........ .
Lifting vehicle ............... .
Technical data
General information
340
340
340
34 3
350
350
354
355
3SS
3SS
355
356
358
360
362
362
Explana tion of technical da ta . . . 362
Veh icle iden tification ......... .
We ig hts .................... .
Dimensions ................. .
Data .... ....... ........ ...... .
272 hp, 6 -cylinder engine, with all
whee l d rive ................. .
333 hp, 6-cylinder engine, with all
whee l dr ive ................. .
225 hp, 6 -cylinder engine, with all
wheel dr ive ................. .
Consumer Information ...... .
Warranty cove rages ......... . .
Ope rating your vehicle o utside the
U.S .A. or Canada ......... .... .
Aud i Se rvice Repair Ma nuals and
Li terature . .................. . 362
363
364
365
365
366
367
368
368
368
368
Ma intenance . . . . . . . . . . . . . . . . . 368
Vehicle operation Vehicle care Do-it-yourself service Technical data
Page 11 of 392
Instruments and controls
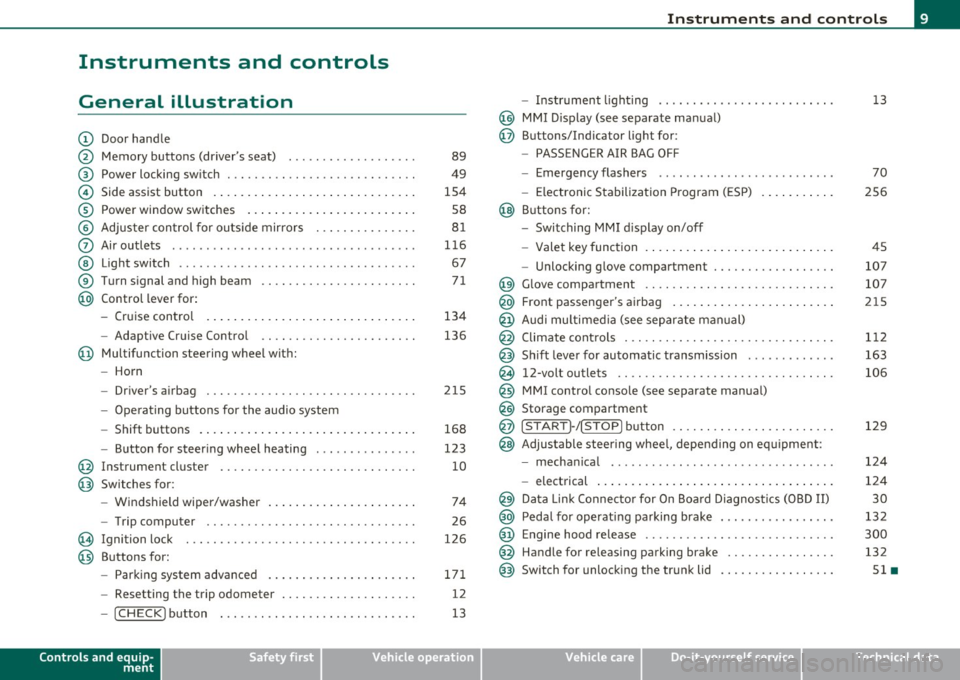
General illustration
(D Door handle
@ Memory buttons (driver's seat) .................. .
@ Power locking sw itch ........................... .
© Side assist button ... .. ... ... ... .. .. .. ... . .. ... .
® Power window sw itches ... .... .. .. .. .. .. ... ... . .
© Adjuster con trol for outs ide mir rors .............. .
0 Air outlets .......... .... .. .... ............... .
@ Light switch ...... .. .... ... .. .. .. ... ... .. .. ... .
® Turn s ignal and high beam ...................... .
@ Control lever for:
- Cru ise control . .... ... ... .. .. .. .. .. .. .. .. ... .
-Adaptive Cruise Control .. .. ................ .. .
@ Mu ltifunction steering wheel with:
- Horn
- Driver's airbag .............................. .
- O pera ti ng butto ns for the audio system
- Shift buttons . ... .. .. .. .... .. .. .. .. .. ...... . .
- Button for steer ing whee l heating ..... ... ...... .
@ Instrument cluster ............................ .
@ Switches for:
- Windshield wiper/washer ... ...... .. ..... .... . .
- Trip computer .............................. .
@ Ignition lock ................................. .
@ Buttons for:
- Par king sys tem advance d .... ..... .. .. ... .. .. . .
- Resetting the trip odometer ................... .
- ICHECK ]button ......................... ... .
Controls and equip
ment Safety first
89
49
1S4
S8
8 1
11 6
67
7 1
134
136
2 1S
168
123
10
74
26
126
171 12
13
Instruments and controls
- Instr ument lighting ......................... .
@ MMI Disp lay (see separate ma nual)
@ Buttons/Indicator light for:
- PASSENGER AIR BAG OFF
- Emergency flashers ...... .. ................. .
- Electroni c Stabilization Progr am ( ESP)
@ B uttons for:
- Switching MMI d isplay on/off
- Valet key function .. .. .. .. .. .. .. ...... ... .. .. .
- Unlocking g love compartment ................. .
@ Glove compartment ........................... .
@ Front passenger's airbag ...... ..... .. ..... .. .. . .
@ Audi mu ltime dia (see separate man ual)
@ Climate cont rols .............................. .
@ Shift leve r for automatic transmission ............ .
@ 12-volt outlets ............................... .
@ MMI contro l console (see separate manua l)
@ Storage compartment
@ ISTART]-/ISTOP] button ....................... .
@ Adjustable stee ring whee l, depending on eq uipme nt:
- mecha nical .... .. .... ... .. .. .. ... .... ..... . .
- electrical ..... . ... .. .. .. .... .... .. .. .. ... .. .
@ Da ta Lin k Connecto r for On Boa rd Diagnos tics (OBD II)
@ Peda l for operating pa rking brake ................ .
@ Engine hood release ............. ... .. ......... .
@ Handle for releasing parking brake ............... .
@ Switch for unlocking the trunk lid ................ .
Vehicle care
13
70
2S6
45
107
107
215
1 12
163
106
129
12 4
124
30
13 2
300
132
Sl •
Technical data
Page 17 of 392
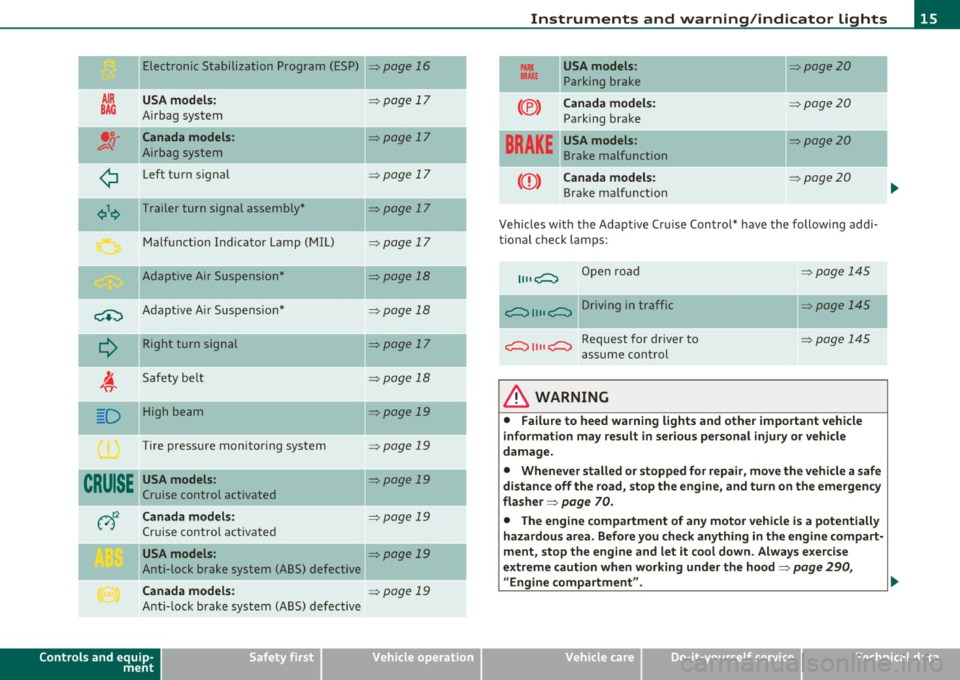
Electronic Stabilization Program (ESP)
AIR USA model s:
BAG A irbag system
•;;-Canada models :
v-'I Airbag system
¢ Left t urn signal
¢\~ Trailer turn signal assembly *
M alfunct io n Indicator Lamp (MIL)
Adaptive Air Suspension*
-
C+:) A dap tive A ir Suspe nsio n*
Q
R ight turn sign al
I. 'fi'
Safety bel t
-.
D High beam
Tire pressure monitoring system
CRUISE USA models :
Cruise control activated
v)t:2 Canada models:
Cruise contro l act ivated
USA models :
Anti-lock brake system (ABS) defective
Canada models :
Anti-lock b rake system (ABS) defective
Controls and equip
ment Safety first
=>page
16
=> page 17
=> page 17
=> page 17
=> page 17
=> page 17
=>page 18
=> page 18
=>page 17
=> page 18
=> page 19
=> page 19
=> page 19
=> page 19
=> page 19
=> page 19
-
-
Instruments and warning /indicator lights
PARX USA models : =>page20 BRAKE Parking br ake
--
(®) Canada model s: :::>page 20
Parking brake
-- -
BRAKE
USA models: =>page20
Brake malfunction
CCD) Canada models: => page20
Bra ke m alfu ncti on
Vehicles with the A dapt ive Cr uise Control* have the following ad di
tional check lam ps:
11, ,C::, Open road
c::, 1111 c::, Driving in traffic
c::, 1111 c::, Request for dr iver to
a ssume con tro l
& WARNING
=:>page 145
=> page 145
~page 145
• Failure to heed warning lights and other important vehicle
information may result in serious personal injury or vehicle
damage.
• Whenever stalled or stopped for repair , move the vehicle a safe
distance off the road, stop the engine, and turn on the emergency
fla sher =>
page 70.
• The engine compartment of any motor vehicle is a potentially
hazardous area . Before you check anything in the engine compart
ment, stop the engine and let it cool down . Always e xercise
extreme caution when working under the hood=>
page 290,
" Engine compartment ". .,,
Vehicle care Technical data
Page 19 of 392
Airbag system
~i (USA models) t!.! r (Canada models)
This warning/indicator light monitors the airbag and the
tensioner systems.
Th e I (USA models) l!.!r (Canada mo dels) warning light i lluminates
for a few seconds each time you switch o n the ignition .
If the
I (USA mode ls)/ !.!r (Canada mode ls) warning light does not go
o ut , or if it illum ina tes while you are d riving, o r if it s tarts to blink ,
then there is a ma lfunct ion somewhere in the system. If the light
does not illum inate whe n yo u sw itch on t he igni tion, this also me ans
there is a malfunction.
& WARNING
If you ha ve a malfunction in the ai rbag system , contact your
authorized Audi dealer immediately. Otherwis e the airbag or the
belt tensioner may not work properly in an accident. •
Turn signals ¢¢
The indicator light blinks w hen you use ei ther turn signal .
Whenever you use the left¢ or the right¢ turn signal, the ind icator
l igh t bl inks. Whe n you use the eme rgency flashers, both indi cator
lights flas h.
If one of the turn signa l light b ulbs burn out, the t urn signal will blink
t wice as fast as normal.
Th is does not app ly, however, in towing mode. The indicator light
does not flash if a turn s ignal is o ut on t he tra ile r or th e tow ing
vehicle. Addit ional i nformat ion on the turn signals =>
page 71. •
Controls and equip
ment Safety first
Instruments and warning
/indicator lights
App lies to vehicles : w ith tow ing hitch
Trailer turn signal assembly ~,1<>
The indicator light also blinks if the turn signal is oper
ated when towing a trailer.
Th e ind icator light ¢ 1¢ blinks when the turn signa
l is used , if a t ra iler
has been properly connected to the vehicle.
If o ne of the turn sign al bu lbs on t he trail er is burned out o r defe ct ive,
the indicato r light will not bli nk when you use the turn signa ls .
(I) Tips
For vehicles w ith a factory installed towi ng hitch or a trailer hitch that
was insta lled later according to factory specifications, the trailer t urn
signa l assembly is act uated. •
Malfunction Indicator Lamp (MIL) 1:1
The Ma lf u nct ion Indicato r Lamp (M IL) is part of the On -Board D iag
nostic (OBD II) system. The symbol -.. lights up when the ignition is
tu rned on and w ill tur n off after the eng ine has sta rted a nd has
sett le d at a constant id le speed . This indicates that the MIL is wo rking
prope rly.
T he warning lig ht illuminates whe n there is a malfunc tion in the
engine e lec tron ic system . Contact your author ized Audi dealer and
have the malfunction corrected .
An improperly closed fuel filler cap may also cause the MIL light to
illuminate (only vehicles with ga soline engine )
::::> page 294.
For more information ~ page 30. •
Vehicle care Technical data
Page 72 of 392
Clear vision
Applies to vehicles : with Adaptive Light
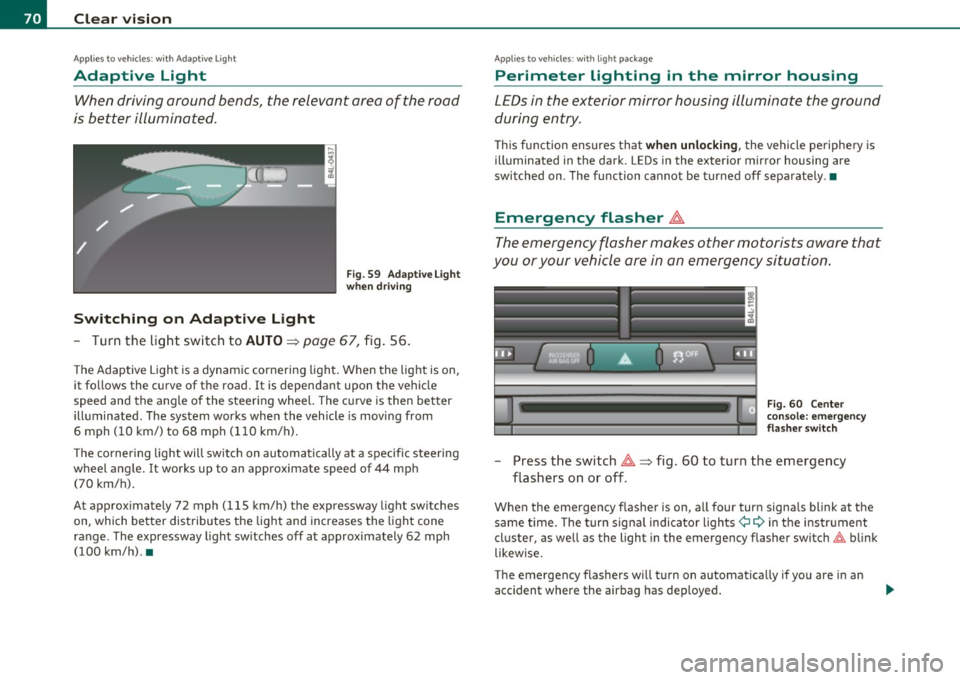
Adaptive Light
When driving around bends, the relevant area of the road
is better illuminated.
Switching on Adaptive Light
Fig . 59 Adaptive Light
when driving
- Turn the light switch to AUTO~ page 67, fig. 56.
The Adaptive Light is a dynamic cornering light. When the light is on,
it follows the curve of the road. It is dependant upon the vehicle
speed and the angle of the steering wheel. The curve is then better
illuminated. The system works when the vehicle is moving from
6 mph (10 km/) to 68 mph (110 km/h).
The cornering light will switch on automatically at a specific steering
wheel angle. It works up to an approximate speed of 44 mph
(70 km/h).
At approximately 72 mph (115 km/h) the expressway light switches
on, which better distributes the light and increases the light cone
range . The expressway light switches off at approximately 62 mph
(100 km/h). •
Applies to vehicles : w ith light package
Perimeter lighting in the mirror housing
LEDs in the exterior mirror housing illuminate the ground
during entry.
This function ensures that when unlocking, the vehicle periphery is
illuminated in the dark. LEDs in the exterior mirror housing are
switched on. The function cannot be turned off separately .•
Emergency flasher ~
The emergency flasher makes other motorists aware that
you or your vehicle are in an emergency situation.
Fig. 60 Center
console: emergency
flasher switch
-Press the switch~~ fig. 60 to turn the emergency
flashers on or off .
When the emergency flasher is on, all fou r turn signals blink at the
same time. The turn signal indicator lights¢
9 in the instrument
cluster, as well as the light in the emergency flasher switch~ blink
likewise.
The emergency flashers will turn on automatically if you are in an
accident where the airbag has deployed.
Page 87 of 392
Seats and storage
General recommendations
Why is your seat adjustment so important?
The safety belts and the airbag system can only provide
maximum protection if the front seats are correctly
adju sted.
Th ere a re various ways of adjusting t he front seats to provide safe and
comfortable support for the driver and the front passenger . Ad just
your seat properly so that :
• you can easily and quickly reach a ll the switc hes and contro ls in the
ins trumen t pa nel
• your body is properly supported thus reducing phys ica l stress and
fatigue
• the safety be lts and airbag system can offer maximum protection
===> page 211 .
In the following sections, you w ill see exact ly how you can best ad just
your sea ts .
Th ere are special regulations a nd instr uctions for install ing a child
safety seat on the front passenger's sea t. Always follow the informa
tion regarding child safety p rovided in===>
page 233, "Child Safety ".
& WARNING
Incorrect seating posit ion of the dri ver and all other passengers
can result in seriou s personal injury.
• Always keep your feet on the floor when the vehicle is in
motion -never put your feet on top of the instrument panel, out
of the window o r on top of the seat cush ion. This applies especially
to the passengers.
If your seating po sition is incorrect, you
increase the ri sk of injury in the case of sudden braking or an acci-
Controls and equip
ment Safety first
Seats and storage
& WARNING
(con tinu ed)
dent . If the airbag inflates and the seating position is incorrect ,
this could result in per sonal injury or even death .
• It is important for both the dri ver and front passenger to keep
a distan ce of at least 10 inche s (25 cm) between themselves and
the steering wheel and /or instrument panel. If you 're sitting any
closer than this , the airbag system cannot protect you properly. In
addition, the front seats and head restraints must be adjusted to
your body height so that they can give you maximum protection .
• Always try to keep as much distance as possible between your
self and the steering wheel or instrument panel.
• Do not adjust the driver's or front passenger 's seat while the
vehicle is moving. You r seat may move unexpectedly , causing
sudden loss of vehicle control and personal injury . If you adjust
your seat while the vehicle is moving , you are out of position. •
Driver's seat
The correct seat position is important for saf e and
re lax ed driving.
W e recomme nd that you a djust the drive r's sea t in the
f ollowing man ner :
- Ad just the seat in fore and aft direction so that you can
easily pus h the pedals to the floor w hile keeping your
knees slightly bent=>
& in "Why is yo ur seat a djus tme nt
so importa nt?" .
- Adjust the seatback so that when yo u sit with yo ur back
agai nst t he seatback , you can st ill grasp t he top of the
steering w heel. ..,
Vehicle care Technical data
Page 89 of 392
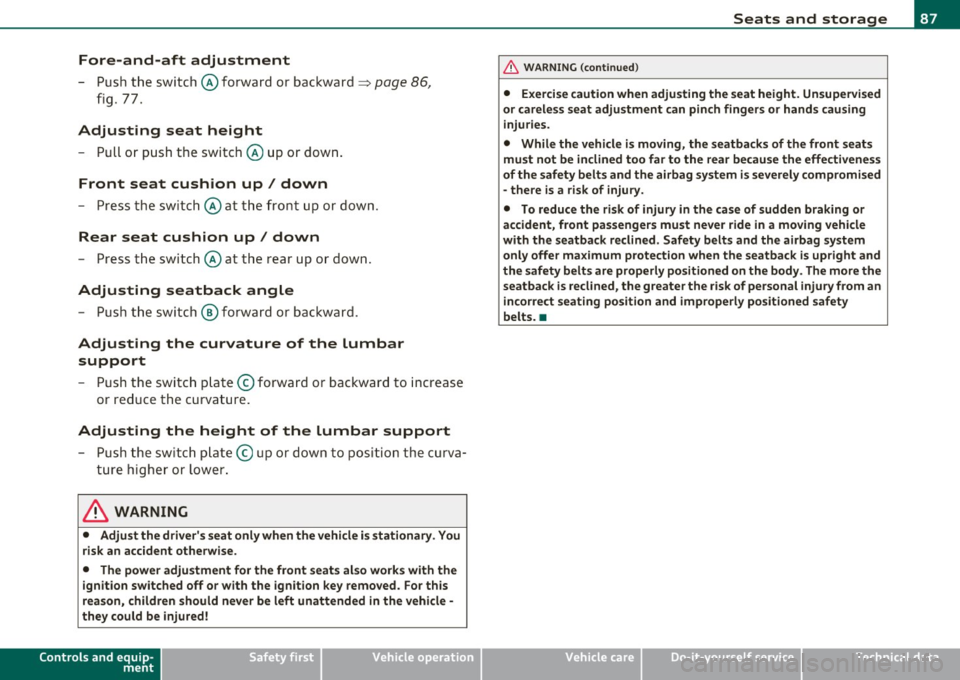
Fore-and-aft adjustment
- Push the switch@forward or backward~ page 86,
fig. 77.
Adjusting seat height
- Pull or push the switch © up or down.
Front seat cushion up/ down
- Press the switch © at the front up or down.
Rear seat cushion up/ down
- Press the switch © at the rear up or down.
Adjusting seatback angle
- Push the switch @ forward or backward.
Adjusting the curvature of the lumbar
support
- Push the switch plate © forward or backward to increase
or reduce the curvature.
Adjusting the height of the lumbar support
- Push the switch plate © up or down to position the curva
ture higher or lower.
& WARNING
• Adjust the driver's seat only when the vehicle is stationary. You
risk an accident otherwise.
• The power adjustment for the front seats also works with the
ignition switched off or with the ignition key removed. For this
reason, children should never be left unattended in the vehicle -
they could be injured!
Controls and equip
ment Safety first
Seats and storage
& WARNING
(continued)
• Exercise caution when adjusting the seat height. Unsupervised
or careless seat adjustment can pinch fingers or hands causing
injuries.
• While the vehicle is moving, the seatbacks of the front seats
must not be inclined too far to the rear because the effectiveness
of the safety belts and the airbag system is severely compromised
- there is a risk of injury.
• To reduce the risk of injury in the case of sudden braking or
accident, front passengers must never ride in a moving vehicle
with the seatback reclined. Safety belts and the airbag system
only offer maximum protection when the seatback is upright and
the safety belts are properly positioned on the body. The more the seatback is reclined, the greater the risk of personal injury from an
incorrect seating position and improperly positioned safety
belts. •
Vehicle care Technical data
Page 90 of 392
Seats and storage
Adjusting front passenger's seat manually
Applies to vehicl es: with manua lly adjustab le passenger seat
Adjustment controls
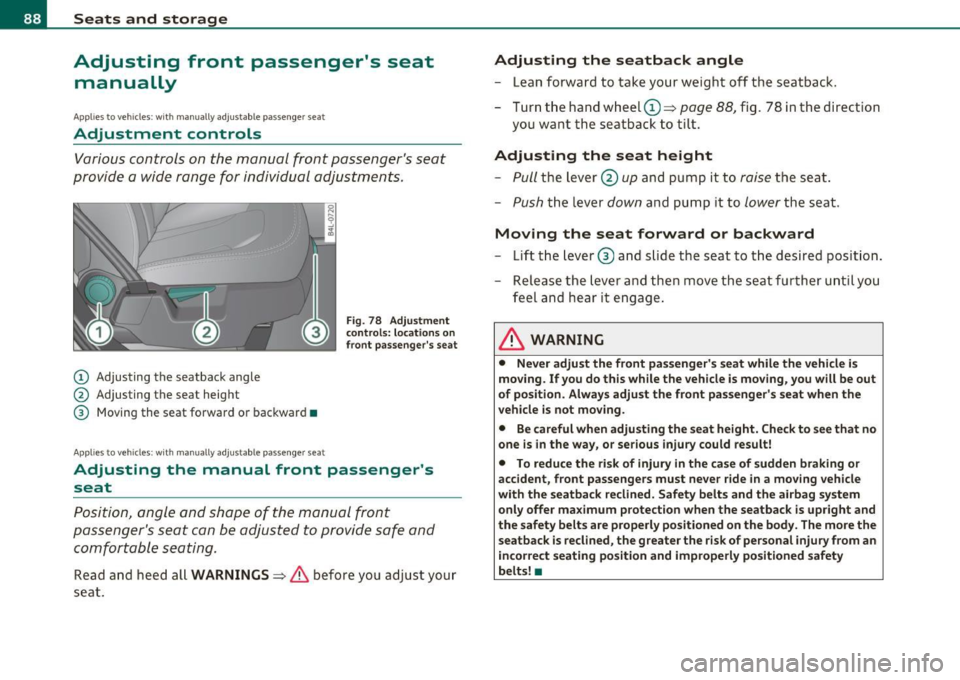
Various controls on the manual front passenger's seat
provide a wide range for individual adjustments.
(D Adjusting the seatback angle
@ Adjusting the seat height
® Moving the seat forward or backward •
Applies to veh icles : w ith manually adjustable passenger seat
Fig . 78 Adjustment
controls: locations on
front passenger's seat
Adjusting the manual front passenger's
seat
Position, angle and shape of the manual front
passenger's seat can be adjusted to provide safe and
comfortable seating.
Read and heed all WARNINGS :::;, & before you adjust your
seat.
Adjusting the seatback angle
- Lean forward to take your weight off the seatback.
- Turn the hand wheel[):::;,
page 88, fig. 78 in the direction
you want the seatback to tilt.
Adjusting the seat height
- Pull the lever @up and pump it to raise the seat.
-Push the lever down and pump it to lower the seat.
Moving the seat forward or backward
- Lift the lever® and slide the seat to the desired position.
- Release the lever and then move the seat further until you
feel and hear it engage.
& WARNING
• Never adjust the front passenger's seat while the vehicle is
moving. If you do this while the vehicle is moving, you will be out
of position. Always adjust the front passenger's seat when the
vehicle is not moving.
• Be careful when adjusting the seat height. Check to see that no
one is in the way, or serious injury could result!
• To reduce the risk of injury in the case of sudden braking or
accident, front passengers must never ride in a moving vehicle
with the seatback reclined. Safety belts and the airbag system
only offer maximum protection when the seatback is upright and
the safety belts are properly positioned on the body. The more the
seatback is reclined, the greater the risk of personal injury from an
incorrect seating position and improperly positioned safety
belts! •
Page 109 of 392
_______________________________________________ S_ e_a _t_ s_ a_n_ d_ s_ t_o _r_a _, g::;.,_ e __ ffl'II
[I) Tips
When the engi ne is off and accessories are st ill plugged in and a re o n,
the vehicle battery can sti ll be drained .•
Storage
General overview
There are numerou s places to store items in your vehi cle .
Glove com pa rt me nt
Cooling box in glove compartment
Sto ra g e com partmen t in roof
Coat hooks
Storage in the door panels
Storage net in footwell
Storage net in the front seatbacks
Storage net in luggage compartment
=> page 107
=> page 109
=> page 109
=> page 109
=> page 110
=> page 11 0
Sto rage com partment bene ath car go floo r => page 99
& WARNING
• Always remove objects from the inst rument panel. Any items
not stored could slide around inside the vehicle while driving or
when accelerating or when applying the brakes or when driv ing
around a corner .
• When you are dri ving make sure that anything you may have
pla ced in the center console or other storage locations cannot fall
out into the footwells. In case of sudden braking you would not be
able to brake or accelerate.
Controls and equip
ment Safety first
& WARNING (
co ntinued )
• Any articles of clothing that you have hung up must not inter
fere with the driver's view. The coat hooks are designed only for lightweight clothing. Never hang any clothing with hard, pointed
or heavy objects in the pockets on the coat hooks . Dur ing sudden
braking or in an accident - especially if the airbag is deployed -
these objects could injure any passengers in side the vehicle. •
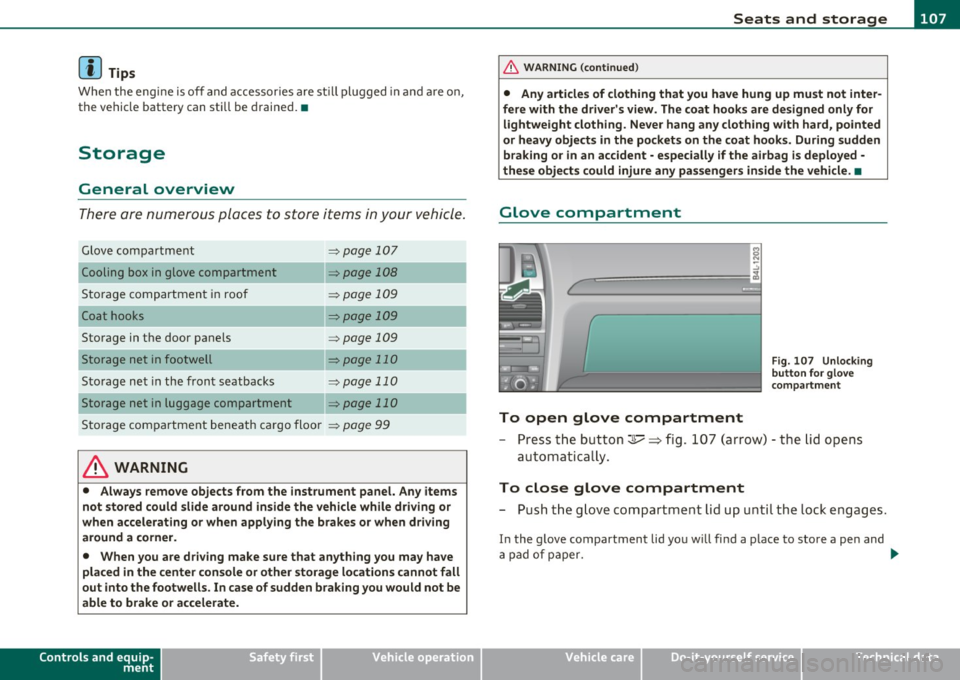
Glove compartment
To open glove compartment
Fig. 107 Unlock in g
button for g love
c ompartment
- Press th e button ::!I----~ fi g. 107 (arrow) - t he lid opens
au tomatica lly .
To close glove compartment
- Push t he g love compartme nt li d up u nti l the lock e ngag es.
In the g love compartment lid yo u w ill find a place to store a pen and
a pad of paper. _.,
Vehicle care Technical data
Page 197 of 392

________________________________________________ D_ r_ i_ v _i_n ""'g "-- S_a_ f_ e_ l _,,y'-- __
- Adjust the head restraints so the upper edge is as even as
possible with the top of your head. If that is not possible,
try to adjust the head restraint so that it is as close to this
position as possible=:> fig. 187.
- If there are passengers in rear seat, fold the head
restraints up on the occupied seats or slide the center
head restraint upward at least to the next notch.
Adjusting head restraints=> page 92.
& WARNING
Driving without head restraints or with head restraints that are
not properly adjusted increases the risk of serious or fatal neck
injury dramatically. To help reduce the risk of injury:
• Always drive with the head restraints in place and properly
adjusted.
• Every person in the vehicle must have a properly adjusted head
restraint.
• Always make sure each person in the vehicle properly adjusts
their head restraint. Adjust the head restraints so the upper edge
is as even as possible with the top of your head. If that is not
possible, try to adjust the head restraint so that it is as close to
this position as possible.
• Never attempt to adjust head restraint while driving. If you
have driven off and must adjust the driver headrest for any reason,
first stop the vehicle safely before attempting to adjust the head restraint.
• Children must always be properly restrained in a child restraint
that is appropriate for their age and size=>
page 233. •
Controls and equip
ment Safety first Vehicle operation
Examples of improper seating positions
The occupant
restraint system can only reduce the risk of
injury if vehicle occupants are properly seated.
Improper seating positions can cause serious injury or death.
Safety belts can only work when they are properly positioned
on the body. Improper seating positions reduce the effective
ness of safety belts and will even increase the risk of injury
and death by moving the safety belt to critical areas of the
body. Improper seating positions also increase the risk of
serious injury and death when an airbag deploys and strikes
an occupant who is not in the proper seating position. A
driver is responsible for the safety of all vehicle occupants
and especially for children . Therefore:
- Never allow anyone to assume an incorrect seating posi-
tion when the vehicle is being used=:>&.
The following bulletins list only some sample positions that will
increase the risk of serious injury and death . Our hope is that these
examples will make you more aware of seating positions that are
dangerous.
Therefore, whenever the vehicle is moving:
• never stand up in the vehicle
• never stand on the seats
• never kneel on the seats
• never ride with the seatback reclined
• never lie down on the rear seat
• never lean up against the instrument panel
• never sit on the edge of the seat
• never sit sideways
• never lean out the window
• never put your feet out the window
Vehicle care Do-it-yourself service Technical data