spare wheel AUDI Q7 2014 Owner´s Manual
[x] Cancel search | Manufacturer: AUDI, Model Year: 2014, Model line: Q7, Model: AUDI Q7 2014Pages: 340, PDF Size: 85.02 MB
Page 5 of 340
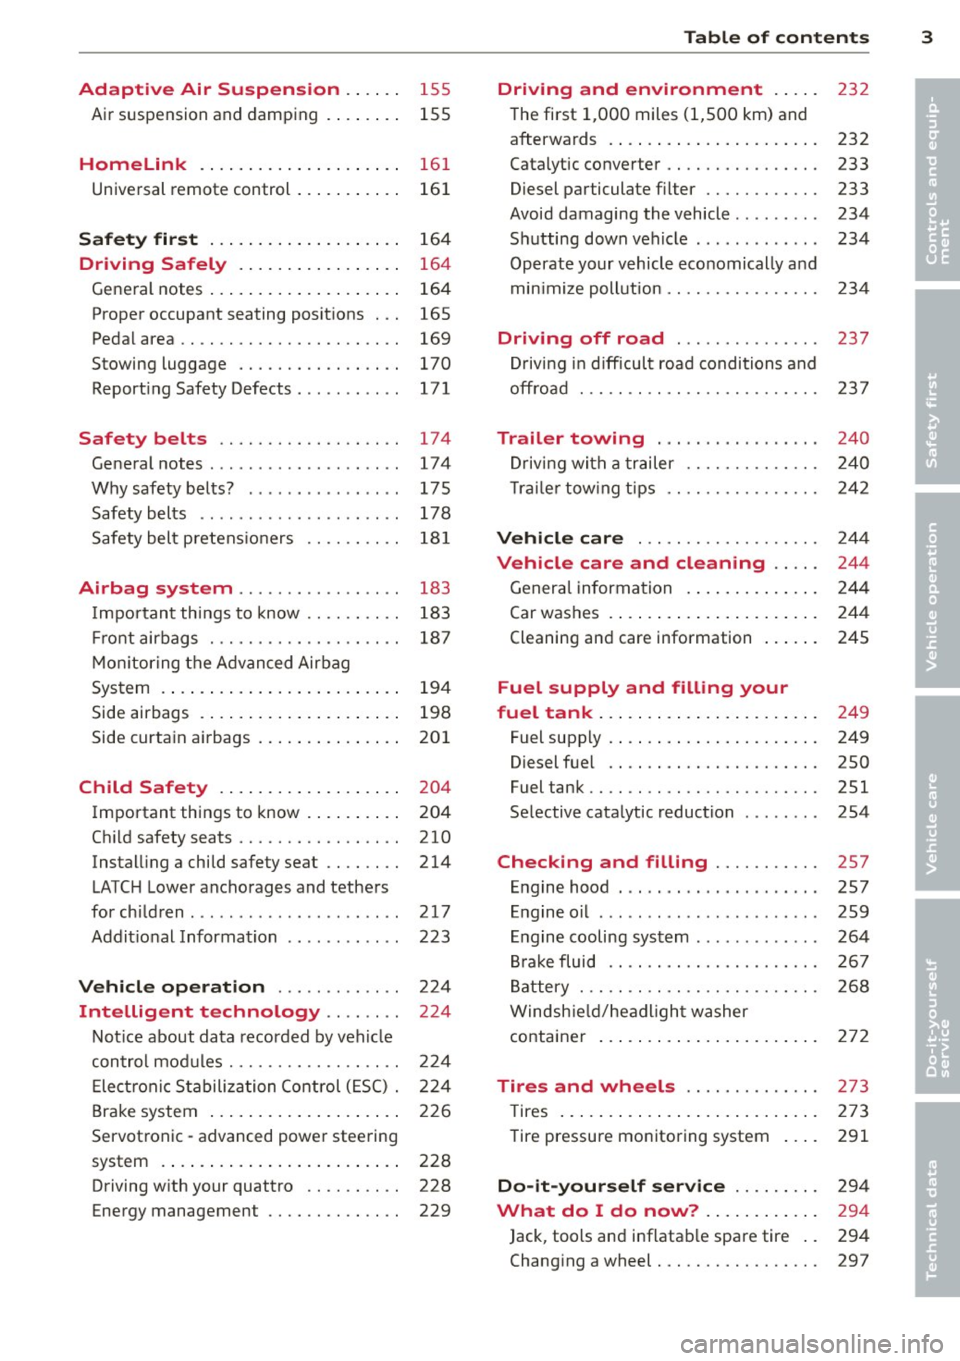
Adaptive Air Suspension .. .. . .
Air suspension and damping 155
155
Homelink . . . . . . . . . . . . . . . . . . . . . 161
Universal remote control . . . . . . . . . . . 161
Safety first . . . . . . . . . . . . . . . . . . . . 164
Driving Safely . . . . . . . . . . . . . . . . . 164
General notes ................... .
Proper occupant seating positions . . .
Pedal area .. .. ............. .. .. . .
Stowing luggage ......... .... .. . .
Reporting Safety Defects ....... ... .
Safety belts ............... .. . .
General notes ......... ...... .... .
Why safety belts? ........... .... .
Safety belts ..... .. ...... .. .. .. . .
Safety belt pretensioners .. .. .. .. . .
Airbag system .......... ... ... .
Important things to know .... .. .. . .
Front airbags ................ .. . .
Monitoring the Advanced Airbag
System .... .. .............. ... . .
Side airbags ................ ... . .
Side curtain airbags .......... ... . .
Child Safety ................. . .
Important things to know ........ . .
Child safety seats ......... .... .. . .
Installing a child safety seat .. .. .. . .
LATCH Lower anchorages and tethers
for children .... .. .. ...... .. .. .. . .
Additional Information
Vehicle operation ....... .. .. . .
Intelligent technology .. .. . .. .
164
165
169
170
171
174 174
175
178
181
183
183
187
194
198
201
204
204
210
214
217
223
224
224
Notice about data recorded by vehicle
control modules . . . . . . . . . . . . . . . . . . 224
Electronic Stabilization Control (ESC) . 224
Brake system . . . . . . . . . . . . . . . . . . . . 226
Servotronic -advanced power steering
system . . . . . . . . . . . . . . . . . . . . . . . . . 228
Driving with your quattro . . . . . . . . . . 228
Energy management . . . . . . . . . . . . . . 229
Table of contents 3
Driving and environment . . . . .
232
The first 1,000 miles (1,500 km) and
afterwards . . . . . . . . . . . . . . . . . . . . . . 232
Catalytic converter . . . . . . . . . . . . . . . . 233
Diesel particulate filter . . . . . . . . . . . . 233
Avoid damaging the vehicle . . . . . . . . . 234
Shutting down vehicle . . . . . . . . . . . . . 234
Operate your vehicle economically and
min imize pollution .. . ............ .
Driving off road .............. .
Driving in difficult road conditions and
offroad . .. .. .. .. .... ........... .
Trailer towing .... .. .. ... ..... .
Driving with a trailer ........... .. .
Trailer towing tips .. . ............ .
Vehicle care ... .. .. ........... .
Vehicle care and cleaning .... .
General information ............. .
Car washes . ....... ............. .
Cleaning and care information ..... .
Fuel supply and filling your
fuel tank ... .... .. ............. .
Fuel supply . ... .. .. ............. .
Diesel fuel .. .. ...... ........... .
Fuel tank .. .. .. .. ... ............ .
Selective catalytic reduction ....... .
Checking and filling .......... .
Engine hood ..... .... .... ... .... .
Engine oil ... .. .. .. . .. .... ...... .
Engine cooling system ............ .
Brake fluid .. .. .. ............... .
Battery ..... .. .. .. .. ........... .
Windshield/headlight washer 234
237
237
240
240
242
244
244
244
244
245
249
249
250
251
254
257
257
259
264
267
268
container . . . . . . . . . . . . . . . . . . . . . . . 272
Tires and wheels . . . . . . . . . . . . . . 273
T ires . . . . . . . . . . . . . . . . . . . . . . . . . . . 273
Tire pressure monitoring system 291
Do-it-yourself service . . . . . . . . . 294
What do I do now? . . . . . . . . . . . . 294
Jack, tools and inflatable spare tire . . 294
Changing a wheel . . . . . . . . . . . . . . . . . 297
•
•
Page 280 of 340
278 Tires and wheels
you have stored. The system does not recog
nize the load condition of your vehicle.
The effectiveness of the tire pressure monitor
ing system w ill be impaired if yo u store nor
mal load pressures but then operate the vehi
cle at its maximum load¢.&. .
See the illustration¢
fig. 249 for the location
of the label on driver's side 8-pillar (color of
the actua l label and exact location on the ve
hicle wi ll vary slightly).
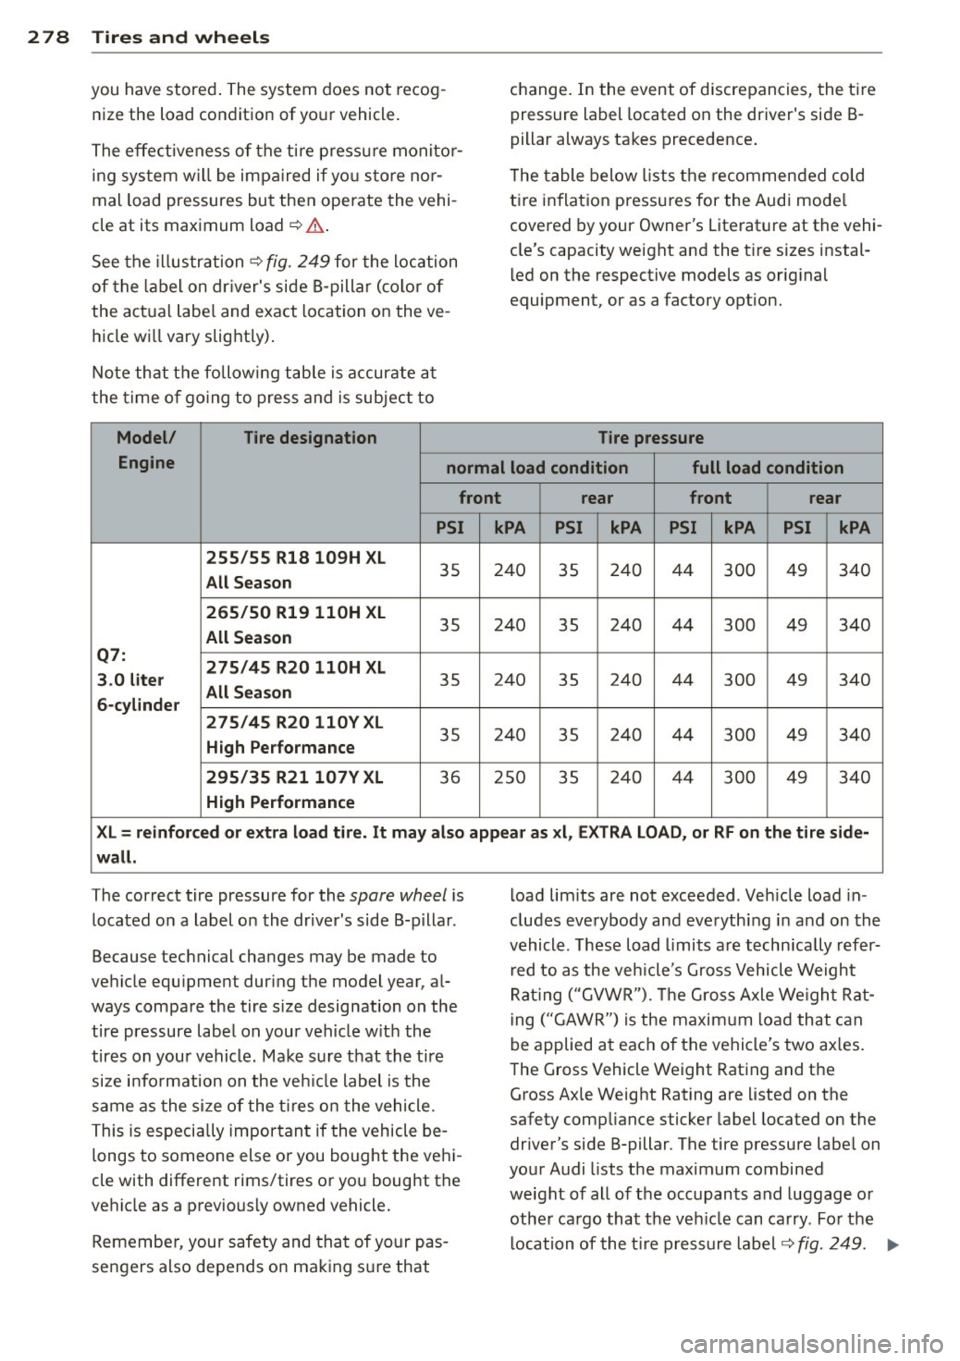
Note that the following table is accurate at
the time of going to press and is subject to
Model/ Tire designation
change. In the event of discrepancies, the tir e
pressure label located on the driver's side 8-
pillar always takes precedence.
T he table below lists the recommended cold
ti re inflation pressures for the Audi mode l
covered by your Owner's Literature at the vehi
cle's capacity weight and the t ire sizes instal
l ed on the respective models as original
equipment, or as a factory option.
Tire pressure
Engine normal load condition full load condition
front rear
front rear
PSI kPA PSI kPA PSI kPA PSI kPA
255/55 Rl8 109H XL
35 240 35 240 44
300 49 340 All Season
265/50 Rl9 llOH XL
35 240
35 240
44
300 49 340 All Season
Q7: 275/45 R20 llOH XL
3 .0 liter
35 240
35 240 44
300 49 340 All Season
6-cylinder
275/45 R20 llOYXL
35 240 35 240 44 300 49 340 High Performance
295/35 R21 107V XL
36 250 35 240 44 300 49 340
High Performance
XL= reinforced or extra load tire. It may also appear as xl, EXTRA LOAD, or RF on the tire side-
wall.
The correct tire pressure for the spare wheel is
located on a label on the driver's side 8-p illar .
Because technical changes may be made to
vehicle equipment dur ing the model year, al
ways compare the tire size designation on the
tire pressure label on your vehicle w ith the
tires on your vehicle. Make sure that the tire
size info rmation on the vehicle label is the
same as the size of the tires on the vehicle.
This is especially important if the vehicle be
l ongs to someone else or you bought the vehi
cle with different rims/tires or you bought the
vehicle as a previously owned vehicle.
Remember, your safety and that of yo ur pas
sengers also depends on making s ure that load
limits are not exceeded . Veh icle load in
cludes everybody and eve ryth ing in and on the
vehicle. These load limits are techn ica lly refer
red to as the veh icle's Gross Vehicle Weight
Rating ("GVWR"). The Gross Axle We ight Rat
ing ("GAWR") is the maximum load that can
be applied at each of the vehicle's two ax les.
The Gross Vehicle Weight Rating and the Gross Axle Weight Rating are listed on the
safety comp liance sticker label located on the
driver's side 8-pillar . The tire pressure label on
your Audi lists the maximum combined
weight of all of the occupants and luggage or
other cargo that the veh icle can carry . For the
location of the tire pressure label¢
fig. 249. ..,_
Page 281 of 340
& WARNING
Overloading a vehicle can cause loss of ve
hicle control, a crash or other accident, se
rious personal injury, and even death .
- Carrying more weight than yo ur vehicle
was designed to carry will prevent the
vehicle from handling properly and in crease the risk of a loss of veh icle con
trol.
- The brakes on a veh icle that has been
overloaded may not be able to stop the
vehicle within a safe distance .
- Tires on a vehicle that has been overload
ed can fail suddenly causing loss of con
tro l and a crash .
- Always make sure that the tota l load be
ing transported -including the we ight of
a tra ile r hi tch and the tongue weight of a
loaded trailer -does not make the veh i
cle heav ier than the veh icle's Gross Vehi
cl e Weight Rating.
& WARNING
- Incorre ct tire pressures and/or underin
fla tion can lead to a serious o r fatal acci
dent.
- Incorrect tire pressures and/or underin
flation cause increased tire wear and can
affect the handling of the vehicle .
- Incorre ct tire pressures and/or underin
fla tion can also lead to sudden tire fa il
ure, incl uding a blowo ut and sudden de
flation, causing loss of vehicle control.
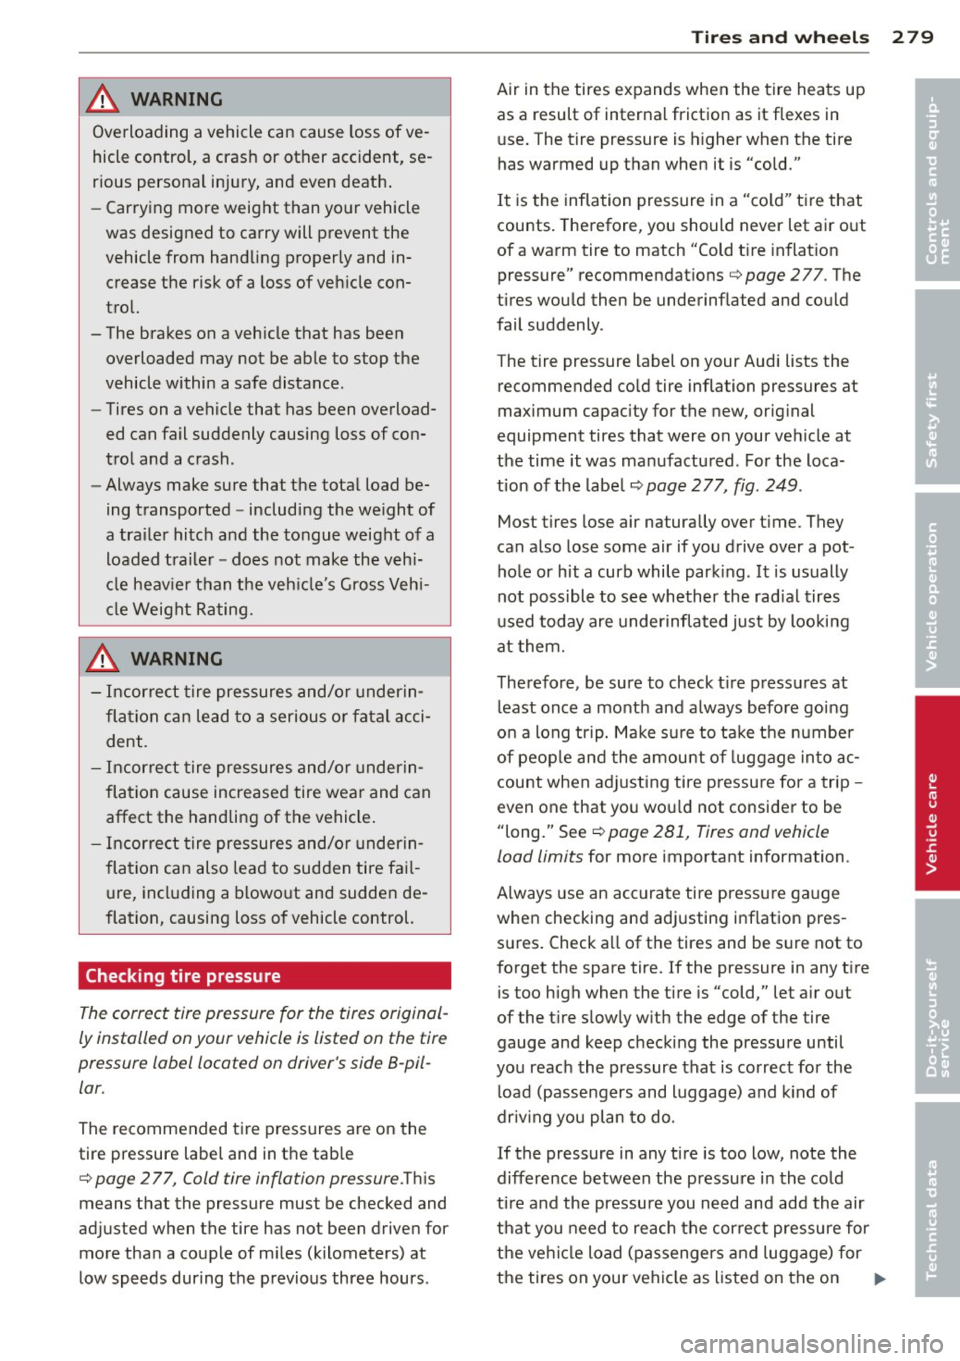
Checking tire pressure
-
The correct tire pressure for the tires original
ly installed on your vehicle is listed on the tire
pressure label located on driver's side 8-pil lar.
The recommended tire pressures are on the
tire pressure label and in the tab le
c:::> page 277, Cold tire inflation pressure .Th is
means that the pressure must be checked and
adjusted when the tire has not been driven for more than a couple of m iles (kilometers) at
low speeds during the p revious three hours .
Tires an d wheel s 2 79
Air in the tires expands when the tire heats up
as a result of internal friction as it flexes in
u se . The tire pressure is h igher when the tire
has warmed up than when it is "cold."
It is the inflation pressure in a "co ld" t ire that
counts . The refore, you should never let air o ut
of a warm tire to match "Cold t ire in flat ion
pressure" recommendat ions ¢
page 277 . The
tires wo uld then be underinf lated and could
fail suddenly .
The t ire pressure label on your Audi lists the
recommended co ld tire inflation pressures at
maximum capacity for the new, orig inal
equipment tires that were on your ve hicle at
the time it was ma nufactured . For the loca
tion of the labe l
¢page 277, fig . 249 .
Most tires lose air naturally over t ime . They
can a lso lose some air if you drive over a pot
hole or hit a curb while park ing.
It is usually
not poss ible to see whethe r the rad ia l tires
u sed today are under inflated just by loo kin g
at them.
T herefo re, be su re to check t ire pressu res at
l east once a mo nth and a lways befo re go ing
o n a long tr ip. Ma ke s ure to ta ke t he number
of peop le and the amount of luggage in to ac
count when ad justing tire pressu re for a trip -
even one that yo u wo uld not conside r to be
"long." See¢
page 281, Tires and vehicle
load limits
for more important information .
A lways use an acc ura te tire pressu re ga uge
when checking and adj usting inf lation pres
s ur es . Check a ll of the tires and be sure not to
forget the spare tire. If the pressure in any t ire
is too high when the tire is "cold," let a ir o ut
of the t ire s low ly w ith the edge of the tire
gauge and keep checking the pressure until
yo u reach the pressure that is correct for the
load (passengers and luggage) and k ind of
driv ing you plan to do.
If the pressure in any tire is too low, note the
difference between the pressure i n the cold
t ir e and the pressu re you need and add the air
t h at you need to reach the cor re ct pressure for
the ve hicle load (passengers and luggage) for
the tires on your vehi cle as listed on the on •
•
Page 282 of 340
28 0 T ire s and wheel s
your veh icle and in this manua l and the kind
of driving yo u plan to do .
Neve r e xcee d the m ax imum inflati on pres
s u re list e d on th e tir e s ide wall f or a ny r ea
s on.
Remember that the vehicle manufacturer, not
the tire manufacturer , determ ines the co rrect
tire pressure for the t ires on your veh icle .
It is important to check the tire pressure when
the tires a re cold .
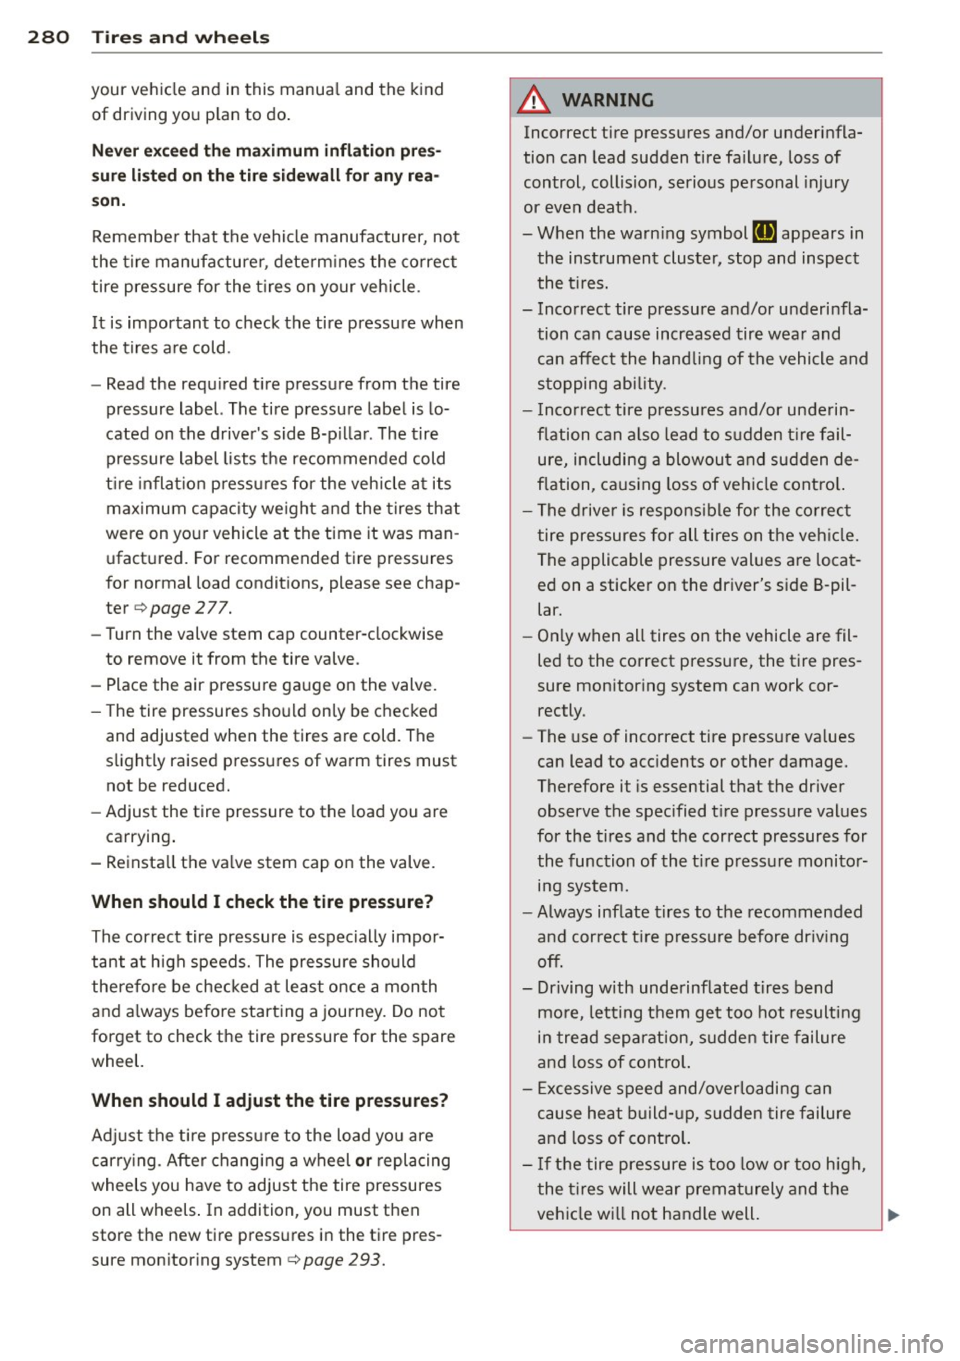
- Read the required t ire pres sure from the tire
pressure label. The ti re pressure label is lo
cated on the driver's side 8-p illar . The t ire
pressure label lists the recommended cold
t ire inflat ion p ressu res for the veh icle at its
maximum capacity we ight and the tires that
were on you r vehicle at the time it was man
ufactured . For recommended tire pressures
for normal load condit ions, please see chap
ter
c:> page 2 77.
- Turn the valve stem cap counter-clockwise
to remove it from the tire valve.
- Place the a ir pressure gauge on the valve.
- T he tire pressures should on ly be checked
and adjusted when the tires are cold. The
s li ghtly raised pressures of warm tires must
not be reduced.
- Adjust the tire pressure to the load you are
carrying .
- Reinsta ll the va lve stem cap on the valve.
When should I check the tire pressur e?
The correct tire pressure is especially impor
tant at high speeds. The pressure should
therefore be checked at least once a month
and always befo re starting a journey. Do not
forget to check the tire pressure for the spare wheel.
When should I ad ju st th e tire p re ss ures?
Adj ust the tire p ressure to the load you are
carry ing . After chang ing a wheel
or replacing
wheels you have to adjust the tire pressures
on all wheels . In addition, you must then
store the new tire press ures in the tir e pres
sure monito ring system
c:> page 293.
A WARNING
Incorrect tire pressures and/or underinfla
tion can lead sudden tire fa ilure, loss of
control, collision, serious personal injury
or even death .
- When the warn ing symbol
[I] appears in
the instrument cluster, stop and inspect
the t ires.
- Incorrect tire pressure and/or underinfla
tion can cause increased tire wear and
can affect the hand ling of the vehicle and
stopping abi lity.
- I nco rrect tire pressures a nd/or underin
f lation can a lso lead to sudden t ire fail
ure, including a blowout and sudden de
flation, ca using loss of vehicle contro l.
- The drive r is responsible for the correc t
tire pressures for all tires on the veh icle.
The applicable pressure values are locat
ed on a sticker on the driver's side B -pil
lar.
- On ly when all tires on the vehicle are fil
led to the correct pressure, the tire pres
sure mon itoring system can work cor
rectly.
- The use of incorrect tire pressure va lues
can lead to acc idents or other damage.
Therefore it is essential that the driver
observe the spec ified t ire pressure values
for the tires and the correct pressures for
the function of the t i re press ure monitor
ing system.
- Always inflate t ires to the recommended
and correct t ire p ressure before dr iv ing
off.
- Driving with underinf lated tires bend
mo re, letting them get too hot resulting
in tread sepa ration, s udde n tire failure
and loss of cont ro l.
- E xcessive speed and/overloadi ng can
cause heat b uild- up, sudden tire failure
and loss of cont ro l.
- I f the tire pressure is too low or too high,
the t ires will wear prema turely and the
vehicle wi ll not handle well. ..,
Page 287 of 340

contribution to good road holding and safe
handling when in good condition and properly
inflated
¢ .&. .
We recommend that all work on t ires and
wheels be performed by an authorized A udi
dealer. They are familiar with recommended
procedures and have the necessary spec ial
too ls and spare parts as we ll as the proper fa
cilities for dispos ing of the old tires .
Authorized Audi dealers have the necessary information about techn ica l requ irements for
installing or changing tires and r ims.
R eplacing t ires and wheel s
Tires shou ld be rep laced at least in pairs and
not individua lly (for example both front tires
or both rear tires together).
Be s ure to read and heed the information to
the tire pressure monitoring system
¢page 291.
Always buy rep lacement radial tires that have
the same specifications as the t ires approved
for your ve hicle by Audi. Replacement tires
must always have the same load rating speci
fication as the original equipment or approved
optional tires listed in the table
¢ page 277.
Aud i-approved specification tires are specially
matched to your vehicle and its load limits,
and can contribute to the important road hold
ing, driving character istics, and safety of the
veh icle. The table
(¢page 277) lists spec ifica
tions of the t ires approved for the Audi mod
e ls covered by your Owner's Literature .
The tire pressure labe l located on the driver's
side B-pillar
¢ page 2 77, fig. 250 lists the
specif ications of the or iginal equipment tires
installed on your vehicle at the time it was
manufactured.
Federal law requires t ire manufacturers to
p lace standard ized information on the s ide
wall of all tires
¢ fig . 253 . This information
i dent ifies and desc ribes the fundamental
characterist ics, the quality grade of the tire
and a lso provides a tire ide ntificat io n number
Tire s an d wheel s 285
for sa fety standard certification and in case of
a reca ll.
Tire specifications
Knowledge of tire specifications makes it eas
ier to choose the co rrec t tires . Radial ti res
have the tire specifications marked on the
sidewa ll, for examp le:
P255 / 55 R 18 109 H XL
This co nta ins the following information:
P Indicates the tire is for passenger cars
(where app licab le)
255 Nom inal tire width i n mm of the tire
from sidewall edge to sidewall edge. In
general, the larger the number, the wider
the tire
55 Height/w idth ratio in percent (aspect ra -
t io)
R Tire construct ion: Radial
18 Rim diameter code (i n inches)
10 9 Load ra ting code
H Speed ra ting letter code
XL (or "xl", "EXTRA LOAD", or "RF" Indicates
t h at the t ire is a"Re info rced" or an " Extra
Load " tir e
M+S (or "M/S") Indicates that the ti re has
some mud and snow capab ility
The tires could also have the informat ion of
direction of rotation ¢
page 273 .
Tire manufacturing d ate
The manufact uring date is also indicated on
the tire sidewall (possibly only on the
inner
s ide of the wheel):
"DOT ... 2213 .. . "means, for examp le, that
the tire was produced in the 22nd week of 2013.
Speed rating (letter cod e)
The speed rating letter code on the whee ls in
dicates the maximum permissible road speeds
¢ .&. in Winter tires on page 289.
P up to 93 mp h (150 km/h)
Q up to 99 mp h (1 58 km/h)
R up to 106 mph ( 170 km/h)
•
•
Page 289 of 340

-All four wheels must be fitted with radial
tires of the same type, size (rolling cir
cumference) and the same tread pattern .
Driving with different tires reduces vehi
cle handling and can lead to a loss of
control.
- If the spare tire is not the same as the
tires that are mounted on the vehicle -
for example with winter tires -only use
the spare tire for a short period of time and drive with extra care. Refit the nor
mal road wheel as soon as safely possi
ble.
- Never drive faster than the maximum
speed for which the tires on your vehicle
are rated because tires that are driven
faster than their rated speed can fail
suddenly.
- Overloading tires cause heat build-up,
sudden tire failure, including a blowout
and sudden deflation and loss of control.
- Temperature grades apply to tires that
are properly inflated and not over or un
derinflated .
- For technical reasons it is not always
possible to use wheels from other
vehicles -in some cases not even wheels
from the same vehicle model.
- If you install wheel trim discs on the ve
hicle wheels, make sure that the air flow
to the brakes is not blocked. Reduced air
flow to the brakes can them to overheat,
increasing stopping distances and caus
ing a collision.
- Run flat tires may only be used on
vehicles that were equipped with them at the factory. The vehicle must have a
chassis designed for run flat tires. Incor
rect use of run flat tires can lead to vehi
cle damage or accidents. Check with an
authorized Audi dealer or tire specialist
to see if your vehicle can be equipped
with run flat tires. If run flat tires are
used, they must be installed on all four
wheels . Mixing tire types is not permit
ted.
Tires and wheels 287
@ Note
- For technical reasons, it is not generally
possible to use the wheel rims from oth
er vehicles. This can hold true for wheels
of the same vehicle type.
- If the spare tire is different from the
tires that you have mounted on your ve
hicle (for example winter tires or wide
profile tires), then use the spare tire for a
short period of time only and drive with
extra care. Replace the flat tire with the
tire matching the others on your vehicle
as soon as possible.
- Never drive without the valve stem cap .
The valves could get damaged.
(® For the sake of the environment
Dispose of old tires in accordance with the
local requirements.
Uniform tire quality grading
- Tread wear
- Traction AA A B C
- Temperature ABC
Quality grades can be found where applicable
on the tire side wall between tread shoulder
and maximum section width
¢ page 284,
fig. 253.
For example: Tread wear 200, Traction AA,
Temperature A.
All passenger car tires must conform to Feder
al Safety Requirements in addition to these
grades.
Tread wear
The tread wear grade is a comparative rating
based on the wear rate of the tire when tested
under controlled conditions on a specified
government test course.
For example, a tire graded 1S0 would wear
one and one half (1 1/2) times as well on the
government course as a tire graded 100. •
•
Page 290 of 340
288 Tires and wheels
The relative performance of tires depends
upon the actual conditions of their use, how
ever, and may depart significantly from the norm due to variations in driving habits, serv
ice practices and differences in road character
istics and climate.
Traction
The traction grades , from highest to lowest,
are AA, A, Band
C. Those grades represent the
tire's ability to stop on wet pavement as measured under controlled conditions on
specified government test surfaces of asphalt
and concrete . A tire marked C may have poor
traction performance ¢.&, .
Temperature
The tempera ture grades are A (the highest),
B, and
C, representing the tire's resistance to
the generation of heat and its ability to dissi
pate heat when tested under controlled condi
tions on a specified indoor laboratory test
wheel.
Sustained high temperature can cause the
material of the tire to degenerate and reduce
tire life, and excessive temperature can lead
to sudden tire failure~.&, .
The grade
C corresponds to a level of perform
ance which all passenger car tires must meet under the Federal Motor Vehicle Safety Stand
ard No.
109. Grades Band A represent higher
levels of performance on the laboratory test
wheel than the minimum required by law.
A WARNING
The traction grade assigned to this tire is
based on straight-ahead braking traction
tests, and does not include acceleration,
cornering, hydroplaning or peak traction
characteristics.
A WARNING
The temperature grade for this tire is es
tablished for a tire that is properly inflated
and not overloaded . Excessive speed, un
derinflation, or excessive loading, either
-
separately or in combination, can cause heat buildup and possible tire failure.
Winter tires
Winter tires can improve vehicle handling on
snow and ice. At temperatures below 45 °F (7 °C) we recommend changing to winter
tires.
In some heavy snow areas, local governments
may require true winter or "snow" tires, those
with very deeply cut tread . These tires should
only be used in pairs and be installed on all
four wheels . Make sure you purchase snow
tires that are the same size and construction
type as the other tires on your vehicle .
Your vehicle is equipped with all-wheel drive,
this will improve traction during winter driv
ing, even with the standard tires. However, we
strongly recommend that you always equip all
four wheels on your vehicle with correctly fit
ted winter tires or all-season tires, when win
ter road conditions are expected. This also im
proves the vehicle's braking performance and
reduces stopping distances.
Summer tires provide less grip on ice and
snow.
Winter tires (snow tires) must always be fitted
on all four wheels.
Ask your authorized Audi dealer or qualified
workshop for permitted
winter tire sizes . Use
only radial winter tires.
Winter tires lose their effectiveness when the
tread is worn down to a depth of
O .15 7 inch
(4 mm).
Only drive with winter tires under winter con
ditions. Summer tires handle better when
there is no snow or ice on the roads and the
temperature is above 45 °F (7
°().
If you have a flat ti re, see notes on spare
wheel¢
page 284 .
Please always remember that winter tires may
have a lower speed rating than the tires origi-
nally installed on your vehicle at the time it .,.
Page 293 of 340
month and always before a long trip
¢ page 2 79, Checking tire pressure.
What you can do to avoid tire and rim
damage
L ow aspect ratio tires can be damaged more
easi ly by impact with potho les, curbs, gu llies
or ridges on the road, particularly if the tire is
underinflated.
I n order to minimize the occurrence o f impact
damage to the tires of your vehicle, we recom
mend that you observe the following precau
tions :
- Always maintain recommended inflation
pressures. Check your tire pressure every
2,000 miles (3,000 km) and add air if neces
sary.
- Drive carefully on roads with potholes, deep
gullies or ridges. The impact from driving
through or over such obstacles can damage
your tires. Impact with a curb may also cause damage to your tires.
- After any impact, immediately inspect your
t ires or have them inspected by the nearest
authorized Aud i dealer . Replace a damaged
t ir e as soon as possible .
- Inspect your t ires every 2,000 miles (3,000
km) for damage and wear . Damage is not al
ways easy to see. Damage can lead to loss of
air and unde rinflation, wh ich could eventu
ally cause tire failure. If you be lieve that a
tire may have been damaged, replace the
tire as soon as possible.
- These tires may wea r more quickly than oth
ers.
- Please also remember that, while these tires
deliver responsive handling, they may ride
less comfortably and make more noise than
other choices .
Reduced performance in winter/cold
season conditions
All tires are designed for certain purposes .
The low aspect ratio, ultra high performance
tires originally installed on your veh icle are in
tended for max imum dry and wet road per
formance and handling . They are not suitable
for cold, snowy or icy weather condit ions . If
Tires and wheels 2 91
you drive under those ci rcumstances, you
shou ld equip your vehicle with all-season or
winter tires, which offer better traction under
those conditions. We suggest you use the rec ommended snow or all-season t ires specified
for your vehicle, or their equivalent .
Refer to
¢ page 288 for more detailed infor
mation regarding winter tires .
Tire pressure
monitoring system
ill General notes
Each tire, incl uding the spare (if provided),
shou ld be checked monthly when co ld and in
flated to the inflation pressure recommended by the veh icle manufacturer on the veh icle
placard or tire inflation pressure label. (If your
vehicle has tires of a d ifferent size than the
s iz e indicated o n the vehicle placard or tire in
flat io n pressu re lab el, you sho uld determine
the p roper tire inflation pressure for those
tires).
As an added safe ty feature, your veh icle has
been equipped with a tire pressure monito ring
system ( TPMS) that illuminates a low ti re
pressure telltale when one or more of your
tires is significantly under-inflated. According
l y, when the low tire pressure te lltale illumi
nates, you should stop and check your tires as
soon as possible, and inflate them to the
proper pressure . Driving on a sign ificantly un
der- inflated t ire causes the tire to overheat
and can lead to tire fa ilure. Under-inflation al
so reduces fuel efficien cy and tire tread life,
and may affect the vehicle's hand ling and
stopping ability .
Please note that the TPMS is not a subst itute
for proper tire maintenance, and it is the driv
er's responsibility to maintain correct tire
pressure, even if under-inflation has not
reached the leve l to tr igger illumination of the
T PMS low tire pressure tellta le .
Your vehicle has also been eq uipped with a
T PMS ma lfunction indicator to indicate when
the system is not operating properly. The
ll-
•
•
Page 296 of 340
2 94 What do I do now ?
What do I do now?
Jack, tools and
inflatable spare tire
Tools
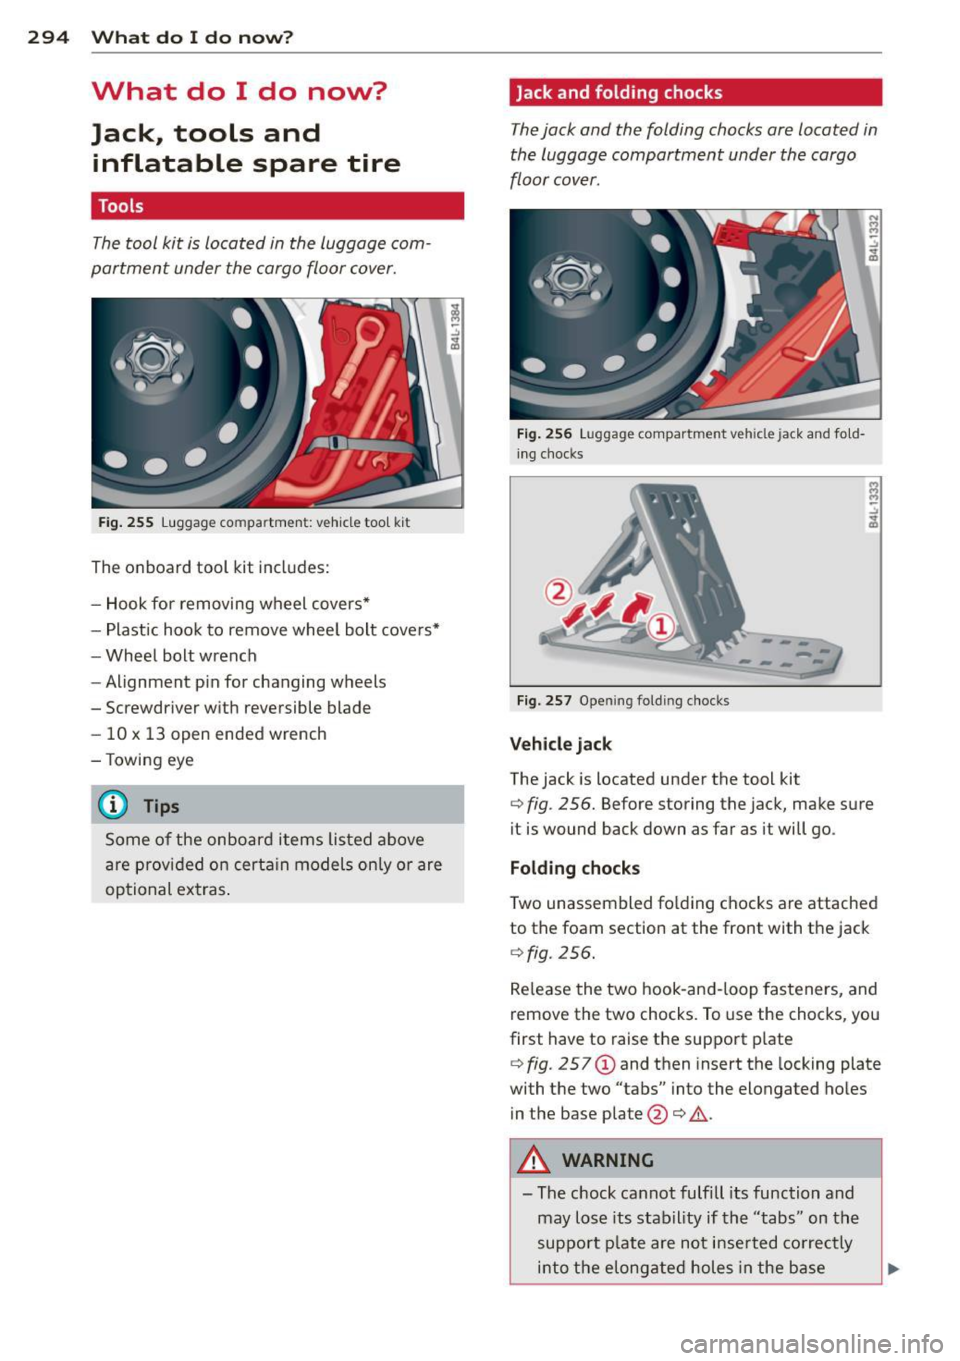
The tool kit is located in the luggage com
partment under the cargo floor cover.
Fig. 255 Luggage compart men t: vehicle too l kit
The onboard tool kit includes:
- Hook for removing wheel covers*
- Plast ic hook to remove wheel bolt covers*
- Wheel bolt wrench
- Alignment pin for changing wheels
- Screwdriver with reversible blade
- 10 x 13 open ended wrench
- Towing eye
(D Tips
Some of the onboard items listed above
are provided on certa in models only or are
optional ext ras .
Jack and folding chocks
The jack and the folding chocks are located in
the luggage compartment under the cargo
floor cover.
Fig . 256 Luggage compartment veh icle jack and fo ld
i ng chocks
-----........ -
Fig. 257 Open ing fold ing chocks
Veh icle jack
The jack is located under the tool kit
<=> fig . 256. Before storing the jack, make sure
it is wound back down as far as it will go.
Folding chock s
Two unassembled folding chocks are attached
to the foam section at the front with the jack
<=>fig. 256.
Release the two hook-and-loop fasteners, and
remove the two chocks. To use the chocks, you
first have to raise the support plate
<=> fig. 257 (!) and then insert the locking plate
with the two "tabs" into the elongated holes
in the base plate@<=>&. .
A WARNING
--The chock cannot fulfill its function and
may lose its stability if the "tabs" on the
suppo rt p late are not inse rted correctly
into the elongated holes in the base
Page 297 of 340
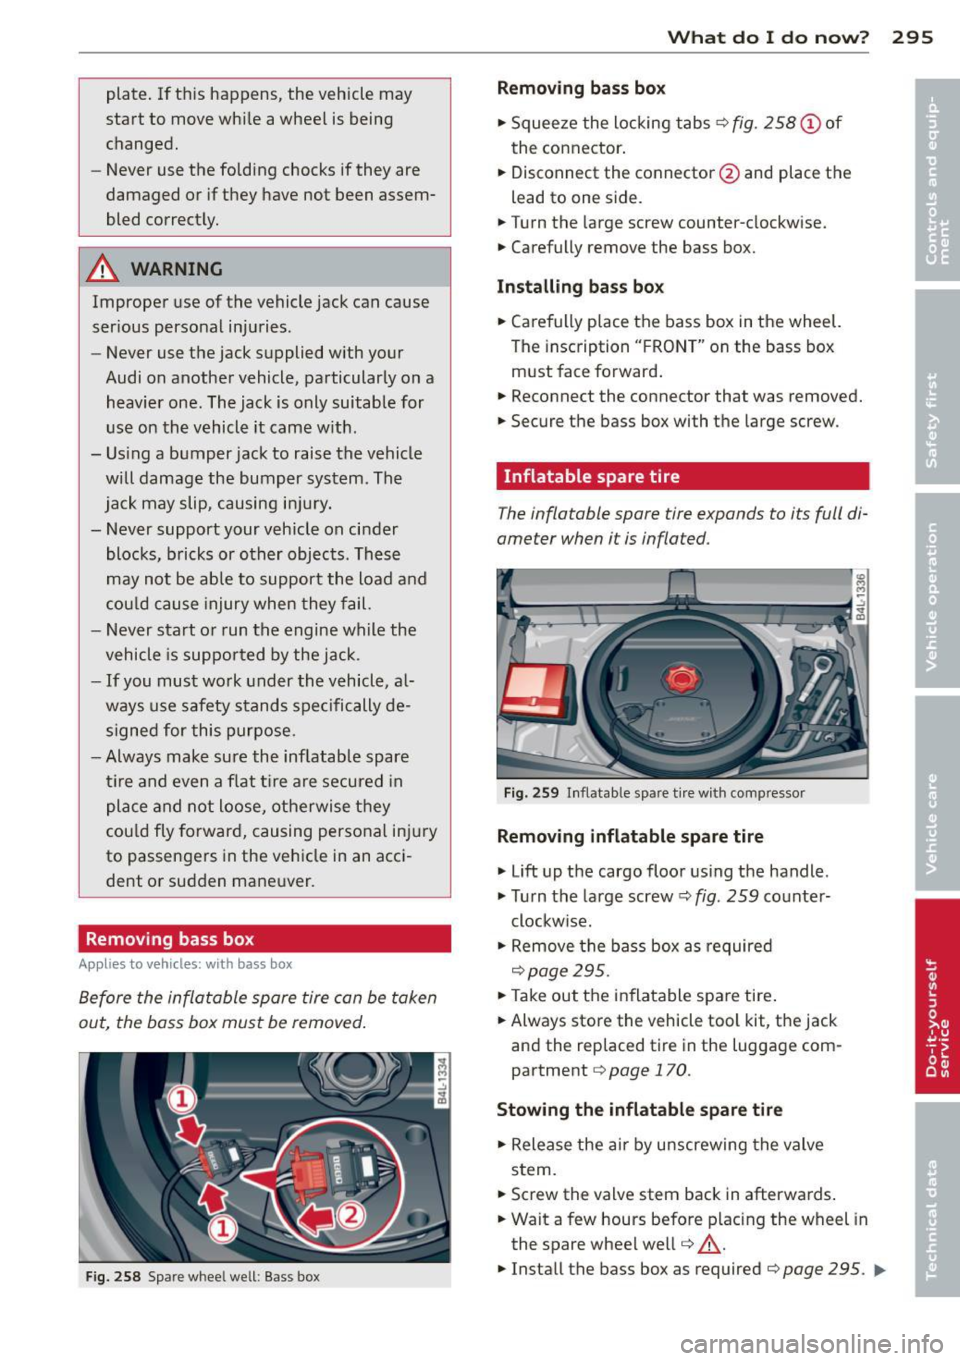
plate. If this hap pens , the vehicle may
start to m ove whi le a whee l is being
changed.
- Never use the folding chocks if they are
damaged or i f they have not been assem
bled correct ly.
A WARNING
Improper use of the vehicle jack can cause
ser ious personal injuries.
- Never use the jack supplied with your
Audi on another vehicle, particularly on a heavier one. The jack is only suitable for
use on the vehicle it came w ith .
- Us ing a bumper jack to raise the vehicle
will damage the bumper system. The
jack may slip, causing i njury.
- Never support your vehicle on cinder bloc ks, b ricks or other objects. Th ese
may not be able to support the load and
cou ld cause injury when they fail.
- Never start or run t he engine while the
vehicle is suppor ted by the jack.
- If you must wo rk under the vehicle, al
ways use safety stand s spe cifically de
signed for this purpose.
- Always make sure the inflatable spare
tir e a nd even a f lat t ire are se cured in
place and not loose, ot herwise they
cou ld fly forward, causing personal inj ury
to passengers in the veh icle in an acc i
dent or sudden mane uver.
Removing bass box
Applies to vehicles: with bass box
Before the inflatable spare tire can be taken
out, the bass box must be removed .
Fig . 2 58 Spare wheel well: Sass box
What do I do now ? 295
Removing bass box
.,. Squee ze the locking tabs ~ fig . 258 (D of
the conne ctor .
.,. Disconnect the connector @and place the
lead to one side.
.,. Turn the large screw counter-clockwise .
.,. Carefully remove the bass box.
Installing bass bo x
.,. Carefully p lace the bass box in the wheel.
The inscription "F RO NT" on the bass box
must face forward .
.,. Reconnect the connector that was removed.
.,. Secure the bass box with the large screw .
Inflatable spare tire
The inflatable spare tire expands to its full di
ameter when it is inflated.
Fig. 25 9 In flatable spare tir e w ith compressor
Removing inflatable spare tire
.,. Lift up the cargo floo r us ing the handle .
"' Turn the large screw
9 fig . 259 co unte r-
clockw ise.
"' Remove the bass box as required
¢ page 295 .
.,. Take out the in flatable spare tire .
.,. Always store the vehicle tool kit, the jack
and the replaced tire in the luggage com
partment
9 page 170.
Stowing the inflatable spare t ire
"' Release the ai r by u nscrewing the valve
stem .
.,. Screw the valve stem back in afterwards .
.,. Wait a few hours before p lac ing the wheel in
the spare wheel we ll¢ ,& .
"' Install the bass box as required ¢
page 295 . ..,_