battery capacity AUDI R8 2007 Owners Manual
[x] Cancel search | Manufacturer: AUDI, Model Year: 2007, Model line: R8, Model: AUDI R8 2007Pages: 210, PDF Size: 8.1 MB
Page 164 of 210

Checking and topping up fluids 162BatteryGeneral notes
All work on batteries requires specialist knowledge.The battery is located behind the cover in the luggage compart-
ment. To remove the cover, slide it to the left and lift it out.
The battery is virtually maintenance-free and is checked in the
Inspection Services.
We recommend that you replace a battery once it is older than 5
years.
Disconnecting the battery
If the battery is disconnected, some of the vehicle's functions will
become inoperative (e.g. electric windows). These functions will
require resetting after the battery is reconnected. For this reason,
the battery should only be disconnected from the vehicle's electrical
system when absolutely necessary.
If the vehicle is not used for long periods
The battery will gradually lose its charge because certain electrical
equipment continues to draw current even when the ignition is off.
If you park the vehicle for long periods of time in winter you should
have your Audi R8 dealer take the battery out of the vehicle and keep
it in a frost-proof room. This ensures that it cannot “freeze up” and
be damaged. At warm outside temperatures it is sufficient to
disconnect the negative terminal of the battery. Even when the
battery is not connected you should charge it from time to time.
Winter conditions
The battery is drained more in cold weather, which means that the
starting power is reduced. For this reason, have the battery checked
and charged if necessary before the start of winter.Replacing the battery
A replacement battery must have the same capacity, voltage and
current rating. It must also have the same dimensions as the orig-
inal, factory-fitted battery and have sealed caps. The Audi batteries
which have been specially developed fulfil the maintenance,
performance and safety specifications for your vehicle.
We recommend to use only maintenance-free batteries or deep-
cycle resistant and leakproof batteries which comply with the
standards TL 825 06 (dated December 1997 or later) and VW 7 50 73
(August 2001 or later).
Since the battery is difficult to access, we recommend having it
replaced by an Audi R8 dealer or qualified workshop.
WARNING
•
All work on batteries requires specialist knowledge. For queries
regarding the vehicle battery please contact an Audi R8 dealership
or other qualified workshop (risk of chemical burns / risk of explo-
sion).
•
The battery must not be opened. Do not attempt to make any
changes to the electrolyte level of the battery. Otherwise, there is
a risk that a mixture of oxygen and hydrogen gas can accumulate
and cause an explosion.Caution
•
The battery holder and clamps must always be correctly secured.
•
Before starting any work on the battery, always observe the
warnings listed under ⇒ in “Important safety warnings for
handling a car battery” on page 163.For the sake of the environment
Batteries contain toxic substances including sulphuric acid and
lead. They must be disposed of appropriately and must not be put
together with ordinary household waste. Make sure the battery
document_0900452a816e6cc9.book Seite 162 Mittwoch, 21. Februar 2007 1:32 13
Page 166 of 210

Checking and topping up fluids 164Charging the battery
A fully-charged battery is important for reliable starting.–Note the warnings ⇒ in “Important safety warnings
for handling a car battery” on page 163 and ⇒.
– Switch off the ignition and all electrical equipment.
– Only if “fast-charging”: both battery cables must be
disconnected (first the “negative” cable, then the “posi-
tive” cable).
– Connect the charger cables to the battery terminals,
noting the colour code (red is used for “positive”, black
or brown for “negative”).
– Now connect the battery charger to the mains and switch
on.
– After charging the battery: switch off the battery charger
and disconnect the mains cable.
– Now disconnect the charger cables.
– If necessary, reconnect both battery cables to the battery
(first the “positive” cable, then the “negative” cable).When charging with a low current (for example with a small battery
charger) the battery cables do not normally have to be discon-
nected. However, both battery cables must be disconnected before
“fast-charging” the battery with a high current. However, always
follow the instructions given by the manufacturer of the battery
charger.
Fast-charging a battery is dangerous ⇒ in “Important safety
warnings for handling a car battery” on page 163. This work should
only be performed by a competent mechanic with the proper equip-
ment. If necessary, we therefore recommend that this work should
only be performed by a qualified workshop.When it is discharged the battery can freeze at temperatures
around 0°C. A frozen battery must be thawed before charging ⇒.
However, it is advisable to replace the battery if it has frozen,
because the ice can crack the battery casing and allow the battery
acid to escape.
The battery caps should not be opened while the battery is being
charged.
WARNING
Never charge a frozen battery – it could explode. Windscreen washerPlain water on its own is not sufficient for the windscreen
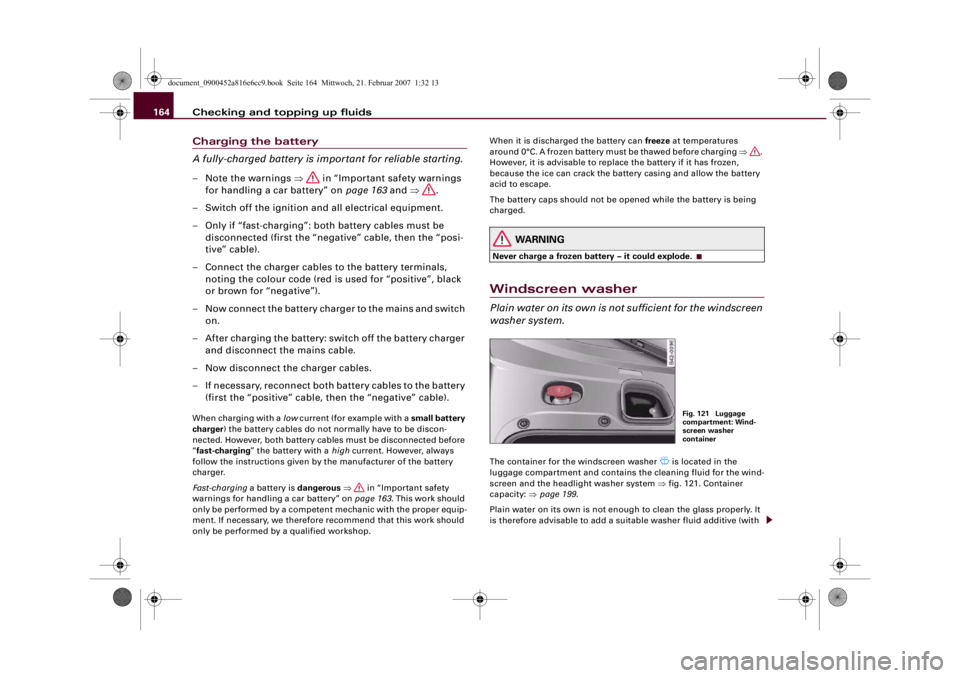
washer system.The container for the windscreen washer
is located in the
luggage compartment and contains the cleaning fluid for the wind-
screen and the headlight washer system ⇒fig. 121. Container
capacity: ⇒page 199.
Plain water on its own is not enough to clean the glass properly. It
is therefore advisable to add a suitable washer fluid additive (with
Fig. 121 Luggage
compartment: Wind-
screen washer
container
document_0900452a816e6cc9.book Seite 164 Mittwoch, 21. Februar 2007 1:32 13
Page 187 of 210

Self-help185
Controls
Safety
Driving tips
General maintenance
Self-help
Technical data
Tightening wheel bolts– Fit the box spanner as far as it will go over the wheel
bolt
5).
– Grip the box spanner as close to the end as possible and
tighten the bolt firmly by turning clockwise.
Have the tightening torque of the wheel bolts checked as soon as
possible with a torque wrench. The correct tightening torque is
120 Nm.
The inflation pressure must be checked as soon as possible.
Put the tools and jack back in the luggage compartment.
WARNING
The wheel bolts must not be loosened – this would cause a safety
risk.
Note
•
Do not use the hexagonal socket in the screwdriver handle to
loosen or tighten the wheel bolts.
•
If you notice that the wheel bolts are corroded and difficult to
turn, they must be replaced before having the tightening torque
checked.
•
In the interest of safety, drive at moderate speeds until the tight-
ening torque of the wheel bolts has been checked.
Jump-startingBefore starting the engine
If necessary, the engine can be started by connecting it to
the battery of another vehicle.If the engine should ever fail to start because of a discharged
battery, the battery can be connected to the battery of another
vehicle to start the engine. Suitable jump leads are required.
Both batteries must be rated at 12 Volts. The capacity (Ah) of the
booster battery should not be significantly lower than that of the
discharged battery.
Jump leads
The jump leads must be heavy enough to carry the starter current.
Refer to the details given by the manufacturer.
Only use jump leads with insulated battery clamps.
Positive cable – usually red
Negative cable – usually black
WARNING
•
When it is discharged the battery can freeze at temperatures
around 0°C. A frozen battery must first be thawed out before
connecting the jump leads, as it could otherwise explode.
•
Please note the safety warnings referring to working in the
engine compartment ⇒page 155.Note
•
There must be no contact between the two vehicles as otherwise
current could flow as soon as the positive terminals are connected.
•
The discharged battery must be properly connected to the
vehicle's electrical system.
5)An adapter is required to tighten the anti-theft wheel bolts ⇒page 182.
document_0900452a816e6cc9.book Seite 185 Mittwoch, 21. Februar 2007 1:32 13
Page 209 of 210

Index207
Controls
Safety
Driving tips
General maintenance
Self-help
Technical data Radio display . . . . . . . . . . . . . . . . . . . . . . . . 20
Radio transmitters
Fixed installation . . . . . . . . . . . . . . . . . 175
Mobile equipment . . . . . . . . . . . . . . . . 175
Radio-controlled clock . . . . . . . . . . . . . . . . 11
Radio-operated remote control
SeeRemote control keys . . . . . . . . . . . 41
Rain sensor . . . . . . . . . . . . . . . . . . . . . . . . . 59
Rain sensor defective . . . . . . . . . . . . . . . . . 38
Rear fog light . . . . . . . . . . . . . . . . . . . . . . . . 54
Rear lights defective . . . . . . . . . . . . . . . . . . 37
Rear spoiler . . . . . . . . . . . . . . . . . . . . . . . . 134
Rear view mirrors
SeeMirrors . . . . . . . . . . . . . . . . . . . . . . . 63
Rear window heating . . . . . . . . . . . . . . . . . 79
Remote control keys . . . . . . . . . . . . . . . . . . 40
Indicator lamp . . . . . . . . . . . . . . . . . . . . 40
Replacing the battery . . . . . . . . . . . 40, 41
Synchronisation . . . . . . . . . . . . . . . . . . . 41
Unlocking and locking . . . . . . . . . . . . . 43
Repairs . . . . . . . . . . . . . . . . . . . . . . . . . . . . 174
Replacement keys . . . . . . . . . . . . . . . . . . . . 40
Replacement parts . . . . . . . . . . . . . . . . . . 174
Rev counter . . . . . . . . . . . . . . . . . . . . . . . . . 11
Reverse gear
R tronic . . . . . . . . . . . . . . . . . . . . . . . . . . 90
Running in . . . . . . . . . . . . . . . . . . . . . . . . . 138
SSAFE . . . . . . . . . . . . . . . . . . . . . . . . . . . . . . . 42
Safe driving . . . . . . . . . . . . . . . . . . . . . . . . 102Safety . . . . . . . . . . . . . . . . . . . . . . . . . . . . . 103
Safety features . . . . . . . . . . . . . . . . . . . . . 102
Seat adjustment
Bucket seats . . . . . . . . . . . . . . . . . . . . . . 70
Electrically adjustable seat . . . . . . . . . . 68
Manually adjustable seat . . . . . . . . . . . 67
Seat belts . . . . . . . . . . . . . . . . . . . . . . . . . . 109
Adjusting seat belts . . . . . . . . . . . . . . . 112
Belt tensioners . . . . . . . . . . . . . . . . . . . 114
Cleaning . . . . . . . . . . . . . . . . . . . . . . . . 150
During pregnancy . . . . . . . . . . . . . . . . 113
Putting on . . . . . . . . . . . . . . . . . . . . . . . 112
Safety notes . . . . . . . . . . . . . . . . . . . . . 110
Taking off . . . . . . . . . . . . . . . . . . . . . . . 113
Warning lamp . . . . . . . . . . . . . . . . . . . . . 18
Seat heating . . . . . . . . . . . . . . . . . . . . . . . . . 80
Security central locking . . . . . . . . . . . . . . . 46
Selector lever defective . . . . . . . . . . . . . . . 38
Service interval display . . . . . . . . . . . . . . . . 21
Service position for windscreen wipers . . 61
Setting time . . . . . . . . . . . . . . . . . . . . . . . . . 12
Setting time format . . . . . . . . . . . . . . . . . . . 12
Side lights . . . . . . . . . . . . . . . . . . . . . . . . . . 52
Sitting position
Driver . . . . . . . . . . . . . . . . . . . . . . . . . . . 104
Front passenger . . . . . . . . . . . . . . . . . . 105
Incorrect sitting position . . . . . . . . . . 106
Snow chains . . . . . . . . . . . . . . . . . . . . . . . 171
Spare key . . . . . . . . . . . . . . . . . . . . . . . . . . . 40
Speed warning . . . . . . . . . . . . . . . . . . . 31, 37
Speedometer . . . . . . . . . . . . . . . . . . . . . . . . 13
Spoiler . . . . . . . . . . . . . . . . . . . . . . . . . . . . 134Starting the engine . . . . . . . . . . . . . . . . . . . 82
Starting with jump leads . . . . . . . . . . . . . 185
Steering
Locking the steering . . . . . . . . . . . . . . . 81
Steering wheel height adjustment
(manual) . . . . . . . . . . . . . . . . . . . . . . . . 81
Steering lock . . . . . . . . . . . . . . . . . . . . . . . . 81
Stowing luggage safely . . . . . . . . . . . . . . 108
Sun visors . . . . . . . . . . . . . . . . . . . . . . . . . . . 58
Switching off the engine . . . . . . . . . . . . . . 83
Symbols
Red symbols in central display . . . . . . 33
Yellow symbols in central display . . . . 33
TTank capacity . . . . . . . . . . . . . . . . . . . . . . . 199
Temperature . . . . . . . . . . . . . . . . . . . . . . . . 76
Tool kit . . . . . . . . . . . . . . . . . . . . . . . . . . . . 178
Tools . . . . . . . . . . . . . . . . . . . . . . . . . . . . . . 178
Tow-away protection . . . . . . . . . . . . . . . . . 49
Towing away . . . . . . . . . . . . . . . . . . . . . . . 187
Towline anchorage . . . . . . . . . . . . . . . . . . 188
Tow-starting . . . . . . . . . . . . . . . . . . . . . . . . 187
Traction control system . . . . . . . . . . . . . . 132
Tread depth . . . . . . . . . . . . . . . . . . . . . . . . 168
Trip recorder . . . . . . . . . . . . . . . . . . . . . 13, 14
Trips, checklist . . . . . . . . . . . . . . . . . . . . . . 102
Turn signals . . . . . . . . . . . . . . . . . . . . . . . . . 56
Two-way radios . . . . . . . . . . . . . . . . . . . . . 175
Type plate . . . . . . . . . . . . . . . . . . . . . . . . . . 196
Tyre Mobility System . . . . . . . . . . . . . . . . 178
document_0900452a816e6cc9.book Seite 207 Mittwoch, 21. Februar 2007 1:32 13