catalytic converter AUDI R8 2007 Owners Manual
[x] Cancel search | Manufacturer: AUDI, Model Year: 2007, Model line: R8, Model: AUDI R8 2007Pages: 210, PDF Size: 8.1 MB
Page 15 of 210
Instruments and warning/indicator lamps13
Controls
Safety
Driving tips
General maintenance
Self-help
Technical data Warning lamp
If the symbol
flashes in the display, this means that either the
coolant temperature is too high or the coolant level is too low
⇒page 35.
If the needle is over to the far right on the dial, this means the
coolant temperature is too high. Stop the vehicle, switch off the
engine and wait for it to cool down. If the warning lamp starts
flashing again after just a short distance, contact a qualified work-
shop.
WARNING
•
Before opening the engine lid and checking the coolant level,
please observe the warning information on ⇒page 155, “Working
on components in the engine compartment”.
•
Never open the engine lid if you can see or hear steam or
coolant escaping from the engine compartment; there is a risk of
being scalded. Wait until you can no longer see or hear escaping
steam or coolant.Caution
•
Additional lights and other accessories in front of the air inlet
reduce the cooling effect of the radiator. At high outside tempera-
tures and high engine loads, there is a risk of the engine over-
heating.
•
The front spoiler also ensures proper distribution of the cooling
air when the vehicle is moving. If the spoiler is damaged this can
reduce the cooling effect, which could cause the engine to overheat.
You should obtain professional assistance.
Fuel gaugeThe gauge only works when the ignition is switched on. When the
needle reaches the reserve zone, the symbol
lights up in the instrument cluster display ⇒page 36. At this point there are still
about 10 litres of fuel left in the tank. This is your reminder to fill up
soon.
The tank capacity of your vehicle is given in the Technical data
section ⇒page 198.
Caution
Never run the tank completely dry. If there is an irregular fuel supply,
misfiring can occur. This allows unburnt fuel to enter the exhaust
system, which could cause overheating and damage the catalytic
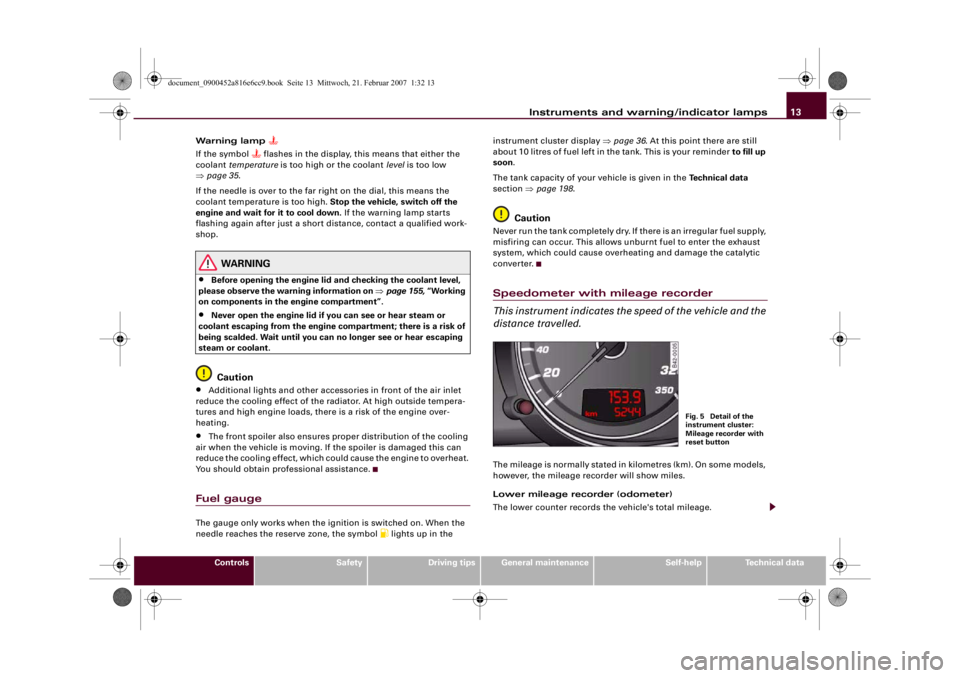
converter.Speedometer with mileage recorder
This instrument indicates the speed of the vehicle and the
distance travelled.The mileage is normally stated in kilometres (km). On some models,
however, the mileage recorder will show miles.
Lower mileage recorder (odometer)
The lower counter records the vehicle's total mileage.
Fig. 5 Detail of the
instrument cluster:
Mileage recorder with
reset button
document_0900452a816e6cc9.book Seite 13 Mittwoch, 21. Februar 2007 1:32 13
Page 19 of 210
Instruments and warning/indicator lamps17
Controls
Safety
Driving tips
General maintenance
Self-help
Technical data
•
It will also come on if a fault should occur in the ABS because the
ESP operates in conjunction with the ABS.
If the warning lamp lights up and stays on after the engine is
started, this may mean that the control system has temporarily
switched off the ESP. In this case the ESP can be reactivated by
switching the ignition off and then on again. If the warning lamp
goes out, this means the system is fully functional.
For further information on the ESP ⇒page 132.
If the battery is disconnected and then reconnected, this warning
lamp will light up when the engine is started and stay on until you
have driven a few metres.
Emission control system
If the warning lamp lights up continuously you should take your
vehicle to a qualified workshop as soon as possible in order to have
the fault rectified.
If the warning lamp flashes drive on at reduced speed and seek
professional help in order to avoid damage to the catalytic
converter.
For further information on the catalytic converter ⇒page 138.Main beam headlights
The indicator lamp
lights up when the main beams are on or
when the headlight flasher is operated.
For further information on the main beam headlights ⇒page 56.
Rear spoiler
This warning lamp monitors the automatic electrically
operated rear spoiler.The warning lamp
has the following functions:
•
It lights up when the ignition is switched on and should go out
again after about 3 seconds. This signals that the lamp is working
properly.
•
It lights up if a malfunction occurs on the automatic rear spoiler.
For further information on the automatic rear spoiler ⇒page 134.
Turn signals and hazard warning lights
Depending on which turn signal is operated, either the left
or
right
indicator lamp flashes. Both indicator lamps will flash when
the hazard warning lights are switched on.
If one turn signal should fail, the indicator lamp will start flashing
twice as fast.
For further information on the turn signals ⇒page 56.
Applies to vehicles: with cruise control systemCruise control
The indicator lamp
in the instrument cluster lights up when the
cruise control system is operating.
Airbag system
This warning lamp monitors the airbag and seat belt
tensioner system.The warning lamp
should light up for a few seconds when the
ignition is switched on.
document_0900452a816e6cc9.book Seite 17 Mittwoch, 21. Februar 2007 1:32 13
Page 140 of 210
Your vehicle and the environment 138Your vehicle and the environmentRunning inA new vehicle should be run in over a distance of 2,500 km. During
the first 1,000 km do not use full throttle and do not exceed an
engine speed of 6,000 rpm. From 1,000 to 2,000 km you should also
avoid using full throttle. From 2,000 to 2,500 km you can then
increase engine speed gradually and briefly to 8,250 rpm.
During its first few hours of running, the internal friction in the
engine is greater than later on when all the moving parts have
bedded down.
How the vehicle is driven for the first 2,500 km also influences the
engine quality. After the first 2,500 km you should continue driving
at moderate engine speeds, in particular when the engine is cold.
This helps to reduce wear and tear on the engine and increases the
potential mileage which can be covered by the engine.
You should also avoid driving with the engine speed too low.
Change down to a lower gear when the engine no longer runs
“smoothly”. Excessively high engine speeds are prevented by an
automatic rev limiter.Emission control systemsThe vehicle must only be used with unleaded petrol, otherwise the
catalytic converter will be destroyed.
Never run the tank completely dry. The irregular fuel supply can
cause misfiring, which would allow unburnt fuel to enter the
exhaust system, which could cause overheating and damage the
catalytic converter.
WARNING
•
Because of the high temperatures which can occur in the emis-
sion control system, do not park the vehicle where the exhaust
can come into contact with flammable materials under the car
(e.g. on grass or at the forest edge). - Fire hazard!
•
Do not apply any underseal agents in the area around the
exhaust system - fire hazard!
Driving abroadUnleaded petrol
A car with catalytic converter must not be run with leaded petrol
⇒page 138. Before driving abroad make sure that unleaded petrol
is available there.
Changing over headlight dip settings
The asymmetric low beams of the headlights are designed to light
up the near side of the road more intensely. If you drive in a country
where traffic drives on the opposite side of the road to the home
country, this will dazzle oncoming traffic.
The headlight dip settings must be changed to avoid dazzling
oncoming traffic. For safety reasons, you should have the dip
settings changed by a qualified workshop.
For further information about changing the dip settings on xenon*
headlights, please contact your Audi R8 dealer or other qualified
workshop.
document_0900452a816e6cc9.book Seite 138 Mittwoch, 21. Februar 2007 1:32 13
Page 154 of 210
Fuel and filling the tank 152Fuel and filling the tankPetrolPetrol grade
The correct grade of petrol is listed inside the fuel tank
flap.The vehicle is equipped with a catalytic converter and must only be
run on unleaded petrol. Unleaded petrol must comply with the
European EN 228 standard. The petrol grades have different octane
ratings (RON). If, in exceptional circumstances, the correct octane
rating is not available, please note the following:
Your engine normally requires Super Plus unleaded petrol (98 RON).
Premium unleaded fuel with 95 RON can also be used. This can,
however, result in a slight loss of power under certain driving condi-
tions. If premium unleaded petrol is not available, the engine can be
run on regular unleaded petrol with 91 RON as an emergency
measure. In this case only use moderate engine speeds and a light
throttle. Avoid using full throttle. Fill up with premium or Super Plus
petrol as soon as possible.
Caution
•
Petrol complying with the EN 228 standard can contain small
quantities of ethanol. However, “bioethanol fuels”, which are
retailed under various different names such as E50 and E85, and
which contain a large proportion of ethanol, must not be put into
the vehicle, as this would damage the fuel system.
•
Even one tankful of leaded fuel would permanently impair the
efficiency of the catalytic converter.
•
High engine speed and full throttle can damage the engine when
using petrol with an octane rating lower than the correct grade for
the engine.
Filling the tankFilling the tankUnscrewing the tank cap
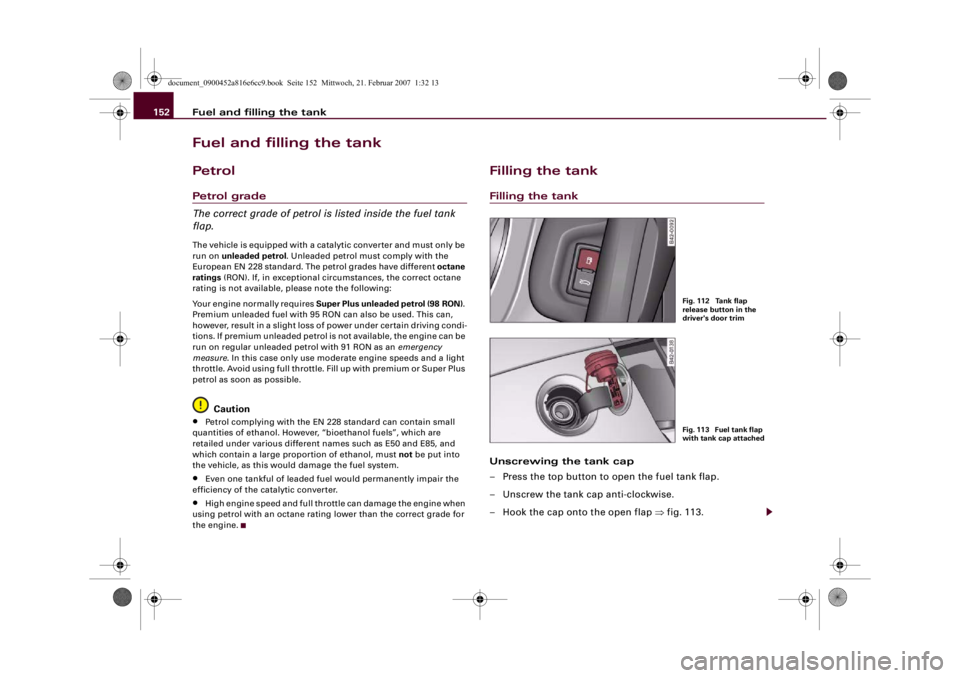
– Press the top button to open the fuel tank flap.
– Unscrew the tank cap anti-clockwise.
– Hook the cap onto the open flap ⇒fig. 113.
Fig. 112 Tank flap
release button in the
driver's door trimFig. 113 Fuel tank flap
with tank cap attached
document_0900452a816e6cc9.book Seite 152 Mittwoch, 21. Februar 2007 1:32 13
Page 155 of 210
Fuel and filling the tank153
Controls
Safety
Driving tips
General maintenance
Self-help
Technical data
Closing the tank cap
– Screw on the tank cap clockwise until it clicks audibly.
– Close the tank flap.When the automatic filler nozzle is operated correctly it will switch
itself off as soon as the tank is “full”. Do not try to put in more fuel
after the nozzle cuts out, as this will fill the expansion chamber in
the fuel tank.
The correct fuel grade for your vehicle is given on a sticker on the
inside of the tank flap. Further notes on fuel ⇒page 152.
The tank capacity of your vehicle is given in the Technical data
section ⇒page 198.
WARNING
Fuel is highly inflammable and can cause serious burns and other
injuries.•
When filling your tank or a spare fuel canister with fuel, do not
smoke and keep away from naked flames. Risk of explosion!
•
Observe all relevant statutory regulations on using, storing and
transporting spare fuel canisters.
•
For safety reasons we do not recommend carrying a spare fuel
canister in the vehicle. The canister could become damaged in an
accident and leak.
•
If, in exceptional circumstances, you have to carry a spare fuel
canister, please observe the following warnings:
−Never fill fuel into the spare fuel canister with the canister
placed in or on top of the vehicle. An electrostatic charge could
build up during filling, causing the fuel vapour to ignite. Danger
of explosion. Always place the canister on the ground to fill it.
−Insert the filler nozzle as far as possible into the spare fuel
canister.−If the spare fuel canister is made of metal, the filler nozzle
must be in contact with the canister during filling. This helps
prevent an electrostatic charge building up.
−Make sure you never spill fuel in the vehicle or in the luggage
compartment. Fuel vapour is explosive. Risk of fatal accident!
Caution
•
If any fuel is spilt onto the vehicle, it should be removed immedi-
ately as it could otherwise damage the paintwork.
•
Never run the tank completely dry. If there is an irregular fuel
supply, misfiring can occur. As a result unburnt fuel can enter the
exhaust system and cause damage to the catalytic converter(s).For the sake of the environment
Do not overfill the fuel tank – it may cause the fuel to overflow if it
becomes warm.
Note
•
Should the fuel tank flap become frozen stuck during inclimate
weather, press the middle of the flap with the palm of the hand and
try again.
•
When the fuel filler pump switches itself off, wait 5 seconds
before pulling out the fuel nozzle so that any remaining fuel flows
into the tank opening.WARNING (continued)
document_0900452a816e6cc9.book Seite 153 Mittwoch, 21. Februar 2007 1:32 13
Page 160 of 210
Checking and topping up fluids 158
Checking oil level
– Warm up the engine by driving the vehicle until the oil
temperature shown in the instrument cluster is between
100 °C and 110 °C ⇒page 157, fig. 117.
– Park your vehicle on a level surface.
– Allow the warm engine to run for about two minutes at
idling speed.
– Switch off the engine and wait for two minutes.
– Check the oil level using the dipstick ⇒page 157,
fig. 118.
Oil level in area
–Do not top up oil.
Oil level in area
– Add 1 litre of oil ⇒page 158. After topping up the oil level
should be in area .Depending on how you drive and the conditions in which the car is
used, oil consumption can be up to 1.0 ltr./1000 km. Oil consump-
tion is likely to be higher for the first 5000 km.
Topping up the engine oil
–Unscrew cap
from oil filler opening ⇒fig. 119.
– Top up carefully using the correct oil ⇒page 198.
– Check the oil level again ⇒page 157.
– Top up with oil if necessary.
– Replace the oil filler cap carefully and push the dipstick
all the way in.
WARNING
•
Ensure that no oil comes into contact with hot engine compo-
nents when topping up: this could cause a fire.
•
Wash your skin thoroughly if it comes into contact with engine
oil.Caution
•
The oil level must never be above area , as this may result in
damage to the catalytic converter or to the engine. Contact a quali-
fied workshop to extract the engine oil if necessary.
AaAbAa
Fig. 119 Engine
compartment: Engine
oil filler cap
Aa
document_0900452a816e6cc9.book Seite 158 Mittwoch, 21. Februar 2007 1:32 13
Page 191 of 210
Self-help189
Controls
Safety
Driving tips
General maintenance
Self-help
Technical data not successful. Tow-starting is an attempt to start the engine via the
movement of the wheels.
When tow-starting a vehicle with a petrol engine, do not tow it more
than a short distance, otherwise unburnt fuel can enter the catalytic
converter and cause damage.
WARNING
There is a high risk of accidents when tow-starting, as the towed
vehicle can easily be driven into the towing vehicle.
Caution
When tow-starting the vehicle, do not tow it further than 50 metres:
otherwise the catalytic converter could be damaged.To w i n g a w a y
Certain restrictions must be observed when towing your
vehicle.Please observe the notes ⇒page 187.
The vehicle can be towed with a towbar or towrope in the normal
way, with all four wheels on the ground. When doing so, please note
the following points:•
Make sure the gear lever is in neutral or the selector lever is in
the N position.
•
The vehicle must not be towed faster than 50 km/h.
•
The vehicle must not be towed further than 50 km. The reason
for this is: when the engine is not running, the gearbox oil pump
does not work and the gearbox is not adequately lubricated for
higher speeds or longer distances.
Caution
The vehicle must not be towed with the wheels lifted at either the
front or rear otherwise the gearbox may be damaged.
Note
If it is not possible to tow the vehicle as described above, or if it has
to be towed further than 50 km, it must be transported on a special
car transporter or trailer.
document_0900452a816e6cc9.book Seite 189 Mittwoch, 21. Februar 2007 1:32 13
Page 205 of 210
Index203
Controls
Safety
Driving tips
General maintenance
Self-help
Technical data Car keys . . . . . . . . . . . . . . . . . . . . . . . . . . . . 40
Carbon parts
Exterior . . . . . . . . . . . . . . . . . . . . . . . . . 146
Interior . . . . . . . . . . . . . . . . . . . . . . . . . 147
Care of vehicle . . . . . . . . . . . . . . . . . . . . . . 144
Catalytic converter . . . . . . . . . . . . . . . . . . 138
Central locking system . . . . . . . . . . . . . . . . 42
Deadlock mechanism . . . . . . . . . . . . . . 44
Locking . . . . . . . . . . . . . . . . . . . . . . . . . . 44
Locking and unlocking the vehicle from
inside . . . . . . . . . . . . . . . . . . . . . . . . . . 45
Locking doors manually . . . . . . . . . . . . 46
Luggage lid . . . . . . . . . . . . . . . . . . . . . . . 47
Opening and closing windows . . . . . . . 43
Security central locking . . . . . . . . . . . . 46
Switches . . . . . . . . . . . . . . . . . . . . . . . . . 45
Unlocking . . . . . . . . . . . . . . . . . . . . . . . . 44
Ceramic brake discs
Changing a wheel . . . . . . . . . . . . . . . . 184
Changing a wheel . . . . . . . . . . . . . . . . . . . 182
Changing bulbs . . . . . . . . . . . . . . . . . . . . . 193
Chassis number . . . . . . . . . . . . . . . . . . . . . 196
Child safety . . . . . . . . . . . . . . . . . . . . . . . . 122
Child safety seat . . . . . . . . . . . . . . . . . . . . 123
Child seat categories . . . . . . . . . . . . . . 123
Fitting . . . . . . . . . . . . . . . . . . . . . . . . . . 126
ISOFIX system . . . . . . . . . . . . . . . . . . . 128
Safety notes . . . . . . . . . . . . . . . . . . . . . 122
Cigarette lighter . . . . . . . . . . . . . . . . . . . . . 72
Cleaning . . . . . . . . . . . . . . . . . . . . . . . . . . . 144
Cleaning Alcantara . . . . . . . . . . . . . . . . . . 150Cleaning seat covers
Alcantara . . . . . . . . . . . . . . . . . . . . . . . . 150
Natural leather . . . . . . . . . . . . . . . . . . . 149
Textile covers . . . . . . . . . . . . . . . . . . . . 147
Cleaning textile covers and trim parts . . 147
Closing
Engine lid . . . . . . . . . . . . . . . . . . . . . . . 156
Clutch overheating . . . . . . . . . . . . . . . . . . . 38
Colour code . . . . . . . . . . . . . . . . . . . . . . . . 196
Coming home function . . . . . . . . . . . . . . . . 54
Compartment for (sun)glasses . . . . . . . . . 73
Compass in mirror . . . . . . . . . . . . . . . . . . . 65
Conformity certification . . . . . . . . . . . . . . . 98
Controls and displays
Overview . . . . . . . . . . . . . . . . . . . . . . . . . . 9
Convenience close . . . . . . . . . . . . . . . . . . . 43
Convenience open . . . . . . . . . . . . . . . . . . . . 43
Cooling system
Anti-freeze additive . . . . . . . . . . . . . . . 159
Checking coolant level . . . . . . . . . . . . 160
Coolant . . . . . . . . . . . . . . . . . . . . . . . . . 159
Coolant temperature gauge . . . . . . . . . 12
Malfunction . . . . . . . . . . . . . . . . . . . . . . 35
Radiator fan . . . . . . . . . . . . . . . . . . . . . 161
Topping up coolant . . . . . . . . . . . . . . . 160
Cruise control system . . . . . . . . . . . . . . . . . 86
Adjusting stored speed . . . . . . . . . . . . . 87
Indicator lamp . . . . . . . . . . . . . . . . . . . . 17
Setting speed . . . . . . . . . . . . . . . . . . . . . 87
Switching off . . . . . . . . . . . . . . . . . . . . . 88
Switching off temporarily . . . . . . . . . . . 88
Cup holders . . . . . . . . . . . . . . . . . . . . . . . . . 72
Current fuel consumption . . . . . . . . . . . . . 22
DDashboard lighting
SeeInstrument lighting . . . . . . . . . . . . . 55
Date display . . . . . . . . . . . . . . . . . . . . . . . . . 12
Daytime running lights . . . . . . . . . . . . . . . . 52
Deactivating front passenger's airbag . . 120
Deadlock mechanism . . . . . . . . . . . . . . . . . 44
Defrosting windows . . . . . . . . . . . . . . . . . . 78
Deluxe automatic air conditioner
Economical operation . . . . . . . . . . . . . . 79
Description of R tronic . . . . . . . . . . . . . . . . 90
Digital clock . . . . . . . . . . . . . . . . . . . . . . . . . 12
Digital compass . . . . . . . . . . . . . . . . . . . . . . 65
Dimensions . . . . . . . . . . . . . . . . . . . . . . . . 198
Dipped headlights . . . . . . . . . . . . . . . . . . . . 52
Defective . . . . . . . . . . . . . . . . . . . . . . . . . 37
Distance covered . . . . . . . . . . . . . . . . . . . . . 23
Door catches, engine lid and front lid
warning . . . . . . . . . . . . . . . . . . . . . . . . 20
Doors
Locking doors manually . . . . . . . . . . . . 46
Driver
SeeSitting position . . . . . . . . . . . . . . . 104
Driver information system
CD and radio display . . . . . . . . . . . . . . . 20
Door catches, engine lid and front lid
warning . . . . . . . . . . . . . . . . . . . . . . . . 20
Help . . . . . . . . . . . . . . . . . . . . . . . . . . . . . 25
Menu button . . . . . . . . . . . . . . . . . . . . . . 25
Menu display . . . . . . . . . . . . . . . . . . . . . 24
On-board computer . . . . . . . . . . . . . . . . 22
Outside temperature display . . . . . . . . 20
document_0900452a816e6cc9.book Seite 203 Mittwoch, 21. Februar 2007 1:32 13