sport mode AUDI R8 SPYDER 2011 Owners Manual
[x] Cancel search | Manufacturer: AUDI, Model Year: 2011, Model line: R8 SPYDER, Model: AUDI R8 SPYDER 2011Pages: 244, PDF Size: 59.74 MB
Page 13 of 244
Instrument s and warning /indicator lights 11
Tachometer (engine rev counter)
The tachometer indicates the engine RPM
(revolutions per minutes) .
You should shift to the next lowest gear when
the speed is below 1500 RPM. The beg inning
of the red zone in the tachometer indicates
the maximum permiss ible engine speed for
all gears once the eng ine has been broken in
a nd when i t is wa rm. You sho uld shift to the
n ex t hi gher gea r, switc h the R tron ic sport
mode
off or remove your foot from the accel
erator pedal befo re reaching this a rea in the
ga uge.
(D Note
The needle in the tachometer~ page 10,
fig.
3 @ may only be in the red area of the
gauge fo r a short time or the engine could
be damaged. The location whe re the red
zone beg ins va ries depending on the en
g ine.
Digital clock with date display
Your vehicle is equipped with a quartz con
trolled digital clock.
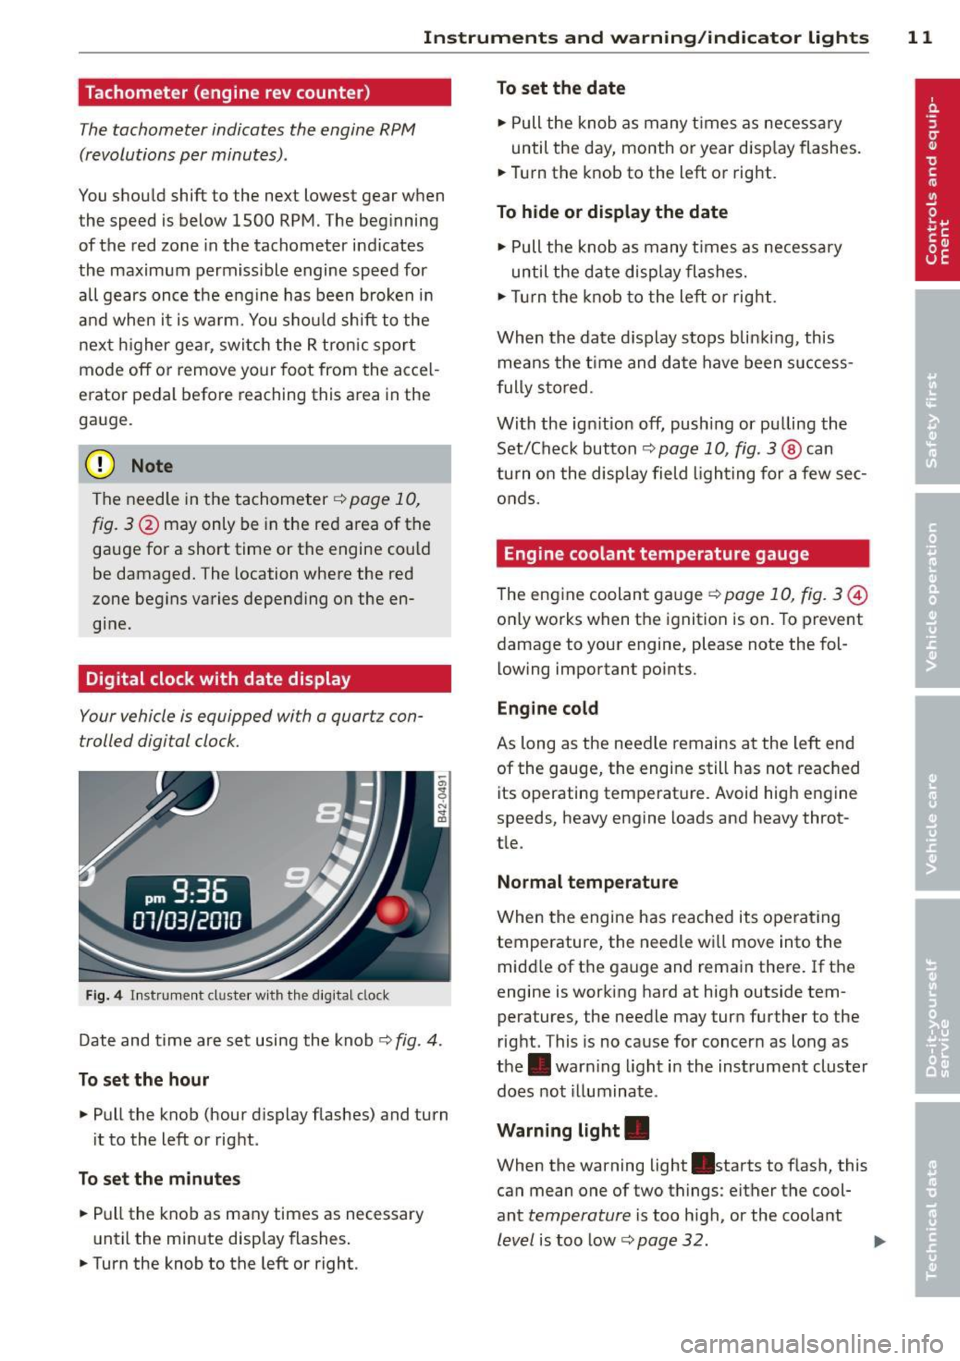
F ig. 4 I n stru ment cl uste r w ith t he d ig ita l cl ock
D ate and time are set using the knob~ fig. 4.
To set the hour
• Pull the knob (hour d isplay flashes) and turn
it to the left o r rig ht.
To set the minutes
• Pull the knob as many times as necessary
u nti l the min ute display flashes .
• Turn the knob to the left or right.
To set the date
• Pull the knob a s many times as necess ary
until the day, month o r year disp lay flashes.
• Tur n the knob to the left or rig ht.
To hide or display the date
• Pull the knob as many t imes as necess ary
until the date di sp lay fla shes.
• Turn the knob to the le ft or rig ht.
Wh en th e date d isp lay s tops blin king, this
means the time and da te have been s uccess
f ully s to red.
Wi th the ig nition
off, push ing or pu lling the
Set/Che ck button
~ pag e 10, fig. 3@ can
tu rn o n the display field light ing for a few sec
on ds.
Engine coolant temperature gauge
The engine coolan t ga uge ~ page 10, fig. 3@
onl y works when t he ig nition is on. To prevent
damage to your engine, please note the fol
lowing important points.
Engine cold
As long as the need le remains a t the left end
of the gauge, the engi ne still has not reac hed
its operating tem perature. Avoid high eng ine
speeds, heavy engine loads and heavy throt
tle.
Normal temperature
When the engine has re ached it s operat ing
temperature, the need le w ill move into the
midd le of the gauge and rema in the re .
If th e
engine is working hard at high outside tem
peratures, the needle may turn further to the
right. This is no cause for concer n as long as
the . warn ing light i n the instrument clus ter
does not illuminate .
Warning light.
When the warning light .starts to flash, this
can mean one of two t hings : either the cool
ant
temperature i s too h igh, or the coolant
l e vel is too low~ page 32 . IIJ,,
Page 84 of 244
82 On the road
You can also increase your speed by pressing
the accelerator pedal. After you release the
accelerator pedal, the system automat ically
adjusts back down to the speed you previously
set .
However, if you exceed this speed by 5 mph
(10 km/h) for longer than 5 m inutes, the stor
ed speed will be deleted. You will have to re
save it.
Briefly pressing lever
The desired speed is increased by about 2 mph
(2 km/h) by briefly pressing the lever upwards
towards
c:> page 81 , fig . 87 0 -
The desired speed is decreased by about 2
mph (2 km/h) by briefly pressing the lever
downwards towards
c:> poge 81, fig. 87G).
Switching control mode off temporarily
.. Step on the brake pedal, or
.. Depress the clutch pedal all the way, or
.. Press the lever towards @(not latched)
c> page 81, fig. 87 .
When the system is turned off temporarily,
the speed stored at the time is retained.
To resume the stored speed, release the brake
or clutch pedal and pu ll the lever to position
(D .
If no desired speed was stored when the sys
tem was temporarily switched
off, you can
store a new desired speed as follows: Drive at
the desired speed and briefly press button
c> page 81, fig. 87 @ (SET) .
A WARNING
You should only return to the saved speed
if it is not too fast for the current traffic
conditions - risk of an accident!
Deactivating
.. Press leve r into position @(latc hed)
¢ page 81, fig. 87.
The saved speed value is deleted when the ig
nition is switched
off.
(D Tips
Switch the cruise control system off com
pletely at the end of each trip. When you
start the next trip, the desired speed can
be set simp ly from the basic setting
c>poge 81.
Audi magnetic ride
Damping con be adjusted to the driver's pref
erence and it adapts automatically to the cur
rent driving situation .
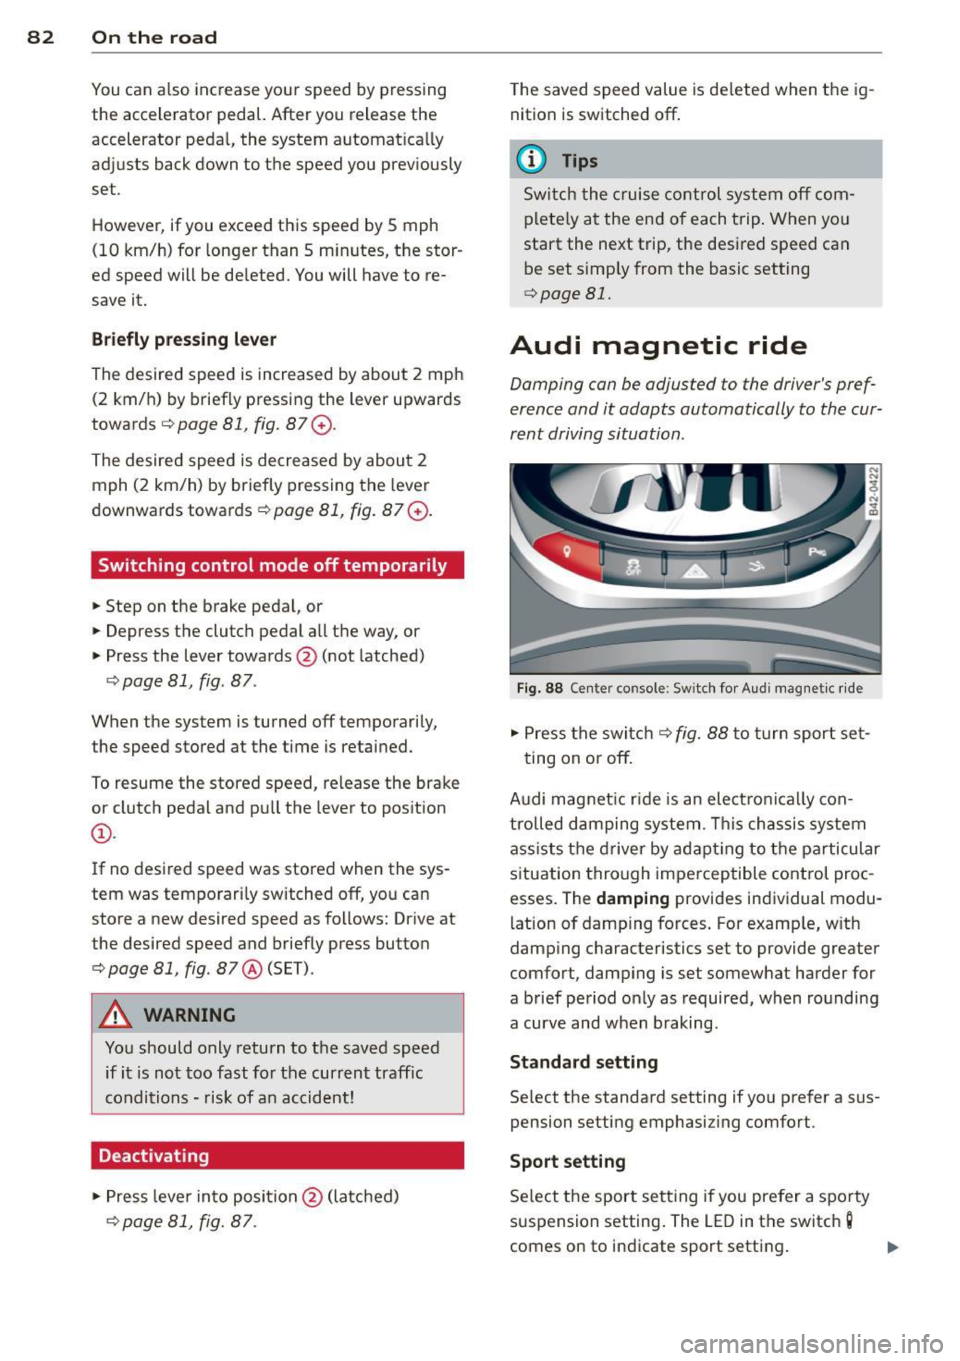
Fig. 88 Center console: Sw itch for Audi magnet ic ride
.. Press the switch c:> fig. 88 to turn sport set-
ting on or
off.
Audi magnet ic rid e is an elec tronically con
trolled damping system . This chassis system
assists the driver by adapting to the particular
situation through imperceptible control proc
esses. The
damping provides individual modu
lation of damp ing forces. For examp le, w ith
damp ing characteristics set to provide greater
comfort, damping is set somewhat harder for
a brief period only as required, when rounding
a curve and when braking.
Standard setting
Select the standard setting if you prefer a sus
pension setting emphasiz ing comfort.
Sport setting
Select the sport setting i f you prefer a spo rty
suspension setting . The LED in the switch
g
comes on to indicate sport setting .
Page 87 of 244
Automated manual transmission
Description
App lies to vehicles: with R tro nic
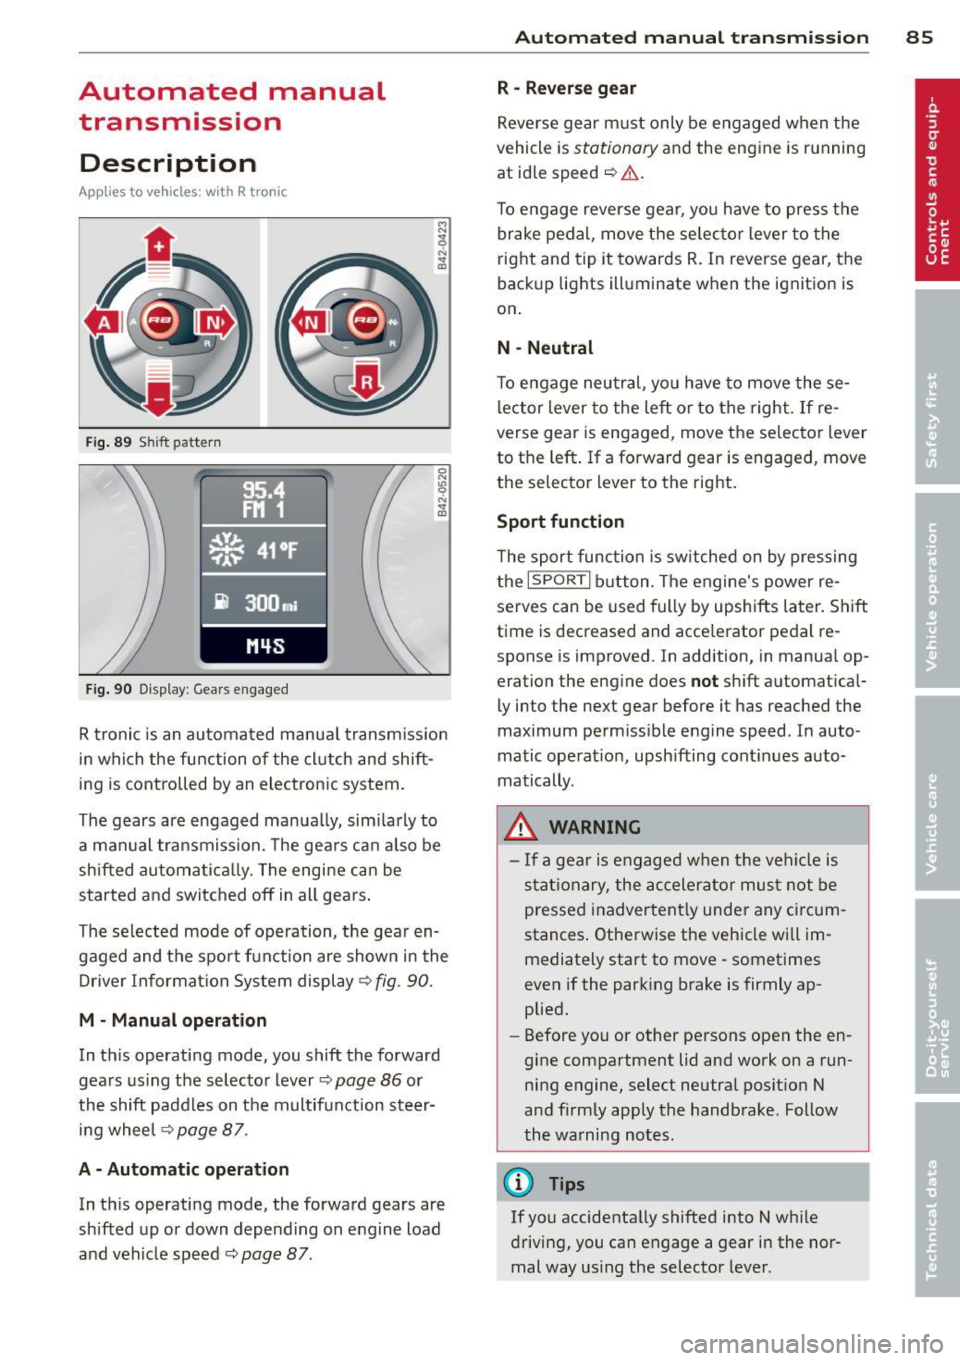
Fig . 89 S hift pattern
F ig. 90 Display : Gear s engaged
R tronic is an au tomated manua l transm iss ion
in which the function of the cl utch and shift
ing is controlled by an electronic system.
The gears are engaged manua lly, sim ilarly to
a manual transmission. The gears ca n also be
shifted automatica lly. The engine can be
started and switched off in all gears .
The selected mode of operation, the gear en gaged and the spor t funct ion are shown in the
Driver Information Sys tem display ¢
fig. 90.
M · Manual operation
In th is operating mode, you shift the forward
gears us ing the selecto r lever
¢ page 86 or
the shift paddles on the multifunction steer i ng whee l
¢page 87.
A - Automati c operation
In th is operating mode, the forward gears are
shifted up or down depending on engine load
and vehicle speed ¢
page 87.
Autom ated manual tr an sm iss ion 85
R -Rever se g ear
Reve rse gear m ust only be engaged when the
vehicle is
stationary and the engine is running
at id le speed
~ ,1. .
To engage reverse gear, you have to press the
brake pedal, move the selec to r lever to the
right and tip it towards R. In reverse gear, the
back up lights ill uminate when the ignition is
on .
N -Neutral
To engage neu tral, yo u have to move these
lector lever to the left or to the right .
If re
verse gear is engaged, move the selector lever
to the left . If a forward gear is engaged , move
the selector lever to the right.
Sport function
T he sport function is sw itched on by pressing
the
I SPORT I b utton. The engine's power re
serves can be used fully by upshifts later. Shift
t ime is decreased and acce lerator pedal re
sponse is improved . In addition, in manua l op
eration the eng ine does
not sh ift a utomat ical
ly into the next gear before it has reached the
maximum perm iss ible engine speed . In auto
matic operat io n, upsh ifting cont inues auto
matically .
_&. WARNING
- If a gear is engaged when the veh icle is
stat ionary, the accelera to r must not be
pressed inadvertent ly under any circum
stances . Otherwise the vehicle wi ll im
mediately start to move· sometimes
even if the park ing brake is firmly ap
plied.
- Before you or other persons open the en
gine compartment lid and work on a run ning engine, select neutral pos ition N
a nd firmly app ly the handbrake . Follow
the warning notes.
(!} Tips
If you accidenta lly shifted into N w hile
driving, you can engage a gear in the nor mal way us ing the selecto r lever.
Page 143 of 244
Child Safety 141
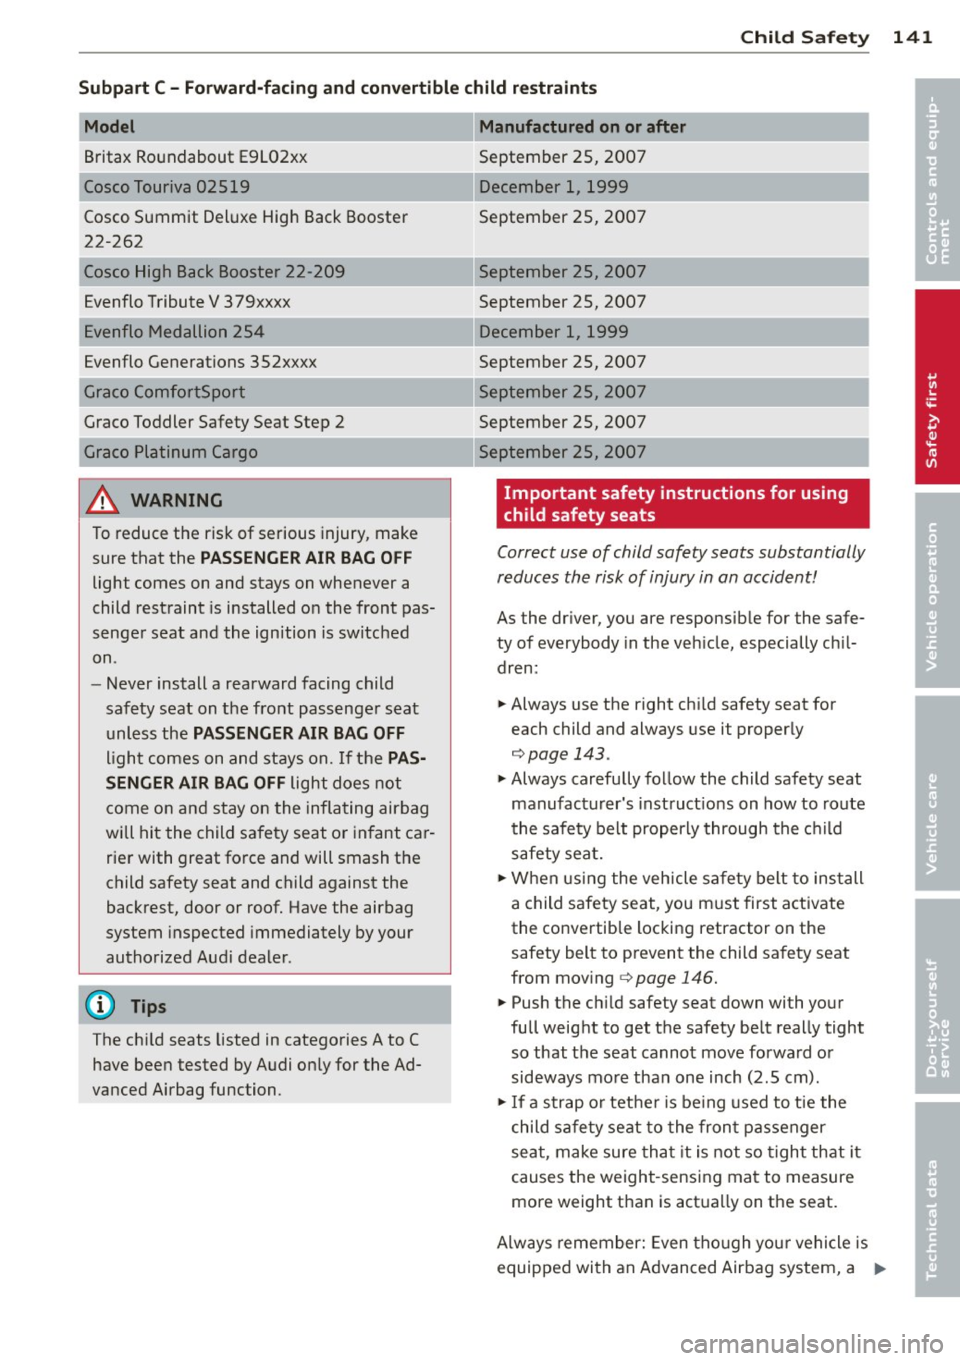
Subpart
C -Forward-facing and convertible child restraints
Model
Britax Roundabout E9L02xx
Cosco Touriva 02519
Cosco Summit Deluxe High Back Booster
22-262
Cosco High Back Booster 22-209
Manufactured on or after
September 25, 2007
December 1, 1999
September 25, 2007
September 25, 2007
September 25, 2007
Evenflo Tribute V 379xxxx
E venflo Medallion 254
----------
Evenflo Generations 352xxxx
Graco ComfortSport
----~-,
December 1, 1999
September 25, 2007
September 25, 2007
September 25, 2007
Graco Toddler Safety Seat Step 2
Graco Platinum Cargo
-------
& WARNING
To reduce the risk of serious injury, make
sure that the
PASSENGER AIR BAG OFF
light comes on and stays on whenever a
child restraint is installed on the front pas
senger seat and the ignition is switched
on .
- Never install a rearward facing child
safety seat on the front passenger seat
unless the
PASSENGER AIR BAG OFF
light comes on and stays on. If the PAS
SENGER AIR BAG OFF
light does not
come on and stay on the inflating airbag
will hit the child safety seat or infant car
rier with great force and will smash the
child safety seat and child against the
backrest, door or roof. Have the airbag
system inspected immediately by your
authorized Audi dealer .
(D Tips
The child seats listed in categories A to C
have been tested by Audi only for the Ad
vanced Airbag function. September 25, 2007
Important safety instructions for using
child safety seats
Correct use of child safety seats substantially
reduces the risk of injury in an accident!
As the driver, you are responsible for the safe
ty of everybody in the veh icle, especially ch il
dren:
.., Always use the right chi ld safety seat for
each child and always use it properly
¢page 143.
.., Always carefully follow the child safety seat
manufacturer's instruct ions on how to route
the safety belt properly through the child
safety seat.
.., When using the vehicle sa fety belt to install
a child safety seat, you must first activate
the convertib le locking retractor on the
safety belt to prevent the child safety seat
from moving ¢
page 146.
.., Push the ch ild safety seat down with your
full weight to get the safety belt really tight
so that the seat cannot move forward or
sideways more than one inch (2 .5 cm).
"'If a strap or tethe r is being used to tie the
child safety seat to the front passenger
seat , make sure that it is not so tight that it
causes the weight-sensing mat to measure
more weight than is actua lly on the seat.
Always remember: Even though your vehicle is
equipped with an Advanced Airbag system, a .,..
•
•
Page 153 of 244
as a pulsing motion of the brake pedal, ac
companied by some noises. In order for ABS
to be able to operate optimally in th is range,
you must keep the brake pedal depressed -
never "pump the brakes" . You should not ex
pect that braking d istances w ill be
shortened
under all circumstances with ABS . Braking dis
tance may even be slightly
longer, for exam
p le on gravel or wi th fresh snow on a slippery
surface .
If a sign ificant
speed differential between the
d rive wheels on one axle is determined (for
examp le, on a su rface that is s lippery
on one
side),
the EDS brakes the spinn ing whee l and
transfers power to the other drive whee ls.
This is done up to a speed of about 60 mph (100 km/h) . Noises from the brake system
signal that whee l spin is being controlled.
I f one whee l spins when starting from a com
p lete stop because o f a different grip (for ex
ample , one wheel o n ice), keep your foot
hard
on the accelerator until the veh icle starts to
move.
If the wheels spin , ASR wi ll automatically re
duce engine torque and match power to road
surface conditions .
Switching on Sport mod e
In specific driving situations (e.g. Launch Con
trol), you swi tch ASR and ESP to Sport mode
by pressing the
[!I button once . The indicator
light
11 illuminates and ESP sport -Wa rni ng!
Restric ted stab ility
appears . "Slip" is matched
to the speed. You should do this only if your
driving skill and traffic cond it ions permit .
Switching ASR /ESP off
In certain sit uations (e .g . in deep snow, on a
l oose surface, o r when rocking the vehicle
free), switch ASR and ESP off by pressing the
[ill button for more than 3 seconds. The ind ica
tor light
I) illuminates and ES P sw itc hed off -
Warning! R estricted stability
appears . You
should do th is only if your driving skill and
traffic cond itions pe rmit .
Int ellig ent technolog y 151
Switching ASR /ESP on
Activate ASR/ ESP by p ressing the [!I button
again. The message
ESP on appears in the d is
play briefly.
Brake overheating
So that the disc b rake on a b raked wheel does
not overheat, the EDS switches off automati
ca lly if there is un usua lly severe loa ding at
th is wheel. The vehicle is st ill drivable and has
the same properties as a vehicle wit hout EDS .
As soon as the brake has cooled down, EDS
swi tches on aga in automatically.
A WARNING
- Even ESP, ABS, EDS and ASR cannot over
come the laws of physics . You should
keep this in m ind in particular on an icy
or wet road. If the systems intervene,
you shou ld adjust your speed immediate
ly to road and traff ic conditions . Do not
be tempted by the increased safety pro
vided to take risks -you risk having an
accident.
- Please keep in mind that the r isk of an
accident is i ncreased by driving too fast,
pa rti cularly in corners and on icy or wet
ro ads, and by drivi ng too close to the ve
hicle ahead . Even ES P, ABS, E DS and ASR
cannot eliminate the increased risk of
having an accident.
-Apply the throttle ca re fully when accel
erating on a consistently s lippery sur
face, e.g. on ice and snow . The drive
wheels can spin in spite of the EDS and thereby affect vehicle stability -you risk
having an accident .
- Please note that when ASR or ESP/ASR is
deactivated, the drive wheels can spin on
icy and slippery roads and the veh icle can
break away -the re is a risk of skidd ing!
(D Tips
- In the event of a defect in the rear spoil-
er system or in Audi magnet ic ride, it can
happen that ASR and ASR/ESP cannot be .,.
•
•