ESP AUDI R8 SPYDER 2012 Owner's Manual
[x] Cancel search | Manufacturer: AUDI, Model Year: 2012, Model line: R8 SPYDER, Model: AUDI R8 SPYDER 2012Pages: 236, PDF Size: 59.24 MB
Page 82 of 236
80 Transmi ssion
(0 Note
If you must stop on an incline, always hold
the vehicle in place w ith the foot brake to
prevent it from roll ing back. Never hold
the vehicle on an incline w ith a slipping
clutch. The clutch was overloaded if
Clutch
overheat ing! If possib le pl ea se st op ve hi
cle appears in the Driver Information Sys
t em disp lay.
Automatic operation
Ap plies to ve hicles : wit h R tro nic
The forward gears are shifted up or down au
tomatically.
Startin g from a stop
11-Press and ho ld the brake pedal.
11-Tap the se lector lever towards A .
... Re lease the brake pedal and acce lerate
¢ ,& in Manual operation on page 79 .
Under certain circumstances (driving in the
mounta ins for example), it can be beneficia l
to switch tempo rarily to the manual shift pro
g ram ¢
page 79in order to adjust th e gear ra
tios to driv ing cond itions
manually.
Kick-down
A ppl ies to vehicles : wit h R tro nic
When you depress the accelera to r pedal be
yond the resistance po int, R tron ic downsh ifts
into a lower gear, depending on vehicle speed
and engine rpm. The ups hift into the next
h igher gear takes place once the max imum
specified engine speed is reached. Exception:
You have activated the sport funct ion .
A WARNING
Please note that the drive wheels can spin
if kick-down is used on a smooth slippery
road -there is a risk of skidding.
Launch Control Program
App lies to veh icles : w it h R tro nic
The Launch Control Program enables maxi
mum acceleration .
Requirement: The engine must be at operat
ing temperature and the steering wheel must
not be turned .
... With the engine running, press the
I!! but
ton one time. The ESC ind icator light
I in
the Driver Information System d isplay illu
m inates and the message
ESP sport - Warn
ing! R estr icted stability
appears .
... Press the b rake pedal w it h your l eft foot
and hold i t down.
11-Eng age a gear.
11-Press the I SPORT I button on the selector
lever cover .
... Press the accelerator peda l wit h your right
foot sim ultaneously until the engine has
reached a constant speed .
... Remove your left foot from the brake¢,& .
A WARNING ,-
-Always adapt your dr iving to the traffic
f low.
- Onl y use Launch Control when road and
traffic cond itions allow it and ot her dr iv
ers will not be endange red o r annoyed by
your driving and the vehicle's ac celera
t ion .
- Please note that t he d riving wheels ca n
sp in and the vehicle can br eak away
when ESC is swi tched off, especially
when the roa d is s lippery.
- Once the s tarting procedure is comple te,
you sho uld sw itch ESC on again by press
i n g the
I!] switch.
(D Tips
When a ccele rat ing using the Lau nch Con
t rol program, all vehicle parts are s ubje ct
to heavy loads . This can result in increase d
wear .
-
Page 85 of 236
Rear vi ew camer a coverage area
The rearview camera shows you the a rea be
hind your vehicle in the navigation system dis
p lay. This area roughly corresponds to the
area in¢
fig . 92 and (!) ¢fig. 93 . Orientation
lines and colored surfaces are projected in the
area shown, which can help you with parking
and maneuvering. Objects that are located in
an area that is not captured by the camera @
¢
fig. 93 and that are closer to the bumper
will not appear on the nav igation system dis
p lay.
We recommend that you practice park ing with
the rearview camera in a traffic-free location
or pa rking lot to become familiar w ith the sys
tem, the o rientation l ines, and their function.
There should be sufficient light and good
weather conditions when doing so.
I n the nav igat io n system disp lay, objects or
veh icles appear closer or fu rther away if:
Objects or vehicles appear closer or farther
away in the navigation system if:
- you are driving in reverse gear from a level
surface onto an incline, or a downward
slope,
- you are driving in reverse gear toward pro-
truding objects.
The accuracy of the orientation lines and blue
surfaces dimin ishes if:
- the rearview camera does not provide a reli able image, for examp le, in poor visibility
cond itions or if the lens is dirty,
- the image on the screen is not visible due to
sun g lare and reflect ion .
Caring f or the re arvi ew cam era len s
The rearview camera is located i n the center
of the vehicle above the rear license plate bra cket. In o rder for the rearview camera to
f u nction properly, the came ra lens must be
kept clean and free of snow and ice .
- Dampen the lens with a househo ld alcoho l
based glass cleane r, and clean the lens with
a dry cloth.
Par king system 83
- Remove snow with a hand br ush and ice
preferably with a de-icing spray ¢(D .
A WARNING
-The parking system cannot replace the
driver's attention. The driver alone is re
sponsib le for parking and similar driving
maneuvers.
- Sensors have blind spots in wh ich objects
can not be detected. Pay spec ia l attent ion
to small children and an imals because
the sensors cannot always detect them.
- Always keep your eyes on the vehicle's
sur ro undings, us ing the rearv iew mirro r
as well.
- Do not allow yourself to be distracted from traffic by the rearv iew camera pic
tures in the navigat ion system display.
- If the position and the installation angle
of the camera has changed, for example,
after a rear end collision, do not conti nue
to use the system for safety reasons.
Have it checked by an au thori zed A ud i
dea ler or other q ualified workshop .
(D Note
-Low obstacles a lready s ignaled by a
wa rni ng can disappear from the system's
detect ion range as they are app roached
and wi ll not continue to be signaled. Ob
jects such as barrier chains, trailer d raw
bars, narrow painted vertica l poles or
fences may not be detected by the sys tem, posing risk of damage.
- Never use warm or hot water to remove snow or ice from the rearv iew camera
lens because the lens could crack.
- Never use products that are abrasive when clean ing the lens.
-
Page 87 of 236
Reverse parking
Applies to vehicles: with parking system advanced
Parking mode 1 can be used when parking in
a garage or into a parking space.
Fig. 96 Navigation system display: Aiming at a parking
spot
Fig. 97 Navigation system display: Al ign ing the veh icle
~ Switc h the navigation system and the dis
play of the navigation system on.
~ Select the reverse gear.
~ Turn the steering wheel until the orange
orientation lines(!) appear in the parking
spot
9 fig. 96. Use the markings @to help
you estimate the distance from an obstacle.
Each marking represents 3
ft. (1 m). The
blue area represents an extension of the ve
hicle's outline by approximately 16
ft. (5 m)
to the rear.
~ While driving in reverse gear, adjust the
steering wheel angle to fit the parking spot
with the a id of the orange orientation lines
9(D. @ marks the rear bumper. Stop the
vehicle once the red orientation line©
touches an object
9 ,&. .
A WARNING
-The rearview camera does not show the
entire area behind the vehicle~
page 82,
fig. 93. Watch out especially for small
Parking system 85
children and animals. The rear view cam
era cannot always detect them, posing
risk of an accident!
- Please note that objects not touching the
ground can appear to be farther away
than they really are (for example, the
bumper of a vehicle or the rear of a
truck). In this case, you should not use
the orientation lines to help with park
ing, which poses danger of an accident!
(D Note
In the navigation system display, the direc
tion of travel of the vehicle rear is repre
sented depending on the steering wheel
angle. The vehicle front swings out more
than the vehicle rear. Maintain plenty of
distance so that your outside mirror or a
corner of your vehicle does not collide with
any obstacles. This can damage to your ve hicle.
Parallel parking
Applies to vehicles: with parking system advanced
Use parking mode 2 to help you parallel park
along the side of a street.
Fig. 98 Navigat ion system display: Blue surface
a ligne d with parking spot
Fig. 99 Navigat ion system display: The blue curved line
contacting the curb
IJi,,-
Page 88 of 236
86 Parking system
The following steps app ly only when there is
no obstacle such as a wall near the parking
spot. Otherwise, please read the informat ion
prov ided in the "Parking Next to Obstacles"
section.
.. Activate the turn signal.
.. Position your vehicle parallel to the edge of
the street, approximately 3 ft. (1 m) from a parked vehicle .
.. Switch the navigation system and the nav i
gat ion system d isplay on.
.. Se lect rev erse gear . T he parking aid turns
on and pa rking mode 1 appea rs on the dis
play.
.. Press the cont ro l button 1 on the nav iga
tion system ¢
fig. 98. Parking mode 2 ap
pears .
.. Back up and align your vehicle so the b lue
area @ borders on the rear end of the vehi
cle or on the parking spot line. The blue area
represents an extension of the ve hicle's out
line by approximately 16 ft (5 meters) to the
r ear. The long side of the blue area shou ld
be o n the curb. The entire blue area must fit
i n to the par king spot .
.. Wi th the veh icle stopped, turn the steer ing
wheel to the right as far as it wi ll go .
.. Back into the parking spot unti l the blue
curve to uches the curb¢
fig. 99. Stop the
vehicle .
.. With the veh icle stopped, turn the steer ing
whee l to the left as fa r as it wi ll go .
.. Co nti nu e to back into the pa rk ing spot until
the vehicle is par ked para llel to the curb. @
ma rks the rear bumper. Stop the vehicle
when the red orientation line@ borders an
obje ct ¢ .&,. . Keep an eye on the fron t of
yo ur vehicle while doing this
c> (D.
Parking next to obstacles
When the re is an obsta cle (suc h as a wall)
next to the pa rking spot, choose a spot w ith
mo re space on the sides. Pos ition the long
side of the blue area so t hat there is sufficient
space from the c urb. The area must not be on
the c urb. Yo u wi ll also need to start turning
the steering wheel much ear lier. There should
be a suffic ient amount of space between the c
ur b and the blue curve, and the b lue curve
c> fig. 99 must not touch the curb.
A WARNING
--The rearview came ra does not show the
entire area behind the vehicle¢
page 82,
fig. 93. Watch out especially for small
children and anima ls . The rear view cam
era can not always detect them, posing
ris k of an accident!
- Please note that objects not touching the ground can appear to be farther away
than they really a re (fo r example, the
bumper of a vehicle or the rear of a
t ruck). In th is case, you should not use
the orientation lines to help wi th par k
ing, which poses dan ger of an accident!
(D Note
In the navigation system disp lay, the direc
tion o f tra ve l o f th e veh icle re ar is rep re
sented depend ing on the steering wheel
angle. The vehicle front swings out mo re
than the vehicle rear . Ma inta in p lenty of
distance so that your o utside mirror or a
corner of you r vehicle does not coll ide with
any obstacles . This can damage to your ve
hicle .
@ Tips
The left o r right orientation lines and su r
faces will be disp layed, depending on t he
turn s ignal being used .
Adjusting the warning tones
Applies to vehicles: with parking system advanced
Fi g. 100 N av igation syste m dis pl ay: a djustin g t he
park ing syst em
Page 93 of 236
Driving Safely
General notes
Safe driving habits
Please remember -safety first!
This chapter contains important information,
tips, instructions and warnings that you need
to read and observe for your own safety, the
safety of your passengers and others . We have
summarized here what you need to know
about safety belts, airbags, child restraints as
well as child safety. Your safety is for us
priori
ty number 1.
Always observe the information
and warnings in this section - for your own
safety as well as for that of your passengers.
The information in this section applies to all
model versions of your vehicle . Some of the
features described in this sections may be
standard equipment on some models, or may
be optional equipment on others. If you are
not sure, ask your authorized Audi dealer.
A WARNING
- Make certain that you follow the instruc
tions and heed the WARNINGS in this
Manual. It is in your interest and in the
interest of your passengers.
- Always keep the complete owner's litera
ture in your Audi when you lend or sell
your vehicle so that this important infor
mation will always be available to the
driver and passengers.
- Always keep the owner's literature handy
so that you can find it easily if you have
questions.
Safety equipment
The safety features are part of the occupant
restraint system and work together to help
reduce the risk of injury in a wide variety of
accident situations .
Your safety and the safety of your passengers
should not be left to chance. Advances in
technology have made a variety of features
available to help reduce the risk of injury in an
Driving Safely 91
accident. The following is a listing of just a
few of the safety features in your Audi:
- sophisticated safety belts for driver and all
passenger seating positions,
- safety belt pretensioners ,
- front airbags,
- knee airbags,
- side airbags in the seats
- adjustable head restraints,
- adjustable steering column.
These individual safety features can work to
gether as a system to help protect you and
your passengers in a wide range of accidents.
These features cannot work as a system if
they are not always properly adjusted and
properly used!
Safety is everybody's responsibility!
Important things to do before driving
Safety is everybody's job! Vehicle and occu
pant safety always depends on the informed and careful driver.
For your safety and the safety of your passen
gers,
before driving always:
~ Make sure that all lights and signals are op
erating correctly .
~ Make sure that the tire pressure is correct.
~ Make sure that all windows are clean and
afford good visibility to the outside.
~ Secure all luggage and other items carefully
c::>page 62.
~ Make sure that nothing can interfere with
the pedals.
~ Adjust front seat, head restraint and mir
rors correctly for your height .
~ Instruct passengers to adjust the head re
straints according to their height .
~ Make sure to use the right child restraint
correctly to protect children¢
page 130,
Child Safety.
~ Sit properly in your seat and make sure that
your passengers do the same¢
page 59,
Seats and storage. .,..
•
•
Page 94 of 236
92 Driving Safel y
• Fasten your safety belt and wear it proper ly.
Also instruct your passengers to fasten their
safety belts proper ly
¢ page 101.
What impairs driving safety?
Safe driving is directly related to the condi
tion of the vehicle, the driver as well as the
driver's ability to concentrate on the rood
without being distracted.
The driver is responsible for the safety of the
vehicle and all of its occupants. If your ability
to drive is impaired, safety risks for everybody
in the vehicle increase and you also become a
hazard to everyone else on the road
¢ .&, .
Therefore:
• Do not let yourself be distracted by passen
gers or by using a cellular telephone.
• NEVER drive when your dr iving ability is im
paired (by medicat ions, alcohol, drugs, etc.) .
• Observe all traffic laws, rules of the road
and speed limits and plain common sense .
• ALWAYS adjust your speed to road, traff ic
and weather condit ions.
• Take frequent breaks on long trips . Do not
drive for more than two hours at a stretch .
• Do NOT drive when you are tired , under
pressure or when you are stressed.
A WARNING , .
Impaired driving safety increases the risk
of serious personal injury and death when
ever a vehicle is being used .
Proper occupant
seating positions
Proper seating position for the driver
The proper driver seating position is impor
tant for safe, relaxed driving.
Fig. 104 Correct seat ing posit ion
For your own safety and to reduce the risk of
injury in the event of an accident, we recom
mend that you adjust the driver's seat to the
following position:
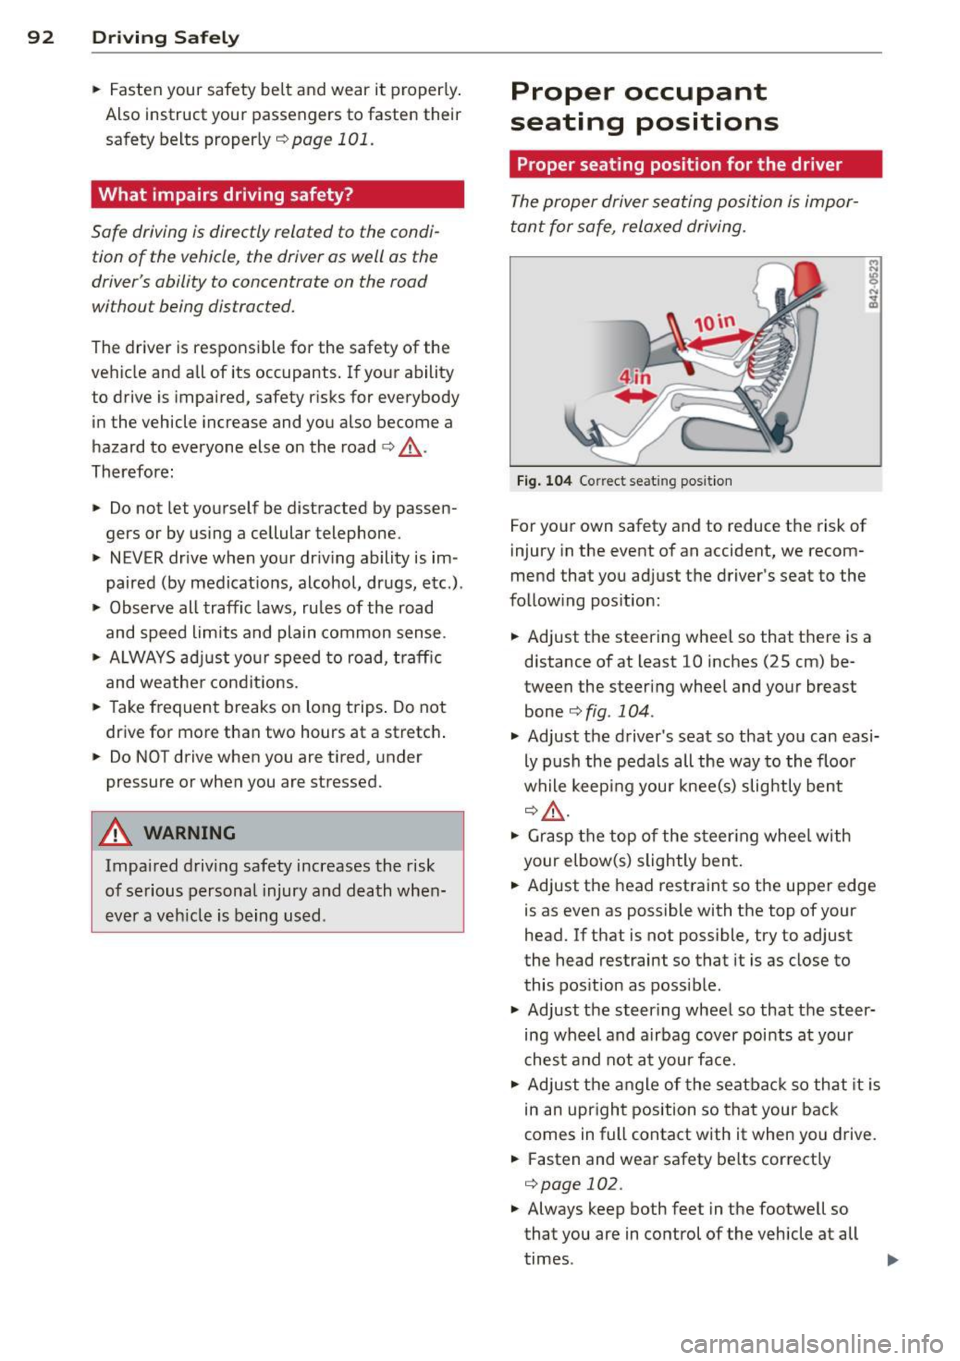
• Adjust the steering wheel so that there is a
distance of at least 10 inches (25 cm) be
tween the steering wheel and your breast
bone¢
fig . 104 .
• Adjust the driver's seat so that you can easi
ly push the pedals all the way to the floor
while keeping your knee(s) slightly bent
¢.&, .
• Grasp the top of the steer ing whee l with
your elbow(s) slightly bent.
• Adjust the head restraint so the upper edge
is as even as possible with the top of your
head. If that is not possible, try to adjust
the head restraint so that it is as close to
this position as possible .
• Adjust the steering wheel so that the steer
ing wheel and airbag cover points at your
chest and not at your face.
• Adjust the angle of the seatback so that it is
in an upright position so that your back
comes in full contact with it when yo u drive.
• Fasten and wear safety be lts correctly
¢ page 102.
• Always keep both feet in the footwell so
that you are in control of the vehicle at all
times .
Page 97 of 236
-Children must always be properly re
strained in a child restraint that is appro
priate for their age and size
c:> page 130.
Examples of improper seating positions
The occupant restraint system can only re
duce the risk of injury if vehicle occupants are
properly seated.
Improper seating positions can cause serious
injury or death. Safety belts can only work
when they are properly positioned on the
body. Improper seating positions reduce the
effectiveness of safety belts and will even in
crease the risk of injury and death by moving
the safety belt to critical areas of the body .
Improper seating positions also increase the
risk of serious injury and death when an air
bag deploys and strikes an occupant who is
not in the proper seating position. A driver is
responsible for the safety of all vehicle occu
pants and especially for children. Therefore:
.,. Never allow anyone to assume an incorrect
seating position when the vehicle is being
used
c:> ,&. .
The following bullets list only some sample
positions that wi ll increase the risk of serious
injury and death . Our hope is that these exam
ples will make you more aware of seating po
sitions that are dangerous.
Therefore, whenever the vehicle is
moving:
- never stand up in the vehicle
- never stand on the seats
- never kneel on the seats
- never ride with the seatback reclined
- never lean up against the instrument panel
- never sit on the edge of the seat
- never sit sideways
- never lean out the window
- never put your feet out the window
- never put your feet on the instrument panel
- never rest your feet on the seat cushion or
back of the seat
- never ride in the footwell
Driving Safely 95
-never ride in the cargo area
A WARNING
Improper seating positions increase the
risk of serious personal injury and death
whenever a vehicle is being used.
- Sitting incorrectly places occupants at
risk of being critically injured if the air
bags deploy and strike them.
- Before you start driving, seat yourself
properly and always maintain this seat
ing position during the trip. Before each
trip, instruct your passengers to seat
themselves properly and to maintain this
seating position during the trip
c:> page 59, Seats and storage.
Driver and passenger
side footwell
Important safety instructions
A WARNING
A lways make sure that the knee airbag can
inflate without interference. Objects be
tween yourself and the airbag can increase
the risk of injury in an accident by interfer
ing with the way the airbag deploys or by
being pushed into you as the airbag de
ploys .
- No persons (children) or animals should
ride in the footwell in front of the pas
senger seat . If the airbag deploys, this
can result in serious or fatal injuries.
- No objects of any kind should be carried
in the footwell area in front of the driv
er 's or passenger's seat. Bulky objects
(shopping bags, for example) can ham
per or prevent proper deployment of the
airbag. Small objects can be thrown
through the vehicle if the airbag deploys
and injure you or your passengers .
•
•
-
Page 99 of 236
For example, in a frontal collision at a speed
of 30 mph (48 km/h), the forces acting on a 10- lb (4.5 kg) object are about 20 times the
normal weight of the item. This means that
t he we ight of the item would suddenly be
about 200 lbs . (90 kg). You can imagine the
in juries that a 200 lbs. (90 kg) item flyi ng
freely through the passenge r compartment
could cause in a collision like t his.
_& WARNING
Imprope rly stored luggage or other items
can fly through the vehicle ca us ing se rious
personal inj ury in the event of hard b rak
ing or an acc ident. To help reduce the r is k
of serious personal injury :
- Always put objects, for examp le, luggage
o r othe r heavy items in the luggage com
partment .
_& WARNING
Heavy loads will influence the way your ve
hicle handles. To help reduce the r isk of a
loss of control leading to ser ious personal
injury:
- Always keep in m ind whe n transporting
heavy objects, t hat a change in t he cen
ter of g ravity can also cause changes in
vehicl e handling.
- Never exceed the G ross Ax le Weight Rat
ing or t he Gross Veh icle We ight Rating
spe cified on t he safety compliance stic k
er on the left door jamb. Exc eeding pe r
missib le we igh t standa rds can cause the
vehicle to s lide and handle differently.
- Please observe info rm ation on s afe driv
ing
~ page 91.
_& WARNING ,~ ~
Always make su re that the doors, all win
dows and the front lid are securely closed
an d locked to red uce the risk of in jury
when the veh icle is not being used .
- After closing the front lid, a lways make
s u re that it is properly closed and locked.
- Never leave you r vehicle unatten ded es
pecially with the front lid left open . A
Dr iving S afel y 97
child cou ld craw l into the luggage com
pa rtment and close the front lid becom
ing trapped and unable to get out. Be ing
trapped in a veh icle can lead to serious
pe rsonal injury .
- Never let ch ildren play i n or around the
veh icle .
- Never let passengers ride in t he luggage
compartment . Vehicle occupants must
always be prope rly restra ined in one of
the vehicle 's seating pos it ions .
(D Tips
The t ire pressure must correspond to the
l oad . The t ire press ure is shown on the tire
p ressure label. The tire pressure label is lo
cated on the d river 's s ide B-pillar. The t ire
pressure label lists the recommended cold
tire inflation pressures for the vehicle at
it s m aximum c apac ity we igh t a nd the tires
that we re on your vehicle at the t ime it
was manufacture d. For recommended tire
pressures fo r normal load cond it ions,
pleas@ s@@ chapter c::> page 187.
Reporting Safety
Defects
Applicable to U.S.A.
If you believe that your vehi cle
ha s a defect which could cau se
a crash or could caus e injury or
death, you should immediately inform the National Highway
Traffic Safety Administration (NHTSA) in addition to notify
ing Audi of Amer ica , Inc .
If NHTSA recei ves similar com
plaints, it may open an investi
gation , and if it finds that a
s afet y defect s exists in a group .,.
•
•
Page 103 of 236
Safety belts
General notes
Always wear safety belts!
Wearing safety belts correctly saves lives!
This chapte r exp lains why safety be lts a re nec
essary, how they work and how to adjust and
wear them correctly.
~ Read all the information that fo llows and
heed all of the inst ruct ions and WARNINGS.
A WARNING
Not wearing safety belts or wearing them
improperly increases the risk of ser ious
personal in jury and death .
- Safety belts are the sing le most effective
means availab le to red uce the r isk of se
rious injury and death in a utomob ile acci
de nts . For your prot ecti on and that of
yo ur passenge rs, always co rrec tly wear
sa fe ty bel ts when the ve hicle is mov ing.
- P re g nant women, injured, or physically
imp aired perso ns must also use safe ty
belts. L ike a ll vehicle occup ants, they are
more like ly to be ser ious ly injure d if they
do not wea r safety be lts . The best way to
protect a fet us is to protect the mother -
thro ughout the entire pregnancy.
Number of seats
Your Audi R8 has two seating posit ions in the
front. Each seating position has a safety belt.
A WARNING
Not wearing safety belts or wearing them
im proper ly increases the risk of ser ious
personal in ju ry and death.
- Never st rap more than one person, in
clu ding small ch ild ren, into any belt. It is
especially dangerous to place a safety
belt over a child s itting on yo ur lap.
- Never let mo re people ride in t he ve hicle
t h an t he re are safety be lts ava ilable.
Sa fety belts 1 O 1
- Be s ure everyone riding in the vehicle is
properly restrained w ith a separate sa fe
ty belt or child restra int.
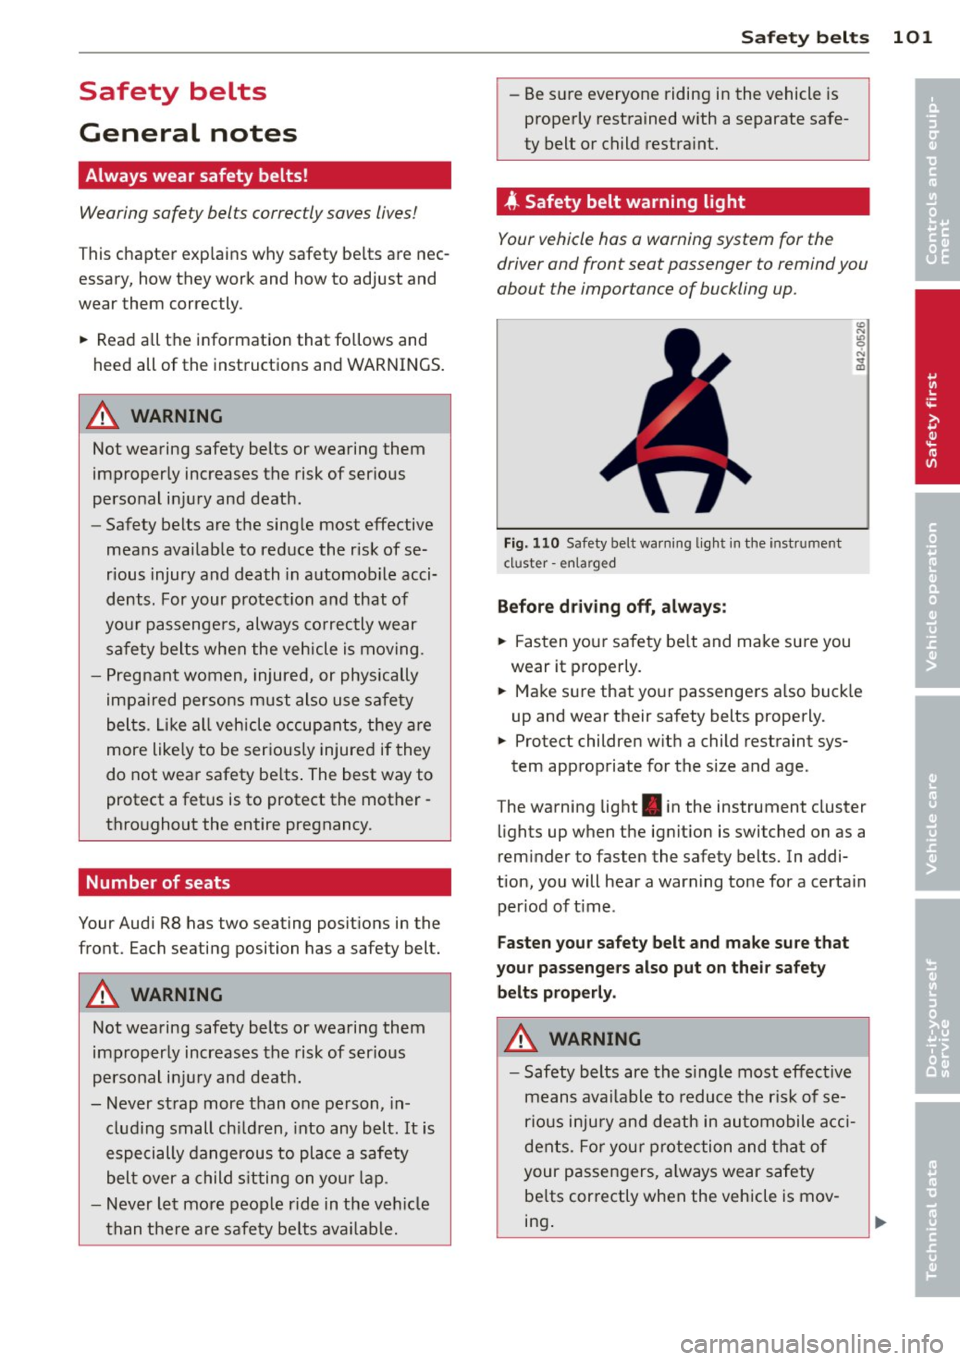
4 Safety belt warning light
Your vehicle has a warning system for the
driver and front seat passenger to remind you
about the importance of buckling up .
Fig. 1 10 Safety be lt warn ing lig ht in the instr ume nt
cl uster -enla rged
Before driv ing off, always :
~ Fasten your safe ty be lt and make su re you
wear it p roperly.
~ Ma ke s ure that yo ur passengers a lso buck le
up and wear their safety belts properly.
~ Protect children w it h a child restraint sys-
tem app ropriate for the size and age .
The wa rning light . in the instrument cluster
li ghts up w hen t he ig nit ion is switched on as a
rem inder to fasten the safety belts. In addi
tion , you will hear a warning tone for a certa in
per iod of t ime .
Fasten your safety belt and make sure that
your passengers also put on the ir safety
belts properly .
A WARNING
-Safety belts are the s ingle most effect ive
means ava ilable to reduce t he risk of se
rio us i nju ry and death in au tomobile a cci
dents. Fo r yo ur pro tection and tha t of
your passen gers, a lways wear safety
be lts cor rectly when the vehicle is mov
ing . •
•
Page 109 of 236
when an airbag deploys and strikes an occupant who is not in the correct seating posi
tion. A driver is responsible for the safety of
all vehicle occupants and especially for chil
dren. Therefore:
~ Never permit anyone to assume an incorrect
s itting position in the vehicle while traveling
c:>& .
A WARNING
Improperly worn safety belts increase the
risk of serious personal injury and death
whenever a vehicle is being used .
- Always make sure that all vehicle occu
pants are correctly restrained and stay in
a correct seating position whenever the
vehicle is being used.
- Always read and heed all WARNINGS and
other important information
c:> page 102.
Safety belt preten
sioners
How safety belt pretensioners work
In front, side and rear end collisions and in a
rollover above a particular severity , safety
belts in use are tensioned automatically.
The safety belts for the front seating positions are equipped with safety belt pretensioners.
T he system is activated by sensors in front,
side and rear-end collisions and in a rollover of
great severity. This tightens the belt and takes
up belt slack
c:> &. in Service and disposal of
safety belt pretensioner on page 107.
Taking
up the slack helps to reduce forward occupant
movement during a collision .
@ Tips
The safety belt pretensioner can only be
activated once .
- In minor frontal and side collisions, in
rear-end collisions and in accidents in
volving very little impact force, the safe
ty belt pretensioners are not activated.
Safety belts 107
-When the safety belt pretensioner is ac
tivated, a fine dust is released. This is
normal and is not caused by a fire in the
vehicle.
- The relevant safety requirements must
be observed when the vehicle or compo
nents of the system are scrapped. An au
thorized Audi dealer is familiar with
these regulations and will be pleased to
pass on the information to you .
- Be sure to observe all safety, environ
mental and other regulations if the vehi
cle or individual parts of the system, par
ticularly the safety belt or airbag, are to
be disposed. We recommend you have
your authorized Audi dealer perform this
service for you.
Service and disposal of safety belt
pretensioner
The safety belt pretensioners are parts of the
safety belts on your Audi . Installing, remov
ing, servicing or repairing of belt pretension
ers can damage the safety belt system and
prevent it from working correctly in a colli
s ion.
There are some important things you have to
know to make sure that the effectiveness of
the system will not be impaired and that dis
carded components do not cause injury or pol
lute the environment .
A WARNING r----
Improper care, servicing and repair proce-
dures can increase the risk of personal in
jury and death by preventing a safety belt pretensioner from activating when needed
or activating it unexpectedly :
- The belt pretensioner system can be acti
vated only once. If belt pretensioners have been activated, the system must be
replaced.
- Never repair, adjust, or change any parts
of the safety belt system.
1)1,,
•
•