check engine AUDI R8 SPYDER 2014 User Guide
[x] Cancel search | Manufacturer: AUDI, Model Year: 2014, Model line: R8 SPYDER, Model: AUDI R8 SPYDER 2014Pages: 244, PDF Size: 61.06 MB
Page 20 of 244
18 Instrum ent s and w arn ing /indic ato r light s
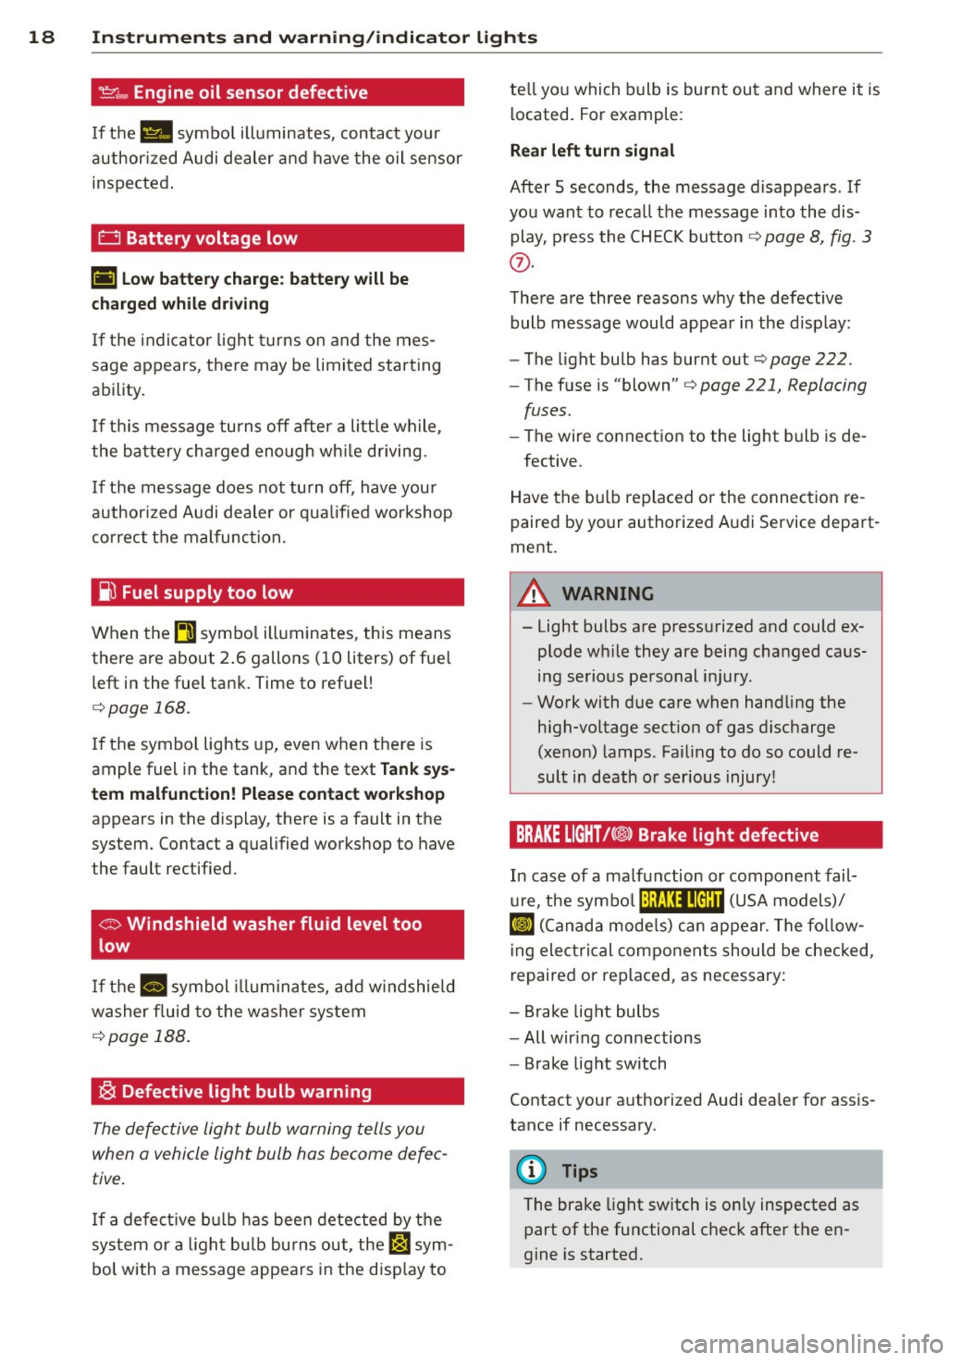
't':r.,. Engine oil sensor defective
If the Ill symbo l illuminates, contact your
author ized Audi dealer and have the oil sensor
inspected .
0 Battery voltage low
(•) Low batter y ch arg e: batt ery wi ll be
charged while dri ving
If the indicator light turns on and t he mes
sage appears, there may be limited starting
ability.
I f th is message turns off after a litt le wh ile,
the battery cha rged enough wh ile driving.
If the message does not turn off, have your
author ized Audi dealer or qualified workshop
correct the malfunction.
~ Fuel supply too low
When the~ symbo l illuminates, this means
there are about 2 .6 gallons (10 liters) of fue l
l eft in the fuel tank. Time to refuel!
c::> page 168.
If the symbol lights up, even when the re is
ample fuel in the tank, and the text
Tank sys
tem m alfunct ion! Plea se cont act workshop
appears in the display, there is a fault in the
system. Contact a qualified workshop to have
the fault rectified.
<;:> Windshield washer fluid level too
low
If the -· "ymbol illum inates, add w indshield
washer f luid to the washer system
c::> page 188.
~ Defective light bulb warning
The defective light bulb warning tells you
when a vehicle light bulb has become defec tive .
If a defect ive b ulb has been detected by the
sys tem or a ligh t bu lb burns out , the
l',sl sym
bol with a message appears in the disp lay to te
ll yo u which bulb is burnt out and where it is
located. For example:
Rear left turn sign al
After 5 seconds, the message disappears . If
you want to reca ll the message into the dis
play, p ress the CH ECK button
c::> page 8, fig. 3
(J).
The re are three reasons why the defective
bulb message would appear in the disp lay:
- The light bulb has burnt out
c::>page 222.
-The fuse is "blown" c::> page 221, Replacing
fuses.
- The wire connection to the light bulb is de-
fective.
Have the bulb replaced or the connection re
paired by your authorized Audi Service depart
ment.
A WARNING
-- Light bulbs are pressurized and could ex- plode wh ile they are being changed caus
ing serious personal injury.
- Work with due care when handling the
high-vo ltage sect ion of gas discharge
(xenon) lamps. Fa iling to do so could re
sult in death or serious injury!
BRAKE LIGHT t<@> Brake light defective
In case of a ma lfunction or component fail-
u re, the symbo l (USA models)/
¢@ )
repaired or rep laced, as necessary:
- Brake light bulbs
- All wir ing connections
- Brake light switch
Contact your a uthorized Audi dea ler for assis
tance if necessary.
(D Tips
The brake light sw itch is on ly inspected as
part of the functional check after the en
gine is started.
Page 22 of 244
20 Driver information system
Driver information
system
Introduction
The Driver information display inside the in
strument cluster provides you, the driver ,
with important information.
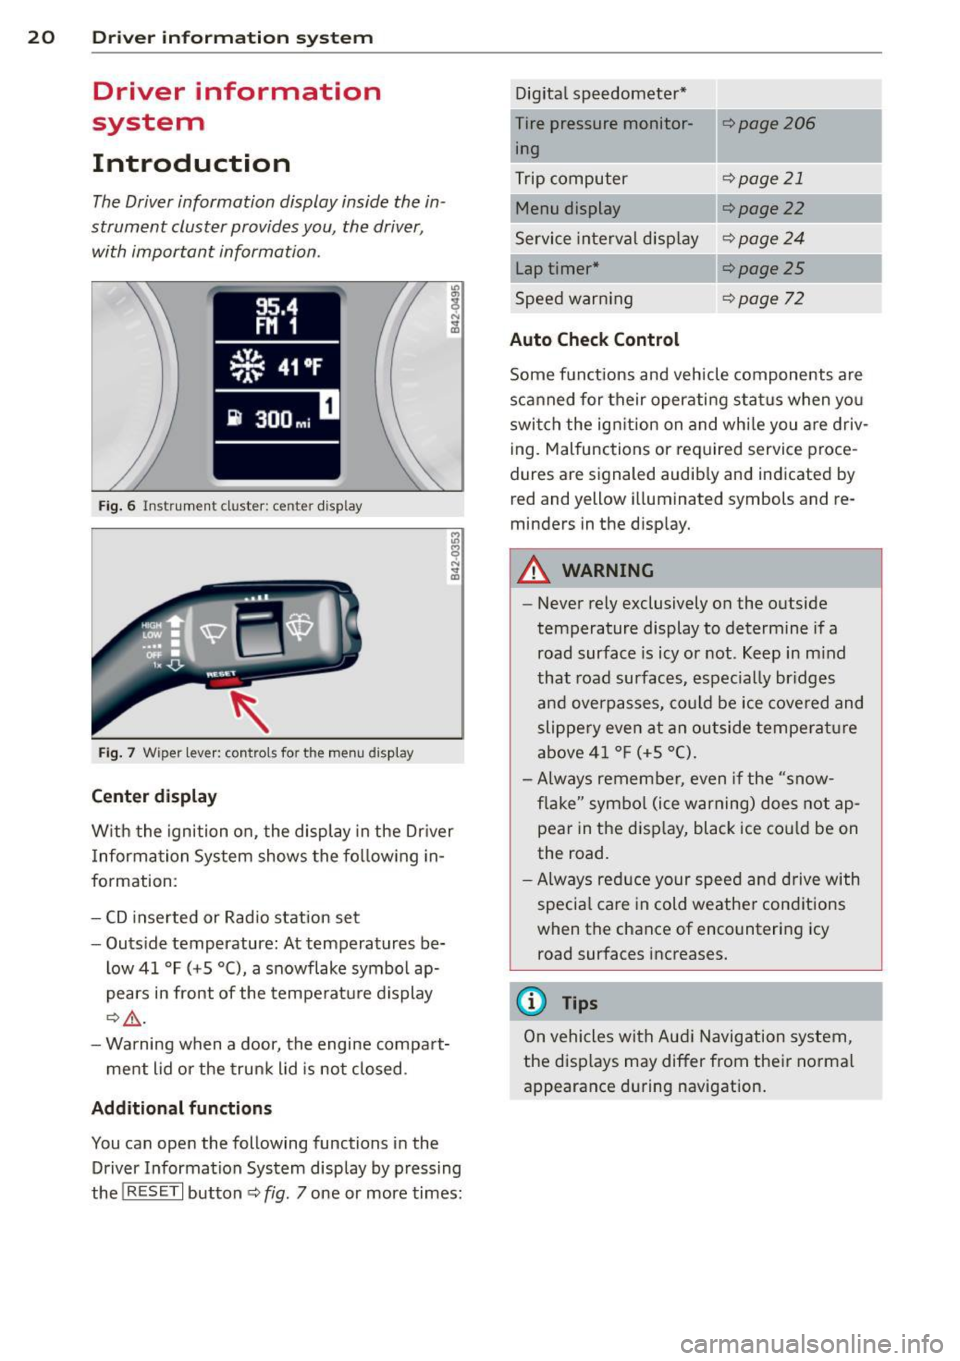
Fig. 6 In strum en t cl ust er: center display
Fig. 7 W iper le ver: c on trols fo r the menu disp lay
Center display
W ith the ignition on, the display in the Dr iver
I nformation System shows the following in
formation :
- CD inserted or Radio station set
- Outside temperature: At temperatures be-
low 41 °F ( +S °C), a snowflake symbol ap
pears in front of the temperature display
¢.&_ .
-Warning when a door, the engine compart-
ment lid or the trunk lid is not closed .
Additional functions
You can open the following function s in the
Driver Information System disp lay by pressing
the
! R ESE T I button ¢ fig. 7 one or more times: Digital
speedometer*
Tire pressure monitor ing
Trip computer
Menu display
Service interval display
Lap timer*
Speed warn ing
Auto Check Control
¢page206
¢page 21
¢ page22
¢page24
¢page25
¢page 72
Some functions and vehicle components are
scanned for their operating status when you
switch the ign ition on and whi le you are driv
ing. Malfunctions or required service proce
dures are signaled audib ly and indicated by
red and y ellow illuminated symbols and re
m inders in the display.
A WARNING
--
- Never rely exclusively on the outside
temperature display to determine if a
road surface is icy or not . Keep in mind
that road surfaces, espec ially br idges
and overpasses, could be ice covered and
slippery even at an outside temperature
above 41 °F (+S °C).
- Always remember, even if the "snow
flake" symbol (ice warning) does not ap
pear in the display, black ice cou ld be on
the road.
-Always reduce your speed and drive with
specia l care in cold weather conditions
when the chance of encountering icy road surfaces increases.
@ Tips
On vehicles with Aud i Navigation system,
the displays may differ from their normal
appearance during navigation.
Page 30 of 244
28 Opening and closing
Opening and closing
Keys
Key set
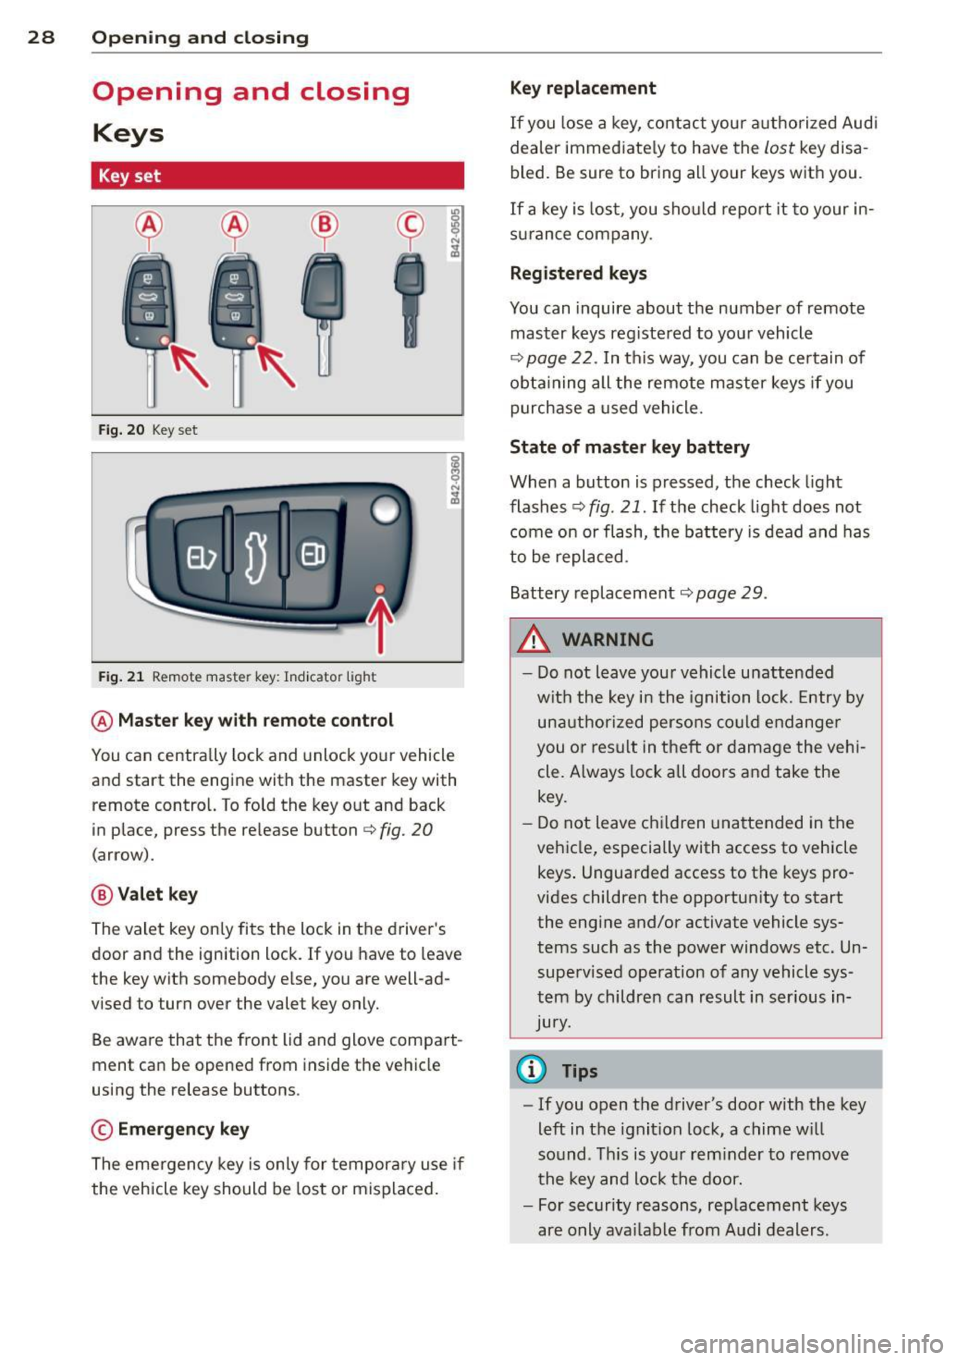
Fig. 20 Key set
Fig. 21 Remot e mas ter key : Indicator ligh t
@ Master key with remote control
You can centrally lock and unlock your vehicle
and start the engine with the master key with
remote control. To fold the key out and back
in place, press the re lease button
c:> fig. 20
( a rrow).
@ Valet key
The valet key on ly fits the lock in the driver's
door and the ignition lock . If you have to leave
the key with somebody e lse, you are well-ad
vi sed to tu rn over the valet key only.
Be aware that the front lid and glove compart
ment can be opened from inside the vehicle
using the release buttons .
© Emergency key
The emergency key is only for temporary use if
the vehicle key should be lost or misplaced.
Key replacement
If you lose a key, contact your authorized Audi
dealer immed iate ly to have the
Lost key disa
bled. Be sure to bring all your keys with you .
If a key is lost, you should report it to your in
surance company .
Registered keys
You can inquire about the number of remote
master keys registered to your vehicle
c:> page 22 . In this way , you can be certain of
obtaining all the remote master keys if you
purchase a used vehicle.
State of master key battery
When a button is pressed, the check light
flashes
c:> fig . 21 . If the check light does not
come on or flash, the battery is dead and has
to be replaced.
Battery replacement
c:::;, page 29 .
.&_ WARNING ~
- Do not leave your vehicle unattended
with the key in the ignition lock. Entry by
unauthorized persons could endanger
you or result in t heft or damage the vehi
cle. A lways lock all doors and take the
key.
- Do not leave children unattended in the
vehicle, especially with access to vehicle keys . Unguarded access to the keys pro
vides children the opportunity to start the engine and/or activate vehicle sys
tems such as the power windows etc. Un supervised operation of any vehicle sys
tem by children can result in serious in
Jury.
{l) Tips
- If you open the driver's door with the key
left in the ignit ion lock, a chime will
so und . This is your reminder to remove
the key and lock the door.
- For security reasons, replacement keys
are only available from Audi dealers.
Page 37 of 244
The indicator li ght q fig . 30 starts flashing
rapidly fo r 2 seconds and then blinks slowly.
How is the anti-theft alarm system
switched off?
The anti -the ft alarm system is switched off
on ly when you unlock your vehicle. If yo u do
not open a door with in 30 seconds after yo u
have unlocked with the remote control, the
ve hicle w ill lock itse lf again a utomat ically.
When will the anti theft alarm system be
triggered?
When the veh icle is locked, the alarm system
monitors and protects the following parts of
the vehicle:
- engine compartment
- luggage compartment
- doo rs
- ignition
When the system is activated , the alarm wi ll
be tr iggered if one of the doors, the eng ine
compa rtment lid or the front lid are opened .
The anti-theft a larm system will also go off
when the battery is disconnected .
You can a lso trigger the alarm by pressing t he
PANIC button on your remote-control key .
This will a lert other peop le in case of emer
gency . Press the
PANIC button again to tu rn
off the alarm .
How is the ant i-theft alarm switched off
when triggered?
The alarm system is switched off w hen you
u nl ock the vehicle us ing the remote-control
key or when the ignition is sw itche d on . T he
a larm w ill also switch itse lf off when it comes
t o the en d of its cycle.
Emergency flasher
The emergency f lasher w ill blink b riefly w hen
the doors, e ngine compartment l id and fron t
lid are properly clos ed .
If the emergency flashers do not blink, check
the doors, e ngine compartment l id and front
l id to make sure t hey a re p roperly closed . If
Opening and clo sin g 35
you close a doo r, the eng ine compartment lid
o r the fro nt lid with the anti -theft alarm
switched on, the eme rgency flashers w ill blink
o nl y after yo u have closed the door or lid.
@ Tips
For the a nti-theft alarm system to f unc
tion properly, make sure all ve hicle do ors
and windows are closed bef ore leaving t he
vehicle.
Power windows
Controls
Th e driver can opera te all windo ws.
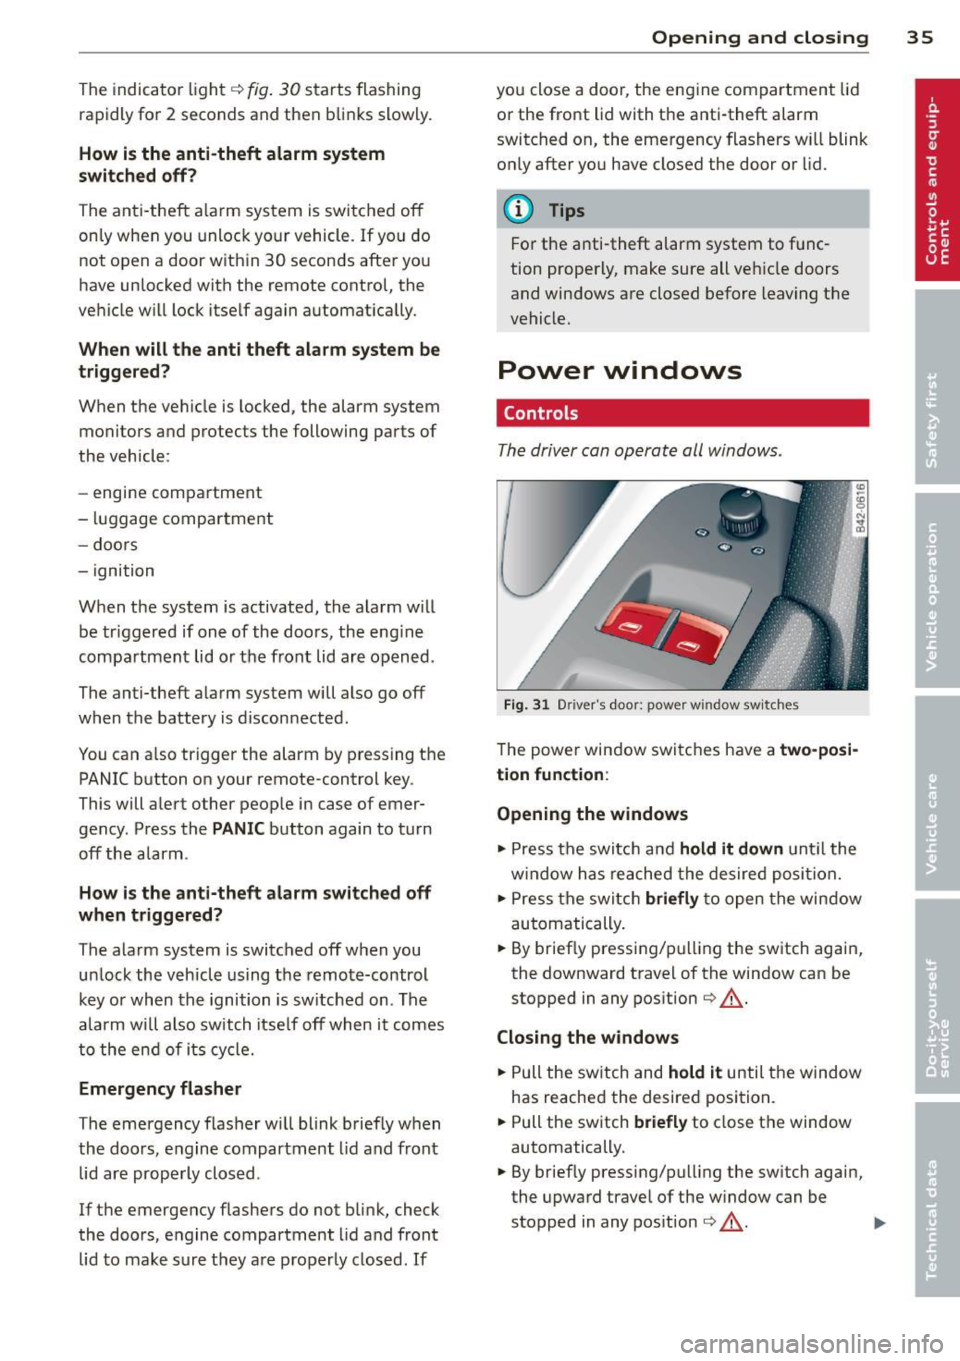
F ig. 31 Driver 's doo r: power w indow sw it ches
T he powe r window swi tc hes have a two-posi
tion function :
Opening the windows
.,. Press the swit ch and hold it down u nt il the
w indow h as reached the desired posi tio n.
.,. Press t he swi tch
briefly to open the win dow
automatically .
... By briefly press ing/p ulling the sw itch again,
the downward t ravel of the window can be
stopped in any pos ition
¢ ,& .
Closing the windows
.,. Pull the sw itch and hold it until the w indow
has reached the desire d posi tion .
... Pull the sw itch
briefly to close t he window
automatically.
... By briefly pressing/pull ing the sw itch again,
the upwa rd trave l of the w indow can be
stopped in any pos it ion
¢ ,& . .,.
Page 38 of 244
36 Openin g and clo sing
A WARNING
- Do not leave children unattended in the
vehicle, especially with access to vehicle
keys . Unsupervised use of the keys can
result in starting of the engine and use
of vehicle systems such as powe r win
dows , etc. which cou ld result in serio us
injury.
- Remember -you can still open or close
the power w indows for abou t ten m i
nutes after the ignition is sw itched off .
Only when either of the front doors are
opened are the power windows switched
off.
- Be careful when closing the windows .
Check to see that no one is in the way, or
serious injury could result!
- Always remove the ignition key whenever
you leave your vehicle.
- If you lock your vehicle from the outside,
no one, especia lly children, sho uld re
ma in in the vehicle .
- Do not stick anything on the windows or
the windsh ield that may interfere with
the driver's fie ld of vision.
@ Tips
- When the doors are opened, the w in
dows are a utomatica lly lowered 0.4 in
(10 mm) .
Reactivating the system after battery
disconnection
If the vehicle ba ttery i s disconnected and
then reconnected, the automatic closing and
opening function will not work until it is reac
tivated .
• Pull and hold the power w indow swi tch un til
the window is completely clo sed .
• Release the switch and pull it again for one
second.
Page 55 of 244
is switched back on by moving the wind
shield wiper lever to any position.
- Worn or dirty windshield wiper blades
cause smearing, which can affect the op
eration of the light/rain sensor*. Check
the condition of your windshield wiper
blades regularly.
- The rain sensor is part of the interval
wiping system. Turning off the ignition
will also deactivate the rain sensor. To re
activate the sensor, switch off the inter
val wiping function, then switch it back
on again.
- Applies to vehicles with light/rain sen
sor: When the wipers are switched on
manually and in rain conditions, the au
tomatic headlights* turn on
c;> page 46,
Lights or off during the day when the
wipers are no longer operating. The au
tomatic headlights* function is available
in this case only when the light switch is
in the "AUTO" position
c;> page 46,
fig. 52.
-Make sure the washer fluid reservoir in
the engine compartment is topped off
before going on a long trip. Look up
c;> page 188 for checking and filling the
washer container.
- The wipers only operate with the hood
completely closed.
Service position
It is only possible to change wiper blades if
you move the wiper arms to the service posi
tion.
In order to use the windshield wipers, the
front lid must be completely closed.
Moving wiper blades to the service
position
.,. When there is a risk of frost, make sure that
the wiper blades are not frozen to the wind
shield .
.,. Switch the ignition on .
.,. Move the wiper lever to position
0
c;>page 51, fig. 60 .
Clear vision 53
.,. Press the I RESET ! button until the Display
type
menu appears in the Driver Informa
tion System display.
.,. Using the rocker switch and the
I RESET ! but
ton, select the
Set > Wipers > Front> Serv
ice position on
function. The windshield
wiper arms move to the service position.
Moving wiper blades to park position
.,. Make certain that the wiper arms are lying
against the windshield.
.,. Switch the ignition on and move the wiper
lever from position
O to 4 c;> page 51,
fig . 60. The wiper arms will move back to
the park position.
(D Note
Never drive your vehicle when the wind
shield wiper arms are in the service posi
tion and pulled away from the windshield.
When you drive faster than 4 mph (6 km/
h), the wiper arms automatically return to
the park position and could cause paint
damage to the front lid!
(D Tips
-You can also turn on the service position,
for example, if you want to protect the
windshield from icing by using a cover.
- The service position moves to
off auto
matically when you operate the wind
shield wiper lever, or speed exceeds
4 mph (6 km/h).
Cleaning windshield wiper blades
Clean the windshield wiper blades when they
begin to leave streaks .
.,. Place the windshield wiper arms in the serv
ice position. Refer to
c;> page 53.
.,. Use a soft cloth and glass cleaner to clean
the windshield wiper blades.
A WARNING
Dirty windshield wiper blades can impair
your view. This can lead to accidents.
Page 70 of 244
68 On th e road
On the road
Steering
Adjusting the steering wheel column
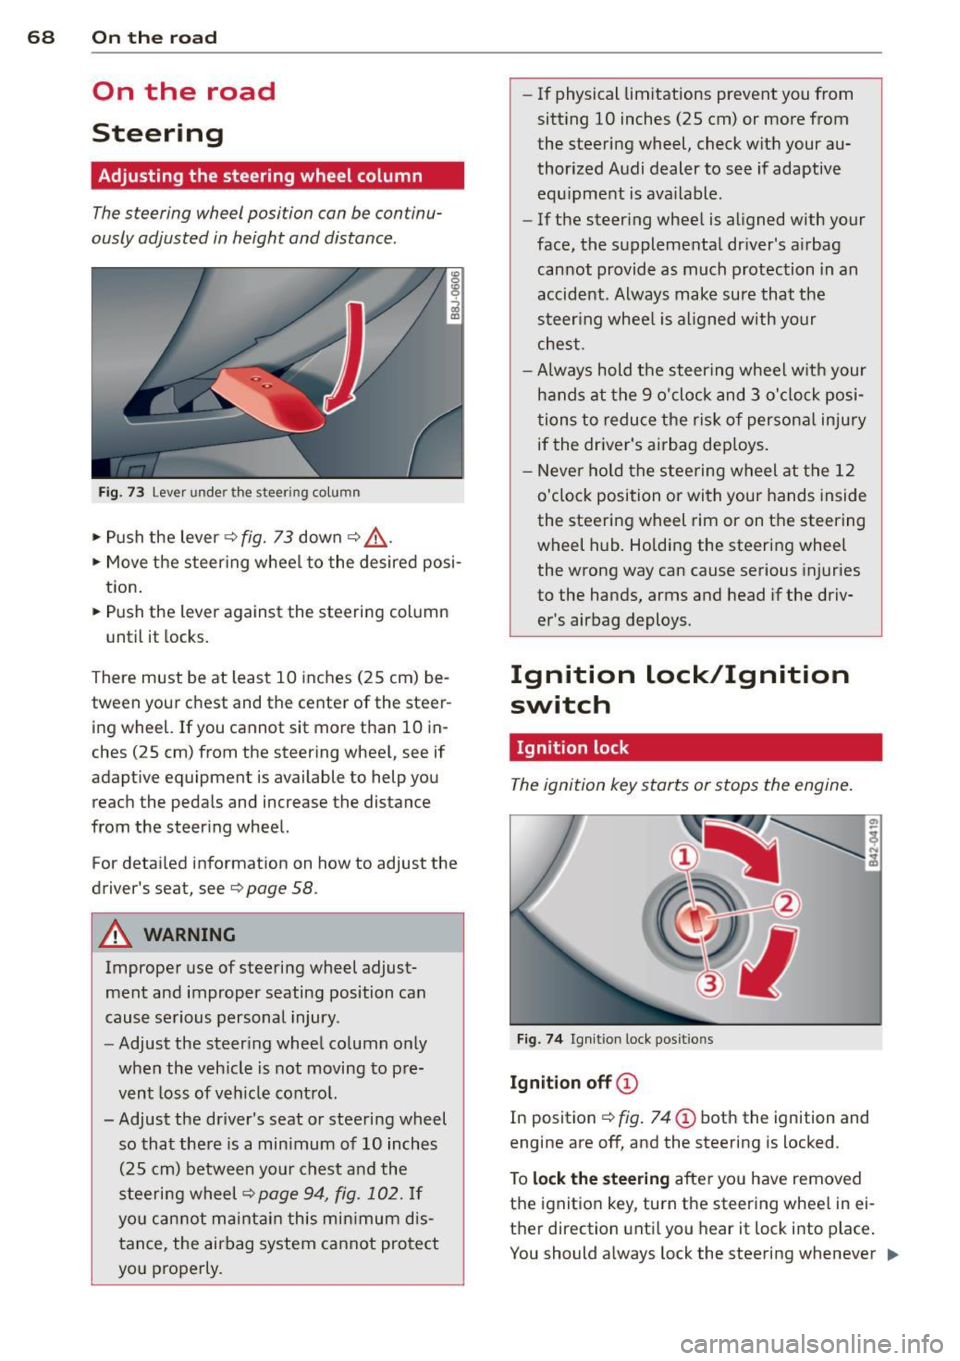
The steering wheel position can be continu
ously adjusted in height and distance .
Fig. 73 Lever under the steering column
~ Push the lever Q fig. 73 down Q ,&..
~ Move the steer ing whee l to the desired posi
tion.
~ Push the lever against the steering column
until it locks.
There must be at least 10 inches (25 cm) be
tween your chest and the center of the steer ing wheel. If you cannot sit more than 10 in
ches (25 cm) from the steering wheel, see if
adaptive equipment is available to help you
reach the pedals and increase the distance
from the steer ing wheel.
For detai led informat ion on how to adjust the
driver's seat, see
Q page 58.
A WARNING
Improper use of steering wheel adjust
ment and improper seating position can
cause serious personal injury .
- Adjust the steer ing wheel column only
when the veh icle is not moving to pre
vent loss of veh icle cont rol.
-
- Adjust the driver's seat or steering wheel
so that there is a min imum of 10 inches
(25 cm) between your chest and the
steering wheel
Q page 94, fig . 102. If
yo u can not maintain this min imum dis
tance, the airbag system cannot protect
you properly.
- If physical limitations prevent you from
sitt ing 10 inches (25 cm) or more from
the steering wheel, check with your au
thorized Audi dealer to see if adaptive equ ipment is ava ilable .
- If the steering wheel is aligned with your
face, the supplemental driver's airbag cannot provide as much protection in an
accident. Always make sure that the
steer ing whee l is aligned with your
chest.
- Always hold the steering wheel w ith your
hands at the 9 o'clock and 3 o'clock posi
tions to reduce the risk of persona l injury
if the driver's airbag dep loys .
- Never ho ld the steering wheel at the 12
o'clock position or with your hands inside
the steering wheel rim or on the steering
wheel hub . Holding the steering wheel
the wrong way can cause serious injuries
to the hands, arms and head if the driv
er's airbag deploys.
Ignition lock/Ignition
switch
Ignition lock
The ignition key starts or stops the engine.
Fig . 7 4 Ign ition lock positions
Igniti on off @
In position Q fig. 74 @ both the ignition and
engine are off, and the steering is locked .
T o
lo ck th e steering after yo u have removed
the ignition key, turn the steer ing whee l in ei
ther direction unti l you hear it lock into place .
You should always lock the steering whenever
II>
Page 77 of 244
_& WARNING
You should only return to the saved speed if it is not too fast for the current traffic
conditions - risk of an accident!
Audi magnetic ride
Damping can be adjusted to the driver's pref
erence and it adapts automatically to the cur
rent driving situation.
SPORT •
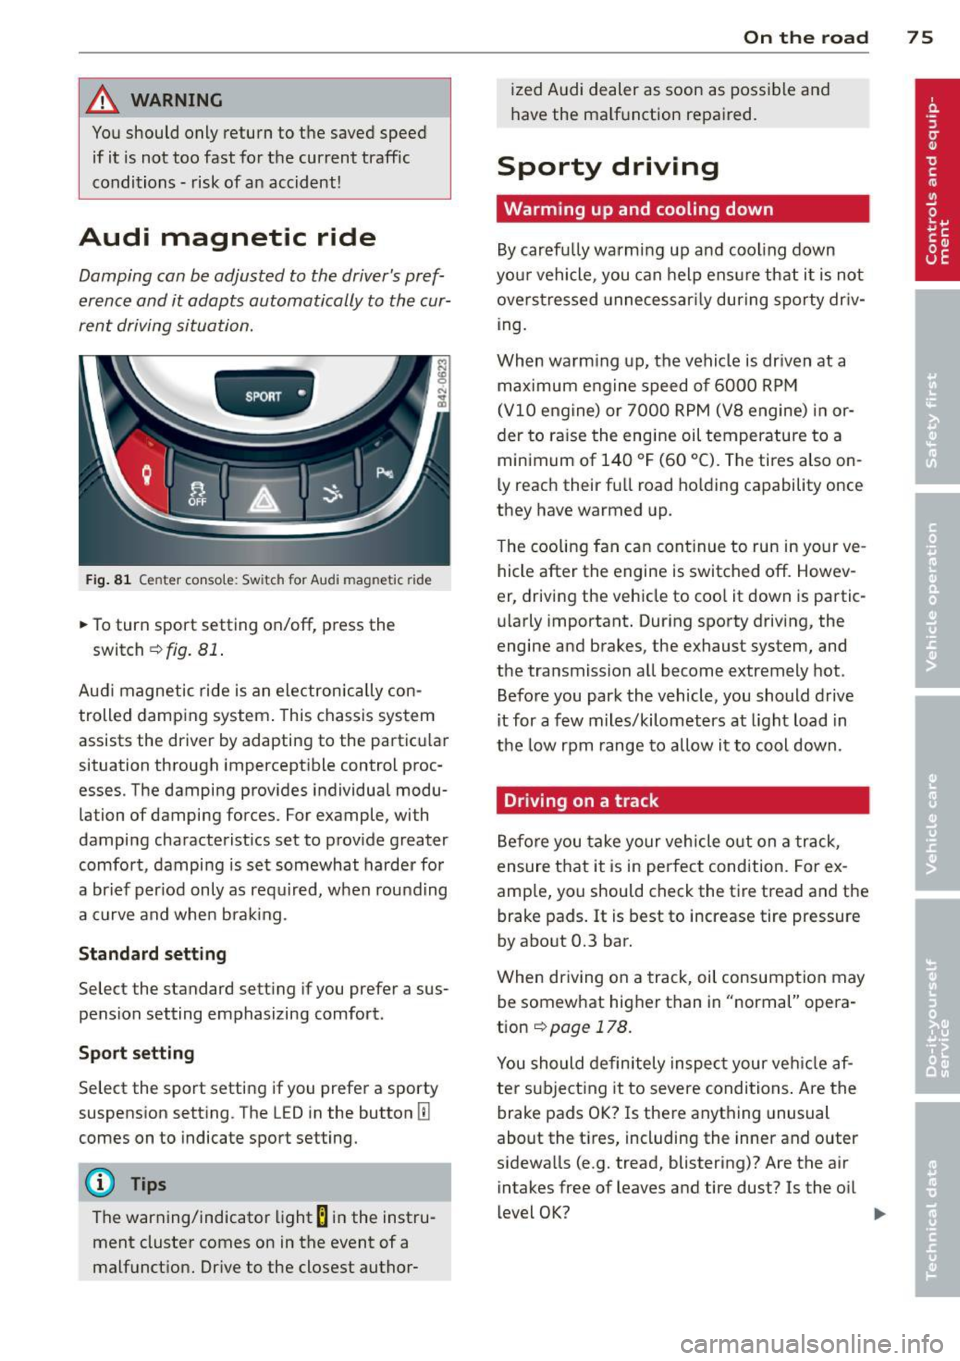
Fig. 81 Center conso le : Switch for Audi magnetic ride
.,. To turn sport setting on/off, press the
switch
¢fi g. 81 .
Aud i magnetic ride is an electronica lly con
trolled damping system . This chassis system
assists the driver by adapting to the particu lar
situation through imperceptible control proc
esses. The damping provides individual modu
lation of damping forces. For example, with
damping characteristics set to prov ide greater
comfort, damping is set somewhat harder for
a brief period only as required, when rounding
a curve and when brak ing.
Standard setting
Select the standard setting if you prefer a sus
pension setting emphasizing comfort.
Sport setting
Select the sport setting if you prefer a sporty
suspension setting. The LED in the button
II]
comes on to indicate sport setting.
@ Tips
The warning/indicator light Bin the instru
ment cluster comes on in the event of a
malfunction. Drive to the closest author-
On the road 75
ized Audi dealer as soon as possible and
have the malfunction repaired.
Sporty driving
Warming up and cooling down
By carefully warming up and cooling down
you r vehicle, you can help ensure that it is not
overstressed unnecessar ily during sporty driv
ing .
When warm ing up, the vehicle is driven at a
maximum engine speed of 6000 RPM
(Vl0 engine) or 7000 RPM (V8 engine) in or
der to raise the engine oil temperature to a
minimum of 140 °F (60 °C). The tires also on
ly reach their full road holding capability once
they have warmed up.
The cooling fan can cont inue to run in your ve
hicle after the engine is switched off. Howev
er, driving the vehicle to coo l it down is partic
ularly important. During sporty driving, the
engine and brakes, the exhaust system, and
the transmission all become extremely hot.
Before you park the vehicle, you should drive
it for a few m iles/kilometers at light load in
the low rpm range to allow it to cool down.
Driving on a track
Before you take your vehicle out on a track ,
ensure that it is in perfect condition. For ex
amp le, you should check the tire tread and the
brake pads. It is best to increase tire pressure
by about 0.3 bar.
When driving on a track, oil consumption may
be somewhat higher than in "normal" opera
tion
r=> page 178.
You should definitely inspect your vehicle af
ter subject ing it to severe conditions . Are the
brake pads OK? Is there anything unusual
about the tires, including the inner and outer
sidewalls (e.g. tread, blistering)? Are the air
intakes free of leaves and tire dust? Is the oil
level OK? .,,.
Page 148 of 244

146 Intelligent technology
ESC sport mode
In ce rtain situat ions, it migh t make sense to
a llow some slip. For example :
- Rocking the vehicle to free it when it is stuck
- Driving in deep snow or on loose ground
- Driving with snow cha ins
Press the[!] button briefly¢
fig. 128 . The I
indicator light turns on and Sport control
Warning! Restricted stability
appears in the
driver information system display . Driving sta
b ili ty is limited in sport mode .
Switching ESC off
Press and hold the [!I button for three sec
onds . The ESC indicator light
ti turns on and
Stabilization program off appears in the dis
play. ASR is also sw itched
off when ESC is
switched
off .
Switching on
Press the[!] button aga in. The message Stabi
lization program on
appears briefly in the d is
play.
A WARNING
You should only switch the ESC off if your
driving ability and the traffic s ituation al
low. This could increase the risk of slip
ping.
- The stabilizing function is limited in ESC
sport mode. The driv ing whee ls could
spin and the vehicle could swerve, espe
cially on slick or slippery road surfaces.
- T here is no vehicle stabilization when
E SC is switched
off.
0) Tips
If there is a malfunction in the retractable
rear spo iler* or the Audi magnet ic r ide*, it
may not be possible to activate ESC spo rt
mode or normal mode may activate again
automatically.
Braking
General information
What affects braking efficiency?
New brake pads
During the first 250 miles (400 km), new
brake pads do not possess their full braking
effect, they have to be "broken in" first. The
distance can be ten times longer in vehicles
with ceramic brakes*. You can compensate for
th is slightly reduced braking power by push
ing harder on the brake pedal. Avoid heavy
braking loads during the break-in period.
Operating conditions and driving habits
The brakes on today's automobiles are still
subject to wear, depending largely on operat
ing condit ions and driving habits ¢.&, . On
vehicles that are either driven mostly in stop
and-go city traffic or are driven hard, the
brake pads should be checked by your author
ized Audi dea ler more often than specified in
the
Warranty & Maintenance booklet. Failure
to have your brake pads inspected can result
in reduced brake performance.
On steep slopes, you should use the braking
effect of the engine. This way, you prevent un
necessary wear on the brake system. If you
must use your brakes, do not hold the brakes
down cont inuously. Pump the brakes at inter
vals.
Moisture o r road salt
Under certain conditions, for example, when
driving through water or very heavy rain, or
even after washing your vehicle, the braking
effect can be reduced due to moisture (or in
freezing conditions ice) on the brake pads . A
few cautious brake applications should dry
off
the brake pads or remove any ice coatings .
When you are driving at higher speeds with
the windshield wipers on, the brake pads will briefly touch the brake discs in regular inter
vals so as to improve reaction time when brak
i ng on wet surfaces. You, the driver, will not
notice anything. .,.
Page 149 of 244
The effectiveness of the brakes can be reduced
when the vehicle is dr iven on a salt -covered
road and the brakes are not used. Likewise,
you clean
off accumulated salt coating from
brake discs and pads with a few ca utious ap
plications of the brake<=>,& .
Co rrosion
There may be a tendency for dirt to build up
on the brake pads and corrosion to form on
the discs if the car is not dr iven regularly or
only for short trips with little use of the
brakes.
If the brakes are not used frequently, or if cor rosion has formed on the discs, it is advisable
to clean
off the pads and discs by brak ing
firmly a few times from a moderately high
speed<=> ,&.
Fa ult s in th e bra ke s yste m
If you should notice a sudden increase in
brake pedal travel, then one of the two brake
circu its may have failed. Drive immed iately to
the nearest qualified workshop to have the
damage repa ired. Drive at reduced speed on
the way there and anticipate longer stopping
d istances and higher peda l pressure¢ _&.
Low brake fluid level
Malfunctions can occur in the brake system if
the brake flu id level is too low . The brake fluid
l eve l is monito red electronically .
Brake po wer ass ist un it
The brake power assist un it increases the
pressure that you generate with the brake
pedal. It works only when the eng ine is run
ning.
Br ake lining w ear statu s
Brake lining wear may be checked by visual in
spection of the condition of the brake pads
through the openings in the wheel. If neces
sary, the wheel may be removed for this in
spection
¢ page 214 .
Int ellig ent technolog y 147
_& WARNING
-You should perform braking maneuvers
for the purpose of cleaning the brake
system only if road conditions permit.
Other road use rs must not be put at risk -
you may ca use an accident!
- Before descend ing a steep grade, reduce
speed and sh ift transmission into a lower
gear o r lower dr iving range. Do not ride
the brakes or hold the pedal down too
long o r too often. Th is could cause the
brakes to get hot and diminish braking
efficiency .
- Do not " ride the brakes" by resting you r
foot on the pedal when you do not intend to brake. This may cause the brakes to
overheat, premature wear and increased
stopping distance.
- Under certain cl imatic and operat ing
conditions such as passing through wa
ter, dr iv ing in heavy rain o r after washing
the vehicle, the effectiveness of the brakes can be reduced. In winte r, ice can
accumu late on the bra ke pads, lin ings,
discs and drum s. Carefully app ly bra ke s
for a test. Brakes w ill dry and ice coa t
ings w ill be cleaned
off after a few care
fu l brake applications.
- Driving for an extended period of time on
salt -cove red roads without using your
brakes can a lso affect braking efficiency .
Clean
off accum ulated salt coating from
brake discs and pads with a few cautious
brake applications.
- I f you damage the front spoiler, or if you
install a different spoiler, be sure the air
f low to the front brakes is not obstruct
ed. Otherw ise the brake system could
overheat reducing the effectiveness of
the entire brake system.
- Failure of one b rake circuit will impai r
the braking capab ility result ing in an in
creased stopping distance. Avoid driving
the vehicle a nd have it towed to the near
est A udi dealer or qualified workshop .
- Never let the veh icle roll to a s top with
the engine shut
off. .,.
•
•