check engine AUDI RS5 COUPE 2015 Owners Manual
[x] Cancel search | Manufacturer: AUDI, Model Year: 2015, Model line: RS5 COUPE, Model: AUDI RS5 COUPE 2015Pages: 254, PDF Size: 64.12 MB
Page 5 of 254
M N
0:: loo ,....,
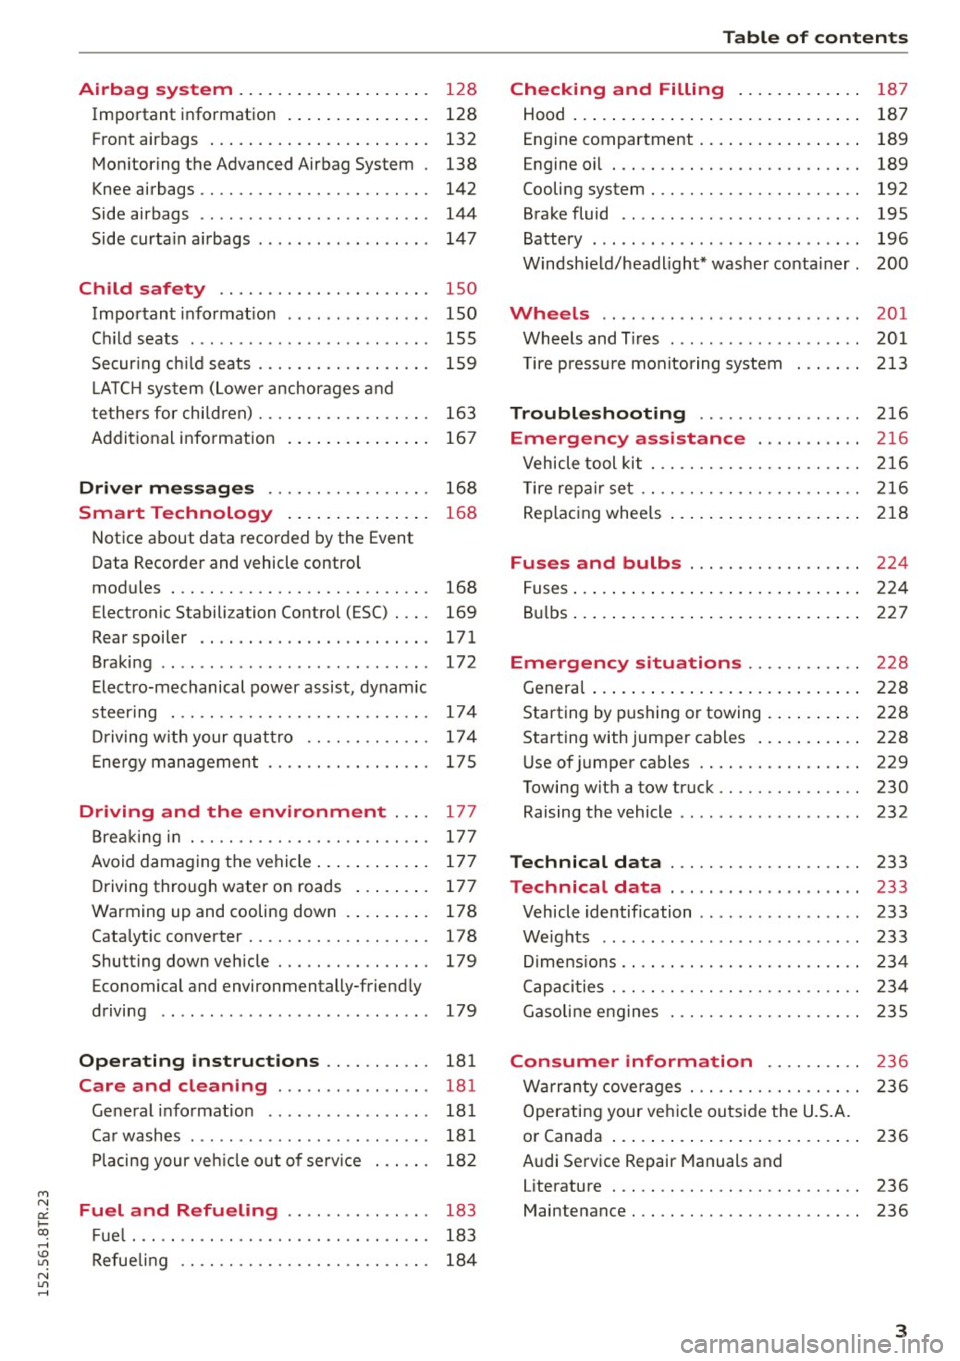
Airbag system . . . . . . . . . . . . . . . . . . . . 128
Important information . . . . . . . . . . . . . . . 128
Front ai rbags . . . . . . . . . . . . . . . . . . . . . . . 132
Mon ito ring the Advanced A irb ag Sys tem . 138
Knee airbags . . . . . . . . . . . . . . . . . . . . . . . . 142
Side airbags . . . . . . . . . . . . . . . . . . . . . . . . 144
Side curta in a irbags . . . . . . . . . . . . . . . . . . 1 47
Ch ild safety . . . . . . . . . . . . . . . . . . . . . . 150
Important informat ion . . . . . . . . . . . . . . . 150
Ch ild seats . . . . . . . . . . . . . . . . . . . . . . . . . 155
Secur ing c hild seats . . . . . . . . . . . . . . . . . . 159
L A TC H system (Lower anchorages and
tethers for chi ldren) . . . . . . . . . . . . . . . . . . 163
Addit ional info rmation
167
Driver messages . . . . . . . . . . . . . . . . . 168
Smart Technology . . . . . . . . . . . . . . . 16 8
N otice about data recorded by the Event
Data Recorder and vehicle cont rol
modules . . . . . . . . . . . . . . . . . . . . . . . . . . . 168
Electronic Stabili za tion Control (ESC) . . . . 169
Rear spoiler . . . . . . . . . . . . . . . . . . . . . . . . 171
Braking . . . . . . . . . . . . . . . . . . . . . . . . . . . . 172
Elect ro-mechanical power assist , dynamic
steer ing . . . . . . . . . . . . . . . . . . . . . . . . . . . 174
Dr iving w ith your quat tro . . . . . . . . . . . . . 17 4
E ne rgy management . . . . . . . . . . . . . . . . . 17 5
Driving and the environment . . . . 177
B rea kin g in . . . . . . . . . . . . . . . . . . . . . . . . . 177
Avoid damaging the vehi cle . . . . . . . . . . . . 17 7
D riving through water on roads . . . . . . . . 177
Warming up and cooling down . . . . . . . . . 178
Cata lytic converter........ .... .. .. .. . 17 8
Shutt ing down veh icle . . . . . . . . . . . . . . . . 179
Economical and environmentally-friend ly
driving . . . . . . . . . . . . . . . . . . . . . . . . . . . . 179
Operating instructions . . . . . . . . . . . 181
Care and cleaning . . . . . . . . . . . . . . . . 181
Ge ne ral i nfo rmat ion . . . . . . . . . . . . . . . . . 181
Ca r washes ............... ...... ... .
Pl acing your veh icle out of se rv ice 18
1
18 2
Fuel and Refueling . . . . . . . . . . . . . . . 183
F ue l... .. .. ................. .. .... . 183
~ Refue ling . . . . . . . . . . . . . . . . . . . . . . . . . . 184
N l/'I ,....,
Tab le of conten ts
Checking and Filling . . . . . . . . . . . . .
187
Hood . . . . . . . . . . . . . . . . . . . . . . . . . . . . . . 187
Engine compartment . . . . . . . . . . . . . . . . . 189
Engine oil . . . . . . . . . . . . . . . . . . . . . . . . . . 189
Cooling system . . . . . . . . . . . . . . . . . . . . . . 192
Brake fluid . . . . . . . . . . . . . . . . . . . . . . . . . 195
Battery . . . . . . . . . . . . . . . . . . . . . . . . . . . . 196
Windsh ie ld/headlight* washer conta iner. 200
Wheels .. .. .. .. .. ... .. ... ..... .. .. 201
Whee ls and T ires . . . . . . . . . . . . . . . . . . . . 201
T ire pressu re monito ring system 213
Troubleshoot ing .............. ... 216
Emergency assistance ... .. .. ... . 216
Vehicle tool kit . . . . . . . . . . . . . . . . . . . . . . 216
T ire repa ir set .. . .. .......... .... .. . . 216
Rep lac ing whee ls . . . . . . . . . . . . . . . . . . . . 2 18
Fuses and bulbs . . . . . . . . . . . . . . . . . . 224
F uses ... .. .. .. .. .. .... .... ... .. .. .. 224
B ul bs . . . . . . . . . . . . . . . . . . . . . . . . . . . . . . 2 27
Emergency situations . . . . . . . . . . . . 228
Genera l . . . . . . . . . . . . . . . . . . . . . . . . . . . . 2 28
Starting by pushing or towing . . . . . . . . . . 228
Starting with jumper cabl es . . . . . . . . . . . 228
U se of jumper cables . . . . . . . . . . . . . . . . . 229
Towing with a tow truck . . . . . . . . . . . . . . . 230
Raising the vehicle . . . . . . . . . . . . . . . . . . . 232
Technical data . . . . . . . . . . . . . . . . . . . . 233
Technical data . . . . . . . . . . . . . . . . . . . . 233
Vehicle identification . . . . . . . . . . . . . . . . . 233
Weights . . . . . . . . . . . . . . . . . . . . . . . . . . . 233
D imens io ns . . . . . . . . . . . . . . . . . . . . . . . . . 234
Capaci ties . . . . . . . . . . . . . . . . . . . . . . . . . . 234
Gasoli ne engines . . . . . . . . . . . . . . . . . . . . 235
Consumer information . . . . . . . . . . 236
W arranty cove rages . . . . . . . . . . . . . . . . . . 236
Operatin g your ve hicl e outs ide the U.S.A.
o r Canada . . . . . . . . . . . . . . . . . . . . . . . . . . 236
Audi Se rvice Repair Manuals and
Literature . . . . . . . . . . . . . . . . . . . . . . . . . . 236
Maintenance . . . . . . . . . . . . . . . . . . . . . . . . 236
3
Page 13 of 254
"' N
0:: loo
rl I.O
"' N
"' rl
A WARNING
-Always observe the warning in¢ page 187,
before open ing the hood and check ing the
engine coolant level.
- Never open the engine hood if you see or
hear steam, or if you see engine coolant
dr ipping from the engine compartment. You
cou ld burn yourself. Let the eng ine cool off
first so that you cannot hear o r see any
steam o r engine coo lant.
0 Note
- Mount ing additional lights or accesso ries in
fron t of the a ir inlets reduces the cooling ef
fect of the radia to r. A t high outside temper
atu res or high e ngine load, the eng ine could
overheat.
- The front spo iler has been designed to prop
erly distribute the cooling air when the veh i
cle is moving. If the spo iler is damaged, this
could reduce the cooling effect and the en
gine could then overheat. Ask your author ized Audi dealer for assistance.
Tachometer (engine rev counter)
The tachometer indicates the engine RPM (revo
lutions per minutes).
If engine RPM drops be low 1,5 00, you should
downshift to the next lower gea r. T he red area at
the end of the scale indicates max imum permis
sible eng ine RPM after the break-in period . Be
fore reachi ng this area, move the selector lever to
position D/S or ease your foot off the accelerator
pedal.
(D Note
The tachometer needle@¢ page 10, fig. 3
should o nly briefly be in the red zone: you
co uld damage your eng ine! The beginn ing of
the r ed zone varies depending on the engine.
@ For the sake of the environment
Upshift ing early saves fuel and reduces eng ine
noise .
Instrument s and indi cator ligh ts
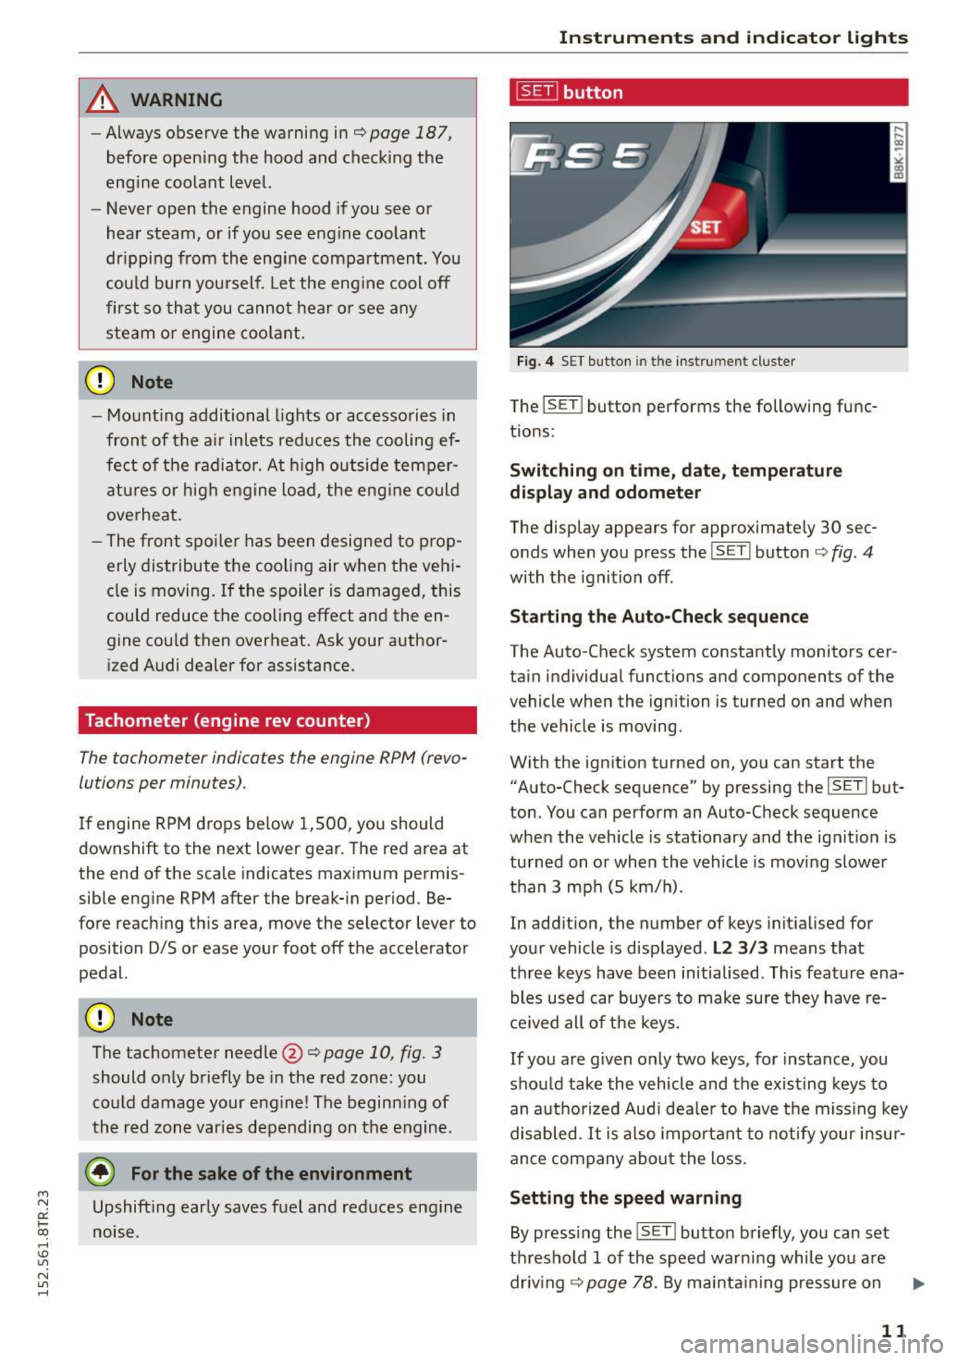
~ button
Fig. 4 SET butto n in the instrument cluste r
The lsET j button performs the following func
t ions:
Switching on t ime, date , temperature
display and odometer
The display appears for approximate ly 30 sec·
onds when you press the
! SE T! button c;, fig . 4
with the igni tion off .
Starting the Auto-Check sequence
The Auto-Check system constantly monitors cer
tain individual functions and components of the
vehicle when the ignition is turned on and when
the vehicle is moving .
With the ign ition turned on, you can start the
"Auto-Check sequence" by pressing the
I SE TI but
ton. You can perform an Auto-Check sequence
when the vehicle is sta tionary and the ign it ion is
tu rned on o r whe n th e vehicle is moving slowe r
t h an 3 mph (5 km/ h).
In add ition , the number of keys init ia lised for
your vehicle is disp layed .
L2 3/3 means that
th ree keys have be en initialised. This feature ena
bles used car buye rs to make sure they have r e
c e ived all of the keys.
If you are g iven only two keys, for instance, you
should take the vehicle and the existing keys to
an a utho rized Aud i dea le r to have the miss ing key
disabled.
It i s also important to no tify your insur
ance company abo ut the loss.
Setting the sp eed warning
By pressi ng the !SET ! button briefly, you can set
th reshold 1 of the speed wa rn ing while you are
dr iv ing ¢page 78. By ma intai ning pressure on
11
Page 15 of 254
M N
0:: loo ,...., \!) 1.1"1
N 1.1"1 ,....,
Indicator lights
Description
The indicator lights in the instrument cluster
blink or turn on. They indicate functions or mal
functions¢ &.
Messages may appear with some indicator lights .
A warning signal will sound at the same time.
The messages disappear again after a short time.
To display a message again, press the
I SE TI but
ton ¢
page 11. If several malfunctions occur,
each of the indicator/warning lamps will be dis
p layed in succession for about two seconds at a
time.
Some indicators lights in the display can turn on
in several colors.
8_ WARNING
- Failure to heed warning lights and other im
portant vehicle information may resu lt in
serious personal injury or vehicle damage.
- Whenever sta lled or stopped for repa ir,
move the vehicle a safe distance off the
road, stop the engine, and turn on the emer
gency flasher¢
page 45.
- The engine compartment of any motor vehi
cle is a potentially hazardous area. Before
you check anything in the engine compart
ment, stop the engine and let it cool down.
Always exercise extreme caution when work
ing under the hood¢
page 187.
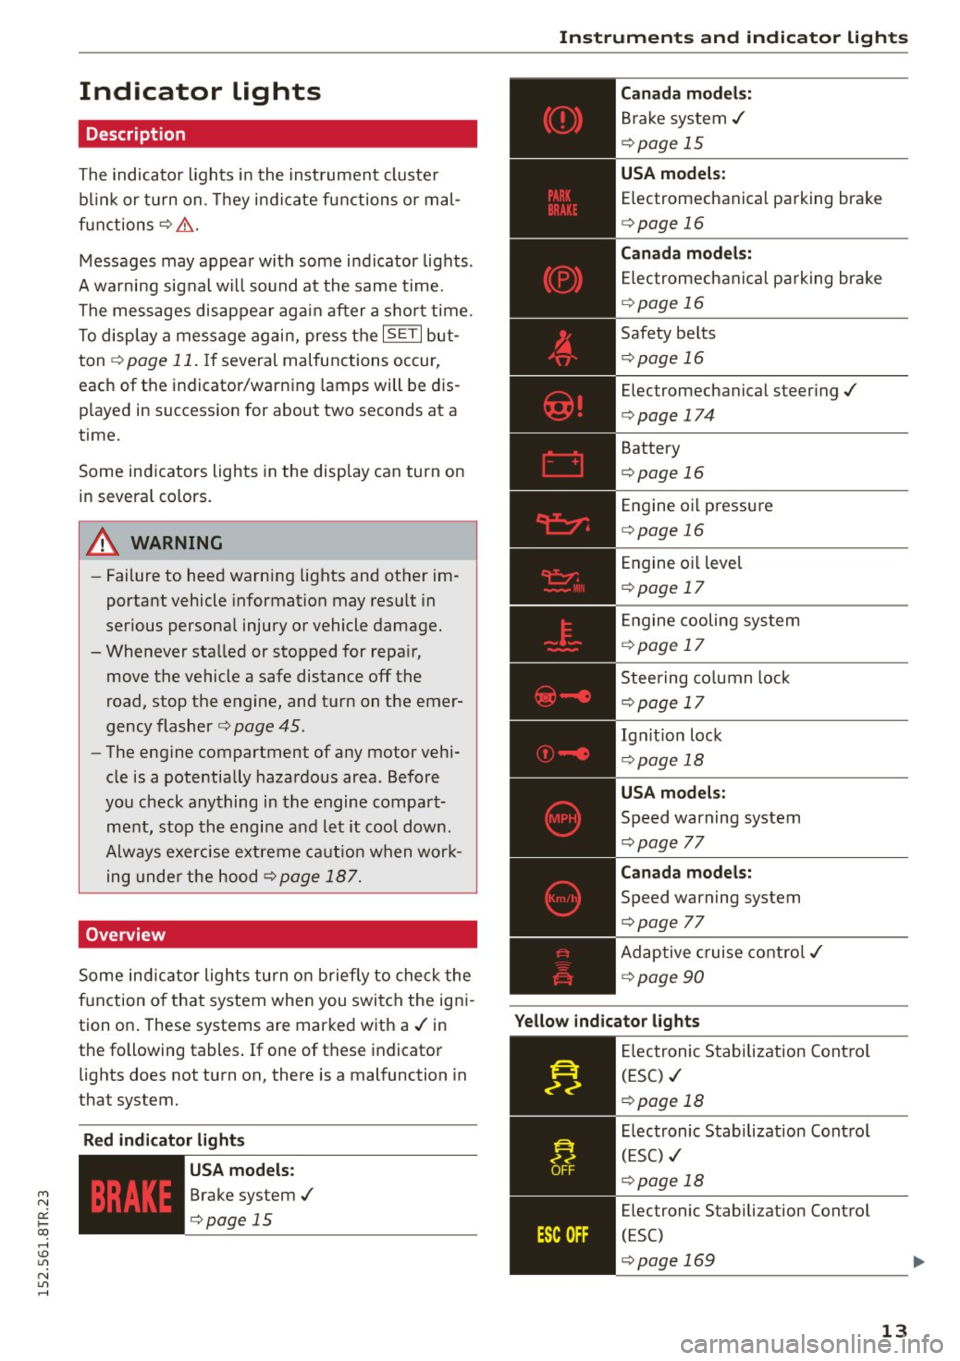
Overview
Some indicator lights turn on briefly to check the
function of that system when you switch the igni
tion on . These systems are marked with a./ in
the following tables .
If one of these indicator
lights does not turn on, there is a malfunction in
that system.
Red indicator light s
--------------
US A models:
Brake system./
¢page 15 Instruments
and indicator lights
Canada models:
Brake system./
¢page 15
USA models:
Electromechanical parking brake
¢ page 16
Canada models:
Electromechanical parking brake
¢ page 16
Safety belts
¢page 16
Electromechanical steering./
¢page 174
Battery
¢page 16
Engine oil pressure
¢page 16
Engine oil level
¢page 17
Engine cooling system
¢page 17
Steering column lock
¢page 17
Ign it ion lock
¢ page 18
USA models:
Speed warning system
¢page 77
Canad a models:
Speed warning system
¢page 77
Adaptive cruise control./
¢page 90
Yellow indicator lights
--------------
Electronic Stabilization Contro l
(ESC) ./
¢page 18
Electronic Stabilization Contro l
(ESC) ./
¢page 18
Electronic Stabilization Control
(ESC)
¢page 169
13
Page 17 of 254
M N
0:: loo ,...., \!) 1.1'1
N 1.1'1 ,....,
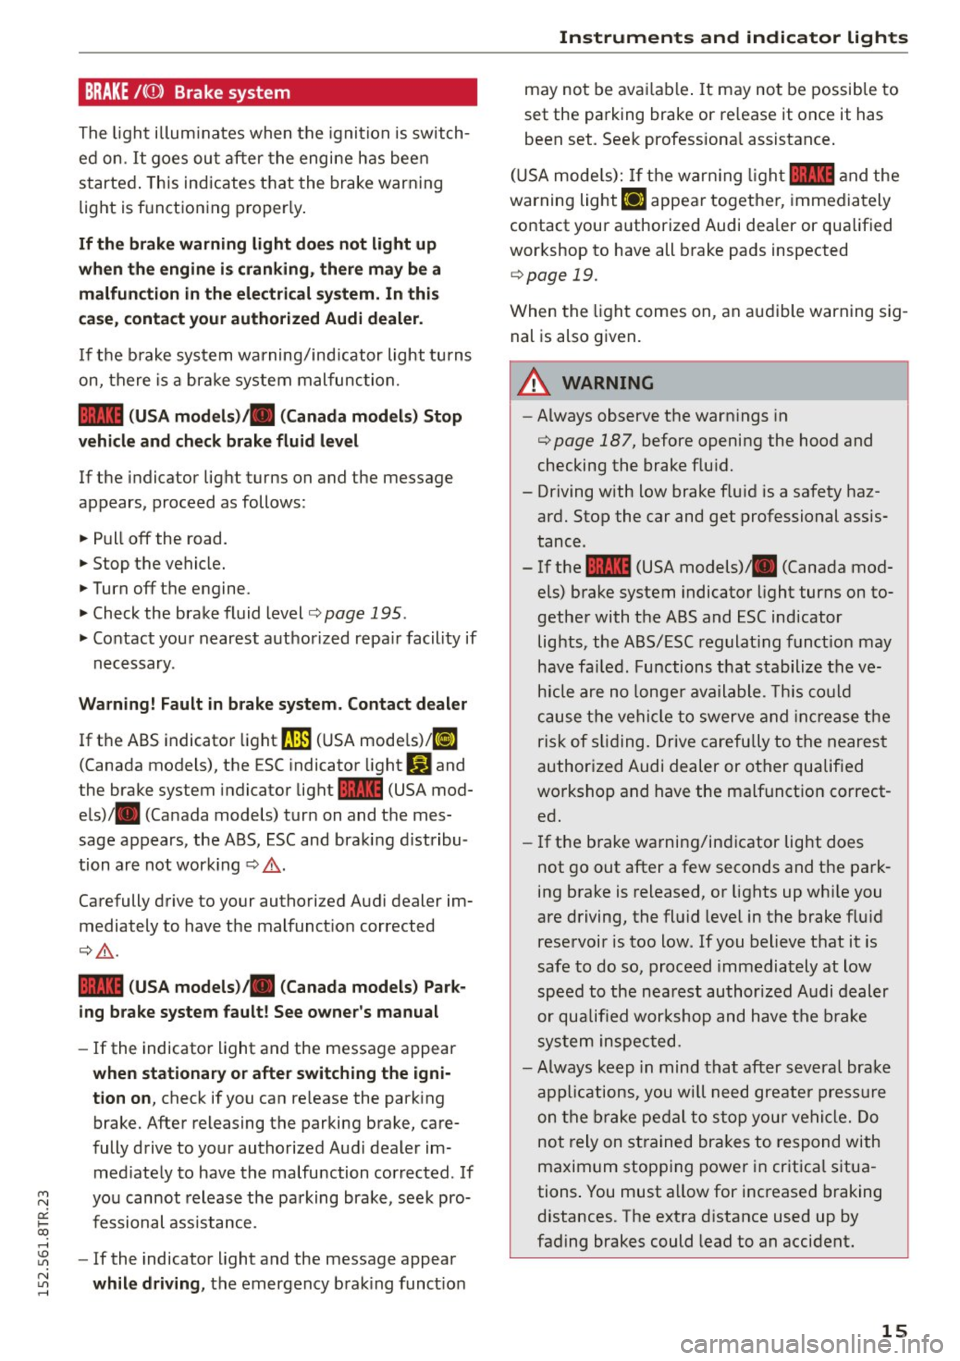
BRAKE /((f) ) Brake system
The ligh t illu min ates when t he igni tion is switch
ed on.
It goes ou t after the engine h as bee n
started . This indicates t hat the brake war ning
light is f unctioning p ro p er ly .
If the brake warning light doe s not light up
when the engine is cranking, there may be a malfunction in the electrical system . In this
case , contact your authorized Audi dealer.
If the b rake system wa rning/ind icator light tu rns
on, there is a br ak e system malfunc tion.
1111 (USA mod els )/ . (Canada models) Stop
vehicle and check brake fluid level
If the indicator light turns on and the message
appears, proceed as follows:
~ P ull off the road.
~ Stop the vehicle.
~ Turnoff the engine.
~ Check the brake fluid level c::> page 195.
~ Contact you r nearest author ized repa ir facility if
n ecessary .
Warning! Fault in brake system. Contact dealer
If the ABS indicator light ~ (U SA mode ls)l [i]
(Canada models), the ESC indicato r light
J.i) and
the brake system indicator light
1111 (USA mod
e ls)/ . (Canada models) turn on and the mes
sage appears, the ABS, ESC and braking d istribu
tion are not wor king
c::> .&. .
Carefully drive to your authorized Audi dealer im
mediately to have the malfunct io n corrected
c::> .&. .
1111 (USA models )ta (Canada models ) Park
ing brake system fault ! See owner's manual
- If the indicator light and the message appear
when stationary or after switching the ign i·
tion on ,
check if you can re lease the park ing
brake. After releasing the parking brake, care
fully drive to your authorized Aud i dealer im
med iate ly to have the malfunction corrected . If
yo u cannot release the pa rking brake, see k pro
fessional ass ista nce.
- If the indicator light and the message appear
while driving , the emergency b ra ki ng funct io n
Instruments and indicator lights
may no t be ava ilable . It may not be possible to
set the parking brake or re lease it once it has
been set. Seek professiona l assistance .
( U SA mode ls):
If the war ning ligh t 1111 and the
warning light
Ill appear togethe r, immedia tely
contact your authorized Audi dealer or qua lified
wor kshop to have all b rake pads inspected
c::> page 19.
When the light comes on, an au dible warning sig
nal is also given.
A WARNING
-- Always observe the warn ings in
c::> page 187, before opening the h ood and
checking the brake flu id.
- Driving with low brake fluid is a safety haz
ard. Stop the car and get professional ass is
tance.
- If the 1111 (USA models) . (Canada mod
e ls) brake system indicator light turns on to
gether with t he ABS and ESC ind icator
lig hts, the ABS/ESC regulat ing funct ion may
have fa iled. Functions that stabilize the ve
h icl e are no longe r available. This co uld
c a use t he ve hicle to swerve and increas e t he
ris k of s liding. Drive carefu lly to the neares t
author ized Audi dealer or other qualified
wo rkshop and have the malf unct ion co rrect
ed.
- If the b rake wa rning/in dicator light does
not go out after a few seconds and the pa rk
ing brake is released, or lights up wh ile you
are driving, the fl uid level in the brake f lu id
rese rvoir is too low. If y ou believe t hat it is
safe to do so, proceed immediately at low
speed to the nea rest authorized A udi dealer
or qualified workshop and have t he b rake
sy stem inspec ted.
- Always keep in min d that after s evera l brak e
a pplicat ions, you wi ll n eed gre ate r pr essure
o n th e br ake pe dal t o s to p you r ve hicle . Do
no t rely on st rained bra kes to respond with
maxim um stop ping power i n cr itica l s itua
tions . You must a llow for increased braking
d istances. The extra d istance used up by
fading brakes could lead to an accident .
15
Page 19 of 254
M N
0:: loo ,...., \!) 1.1'1
N 1.1'1 ,....,
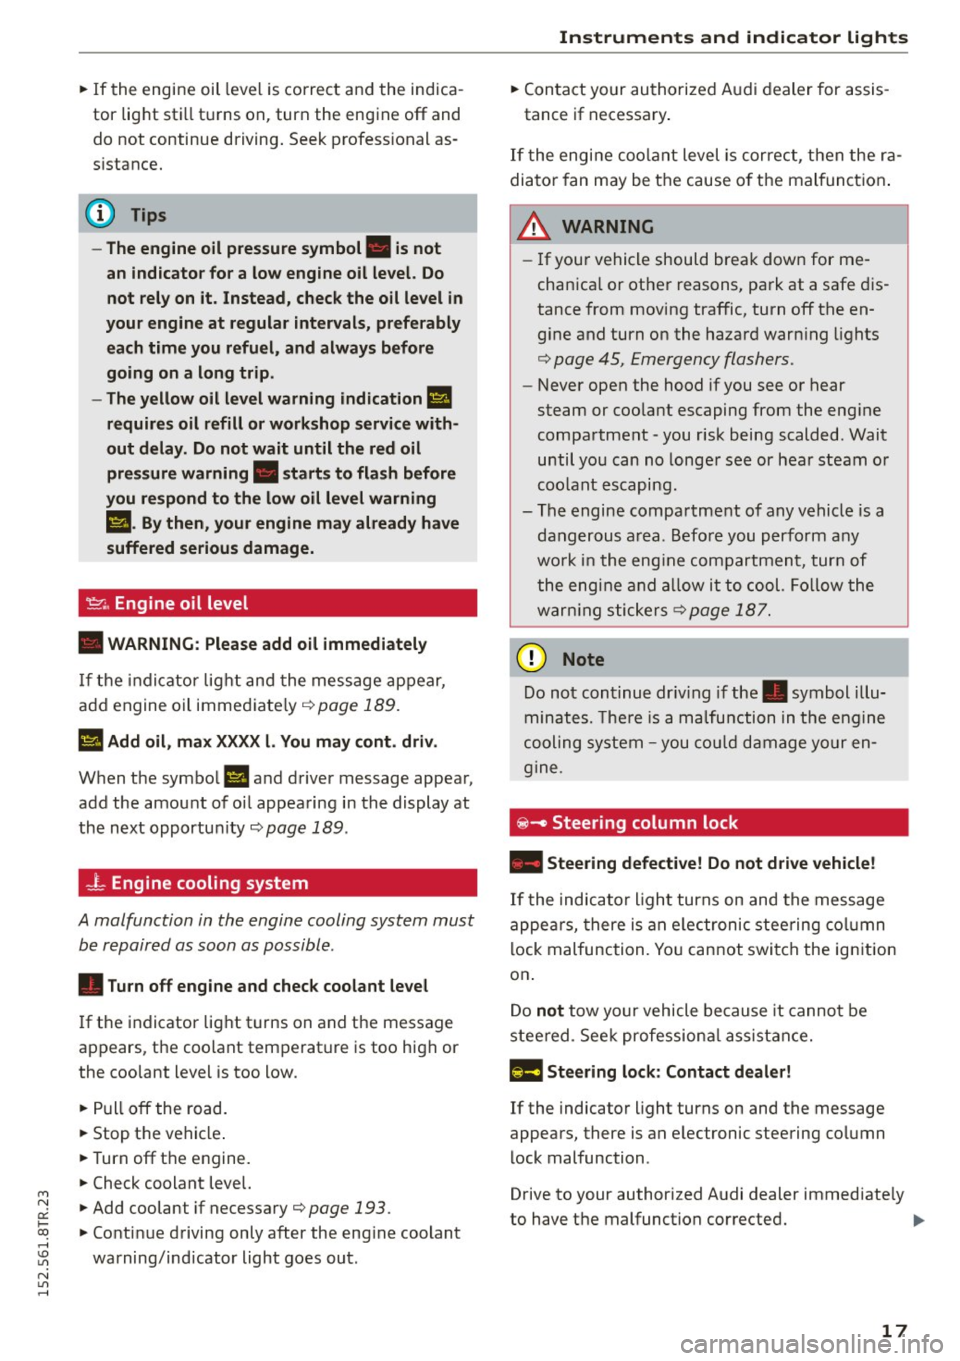
~ If the engine oil level is correct and the indica
tor light still turns on, turn the engine off and
do not continue driving. Seek profess ional as
sistance.
(D Tips
- The engine oil pressure symbol. is not
an indicator for a low engine oil level. Do
not rely on it. Instead, check the oil level in
your engine at regular intervals, preferably
each time you refuel, and always before
going on a long trip.
- The yellow oil level warning indication
Ill
requires oil refill or workshop service with
out delay. Do not wait until the red oil
pressure warning. starts to flash before
you respond to the low oil level warning
m. By then, your engine may already have
suffered serious damage.
'1::1'., Engine oil level
• WARNING : Please add oil immediately
If the indicator light and the message appear,
add engine oil immediately ¢ page 189.
l!I Add oil, max XXXX l. You may cont . driv.
When the symbol Ill and driver message appea r,
add the amount of oil appearing in the display at
the next opportun ity ¢
page 189 .
-L Engine cooling system
A malfunction in the engine cooling system must
be repaired as soon as possible .
• Turn off engine and check coolant level
If the indicator light turns on and the message
appears , the coolant temperature is too high or
the coolant level is too low .
~ Pull off the road.
~ Stop the vehicle .
~T urnoff the engine.
~ Check coolant level.
~ Add coolant if necessary¢ page 193 .
~ Continue driving only after the eng ine coolant
warning/indicator light goes out .
Instruments and indicator lights
~ Contact your authorized Audi dealer for assis
tance if necessary .
If the engine coolant level is cor rect, then the ra
diator fan may be the cause o f the malfunction .
A WARNING
--If your vehicle should break down for me
chanica l or other reasons, park at a safe dis
tance from moving traffic, turn off the en
gine and turn on the hazard warn ing lights
¢ page 45, Emergency flashers .
-Never open the hood if you see or hear
steam or coolant escaping from the eng ine
compartment -you risk being scalded . Wait
until you can no longer see or hear steam or
coolant escaping.
- The engine compartment of any vehicle is a
dangerous area. Before you perform any
wo rk in the eng ine compartment, turn of
the engine and allow it to cool. Follow the
warn ing stickers
¢ page 187 .
d) Note
Do not continue dr iv in g if the . symbol illu
minates. There is a malfunction in the engine
cooling system -you could damage your en
gine.
iii! -Steering column lock
• Steering defective! Do not d rive vehicle!
If the indicator light turns on and the message
appea rs, there is an electronic steering column
lock malfunction. You cannot switch the ignition
on .
Do
not tow your vehicle because it cannot be
steered . Seek professiona l assistance.
1!;11 Steering lock : Contact dealer!
If the indicator light turns on and the message
appears, there is an elec tronic steering column
lock malfunction .
Drive to your authorized Audi dealer immediate ly
to have the malfunction corrected. ..,.
17
Page 20 of 254
Instruments and indicator lights
A WARNING
Your vehicle must not be towed in the event
of a malfunct ion in the electron ic steer ing col
umn lock because it cannot be stee red due to
the locked steering .
If it is towed w ith the
steering locked, there is the risk of an a cci
dent .
©-Ignition lock
• Ignition lock defective. Conta ct dealer!
If the indicator lig ht t urns on and the message
appears, do
not sw itc h the ignition off because
you may not be able to switch it on again.
Dr ive to your authorized Aud i dea ler immediately
to have the ma lfunction co rrected .
O n ve hicles w ith convenience key*, the engine
should not be sw itched off using the
I STAR T ENGIN E ST OP I button because the engine
cannot be sta rted again afte r the ig nit ion has
been swi tc h ed off .
@ Tips
The symbol's appearance might be different
in some mode ls .
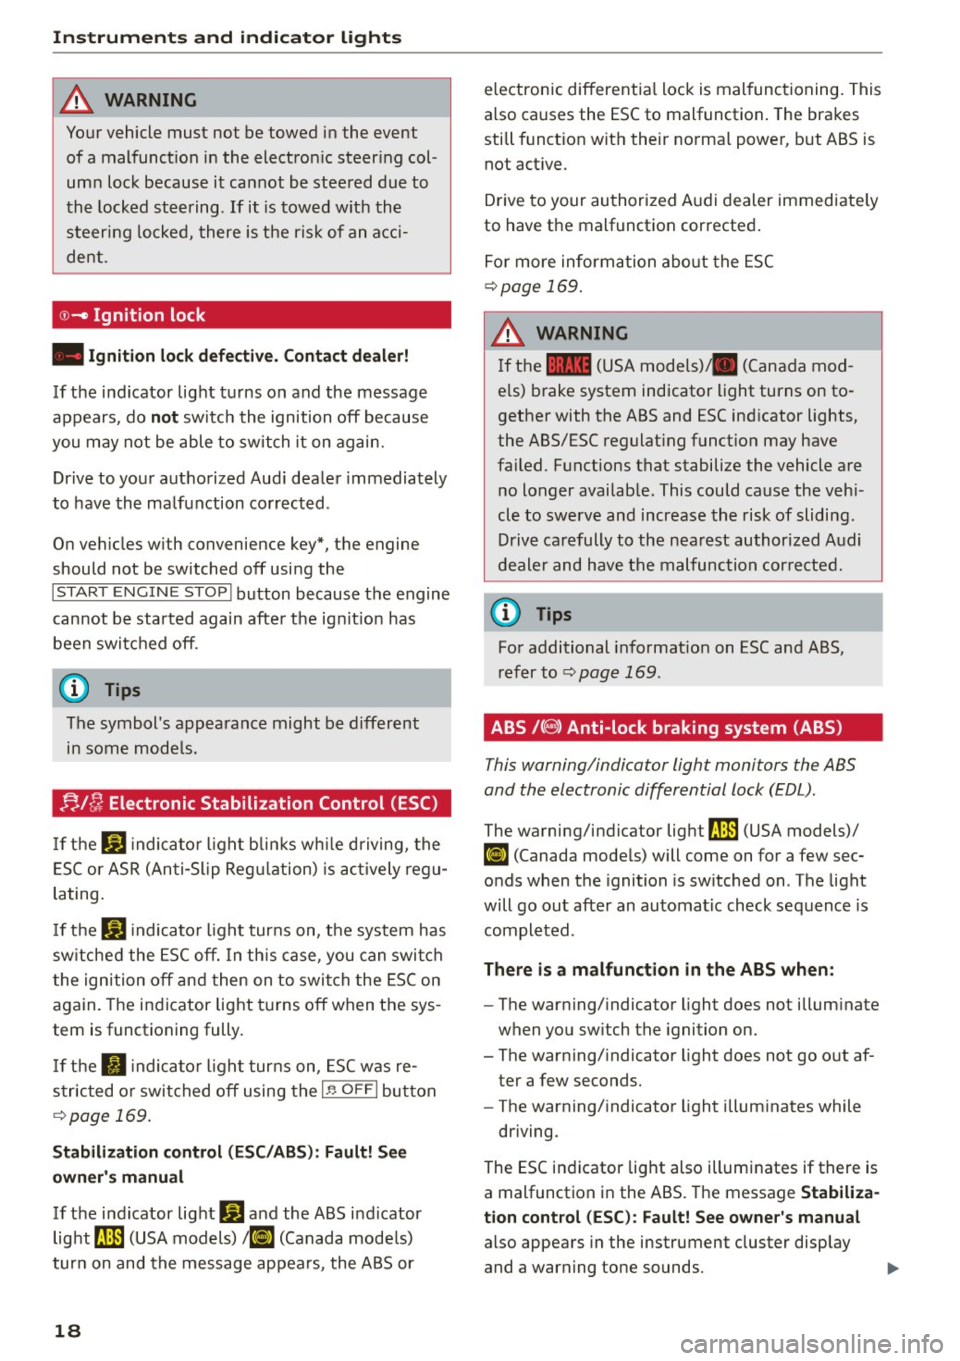
!;. !~ Electronic Stabilization Control (ESC)
If the Ji) indica to r li ght blink s while driving, the
E SC or ASR (An ti- Slip Reg ulation) is ac tively regu
lating.
If t h e DJ indicato r light tur ns on, the system has
sw itche d the ESC off. In th is ca se , you can swi tch
t he ign ition off and then on to swi tch the ESC on
again. The indicator light t urns off when the sys
tem is function ing fully.
If the II indica to r li ght tur ns on, ESC was re
s tric ted or swi tched off using the
I~ O FFI bu tton
c::> page 169.
Stabilization control (ESC /ABS ): Fau lt! S ee
owner 's manual
If the ind icator lig ht Q] and the ABS i ndicator
light ~ (USA models)
111] (Canada mode ls)
tur n on and the message ap pea rs, the ABS or
18
electronic differentia l lock is mal functioning. This
a lso causes the ESC to malfunction . The brakes
still f unct ion wit h their norma l powe r, b ut ABS is
not act ive.
Drive to your authori zed A udi dealer immediate ly
to have the malfunction corrected .
Fo r more information abo ut the ESC
c::> page 169.
A WARNING
If the 11111 (USA models) . (Canada mod
e ls) b rake system indicator light turns on to
gether with the ABS and ESC ind icator lights,
the ABS/ESC regulat ing funct ion may have
failed. F unctions that stabilize the vehicle are
no longer availab le. This could cause the vehi
cle to swerve and increase the risk of slidi ng.
D riv e ca refully to the nea rest authorized A udi
d eale r and have the m alfunc tion corre cte d.
@ Tips
Fo r additional informat ion on ESC and ABS,
ref er to c::> page l 69 .
ABS /(8 ) Anti-lock braking system (ABS)
This warning/indicator light monitors the ABS
and the electronic differential lock (EDL).
The warning/indicator light ~ (USA models)/
Ii] (Canada mode ls) will come on for a few sec
onds when the ignition is sw itched on . T he light
will go out after an automatic check sequence is
completed .
There is a malfunction in the ABS when:
-The war ning/ indicator light does not illum inate
when you sw itch the ignition on.
- The warning/ indicato r light does not go o ut af
ter a few seconds.
- The warning/ indicato r light illum inates while
driving.
The ESC in dicator lig ht also illuminates if there is
a malfunction in the ABS. The message
Stabiliza
tion control (ESC ): Fault! See owner's manual
also appears in the instrument cluster display
and a warn ing tone sounds.
Page 22 of 254
Instruments and indicator lights
co mes on in the i nstrument cl uster display,
immediately contac t your author ized Audi
dealer or qualified workshop to have all
brake pads checked o r replaced if necessary.
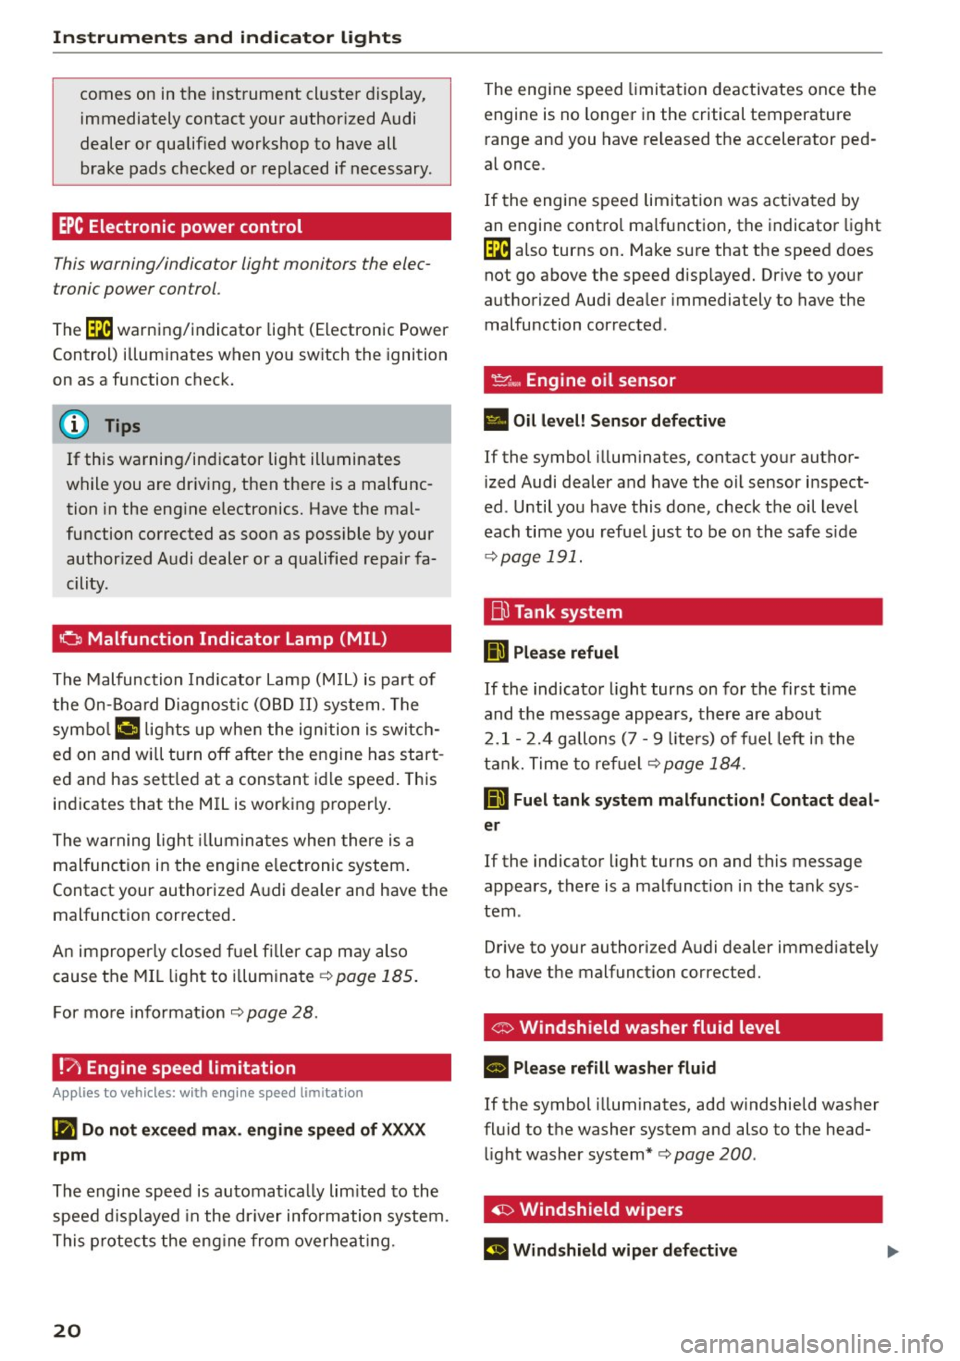
EPC Electronic power control
This warning/indicator light monitors the elec
tronic power control .
The (m warning/indicator light (Electronic Power
Control) i llum inates when yo u switch the ignition
on as a function check.
(D Tips
If this warning/indicator light ill uminates
while you are dr iv ing, then the re is a malfunc
tion in the eng ine electronics. Have the mal
fu nction corrected as soon as possible by your
author ized A udi dealer or a qualified repair fa
cility.
o Malfunction Indicator Lamp (MIL)
The Malfu nction Indicator Lamp (M IL) is part of
the On-Board Diagno stic (OB D II) system . The
symbo l
('4 lights up whe n the ign ition is switch
ed on and will turn off afte r th e engine has star t
ed an d has sett le d at a constant idle speed . This
indicates that the MIL is working proper ly.
The warning ligh t illumina tes when there is a
malfunct ion in the engine e lectronic system .
Contact your authorized A udi dealer and have the
malfunctio n corrected .
An improperly close d fu e l fi ller cap may also
cause the MIL li ght to il lum inate ¢
page 185 .
For mo re info rmat io n ¢page 28.
!?) Engine speed limitation
Applies to vehicles: with engine speed limitation
(Iii Do not ex ceed max. engine speed of XXXX
rpm
The engine speed is automatically lim ited to the
speed d isp layed in the dr iver information system.
T his protect s the eng ine from overheat ing.
20
The eng ine speed limita tion deactivates once the
engine is no longe r in the critical temperature
r ange and you have re leased t he accelerator ped
a l once .
I f the engine speed limitation was activated by
an engine contro l ma lf u nction, the indicato r light
(m also turns on. Make sure that the speed does
not g o above the speed disp layed. Dr ive to your
authorized Aud i dea ler immediately to have the
malfunction cor rected .
~~, Engine oil sensor
• Oil level! S ensor defective
If the symbol illuminates, contact yo ur author
i zed Audi dealer and have the oil sensor inspect
ed . Until you have this done, check the oil level
each time you refue l just to be on the safe s ide
¢ page 191.
ffi Tank system
IIJ Please refuel
If the indicato r light turns on for the first t ime
and t he m essage appea rs, there are about
2 .1- 2. 4 gallons (7 -9 liters) of fuel left i n the
t ank . T ime to re fuel
¢page 184.
D Fuel tank syst em malfunction! Contact deal
er
If the indicator light turns on and this message
appears , there is a malfunct io n in the tank sys
tem .
Drive to your authorized A udi dealer immediate ly
to have the malfunct ion corrected.
' G> Windshield washer fluid level
II Please refill washer fluid
If the symbol illuminates, add w indshield washer
fl uid to t he washer system and also to the head
li ght washer system*¢
page 200 .
~ Windshield wipers
El Windshield wiper defective
Page 28 of 254
Driver information system
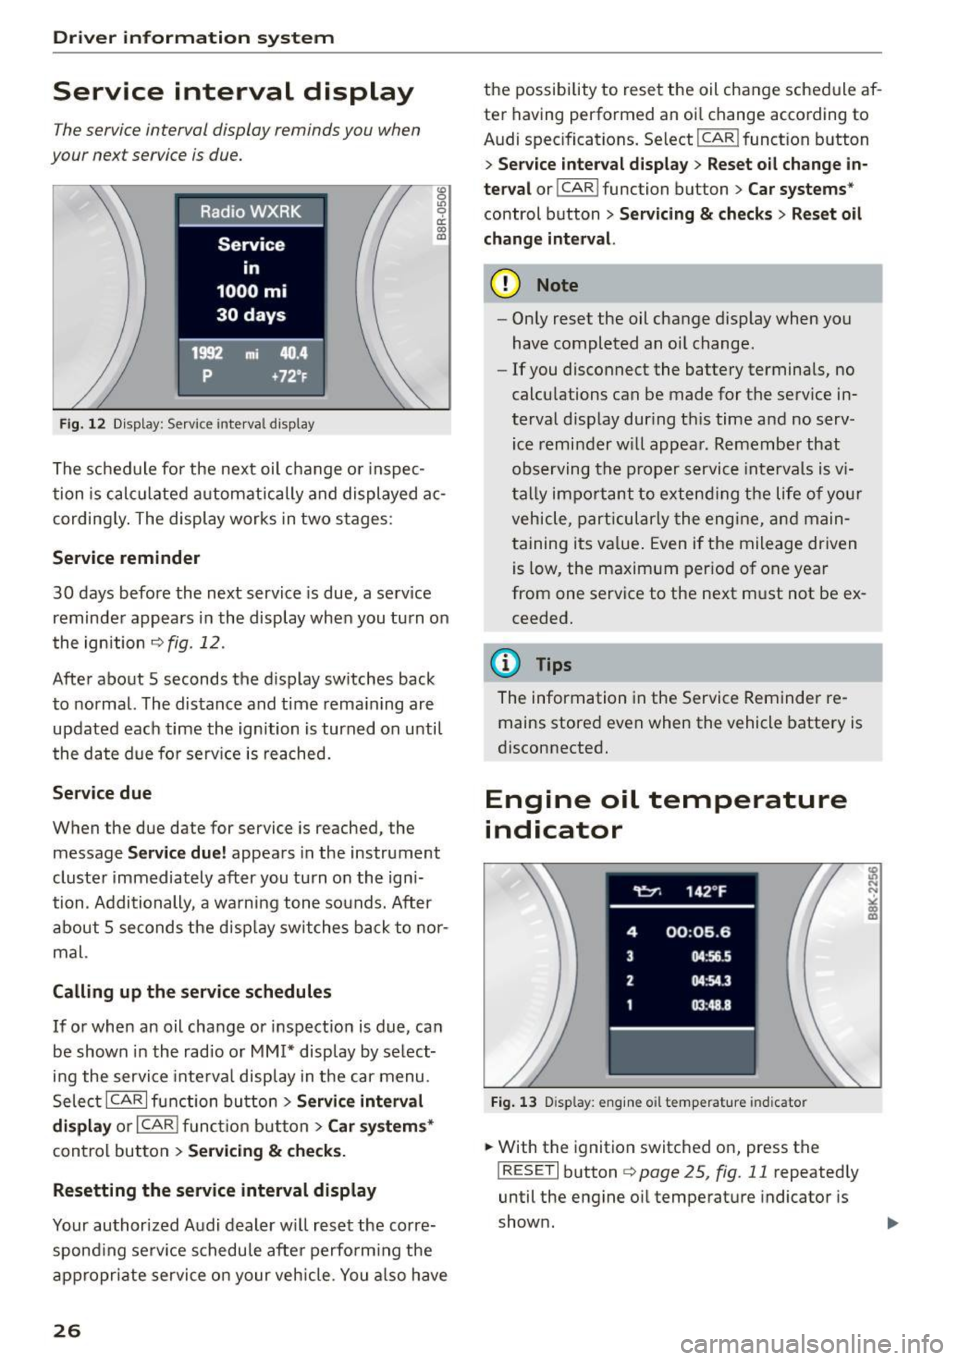
Service interval display
The service interval display reminds you when
your next service is due.
Fig. 12 Display: Service interva l display
"' 0 Ill 0 a: CX) (D
The schedule for the next oil change or inspec
tion is calculated automatically and displayed ac
cording ly. The display works in two stages :
Service reminder
30 days before the next service is due, a serv ice
reminder appears in the display when you turn on
the ignition
c> fig . 12.
After about 5 seconds the display switches back
to normal. The distance and time remaining are
updated each time the ignition is turned on unti l
the date due for serv ice is reached.
Service due
When the due date for service is reached, the
message
Service due! appears in the instrument
cluster immediately after you turn on the igni
tion . Additionally , a warning tone sounds. After
about 5 seconds the disp lay switches back to nor
mal.
Calling up the service schedules
If or when an oil change or inspection is due, can
be shown in the radio or
MM!* display by select
ing the service inte rval display in the car menu.
Select ICARI function button>
Service interval
display
or I CAR ! function button > Car systems*
control button > Servicing & checks.
Resetting the service interval display
Your authorized Audi dealer will reset the corre
spond ing serv ice schedule after perform ing the
appropriate service on your vehicle. You also have
26
the possibility to reset the oil change schedule af
ter having performed an oi l change according to
Audi specifications. Select
I CAR ! function button
> Service interval display> Reset oil change in
terval
o r! CAR i function button > Car systems *
control button > Servicing & checks > Reset oil
change interval.
(D Note
-Only reset the oil change display when you
have completed an oil change .
- If you disconnect the battery terminals, no
calculations can be made for the serv ice in
terval display during th is time and no serv
ice reminder will appear. Remember that
observing the proper service intervals is v i
tally impo rtant to extending the life of you r
vehicle, particularly the engine, and main
taining its value. Even if the mileage driven
is low, the maximum period of one year
from one service to the next must not be ex
ceeded.
(D Tips
The information in the Service Reminder re
mains stored
even when the vehicle battery is
disconnected.
Engine oil temperature
indicator
Fig. 13 Disp lay: eng ine o il temperature indicato r
.. With the ignition switched on, press the
! RESET! button
c> page 25, fig. 11 repeatedly
until the engine oil temperature indicator is
shown.
Page 40 of 254
Open in g and cl osin g
"' Pull the switch briefly to the se con d sto p to au
tomatically close the window.
A WARNING
- When you leave your vehicle -even if only
briefly -always remove the ignition key. This
applies part icularly when children remain in
the vehicle. Otherwise the children could start the engine or operate electr ical equip
ment (e.g. power w indows). The power win
dows are functional until the driver's door o r
passenger's door has been opened.
- Pay close atten tion when closing the w in
dows to prevent pinch ing of hands or limbs.
- When locking the vehicle from outs ide, the
vehicle must be unoccupied since the win dows can no longer be opened in an emer
gency.
(I) Tips
- When you open the doo rs, the windows au
tomatically lower about 10 mm.
- After the ignition has been switched off, the
windows can st ill be opened or closed for
about 10 m inutes. The window regulators
are not switched until the dr iver's or pas
senger's door is opened .
Convenience opening/closing
The windows and the panoramic tilting sunroof
can be opened and closed with the mechanical
key or the emergency key.
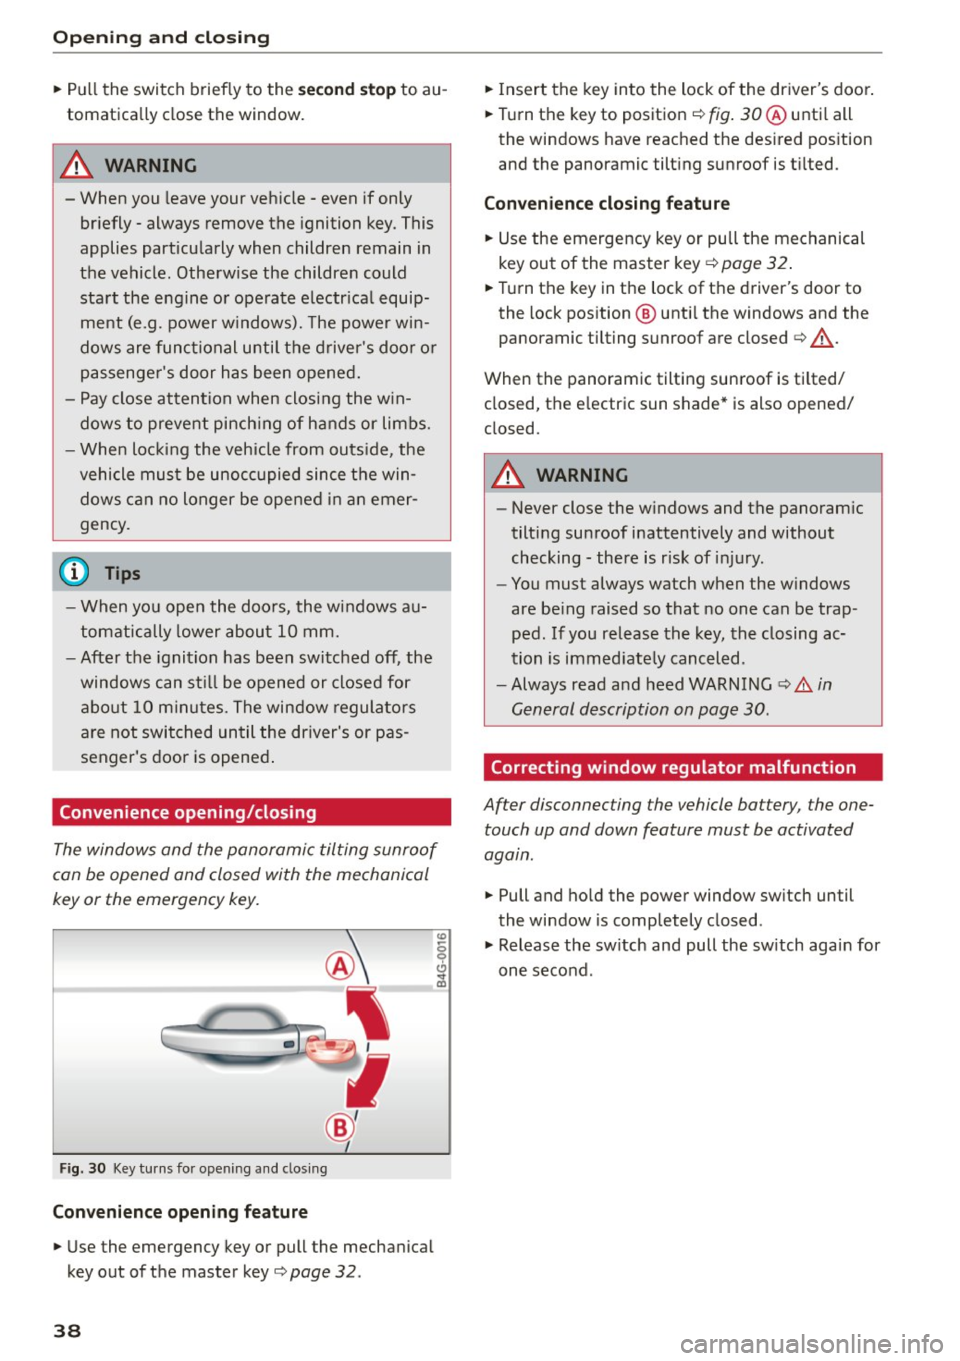
F ig. 30 Key turns fo r opening a nd clos ing
Conveni ence opening fe ature
"' Use the emergency key or pull the mechanical
key out of the master key
c> page 32 .
38
"'Insert the key into the lock of the driver's door .
"' Turn the key to position ¢
fig. 30 ® unti l all
the windows have reached the des ired pos ition
and the panoramic tilting sunroof is t ilted.
Con veni ence clo sing f eatur e
"'Use the emergency key or pull the mechanical
key out of the master key ¢
page 32.
"'Turn the key in the lock of the driver's door to
the lock position @ unti l the windows and the
panoramic tilting sunroof are closed
c> ,& .
When the panoramic tilting sunroof is tilted/
closed, the electric sun shade* is also opened/
closed.
A WARNING
- Never close the windows and the panoram ic
tilting sunroof inattentively and without
checking -there is risk of injury .
- You must always watch when the w indows
are be ing raised so that no one can be trap
ped. If you release the key, the closing ac
tion is immed iate ly canceled .
- Always read and heed WARN ING
c> A in
General description on page 30.
Correcting window regulator malfunction
After disconnecting the vehicle battery , the one
touch up and down feature must be activated
agatn.
"' Pull and ho ld the power window sw itch until
the window is completely closed .
"' Release the sw itch and pull the sw itch again for
one second .
Page 73 of 254
"' N
0:: loo
rl I.O
"' N
"' rl
Driving
Steering
Manually adjustable steering wheel
The steering wheel position is fully adjus table up
and down and forward and back .
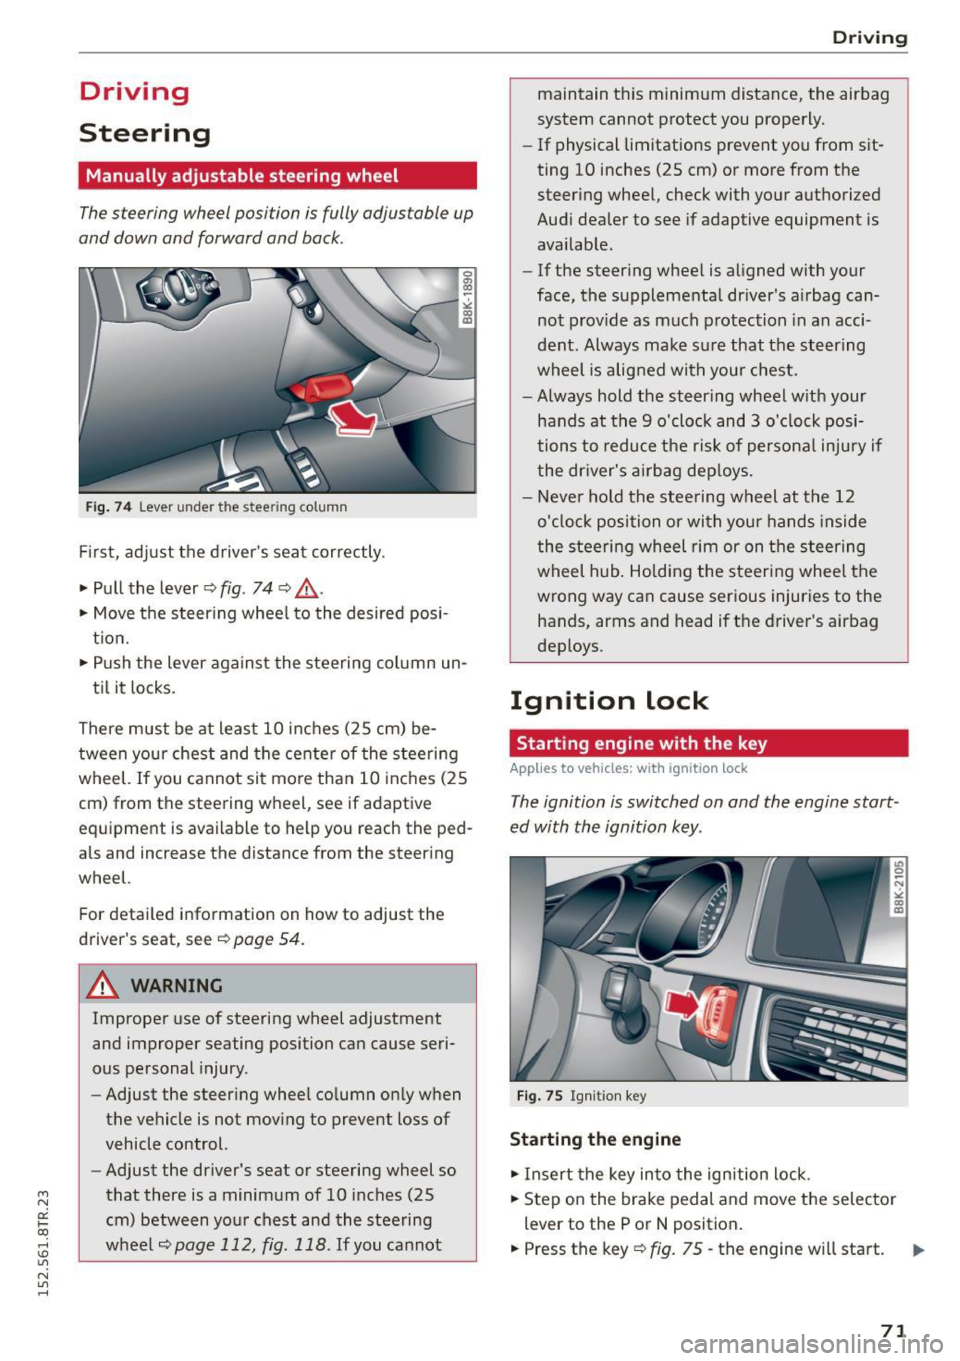
Fig. 74 Lever under the st eering column
First, adjust the driver's seat correctly.
• Pull the lever~
fig. 74 ~ .&, .
• Move the steering wheel to the desired posi
tion.
• Push the lever against the steering column un-
til it locks.
There must be at least 10 inches (25 cm) be tween your chest and the center of the steering
wheel. If you cannot sit more than 10 inches (25
cm) from the steering wheel, see if adaptive
eq uipment is available to help you reach the ped
als and increase the distance from the steering
wheel.
Fo r detailed information on how to adjust the
driver's seat, see
~ page 54 .
.&_ WARNING
Improper use of steering wheel adjustment
and improper seating position can cause seri
ous personal injury.
- Adjust the steering wheel column only when
the vehicle is not moving to prevent loss of
vehicle control.
- Adjust the driver's seat or steering wheel so
that there is a minimum of 10 inches (25
cm) between your chest and the steering
wheel
~page 112, fig. 118 . If you cannot
-
Driving
maintain this minimum distance, the airbag
system cannot protect you properly.
-If phys ical limitations prevent you from sit
ting 10 inches (25 cm) or more from the
steering wheel, check with your authorized
Audi dealer to see if adaptive equipment is
available.
- If the steering wheel is aligned with your
face, the supplemental driver's airbag can
not provide as much protection in an acci
dent. Always make sure that the steering
wheel is aligned with your chest.
- Always hold the steering wheel with your
hands at the 9 o'clock and 3 o'clock posi
tions to reduce the risk of personal injury if
the driver's airbag deploys.
- Never hold the steering wheel at the 12
o'clock position or with your hands inside
the steering wheel rim or on the steering
wheel hub. Holding the steering wheel the
wrong way can cause serious injuries to the
hands, arms and head if the driver's airbag
deploys .
Ignition lock
Starting engine with the key
Applies to vehicles: with ignition lock
The ignition is switched on and the engine start
ed with the ignition key .
Fig. 75 Igni tion key
Starting the engine
• Insert the key into the ignition lock .
• Step on the brake pedal and move the selector
lever to the P or N position.
• Press the key~
fig. 75 -the engine will start.
71