hood open AUDI S3 2009 Owners Manual
[x] Cancel search | Manufacturer: AUDI, Model Year: 2009, Model line: S3, Model: AUDI S3 2009Pages: 324, PDF Size: 76.02 MB
Page 12 of 324
Instruments and warning/indicator lights
Engine cold
As long as the needle remains at the left end of the gauge, the
engine still has not reached its operating temperature . Avoid high
engine speeds, heavy engine loads and heavy throttle.
Normal temperature
When the engine has reached its operating temperature, the needle
will move into the middle of the gauge and remain there. If the engine is working hard at high outside temperatures, the needle
may turn further to the right. This is no cause for concern as long as
the
_ f_ warning light in the instrument cluster does not illuminate.
When the
-L warning light starts to flash, this can mean one of two
things: either the coolant
temperature is too high, or the coolant
level is too low=> page 30.
& WARNING
• Always observe the warning in => page 217, "Engine compart
ment" before opening the engine hood and checking the engine
coolant level.
• Never open the engine hood if you see or hear steam, or if you
see engine coolant dripping from the engine compartment. You
could burn yourself. Let the engine cool off first so that you cannot
hear or see any steam or engine coolant.
0 Note
• Mounting additional lights or accessories in front of the air inlets
reduces the cooling effect of the radiator . At high outside tempera
tures or high engine load, the engine could overheat.
• The front spoiler has been designed to properly distribute the
cooling air when the vehicle is moving. If the spoiler is damaged,
this could reduce the cooling effect and the engine could then over
heat. Ask your authorized Audi dealer for assistance. •
Fuel gauge
The fuel gauge works only when the ignition is on.
When the needle reaches the red area, the warning light in the
instrument cluster will illuminate=>
page 32 I). This means you
have approximately 1.8 gallons (7 liters) of fuel left in the tank.
Time
to refuel!
The total tank capacity of your vehicle is listed in=> page 300,
"Data".
0 Note
Never run the tank completely dry! An irregular supply of fuel can
cause engine misfiring and fuel could enter into the exhaust
system. The catalytic converter could then overheat and be
damaged .•
Speedometer with odometer
The speedometer shows you the vehicle speed, and the
odometer shows you how many miles (kilometers) you
have driven.
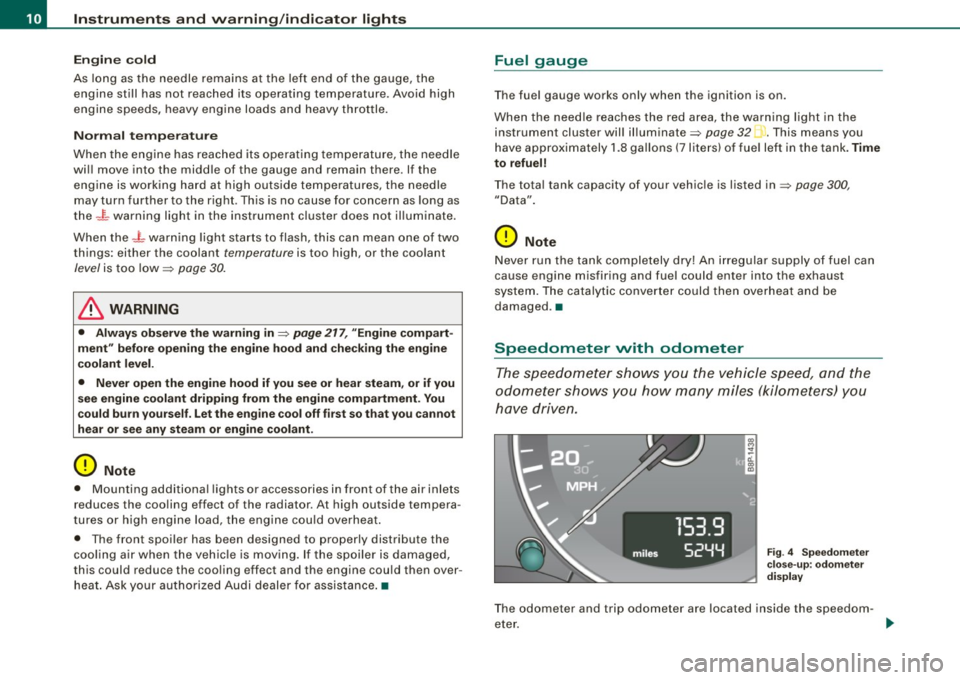
Fig. 4 Speedometer
close-up : odometer
display
The odometer and trip odometer are located inside the speedom
eter.
Page 33 of 324
-Turn off the engine.
- Check coolant level => page
233 .
-Add coolant if necessary => page 234 .
-Continue driving only after the engine coolant
warning/indicator light goes out.
- Contact your authorized Audi dealer for assistance if
necessary.
If the engine coolant level is correct, then the radiator fan may be
the cause of the malfunction.
If the generator warning/indicator light should also illuminate
=> page 14, then the fan belt may be damaged .
& WARNING
• If your vehicle should break down for mechanical or other
reasons, park at a safe distance from moving traffic, turn off the
engine and turn on the hazard warning lights
=> page 58, "Emer
gency flasher
A".
• Never open the hood if you see or hear steam or coolant
escaping from the engine compartment -you risk being scalded.
Wait until you can no longer see or hear steam or coolant
escaping.
• The engine compartment of any vehicle is a dangerous area.
Before you perform any work in the engine compartment, turn off
the engine and allow it to cool . Follow the warning stickers
=> page 217, "Engine compartment" .
0 Note
Do not continue driving if the -IL symbol illuminates. There is a
malfunction in the engine cooling system -you could damage your
engine. •
Controls and equip
ment
Driver information display
Engine oil pressure malfunction 'l=;:f.
The red engine oil pressure warning symbol requires
immediate service or repair.
If the 'l=::7-: symbol appears in the display and flashes, the oil
pressure is too low. In addition to the symbol, the following
message also appears in the display:
Switch off engine and check oil level
-Pull off the road and stop the vehicle.
Shut the engine down.
Check the engine oil level=> page
229.
Contact your authorized Audi dealer for assistance if
necessary.
Engine oil level too low
If the engine oil level is too low, top off oil to the proper level
=> page 230.
Engine oil level OK
If the ~ symbol star ts flashing again even though the engine oil
level checks OK on the dipstick,
do not start driving again and do not
let the engine run at idle .
Instead, contact your authorized Audi
dealer for assistance.
[ i] Tips
• The engine oil pressure symbol ~ is not an indicator for a low
engine oil level. Do not rely on it. Instead, check the oil level in your
engine at regular intervals, preferably each time you refuel, and
always before going on a long trip.
• The yellow oil level warning indication requires oil refill or
workshop service without delay. Do not wait until the red oil pres
sure warning symbol
~ starts to flash before you respond to the ...
I • •
Page 47 of 324
Anti-theft alarm system
The anti-theft alarm triggers an alarm if anyone attempts
to break into the vehicle.
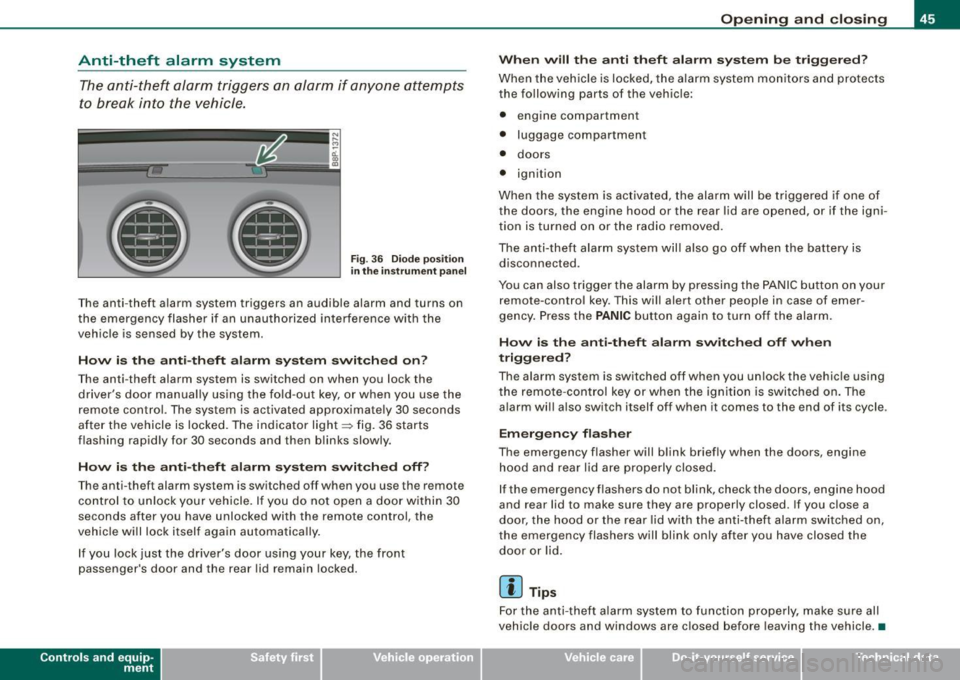
F ig . 3 6 D iod e posi tion
in th e instrum ent p an el
T he anti-theft alarm system triggers an audible alarm and turns on
the emergency flasher if an unau thorized interference with the
vehicle is sensed by the system .
How is the anti -theft alarm sy ste m switched on ?
The anti -theft alarm system is switched on when you lock the
driver's door manually using the fold -out key, or when you use the
remote control. The system is activated approximate ly 30 seconds
after the vehicle is locked. The indicator light~ fig. 36 starts
flashing rapid ly for 30 seconds and then b links slowly .
How i s the anti -theft alarm s yste m switch ed off?
The anti-theft alarm system is switched off when you use the remote
co ntrol to un lock your vehicle. I f you do not open a d oor within 30
seconds after you have unlocked with the remote control, the
vehicle will lock itself again automatically.
I f you lock just the driver's door using your key, the front
passenger's door and the rear lid remain locked.
Con tro ls and eq uip
ment
Op ening and clo sing
When will th e anti th eft alarm sy ste m b e trigg ere d ?
When the vehic le is locked, the a larm system monitors a nd protects
the following parts of the vehic le:
• engine compartment
• luggage compartment
• doors
• ignition
When the system is ac tivated, the alarm will be trigge red if one of
the doors, the engine hood or the rear lid are opened, or if the igni
t ion is turned on or the radio removed.
The anti-theft alarm sys tem will also go off when the battery is
disconnected .
You can also trigger the alarm by pressing the PA NIC button on your
remote-contro l key. This will alert other people in case of emer
gency. Press the
PANIC button again to turn off the alarm.
How is th e anti-th eft alarm sw itched off when
triggered ?
The alarm system is switched off when you unlock the vehic le using
the remote -cont rol key or when the ignition is switched on . The
alarm wi ll also switch itself off when it comes to the end of its cycle .
Emergency flasher
The emergency flasher will blink briefly when the doors, engine
h o od and rear lid are properly closed.
If the emergency flashers do not blink, check the doors, engine hood
and rear lid to make sure they are properly closed. If you close a
door, the hood or the rear lid with the anti -theft alarm switched on,
the emergency flashers will blink only after you have closed the
door or lid.
[ i ] Tips
For the anti -theft a larm sys tem to func tion properly, make su re all
vehicle doors and windows are closed before leaving the vehicle . •
Vehicle care I I irechnical data
Page 120 of 324

• ..__T_ r_a _n_ s_ m_ is_ s_io _ n ______________________________________________________ _
& WARNING
• Never p lace the selector lever in the R or P position while the
vehic le is moving -risk of an accident!
• With the eng ine running , it is necess ary to hold the vehicle w ith
the foot brake in all selector lever positions (except P and N },
because even at idle speed the transfer of power is never
c ompletely interrupted -the vehicle "creeps ". If the vehicle i s
stationary and the transmi ssion is engaged , the eng ine should
never be speeded up unintentionally (e.g . manually from under the
hood }. Otherwi se the vehicle will immediately start to move -
sometimes even if the parking brake is firmly applied -risk of an
accident !
• Before you or other persons open the hood and work on a
running engine , the selector lever mu st be moved to P and the
parking br ake applied firmly -risk of an accident! Follow the
warning stickers=>
page 217 , "Engine compartment ".
[ i J Tips
If you have inadvertent ly shift ing into N while the vehicle is mov ing,
you should remove your foot from the accelerator and wait unti l the
engin e speed ha s dropped to id le befor e shifting bac k to Dor S . •
Ap plies to vehicles: withs tro ni c®
Selector lever lock
The selector le ver l ock prevents a gear from being
en ga ged acc ide ntall y and unin ten tionally settin g the
v ehi cle in motion.
Fig . 1 21 Se lecto r l ever
l oc ks
T he sel ector lever loc k is released as follo ws:
Sw it c h t he igni tion on.
S tep on t he brake pedal
and sim ultaneous ly hold down
t h e release b utton.
Automatic select or lever lock 6ll
The selector lever is locked in the P and N positions when the igni
t io n is on . To move the lever fr om these positions th e driver must
depress the brake pedal. As a reminder to the driver , the following
wa rn ing appears in the instru ment cl uster display when the selecto r
is in P and N :
APPLY BRAKE WHEN ENGAGING GEAR WITH VEHICLE
S TATIONARY
In addition, the symbol~ for the automat ic selector lever lock illu -
mi nates in t he sh ift ga te . .,_
Page 210 of 324

., __ C_ le_ a _ n_i_n ~g _ a_ n_ d __ p_r _o _t _e _c_ t_ i_o _n ___________________________________________ _
& WARN ING (c o ntinu ed )
• Always read and heed all WARNINGS and oth er informat ion
~ page 2 06.
0 Not e
• Never try to remove dirt, mud or dust if the surface of the vehicle
is dry. Never use a dry cloth or sponge, since this cou ld scratch your
veh ic le's paint or w indows .
• Never wash your car in bright sunlight. Drops of water act as
magnifying lenses and may damage your paint.
• When you wash your car in the winter : if you rinse your vehic le
with a hose, be careful not to aim the stream of water directly at
locks, or at door or hatch openings -they can freeze shut.
• Never use sponges designed to remove insects, or any kitchen
scouring s ponges or simila r products. They can damage your paint
finish .
• Never use a dry cloth or sponge to c lean the head ligh ts. O nly use
wet cloths or sponges to prevent scratches . It is best to use soapy
water.
c£, For the sake of the environment
In the interest of the environment, the vehicle shou ld on ly be
washed in specia l wash bays. •
Washing your vehicle with a power washer
Cleaning the exterior of your car wi th a high -p ressure
power washer is safe as l ong as y ou observe a few simple
rules .
-Before us ing the p ower washer, make s ure you have read
and unde rs too d t he WAR NINGS=:>
& in "General in for
mati on" o n
page 206.
-Always follow the operati ng inst ructions fo r th e pow er
washer.
Make sure that the jet on t he spray hose produces a "fan
sha ped sp ray".
D o
not hold the spray nozzle too close to soft materials.
When cleaning the vehicle with a power washer always follow the
opera ting instructions. Th is applies particularly to the
operating
pre ssure
and the spraying distance . Maintain a sufficient distance
t o soft ma teria ls such as rubber hoses a nd sound/vibrat ion dead
ening materia ls (particularly on the underside of the engine hood).
Do not use a jet which sprays water in a
direct stream o r one tha t
has a
rotating j et.
Water temperature shou ld not exceed 140 °F (60 °Cl.
& WARNING
Never wash tires with a jet that sp ray s water in a dire ct stream .
This could c ause invi sible damage to the tire s and we ake n them ,
even if the spray i s from a relatively long distan ce and for a short
time . D amag ed and weakened tires can fail and cau se ac cident s
a nd p erson al injury.
0 Note
To avoid damaging your vehic le, always make sure that there is
suffic ient distance between the spray hea d and so ft m ateria ls like
rubber hoses, plastic parts and sound -deadening materials . Never
aim the spray head at the same p oint for a l ong time . This a lso
applies to cleaning head lights and painted bumpers . Remember:
t he c loser the n ozzle is to the surface of the materia l, the greater the
stress on the material. •
Page 226 of 324
___ C_h_ e_ c_k _in --== g'-- a_n _d_ f_il _li _n ..:::g:::..- ___________________________________________ _
Checking and filling
Engine hood
Releasing the engine hood
The engine hood is released from inside the vehicle.
-Open the driver's door .
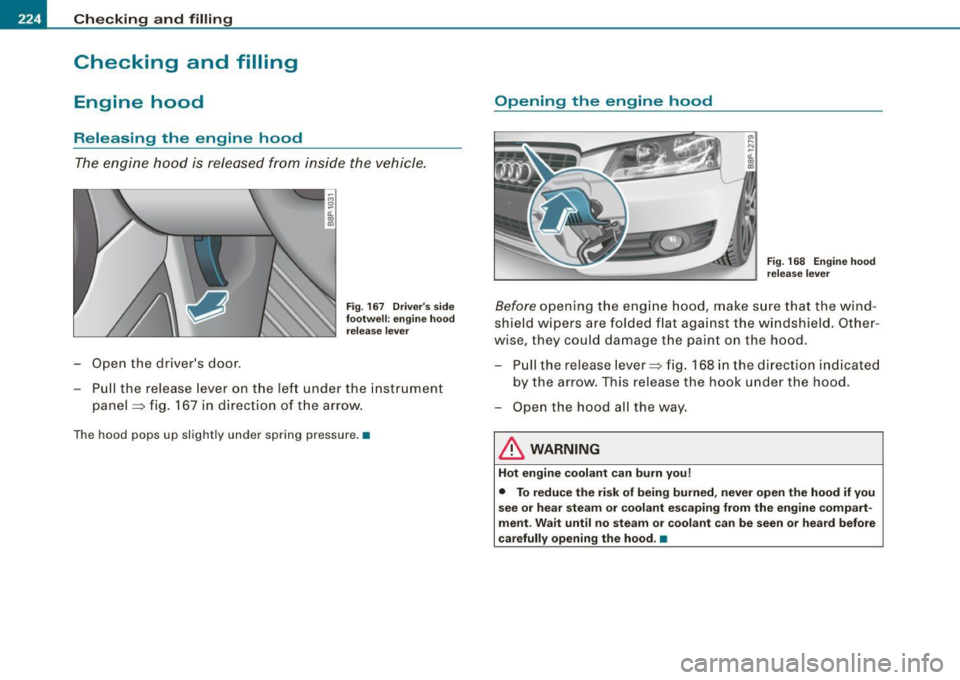
Fig. 167 Driver's side
footwell: engine hood
release lever
-Pull the release lever on the left under the instrument
panel
~ fig. 167 in direction of the arrow.
The hood pops up slightly under spring pressure. •
Opening the engine hood
Fig. 168 Engine hood
release lever
Before opening the engine hood, make sure that the wind
shield wipers are folded flat against the windshield. Other
wise, they could damage the paint on the hood.
Pull the release lever~ fig. 168 in the direction indicated
by the arrow. This release the hook under the hood.
- Open the hood all the way.
& WARNING
Hot engine coolant can burn you!
• To reduce the risk of being burned, never open the hood if you
see or hear steam or coolant escaping from the engine compart
ment. Wait until no steam or coolant can be seen or heard before
carefully opening the hood. •
Page 227 of 324
Checking and filling -
--------------~-
•
Closing the engine hood
-Pull the hood dow n until the pressure fro m t he s trut is
r edu ce d .
- Let the hood
drop dow n and latch in p lace . Do not try to
pus h it shut ;
it ma y fail to enga ge => & .
& WARNING
A hood that is not completely latched could fly up and block your
view while driving.
• When you close the engine hood, check it to make sure the
safety catch has properly engaged. The hood should be flush with
the surrounding vehicle body parts .
• If you notice while driving that the hood is not secured prop
erly , stop at on ce and close it. •
Working in the engine compartment
B e e speci ally ca reful wh ene ver you work in th e e ng in e
co mpartmen t!
Whenever you must perform any work in the engine compartment ,
for example checking and filling different fluids , there is a ri sk of
injury , burns and accidents . To prevent personal injury always
observe the following WARNINGS . The engine compartment of any
vehicle is a hazardous area!
~ &
& WARNING
To help avoid injury , before you check anything under the hood :
• Turn off the engine.
• Remove the ignition key .
• Set the parking brake fully .
& WARNING (continued )
• Move selector lever of automatic transmission to "P" (Park) ;
put manual transmission in Neutral .
• Always let the engine cool down . Hot components will burn
skin on contact.
• To reduce the risk of being burned , never open the hood if you
see or hear steam or coolant escaping from the engine compart
ment . Wait until no steam or coolant can be seen or heard before
carefully opening the hood .
• Keep children away from the engine compartment .
• Never spill fluids on hot engine components . They can cause a
fire.
• Never touch the radiator fan. The auxiliary electric fan is
temperature controlled and can switch on suddenly.
• Never open the coolant reservoir cap when the engine is still
warm . The coolant system is pressurized and hot coolant could
spray out!
• Protect your face , hands and arm from steam or hot engine
coolant by placing a thick rag over the cap when you open the
coolant reservoir .
• If work on the fuel system or the electri cal system is necessary :
- Always disconnect the battery .
- Never smoke or work near heaters or open flames . Fluids in
the engine compartment could start a fire .
- Keep an approved fire extinguisher immediately available.
• To avoid electrical shock and personal injury while the engine
is running or being started , never touch :
- Ignition cables
- Other components of the high voltage electronic ignition
system .
• If you must perform a check or repair with the engine running : ..,
Vehicle care
I t •
Page 314 of 324
-Al
phab eti ca l ind ex
_.:_.__ ____ _...::.:...::..;.:___ ________________ _
Emergency flashers . . . . . . . . . . . . . . . . . . 58
Eme rgency operation
panoramic sliding sunroof . .... ..... 49
Rear lid . .... ... .. .... .... ...... .. 43
Emergency release for selector lever . . . 123
Emergency starting . . . . . . . . . . . . . . . . . 287
Emergency towing . . . . . . . . . . . . . . . . . . 292
Engine 4-cylinder (200 hp) ..... ... .... ... 226
6 -cylinder (250 hp) ............... 227
Coolant .......... .... ....... .... 232
Hood .... ... .. ...... .... ... .... . 224
Starting .... .... .... .... .... 108, 109
Starting with jumper cables ...... . 287
Stopping ... .... .... .... ........ 109
E . ngine compartment . .... .... .... .. .
Safety instructions ...... .... .... .
226
225
Working in the engine compar tment 225
Engine coolant system .............. 232
Adding coolant .... .... .......... 234
Checking coolant level .... .... .... 233
Checking the engine coolant leve l .. 233
Radiator fan . . . . . . . . . . . . . . . . . . . . . 235
Engine coolant temperature
Gauge .............. .............. 9
Engine cooling system
Malfunction ...... .... ....... .... . 30
E . d ngine ata ...... .... ........... .. . 300
Engine hood Closing ......................... 225
Release lever . ............... .... 224
R I . d . e easing an opening .... ... ... .. 224 Engine
oil .... ...... ........ ... .... . 227
Adding ...... ... .. .... .... ...... 230
Additives ....................... 230
Changing .. ............. ........ 231
Check ing the engine oil level .... ... 229
Indications and conditions requiring extra checking .......... ...... ...... 229
Oil consumption ................. 229
Oil grades . .... ...... ... .. .... ... 227
Recommended oil check intervals .. 229
Specification and viscosity ........ 227
Engine oil level ... ..... .. ...... ...... 32
Engine oil pressure (malfunction) ... .. . 31
Engine oil sensor defective ............ 32
Engine speed limitation .. .... .... .... . 32
Environment
B k. . d
rea -in peno .... .... .... .... . . 197
Catalytic converter . . . . . . . . . . . . . . . 198
Disposing of your vehic le battery ... 237
Driving at high speeds . . . . . . . . . . . . 199
Driving to minimize pollution and noise .
199
Fuel ............................ 221
Fuel economy . . . . . . . . . . . . . . . . . . . 199
Leaks under your vehicle . .... ..... 225
Letting the vehicle stand and warm up ..
200
Proper disposal of drained brake fluid
236
Proper disposa l of
di ra ined engine
coo lant .. .... ... .... .... .... ... 234
Proper disposa l of drained engine oil
230,231
Recycling used engine oil .. .... ... 230 Unleaded fuel
...... ... .. ... .... . 219
What should I do with an old battery?
237
EPC
See Electronic power control . . . . . . . . 13
ESP
See Electronic Stability Program .... 190
Event Data Recorder (EDR) ... .... .... . 190
Expans ion tank 233
F
Fahrenheit
Switching between Fahrenheit and Centigrade . .... .. ... ... .... .... 103
Fan Adjusting the fan speed .. .... .. .. . 103
Cl imate controls ...... ...... .... . 103
Radiator .... .... .... ... .. .... .. . 235
Fastening eyes ... ........ .... .... ... 84
Flat tire Changing ....................... 272
Floor mats . ....... ..... ... .... .... . 132
Fog lights, front ...... .... ... ... ... .. 56
Folding master key with remote control . 35
Foot pedals . ... .. .... .... ...... .... 132
For the sake of the environment
Gasoline fumes and the environment 221
Letting your engine warm up . ..... . 109
Reducing engine noise by upshifting
early ... .. .... .... ... .... .... .. 8, 9
Refueling .. ........... ........ .. 221
Page 318 of 324
___ A_l.:,. p _h_ a_ b_e _t _ic _ a_l _in _ d_e _x ____________________________________________ _
Passive safety system . . . . . . . . . . . . . . . 126
Pedals . .... ... .. .... .... .... ...... 132
Physical p rinciples of a frontal collision 138
Polish ing ... ... ... .. ... .... .... .... 209
Power locking switch .. ... .... ...... .. 41
Rear center console ... ........ .... 42
Power locking system . . . . . . . . . . . . . . . . 37
Convenience close/open feature .. ... 47
Locking and unlocking the vehicle from inside ... .... ... .... .... ..... .. . 41
Opening and closing the windows .. . 47
Operating locks from with k ey . ..... 40
Rear lid .. .. .. .. .. .... .... ...... .. 42
Remo te control . . . . . . . . . . . . . . . . 36, 39
Un locking and locking vehicle .. ... .. 39
Power outlets . . . . . . . . . . . . . . . . . . . . . . . 93
Power seat Adjusting the seatback ..... ........ 77
Adjustment . ...... .... .... ... .... 76
Power steering
See Electro-mechanical power assist . 16 ,
195
Power sunroof
See panoramic sliding sunroof .... .. 48
Power window switches . . . . . . . . . . . . . . 46
In the driver's door ................ 46
Reactivating the system . . . . . . . . . . . . 48
Pregnant wom en
Special considerations when wearing a safety belt . . . . . . . . . . . . . . . . . . . . . 143
Proper occupant sea ting posi tions .... 128
Proper safety belt position . . . . . . . . . . . 142 Proper seating position
Front passenger . . . . . . . . . . . . . . . . . 129
Occupants .... ...... .... ... .. ... 128
Rear passengers 130
a
Quartz clock ...... ..... .. .... .... .... . 9
quattro®
See All Wheel Drive . . . . . . . . . . . . . . . 196
Question
R
What happens to unbelted occupants? ..
139
Why safety belts? . . . . . . . . . . . . . . . . 137
Radiato r fan . .... .... ...... .... .... . 235
Radio Replacing . .... ... .... .... .... ... 306
Rain sensor defective ... ... .... ... .... 34
Reading light
Rea r ..... ..... ...... .... .... .... . 61
Reading lights
Front ..... ..... ... .... ... .... .... 60
Rea r ... ... .... ... ... .. ...... ..... 60
Rear armrest .... ... .. .... .. .. ... .... 82
Rea r ashtray . .... ...... .... ... .. .... 93
Rear lid
Emergency release .... .... .... .... 43
Lock ing/unlocking . ... .. ....... ... . 42
Rear light defective . . . . . . . . . . . . . . . . . . 33
Rear power locking switch ... .... .... . 42 Rear seat bottom
...... .. .... .... .. . . 83
Rear view mirror
Inside rear view mirror ............ . 69
Rear window defogger with air-conditioning ... ... .. ..... 105
Refuelling ....... .... .... ...... ..... 221
Release lever for engine hood ..... .... 224
Remo te con trol . ...... .. .. ... ..... .. . 36
Resetting remote control ... .... .... 40
Un locking and locking . .... .... ... . 39
Remote mast er key
Ba ttery replacement ............... 36
Check light .... .... .... ..... .. ... . 36
Repair manuals ... .... ... .... .... .. . 303
Repairs Airbag system .... .... .... .... ... 161
Replacing Wheel rims . ... .... .... .... .. 255, 257
Replacing a fuse ... ... ....... .... ... 280
Replacing a sound system . .... .... ... 306
Replacing light bulbs . ...... .. .... ... 285
Replacing tires and wheels ........... 256
Reporting Safety Defects .. ....... 135, 136
Reset but ton . . . . . . . . . . . . . . . . . . . . . . . . 10
Resetting remote control ...... .... .... 40
Retractor . . . . . . . . . . . . . . . . . . . . . . . . . . 141
Reverse Automatic transmission .... .... .. . 117
Reversible cargo area floo r ........ .... 87