lights AUDI S3 2012 Owner's Manual
[x] Cancel search | Manufacturer: AUDI, Model Year: 2012, Model line: S3, Model: AUDI S3 2012Pages: 280, PDF Size: 70.11 MB
Page 54 of 280

52 Clear vis ion
Light switch @c:::> page 51, fig . 49 has the fo l
lowing functions:
Door cont act activ ation
.. Move t he sw itch to the center posit ion. The
f orward dome light is turned on/off by the
contact switches on any of the doors.
Forw ard dom e light on
.. Move the sw itch to position I. The forward
dome light goes on and stays on regard less
of door position.
Forw ard dome light off
.. Move th e sw itch to position 0 . The light will
not go on regardless of door position.
~ F o rward re a ding light s
.. Press the left or right switch @ to switch
the left or right forward reading light on or
off.
Glove compartment light
.. Open the glove compartment -the light in
the g love compartment automatically illu
mi nates as long as the side marker lights or
headlights are on. When you close the g love
compartment, the light goes off.
With the interior lig ht switch at the door con
tact (center) position, the forward dome light illum inates whenever you unlock the vehicle
or open a door. The dome light goes out after
approximately 30 seconds after you have
closed the door. L ikewise, when you lock your
vehicle or switch on the ign ition, the dome
l ight goes out.
If you leave a door open, the dome light will
go out after ten minutes to conserve battery
cha rge.
A dimmer automatically controls the bright
ness of the lights when they are sw itched on .
Ambient lighting
Applies to vehicles: with light package
The ambient lighting illuminate important
controls for you .
0 0
Fig . 51 Contro l panel above w inds hield: positio n of
amb ient light bulbs
0 ,..
cL
m a,
When you switc h on the ignition, the lights in
t h e door handles illum inate .
When the side marker lights or headlig hts are
switched on, the center conso le is i lluminated
from the ambient light located above the
windshield .
You cannot manua lly turn off these lights.
Rear reading light
Fig. 52 Rear reading light
Rear reading light
Press the sw itch ~ to turn on and off the
readi ng lig ht.
N
0 ,..
-cL m a,
Page 56 of 280
54 Clear vis ion
Depending on outside temperature and vehi
cle speed, the mirror surfaces are heated until
the ignition is switched off -even if the rotary
knob is no longer in position@.
You are well-advised to fold the exterior mir
rors in when maneuvering in tight spaces or
when leaving the car parked close to other ve
hicles.
(D Note
- Cu rved mirror surfaces (convex or spheri
ca l*) increaseyourf ield of view. Remem
ber that vehicles or other objects wi ll ap
pear smaller and farther away than when
seen in a flat mirror. If yo u use this mir
r or to est imate distances of following ve
hicles when changing lanes, you could
estima te incorrect ly and cause an acci
dent.
(D Tips
I f the re should be a malfunction in the
e lec trical system, you can still adjust the
exterior m irrors by pres sing the edge of
the mirror.
Dimming the mirrors
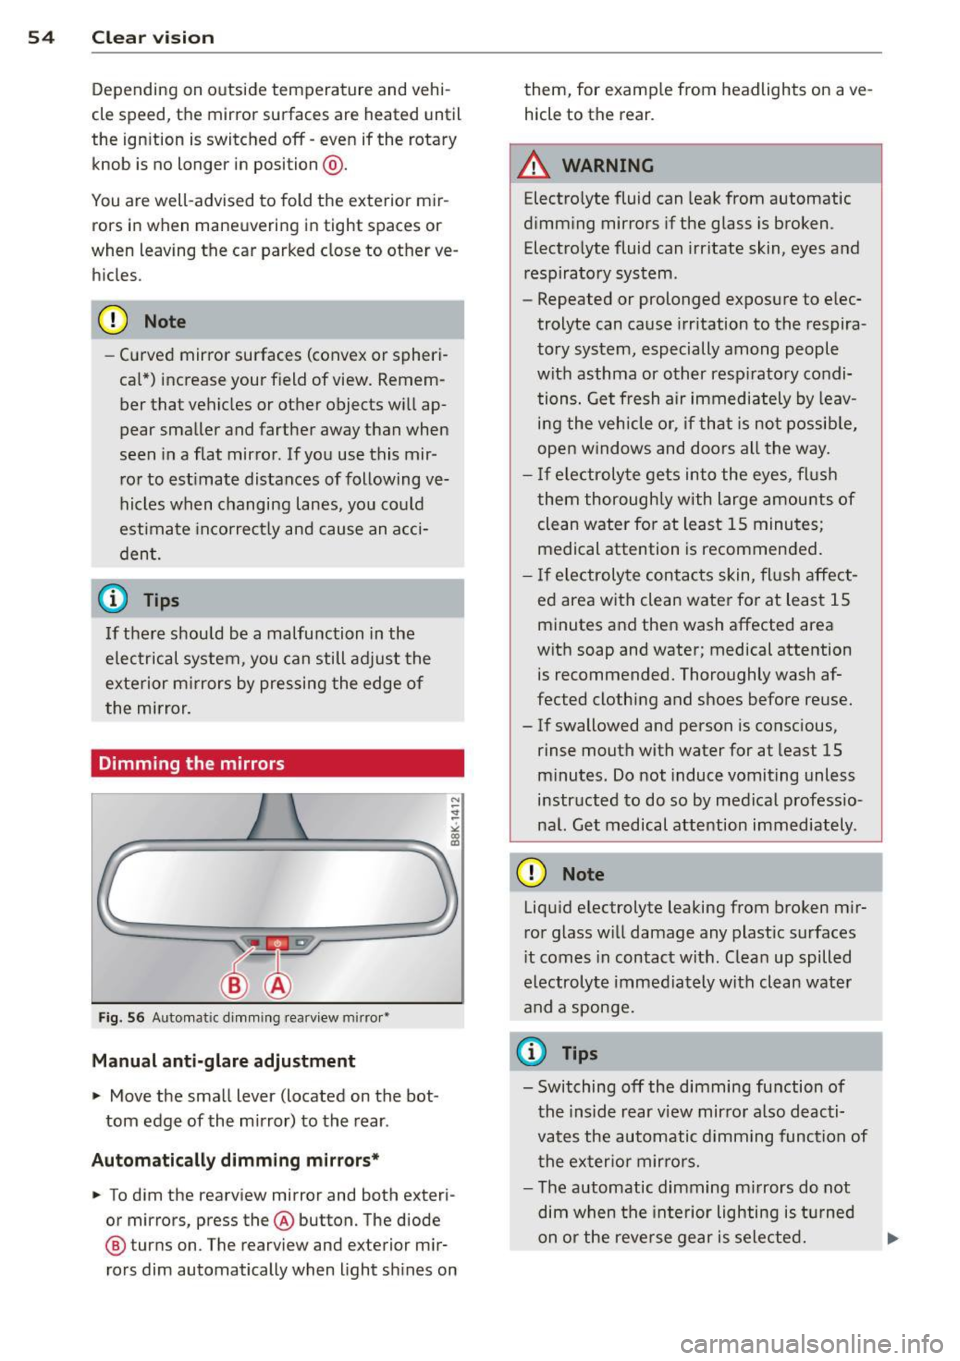
F ig. 56 Automatic dimm ing rearview mirror•
Manual anti-glare adjustment
• Move the small lever (located on the bot
tom edge of the mirror) to the rear.
Automatically dimm ing mirror s*
• To dim the rearview mirror and both exteri
or mirrors, press the® button. The diode
@ turns on. The rearview and exterior m ir
rors dim automatically when light sh ines on them, for
example from headlights on ave
hicle to the rear.
A WARNING
Electro lyte fluid can leak from automatic
dimming mirrors if the glass is broken.
Electro lyte fluid can irr itate skin, eyes and
respiratory system.
- Repeated or prolonged exposure to elec
trolyte can cause irr itation to the respira
tory system, especially among people
with asthma or other resp iratory condi
tions. Get fresh air immediately by leav i n g the vehicle o r, if that is not possib le,
open windows and doors all the way.
- I f electrolyte gets into the eyes, flus h
them thoroughly with large amounts of clean water fo r at least 1 5 minutes;
medical attention is recommended.
- I f electrolyte contac ts skin, fl ush affect
ed area with clean water for at least 15
minutes and the n wash affected area
with soap and water; medical attention
is recommended. Thoroughly wash af
fected clothing and shoes before reuse.
- If swallowed and person is conscious,
rinse mouth with water for at least 15
minutes. Do not induce vomiting unless
instructed to do so by medical professio
nal. Get medical attention immediately.
(D Note
Liqu id electrolyte leaking from broken m ir
r or glass w ill damage any plastic surfaces
i t comes in contact with. Clean up spilled
electrolyte imme diately with clean water
and a sponge.
(D Tips
- Switching off the dimming function of
the ins ide rear view mir ro r also deacti
vates the automatic dimming function of
the exter io r mir ro rs.
- The automatic dimming m irrors do not
dim when the inte rior lighting i s tur ned
on or the reverse ge ar is sele cted. .,.
Page 58 of 280
56 Clear vis ion
as rain or drizz le re duces visibi lity
through th e windshield.
- The windshie ld must not be treated with
water-repe llent materials. They can in
crease glare under poor visibility condi
t ions such as wetness, darkness, or when
the sun is low on the horizon . In addi
t ion, they can cause th e windshield wip
ers to chatter.
(D Note
- In the case of frost, check whether the
windsh ield wiper b lades are frozen to
the windshield. Switching on the wind
shield wipers can damage the wiper
blades!
- Do not use the wipers to clear a frosted
window . U si ng the w ipers as a conven
i en t ice s craper will destroy the wiper
blades .
- Prior to using a car wash, the windshield
wiper system m ust be switched off (lever
i n position 0) . This helps to prevent unin
tentiona l switching on and damage to
the windshie ld wiper system.
(D Tips
- The w indshield wipers are swi tched off
when the ignition is turned off. Activate
the windshie ld wipers after the ignition
i s sw itched back on by mov ing the w ind
shield wiper lever to any pos it ion.
- Worn or dirty windshie ld wiper blades
cause smearing, which can affect the op
eration of the light/rain sensor*. Check
the condition of your windshie ld w iper
blades regularly.
- The rai n sensor is part of the interval
wiping system. Tur ning off the ignition
will a lso deact ivate the rain sensor. To re
activate t he senso r, switch off the inter
val w iping function, then sw itch it ba ck
on aga in.
- Applies to vehicles with lig ht/ rain sen
sor: When the wipers are swi tched on
manu ally and in rain condi tions, the au
tomatic head lights* turn on¢
page 47,
·'t!.-Switching the headlights on and off
or off during the day when the wipers are
no longer operating. The automatic
head lights* funct ion is available in th is
case on ly when the light switch is in the
"A UTO" position¢
page 47, fig. 43.
-Make s ure the washer fluid reservoir in
the engine compartment is topped off
before going on a long trip. Look up
¢
page 211 for check ing and filling the
washer co nta iner .
- The wipers only operate with the hood
completely closed .
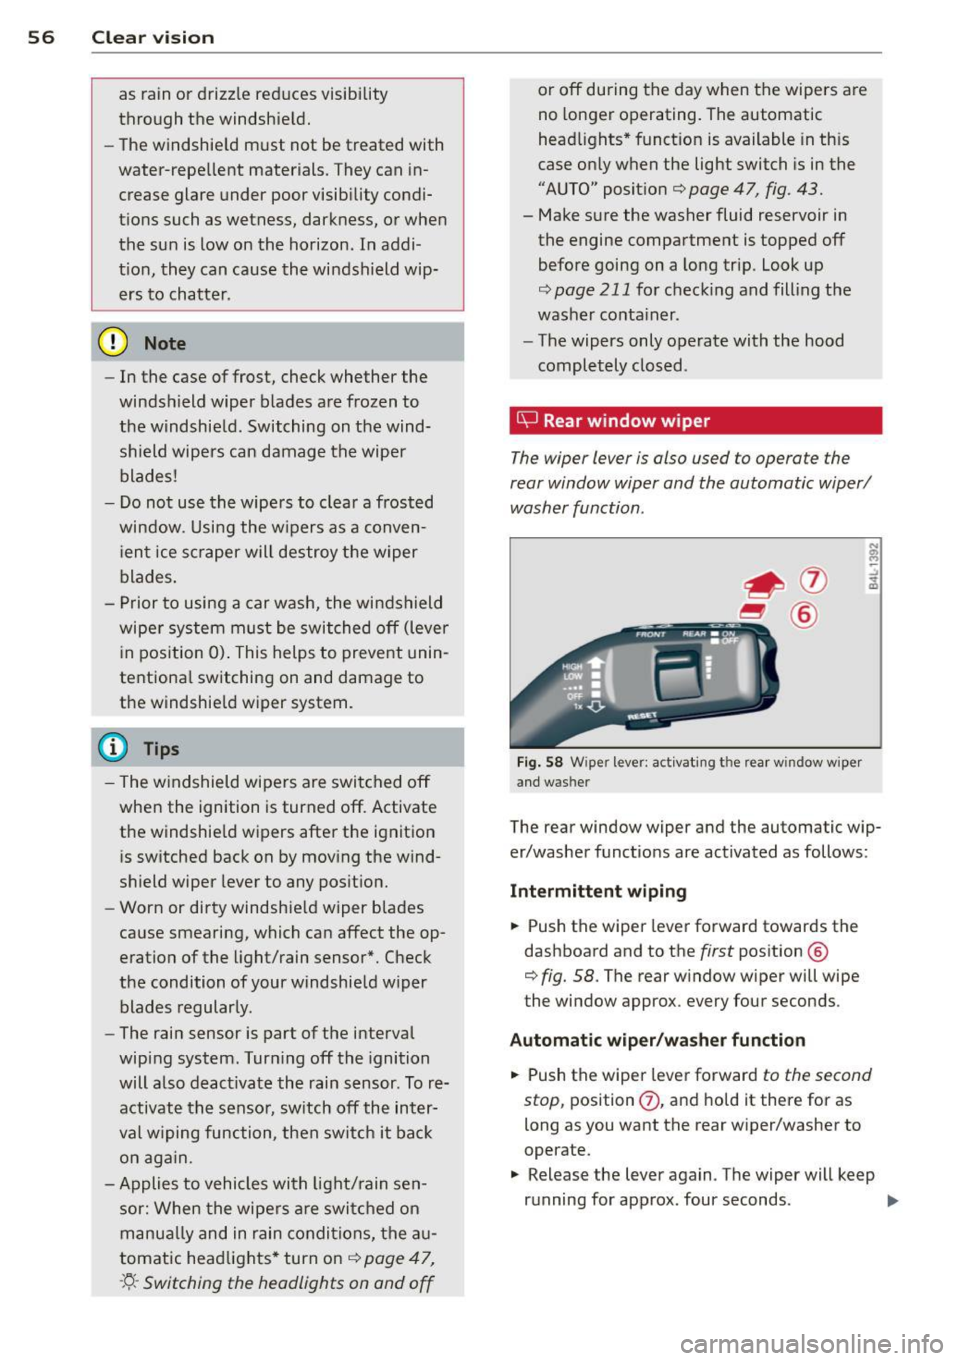
is;J Rear window wiper
The wiper lever is also used to operate the
rear window wiper and the automatic wiper/ washer function .
Fig. 5 8 W iper lever: activat ing the rear w indow w iper
and washer
The rear window wiper and the automatic wip
er/washer functions are activated as follows :
Intermittent wiping
.,. Push the wiper leve r forward towards the
dashboard and to the
first position @
¢
fig. 58. The rear w indow wiper will wipe
the window approx. every four seconds .
Automatic wiper /washer function
.,. Push the wiper lever forward to the second
stop,
position (j) , and hold it there for as
long as you want the rear w iper/washer to
operate.
.,. Release the lever again. The wiper will keep
running for approx. four seconds . .,,_
Page 78 of 280
76 Seats and storage
& WARNING
-Always remove objects from the instru
ment panel. Any items not put away
could slide around inside the vehicle
while driving or when accelerating or
when applying the brakes or when driv
ing around a corner.
- When you are driving make sure that
anything you may have placed in the cen
ter console or other storage locations
cannot fall out into the footwells. In case
of sudden braking you would not be able
to brake, depress the clutch or acceler
ate.
- Any pieces of clothing that you have
hung up must not interfere with the driv
er's view. The coat hooks are designed
only for lightweight clothing. Never hang
any clothing with hard, pointed or heavy
objects in the pockets on the coat hooks.
During sudden braking or in an accident -
especially if the airbag is deployed -
these objects could injure any passen
gers inside the vehicle .
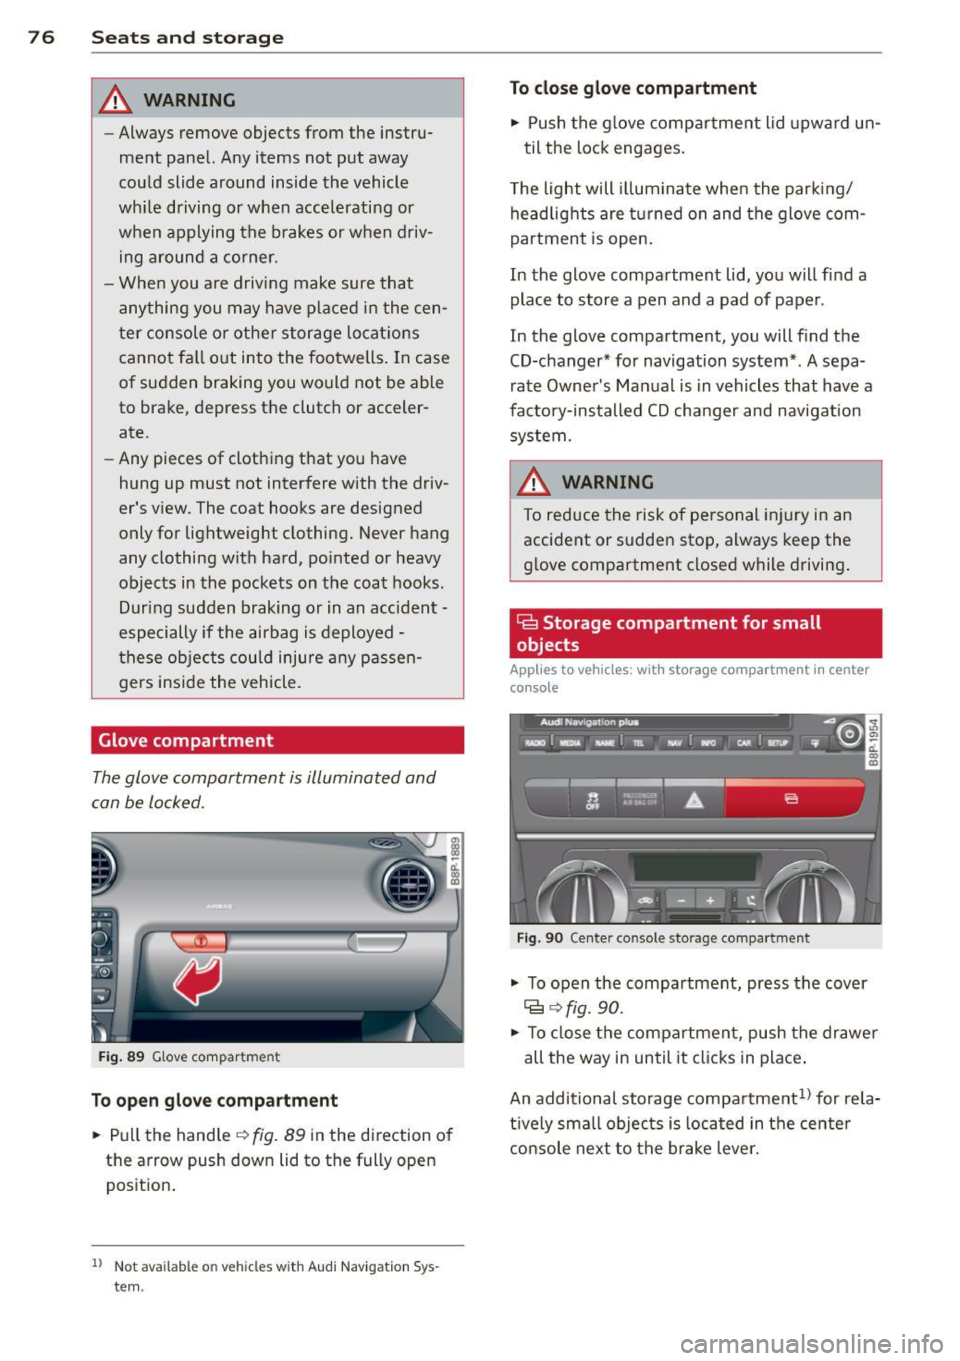
Glove compartment
The glove compartment is illuminated and
can be locked .
Fig. 89 Glove compar tment
To open glove compartment
"' Pull the handle~ fig. 89 in the direct ion of
the arrow push down lid to th e fully op en
position.
1 ) Not ava ilab le o n veh icl es with Audi N avigat ion Sys
t e m .
To close glove compartment
"' Push the glove compartment lid upward un-
til the lock engages.
The light will illuminate when the parking/
headlights are turned on and the glove com
partment is open.
In the glove compartment lid, you will find a
place to store a pen and a pad of paper .
In the glove compartment, you will find the
CD-changer* for navigation system* . A sepa
rate Owner's Manual is in vehicles that have a
factory-installed CD changer and navigation
system.
A WARNING
To reduce the risk of personal injury in an
accident or sudden stop, always keep the
glove compartment closed while driving.
Ga Storage compartment for small
objects
Applies to vehicles: with storage compartment in center
console
Fig. 90 Cen te r c onso le s torage compar tme nt
"' To open the compartment, press the cover
Cg ~fig. 90.
-
"' To close the compartment, push the drawer
all the way in until it clicks in place.
An additional storage compartment
1> for rela
tively small objects is located in the center
console next to the brake lever.
Page 91 of 280

Ignition lock and ignition switch
Ignition lock
The engine can be started or turned off with
the ignition key.
Fig. 102 I gni tion lock positio ns
Ignition off@
In position ¢ fig. 102@both the ignition and
engine are off, and the steering is locked.
To
lock the steering after you have removed
the ignition key, turn the steering wheel in ei
ther direction until you hear it lock into place.
You shou ld always lock the steering whenever
you leave your vehicle. This makes a vehicle
theft even more difficul t
q ,&.
Ignition on CD
If it is difficult to turn the key after you have
inserted it into the ignition lock, turn the
steering wheel back and forth. This will take
the load off the steering lock mechan ism and
you will be able to turn the key freely and
start the engine. On vehicles with a diesel en
g ine*, the system can preheat in this pos ition .
Starting the engine @
In this position the engine starts. While the
engine is starting, the power supply to the
headlights and other electrical consumers is
temporarily interrupted to conserve battery power. After the engine has started, release
the key and it will return to position @.
Before the starter can be operated again the
key must be turned back to position @. The
non-repeat lock prevents you from damag ing
the starter when the engine is running.
On the road 89
A WARNING
-Never remove the key from the ignition
lock wh ile the vehicle is moving. The
steering wheel will lock caus ing loss of
control.
- If you have to leave your vehicle - even
for just a minute -always remove the ig
nition key and take it with you. This is es
pecia lly important if you are going to
leave children behind in the vehicle. The
children could start the engine or use
other vehicle controls. Unsupervised use
of vehicle controls (for example, power
windows) can cause serious personal in
juries.
(D Tips
If the vehicle battery has been disconnect
ed and then reconnected, then you must leave the key in position @for about 5
seconds before you can start the engine.
Ignition key safety lock
Applies to vehicles: wit h automatic transmission
The ignition key can only be removed when
the selector lever is in the "P" (Park) position.
Place the selector lever in the "P" position be
fore switching off the engine .
After switching off the ign ition, the ignition
key can on ly be removed from the ignition
lock when the selector lever is in the "P"
(Park) position. After you have removed the
key, the se lector lever is locked and cannot be
moved.
Page 92 of 280
90 On the road
Starting and stopping
the engine
Starting the engine
The engine can only be started with your orig
inal Audi key.
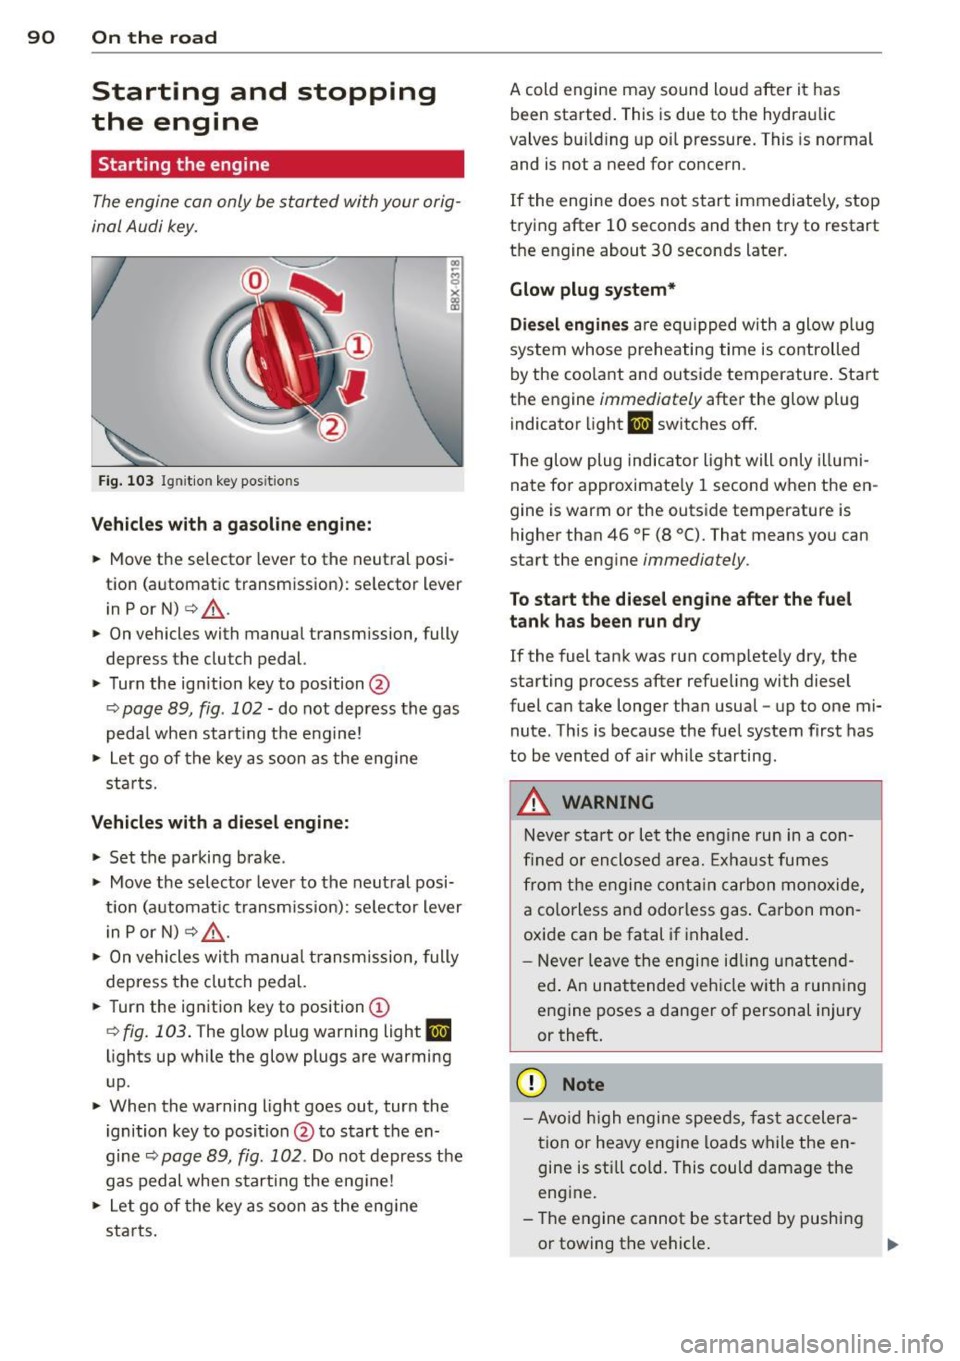
Fig. 10 3 Igni tio n key pos itio ns
Vehicles with a gasoline eng ine:
.. Move the selector lever to the neut ral posi
t ion (a utomatic transmission): se lector lever
in Por
N) c> .&_ .
.. On vehicles with manual transmission, fully
depress t he clu tch pedal.
.,. Turn the ig nition key to position @
¢ page 89, fig. 102 -do not d epress th e gas
peda l when start ing the e ngine!
.. Let go of the key as soon as the eng ine
s tar ts.
Vehicles with a diesel engine:
.. Set the parking bra ke .
.. Move t he sele cto r lever to the neut ral posi
t ion (a utomat ic tr ansm iss ion): se lecto r lever
i n
P or N) c> .&_ .
.. On vehicles wi th m anu al transm is s ion, fully
depress the clutch pedal.
.. Turn the ignition key to position
(D
¢ fig . 103 . The glow plug warning light II
lights up while the glow plugs are warming
up .
.. When the warning light goes out, tur n the
i gnition key to posi tion @to s tart the en
gine
c> page 89, fig . 102 . Do no t depress t he
gas pedal when s tart ing the engine!
.. Let go of the key as soon as t he eng ine
sta rts . A cold engine may sound lo
ud after it has
been started . This is due to the hydraulic
valves b uilding up o il pressure. This is normal
and is not a need for co ncern .
If the engine does not start immediate ly, stop
t rying after 10 seconds and then try to restart
t h e engine about
30 seconds later.
Glow plug system*
Diesel engines are e quipped w ith a glow pl ug
system whose prehe ating time is co ntrolled
by the coo la nt an d ou tside temperature . Sta rt
the engine
immediately after the g low plug
i ndicator light
II switches off.
T he glow plug indica to r ligh t will only illumi
nate fo r approximate ly 1 second w hen t he en
gine is warm or the outside temperature is
higher than
46 °F (8 °(). That means yo u can
start the eng ine
immedia tely .
To start the diesel eng ine after the fuel
tank has been run dry
If the fuel tank was r un comp lete ly dry, the
starting process after refue ling with diesel
fuel can take longer than usua l - up to one mi
nute . This is because the fue l system first has
to be vented of a ir wh ile s tarting .
A WARNING
-Neve r sta rt or l et the eng in e r un in a con-
fi ned o r encl ose d area. Exhaus t fumes
fr om the e ngine co ntain ca rbo n m onoxide ,
a colorless and odorless g as. Ca rbon mo n
oxi de can be fatal if inhaled .
- N ever le ave the engi ne id ling una tten d
ed . An unat tende d veh icle w ith a run ning
e ng ine poses a dan ger of personal injury
or theft .
(D Note
-Av oid high engine spee ds, fast a cceler a
t ion or heavy engine loa ds w hile the en
gine is st ill co ld. This could damage the
eng ine .
- The e ngine cannot be starte d by pushing
or towing t he vehicle . .,.
Page 98 of 280
96 Transmis sion
Transmission
Manual transmission
Gearshift lever
Applies to vehicles: with manual transmission
The clutch pedal must be depressed all the
way before you can start the engine .
The manual transmission in your Audi is
equipped with an
interlock-feature.
• Depress the clutch pedal all the way.
• Start the engine with the gearshift lever in
Neutral and the clutch pedal depressed.
(D Note
Always depress the clutch pedal fully when
changing gears. Do not hold the vehicle on
a hill with the clutch pedal partially de
pressed. This may cause premature clutch
wear or damage .
@ Tips
-Resting your hand on the gearshift lever
knob while driving will cause premature
wear in the transmission.
- The back-up lights go on when you shift
i nto Reverse with the ignition on.
Gearshift pattern (6-speed manual
transmission)
Applies to vehicles: with 6-speed manual transmission
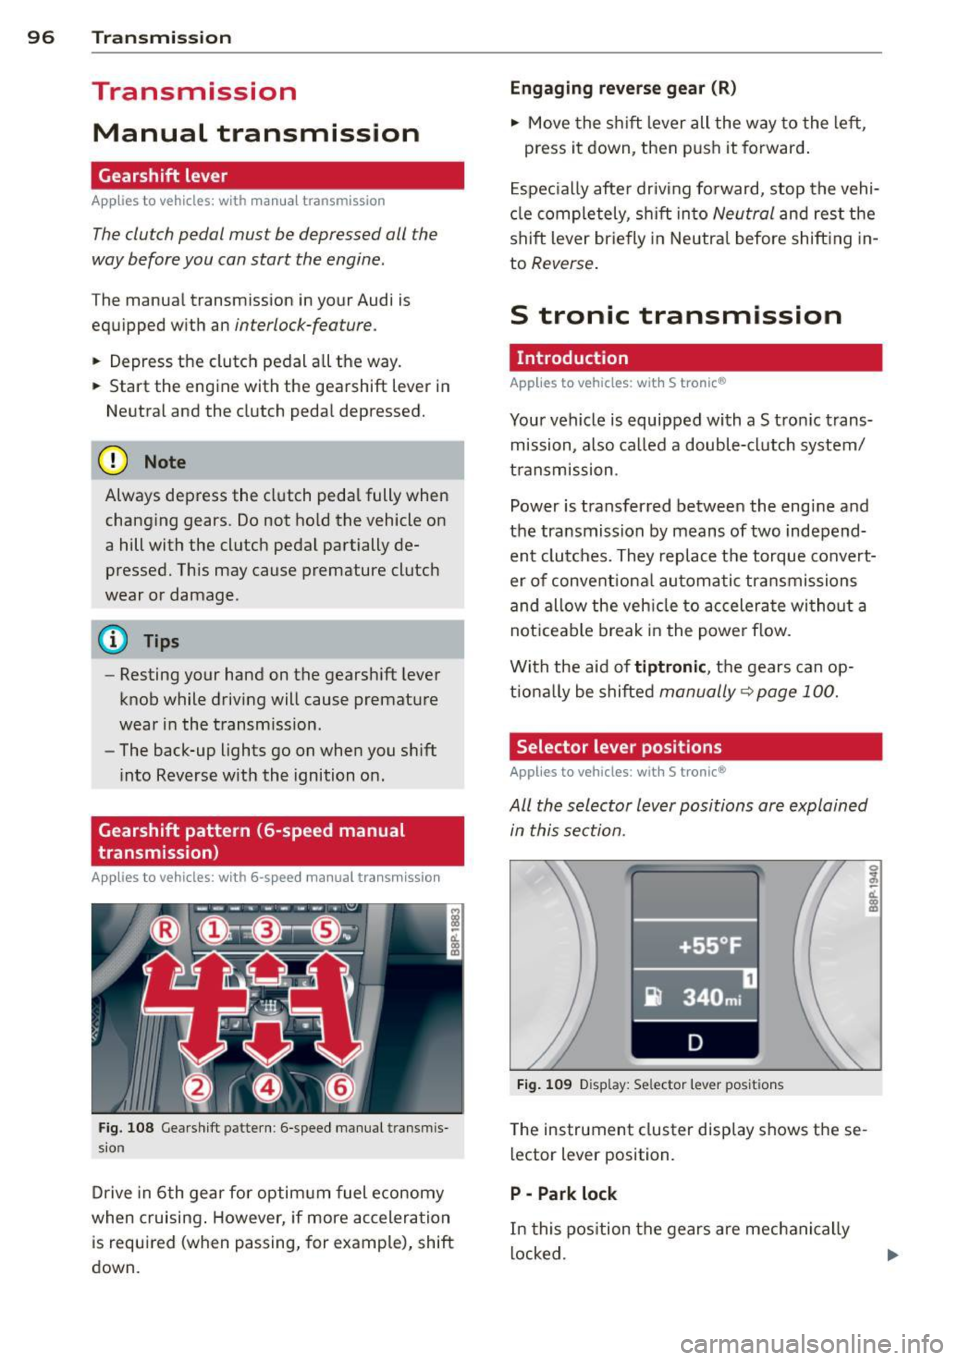
Fig. 108 Gearshift pattern: 6 -speed manual t ransmis
sion
Drive in 6th gear for optimum fuel economy
when cruising . However, if more acceleration
is required (when passing, for example), shift
down.
Engaging reverse gear (R)
• Move the shift lever all the way to the left,
press it down, then push it forward.
Especially after driving forward, stop the vehi
cle completely, shift into
Neutral and rest the
shift lever briefly in Neutral before shift ing in
to
Reverse.
S tronic transmission
· Introduction
Applies to vehicles: with S tronic®
Your vehicle is equipped with a S tronic trans
mission, also called a double-clutch system/
transmission .
Power is transferred between the engine and
the transmission by means of two independ ent clutches. They replace the torque convert
er of conventiona l automatic transmissions
and allow the vehicle to accelerate without a
not iceable break in the power flow.
With the aid of
tiptronic, the gears can op
t ionally be shifted
manually ~ page 100.
Selector lever positions
Applies to vehicles: with S tronic®
All the selector lever positions are explained
in this section.
~-. -·~•-~ _ .. _....,-l
•+55 °F '
i} 340 mi
D
Fig. 109 Disp lay: Se lector lever posi tions
The instrument cluster display shows these
lector lever position.
P -Park lock
In this position the gears are mechanically
locked.
Page 99 of 280
The park lock must only be engaged with the
vehicle
stationary c::> &.
To engage P and to remove the lever from th is
position, you must depress the release b utton
(button in the selector lever handle)
and si
multaneously you must step on the brake
pedal.
R · re vers e
I n th is position, reverse is engaged.
Reverse gear must only be engaged with the
veh icle
stationary and the eng ine runn ing at
id le speed
c::> ,&. .
To engage R, you have to depress the release
button
and s imultaneously step on the brake
pedal. In the R position, the back-up lights il
lum inate with the ign ition on.
N • N eutra l
The transmission is in neutral in this position .
D -Norm al po sition f or d riving forwa rd
In this position, the forward gears are auto matica lly shifted up and down, depending on
engine load and vehicle speed.
To engage S from N, the brake pedal must be
depressed at speeds be low S km/h or when
the vehicle is stationary
c::> & .
In certain circumstances (driving in the moun
tains for examp le) it can be beneficial to
switch temporarily to the manua l shift pro
gram
c::> page 100 in order to adjust the gear
ratios to driving cond itions
manually.
S -Sport setting
The S se tt ing shou ld be selected for sporting
d riving . The power reserves of the engine can
be fu lly exp loited through later upshifts.
To engage S from N, the brake pedal must be depressed at speeds be low S km/h or when
the vehicle is stationary
c::> & .
Tra n sm iss io n 9 7
A WARNING
- Never p lace the selector lever in the R or
P posit ion while the veh icle is moving -
risk of an accident!
- With the engine running, it is necessary
to hold the vehicle with the foot brake in all se lector lever positions (except P and
N), because even at idle speed the trans
fe r of power is never completely inter
rupted -the vehicle "creeps". If the vehi
cle is stationary and the transm ission is
engaged, the engine should never be
speeded up unintentionally (e .g. manual
ly from under the hood). Otherwise the
veh icle w ill immediately start to move -
sometimes even if the park ing brake is
firmly applied -risk of an accident!
- Before you or other persons open the
hood and work on a running engine, the
selecto r lever must be moved to P and
the park ing brake applied f irmly - risk of
an accident! Follow the warning sticke rs
c::> page 187, Engine compartment.
(D Tips
If you have inadvertently shift ing into N
while the vehicle is moving, you shou ld re
move you r foot from the accelerator and
wait unt il the engine speed has dropped to
idle before shifting back to Dor S .
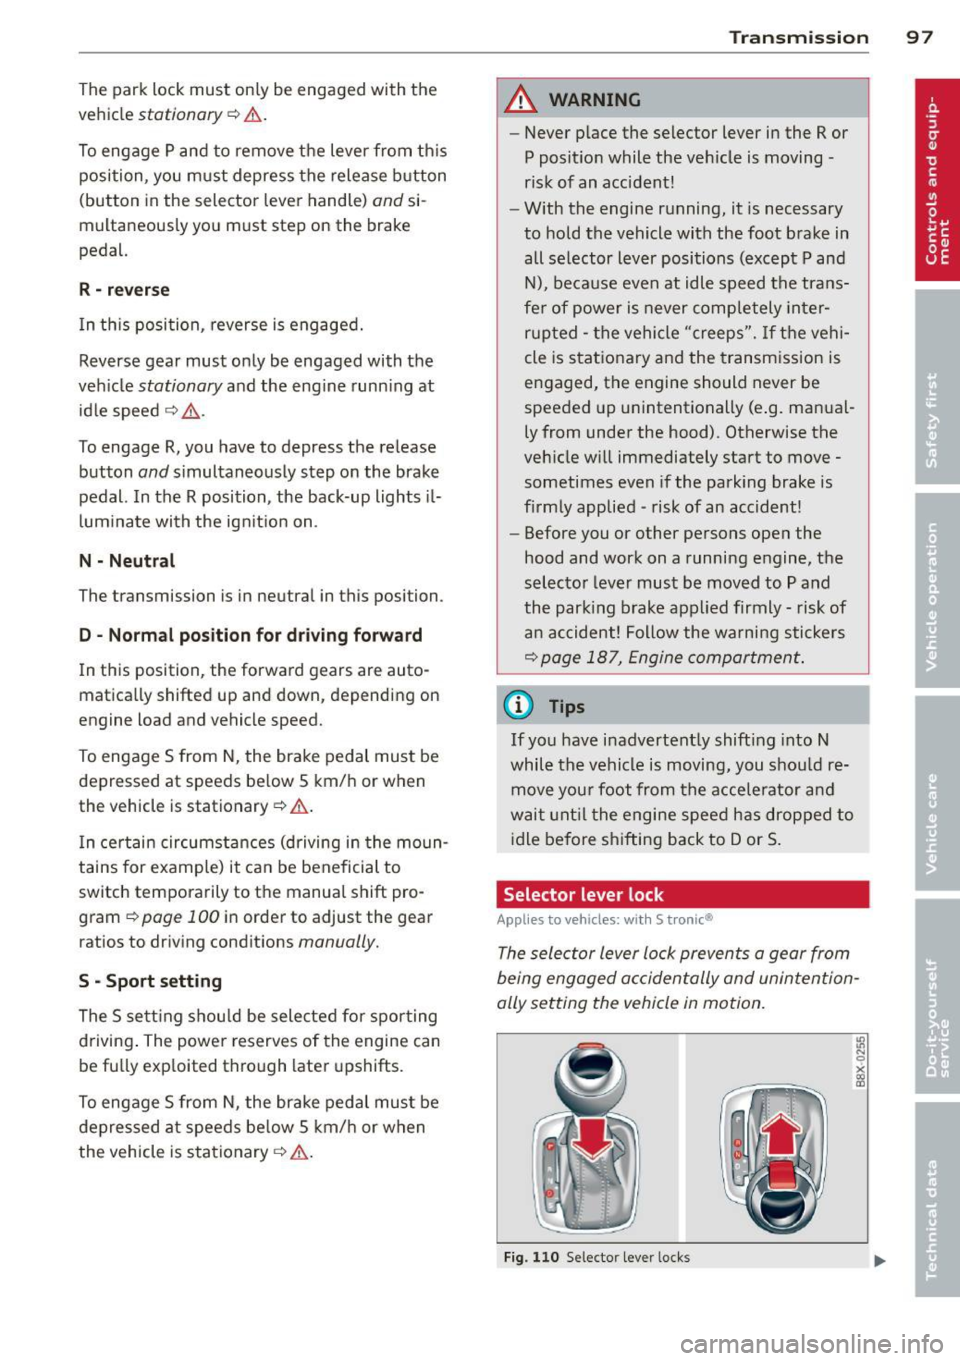
Selector lever lock
Applies to vehicl es: with S tronic®
The selector lever lock prevents a gear from
being engaged accidentally and unintention
ally setting the vehicle in motion.
F ig. 110 Selector lever locks
Page 105 of 280
Driving Safely
General notes
Safe driving habits
Please remember -safety first!
This chapter contains important information,
tips, instructions and warnings that you need
to read and observe for your own safety, the
safety of your passengers and others . We have
summarized here what you need to know
about safety belts, airbags, ch ild restra ints as
well as child safety. You r safety is for us
priori
ty number 1.
Always observe t he information
a nd warn ings in th is se ct ion - for yo ur own
safety as well as that of your passengers .
The information in this se ction applies to all
model ve rsion s of your veh icle . Some of the
feat ures descr ibed in th is sec tions may be
standa rd equipment on some models, or may
be optional equipment on others . If you are
not sure, ask yo ur authorized Aud i dea ler.
A WARNING
- Always make sure that you follow the in
st ruct ions and heed the WARNINGS i n
this Manual. It is in your interest and in
the inte rest of you r passengers.
- Always keep the complete Owne r's Liter
at ure in your Audi when you lend or sell
yo ur vehicle so that this important info r
mation will always be ava ilable to the
dr iver and passenge rs.
- Always keep the Owner's literature handy
so that you can find i t eas ily if you have
ques tion s.
Safety equipment
The safety features are part of the occupant
restraint syst em and work togeth er to help
redu ce the risk of injury in a wide variety of
accident situations .
Your safety and the safety of your passenge rs
should not be left to chance. Advances in
t echnology have made a var iety o f fea tures
avai lable to he lp red uce the risk of i njury in an
Dr iving Safel y 103
accident . The following is a list of just a few of
the safety features in yo ur Audi :
- sophis tic ated s afety be lts fo r driver and a ll
passenger sea ting posit ions,
- s afety bel t prete nsio ners ,
- safety belt force lim ite rs fo r the front sea ts,
- safety belt he ight adjustment systems for
the front seats ,
- automatic safety be lt height adjustment for
the rear seats,
- head restra ints for each seating posit ion,
- front airbags,
- side airbags in the front seats and outer rea r
seats *,
- side c urtai n airbags ,
- specia l LATCH an cho rages for child re-
s tr ain ts,
- he ad restra ints for each sea ting posit ion,
- adj ustab le steering colum n.
These ind iv idual safety features , can work to
gether as a system to he lp protect you and
you r passengers in a w ide range of accide nts.
T hese fe;;itures c;;innot work ;;is ;;i system if
t h ey a re not always cor re ct ly adjus ted and co r
re ct ly used .
Safety is everybody' s responsibility!
Important things to do before driving
Safety is everybody 's job! Vehicle and occu
pant safety always depends on the informed
and careful driver .
For you r safety and the safety of your passen
gers,
before driving always:
.,. Make s ure that all lights and signals are op
erating correctly .
.,. Make sure that the tire pressure is correct .
.,. Make su re that all windows are clean and
afford good v isib ility to the o utside.
.,. Sec ure a ll luggage a nd other items carefu lly
~ page 75.
.,. Mak e s ure th at nothing can interfe re wi th
t he peda ls .
.,. Adjust front seat, head restraint and mir
rors co rrectly for your height.
•
•
Page 115 of 280
Safety belts
General notes
Always wear safety belts!
Wearing safety belts correctly saves lives!
This chapter explains why safety belts are nec
essary, how they work and how to adjust and
wear them correctly.
~ Read all the information that follows and
heed all of the instructions and WARNINGS.
A WARNING
Not wearing safety belts or wearing them
improperly increases the risk of serious
personal injury and death.
- Safety belts are the single most effective
means available to reduce the risk of se
rious injury and death in automobile acci
dents. For your protection and that of
your passengers, always correctly wear
safety belts when the vehicle is moving.
- Pregnant women, injured, or physically
impaired persons must also use safety
belts. Like all vehicle occupants, they are
more likely to be seriously injured if they
do not wear safety belts. The best way to
protect a fetus is to protect the mother -
throughout the entire pregnancy.
Number of seats
Your Audi has a total of five seating positions:
two in the front and three in the rear. Each
seating position has a safety belt.
A WARNING
Not wearing safety belts or wearing them
improperly increases the risk of serious
personal injury and death.
- Never strap more than one person, in
cluding small children, into any belt. It is
especially dangerous to place a safety
belt over a child sitting on your lap.
- Never let more people ride in the vehicle
than there are safety belts available.
Safety belts 113
-Be sure everyone riding in the vehicle is
properly restrained with a separate safe
ty belt or child restraint.
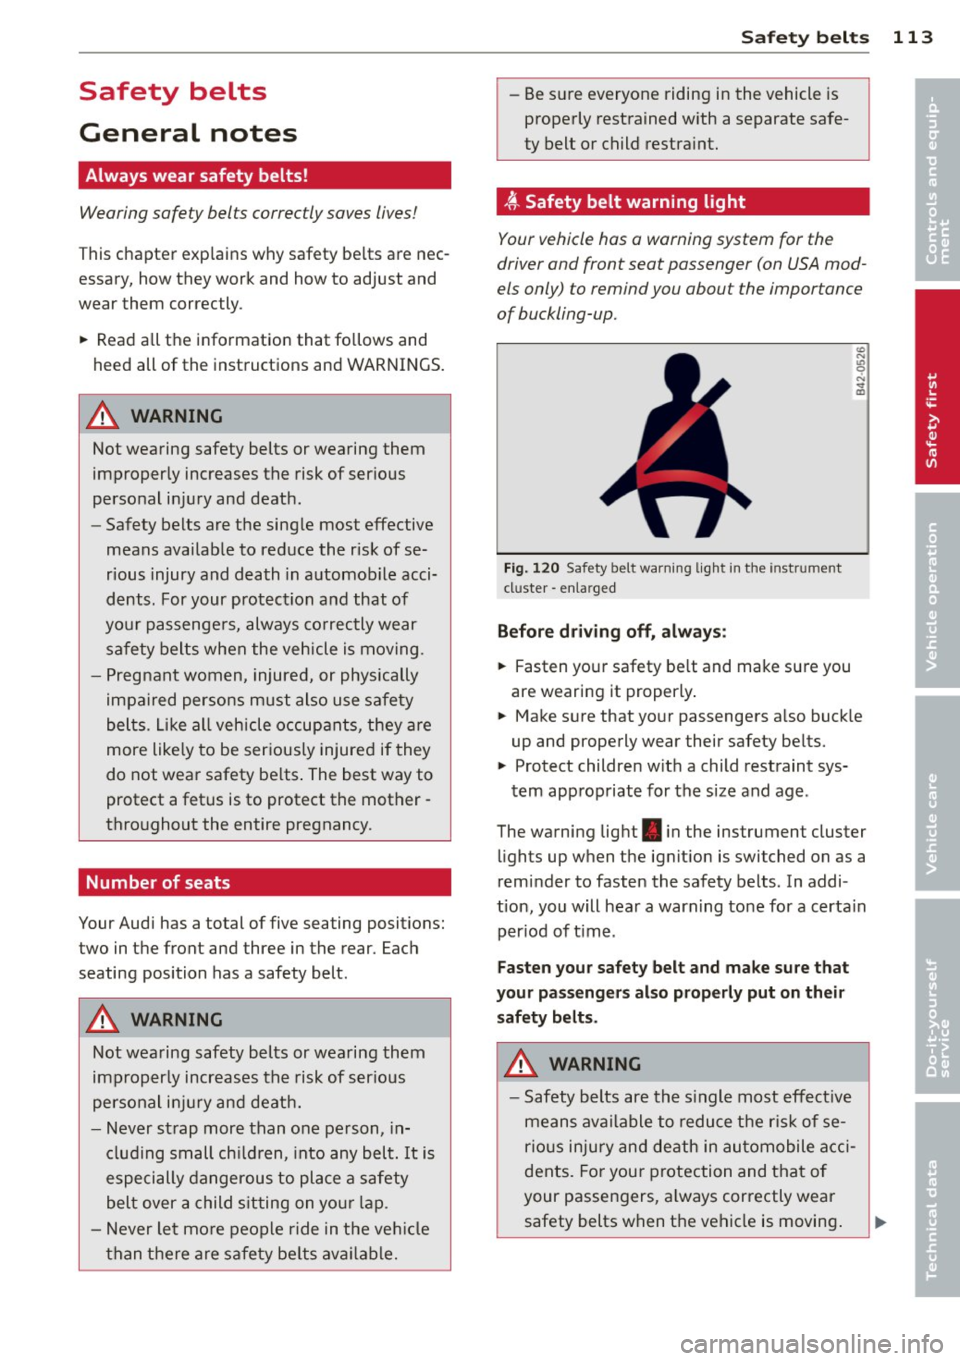
~ Safety belt warning light
Your vehicle has a warning system for the
driver and front seat passenger (on USA mod
els only) to remind you about the importance
of buckling-up.
Fig. 120 Safety belt warning light in the instr ument
cl uster -enla rged
Before driving off, always:
~ Fasten your safety belt and make sure you
are wearing it properly.
~ Make sure that your passengers also buckle
up and properly wear their safety belts.
~ Protect children with a child restraint sys-
tem appropriate for the size and age .
The warning light . in the instrument cluster
lights up when the ignition is switched on as a
reminder to fasten the safety belts. In addi
tion, you will hear a warning tone for a certain period of time .
Fasten your safety belt and make sure that
your passengers also properly put on their
safety belts.
A WARNING
- Safety belts are the single most effective
means available to reduce the risk of se
rious injury and death in automobile acci
dents. For your protection and that of
your passengers, always correctly wear
safety belts when the vehicle is moving.
•
•