catalytic converter AUDI S3 SEDAN 2015 Owners Manual
[x] Cancel search | Manufacturer: AUDI, Model Year: 2015, Model line: S3 SEDAN, Model: AUDI S3 SEDAN 2015Pages: 282, PDF Size: 71.14 MB
Page 14 of 282
Instruments and indicator lights
reached the reserve mark, the bottom LED will
turn red and the
ljJ indicator light turns on
¢
page 23. The bottom LED blinks red when
the fuel level is very low.
The on-board computer shows the range based
on the fuel level¢
page 28, On-board comput
er display.
For the tank capacity in your vehicle, refer to the
Technical Data
¢ page 260.
(D Note
Never drive until the tank is completely emp
ty. The irregular supply of fuel that results
from that can cause engine misfires. Uncom
busted fuel will then enter the exhaust sys
tem. This can cause overheating and damage
to the catalytic converter.
Coolant temperature indicator
In vehicles without a coolant temperature indica
tor, an indicator light. will turn on when the
coolant temperature is too high ¢
page 19. Re
fer to ¢(1) .
The coolant temperature indicator @c:>
page 10,
fig . 3 only works when the ignition is switched
on . To prevent engine damage, please observe
the following notes about the temperature rang
es.
Cold range
If only the LEDs at the bottom of the gauge turn
on, the engine has not reached operating tem perature yet. Avoid high engine speeds, full accel
erating and heavy engine loads.
Normal range
The engine has reached its operating tempera
ture once the LEDs up to the center of the gauge
turn on under normal driving conditions . The
LEDs higher up may turn on if the engine is under
heavy load or the outside temperature is high.
This is no cause for concern as long as the. in
dicator light in the instrument cluster does not
turn on.
12
Hot range
If the LEDs in the upper area of the display and
the . indicator light in the instrument cluster
display turn on, the coolant temperature is too
high
c:> page 19 .
A WARNING
-Never open the hood if you can see or hear
steam or coolant escaping from the engine
compartment. This increases the risk of
burns. Wait until you no longer see or hear
steam or coolant escaping.
- The engine compartment in any vehicle can
be a dangerous area . Stop the engine and al
low it to cool before working in the engine
compartment. Always follow the informa
tion found in ¢
page 198, Working in the
engine compartment.
(D Note
- In vehicles with a boost pressure indicator* ,
this indicator replaces the temperature dis
play. To promote a long engine service life,
avoiding high engine speeds, full accelera
tion and heavy engine loads during approxi
mately the first 15 minutes when the en
gine is cold is recommended . The amount of
time until the engine is warm depends on
the outside temperature . Check the engine
oil temperature* if necessary .
c:> page 30
-Auxiliary headlights and other accessories in
front of the cooling-air intake impair the
cooling effect of the coolant. This increases
the risk of the engine overheating during
high outside temperatures and heavy engine
load.
- The front spoiler also helps to distribute
cooling air correctly while driving. If the
spoiler is damaged, the cooling effect will
be impaired and the risk of the engine over
heating will increase. See an authorized
Audi dealer or authorized Audi Service Fa
cility for assistance.
Page 74 of 282
Driving
You must drive your vehicle about 3,000 miles (5,000 kilometers) before you can properly as
sess oil consumption.
This also applies to fuel consumption and engine
output.
@ Note
- Have your vehicle maintained properly and
in accordance w ith the service recommenda
tions in your Warranty
& Maintenance book
let. Lack of proper maintenance as well as
improper use of the vehicle will impair the
function of the emission control system and
could lead to damage.
- Do not alter or remove any component of the Emission Control System unless approved by the manufacturer.
- Do not alter or remove any device, such as heat shields, switches, ignition wires,
valves, which are designed to protect your
vehicle's Emission Control System and other important vehicle components.
Fewer short trips
Fuel consumption will always be relatively high
on short trips.
.,. Try to avoid driving short distances with a cold
engine.
The eng ine and catalytic converter have to reach
their optimal
operating temperature to reduce
fuel consumption and noxious emissions effec
tively .
Just after starting, a cold engine in a mid-size car only achieves a fuel economy of 6-8 miles per
gallon (30-40 l/100 km). After about a half a mile, fuel economy climbs to 12 mpg (20
l/
100 km) . After about 2.5 miles (4 km), the en
gine is at its proper operating temperature and
fuel economy has reached a normal level. So you
can see that you should avoid short trips whenev
er possible.
The
outside temperature is also critical in this re
gard. Your car consumes more fuel in the winter
than in the summer.
72
Steering
Adjusting the steering wheel position
The steering wheel position is fully adjustable up
and down and forward and back .
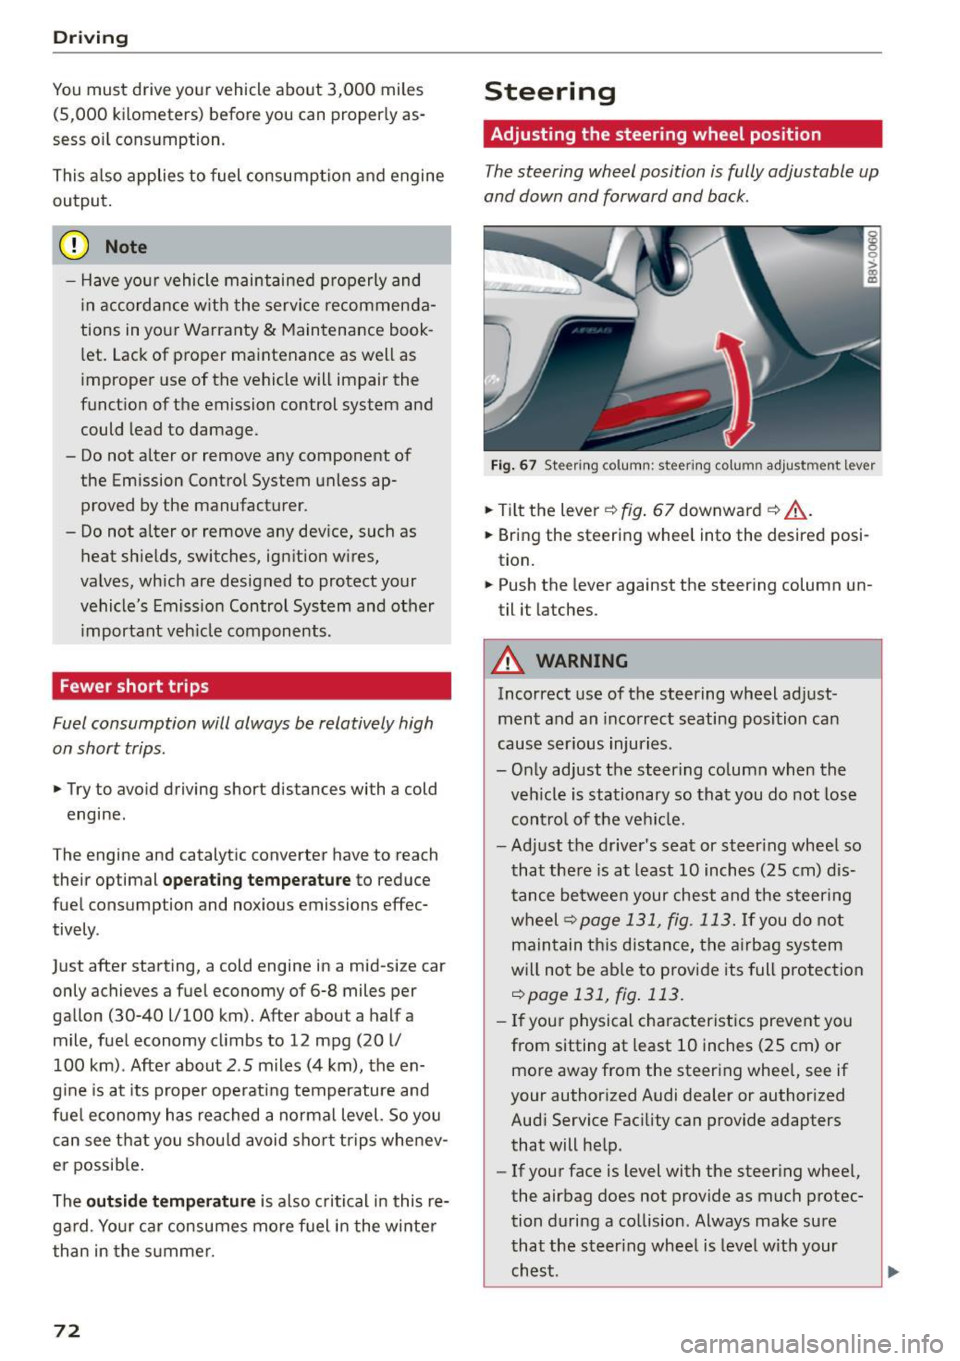
Fig. 67 Ste ering co lumn : steer ing colu mn adjus tmen t l eve r
.,. Tilt the lever ¢ fig. 67 downward ¢.&, .
.,. Bring the steering wheel into the desired posi
tion.
.,. Push the lever against the steering column un
til it latches .
A WARNING
Incorrect use of the steering wheel adjust
ment and an incorrect seating position can
cause serious injuries.
- Only adjust the steering column when the
vehicle is stationary so that you do not lose
control of the vehicle.
-
-Adjust the driver's seat or steer ing wheel so
that there is at least 10 inches (25 cm) dis
tance between your chest and the steering
wheel ¢
page 131, fig. 113. If you do not
maintain this distance, the airbag system
will not be able to provide its full protection
¢page 131, fig. 113.
-If your physical characteristics prevent you
from sitting at least 10 inches (25 cm) or
more away from the steering wheel, see if
your authorized Audi dealer or authorized
Audi Service Facility can provide adapters that will help.
- If your face is level with the steering wheel,
the airbag does not provide as much protec
tion during a collision . Always make sure
that the steering wheel is level with your
chest .
Page 192 of 282
Checking and F ill in g
Checking and Filling
Gasoline
Fuel supply
App lies to veh icles: w ith gaso line engine
Using the right fuel helps keep the environment
clean and prevents engine damage.
Fuel re co mm en da tion
The fuel recommended for your vehicle is unl ead
e d prem ium
grade gaso line. Audi recommends
using TOP TIER Detergent Gasoline with a mini
mum octane rating of 91 AKI (95 RON). For more
information on TOP TIER Detergent Gasoline,
please go to the official website
(www.toptiergas .com).
The recommended gasoline octane rating for
your engine can also be found on a label located on the ins ide of the fuel filler flap . This rating
may be specified as AKI or RON .
Your vehicle may also be operated using unlead
ed regular gasol ine with a minimum octane rat
ing of 87 AKl/91 RON. However, using 87 AKI/
91 RON octane fue l wi ll sli ght ly reduce engine
pe rformance.
U se un leade d ga solin e only . Unleaded gasoline
is available throughout the USA, Canada, and in
most European countries. We recommend that
you do not ta ke you r vehicle to areas or countr ies
where unleaded gasoline may no t be ava ilable.
For more informat ion on refueling your veh icle,
see
¢page 192.
Octan e rat ing
Octane rating indicates a gasoline's ability to re
sist engine damaging "knock" caused by prema
ture ignition and detonation . Therefore, buying
the correct grade of gasoline is very important to
he lp prevent possible eng ine damage and a loss
of eng ine performance.
Gasoline most commonly used in the Un ited
States and Canada has the following octane rat
i n gs that ca n usually be found on the filler pump:
- Prem ium Grade : 91 - 96 AKI
190
- Regular Grade: 87 -90 AKI
Explanation of the abb reviations:
AKI = Anti Knock Index = (R +M)/2 = (RON+MON)/
2
RON= Research Octane Number
MON = Motor Octane Number.
{[) Note
-Do not use any fue l w ith o ctane rat ings low
er than 87 AKI or 91 RON otherwise expen
sive engine damage w ill occur .
- Do
not use leaded gasoline. The use of lead
ed gasoline will severely damage your veh i
cle's catalytic converter and its abi lity to
control exha ust em issions.
Blended gasoline
App lies to vehicles: wit h gaso line e ngi ne
U se of g aso lin e cont aining alcohol or MTBE
( meth yl tert iary butyl ethe r)
You may use unleaded gasoline blended with al
cohol or MTB E (commonly referred to as oxygen
ates) if the ble nded mixture meets the following
criteria:
Blend of gasoline methano l (wood alcohol or
m eth yl alcoho l)
-Anti -knock index must be 87 AKI or h igher.
- Blend must contain no more than 3% metha-
nol.
- Blend must contain more than 2% co-solvents.
Blend of ga solin e and ethan ol (grain alcoh ol or
ethyl alcohol )
- Anti-knock index must be 87 AKI or h igher.
- Blend must not conta in more than 15% etha-
nol.
Blend of ga soline a nd M TBE
- Anti-knock index must be 87 AK I or h igher.
- Blend must contain not more tha n 1S % MTB E.
S eas onall y adjust ed gasoline
Many gasoline grades are blended to perform es
pecially well for winter or summer dr iv ing . Dur-
i ng seasonal change-over, we suggest tha t you .,..
Page 194 of 282
Checking and Fill in g
These fuels contain substances that can se
verely damage the fuel system and the en
gine if the engine is started .
- If the diesel f uel quality is poor, it may be
necessary to have the water d rained from
the water separator in the
fuel filter more
often than specified in the maintenance
schedule. This can help reduce engine ma l
funct ions
c:> page 2 3.
Refueling
Fuel filler neck
The fuel filler neck is located on the right rear
side pane l behind the fuel f iller flap.
If the power locking sys tem should fail, you can
still open the flap manua lly -for detai led instruc
tions see
c:> page 194.
You can find the fue l tank capacity of you r vehicle
in
c:> page 260.
The label on the inside of the fue l filler flap te lls
you t he cor rect fuel for your vehicle. For more in
form ation abo ut fue l specifications, see
c:> page 190 .
Your vehicle fuel tank has an on board refue lling
vapor re cove ry system . This feature helps to p re
ve nt fuel vapors from escaping from the tank and
pollut ing t he environment w hile you refue l yo ur
ve hicle. In orde r to fill the tank p roperly whi le
protecting the environment, please follow this
refueling procedure carefully.
A WARNING
Under normal operating conditions, never ca r
ry additional fuel containers in your car . Gas
canisters and ot her conta iners used to trans
port fuel can be dangerous . Such contai ners,
full or empty, may leak and could cause a fire
in a collision. If yo u m ust t ransport fue l to
use fo r yo ur l awn m owe r, snow b lower, etc.,
be very ca re ful and a lways observe loca l and
state laws rega rding the use, transportation
and sto rage of such fuel containe rs . Make cer
tain the container meets industry standards (ANSI/ASTM F852 - 86).
192
(D Note
Never drive your vehicle until the fue l tank is
complete ly empty . The irregular supply of
f u el can cause misfiring. Gasoline could enter
the exhaust system and damage the catalytic converter.
Fueling procedure
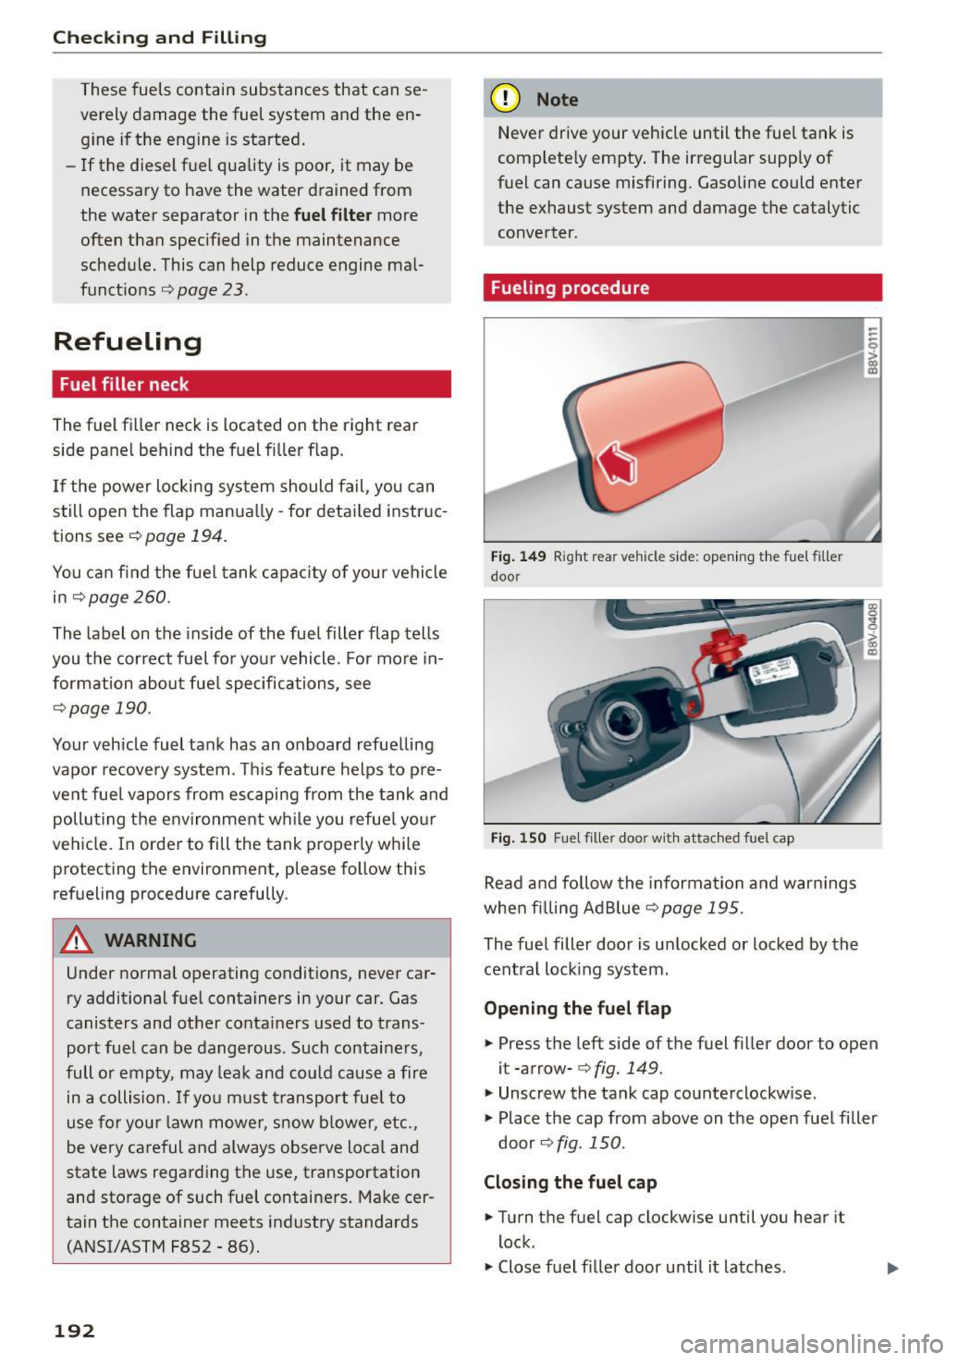
F ig . 149 Righ t rea r ve hicle s ide: open ing t he fuel filler
door
Fi g. 15 0 Fuel fill er doo r wit h attac hed fuel cap
Re ad a nd fo llow the informa tion and war ning s
whe n filling AdB lue
c:> page 195 .
The fuel filler doo r is u nlocked or locked by the
cent ral lock ing system.
Opening the fuel flap
--0 ~
ffl
.,.. Press the left side of the fuel f iller door to open
it -arrow-
c:> fig. 149 .
.,.. Unscrew the tank cap counterclockw ise .
.,.. Place the cap from above on the open fue l filler
door
c:> fig . 150.
Closing the fuel cap
.,.. Turn the f uel cap clockwise until you hear it
lock .
.,.. Close fuel fi ller door until it latches.
Page 195 of 282
M N
0 > co ,...., \!) 1.1'1
1.1'1
1.1'1
,....,
Once the pump nozzle switches off, the fuel tank is "full". Do not fill the tank more. Otherwise the
expansion space in the tank will be filled.
The correct fuel type for your vehicle can be
found on a label located on the inside of the fuel
filler door. For additional information on fuel , re
fer to ¢
page 190.
The fuel tank capacity of your vehicle is in the
Technical Data ¢ page 260.
To avoid fuel spilling or evaporating from the fuel
tank always close fuel filler cap properly and
completely. An improperly closed fuel filler cap
may also cause the MIL lamp ¢
page 25 to come
on.
A WARNING
Not paying attention when fueling or han
dling fuel incorrectly can lead to fires, explo
sions or serious injuries.
- Fuel ignites easily and can cause serious burns and other injuries.
- If you do not switch the engine off when fu
eling and/or do not insert the fuel no zzle
completely into the tank opening, fuel can
leak out or run over . Leaked fuel can ignite
and start a fire.
- Do no t use the telephone while fueling. The
electromagnetic rays can cause sparks,
which can ignite fuel vapors and start a fire .
- Do not sit in your vehicle while fueling . If
you must make an exception and enter your
vehicle again while fueling , close the door
and touch metal to discharge static electric
ity before touching the fuel nozzle. Static
electricity can create sparks, which can ig
nite vapors when fueling.
- Do not smoke or have an open flame in the
area when fueling your vehicle or filling a
fuel container because this increases the
risk of an explosion.
- For your safety, carrying fuel containers in
your vehicle is not recommended. Whether
full or empty, the container can leak and
cause a fire in the event of an accident .
-If you must make an exception and trans
port a fuel container, note the following:
Checking and Filling
- Never fill the fuel container with fuel
while it is in or on the vehicle . Static elec
tricity is discharged when filling which can cause the fuel vapors to ignite and increas
es the risk of an explosion .
- Always place a fuel container on the
ground before filling .
- Always hold the fuel nozzle completely in
the fuel container when filling .
-If the fuel container is made of metal, the
fuel nozzle must always be in contact with
the container when filling it with fuel. This prevents static electricity from discharg
ing .
- Never spill fuel in the vehicle or the lug
gage compartment . Evaporated fuel is ex
plosive and increases the risk of serious in
jury or death.
- Follow legal requirements when using,
storing and transporting fuel containers .
- Make sure the fuel container conforms to
industry standards (ANSI/ASTM F852-86).
Q) Note
-Remove spilled fuel from vehicle paint im
mediately , because it can damage paint .
- Never drive until the fuel tank is completely
empty. The irregular supply of fuel that re
sults from that can cause engine misfires .
Uncombusted fuel will enter the exhaust
system and increase the risk of damage to
the catalytic converter.
- If the fuel tank runs completely empty in a
vehicle with a
diesel engine, the ignition
must remain switched on for at least 30
seconds after refueling before starting the
engine. It may take longer than usual for
the engine to start, even up to a minute.
This is because the air must first bleed out of the fuel system when starting the engine .
@ For the sake of the environment
- If
the fuel nozzle is used correctly, it will in
dicate that the tank is full the first time it
switches off automatically. Do not try to add
more fuel, because it can spill over. Also, "'
193
Page 196 of 282
Checking and Fill in g
the expansion space in the tank will fi ll,
which can result in fuel spilling out when it
becomes warm and polluting the environ
ment.
(D Tips
- If
the engine is running while fueling, va
pors can escape or the fuel can spill over.
Because of th is, the fuel nozz le switches off
before th e tank is full.
- Do not fue l the vehicle when the ignition is
switc hed on. Otherwise, the fuel gauge may
not show the correct level after fueling the
vehicle.
- Diesel vehicles are equipped with a diesel
misfueling guard
l). It allows the vehicle to
be fueled on ly w ith a diesel fuel p ump noz
zle .
- A worn o r damaged nozzle or a nozz le that
i s too sma ll may not be able to open the die
se l m isfue ling protector. If this is the case,
try turning the no zzle before inser ting it in
the fue l filler neck, use a different fuel
p ump or see an a uthorized Audi dea le r or
a uthorized Audi Service Facility for assis
tance .
- The misfueling guard does not o pen whe n
adding fue l from a fuel contai ne r. Yo u can
bypass it by adding the diese l fuel s low ly .
- The fuel filler door on your vehicle does not
l ock when you lock the vehicle from the in
side.
l l Market -spec ifi c
194
Fuel filler door emergency release
If the central locking system is faulty, the fuel
filler door can be unlocked manually .
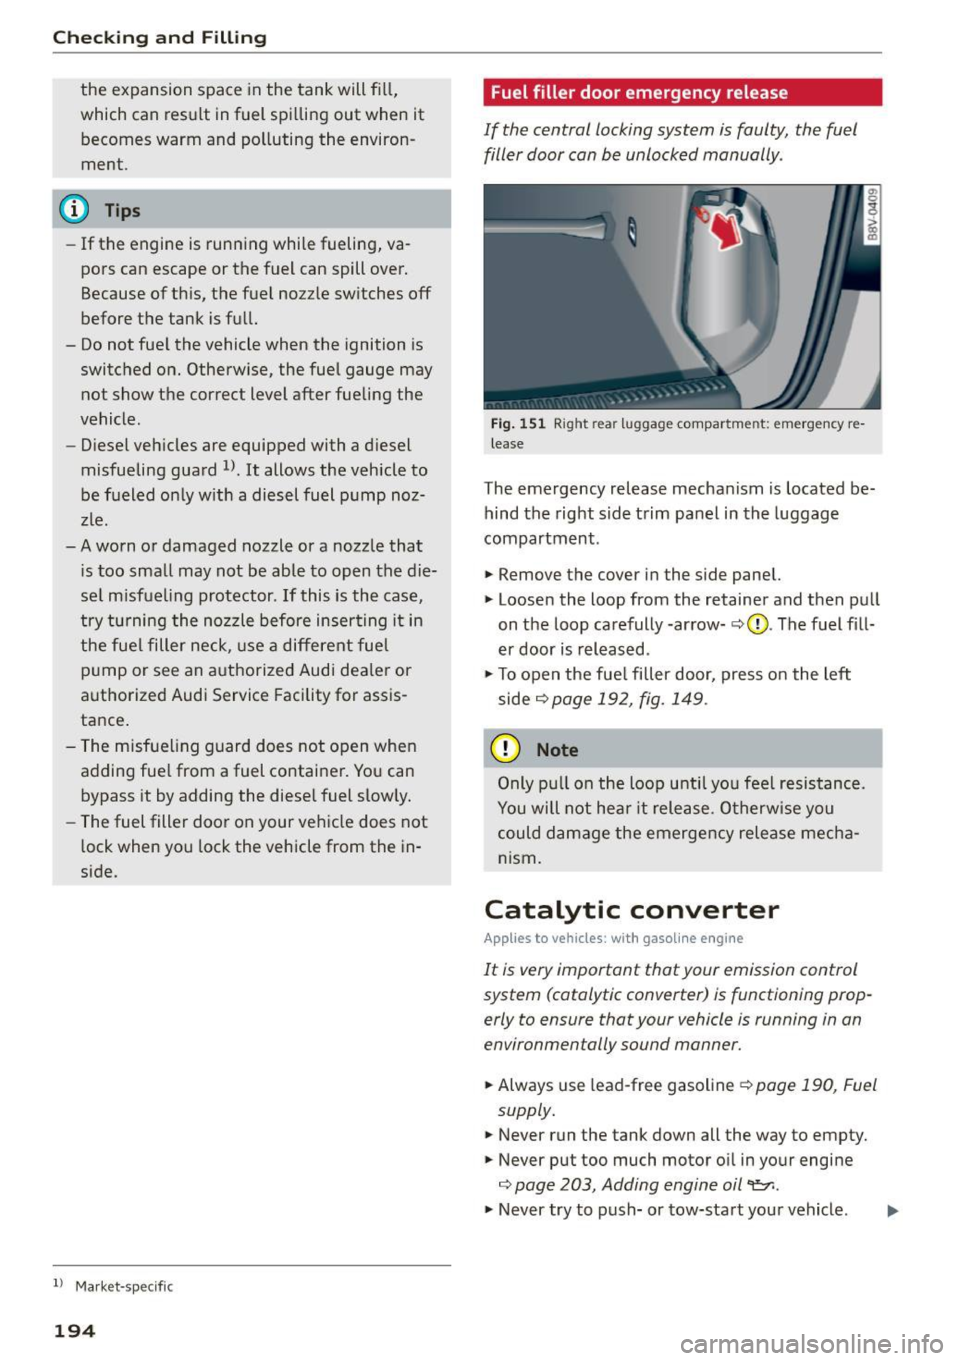
Fig. 15 1 Rig ht rear luggage compartme nt: emergency re
lease
The emergency release mechanism is located be
hind the right side trim panel in the luggage
compartment.
.,. Remove the cover in the side panel.
.,. Loosen the loop from the retainer and then pull
on the loop ca refully-ar row-
c::> 0 . The fuel fill
er door is released .
.,. To open the fue l filler door, press o n the left
side
opage 192, fig. 149 .
(D Note
Only pull on t he loop u ntil yo u feel resistance.
You will not he ar it release. O therwise you
could damage the emergency rele ase mecha
nism.
Catalytic converter
App lies to vehicles: with gasoline e ngine
It is very important that your emission control
system (catalytic converter) is functioning prop
erly to ensure that your vehicle is running in an
environmentally sound manner .
.,. Always use lead-free gasoline c::> page 190, Fuel
supply .
.,. Never run the tank down all the way to empty .
.,. Never put too much motor o il in yo ur engine
o page 203, Adding engine oil 'l:::11 .
.,. Never try to push- or tow-sta rt you r vehicle .
Page 197 of 282
M N
0 > co ,...., \!) ..,.,
..,.,
..,., ,....,
The catalytic conve rter is an efficient "clean -up"
device bui lt into the exhaust system of the vehi
cle. The catalytic converter burns many of the
pollutants in the exhaust gas before they are re
leased into the atmosphere.
The exclusive use of unleaded fue l is critically im
portant for the life of the catalytic converter and
proper functioning of the engine .
A WARNING
The temperature of the exhaust system is
high, both when driving and after stopping
the engine.
- Never touch the exhaust tail pipes once they
have become hot. This could result in burns.
- Do not park or operate the vehicle in areas
where the hot exhaust system may come in contact with dry grass, brush, fue l spill or
other material which can cause a fire .
- Do not apply additional undercoating or
rustproofing on o r near the exha ust man i
fold, exhaust pipes, catalyt ic converte r or
heat s hields. Dur ing driv ing, the subs tance
u5ed for undercoating could overheat and
cause a fire .
(D Note
-Be awa re that just one tank f illing wit h lead
ed
f uel will a lready se riously degrade the
performance of the c ata lytic conver ter.
- Do not exceed the co rrect engine oil leve l
9page203.
-Do not d rive until the fuel tank becomes
complete ly empty. The eng ine could misfi re.
U nburned f uel co uld also ge t in to the e x
haust system and this could ca use the cata
l ytic converter to overheat.
- Do no t sw itch off the ignition wh ile the vehi
cle is moving.
- Do not con tinue to oper ate yo ur vehicle un
der these cond itions, as o therwise fue l can
r each the catalytic converte r. This cou ld re
su lt in overheating of the converter, requir
i ng its replacement.
- To assure efficient ope ration of the Emission
Control System:
Checking and Fillin g
- Have your vehicle maintained properly and
in accordance with the serv ice recommen
dat ions in yo ur Warranty
& Maintenance
booklet.
- Lack of prope r maintenance as we ll as im
p roper use of the vehicle will impair the
f u nction of the emission control system
and could lead to damage.
@ For the sake of the environment
Even when the Emission Control System is op
erating properly, the exha ust gas can have a
su lfur-like exhaust gas sme ll under some op
erating states. Th is depends on the s ulfur
content of the fuel b eing used. Us ing a diffe r
ent bra nd of fue l may he lp, or fi lling the tank
wi th lead-free su per grade gaso line.
Diesel particulate filter
App lies to vehicles: wit h diese l eng ine
T he diese l part icu late filter filters nearly all of
the soot pa rticles ou t of the exha ust. The filter
cl ea ns itself a utoma tic all y unde r no rm al driving
con dit ions. If the filte r cannot clean itse lf (for ex
amp le, because yo u are only driving sho rt distan
ces), th e fi lter becomes clogged with soot and
the
II symbol for the diese l partic ulate filter il
l uminates
9page 22.
A WARNING
-Do not park your veh icle over flammable
materials such as grass or leaves because
the high temperature of the diesel part icu
la te filte r could sta rt a fi re.
-
- Do not app ly an underbody protectant in the
exhaust system area or a fire cou ld start.
Selective catalytic
reduction
General information
App lies to vehicles: wit h diese l eng ine
In veh icles with selective catalytic reduction, a
u rea solution (AdBlue) is injected into the ex
haust system before a nitrogen oxide cata lytic
conve rter to redu ce nitrogen emissions.
195
Page 206 of 282
Checking and Filling
"' Check the oil level again after two minutes
¢ page 203 , Checking the engine oil level.
"'Add oil, if necessary.
"'Close the engine oil filler cap and push the dip
stick all the way in.
A WARNING
- When adding oil, do not let oil drip onto hot
engine components. There could be risk of a
fire.
- You must secure the cap on the oil filler
opening correctly so that oil does not leak
out onto the hot engine and exhaust system
when the engine is running, because this is
a fire hazard.
- Always clean skin thoroughly if it comes into
contact with engine oil.
(D Note
- Applies to vehicles with gasoline engines:
the oil level cannot be above the
0 range
¢ page 203, fig. 159, because this can
cause damage to the catalytic converter or
the engine. Contact an authorized Audi
dealer or authorized Audi Service Facility to
have excess oil extracted if necessary.
- Applies to vehicles with diesel engines: the
oil level must not be in the
(v range
¢ page 203, fig. 160 -The oil must not be
extracted, because this can damage the en
gine. Drive to an authorized Audi dealer or
authorized Audi Service Facility immediate ly .
- Do not mix any additional lubricants into
the engine oil. Damage cause by such addi
tives is not covered by the warranty.
@ For the sake of the environment
- Oil should never enter the sewer system or
come into contact with the ground.
- Pay attention to legal requirements when
disposing of empty oil containers .
204
· Changing the engine oil
We recommend that have your oil changed by an
authorized Audi dealer or a qualified service sta tion.
Before you check anything in the engine compart
ment,
always read and heed all WARNINGS
¢ page 198.
The engine oil must be changed according to the
intervals specified in your Warranty & Mainte
nance booklet . This is very important because the
lubricating properties of oil diminish gradually
during normal vehicle use.
Under some circumstances the engine oil should
be changed more frequently. Change oil more of
ten if you drive mostly short distances, operate
the vehicle in dusty areas or under predominantly stop-and-go traffic conditions, or have your vehi
cle where temperatures remain below freezing
for extended periods.
Detergent additives in the oil will make fresh oil
look dark after the engine has been running for a
short time. This is normal and is not a reason to
change the oil more often than recommended.
Because of the problem of proper disposal, along
with the special tools and necessary expertise re
quired, we strongly recommend that you have
your oil changed by an authorized
Audi dealer or
a qualified service station.
If you choose to change your oil yourself , please
note the following important information:
A WARNING
To reduce the risk of personal injury if you
must change the engine oil in your vehicle
yourself:
- Wear eye protection.
-
- To reduce the risk of burns from hot engine
oil, let the engine cool down to the touch.
- When removing the oil drain plug with your
fingers, stay as far away as possible. Always
keep your forearm parallel to the ground to
help prevent hot oil from running down your
arm.
Page 270 of 282
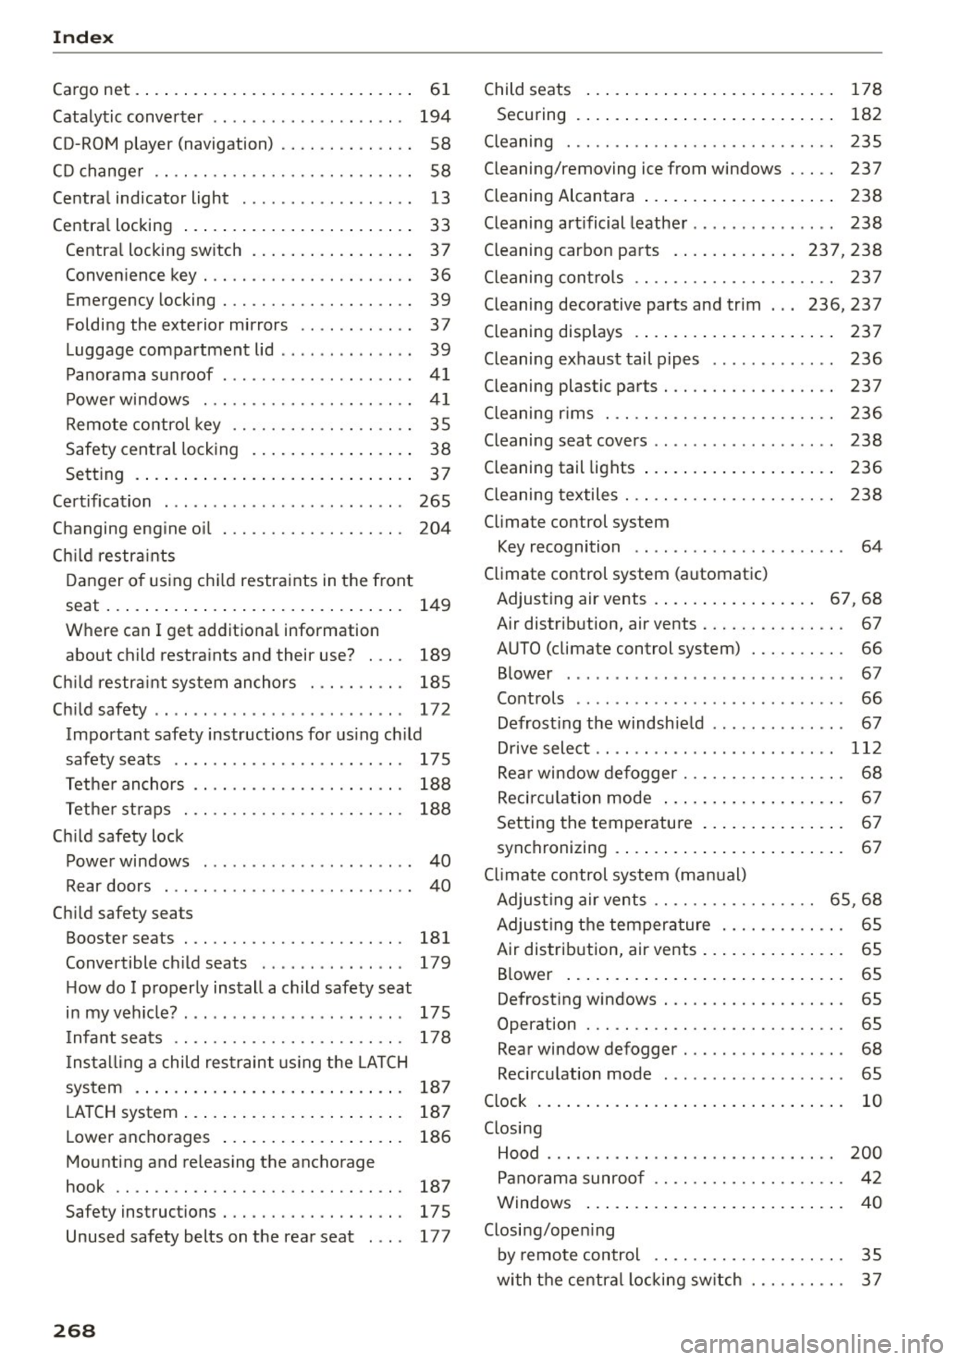
Index
Cargo net. . . . . . . . . . . . . . . . . . . . . . . . . . . . . 6 1
Catalytic converter . . . . . . . . . . . . . . . . . . . . 194
CD -ROM playe r (navigation) . . . . . . . . . . . . . . 58
C D change r . . . . . . . . . . . . . . . . . . . . . . . . . . . 58
Ce ntra l ind icator light . . . . . . . . . . . . . . . . . . 13
Centra l locking . . . . . . . . . . . . . . . . . . . . . . . . 33
Centra l locking sw itch . . . . . . . . . . . . . . . . . 37
Conven ience key . . . . . . . . . . . . . . . . . . . . . . 36
Emergency locking . . . . . . . . . . . . . . . . . . . . 39
Folding the exterior mirrors . . . . . . . . . . . . 3 7
L uggage compa rtment lid . . . . . . . . . . . . . . 39
P anorama sun roof . . . . . . . . . . . . . . . . . . . .
4 1
p ' d owe r win ows . . . . . . . . . . . . . . . . . . . . . . 41
Remote control key . . . . . . . . . . . . . . . . . . . 35
Safety cen tral lock ing . . . . . . . . . . . . . . . . . 3 8
Setting . . . . . . . . . . . . . . . . . . . . . . . . . . . . . 3 7
Cert ification . . . . . . . . . . . . . . . . . . . . . . . . .
265
Changing engine o il . . . . . . . . . . . . . . . . . . . 204
Ch ild restr aints
D anger o f using c hild restra ints in the front
seat ... .. .... .. ... .. ..... ... .. .. ...
149
Where can I get additiona l information
about child restra ints and their use? . . . .
189
Ch ild restra int sys tem an chors . . . . . . . . . . 185
Ch ild safety . . . . . . . . . . . . . . . . . . . . . . . . . . 172
Important safety instructions fo r using ch ild
safety seats . . . . . . . . . . . . . . . . . . . . . . . .
17 5
Tet he r an chors
188
Tethe r str aps . .... ......... .. .. .. .. . 188
Ch ild safety lock
Powe r windows . . . . . . . . . . . . . . . . . . . . . . 4 0
Rear doors . . . . . . . . . . . . . . . . . . . . . . . . . . 40
Ch ild safety seats
Booster seats . . . . . . . . . . . . . . . . . . . . . . .
181
Convertible ch ild seats . . . . . . . . . . . . . . . 179
H ow do I p roperly install a ch ild safety seat
. h' l ? m myve 1c e . ................. ... .. . 175
Infant seats . . . . . . . . . . . . . . . . . . . . . . . . 178
Insta lling a child res traint using the LA T CH
system . . . . . . . . . . . . . . . . . . . . . . . . . . . .
18 7
LA T CH system . . . . . . . . . . . . . . . . . . . . . . . 187
Lower anchorages . . . . . . . . . . . . . . . . . . . 186
Mounting and re leasing the anchorage
hook . . . . . . . . . . . . . . . . . . . . . . . . . . . . . .
187
Safety instructions.............. .. ... 175
Unused safety belts on the rear seat . . . . 177
268
Child seats
Securing 178
182
Cleaning . . . . . . . . . . . . . . . . . . . . . . . . . . . . 2 35
Cleaning/removing ice from windows . . . . . 237
Cleaning Alcan tara . . . . . . . . . . . . . . . . . . . . 238
Cleaning art ificial leathe r . . . . . . . . . . . . . . . 238
C leaning carbon parts . ... . ..... ... 237, 238
Cleaning con trols . . . . . . . . . . . . . . . . . . . . . 2 3 7
Cleaning decorative parts and trim . ..
236, 237
Cleaning disp lays . . . . . . . . . . . . . . . . . . . . . 2 3 7
Cleaning exhaust tail pipes . . . . . . . . . . . . .
236
Cleaning plastic parts . . . . . . . . . . . . . . . . . . 237
Cl eaning r ims . . . . . . . . . . . . . . . . . . . . . . . . 2 36
Cleaning seat covers . . . . . . . . . . . . . . . . . . . 238
Cleaning tail lights . . . . . . . . . . . . . . . . . . . . 236
Cleaning textiles . . . . . . . . . . . . . . . . . . . . . . 2 38
Cli mate control system
Key recognition . . . . . . . . . . . . . . . . . . . . . . 64
Climate co ntrol system (automatic)
Adjusting air vents . . . . . . . . . . . . . . . . .
67, 68
Air distrib ution, air vents . . . . . . . . . . . . . . . 67
A UTO (climate control system) . . . . . . . . . . 66
Blower . . . . . . . . . . . . . . . . . . . . . . . . . . . . . 67
Controls . . . . . . . . . . . . . . . . . . . . . . . . . . . . 66
Defrost ing t he w indshie ld . . . . . . . . . . . . . . 67
D rive select . . . . . . . . . . . . . . . . . . . . . . . . . 112
Re ar window defogger . . . . . . . . . . . . . . . . . 68
Recirc ulation mode . . . . . . . . . . . . . . . . . . . 67
Setting the temperature . . . . . . . . . . . . . . . 67
synch ronizing . . . . . . . . . . . . . . . . . . . . . . . . 67
Cli mate co ntrol system (ma nual)
Adjus ting air vents . . . . . . . . . . . . . . . . .
65 , 68
Adjus tin g the tempera ture . . . . . . . . . . . . . 65
Air distrib ution, air vents . . . . . . . . . . . . . . . 65
B lower . . . . . . . . . . . . . . . . . . . . . . . . . . . . . 65
Defrost ing windows . . . . . . . . . . . . . . . . . . . 65
Operation . . . . . . . . . . . . . . . . . . . . . . . . . . . 65
Rear window defogger . . . . . . . . . . . . . . . . . 68
Recircu lation mode . . . . . . . . . . . . . . . . . . . 65
Clock . . . . . . . . . . . . . . . . . . . . . . . . . . . . . . . . 10
Closi ng
Hood ..... .. .... .. .. ... .......... .. 200
P a no rama sunroo f . . . . . . . . . . . . . . . . . . . . 42
Windows ... .... .. .. ... . .. .... ... .. . 40
Closi ng/ope ning
by remote control . . . . . . . . . . . . . . . . . . . .
35
wi th the centra l locking sw itch . . . . . . . . . . 3 7
Page 272 of 282

Index
Service in terval disp lay . . . . . . . . . . . . . . . 212
Using the multif unction steering whee l . . . 27
Driver seating posit ion . . . . . . . . . . . . . . . . . 13 1
Drive select .. .. ................. .. ... 112
Indicator light . . . . . . . . . . . . . . . . . . . . . . . 25
Driving economically . . . . . . . . . . . . . . . . . . . 70
Driving safely . . . . . . . . . . . . . . . . . . . . . . . . 130
Driving through water . . . . . . . . . . . . . . . . . . 70
Driving t ime . . . . . . . . . . . . . . . . . . . . . . . . . . 28
Dust filter
refer to Po llutant filter . . . . . . . . . . . . . . . . 64
E
ECO mode (automatic climate control
system) . . . . . . . . . . . . . . . . . . . . . . . . . . . . . . 66
Efficiency program . . . . . . . . . . . . . . . . . . . . . 29
Descr ipt ion . . . . . . . . . . . . . . . . . . . . . . . . . . 29
Fue l economy messages . . . . . . . . . . . . . . . 30
Other equipment . . . . . . . . . . . . . . . . . . . . . 30
Electrical accessories
refer to Socket . . . . . . . . . . . . . . . . . . . . . . . 57
Elect romechanica l par king b rake
refer to Parking bra ke . . . . . . . . . . . . . . . . . 78
E lectromechanical steering . . . . . . . . . . . . . 126
Indicator l ights . . . . . . . . . . . . . . . . . . . . . 126
E lectronic different ia l lock . . . . . . . . . . . . . . 123
Indicator light . . . . . . . . . . . . . . . . . . . . . . . 21
Elect ron ic immobili ze r . . . . . . . . . . . . . . . . . . 38
also refer to Immobilizer . . . . . . . . . . . . . . 33
Elect ron ic speed lim ite r . . . . . . . . . . . . . . . . . 94
E lectron ic stabilization control ( ESC)
Indicator light . . . . . . . . . . . . . . . . . . . . . . . 21
Sport mode . . . . . . . . . . . . . . . . . . . . . . . . 124
Elect ronic Stabilization Control (ESC) . . . . . 123
E me rgency ass istance . . . . . . . . . . . . . . . . . 240
E mergency flasher . . . . . . . . . . . . . . . . . . . . . 44
E me rgency flashers
I ndicator ligh t . . . . . . . . . . . . . . . . . . . . . . . 25
E me rgency operation
E me rgency braking fu nction . . . . . . . . . . . . 80
Fr ont passenge r's door/ rear doo rs . . . . . . . 39
L ugg age compartmen t lid . . . . . . . . . . . . . 24 0
P anorama sunroof . . . . . . . . . . . . . . . . . . . . 42
with convenience key . . . . . . . . . . . . . . . . . . 77
270
Emergency re lease
Fuel f iller door . . . . . . . . . . . . . . . . . . . . . . 194
Se lector lever . . . . . . . . . . . . . . . . . . . . . . . . 89
E merge ncy s tarting . . . . . . . . . . . . . . . . . . . 252
Energy management . . . . . . . . . . . . . . . . . . 128
Ind icator light . . . . . . . . . . . . . . . . . . . . . . . 19
Engine Coolant . . . . . . . . . . . . . . . . . . . . . . . . . . . . 20S
Preheating (button) . . . . . . . . . . . . . . . . . . . 75
Preheating (key) . . . . . . . . . . . . . . . . . . . . . . 73
Star ting with jumper cables . . . . . . . . . . . 252
Starting (button) . . . . . . . . . . . . . . . . . . . . . 75
Start ing (dr iver messages w ith conven ience
key) . . . . . . . . . . . . . . . . . . . . . . . . . . . . . . . . 77
Star ting (key) . . . . . . . . . . . . . . . . . . . . . . . . 73
stopp ing (b utton) . . . . . . . . . . . . . . . . . . . . 76
stopp ing (key) . . . . . . . . . . . . . . . . . . . . . . . 7 4
Engine compartment Clos ing the hood . . . . . . . . . . . . . . . . . . . . 200
Open ing the hood . . . . . . . . . . . . . . . . . . . 199
Overview . ... .... .. .. ... . .. .... . 200, 201
Safety preca utions . . . . . . . . . . . . . . . . . . . 198
E ngin e co ntrol ( indicato r light) . . . . . . . . . . . 22
Engine coolant . . . . . . . . . . . . . . . . . . . . . . . 205
Radiator fan . . . . . . . . . . . . . . . . . . . . . . . . 206
Engine o il . . . . . . . . . . . . . . . . . . . . . . . . . . . 201
adding ... .. .... .. ... .. .. ..... ... .. 203
Changi ng . . . . . . . . . . . . . . . . . . . . . . . . . . 204
Checking the oi l level . . . . . . . . . . . . . . . . . 203
Dipst ick ... .. .... .. .. ....... 200, 201, 203
Ind icator light . . . . . . . . . . . . . . . . . . . . . . . 19
Oil consumpt ion . . . . . . . . . . . . . . . . . . . . . 202
Spec ificat io n and viscosity . . . . . . . . . . . . . 201
T empe rat ure indica to r . . . . . . . . . . . . . . . . . 30
U se ...... .. .... .. .. .. ........... .. 203
Engine speed lim itation ( indicato r light) . . . 23
Environment Break-in per iod . . . . . . . . . . . . . . . . . . . . . . . 70
Catalytic converter . . . . . . . . . . . . . . . . . . . 194
Diesel pa rticulate f ilter . . . . . . . . . . . . . . . 19S
Dispos ing of your veh icle battery . . . . . . .
211
D rivi ng at high speeds . . . . . . . . . . . . . . . . . 71
Letting the vehicle stand and warm up . . . . 71
P roper disposal of d ra ined bra ke fl uid . . . 20 7
Proper disposal of d ra ined eng ine oi l . . . . 204
U nleaded fuel .. .. .. ................. 190
Wha t shou ld I do with an o ld battery? ... 211
EPC (engine cont ro l) . . . . . . . . . . . . . . . . . . . . 22