ABS AUDI S3 SEDAN 2017 Owners Manual
[x] Cancel search | Manufacturer: AUDI, Model Year: 2017, Model line: S3 SEDAN, Model: AUDI S3 SEDAN 2017Pages: 400, PDF Size: 67.32 MB
Page 15 of 400
a, co .... N
" N .... 0 N > 00
be slightly higher than the actual temperature
outside due to the heat radiating from the en
g ine.
At temperatures below 41 °F (+5 °C), a snowflake
symbol appears in front of the temperature dis
p lay
c::> .&. .
A WARNING
Do not assume the roads are free of ice based
on the outside temperature display. Be aware
that there may be ice on roads even when the
outs ide temperature is around 41 °F (+5 °C)
and that ice can increase the risk of accidents.
Multifunction steering
wheel plus
Operating
A ppl ies to : ve hicl es with Audi virtual cockpit
You con use the multifunction steering wheel
plus to operate the driver information system and the MMI functions, adjust the volume and
switch the voice recognition system on and off
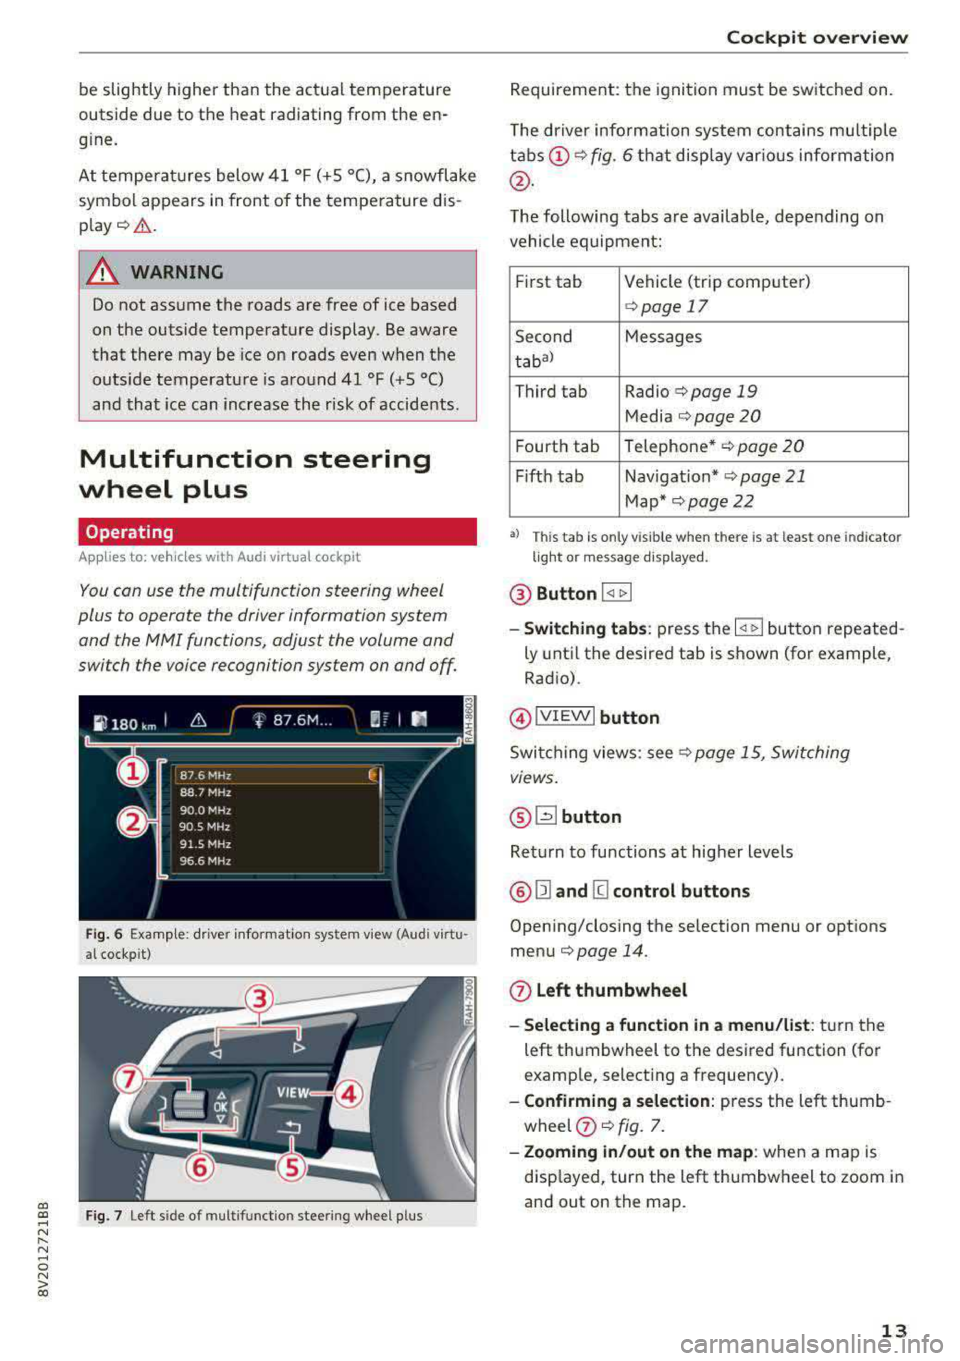
Fig. 6 Example : drive r informat ion system v iew (Aud i virtu ·
al cockp it )
F ig. 7 Le ft sid e of multifunctio n stee ring wheel p lus
Cockpit overview
Requirement: the ignition must be switched on.
The driver information system contains mu ltiple
tabs (!) c::> fig. 6 that display var ious information
@ .
The following tabs are available, depending on
vehicle equipment:
First tab Vehicle (trip computer)
c::> page 17
Second Messages
tabal
Third tab Radio c::>page 19
Media c::> page 20
Fourth tab Telephone* c::> page
20
Fifth tab Navigation* c::> page 21
Map* c::> page 22
•> This tab is only v is ible when t here is at leas t on e indi ca to r
light or mes sage displayed .
@ Button I
-Switching tabs: press the I
ly until the desired tab is shown (for example,
Radio).
@ !VIEWI button
Switching views: see c::> page 15, Switching
views.
@ ~button
Return to functions at higher levels
@ 121 and [g control buttons
Opening/closing the selection menu or options
menu
c::> page 14.
0 Left thumbwheel
- Selecting a function in a menu/list : turn the
left thumbwheel to the desired function (for
examp le, selecting a frequency).
- Confirming a selection: press the left thumb
wheel
(j) c::> fig. 7.
- Zooming in/out on the map : when a map is
disp layed, turn the left thumbwheel to zoom in
and out on the map.
13
Page 18 of 400
Cockpit overview
-Muting or pausing: turn the right thumbwheel
down.
Or : press the right thumbwheel.
-Unmuting or resuming: turn the right thumb
whee l up .
Or: press the right thumbwheel.
@ l1<1
-Selecting the previous/next track or station:
press the l1<1<1! or lt>~ I button.
-Fast forwarding /rewinding audio files : press
and hold the
! 1«1 1 or lt>t> ll button until the desired
location in the file is reached.
@m button / steering wheel heating [ii
-Steering wheel heating*: For additional infor
mation, see ¢
page 73.
-Programmable steering wheel button -open
ing a function :
press the@ button on the mul
tifunction steer ing wheel.
-Programmable steering wheel button -re
questing a function :
press and hold the@ but
ton .
-Programmable steering wheel button -chang
ing a function :
Select in the Infotainment sys
tem:
I MENU I button > Vehicle > left cont rol
button >
Vehicle settings > Steering wheel
button assignment.
@ l~"· I button
-Repeating the last navigat ion prompt : press
the
1 ~ .. v l button when route guidance is act ive.
-Changing the voice guidance volume: when
route g uidance is active, turn the right thumb
wheel upward or downward during a navigation prompt.
16
Multifunction steering
wheel
Operating
Applies to: vehicles with analog instrument cluster
With the multifunction steering wheel , you can
operate the driver information system as well as
the
MMI functions and you can also adjust the
volume.
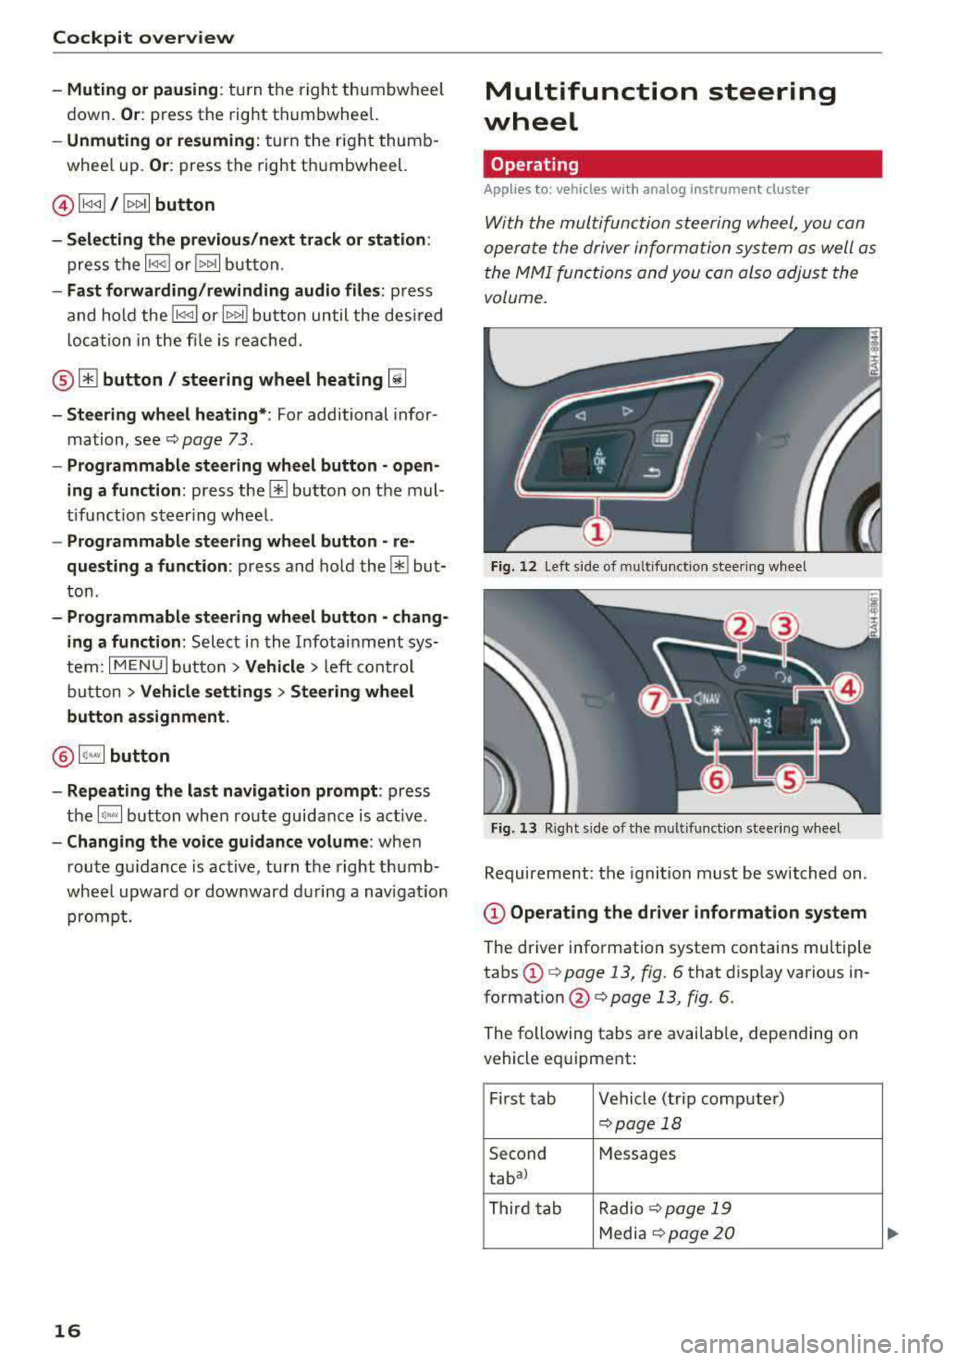
Fig. 12 L eft s ide of multifun ction stee ring wheel
Fig. 13 Right s ide of the multifunct ion steer ing wheel
Requirement : the ignition must be switched on .
@Operating the driver information system
The driver information system contains mu ltiple
tabs
(D q page 13, fig. 6 that display various in
formation
@ c> page 13, fig. 6.
The following tabs a re available, depending on
vehicle equipment:
First tab Vehicle (tr ip computer)
c>page 18
Second Messages
tabal
Third tab Radio c>
page 19
Media ¢ page 20
Page 19 of 400
CXl CXl .... N ,.__
N .... 0 N > 00
Fourth tab Telephone*~ page 20
Fifth tab Navigation*~ page 21
a) This tab is only v isible when there is at least one ind icato r
l igh t or mess age disp layed .
-Switching tabs : press the !<1 t> I button repeated
ly until the des ired tab is shown.
- Opening /clos ing the men u: press the I§ but
ton.
- Selecti ng a funct io n in the menu /list : turn the
left thumbwheel to the desired funct ion.
- Confirming a sele ct ion : press the left thumb
wheel to confirm your selection.
- Returning to functions at highe r le vels : press
the
121 button.
- Scrolling w ithin lists : turn the left thumb
whee l quickly.
@ 0button
-Ac cepting a call : press the 0 button when
there is an incoming ca ll.
-Ending a call : press the 0 button during an ac
t ive phone call.
- Opening the call list : if no phone call is in p rog
ress and there are no incom ing calls, p ress the
0 button.
@ ~ button
-Switching the voice recogn ition system on :
briefly press the 51 butto n. Say the des ired
command afte r th e
Beep .
- Switching the voic e recogn ition sy stem off :
press and hold t he 51 butto n. Or: say the com
ma nd
Cancel.
For more information about the vo ice recognit ion
system, see
¢ page 170, Voice recognition sys
tem.
© Right thum bwheel
You can adjust the vo lume of an aud io source or a
system message (for example, from the voice
recognition system) when the sound is playing .
-Increa sing o r de crea sing the volume : turn the
right thumbwhee l up or down.
- Muting o r pausing : turn the right th umbwheel
down.
Or : press the right thumbwheel.
Coc kpit o ve rv iew
-Unmuting or re suming : turn the right th umb
wheel up .
Or: press the right thumbwhee l.
® l~ I / lt>t> li button
- Selecting the pr eviou s/next track or stat ion :
press the !1<1<1 1 or lt>t> I! button.
- Fa st forwarding /rewinding audio fil es: press
and hold the
l 1<1<1 ! or lt> 1>1 I button unti l the desired
location in the file is reached.
@ [ii button I ste ering whe el heating* ~
-Steering wheel heating *: For add it ional infor
mat ion, see
¢ page 73 .
-Programmab le steering whe el butt on - open
ing a functio n:
Press the [ii button on the mul
tifunction steering wheel.
- Programmab le st eering whe el bu tton -re
que sting a function :
press and hold the [ii but
ton.
- Programmab le ste ering wheel b utton - chang
ing a functio n:
Se lect in the Infotainment sys
t em:
!MENUI b utton> Vehicle > left control
button >
Vehicle setting s > Steering wheel
button a ssig nment .
0 lq•.vl button
- Re peat ing the la st nav igat ion p rompt :
press
the
1 ~ ... ,I button when route gu idance is active .
-Changing the vo ice guid ance volume : when
route guida nce is act ive, turn the r ight thumb
wheel upward or downward dur ing a navigation
prompt.
Driver information
system
Trip computer (Audi virtual cockpit)
App lies to : veh icles w it h Audi virt ual coc kpit
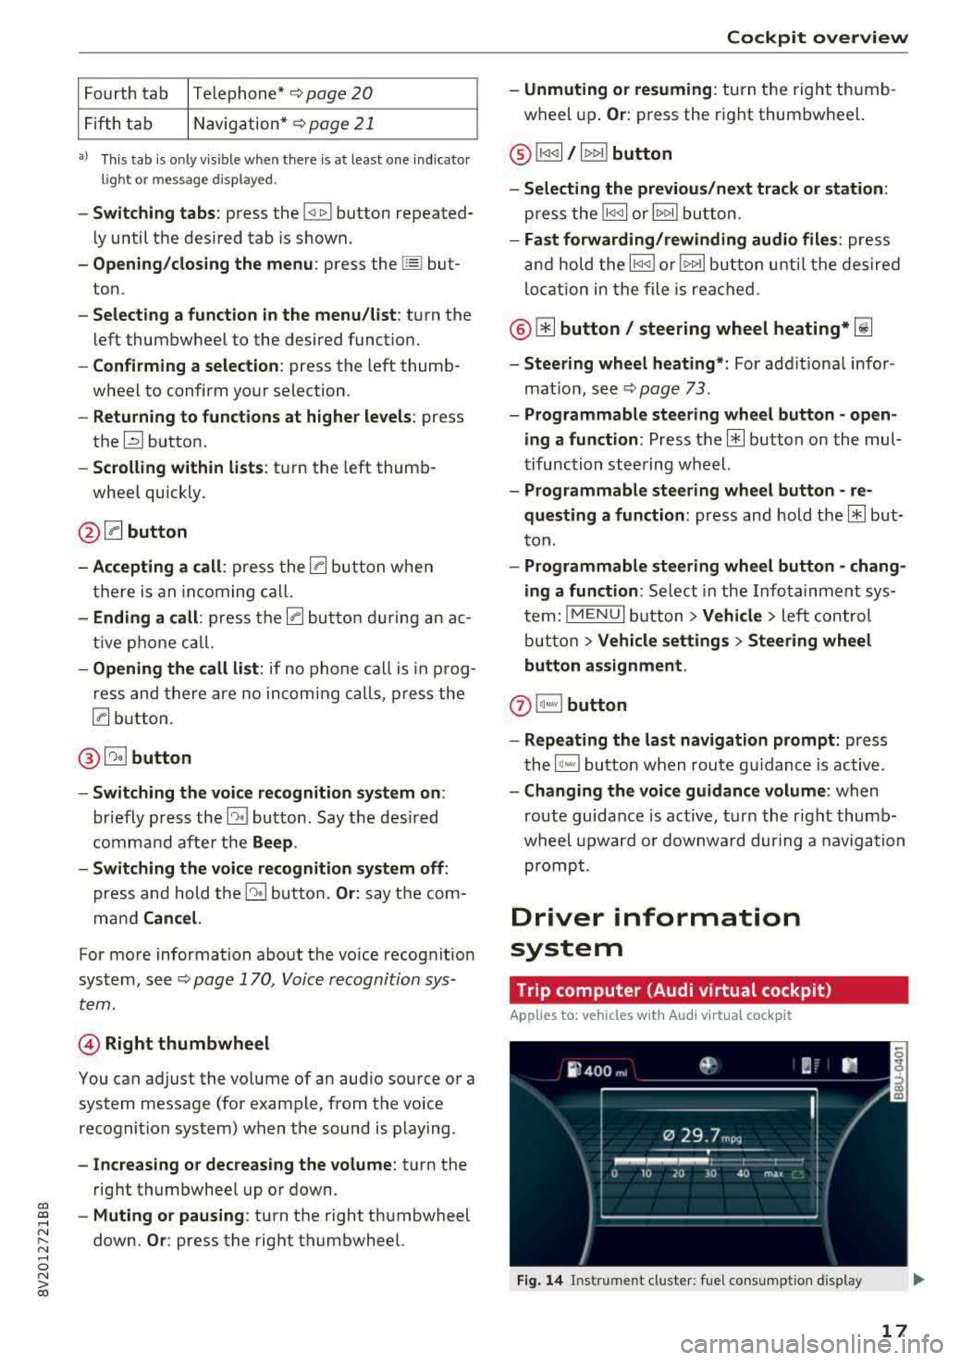
Fig. 14 Instrument cluster: fue l consumption display
17
Page 27 of 400
CXl CXl .... N ,.__
N .... 0 N > 00
Adaptive cr uise control*
¢ page 128
e-tron: system warning *
¢page98
e- tron: charg ing system*
¢ page 117
Yellow indicator lights
--------------
Cent ral indicato r light
¢page 24,
Brake booster*
¢page27
Ele ct ronic Stabi lization Con trol
( E SC)
./
¢ page 31
Electronic Stabilization Control
(ESC)
./
¢ pag e 31
Elect ronic Stabilization Control
(ESC)
opage 151
USA models:
Anti-loc k bra king system (ABS) ./
¢page 31
Canada models :
Anti-lock bra king system (A BS)./
¢ page 31
Safety systems ./
¢page29
USA models:
Brake pads
. , ¢page31
Canada models :
Brake pads
¢page31
Ele ctr omech anical pa rk ing bra ke
¢ page28
Hill hold ass ist
¢ page 31
Tire press ure*
¢ page344
Cockpit o verview
Tire p ressure*
¢ page 344
Engine contro l*
¢ page 31
Engine co ntro l*
¢ page 31
Malfunc tion indica to r l amp (M IL)
./
¢ page 31
En gine speed limitation*
¢page 31
En gine o il level (MIN)
¢ page 32
En gine o il sensor
¢ page 32
Battery charge
¢page 29
Tank system
¢page 32
Washer f lu id level
¢ page 32
Windsh ie ld w ipers
¢ page 32
Remo te contro l key*
¢ page 80
D river 's doo r*
¢ page 32
Battery i n remote control key
¢ page35
Bu lb fa ilure indicator*
¢ page 33
Head light range control system
¢ page 33
Adaptive light *
¢page 33
Lig ht/rain senso r*
¢page 33
Transmission
¢ page 91
Stee ring lock
¢ page 30
25
Page 29 of 400
CXl CXl .... N ,.__
N .... 0 N > 00
D
'
AC ,-..._,
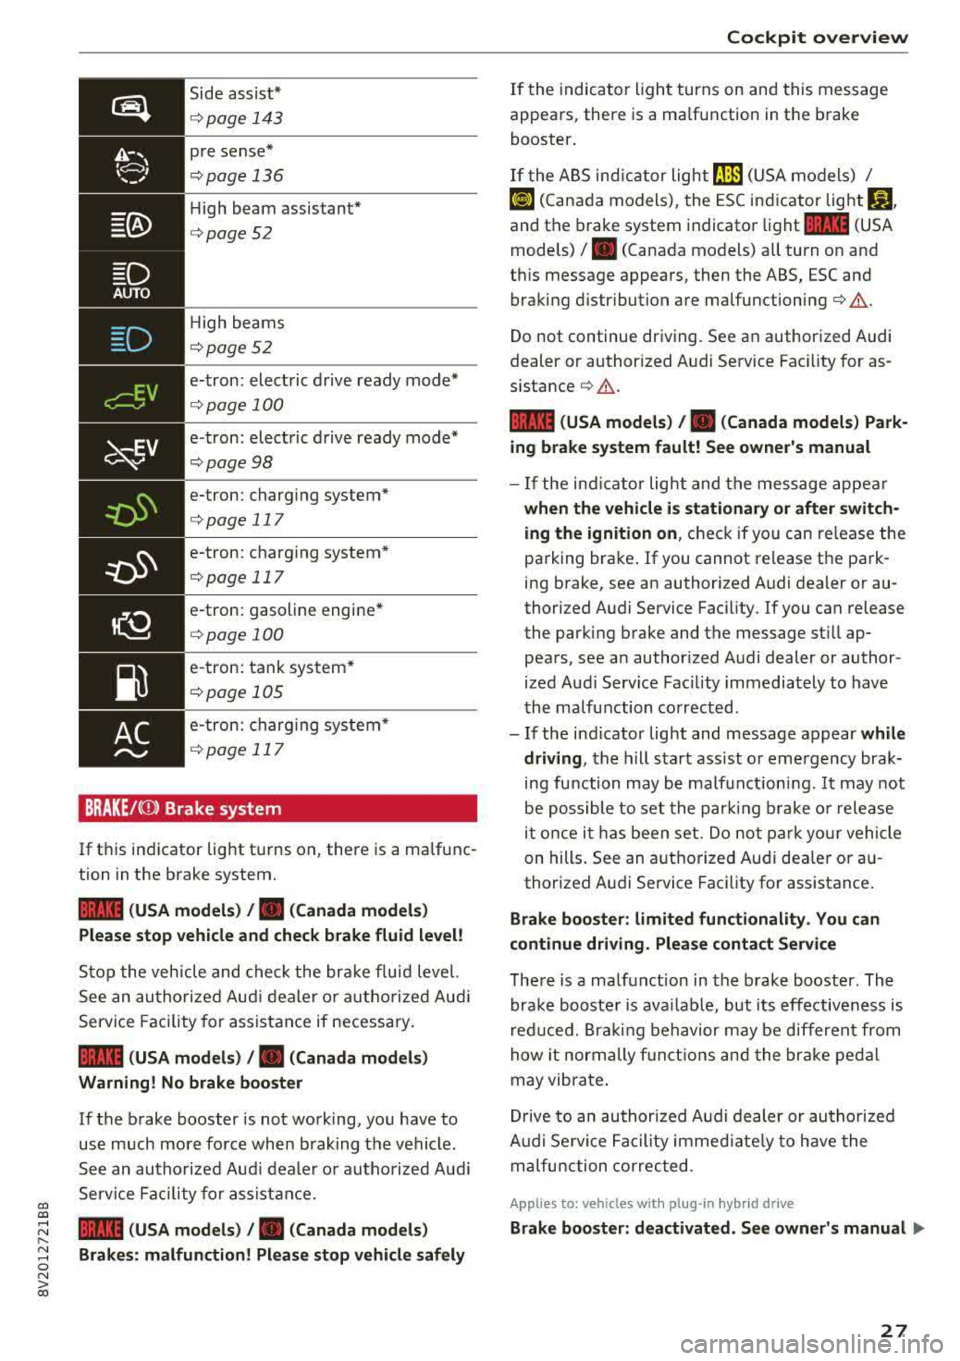
Side assist*
c:>page 143
pre sense*
c:>page 136
High beam assistant*
c:> page 52
High beams
c:> poge 52
e-tron: electric d rive ready mode*
c:> page 100
e-tron: electric drive ready mode*
c::> page98
e-tron: charg ing system*
c:> page 117
e-tron: charg ing system*
c:> page 117
e-tron: gasoline engine*
c:> page 100
e-t ron: tank sys tem*
c:> poge 105
e-tron: charg ing system*
c:> page 117
BRAKE/C CD) Brake system
If this ind icator light tu rns on, there is a malfunc
tion in the brake system.
1111 ( USA models ) /. (Canada mod els )
Please stop vehicle and check brake fluid le vel!
Stop the veh icle and check the brake f luid level.
See an au thori zed Aud i dealer o r aut ho rized Aud i
Service Facility for assistance if necessary .
1111 (USA model s) /. (Cana da model s)
Warning! No brake boo ster
If the brake booster is not working, you have to
use much more force when braking the vehicle.
See an autho rized Aud i dealer o r autho rized Aud i
Service Fac ility for ass istance.
1111 ( U SA mod els ) /. (Canada mod els )
Brake s: malfunction ! Pl ease stop v ehicle safely
Coc kpit o ve rv iew
If the indicator light turns on and this message
appears, there is a ma lfunction in the brake
booster .
If the ABS ind icator light rJlm (USA models) /
[iJ (Canada models), the ESC ind icator light Bl
and the brake system indicator light 1111 (USA
models)
/ . (Canada models) all turn on and
th is message appears, then the ABS, ESC and
braking d istribution are malfunctioning
c:> .&. .
Do not continue driving. See an authorized Audi
dealer or authorized A udi Service Fac ility for as
s istance
c:> .&. .
1111 (USA model s) /. (Canada mo del s) Park
ing b rake sy stem f ault! See owner 's manual
- I f the ind icator lig ht and the message appea r
when the vehicle is stationary or after switch
ing the ignition on ,
check if you can release the
parking brake . If you cannot release the park
ing brake, see an author ized Audi dealer or au
thori zed Audi Service Fac ility.
If you can release
the parking brake and the message st ill ap
pears, see an author ized Audi dealer or author
ized Aud i Serv ice Fac ility immediately to have
the malfu nction corrected .
- If the ind icator light and message appear
whi le
driving ,
the hill s tart ass ist or emergency brak
ing function may be ma lf u nctioni ng.
It may not
be possible to set the par kin g b rake o r rele ase
it once i t has been set . Do no t park yo ur vehicle
on hills . See an a utho rized Audi dea le r or a u
thorized A udi Service Facility for assistance.
Brake boo ster : limited functionality . You can
continue driving. Plea se cont act S ervi ce
T he re is a malfunct ion in the b rake booster . The
brake booste r is ava ilable, but its effective ness is
r ed uced. Bra king behavior may be different from
how it normally f unct ions and the br ake pedal
may vibrate .
D rive to an authorized A udi dealer or autho rized
A udi Se rvice Fac ility immed iate ly to h ave the
malfunction correc ted.
App lies to : vehicles wi th plug-in hyb rid drive
Brake booster: d eactivated . See owner's manual .,.
27
Page 30 of 400
Cockpit over view
The brake booster remains active for a br ief peri
od of time after switching off the ignition. To se
cure the vehicle from ro lling away, move these
lector lever in the P position or set the parking
brake.
A WARNING
- Read and follow the warnings in
¢ page 316, Working in the engine com
partment
before open ing the hood and
check ing the b rake fl uid level.
- If the bra ke system indicator light does not
tu rn off o r it t urns on while driv ing, the
bra ke fluid level in the reservoir is too low ,
and this inc reases the risk of an acc iden t.
Stop the vehicle and do not continue dr iv
ing. See an authorized Audi dealer or au
tho rized Audi Service Facility for ass istance .
- If the bra ke sys tem indicator light turns on
together with the ABS and ESC indicator
lights, the ABS/ESC regulating function may
be malfunctioning. Functions that stabilize
the vehicle are no longer ava ilable. This
could cause the rear of the ve hicle to
swerve, which increases the risk that the ve hicle will slide . Do not continue driving . See
an aut ho rize d Aud i dea le r o r authori zed
Audi Service Facility for assistance .
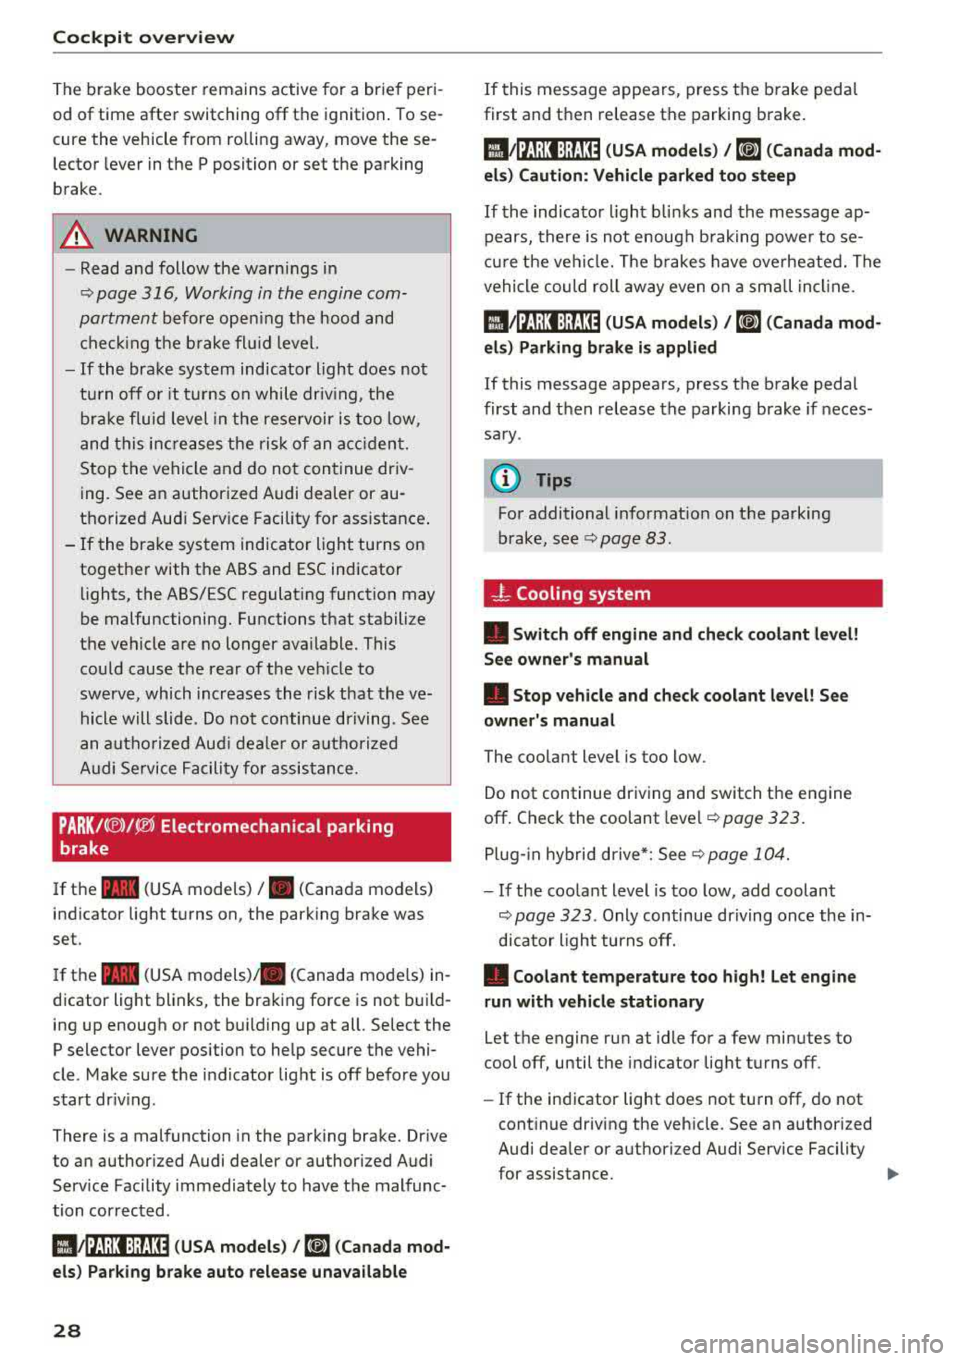
PARK!<®)/ ~ Electromechanical parking
brake
If the -(USA models) I . (Canada models)
indicator light t urns on, the park ing brake was
set.
I f the
-(USA models)/ . (Canada mode ls) in
dicator light blinks, the braking fo rc e is not b uild
ing up enoug h or not b uilding up at all. Select the
P selector lever position to help secure the vehi
cle. Make sure the indicator lig ht is off before you
s tart dr iv ing .
There is a mal function in the park ing brake. Dr ive
to an author ized Audi dealer or author ized Audi
Serv ice Facility immediately to have the malfunc
tion corrected .
1'11j1j;j:lj :j;fj~~ (USA models ) / DJ (Can ada mod
els ) Par king brake auto release unava ilable
28
If this message appears, press the brake pedal
first and then release the parking brake.
1!1Jj1J;j:lj :J;f:U~ (USA model s) I DJ (Canada mod
els) C aution: Vehicle parked too steep
If the indica to r li gh t blin ks and the message ap
pears, there is not enoug h braking powe r to se
cu re the ve hicl e. Th e b rakes have ove rheate d. The
vehicle could roll away even o n a small in cli ne .
l91j;l1;j:lj :);f:U~ ( USA model s) / DJ (Canada mod
el s) Parking brake is applied
If this message appears, press the brake peda l
first and then release the parking brake if neces
sa ry .
(D Tips
For additional informat ion on t he parking
brake, see
¢ page 83.
-L Cooling system
• Switch off engine and check coolant level!
See owner's manual
• S top vehicle and ch eck coolant le vel! See
owner's manual
The coolant level is too low .
Do not continue driving and switch the engine
off. Ch eck the coolant level ¢
page 323 .
Plug -in hybrid d rive*: See ¢ page 10 4.
- If the coo lant level is too low, add coolant
¢
page 323 . Only continue dr iving once the in
dicator light turns off.
• Coolant temperature too high! L et engine
run with vehicle stationary
Let the engine ru n at idle for a few minutes to
cool off , until the indicator lig ht turns off .
-If the indicator light does not turn off , do not
cont inue driving the veh icle. See an authori zed
Audi dea le r or authori zed Audi Service Facility
for assistance.
.,,.
Page 33 of 400
CXl CXl .... N r--N .... 0 N > 00
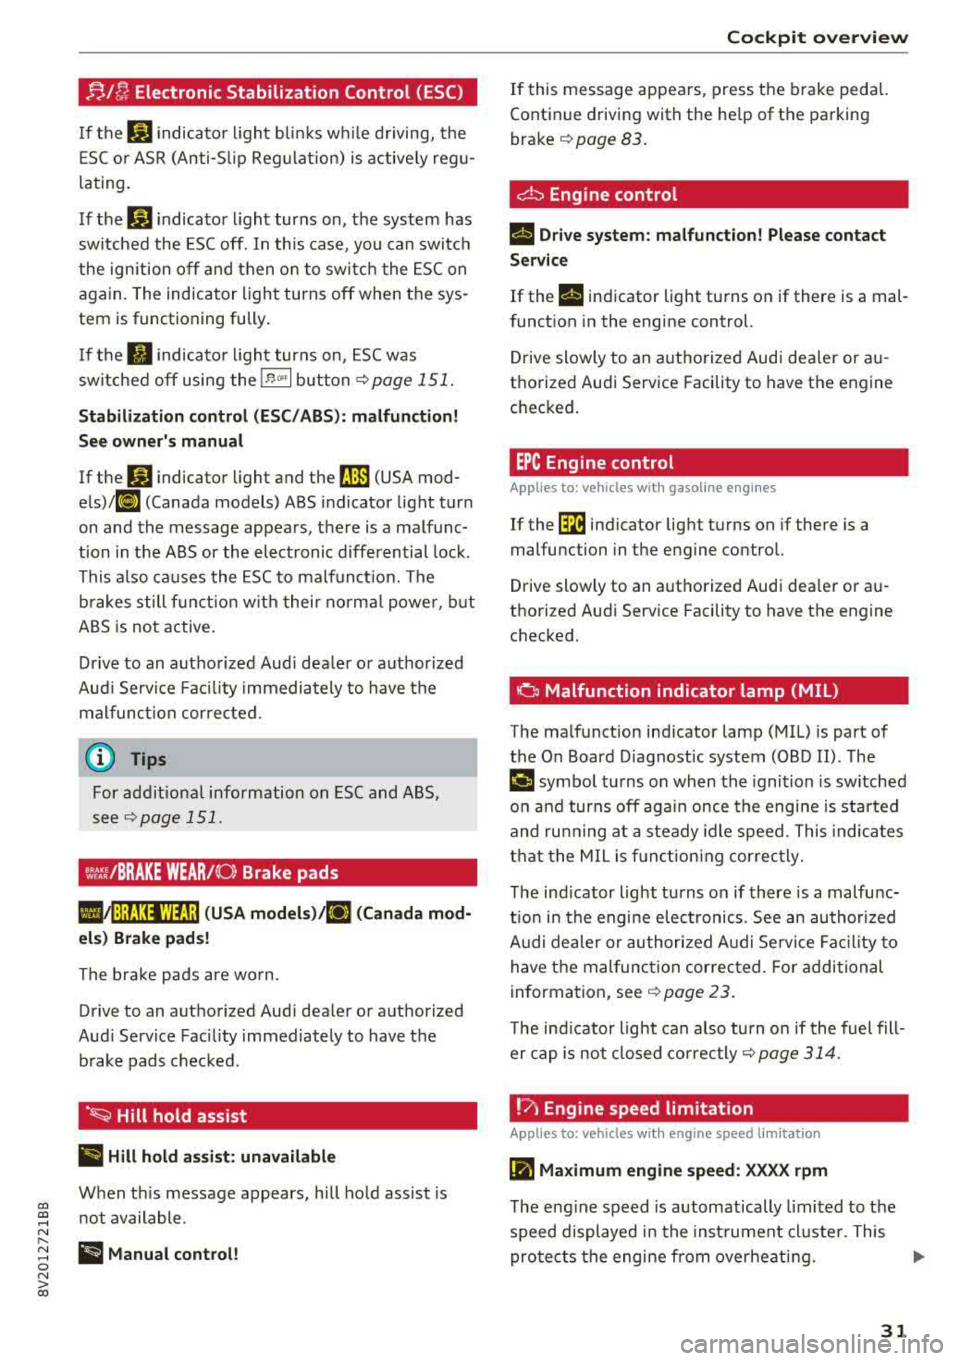
!;.!~ Electronic Stabilization Control (ESC)
If th€: G1 indicato r ligh t blink s w hile d riving, the
E SC or ASR (Anti-S lip Reg ulation) is active ly reg u
l at ing .
I f
the: GJ indicator light turns on, the system has
sw itched the ESC off. In this case , you can switc h
the ign ition off and then o n to switch the ESC on
again. The indicator light turns off when the sys
tem is functioning fully .
I f the
II indicato r ligh t turns on, ESC was
sw itched off using the
!.$ m l button i=:> page 151.
Stabilization control (ES C/ ABS) : malfunction!
Se e owner's manual
If the: G1 ind icator light and t he ~ (USA mod
els)/ 11] (Canada models) ABS indicator light turn
on and the message appears, there is a malfunc
tion in the ABS or the elect ronic differential lock .
This a lso ca uses the ESC to malfunct io n. The
b rakes s till f unct io n w it h thei r norma l powe r, but
ABS is not act ive.
D rive to an autho rized Aud i dea le r or a uthorized
Aud i Servi ce Faci lity immediately to have the
malfunct ion corrected .
For addit ional information on ESC and ABS,
see
¢ page 151.
~,t:ri /BRAKE WEAR/ (0: Brake pads
l,IJ1 :j;t!31WtJ ;j ( USA models )/riJ (Canad a mod
el s) Brake pads !
The brake pads are wo rn.
Drive to an authorized Aud i dea ler or authorized
Aud i Service Facility immediately to have the
b rake pads c hecked .
·~ Hill hold assist
II Hill hold a ssist : unavailable
When th is message appears, h ill hold assist is
n ot available .
ii Manual control!
Cockpit o ve rv iew
If this message appears , press the b rake p eda l.
Continue driving with the he lp of th e parking
brake
¢ pag e 83.
~ Engine control
II Drive system: malfunction! Please contact
Serv ice
If the II indicator light turns on if ther e is a mal
funct ion in the engine control.
Drive slowly to an a uthorized Audi dea ler or a u
t h orized Audi Service Facility to have the engine
c h ecked .
EPC Engine control
Applies to : vehicles with gasoline engines
If the ~ indicato r light t urns on if there is a
malfunction in the engine cont rol.
Drive slowly to an a uthori zed Audi dea ler or a u
thori zed Audi Serv ice Facility to have t he engine
checked.
o Malfunction indicator lamp (MIL)
T he ma lfunction ind icator lamp (MIL) is p art of
the On Board D iagnost ic system (OBD II) . The
¢4 c;ymbol tu rns on when the igni tion is sw itched
o n and turns off aga in once the engine is started
and ru nning at a steady idle speed. This indica tes
t h at the MIL is f unct ion ing cor rec tly.
T he ind icator light tu rns o n if there is a malfu nc
t ion in the engine electronics . See an author ized
A udi dealer or authori zed A udi Se rvice Fa cility to
have t he mal func tion cor rected . Fo r addi tional
information, see
i=:> page 23.
The ind icator light can a lso tu rn o n if the fuel fill
er cap is not closed correc tly
i=:> page 314 .
!?) Engine speed limitation
Applies to: vehicles wi th engine speed limitation
(Pl Maximum engine speed : XXXX rpm
The eng ine speed is automatically limited to the
speed displayed in the inst rument cl uste r. This
pro te cts the engine from ove rheating .
31
Page 81 of 400
If the 'Tj indicator light blinks and the message
Please turn steering wheel appears when switch
ing the ign ition on, the steer ing lock is locking
the steering wheel. In this case, turn the steering
wheel slight ly to the left/right.
Start /Stop system*
See the information in¢ page Bl, Start/Stop
system .
A WARNING
To reduce the risk of poisoning, never allow
the engine to run in confined spaces.
@ Note
Avoid high engine speed, full throttle, and
heavy engine load if the engine has not
reached operating temperature yet. You could
damage the engine.
@ For the sake of the environment
Do not let the engine run while parked to
warm up. Begin driving immediately. This
re
duces unnecessary emissions.
(D Tips
-Some noise after starting the engine is nor
mal and is no cause for concern.
- If you leave your vehicle with the ignition
switched on, the ignition will switch off
af
ter a certa in amount of t ime. Make sure that
electr ica l equ ipment such as the exter ior
lights are switched off.
Stopping the engine
Applies to: veh icles with conve nience key
-
Plug-in hybrid dr ive*: refer to the informat ion un
der ¢ page 96.
.. Bring the vehicle to a full stop.
.. Move the selector lever into the P pos ition.
.. Press the I STAR T ENGINE ST OPI button
¢ page 78, fig. 90 .
CXl CXl .... N r--N .... 0 N > l) This func tion is not avai lable in all countries. 00
D riving
Steering
lock1 )
T he steering locks when yo u turn the engine off
using the
I STA RT ENG INE S TOPI* button, move
the selector lever into the P position and open
the driver's door. The locked steering hel ps pre
vent vehicle theft.
Emergency off function
If it is absolutely necessary, the eng ine can also
be turned off whi le driving at speeds starting at
4 mph (7 km/h). To switch the engine off, press
the
I START ENGINE STOPI button twice in a row
briefly or press and ho ld for longer than two sec
onds.
A WARNING
-- Never turn off the engine before the vehicle
has come to a complete stop. The full func
tion of the brake booster and the power
steer ing is not guaranteed. You must use
mo re force to turn or brake. Because you
cannot steer and brake as you usually
wou ld, this could lead to accidents and seri
ous injuries.
-Always take the key with you whenever yo u
leave your vehicle. Otherwise, the engine
could be started or electrical equipment
such as the power windows could be operat
ed. This can lead to ser ious injury.
- For safety reasons, always park the vehicle
with the selector lever in the P pos ition.
Otherw ise, there is the risk that the vehicle
could roll unintentionally .
(D Note
If the engine has been under heavy load for
an extended period of time, heat builds up in
the engine compartment after the engine is
switched off and there is a r isk of damaging
the engine. For th is reason, let the engine run
for at id le for approximately two minutes
be-
fore shutting it off . ..,.
79
Page 86 of 400
Driving
"'To start driving and release the parking brake
automatically, press the accelerator pedal as
usual.
In addition to releasing the parking brake auto
matically, other convenience and safety functions
are available when you start driving
¢ page 85,
Starting from a stop.
Preventing the automatic parking brake
release
The vehicle could begin rolling unintentionally,
dep ending on the hill or if towing a trailer.
"'To prevent the parking brake from releasing au
tomatically, pull and hold
the®> switch and
press the accelerator pedal. The parking brake
remains set and prevents the vehicle from roll
ing backward.
"'You can release the(®) switch again once you
are sure that you are giving enough driving
force to the wheels by pressing the accelerator pedal.
Emergency braking function
You can use the emergency braking function in an emergency situation, or if the standard brake op
eration malfunctions or is disabled .
"'Pull and hold the(®) switch.
"' As soon as you release the ®> switch or acceler-
ate, the braking stops .
Pulling and holding
the®> switch while driving
the vehicle activates the emergency braking func
tion . The vehicle is braked at all four wheels by
activating the hydraulic brake system. The brak ing effect is similar to heavy
braking ¢,&. .
To reduce the risk of activating the emergency
braking by mistake, a warning tone (bu zzer)
sounds when
the(®) switch is pulled. Emergency
braking stops as soon as
the(®) switch is released
or the accelerator pedal is pressed .
Parking
"' Press the brake pedal to stop the vehicle.
"'Pull the®> switch to set the parking brake.
"'Place the selector lever in the P position.
"'Turn the engine off ¢,&. .
84
"'Turn the steering wheel when parking on in
clines so that the wheels will roll into the curb
if the vehicle starts moving.
A WARNING
- Do not press the accelerator pedal inadver
tently if a gear is selected when the vehicle
is stationary and the engine is running . Oth
erwise, the vehicle will start to move imme
diately and this could result in an accident.
- Emergency braking should only be used in
an emergency, when the normal brake pedal has failed or the brake pedal is obstructed.
During emergency braking, your vehicle will
brake similar to heavy braking. ESC and the
associated components (ABS, ASR, EDL)
cannot overcome the laws of physics. In cor
ners and when road or weather conditions
are bad, a full brake application can cause
the vehicle to skid or the rear end to swerve,
which increases the risk of an accident.
- If the power supply fails, you cannot set the
parking brake if it is released . In this case,
park the vehicle on level ground and secure
it by placing the selector lever in the P posi
tion. See an authorized Audi dealer or au
thorized Audi Service Facility for assistance.
-Always take the vehicle key with you when
leaving your vehicle, even for a short period
of time . This applies particularly when chil
dren remain in the vehicle. Otherwise chil
dren could start the engine, release the
parking brake or operate electrical equip
ment such as power windows, which in
creases the risk of an accident.
- No one should remain in the vehicle when it
is locked - especially children. Locked doors
make it more difficult for emergency work
ers to get into the vehicle, which puts lives
at risk .
(D Tips
When stopping at a traffic signal or stopping
in city traffic, you can set the parking brake
manually . The vehicle does not have to be
held with the brake pedal. The parking brake
eliminates the tendency to creep when a se lector lever position is engaged . As soon as
Page 112 of 400
e-tron
Charging dock
Applies to: vehicles with plug -in hybrid drive and charging
dock
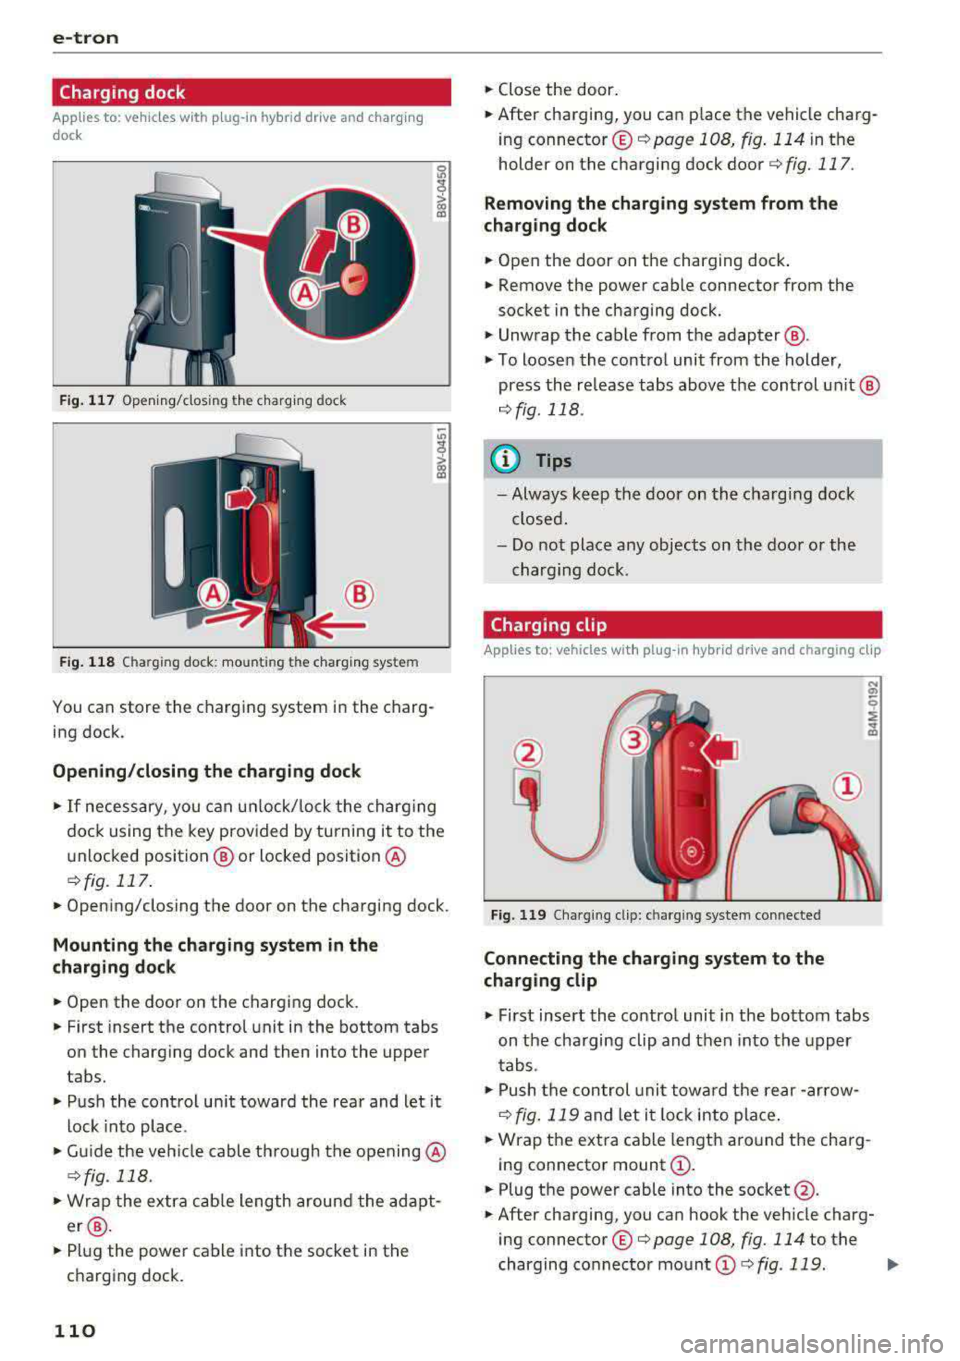
F ig . 11 7 Opening/clos ing t he charg ing dock
®
F ig . 118 Cha rg in g dock : mount ing th e c harg ing sys te m
You can store the charg ing system in the charg
ing dock.
Opening /closing the charging dock
• If necessary, you can u nlock/ lock the charg ing
dock using the key provided by turning it to the
unlocked position @ or locked position @
¢fig. 117 .
• Opening/closing the door on the charging dock.
Mounting the cha rging system in the
charging dock
• Open the door on the charging dock.
• First insert the control unit in the bottom tabs
on the charging dock and then into the upper
tabs.
• Push the control un it toward the rea r and let it
lock into place .
• Guide the vehicle cable th rough the opening @
¢fig _ 118.
• Wrap the extra cab le length around the adapt
er @ .
• Plug the power cable into the socket in the
charging dock .
110
• Close the door.
• After charging, you can p lace the vehicle charg
ing
connector ©¢ page 108 , fig. 114 in the
holder on the charging dock
door ¢ fig. 117.
Removing th e charging system from th e
charging dock
• Open the door on the charging dock .
• Remove the power cable connector from the
socket in the charging dock.
• Unwrap the cable from the adapter @.
• To loosen the contro l unit from the holder,
press the re lease tabs above the cont rol un it @
r=:> fig. 118 .
(D Tips
-Always keep the door on the cha rging dock
closed.
- Do not place any objects on the door or the
charging dock .
Charging clip
Applies to: vehicles with plug-in hybrid drive and charging clip
Fig. 119 Cha rg in g cl ip: c harg ing sys tem co nnected
Connecting the char ging system to the
charging clip
• First insert the control unit in the bottom tabs
on the charging clip and then into the upper
tabs .
• Push the con trol uni t towa rd the rear -ar row
¢ fig. 119 and let i t lock into place .
• Wrap the extra cable length around the charg
ing connector mount
(D .
• Plug the power cable into the socket @.
• After charging, you can hook the vehicle charg
ing
connector ©¢ page 108, fig. 114 to the
charging connector mount
(D ¢ fig . 119. ..,.