fuel cap AUDI S3 SEDAN 2017 Owners Manual
[x] Cancel search | Manufacturer: AUDI, Model Year: 2017, Model line: S3 SEDAN, Model: AUDI S3 SEDAN 2017Pages: 400, PDF Size: 67.32 MB
Page 6 of 400
Table of content s
Online media and Internet radio . . . . . . . . 227
Mu ltim edia connections . . . . . . . . . . . . . . 228
Playing media . . . . . . . . . . . . . . . . . . . . . . . 230
Addit ional se ttings . . . . . . . . . . . . . . . . . . 233
Supported media and file formats . . . . . . 235
Troubleshoot ing ................. ... . 237
Audi smartphone interface . . . . . . 239
Setup . . . . . . . . . . . . . . . . . . . . . . . . . . . . . 239
Operating . . . . . . . . . . . . . . . . . . . . . . . . . . 240
Troubleshoot ing . . . . . . . . . . . . . . . . . . . . . 240
System settings . . . . . . . . . . . . . . . . . . 241
Sett ing the date and time . . . . . . . . . . . . . 24 1
MMI se ttings . . . . . . . . . . . . . . . . . . . . . . . 241
Con nection ma nager . . . . . . . . . . . . . . . . . 242
System update . . . . . . . . . . . . . . . . . . . . . . 244
Sound settings . .... .. ..... ... .. .. .. .
Volume settings .... .. ..... ... .. .. .. .
Restarting the
MMI . .. ..... ... .. .. .. .
Software license information 2
4 5
245
246
246
Safety first . . . . . . . . . . . . . . . . . . . . . . . 247
Driving safety . . . . . . . . . . . . . . . . . . . . 247
Basics . . . . . . . . . . . . . . . . . . . . . . . . . . . . . 247
Correct passenger seating positions . . . . . 248
Driver 's and front passenger's footwell . . 252
Pedal area . . . . . . . . . . . . . . . . . . . . . . . . . . 252
Sto ring cargo co rrectly . . . . . . . . . . . . . . . 253
R epo rting Safety Defects . . . . . . . . . . . . . . 255
Ac tive rollove r prote ct io n system 256
Safety belts . . . . . . . . . . . . . . . . . . . . . . 258
Gene ral notes . . . . . . . . . . . . . . . . . . . . . . . 258
W hy use safety belts? . . . . . . . . . . . . . . . . 259
Safety belts . . . . . . . . . . . . . . . . . . . . . . . . 262
Belt tensione rs . . . . . . . . . . . . . . . . . . . . . . 265
Airbag system . . . . . . . . . . . . . . . . . . . . 26 7
Important information . . . . . . . . . . . . . . . 267
Front airbags ... ... ... .... ... .. .. .. . 271
Mon itor ing the Advanced Airbag System . 279
K nee airbags . . . . . . . . . . . . . . . . . . . . . . . . 283
4
S ide a irbags . . . . . . . . . . . . . . . . . . . . . . . . 285
Side curtain airbags . . . . . . . . . . . . . . . . . . 288
Child safety . . . . . . . . . . . . . . . . . . . . . . 292
Important information . . . . . . . . . . . . . . . 292
Child safety seats . . . . . . . . . . . . . . . . . . . . 298
Securing child safety seats . . . . . . . . . . . . 303
LATCH system (lower anchorages and
tethers for c hildren) . . . . . . . . . . . . . . . . . 306
Additional informat ion ........ ..... .. 311
Maintenance and Care ........... 312
Checking and Filling . . . . . . . . . . . . . 312
Fuel ......... .... ... ............... 312
Refueling . . . . . . . . . . . . . . . . . . . . . . . . . . 313
Ca talytic conve rter .. .. .. ........... .. 316
Engine compar tment .. ... .......... .. 316
Engine o il . . . . . . . . . . . . . . . . . . . . . . . . . . 3 19
Cooling system . . . . . . . . . . . . . . . . . . . . . . 323
Brake fluid . . . . . . . . . . . . . . . . . . . . . . . . . 325
Battery . . . . . . . . . . . . . . . . . . . . . . . . . . . . 325
Windshie ld washer system . . . . . . . . . . . . 327
Service interva l display 327
Wheels .... .. . ... .. .. ........... .. 328
Wheels and Tires . . . . . . . . . . . . . . . . . . . . 328
Tire pressure monitoring system 344
Care and cleaning . . . . . . . . . . . . . . . . 347
Genera l information . . . . . . . . . . . . . . . . . 347
Car washes . . . . . . . . . . . . . . . . . . . . . . . . . 347
Cleaning and care informat ion . . . . . . . . . 348
Plac ing your vehi cle ou t of serv ice 352
Do It Yourself . . . . . . . . . . . . . . . . . . . . 353
Emergency assistance . . . . . . . . . . . 353
T ru nk escape la tch . . . . . . . . . . . . . . . . . . . 353
Genera l info rmation . . . . . . . . . . . . . . . . . 353
Eq uipment . . . . . . . . . . . . . . . . . . . . . . . . . 353
T ire mobility kit . . . . . . . . . . . . . . . . . . . . . 354
Replacing wheels . . . . . . . . . . . . . . . . . . . . 356
Spare t ire . . . . . . . . . . . . . . . . . . . . . . . . . . 362
Page 14 of 400
Cockpit overv iew
driving conditions. The engine oil temperature
may be higher if there is heavy engine load and
h igh temperatures outside . Th is is not a ca use for
concern as long as
the .¢ page 29 or El
¢ page 32 indicator lights do not turn on.
Boost ind icator
Ap plies to: ve hicles w ith Audi virtual cockpit
The boost indicator is only shown in the expand
ed view or in the sport view*
c:::> page 15 .
The current engine load (meaning the current
boost pressure) is indicated by a bar .
Tachometer
The tachometer displays the engine speed in rev
olutions per minute (RPM) .
The beginning of the red zone in the tachometer
indicates the maximum pe rm iss ible engine speed
for all gears once the engine has been broken in and when it is wa rmed up to ope rating tempera
ture. Before reaching the red zone, yo u should
shift in to the next higher gear, choose the Do r S
selector leve r posit ion, or remove your foot from
the accelerator peda l.
Applies to: vehicles with plug- in hybrid drive
D epending on t he vehi cle eq uipment, there are
d ifferent disp lay formats
a vai lable¢ page 97.
CD Note
The needle in the tachometer @
¢ page 10,
fig. 4
o r c:::> page 10, fig. 3 may only be in the
red area of the ga uge fo r a short time o r there
is a risk of engi ne damage . The location where
the red zone beg ins varies depending on the
eng ine.
@ For the sake of the environment
Upshifting early helps you to save fuel and re
duces operating noise.
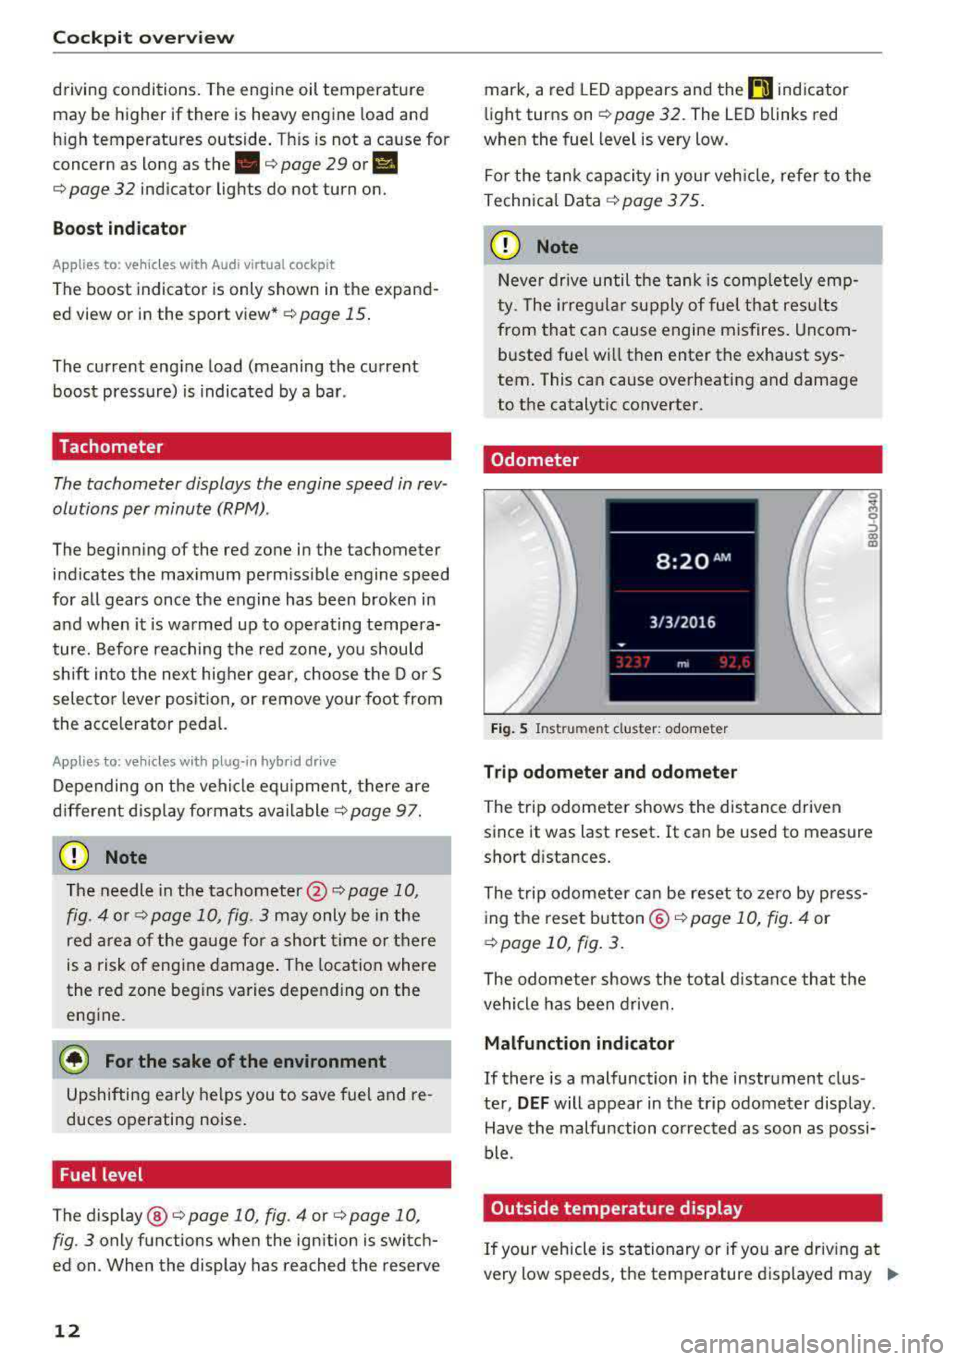
Fuel level
The
display ®¢ page 10, fig. 4 or¢ page 10,
fig. 3
only functions when the ign ition is switch
ed on . When the display has reached the reserve
12
mark, a red LED appears and the t'D ind icator
li ght turns on
c:::> page 32. The LED blinks red
when the fuel level is very low.
Fo r the tank capacity i n your veh icle, refer to the
Technical Data
c:::> page 375.
CD Note
Neve r drive until the tank is comp letely emp
ty. The irreg ular supply of fuel t hat res ults
from that can cause engine misfires . Un com
b usted fue l wi ll then enter the exhaust sys
tem . This can cause overheating and damage
to the catalyt ic converter.
Odometer
F ig . 5 Instrument cluster: odometer
Trip odometer and odometer
The trip odometer shows the dis tance driven
since it was last reset. It can be used to measure
sho rt d ista nces.
The trip odometer ca n be reset to zero by p ress
ing the reset b utton ©
c:::> page 10, fig . 4 or
c:::> page 10, fig. 3.
The odometer shows the total distance that the
vehicle has been driven.
Malfunction indicator
If there is a malfunction in the instrument clus
ter,
DEF will appear in the trip odome ter disp lay.
Have the malfu nction corrected as soon as possi
ble.
Outside temperature display
If your vehicle is stationary or if you are driv ing at
very low speeds, t he temperature d isplayed may
.,.
Page 25 of 400
a, a, ..... N
" N .... 0 N > 00
of the street name, you should turn onto the
street shown .
® Direction arrow for the upcoming maneuver
@ La ne recommendat ion
(J) A bar graph appears when a direction arrow
is displayed. The fewer bars are shown, the
shorter the distance is until the turn .
The fo llowing functions are also available when
route guidance is active:
- Repeating the last navigation prompt: press
the~ button.
-Changing the voice guidance volume : turn the
right thumbwheel up or down during voice
guidance.
A WARNING
The route calc ulated by the navigation system
is a recommendation for reaching your desti
nation. Obey traffic lights, stopping restric
tions, one-way streets, lane change restr ic
tions, etc.
{!) Tips
-Also refer to the chapter ¢ page 8, Controls
at a glance
- An exclamation point" !" in front of the
street name indicates that the informat ion
about this street or this section of the route
i s not complete in the navigation data con
tained in the MMI. Obey traffic laws in one
way streets and pedestrian zones.
On Board Diagnostic
System (OBD)
Malfunction indicator lamp (MIL)
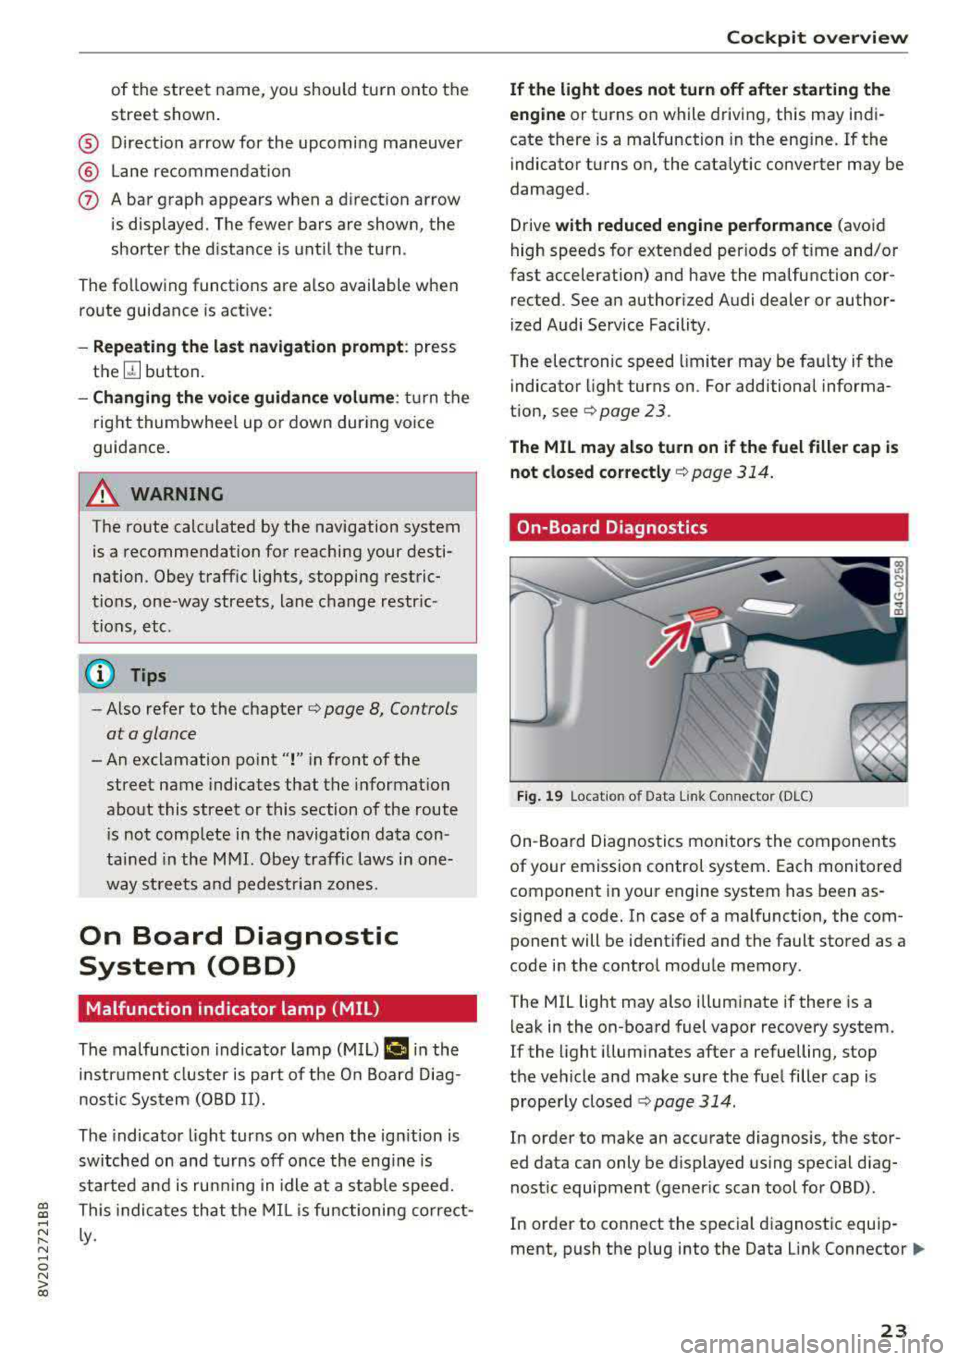
The malfunction indicator lamp (MIL) ¢4 in the
in strument cluster is part of the On Board Diag
n ostic System (080 II).
The indicator light turns on when the ign ition is
switched on and turns off once the engine is
started and is running in idle at a stab le speed.
This indicates that the MIL is functioning correct
l y .
Cockpit overview
If the light does not turn off after starting the
engine
or turns on while driving, this may indi
cate there is a malfunction in the engine.
If the
indicator turns on, the cata lytic converter may be
damaged .
Drive
with reduced engine performance (avoid
high speeds for extended periods of time and/or
fast acceleration) and have the malfunction cor
rected . See an authorized Audi dealer or author
ized Audi Service Facility.
The electronic speed limiter may be fau lty if the
indicator light turns on. For additional informa
tion, see
Q page 23 .
The MIL may also turn on if the fuel filler cap is
not closed correctly
Q page 314.
On-Board Diagnostics
Fig. 19 Locat ion of Data Link Co nnector (D LC)
On-Boa rd Diagnostics monitors the components
of your emission control system . Each monitored
component in your engine system has been as
signed a code. In case of a malfunction, the com ponent will be identified and the fault stored as a
code in the control module memory .
The MIL light may also illuminate if there is a
leak in the on-board fuel vapor recovery system.
If the light illuminates after a refuelling, stop
the vehicle and make sure the fuel filler cap is properly closed
¢ page 314.
In order to make an accurate diagnosis, the stor
ed data can only be displayed using special diag
nostic equipment (generic scan tool for 080) .
In order to connect the special diagnostic equip
ment, push the plug into the Data Link
Connector .,.
23
Page 33 of 400
CXl CXl .... N r--N .... 0 N > 00
!;.!~ Electronic Stabilization Control (ESC)
If th€: G1 indicato r ligh t blink s w hile d riving, the
E SC or ASR (Anti-S lip Reg ulation) is active ly reg u
l at ing .
I f
the: GJ indicator light turns on, the system has
sw itched the ESC off. In this case , you can switc h
the ign ition off and then o n to switch the ESC on
again. The indicator light turns off when the sys
tem is functioning fully .
I f the
II indicato r ligh t turns on, ESC was
sw itched off using the
!.$ m l button i=:> page 151.
Stabilization control (ES C/ ABS) : malfunction!
Se e owner's manual
If the: G1 ind icator light and t he ~ (USA mod
els)/ 11] (Canada models) ABS indicator light turn
on and the message appears, there is a malfunc
tion in the ABS or the elect ronic differential lock .
This a lso ca uses the ESC to malfunct io n. The
b rakes s till f unct io n w it h thei r norma l powe r, but
ABS is not act ive.
D rive to an autho rized Aud i dea le r or a uthorized
Aud i Servi ce Faci lity immediately to have the
malfunct ion corrected .
For addit ional information on ESC and ABS,
see
¢ page 151.
~,t:ri /BRAKE WEAR/ (0: Brake pads
l,IJ1 :j;t!31WtJ ;j ( USA models )/riJ (Canad a mod
el s) Brake pads !
The brake pads are wo rn.
Drive to an authorized Aud i dea ler or authorized
Aud i Service Facility immediately to have the
b rake pads c hecked .
·~ Hill hold assist
II Hill hold a ssist : unavailable
When th is message appears, h ill hold assist is
n ot available .
ii Manual control!
Cockpit o ve rv iew
If this message appears , press the b rake p eda l.
Continue driving with the he lp of th e parking
brake
¢ pag e 83.
~ Engine control
II Drive system: malfunction! Please contact
Serv ice
If the II indicator light turns on if ther e is a mal
funct ion in the engine control.
Drive slowly to an a uthorized Audi dea ler or a u
t h orized Audi Service Facility to have the engine
c h ecked .
EPC Engine control
Applies to : vehicles with gasoline engines
If the ~ indicato r light t urns on if there is a
malfunction in the engine cont rol.
Drive slowly to an a uthori zed Audi dea ler or a u
thori zed Audi Serv ice Facility to have t he engine
checked.
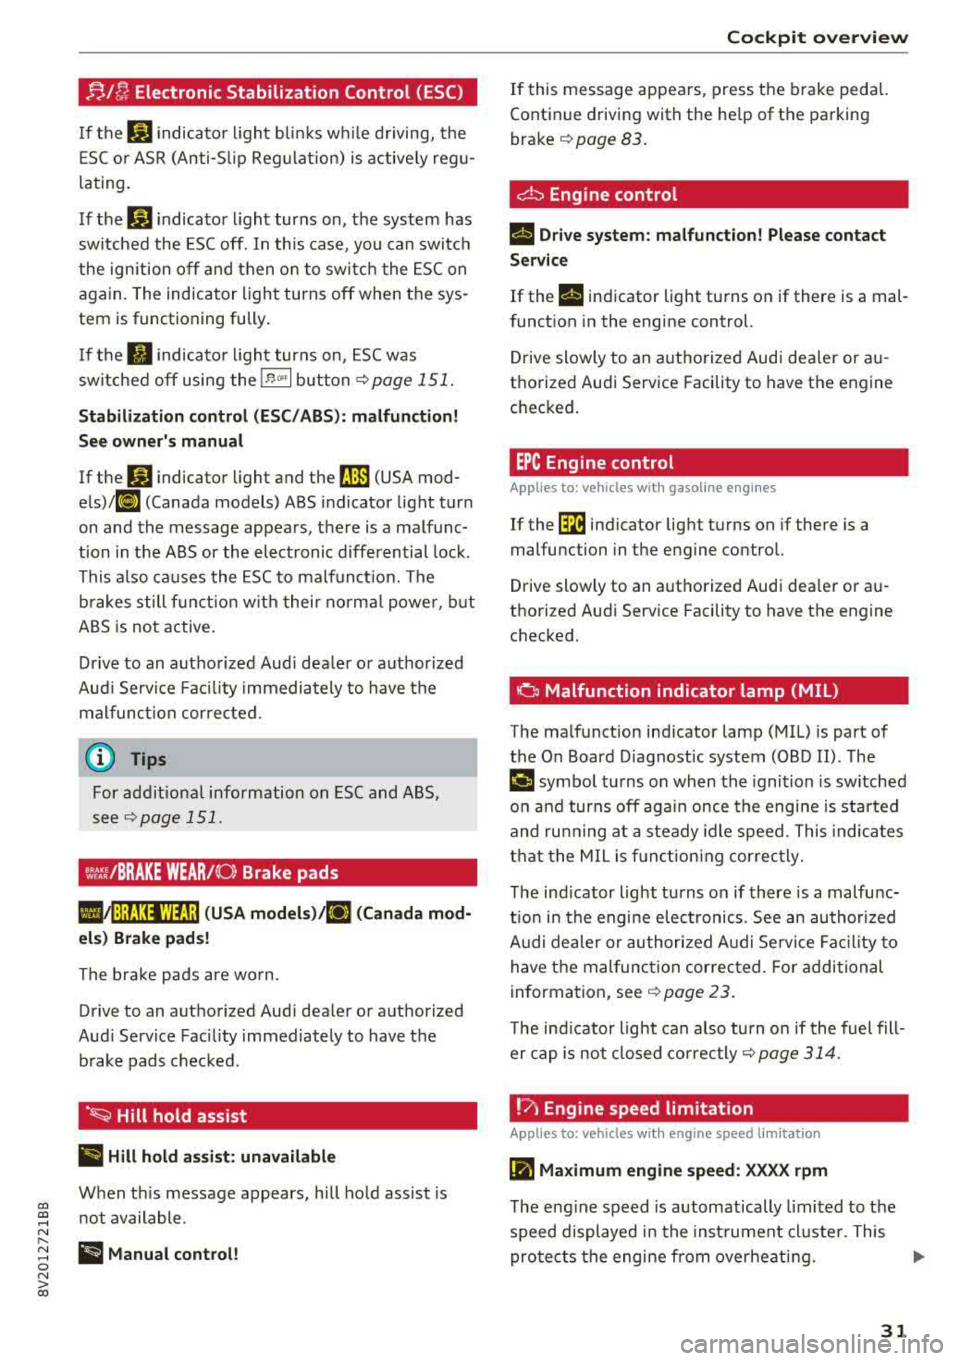
o Malfunction indicator lamp (MIL)
T he ma lfunction ind icator lamp (MIL) is p art of
the On Board D iagnost ic system (OBD II) . The
¢4 c;ymbol tu rns on when the igni tion is sw itched
o n and turns off aga in once the engine is started
and ru nning at a steady idle speed. This indica tes
t h at the MIL is f unct ion ing cor rec tly.
T he ind icator light tu rns o n if there is a malfu nc
t ion in the engine electronics . See an author ized
A udi dealer or authori zed A udi Se rvice Fa cility to
have t he mal func tion cor rected . Fo r addi tional
information, see
i=:> page 23.
The ind icator light can a lso tu rn o n if the fuel fill
er cap is not closed correc tly
i=:> page 314 .
!?) Engine speed limitation
Applies to: vehicles wi th engine speed limitation
(Pl Maximum engine speed : XXXX rpm
The eng ine speed is automatically limited to the
speed displayed in the inst rument cl uste r. This
pro te cts the engine from ove rheating .
31
Page 97 of 400
CXl CXl .... N ,.__
N .... 0 N > 00
injuries. When the vehicle enters drive ready
mode, the status message
e-"'1 o I r.-.Al"'Y ap
pears briefly in the instrument cluster d isplay
and the needle in the power meter points to
READY ¢ page 9 7.
-Make sure that the selector lever is in the P
posit ion and the ignition is switched off
when leav ing t he veh icle.
([) Note
- The high-voltage system can be damaged if
the veh icle underbody comes into contact
with the ground. Immed iately drive your ve
hicle to a n author ized repair facility and
have it inspected.
- The electric drive motor can become very hot dur ing operation . Do not stop the veh i
cle if there is o il, fuel residue or other flam
mable s ubstances under or next to the vehi
cl e.
Special considerations for the high-voltage
battery
Appl ies to: vehicl es with plug- in hybrid drive
Please first read and note the introductory infor
mat ion and heed the
warn ings ¢ page 94.
All batteries age with use and over time. There
are things you should know about the care of the
h igh-vo ltage battery that will he lp it keep giving
you good service and reliab ility over t ime . Please
read and keep the following informat ion in m ind
while you enjoy the performance and economy of
your ve hicle .
- Be sure to charge the high-voltage battery be
fore leaving the vehicle parked and unused for a l onger period of time . Ideally the high-vol tage
batte ry sho uld have a charge leve l between
40
% and 60 % when par ked for a long t ime.
- If the batte ry charge level is below 3
%, never
park the vehicle for more than 21 days without
charg ing the high-vo ltage battery. Sho uld you
have to par k the vehicle fo r a long time, m ake
s u re that the charge leve l is sufficien t to help
prevent the battery from aging premature ly.
- Freq uent and consecutive charging of the high
vo ltage battery when the cha rge level is above
e-tron
98 % can also decrease the capacity o f the
highvo ltage battery . Make sure the charge leve l
is below 98
% when you start the charging
process.
- Should the vehicle be parked for longer than
2 days at temperatures below
-13 °F (-25 °C),
the high-voltage battery could free ze and not
be ab le to prov ide energy to the electric motor.
The battery will start working again, once it
warms up. The battery can be warmed up when
the outside temperature rises or when the vehi
cle is garaged app ropr iate ly. Th e battery w ill al
so warm up when bei ng used (sw itchi ng on the
air conditioner, the heater or by driving the ve
hicle) . Shou ld you have to park your vehicle at
very low temperatures for longer than 1 day, make sure that the h igh-vo ltage battery does
not freeze by parking the vehicle in a garage
that is heated or protected from the outside
temperature .
- The high-voltage battery can be damaged and
the capacity can be decreased when the vehicle
is parked for longer than 24 ho urs when the
ambient temperature is h igher than 118 °F
(48 °C). Always ma ke sure that the h igh-vo lt
age battery is not exposed to temperat ures
above 118 °F (48 °C) for a long time .
- Never pa rk the veh icle in areas that a re l ikely to
be flooded, s uch as beaches or rive r banks, and
never drive the vehicle in WA TER, on flooded
roads or through water that is higher than the
bottom of the vehicle body . The high -voltage
battery, along with other vehicle components,
can be damaged severe ly if the high-voltage
battery is exposed to open water especially for
a longer t ime . However, you ca n drive through
wate r o n roads under certain condi tions
~ page 74.
Failure to heed any of these requ irements can
age the battery prematurely and lead to a perma
nent decrease of the h igh-vo ltage battery's ca
pacity.
(D Tips
Always make sure that the high-voltage bat
tery is not exposed to extreme ly low and high
temperatu res as well as to water espec ia lly
fo r a longe r time. Fail ure to protec t and c are
IJ-
95
Page 108 of 400
e-tron
The gasoline engine is no longer available be
cause th ere is not enough fuel. Drive immediately
to a gas station.
Fuel filler door emergency release
A pp lies to: ve hicles w ith plug- in hy brid drive
You must use the emergency release to open the
fuel filler door when there is a malfunction
c::> page315 .
The tank is not vented. You can only fill a small
amount of fuel in the tank.
~ Fill only until the automatic fuel pump nozzle
turns off for the first time when it is operated
correctly.
Drive to an authorized Audi dealer or authorized
Audi Service Facility immediately to have the
malfunction corrected.
(D Tips
Pressure can escape if you open the tank cap
after using the emergency release. This can
create noises.
Charging
General information
A pp lies to: ve hicles w ith p lug -in hybrid drive
Two options are available for charging the vehi
cle:
- Charge at a public charging station with a spe
cial charging cable*
c::> page 108.
- Charge with household and industrial power
sockets using the Audi e-tron charging system
c::> page 108.
Environmental conditions when using the
Audi e-tron charging system
-Operating temperature : -13 °F (-2 5 °C) to 9 5 °F
(+35 °C)
- Humidity: S% to 95%, non-condensing
- 13,000 feet (4,000 meters) maximum above
sea level
- Protected against dust and spray (IP54 (USA:
enclosure 3 R))
106
Warnings when using the charging system
&
Surfaces can become very hot when
in direct sunlight.
&~
Incorrect use increases the risk of
electric shock.
~"4
Do not use any extensions cords or
cable reels.
~
Do not use any travel adapters.
~~
Do not use any power strips.
~~~
Do not use any charging cables with
damage to the electronics or the
connecting wires.
.&_ WARNING
-
Sockets that are installed incorrectly can
cause electric shock or fire when charging the
high-voltage battery using the vehicle charg
ing connection.
- Installation and setup of the household con
nection for the Audi e-tron charging system
may only be performed by a qualified elec
trician. The qualified electrician is thereby
fully responsible for adhering to applicable
standards and regulations.
- Make sure that the selected charging con nection is suitable for drawing 16 amps .
- Make sure that the household socket is
grounded and shielded from water.
- Always check the functionality of the GFI
outlet before connecting the charging cable.
- Never use a damaged GFI outlet.
- The Audi e-tron charging system may only
be used with a properly grounded power
network. It cannot be used with non
grounded power networks (such as IT net
works).
- Please follow the safety precautions in the
assembly instructions for the Audi charging
dock* or the Audi charging clips*.
.&_ WARNING
If you are not familiar with the socket or the
electrical installation or it has not been
checked by qualified experts, never use it for
Page 121 of 400
Setting the timer
Appl ies to: ve hicles with p lug -in hybrid drive
By setting the depa rture time, you dete rm ine
when yo ur vehicle shou ld reach the desi red tem
pe rature . You can set the time r in the auxiliary air
conditioning menu in the Infotainment system.
Auxiliary climate control : setting th e timer
• Select: I MENU I button > Veh icl e> left control
button >
Auxiliar y A/C > right cont rol b utton>
Program tim er.
• Set the time and the date .
• Press the I BACK I button.
• Confirm the setting with the control knob to ac-
tivate the timer. A
..f appears in the box.
When you reprogram a timer, the next calendar
day is automatica lly entered in the Infotainment
system . To activate the auxiliary climate control
for the next day, confirm the
setting( ../ in the In
fotainment system).
Error me ssag es
l;c1 -The hig h-voltage battery charge level is too
low to heat/air condition the vehicle using only
e lectric power.
I f one of the fo llow ing symbols appears in the
d isp lay, then you cannot switch on the auxiliary
climate cont rol:
,...c -T here is a system ma lf u nction.
Bu -The fuel level is too low .
(D Tips
-You can set the t imer a maximum of seven
days in advance.
- You can operate the climate control in the
vehicle interior when the high-vo ltage bat
tery is charging using the charging timer
9 page 112 . The climate control output de
pends on the powe r socket capac ity.
- Make su re the time and date match in the
Infotainment system settings so that the
timer can function
p roper ly ~ page 241 .
~ -The aux ilia ry climate control can continue to ....
~ run after the depart ure t ime is reached.
N .... 0 N > 00
e-tron
Cleaning/maintenance
information
Appl ies to : vehicles wi th plug-in hybrid drive
When was hing your vehicle with a pressure wash
er, always follow the operat ing instruct ions pro
vided with the pressure washer . This is especially
i mportant in regard to the pressu re and spray ing
distance. Do not dire ct cleaning spray at the
charg ing unit in the rad iator g rille or at t he
charg ing dock*/charging cl ip *. Keep a d istance of
a t least 16 in (40 cm) .
Do not remove snow and ice with a pressure
washer .
Never use cone nozzles or high pressure nozzles .
The water temperature must not be above 60
°C.
Remove contaminants on the Audi e -tron system
with a dry towel.
Remove contaminants on the charging do ck*/
charg ing clip* wi th a wet towel dampened w ith
alcohol-free clean ing solution .
A WARNING ~
-Never immerse t he Audi e-tron charging
system and connecto rs in water.
- The A udi e -tron charging system must on ly
be cleaned when the control unit is com
p letely disconnected from the power supp ly
and from the vehicle.
(D Note
To dec rease the risk of discoloration, never
clean the c harging doc k*/charging clip * with
harsh cleaning sol utions or so lutions that
contain alcoho l.
119
Page 315 of 400
CXl CXl .... N r--N .... 0 N > 00
-If you are unable to determine whether or
not a particular fuel blend meets the speci
ficat ions, ask your service station or its fuel
supplier.
-Do not use fuel for which the contents can
not be identified.
-Fuel system damage and performance prob
l ems resulting from the use of fue ls diffe r
ent from those specified are not the respon
s ibility of Audi and are not covered under
the New Veh icle or the Emiss ion Control
System Warrant ies .
-If you experience a loss of fue l economy or
driveability and pe rformance problems due
to the use of one of these fuel blends, we r ecommend that you switch to unblended
fuel.
Gasoline additives
A ma jor concern among many auto manufactur
ers is carbon deposit build-up ca used by the type
of gasoline yo u use.
A lt hough gasoline grades d iffer from one manu
facturer to another, they have cer tain things in
common . A ll gasoline grades contain substances
that can cause deposits to collect on vita l engine
parts, such as fue l injectors and intake valves.
Al
though most gasoline brands include additives to
keep engine and fuel systems clean, they are not
equally effective .
Aud i recommends using TOP TIER Detergent Gas
oline. For more informat ion on TOP TIER Dete r
gent Gasoline, please go to the official website
(www.toptiergas .com) .
After an extended period of using inadequate
fuels, carbon deposit build-ups can rob your
en
g ine of peak performance.
CD Note
Damage or malfunction due to poor fuel q ual
ity is not covered by the Aud i New Vehicle
Limited Warranty.
Ch eck ing and Filling
Refueling
Fuel filler neck
The fue l filler neck is located on the rig ht rea r
s ide panel behind the fuel fille r flap .
If the power lock ing system shou ld fail, yo u can
st ill open the flap manually
-fo r detailed instruc
tio ns see
9 page 315.
You can find the fuel tank capacity of your vehicle
i n
c::;, page 375 .
The label on the inside of the f uel fi ller flap tells
you the correct fuel for your vehicle. For more in
f ormat ion about fuel spec ificat ions, see
9 page 312.
Your vehicle fuel tank has an onboard refue lling
vapor recovery system. This feature helps to pre
vent fuel vapors from escaping from the tank and polluting the environme nt wh ile you refue l yo ur
vehicle . In order to fill the tank p roper ly w hile
pro tect ing t he e nvir onment, p lease follow t his
r efue ling p rocedure ca refully.
_& WARNING
Un der normal opera ting co nd it io ns, neve r car
ry additional f uel con tainers in your car. Gas
canisters and other containers used to trans
port fue l can be dange rous. Such containe rs,
f ull or empty, may leak and could cause a fire
i n a co llision. If you must transpo rt fuel to
use for your lawn mower, snow blower, etc .,
be ve ry careful and always observe local and
sta te laws rega rding the use, transportation
and storage of su ch f uel con tainers. Make cer
t ai n t he co ntain er meets industry standards
(ANSI/AS TM F8S2
-86).
CD Note
Never drive your veh icle until the fue l tank is
complete ly empty. The irreg ular s upply of
f u el can cause misfiring. Gaso lin e c ould enter
the e xhaust sys tem an d damage the cat aly tic
conve rter.
313
Page 316 of 400
Checking and Filling
Fueling
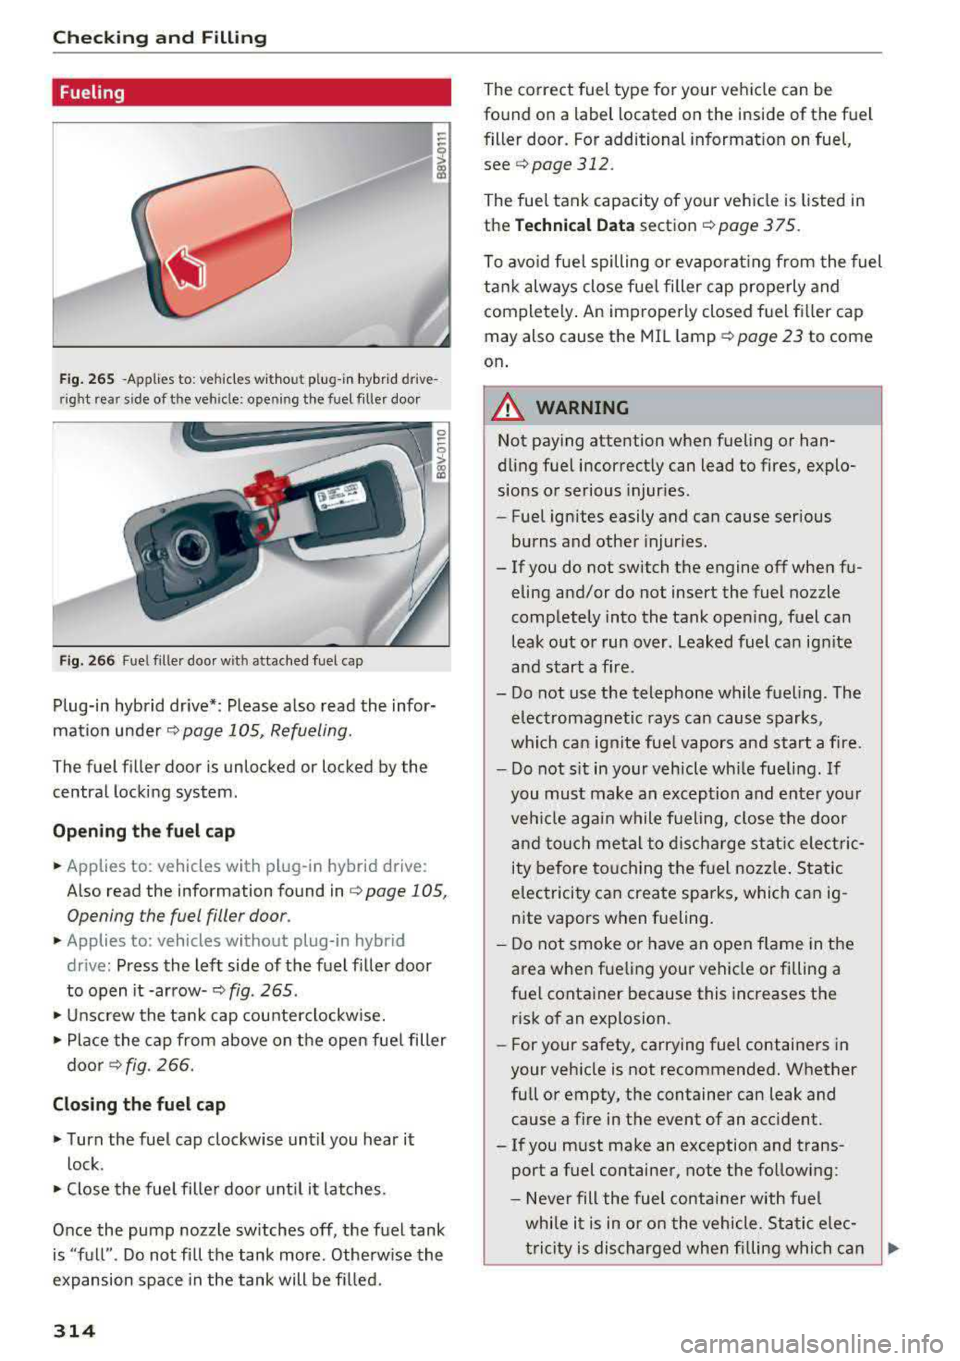
Fig . 265 -Applies to: veh icles wi tho ut p lug -in hybrid dr ive
ri ght rea r side of t he veh icle: ope nin g the fuel filter door
Fig. 266 Fue l fi ll er doo r w it h attached fuel cap
Plug-in hybrid drive* : Please a lso read the infor
matio n under
¢page 105, Refueling.
The fuel filler door is unlocked or locked by the
central locking system.
Op en ing th e fuel cap
"' Applies to : vehicles with p lug-in hybri d drive :
Also read the information found
in c> page 105,
Opening the fuel filler door .
"'Applies to : vehicles wi tho ut plug-in hybrid
dr ive: Press the left side of the fuel filler door
to open it-arrow-
¢ fig . 265.
"' Unscrew the tank cap counterclockw ise.
"' Place the cap from above on the open fue l filler
door ¢ fig. 266.
Closing th e fu el cap
"' Turn the fuel cap clockwise until you hear it
lock.
"' Close the fuel fille r door unt il it l atches.
Once the pump nozzle sw itches off, the fuel tank
is
" full" . Do not fi ll the tank more . Otherw ise the
expansion space in the tank will be f illed.
314
The correct fuel type for your vehicle can be
found on a label located on the inside of the fuel
filler door. For additional informat ion on fuel,
see
¢ page 312.
The fuel tank capacity of your ve hicle is listed in
the
T echn ical Dat a section ¢ page 375.
To avoid fuel spilling or evaporat ing from the fuel
tank always close fue l fi ller cap properly and
completely . An improperly closed fuel fi ller cap
may also cause the MIL
l amp ¢ page 23 to come
on .
_& WARNING
Not pay ing attention when fueling or han
dling fuel incorrectly can lead to fires, explo
sions or serious injur ies.
-Fue l ignites easily and can cause serious
burns and other injur ies.
-
-If you do not switch the engine off when fu
eling and/or do not insert the fuel nozzle
completely into the tank open ing, fuel can
leak out or run over . Leaked fuel ca n ign ite
and start a fire.
-Do not use the telephone while f ueling. The
elec tromagnetic rays ca n cause sparks,
which can ignite fue l vapors and start a fire.
- Do not sit in your vehicle wh ile fue ling. If
you must make an exception and ente r your
veh icle agai n while fueling, close the door
an d touch me tal to d ischarge stat ic elect ric
ity before to uching the f uel nozz le . Static
electricity can create spa rks, which can ig
nite vapors when fueling.
-Do not smoke or have an open flame in the
area when fueling your vehicle or fi lling a
fue l container because this increases the
risk of an explosion.
-For your safety, carrying fuel containers in
your vehicle is not recommended. W hether
fu ll or empty, the container can leak and
cause a fire in the event of an acc ident.
- If you must make an exception and trans- port a fuel container, note the fo llow ing:
- Never fill the fuel container with fuel
while i t is in o r on the vehicle. Static e lec
tricity is discharged whe n filling w hich can
.,._
Page 318 of 400
Check ing and F illing
The pull cable for the emergency release is locat
ed on the cover .
.,. To access t he e mergency release, fold the r ight
bac kres t
forwa rd ¢ page 68 .
.,. Remove the cover from the trim .
.,. Carefully pull the cover toward the center of
the ve hicle at a 45° angle
-arrow- ¢ fig. 268
c>(D . The tab on the cover must point forward
in the direct ion you are pulling when pull ing on
the cover.
.,. Press on the left s ide of the fuel f ille r door to
open it
¢ page 314, fig . 265 .
(D Note
Onl y pull on the loop/cove r unt il you feel re
sistance. You wi ll not hea r it re lease . Other
w ise you cou ld damage t he emergency re
lease mecha nism .
Catalytic converter
The vehicle may o nly be driven with unleaded
g a soline, otherwise the catalyt ic converter will be
destroyed.
Never d rive until the tank is completely empty .
The irregular supp ly of f uel that results from t hat
can cause engine m isfi res. Uncombusted fuel will
ente r the exhaust sys tem, w hich can ca use ove r
heating and damage to the catalyt ic converter .
& WARNING
The tem perature of the ex ha ust system is
high, both when driving and after stopping
the engine.
-
- Never touch the exha ust ta il pipes once t hey
have become hot. This could result in burns.
- Do not park your vehicle over flammable
materials such as g rass or leaves because
the h igh temperat ure of the emiss ions con
trol system cou ld start a f ire.
- Do not apply underbody protectant in the
exhaust system area, because this increases
t h e risk of fire.
316
Engine compartment
· Working in the engine compartment
Special care is required if you are working in the
engine compartment
For work in the engine compartment, such as
checking and fill ing fluids , the re is a risk of in
jury, scalding, accidents , and burns. For this
reason, follow all the warnings and general
safety precaut ions provided in the following in ·
formation . The engine compartment is a dan
gerous area.
c> & .
& WARNING
To reduce the ris k of injur ies, comp lete the
following steps before opening the hood:
- Tur n the engine off.
- S witch the igni tion off.
- Set the park ing brake.
- Move the selector lever into t he P position.
- Never ope n the hood when there is steam o r
coo lant escaping from the engine compart
ment, because there is a risk that yo u could
be burned . Wait unt il no steam or coolant is
escapi ng.
- L et the eng ine cool down .
- Keep children away from the eng ine com-
pa rtment .
- Never sp ill fluids on a hot engine . These flu
ids (such as the anti-freezing agent con
tained in the coolant) ca n ignite.
- Avoid short c ircuits in the electrical system.
- When working in the engine compa rtment,
remember that the radiator fan can switch
on even if t he ignition is switched off, wh ich
increases the r is k of persona l injury.
- Never open the cap on the coolant expan
sion tank when the engine is warm . The
coo ling syste m is under p ressure.
- To protect your face, hands, and a rms from
hot steam or coolant, cover the cap with a
large cloth when opening .
- Do not remove the engine cover under any
circumstances . Th is i ncreases the risk of
burns .
-