brakes AUDI S4 2013 Owners Manual
[x] Cancel search | Manufacturer: AUDI, Model Year: 2013, Model line: S4, Model: AUDI S4 2013Pages: 302, PDF Size: 75.61 MB
Page 18 of 302
16 Instrum ent s and w arn ing /indic ato r light s
possible to set the parking brake or release
it once it has been set. Seek professional as
s istance .
(USA models): If the warning light
1111 and
the warning light
liJ appear together, imme
diate ly contact your authorized Audi dealer or
qua lified workshop to have all brake pads in
spected
¢ page 20.
When the light comes on, an audib le warning
signal is also given .
A WARNING
-Always observe the warnings in
¢ page 213, Engine compartment, be
fore opening the hood and checking the brake flu id .
- Driv ing with low brake fluid is a safety
hazard. Stop the car and get professional
assistance.
- USA models: If the 1111 warn ing light,
the
G1 warning light and the m;B warn
ing light come on together, the rear
wheels co uld lock up first unde r hard
braking. Rear wheel lock-up can cause
loss of vehicle con tro l an d an accident .
Have your vehicle repai red immedia tely
by your aut ho rized Audi dea le r or a quali
fied workshop. Drive slowly and avoid sudden, hard brake applications.
- Canada models: If the brake warn ing
light ., the
DJ warning light and the
ABS warning light
BJ come on together,
the rear wheels could lock up first unde r
hard braking. Rear wheel lock-up can
cause loss of vehicle control and an acc i
dent . Have yo ur vehicle repaired immed i
ately by your authori zed A udi dealer or a
qu alifie d wo rkshop. Dr ive slowly and
avo id su dden, hard brake appli cat ions.
- If the brake warning/indicator light does
no t go out afte r a few se con ds and the
par king brake is released, or lights up
whi le you are driving, the fluid level in
the brake f luid reservoir is too low. If you
believe that it is safe to do so, proceed
immediately at low speed to the nearest
authorized Audi dealer or qualified repair facility and have the brake system in
spected.
- Always keep in mind that after severa l
brake applications, you will need greater
pressure on the brake pedal to stop your
veh icle. Do not rely on strained brakes to
respond with max imum stopping power
in critical s ituations . You must allow for
increased braking distances. The extra
d istance used up by fading bra kes could
le ad to an ac cident.
:l~/(®) Electromechanical parking brake
The warning/indicator light monitors the
electromechanical parking brake .
If the indicator light . (USA models)/ .
(Canada models) turns on, the pa rking brake
was set. If the parking brake is set when the
ignition is off, the ind icator light turns off af
ter abo ut 20 seconds.
The wa rning/i ndicator lig ht will go out when
the pa rking brake is re leased .
• (USA models ) /. (Can ada model s) Cau
tion: Vehicle parked too ste ep
If the indicator light b links and the message
appears, there is not enough braking power to
keep the vehicle from roll ing . The brakes have
overheated . The veh icle cou ld roll away eve n
o n a sma ll incline .
Press brake pedal to release parking bra ke
To re lease the parking brake, press the brake
pedal and press t he button(® or start driving
with starting assist at the same time
¢ page 86.
Please relea se park ing brake
T o re lease the par king b rake manually , p ress
t h e b rake peda l and press the button{®) at
the same time. The pa rking brake on ly releas
es automatically if the driver's safety be lt is
fastened.
Ill Parking brake!
If the 11,1 indicator light turns on and t his
message appears, the re is a parki ng b rake
Page 21 of 302
Instruments and warning/indicator lights 19
@ Tips
The symbol's appearance might be differ
ent in some models .
n,/{J Electronic Stabilization Control
(ESC)
If the G1 indicator lamp blinks while driving,
the ESC or ASR (Ant i-S lip Regulation) is active
ly regulating.
If the G1 indicator lamp illuminates, the sys
tem has switched the ESC off. In this case , you
can switch the ignition off and then on to
sw itch the ESC on again . The system is func
tioning completely when the indicator lamp
switches off .
I f the
Ii indicator lamp illuminates, the ESC
was switched off with the
I.!? O FF ! button.
Stabilization control (ESC/ABS): Fault! See
owner's manual
If the indicator light G1 and the ABS indicator
light
l!SJ (USA models) / li] (Canada mod
els) turn on and the message appears, there is
a malfunct ion in the ABS system or electronic
differential lock. This also interrupts the ESC.
The brakes still function with their normal
power, but ABS is not active.
Drive to your autho rized Aud i dealer immedi
ately to have the malfunction corrected.
For more informat ion about the ESC
c::> page 185.
ABS /(8) Anti-lock braking system (ABS)
This warning/indicator light monitors the ABS
and the electronic differential lock (EDL) .
T he warning/indicator light
E (USA mod
els)l[i] (Canada models) will come on for a
few seconds when the ignition is switched on .
T he light will go out after an automatic check
sequence is completed .
There is a malfunction in the ABS when:
- The warning/indicator light does not illumi
nate when you switch the ignition on. -
The warning/indicator light does not go out
after a few seconds.
- The warning/indicator light il luminates
while driving.
T he ESC indicator lig ht also illuminates if
there is a ma lfunct ion in the ABS. The mes
sage
Stabilization control (ESC): Fault! See
owner 's manual
also appears in the instru
ment cluster display and a warning tone
sounds.
The brake system will still respond even
without the assistance of the ABS system.
See your authorized Audi dealer as soon as
possible to restore full braking performance.
For more information regarding the ABS
c::> page 185.
Malfunction in the brake system
If the brake warning light c::> page 15 and the
ABS warning illuminate together there may be
a malfunction in the ABS, and there may a lso
be a malfunction in the brake system itself
c::> .&. . The ABS will not work and you will no
tice a change in braking response and per
formance.
In the event of a malfunction in the brake
system
the warning/indicator light 1111
(USA models)/ . (Canada models) in the in
strument cluster flashes
c::> page 15 .
Malfunction in the electronic differential
lock (EDL)
The EDL works together w ith the ABS . The
ABS warning light will come on if there is a
malfu nction in the EDL system ¢ page 185 .
See your authorized Audi dealer as soon as
poss ible.
A WARNING
-If the ma:1 (USA mode ls)/ [i] (Canada
models) warning light does not go out,
or if it comes on whi le dr iving, the ABS
system is not working properly. The vehi
cle can then be stopped only w ith the
standard brakes (without ABS). You w ill
not have the protect ion ABS provides.
-
...
Page 22 of 302
20 Instruments and warning /indicator lights
Contact your authorized Audi dealer as
soon as possible.
-USA models: If the la warning light
and the
E warn ing light come on to
gether, the rear wheels could lock up
first under hard braking. Rear wheel lock
up can cause loss of vehicle control and
an acc ident. Have your vehicle repaired
immediately by your authorized Audi
dealer or a qualified workshop. Dr ive
slowly and avoid sudden, hard brake ap
plications.
- Canada models: If the brake warning
light . and the ABS warning light
li]
come on together, the rear wheels could
lock up first under hard braking. Rear
wheel lock-up can cause loss of vehicle
control and an accident. Have your vehi
cle repaired immediately by your author
ized Audi dea ler or a qualified workshop.
Drive slowly and avo id sudden, hard
brake applicat ions.
I I !f Safety systems
The fl (USA models),£,1 (Canada models) in
dicator light monitors the safety systems (e.g.
airbags, pretensioners) and ill uminates for a
few seconds each time you switch the ignition
on.
If the fl (USA models)/ fll (Canada mode ls)
indicator light does not go out, or if it illumi
nates while you are driv ing, or if it starts to
blink, then there is a ma lfunction somewhere
in the system.
If the light does not illuminate
when you switch the ignition on, this also
means there is a malfunction.
& WARNING
If you have a malfunction in the safety sys
tems, contact your author ized Audi dealer
immediate ly. Otherw ise the safety sys
t ems may not work properly in an acci
dent.
l ) - : USA mod els only
(0) Worn brake pads
EiJ Brake pads!
If the warning light illuminates, immediately
contact your authorized Audi dealer or quali
fied workshop to have all brake pads inspect ed . On USA models the warn ing light
EiJ
comes on together with the warning light
la-Both sets of brake pads on an ax le
must a lways be rep laced at the same time.
A WARNING
Driving with bad brakes can cause a colli
sion and serious personal injury.
- If the warning light
EiJ and the warning
light
la1 l with the message Brake
pads! comes on in the instrument cluster
d isplay, immediately contact your au
thor ized Audi dealer or qualified work
shop to have all brake pads checked or
replaced if necessary.
EPC Electronic power control
This warning/indicator light monitors the
electronic power control.
The ~ warning/indicator light (Electronic
Power Control) illuminates when you switch
the ignition on as a function check.
(D Tips
If this warning/ indicator light illuminates
while you are driving, then there is a mal
funct ion in the engine electronics. Have
the malfunction corrected as soon as pos
s ib le by your authorized Audi dealer or
qualified repa ir facility.
Ci Malfunction Indicator Lamp (MIL)
T he Malfunction Indicator Lamp (MIL) is par t
of the On-Board Diagnostic (OBD II) system.
-
The symbo l ¢4' lights up when the ignition is
switched on and will turn off after the engine
has started and has settled at a constant idle
IJ>,
Page 66 of 302
64 Seats and storage
12-volt socket
Applies to vehicles: wit h 12-volt socket
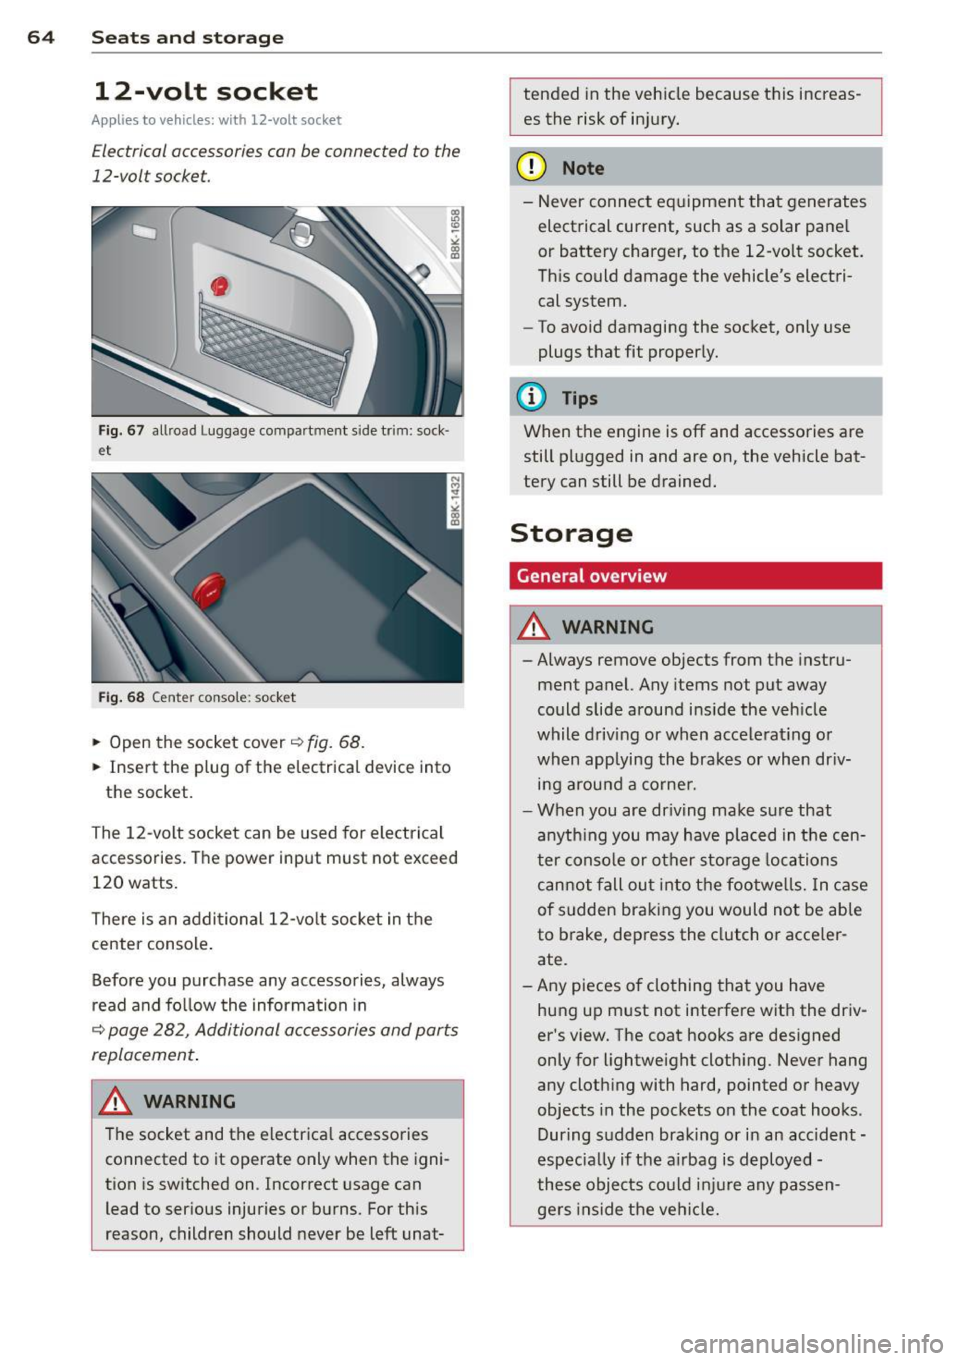
Electrical accessories can be connected to the
12-volt socket.
F ig . 6 7 allroad Luggage compartment s ide trim: sock·
et
Fig . 68 Center conso le: socket
.,. Open the socket cover~ fig. 68.
.,. Insert the plug of the e lectrica l device into
the socket.
The 12-volt socket can be used for elec trical
accessories. The power input must not exceed
120 watts.
There is an addi tional 12-vo lt socket in the
cente r console .
Before you purchase any accessories, always
r ead and fo llow the information in
~ page 282, Additional accessories and parts
replacement .
.&_ WARNING
The socket and the electrica l accessories
connected to it operate only when the igni
tion is sw itched on. Incorrect usage can
lead to serious injuries or burns. For this
reason, children should never be left unat-
-
tended in the veh icle because this increas
es the risk of in jury.
(D Note
-Never connect e quipment that generates
electrical current, such as a solar pane l
or battery charger, to the 12-vo lt socket.
Th is could damage the vehicle's electri
cal system.
- To avoid damaging the socket, only use
plugs t hat fit properly.
(D Tips
When the engine is off and accessories are
still pl ugged in and are on, the vehicle bat
tery can still be drained.
Storage
General overview
.&_ WARNING
-
- Always remove objects from the instru-
ment panel. Any items not put away
could slide around ins ide the veh icle
while driving or when accele rat ing or
when applying the brakes or when dr iv
i n g arou nd a corne r.
- When you are dr iving make su re that
anyth ing you may have pla ced in the cen
ter conso le or other sto rage locations
can not fall ou t in to t he footwe lls. In c ase
of sudden bra king you would not be able
to brake, dep ress the clutch o r acce ler
ate.
- Any pieces o f clothing that you have
hung up m ust not interfere with the driv
er 's view. The coat hooks are des igned
only for lightweight cloth ing. Never hang
a ny clothing with hard, pointed or heavy
objects in the pockets on the coat hooks .
During s udden braking or in an accident -
especia lly if the a irbag is d eployed -
these objec ts co uld inj ure any passen
gers inside the ve hicl e.
-
Page 68 of 302
66 Seat s a nd s tor ag e
Addit ional storage
There are a variety of storage compa rtments
and fasteners in var ious places in the vehicle.
- In the roof headliner above the rearview
mirror .
- On the back of the front seat . The com pa rt
ment can hold a maximum weight of 1 kg.
- On the left and right of the luggage com
partment, behind the s ide trim.
- Garment hooks on the pillars in the rear of
the vehicle .
A WARNING
-When driving, do not leave any hard ob
jects on the rear wi ndow shelf or allow
your pet to s it on the shelf. They could
become a hazard for ve hicle occ upan ts in
the event of sudden braking or a crash.
- Always remove objects from the instru
ment pane l. Any items no t stored could
slide around inside the vehicle while driv
ing or when accelerating or when apply
ing the brakes or when driving around a
corner.
- When you are driving make sure that
anything you may have placed in the cen
ter console or other storage locations cannot fall out into the footwells. In case
of sudden braking you would not be able
to brake or accelerate .
- Any articles of cloth ing that you have
hung up must not interfere with the driv
er's v iew. The coat hooks are designed
only for lightweight clothing. Never hang
any clothing wit h hard, po inted or heavy
objects in the pockets on the coat hooks .
During sudden braking or in an accident -
especially if the airbag is deployed -
these objects could injure any passen
gers inside the vehicle .
- To reduce the risk of persona l injury in an
acc ident or sudden stop, always keep the
glove compartment closed while dr iving.
- Read and fo llow all WARNINGS
i=> page 162, Important safety instruc
tions on the side airbag system.
- Hang clothes in such a way that they do
not impa ir the driver's vision.
- The coat hooks must on ly be used for
lightweight clothing. Do not leave any
heavy or sharp edged objects in the pock
ets which may interfere with the s ide cur
tain airbag deployment and can cause pe rsonal injury in a crash.
- Do not use coat hangers for hanging
cloth ing o n the coat hooks as t his can in
terfere with proper deployment of the
side curta in a irbags in an a ccident.
- Do not hang heavy objects on the coat
hooks , as they could cause personal in
jury in a sudden stop.
- Always keep the compa rtment above the
rea rv iew mirror closed while d riving to
re duc e the risk of i nju ry in the event of
sudden b raking m aneuvers or a collision.
(£} Note
Objects located on the rear shelf that rub
against the rea r window could damage the
hea ting wi res for the rear window defog"
ger.
(D Tips
-A vent slot is located between the shelf
and the rear w indow. Do not bloc k the
vent wi th any items you may place o n the
rear window she lf.
- Do not place b ulky items on the rear win
dow shelf as they co uld restrict or block
the drive r's vision in the rear view mirror.
Page 88 of 302
86 On the road
Emerg ency b rake function
An emergency brake ensures t hat the vehicle
can be slowed down even if the
normal brakes
fail
c::> page 87 , Emergency broking.
Indicat or light s
-If the par king b rake is closed w ith the igni
t ion
s witc hed on the . (USA models) /
• (Canada mode ls) indica tor lights come
on in the instrum ent cluster and the switch .
-If the parking brake is closed w ith the igni
tion
s witc hed off the . (USA models) /
• (Canada mode ls) indicator lights come
on in the instrument clust er and th e switch
for about 20 seconds .
A WARNING
If a gear or a drive range (automat ic trans
m ission) is engaged with the vehicle sta
tionary and the engine runn ing, you must
in no instance accelerate o r release the
cl utch * careless ly. Otherw ise the vehicle
w ill sta rt to move immediately- r isk of an
accident .
@ Note
If the . symbol in the display or the
.. (USA models) . (Canada models)
ind icator light in the instr ume nt cl uster
flashes, there is a ma lf u nction in the brake
system. By pressing the
ISETI button, you
can bring up a driver message which ex
plains the malfunction in more detail. If
the driver message
Pa rking brake! ap
pears, there is an operating malfunction in
the park ing brake which you should have
repaired immediately by an authorized
Aud i deale r or other qualified workshop
c::> page 15.
(D Tips
- You can apply the parking brake at any
time - even w ith the ignition switched
off . Th e ignit ion must be t urned on in o r
der to release the par king brake. - Occasional noises when the parking
bra ke is applied and released are normal
and are not a cause for concern.
- When the vehicle is parked , the parking
brake goes through a self-test cycle at
regu lar interva ls. Any associated noises
are normal.
Parking
Parking
.,. Press the br ake ped al to s top the veh icle .
.,. Pull the button
@ c::> page 85, fig. 98 to set
the parking brake.
.,. Automatic transmission: Move the selector
lever to P.
.,. Tur n the engine off
c::> ,& .
.,. Man ual transmission: Shift into 1st gear.
In addition on inclines and gr ades
.,. Turn the steering wheel so that you r vehicle
w ill roll aga inst the curb in case it shou ld
s tart to move.
A WARNING
- When you leave yo ur vehicle -even if on
ly briefly -always remove the igni tion
key. This app lies particularly when chi l
dren remain in the vehicle. Otherwise the
children could start the eng ine, release
the park ing brake or operate electrical
equ ipme nt (e .g . power windows). There
is the risk of an acc ident .
- When the veh icle is locked, no one -par
ticularly not children should rema in in
the vehicle . Locked doors ma ke it mo re
d ifficult for em ergency worke rs to get in
to the vehicle -putting lives at r isk .
Starting from rest
The starting assist function ensures that the
parking brake is released automatically upon starting.
Stopping and applying parking brake
.,. Pull the switch @ c::> page 85 , fig . 98 to ap-
ply the parking brake . .,.
Page 91 of 302
.. Select: ICARlfunction button> Car sys
t e m s*
control button > Drive r as sist >
Spe ed w arning.
Warning th resho ld 2 can be set in the speed
range starting from 20 mph to 150 mph (30
km/h to 240 km/h). Settings can each be ad
justed in intervals of 6 mph (10 km/h).
Cruise control
Switching on
The cruise control system makes it possible to
drive at a constant speed starting at 20 mph
(30 km/h).
®
f
®t
0
Fig. 100 Control lever wi th push -button
Fi g. 101 Disp lay: Se lected speed
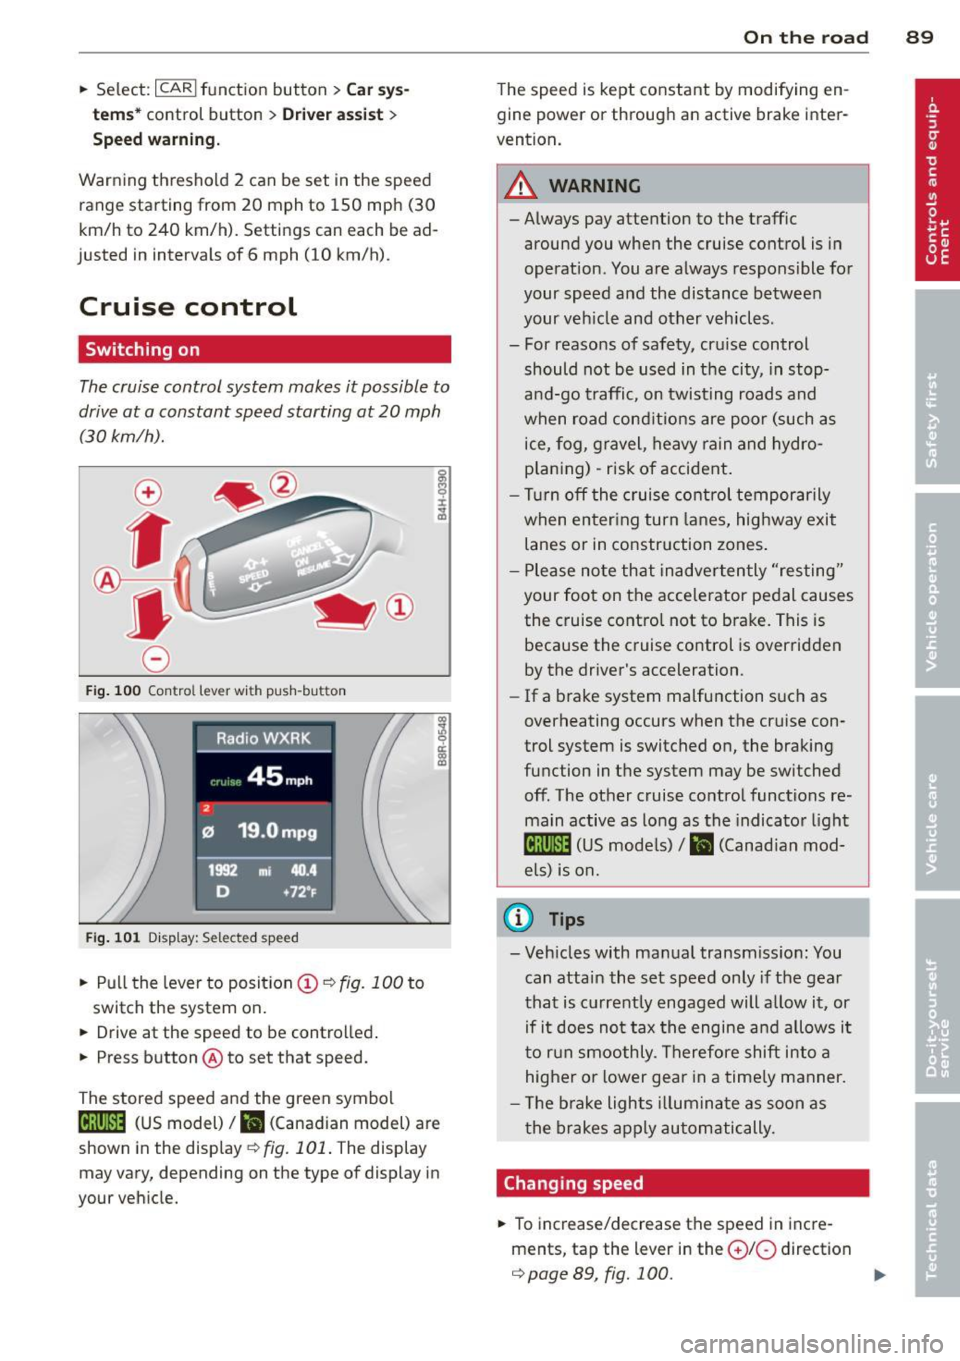
.. Pull the lever to position (D ¢ fig. 100 to
switch the system on.
.. Drive at the speed to be controlled .
.. Press button @to set that speed.
The stored speed and the green symbol
[ij;jl)~i~ (US model)/ .. (Canadian model) are
shown in the display
¢fig. 101. The display
may vary, depending on the type of display in
your veh icle.
On th e road 89
The speed is kept constant by modifying en
gine power or through an active brake inter
vention.
_& WARNING
- Always pay attention to the traffic
around you when the cruise control is in
operation. You are always responsible for
your speed and the distance between
your veh icle and other vehicles.
- For reasons of safety, cru ise control
should not be used in the city, in stop
a nd-go traffic, on twisting roads and
when road cond itions are poor (such as
ice, fog, gravel, heavy rain and hydro
p lan ing) -risk of accident .
- Turn
off the cruise control temporar ily
when enter ing turn la nes, highway exit
lanes or in construction zones .
- Please no te that inadverten tly "resting"
your foot on the accelerator pedal causes
the cruise contro l not to brake. This is
because the cruise control is overridden
by the driver's acceleration.
- If a brake system malfunction suc h as
overheating occurs when the cruise con
trol system is switched on, the braking
function in the system may be switched
off. The other cruise contro l functions re
main active as long as the indicator l igh t
lijj(l)~i~ (US mode ls)/ Iii (Canad ian mod
e ls) is on.
@ Tips
- Veh icles with ma nual transmiss ion: You
can attain the set speed only if the gear
that is currently engaged will a llow it, or
if it does not tax the engine a nd allows i t
t o r un smoothly. Therefore shift in to a
higher or lower gear in a time ly manner.
- The bra ke ligh ts ill umina te as soon as
the brakes app ly au tomatically.
Changing speed
.. To increase/decrease the speed in incre
ments, tap the lever in the
010 direction
¢ page 89, fig. 100. Ill>
Page 94 of 302
92 Transmission
vehicle to accelerate without a noticeable in
terruption in traction.
tiptronic transmission
I n the tiptronic transmission, power is trans
ferred by a torque converter.
Selector lever positions
Applies to vehicles: with multitronic/5 tronic/tiptronic
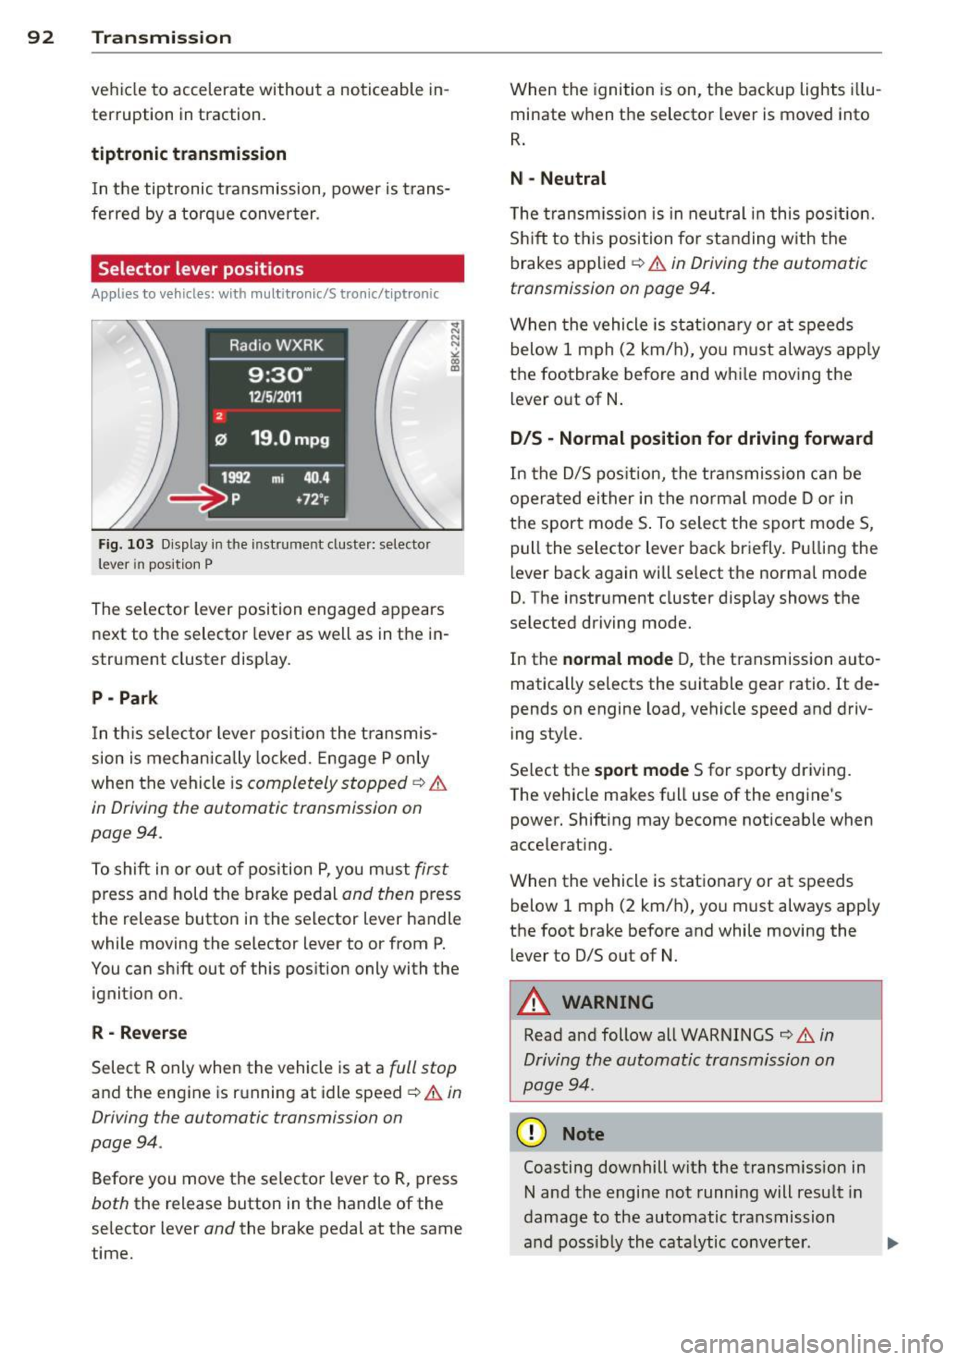
Fig. 103 Display in the in stru me nt duste r: selecto r
lever in position P
The selector lever position engaged appears
next to the selector lever as well as in the in
strument cluster display.
P - Park
In this selector lever position the transmis
sion is mechanically locked. Engage P only
when the vehicle is
completely stopped ¢ &
in Driving the automatic transmission on
pag e 94 .
To shift in or out of pos ition P, you must first
press and hold the brake pedal and then press
the release button in the selector lever handle
wh ile mov ing the se lector lever to or from P.
You can shift out of this position only with the
ignition on .
R-Reverse
Select R only when the vehicle is at a full stop
and the engine is running at idle speed ¢ & in
Driving the automatic transmission on
page 94 .
Before you move the selector lever to R, press
both the release button in the handle of the
selector lever
and the brake pedal at the same
time. When the
ignition is on, the backup lights illu
minate when the selector lever is moved into
R.
N -Neutral
The transmission is in neutral in this position .
Shift to this position for standing with the
brakes applied ¢
& in Driving the automatic
transmission on page 94.
When the vehicle is stat ionary or at speeds
below 1 mph (2 km/h), yo u must always apply
the footbrake before and whi le moving the
lever out of N.
D/S - Normal position for driving forward
In the D/S position, the transmission can be
operated either in the normal mode D or in
the sport mode S . To select the sport mode S,
pull the selector lever back briefly. Pulling the
lever back again will se lect the normal mode
D. The instrument cluster disp lay shows the
selected driving mode.
In the
normal mode D, the transmission auto
matically selects the suitable gear ratio.
It de
pends on engine load, vehicle speed and driv
ing style .
Select the
sport mode S for sporty driving .
T he vehicle makes full use of the engine's
power. Shift ing may become noticeable when
accelerating.
When the vehicle is stationary or at speeds
below 1 mph (2 km/h), you must always app ly
the foot brake before and while moving the lever to D/S out of N.
A WARNING
Read and follow all WARNINGS ¢ & in
Driving the automatic transmission on
page 94 .
(D Note
Coasting downhill with the transm ission in
N and the engine not running will result in
damage to the automatic transmission
and possibly the catalytic conve rter. .,..
Page 97 of 302
-Do not ride the brakes or press the brake
pedal too often or too long when driving
down a hill. Constant braking causes the
brakes to overheat and substantially re
duces braking performance, increases
braking distance or causes complete fail
ure of the brake system.
- To prevent the vehicle from rolling back
when stopping on inclines, always hold it
in place with the brake pedal or parking
brake.
- Never hold the vehicle on an incline with
a slipping clutch. The clutch opens auto
matically when it becomes too hot from
the overload. An indicator lamp
[O] illu
minates and a driver message appears
¢ page 9 7 when the clutch is overload
ed .
- If the engine must remain running, never
have any driving position engaged when
checking under the hood. Make sure the
selector lever has securely engaged and
is locked in P with the parking brake set
¢ page 213, Engine compartment . Oth
erwise, any increase in engine speed may
set the vehicle in motion, even with the
parking brake applied .
0 Note
-S tronic ®- and tiptronic transmission:
When stopping on an incline, do not try
to hold the vehicle in place by pressing
the accelerator pedal while a driving gear
is selected. This can cause the transmis
sion to overheat and can damage it. Acti
vate the parking brake or press the brake
pedal to prevent the vehicle from rolling.
- S tronic ®- and tiptronic transmission: Al
lowing the vehicle to roll when the en
gine is stopped and the selector lever is in N will damage the transmission be
cause it is not lubricated under those cir
cumstances .
(D Tips
For safety reasons, the parking brake is re
leased automatically only when the driv
er's safety belt is engaged in the buckle.
Transmission 95
Hill descent control
App lies to veh icles: w it h m ult itro nic/S tro nic/t iptro nic
The hill descent control system assists the
driver when driving down declines .
Hill descent control is activated when these
lector lever is in D/S and you press the brake
pedal. The transmission automatically selects
a gear that is suitable for the incline. Hill de scent control tries to maintain the speed ach
ieved at the time of braking, within physical
and technical limitations. It may still be nec
essary to adjust the speed with the brakes.
Hill descent control switches off once the de
cline levels out or you press the accelerator
pedal.
On vehicles with the cruise control system*
¢ page 89 , hill descent control is also activat
ed when the speed is set.
.&_ WARNING
-
Hill descent control cannot overcome
physical limitations, so it may not be able
to maintain a constant speed under all
conditions. Always be ready to apply the brakes.
Page 102 of 302

100 Audi adaptive cruise control and braking guard
confirmed by the video camera, an acute
collision warning.
- For safety reasons, do not use adaptive
cruise control when driving on roads with
many curves, when the road surface is in
poor condition and/or in bad weather
(such as ice, fog, gravel, heavy rain and
hydroplan ing). Using the system under
these conditions could result in a colli
sion.
- Switch adaptive cruise control off tempo
rar ily when driv ing in turning lanes, on
expressway exits or in construc tion
zones. This prevents the vehicle from ac
celerating to the set speed when in these
situations.
- Th e adaptive cruise control system w ill
not brake by itse lf if you put your foot on
the accelerator pedal. Doing so can over
ride the speed and distance regulation.
- When approaching stationary objects
such as stopped traffic, adaptive cruise
control will not respond and braking
guard w ill have limited function.
- The adaptive cr uise control system and
braking guard do not react to people, an
ima ls, objects crossing the road or on
coming objects .
- The function of the radar sensor can be
affected by reflective objects such as
guard rails, the entrance to a tunnel,
heavy rain or ice.
- Never follow a vehicle so closely that you cannot stop your vehicle safely. The
adaptive cruise control cannot slow or
brake the vehicle safely when you follow
ano ther vehicle too closely . Always re
member that the automatic braking
function cannot bring the vehicle to a sudden or emergency stop under these
conditions.
- To prevent unintended operation, always
switch ACC off when it is not being used.
{[) Note
The sensor can be d isp laced by impacts or
damage to the bumper, whee l housing and
underbody . That could affect the adaptive cruise control system and b
raking guard.
Have your authorized Audi dea ler or au
thorized Audi Service Facility check their
function.
, In curves
Applies to vehicles: wit h Aud i adapt ive cr uise contro l
Fig . 111 Examp le: driv ing into a curve
When driving into a curve <=> fig. 111 and out
of a curve, the adaptive cruise control may re act to a vehicle in the next lane and app ly the
brakes. You can override or prevent the brak
ing by pressing the accelerator pedal briefly.
Stationary objects
Applies to vehicles: with Aud i adaptive crui se contro l
Fig. 112 Examp le: object chang ing lanes a nd station
a ry object
The adaptive cru ise control system only reacts
to objects that are moving or that the system
has a lready detected as moving. For example,
if a vehi cle@ , which has already been detect
ed by the adaptive cruise control, turns or
changes lanes and another stationary vehicle
@ is located in front of that vehicle, the sys
tem will not react to the stationary vehicle.