remote start AUDI S4 2015 Owners Manual
[x] Cancel search | Manufacturer: AUDI, Model Year: 2015, Model line: S4, Model: AUDI S4 2015Pages: 304, PDF Size: 74.86 MB
Page 34 of 304
32 Opening and clo sing
- If the power locking system should ma l
function, you can lock the driver's door us ing the mechanical key
c:> page 3 7.
- If the power locking system should fail,
you can sti ll open the fue l tank flap in an
emergency
c:> page 211.
- You are we ll advised not to keep valua
bles inside an unattended vehicle, visib le
or not. Even a properly locked vehicle
cannot provide the security of a safe.
- If the LED in the upper edge of the driv
er's door panel comes on for abo ut 30
seconds after the vehicle is locked, there i s a ma lfunction in the power locki ng or
the anti-theft warning system. Have the
malfunction corrected by an author ized
A udi dealersh ip or qua lified repai r fac ili
ty.
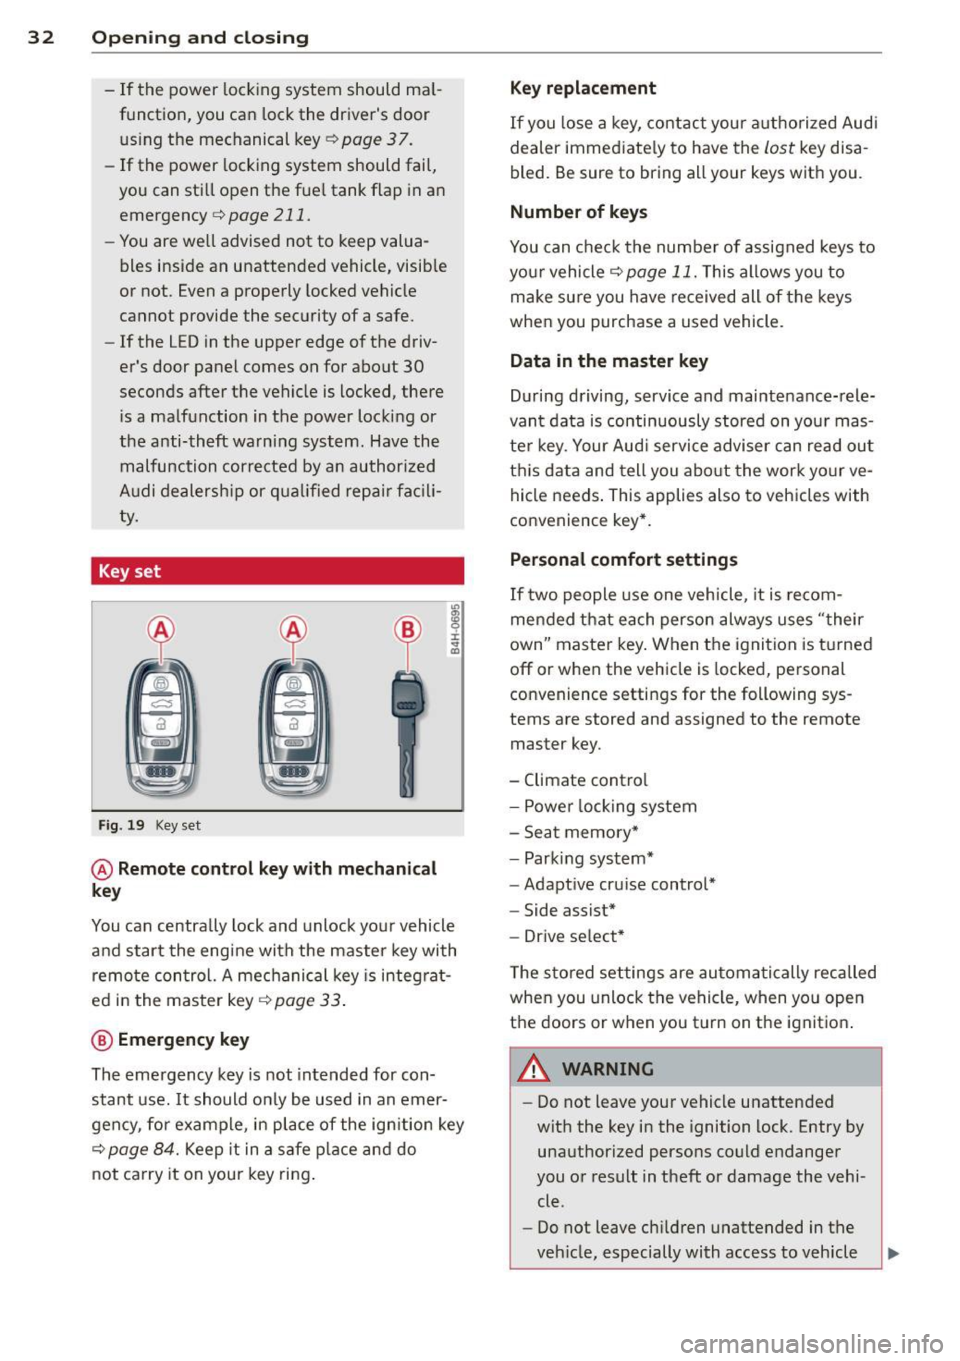
Key set
F ig . 19 Key set
@ Remote cont rol key with mechanical
key
You can centrally lock and unlock your vehicle
and start the engine with the master key with
remo te con trol. A mec hanical key is integ rat
ed i n the master key
c:> page 33 .
@ Emergency key
The emergency key is not intended for con
stant use.
It should on ly be used in an emer
gen cy, fo r example, in place of the ign ition key
cc> page 84. Keep it in a s afe p lace and do
not ca rry it on your key ring .
Key replacement
If you lose a key, contact you r authorized Audi
dealer immed iate ly to have the
Lost key disa
bled. Be sure to bring all your keys with you .
Number of keys
You can check the number of assigned keys to
yo ur vehicle
c:> page 11. This allows you to
make su re you have re ceived all of the keys
when you purchase a used vehicle.
Data in the master key
D uring d riving, s ervice and maintenance-rele
vant data is continuously stored on your mas
te r k ey. Your Aud i service adviser can read out
t hi s data and tell you abo ut the work yo ur
ve
hicle needs . This applies also to vehicles with
convenience key*.
Personal comfort settings
If two people use one veh icle, it i s r ecom
men ded that e ach person alw ays uses "t heir
own" maste r key. When the ignition is tu rne d
off or when the vehicle is locked, personal
convenience setti ngs for the following sys
tems are stored and assigned to the remote
master key.
- Climate contro l
- Powe r lock ing system
- Seat memory *
- Parking system*
- Adapt ive cru ise control*
- Side assist*
- Drive se lect*
T he s to red settings are au toma tically recalled
whe n you unlock the vehicle, when yo u open
t h e doors or w hen you t urn on t he ignitio n.
A WARNING
-Do not leave your vehicle unattended
wit h the key in the ignition lock. Entry by
unaut horized persons co uld endanger
you or result in theft or damage the vehi
cle.
- Do not leave ch ildren unattended in the
veh icle, especially with access to vehicle
Page 35 of 304
keys. Unguarded access to the keys pro
vides children the opportunity to start
the engine and/or activate veh icle sys
tems such as the power windows etc. Un supervised operation of any vehicle sys
tem by ch ildren can result in serious in
jury.
- Do not remove the key from the ignition
lock until the vehicle has come to a com
plete stop. Otherw ise the steering col
umn lock cou ld suddenly engage -caus
ing the risk of an accident.
(D Tips
- The operation of the remote contro l key
can be temporarily disrupted by interfer
ence from transmit ters in the vici nity of
the vehicle working in the same frequen
cy range (e .g . a ce ll phone, radio equip
ment).
- Fo r security reasons, replacement keys
are on ly available from authorized A udi
dealer.
- For Declaration of Compliance to United
States FCC and Industry Canada regula
tions¢
page 286.
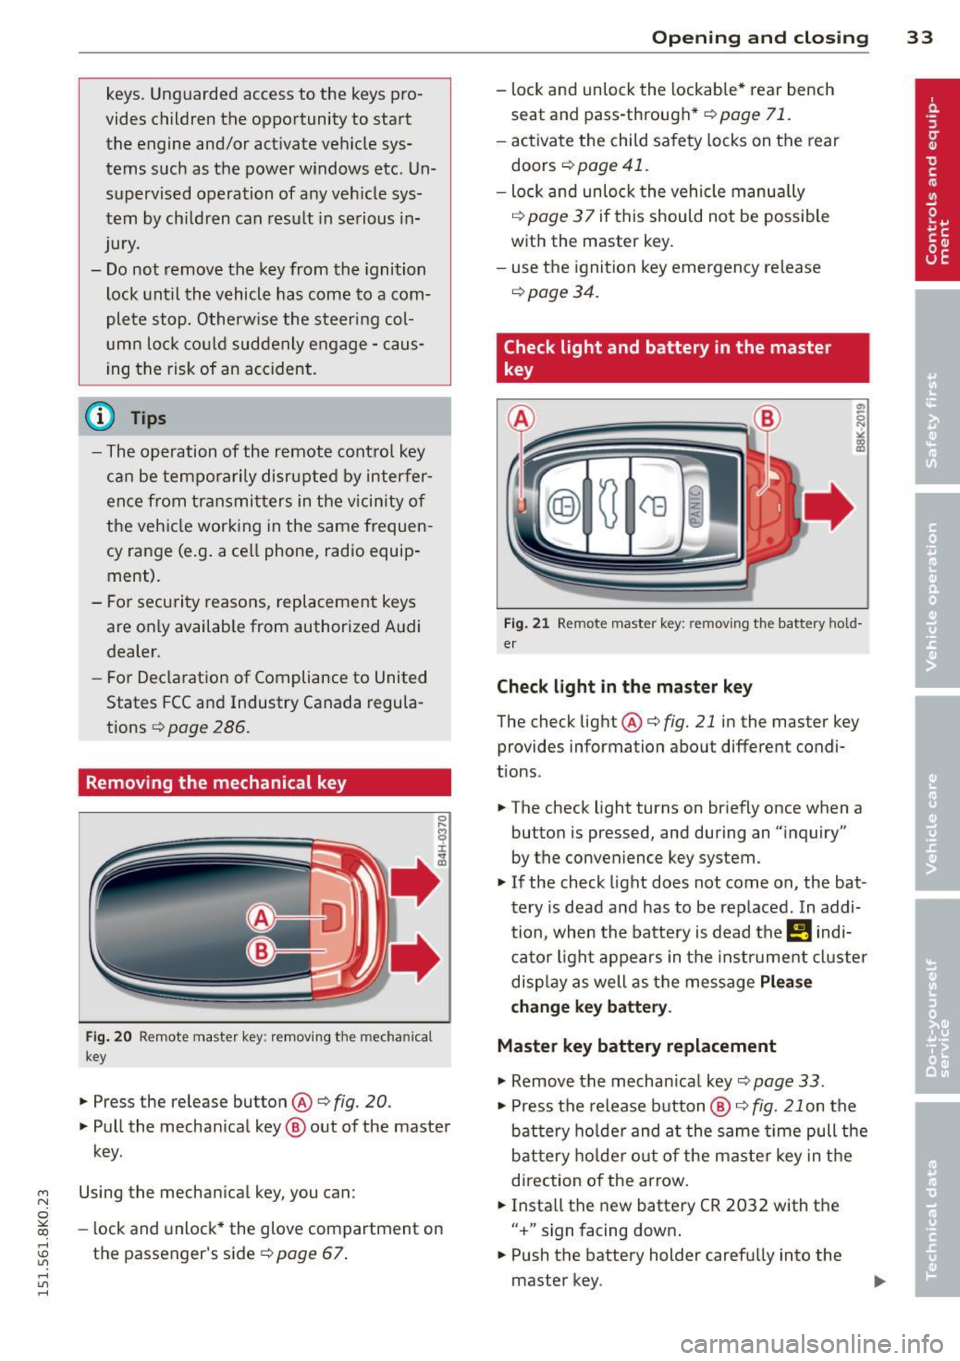
Removing the mechanical key
Fi g. 20 Remote master key: removing the mechanical
key
.,. Press the release button@¢ fig. 20.
.,. Pull the mechan ical key @ out of the master
key.
~ Using the mechanical key, you can:
~ co -lock and unlock* the glove compartment on
rl :5: the passenger's side 9 page 67.
rl l/1 rl
Op enin g an d clos ing 33
- lock and unlock the lockable * rear bench
seat and pass-through*
r=;, page 71.
- activate the child safety locks on the rear
doors
r=;, page 41.
- lock and unlock the vehicle manua lly
r=;, page 3 7 if this should not be possible
with the master key.
- use the ignition key emergency release
r=:> page 34.
Check light and battery in the master
key
Fig . 21 Remote master key: removing the battery hold
er
Che ck light in the ma ster ke y
The check light @ r=:> fig. 21 in the master key
provides information about different condi
t ions .
.,. The check light turns on briefly once when a
button is pressed, and during an "inquiry"
by the convenience key system .
.,. If the check light does not come on, the bat
tery is dead and has to be replaced. In addi
tion, when the battery is dead the
!I indi
cator light appears in the instrument cluster
disp lay as well as the message
Plea se
c hange k ey batt ery.
Master key battery replacement
"'Remove the mechan ical key r=;, page 33 .
"' Press the release button @ i=:> fig. 21 on the
battery ho lder and at the same time pull the
bat tery ho lder out o f the maste r key in the
direction of the arrow.
.,. Insta ll the new battery CR 2032 with the
" + " sign facing down .
.,. Push the battery holder carefu lly into the
master key.
Page 37 of 304
Locking and unlocking with convenience
key
Applies to vehicles: with convenience key
The doors and the rear lid can be unlocked
and locked without operating the master key .
Fig . 23 Door handle : lock ing t he ve hicle
Unlocking vehicle
.. Take hold of the door handle . The door is un-
locked automatically.
.. Pull the handle to open the door.
Locking vehicle
.. Move the selector lever to the P position
(automatic transmission), otherwise the ve
hicle cannot be locked.
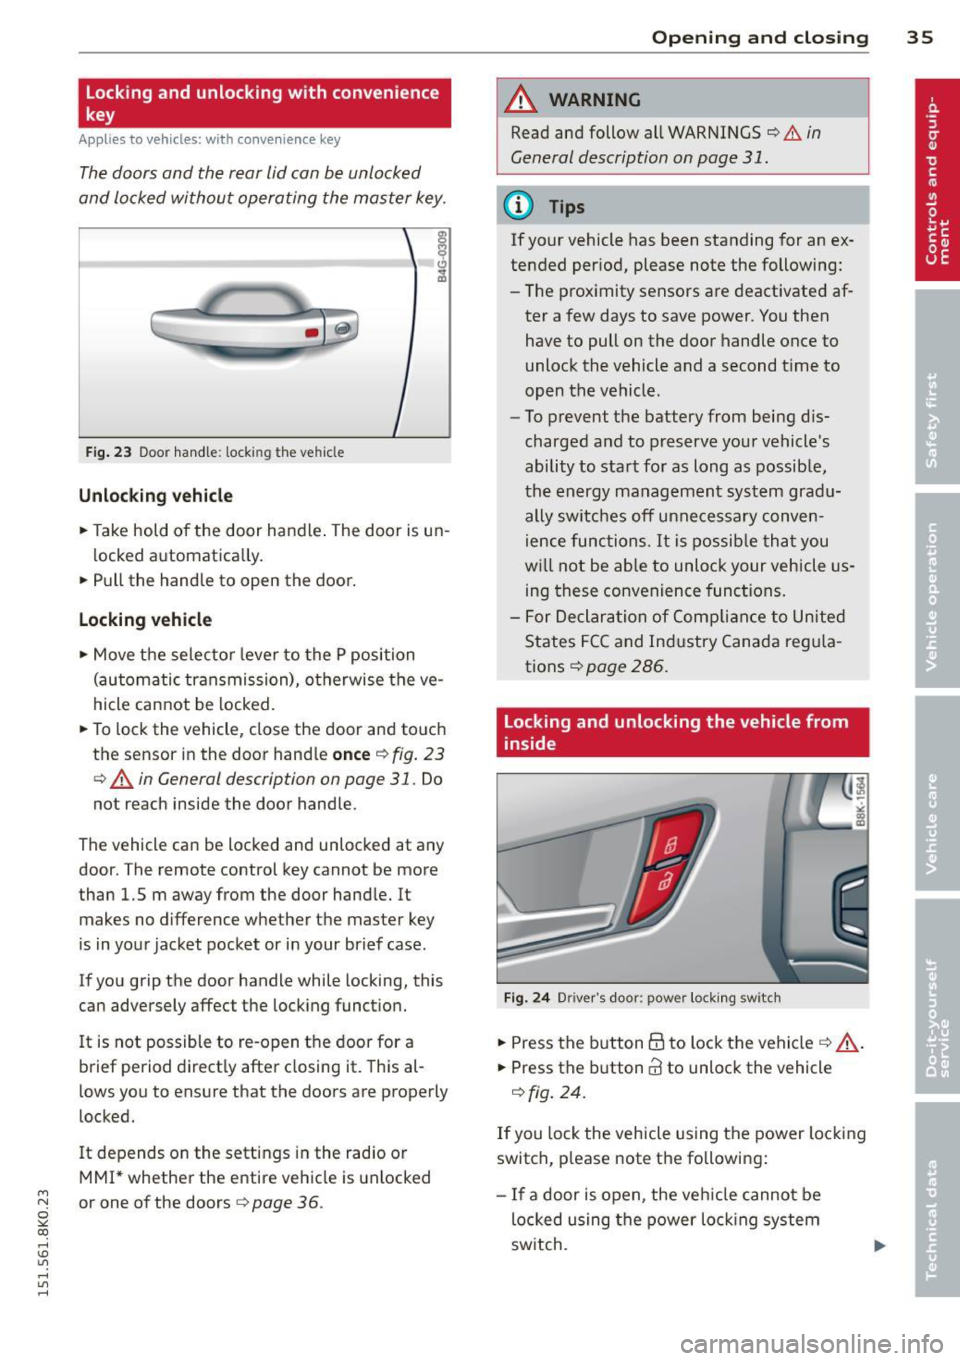
.. To lock the vehicle, close the door and touch
the sensor in the door hand le
once Q fig. 23
¢ A in General descript ion on page 31. Do
not reach inside the door handle .
The vehicle can be locked and unlocked at any
door. The remote control key cannot be more
than 1.5 m away from the door handle. It makes no difference whether the master key
is in your jacket pocket or in your brief case .
If you grip the door handle while locking, this
can adversely affect the locking function.
It is not possible to re-open the door for a
brief period directly after closing it. This al
lows you to ensure that the doors are properly
locked.
I t depends on the settings in the radio or
MMI* whether the entire vehicle is unlocked
M N or one of the doors¢ page 36.
~ co
rl I.O
"' rl
"' rl
Opening and closing 35
A WARNING
Read and follow all WARNINGS ¢.&. in
General description on page 31 .
(D Tips
If your vehicle has been standing for an ex
tended period, please note the following:
- The proximity sensors are deactivated af-
ter a few days to save power . You then
have to pull on the door handle once to
unlock the vehicle and a second t ime to
open the vehicle.
- To prevent the battery from being dis
charged and to preserve your vehicle's
ability to start for as long as possible,
the energy management system gradu
ally switches off unnecessary conven
ience functions. It is possib le that you
w ill not be able to unlock your vehicle us
ing these convenience functions.
- For Declaration of Compliance to United
States FCC and Industry Canada regula
tions ¢
page 286.
Locking and unlocking the vehicle from
inside
Fig. 24 Drive r's doo r: pow er locking sw itch
.. Press the button@ to lock the vehicle¢ _A.
.. Press the button@ to unlock the vehicle
¢fig. 24.
If you lock the vehicle using the power locking
switch, please note the following:
- If a door is open , the veh icle cannot be
locked using the power locking system
switch.
Page 40 of 304
38 Openin g and clo sing
& WARNING
Always take the key with you when you
leave the vehicle . The key can disarm the
electronic engine immobilizer and perm it
an unauthor ized person to start the engine
and enable ope rat ion of the vehi cle sys
tems such as powe r window or power sun
roof leading to ser ious personal in jury .
- The vehicle cannot be started if an unau
thorized key is used. The vehi cle may not
star t if another radio device such as a key
for another vehicle o r a tra nsponder is
l ocated on the key ring.
- For De clarat ion of Compli ance to Uni ted
States FCC and Indus try Canada regu la
tions¢
page 286.
Rear lid
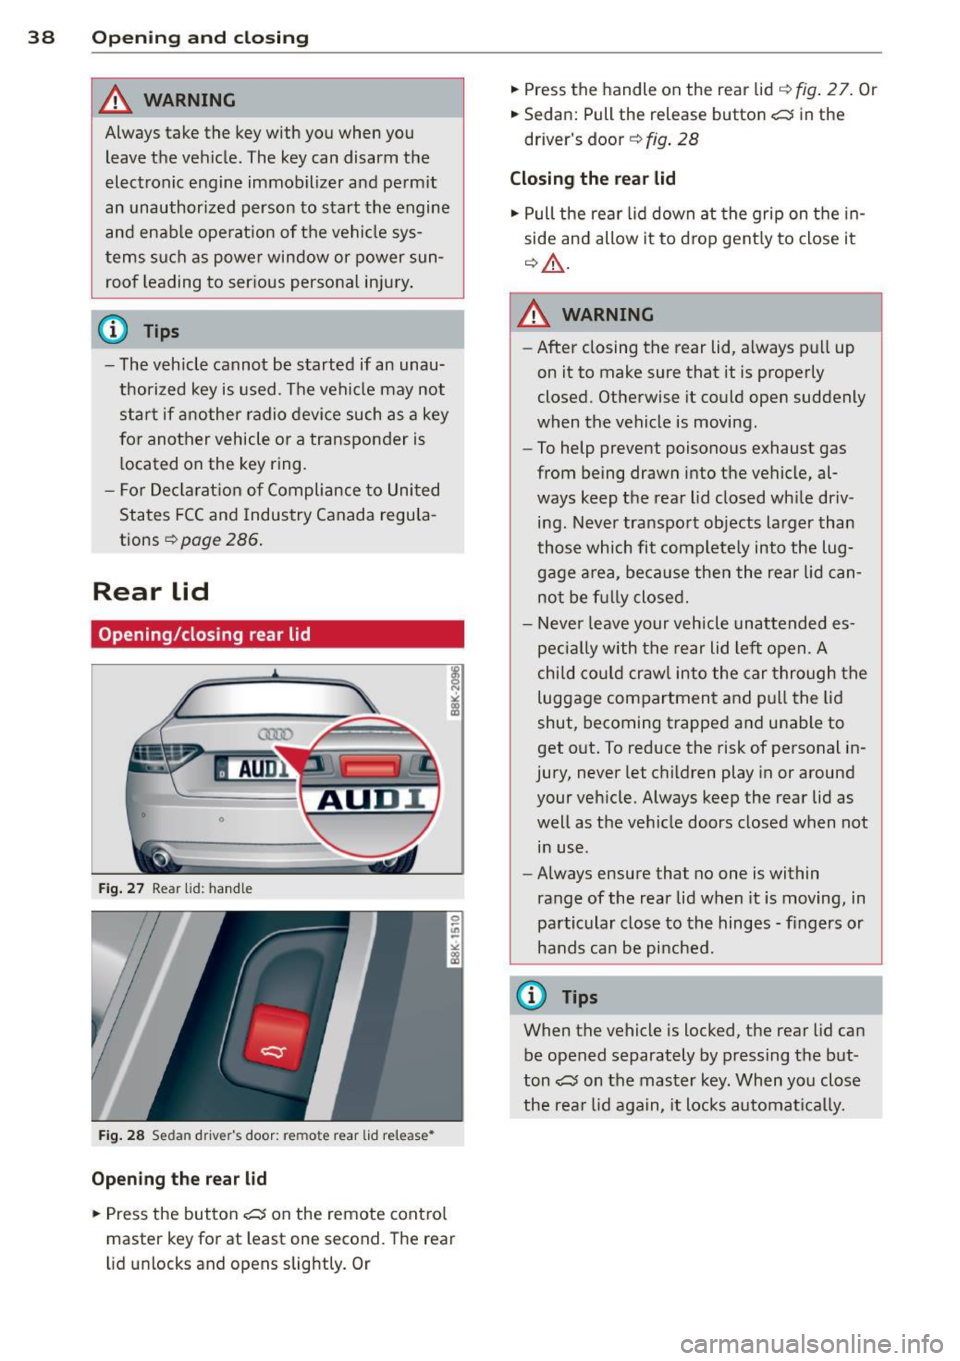
Opening/closing rear lid
Fig . 27 Rear lid : hand le
F ig. 2 8 Sedan drive r's door: remote rear lid release •
Opening the rear lid
.,. Press the but ton c:s on the remote cont ro l
master key for at least one second. The rear
l id unlocks and opens slightly. Or .,.
Press the handle on the rear lid
q fig . 2 7. Or
.,. Sedan: Pull the release button
c:s in the
driver's door ¢
fig. 28
Closing the rear lid
.,. Pull the rear lid down at the grip on t he in
side and allow it to drop gent ly to close it
q _&. .
A WARNING
-After closing the rear lid, a lways p ull up
on it to make sure that it is properly
closed. Otherwise it could open suddenly
when the vehicle is moving.
- To help prevent poisono us exhaust gas
from being drawn into t he vehicle, al
ways keep t he rear lid closed wh ile driv
ing. Never transport objects la rger than
those which fit complete ly into the lug
gage a rea, beca use then the rear lid can
no t be f ully closed.
- Never leave your vehicle unattended es
peci ally with the rear lid left open. A
chi ld cou ld craw l into the car through the
luggage compartment and p ull the lid
shut, becoming trapped a nd u nable to
get o ut. To reduce the risk of personal in
jury, never let c hildren play in or around
your veh icle. Always keep the rear lid as
well as the vehicle doors closed when not
in use.
- Always ensure that no one is within
range of the rear lid when it is moving, in
particular close to th e hinges -fingers or
hands can be pi nched.
@ Tips
When the vehicle is locked, the rear lid can
be opened separately by pressing the but
ton
c:s on the master key. When yo u close
the rea r lid again, it locks automatica lly.
Page 49 of 304
M N
~ co
rl I.O
"' rl
"' rl
Programming the buttons (version B)
Applies to vehicles: with garage door opener (Homelink)
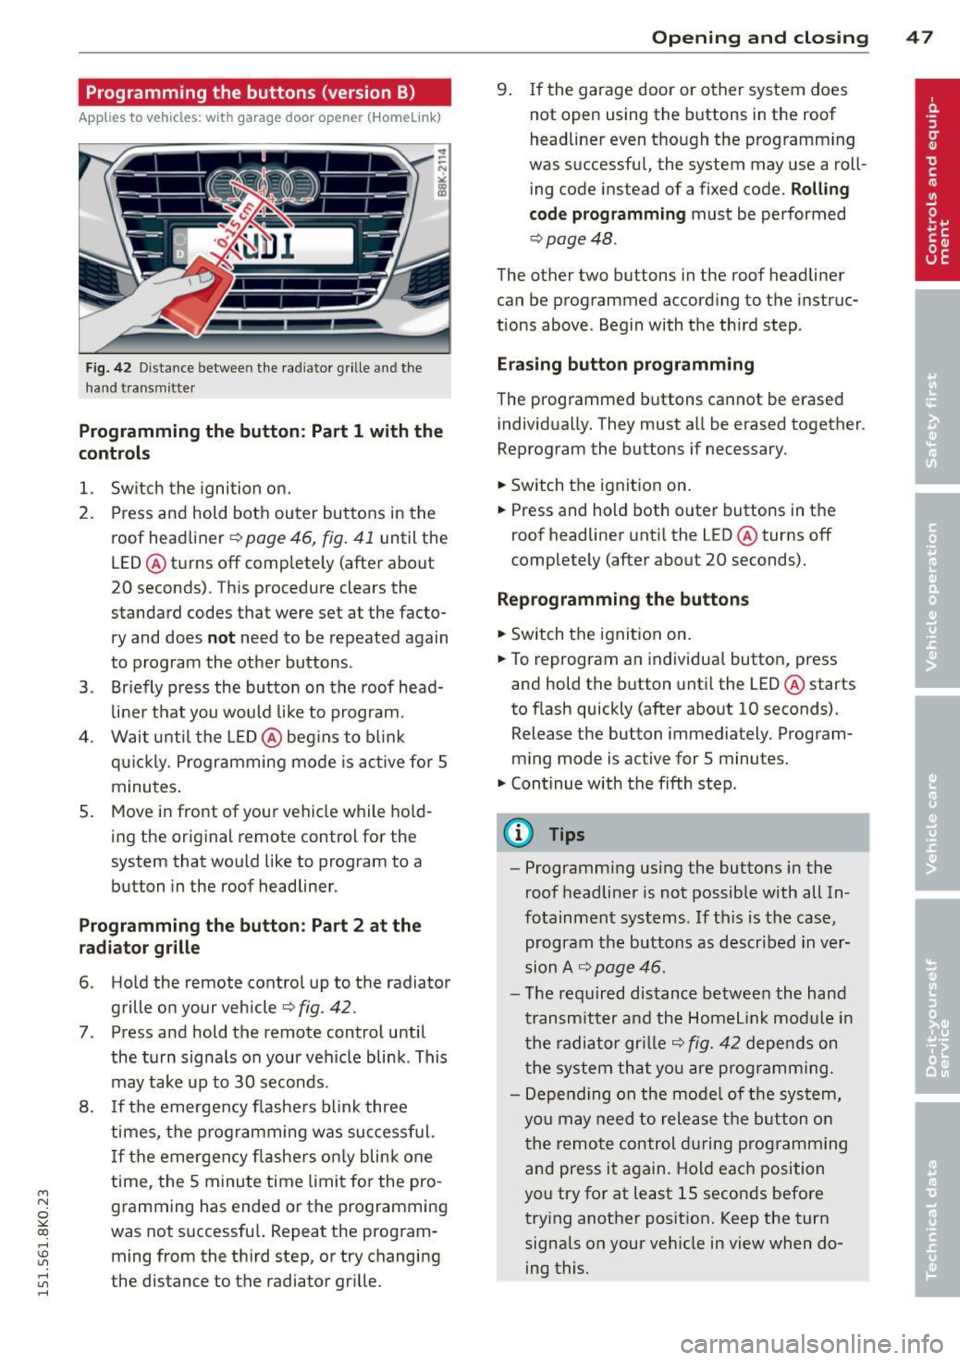
Fig. 42 D ista nce betwee n the radiator gr ille a nd t he
hand transmitter
Programming the button: Part 1 with the
controls
1. Sw itch the ignition on.
2 . Press and hold both outer buttons in the
roof head liner ~
page 46, fig. 41 until the
LED @turns
off completely (after about
20 seconds) . This procedure clears the
standard codes that were set at the facto ry and does
not need to be repeated again
to program the other buttons .
3 . Briefly press the button on the roof head
liner that you would like to program.
4 . Wait unti l the LED@ beg ins to blink
qu ickl y. Programming mode is active for 5
minutes.
5. Move in front of your vehicle while hold
ing the original remote control for the
system that would like to program to a
button in the roof headliner.
Programming the button: Part 2 at the
radiator grille
6. Hold the remote control up to the radiator
grille on your vehicle ¢
fig. 42.
7. Press and hold the remote control until
the turn signa ls on your vehicle blink . This
may take up to 30 seconds .
8 . If the emergency flashers blink three
times, the programming was successful.
If the emergency flashers only blink one
time, the 5 minute time limit for the pro
gramming has ended or the programming
was not s uccessful. Repeat the program
ming from the third step, or try changing
the distance to the radiator gr ille.
Opening and closing 47
9. If the garage door or other system does
not open using the buttons in the roof
headliner even though the programm ing
was successful, the system may use a roll
ing code instead of a fixed code.
Rolling
code programming
must be performed
¢ page 48 .
The other two buttons in the roof headliner
can be programmed according to the instruc
tions above . Begin with the third step .
Erasing button programming
The programmed buttons cannot be erased
individua lly. They must a ll be erased together .
Reprogram the buttons if necessary.
.,.. Switch the ignition on.
.,.. Press and hold both outer buttons in the
roof headliner until the L ED @ turns
off
completely (after about 20 seconds).
Reprogramming the buttons
.,.. Switch the ignit ion on.
.,.. To reprogram an individual button, press
and hold the b utton until the LED @starts
to flash quickly (after about 10 seconds).
Release the button immediately. Program
ming mode is active for 5 minutes.
.,.. Continue with the fifth step .
(D Tips
-Programming using the buttons in the
roof headliner is not possible with all In
fotainment systems . If this is the case,
program the buttons as descr ibed in ver
sion A
~ page 46.
- The requ ired distance between the hand
transmitter and the Homelink module in
the radiator grille~
fig. 42 depends on
the system that you are prog ramm ing.
- Depending on the model of the system,
you may need to release the butt on on
the remote control during programming
and press it again. Hold eac h position
you try for at least 15 seconds before
trying another position. Keep the turn
signals on your vehicle in view when do
ing this.
Page 85 of 304
'"" N
0 ::.,: co ,...., \!) ..,.,
,...., ..,., ,....,
~ Automatic transmission: Step on the brake
peda l and move the se lector lever to the P
or N position .
~ Press the key c::> fig. 97 -the eng ine will
start.
Sw itching the i gnition on /off
If you wou ld like to switch the ignition on
without sta rting the engine, follow t hese
steps :
~ Insert the key into the ignition lock .
~ Press the key briefly without pressing the
clutch peda l (for manual transmissions) or
the brake peda l (for automatic transmis
s ions) .
~ To switch the ignition off, press the key
again .
When starting the engine, major e lectr ica l
loads are switched off temporarily .
You can on ly remove the key with the ignition
switched off.
If the engine sho uld not sta rt immedia tely,
the starting process is automatically stopped
after a short time. Repeat starting proced ure .
A WARNING
-Never allow the engine to run in confined
spaces -danger of asphyxiation.
- Never remove the ign ition key from the
ignition look while the vehicle is moving.
Otherw ise, the steering lock could sud
denly engage and you would not be able
to steer the vehicle.
- Always take the key with you whenever
you leave your vehicle . Otherwise, the
engine could be started or e lectr ical
equipment such as the power w indows
cou ld be operated. This ca n lead to seri
o us inj ury.
- Never leave ch ild ren or persons requiring
assistance unattended in the veh icle. The
doors can be loc ked using the remote
transmitter, preventing people from es caping from the vehicle on their own in
the event of an emergency. Depend ing
on the time of year, people inside the ve-
On th e ro ad 83
hicle can be exposed to very high or very
low temperatures.
(D Note
Avoid high eng ine rpm, fu ll throttle and
heavy engine loads unti l the engine has
reached operating tempe rat ure -other
wise you r isk eng ine damage.
@ For the sake of the environment
Do not let the engine run while parked to
warm up. Begin driving immediately. This
reduces unnecessary emissions.
@ Tips
- If the key cannot be removed from the
ignition lock, you have to pull the me
chanical key out of the master key in or
der to be able to lock the vehi-
cle <=:>
page 34.
-After starting a cold engine, there may
be a brief period of increased no ise be
cause the oil pressure must first bu ild up
in the hydraulic valve adjusters. This is
normal and not a cause for concern.
- If you leave the veh icle with the ignition
switched on, the ign it ion w ill switch off
afte r a certa in per iod of t ime . Please
note that ele ctrical equ ipment such as
exterior lights will sw itch off as well
when that happens .
Page 86 of 304
84 On the road
Starting the vehicle with the emergency
key
Applies to vehicles: with ig ni tion lock
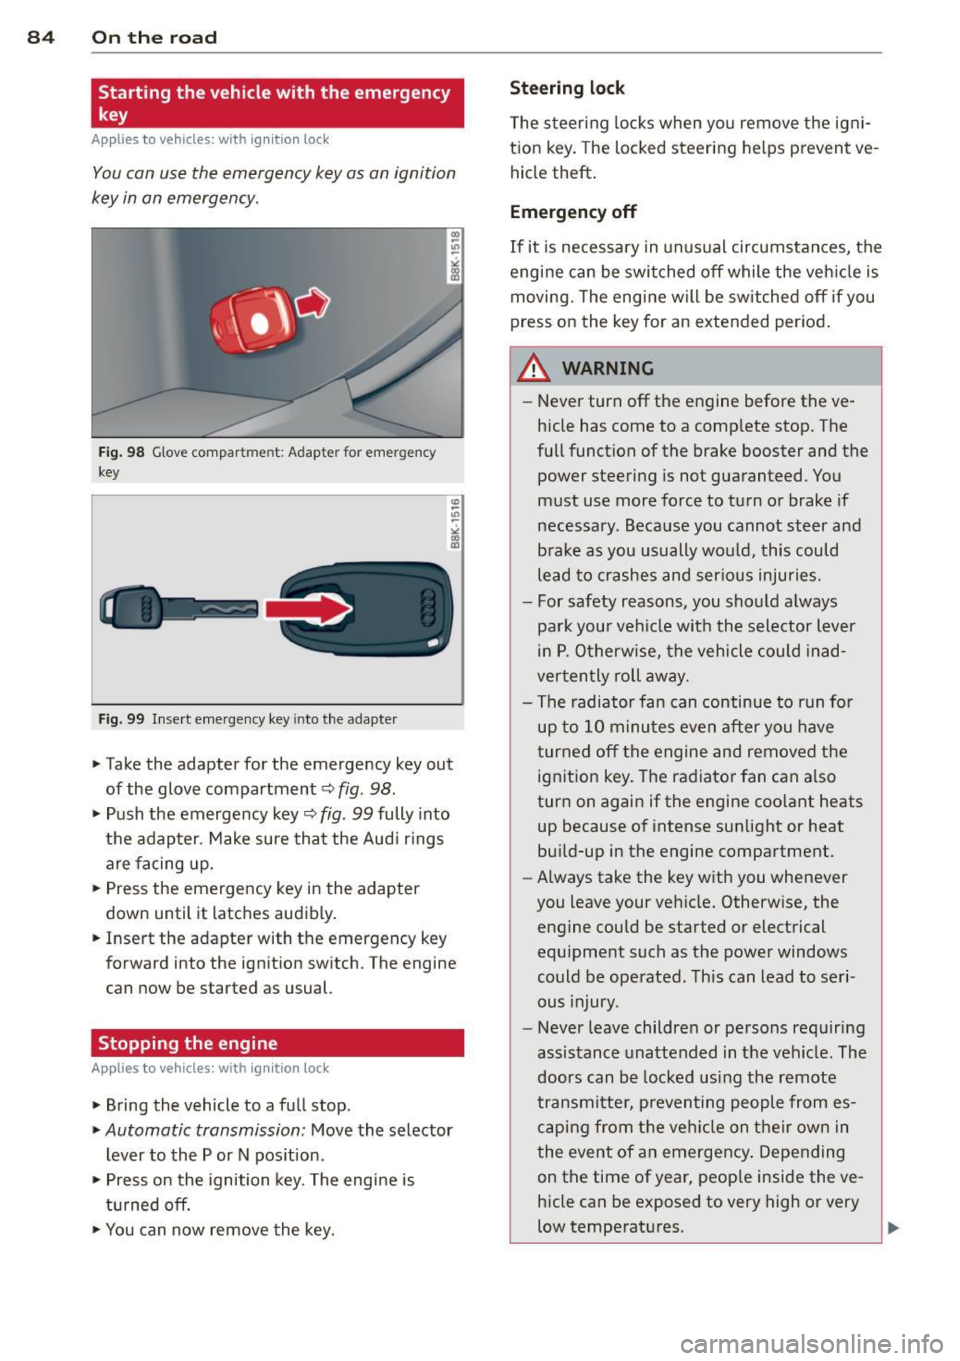
You can use the emergency key as an ignition
key in on emergency.
Fi g. 98 Glove compar tme nt: Adapter for emergency
key
Fig. 99 Inse rt emergency key into the adapter
.. Take the adapter for the emerge ncy key out
of the glove compartment
c!> fig . 98 .
.. Push the emergency key c::> fig. 99 fully into
the adap ter . Make sure tha t the Aud i rings
are facing up.
.. Press the emergency key in the adapter
down until it latches audibly .
.. Insert the adapte r with the emergency key
forward into the ignition switch. The engine
can now be started as usual.
Stopping the engine
App lies to vehicles: with ig n ition lock
.. Bring the vehicle to a full stop .
.. Automatic transmission: Move the selector
lever to the P or N pos ition .
.. Press on the ignition key. The engine is
t ur ned off.
.. You can now remove the key.
Steering lock
T he steering locks when yo u remove the igni
t ion key. The locked steering helps prevent
ve
hicle theft .
Emergency off
If it is necessary in unu sual circumstances, the
engine can be switched off while the veh icle is
moving. The engine will be switched off if you
press on the key for an extended period .
A WARNING ~
-Never turn off the engine before the ve
hicle has come to a comp lete stop. The
fu ll function of the brake booster and the
power steering is not guaranteed. You
must use more force to turn or brake if
necessary. Beca use you cannot steer and
brake as you usually wou ld, this could
lead to crashes and ser ious injuries.
- For safety reasons, you sho uld a lways
park your vehi cle with the selector lever
in P. O therwise, the vehicle could in ad
ver ten tly roll away.
- The radiator fan can continue to run fo r
up to 1 0 minu tes
even after you have
turned off the engine and removed the
ignit ion key. The radiator fan can a lso
turn on agai n if the engine coo lant heats
up because of intense sunlight or heat
bu ild-up in the engine compartment.
- Always take the key with you whenever
you leave your vehicle. Otherw ise, the
engine could be started or electrical
equ ipment such as the power windows
could be operated. This can lead to seri
ous injury.
- Never leave childre n or persons requiring
assistance unattended in t he vehicle . The
doors can be locked using the remote
transm itte r, preven ting people from es
c a ping from t he ve hicle on the ir own in
the event of a n emergency . Depending
on the time of year, peop le inside the
ve
hicle can be exposed to very high or very
low temperatures .
Page 87 of 304
M N
~ co
rl I.O
"' rl
"' rl
CD Note
If the engine has been under heavy load
for an extended period, heat builds up in
the engine compartment after the engine
is switched off- there is a risk of damaging
the engine . Allow the engine to run at idle
for about two minutes before switching it
off.
Convenience key
Starting the engine
Applies to vehicles: with convenience key
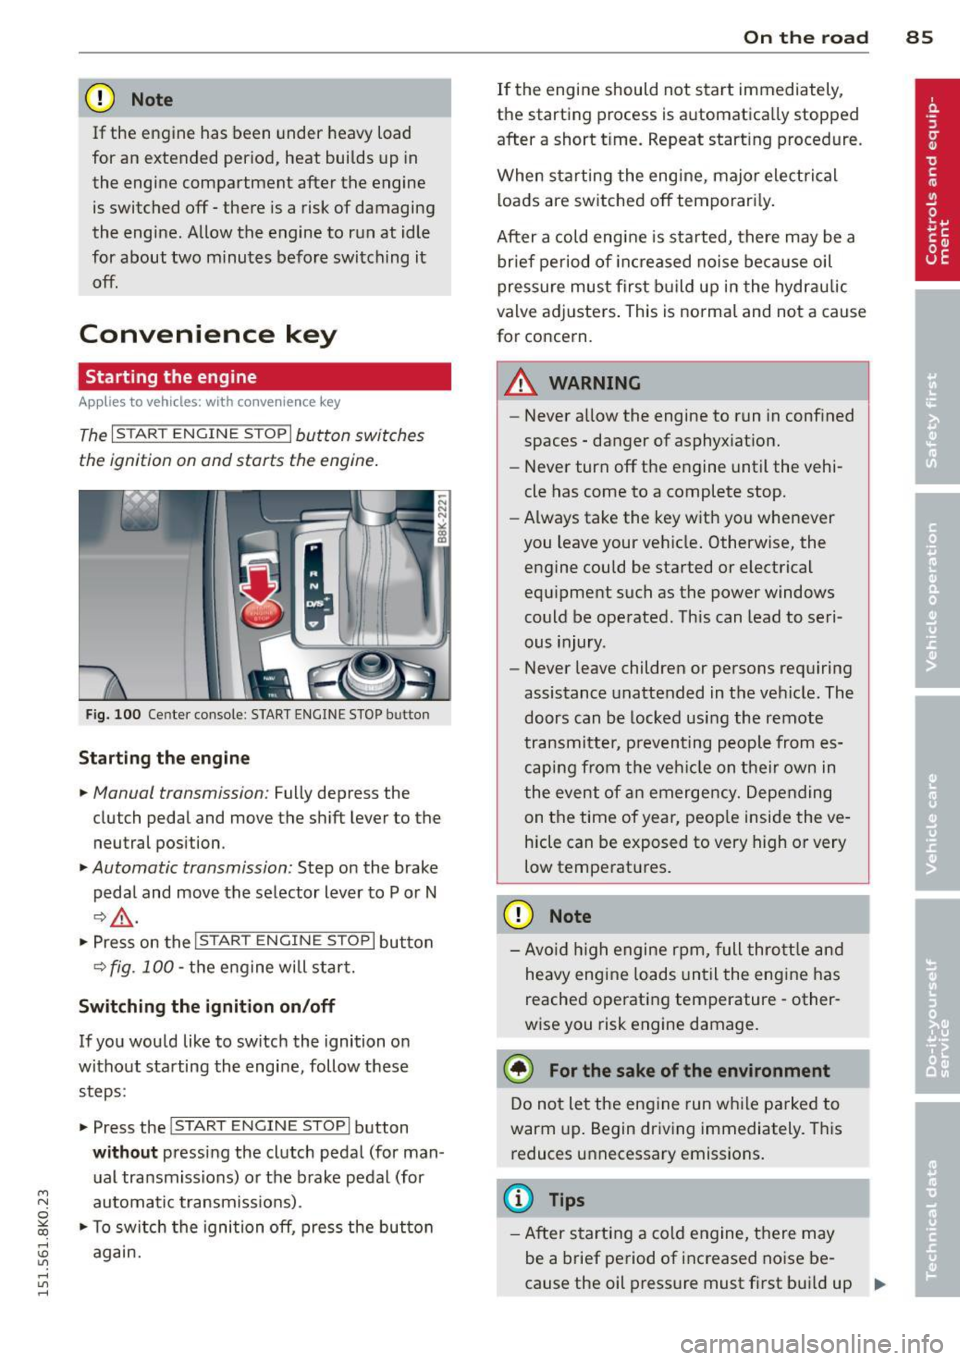
The I STAR T ENGINE ST OPI button switches
the ignition on and starts the engine.
Fig. 100 Ce nter console: START ENGINE STOP butto n
Starting the engine
.. Manual transmission: Fully depress the
clutch pedal and
move the shift lever to the
neutral position .
.. Automatic transmission: Step on the brake
pedal and
move the selector lever to P or N
~.&. -
.. Press on the I STAR T ENGINE ST OP I button
~fig . 100-the engine will start.
Switching the ignition on/off
If you would like to switch the ignition on
without starting the engine , follow these
steps :
.. Press the
I START ENGINE STOPI button
without pressing the clutch pedal (for man
ual transmissions) or the brake pedal (for
automatic transmissions) .
.. To switch the ignition off, press the button
again.
On the road 85
If the engine should not start immediately,
the starting process is automatically stopped
after a short t ime. Repeat starting procedure .
When starting the engine, major electrical
loads are sw itched off temporari ly.
After a cold engine is started, there may be a
brief period of incr eased noise because oil
pressure must first build up in the hydraulic
valve adjusters. This is normal and not a cause
for concern .
A WARNING
-Never allo w the engine to run in confined
spaces - danger of asphyxiation.
- Never turn off the engine until the vehi
cle has come to a complete stop.
- Always take the key with you whenever
you leave your vehicle. Otherwise, the
engine could be started or electrical
equipment such as the power windows
could be operated . This can lead to seri
ous tnJUry .
- Never leave children or persons requiring
assistance unattended in the vehicle. The
doors can be locked using the remote
transmitter, preventing people from es
caping from the vehicle on their own in
the event of an emergency. Depending
on the time of year, peop le inside the ve
hicle can be exposed to very high or very
low temperatures .
CD Note
-Avo id high engine rpm, full throttle and
heavy engine loads until the engine has
reached operating temperature - other
wise you risk engine damage.
@ For the sake of the environment
Do not let the engine run while pa rked to
warm up. Begin driving immediately. This
reduces unnecessary emissions.
(D Tips
-After starting a cold engine, there may
be a brief period of increased noise be-
cause the oil pressure must first bui ld up
II-
Page 89 of 304
M N
~ co
rl I.O
"' rl
"' rl
Shift to N or P to start engine
This message appears when attempting to
start the engine if the selector lever for the
automatic transmission is not in the P or N
position. The engine can only be started with
the selector in these positions .
!!I Is the key in the vehicle?
This message appears if the master key is re
moved from the vehicle with the engine run
ning.
If the master key is no longer in the ve
hicle, you cannot switch on the ignition after
stopping the engine and you also cannot start
the engine again. Moreover, you cannot lock
the vehicle from the outside with the key.
Shift to P otherwise vehicle can roll away.
Doors do not lock if lever is not in P.
This message appears for safety reasons
along with a warning signal.
It appears if the
selector lever for the automatic transmission
is not in the P position when switching off the
ignition. Move the selector lever to the P posi
tion, otherwise the vehicle is not secured
against rolling away. You also cannot lock the
vehicle using the locking button* on the door
handle or using the remote key.
Convenience key defective! Use ignition lock
This message appears if the engine must be
started or stopped using the ignition key and
not the
I START ENGINE STOP! button.
On the road 87
Electromechanical
parking brake
Operation
The electromechanical parking broke replaces
the hand broke.
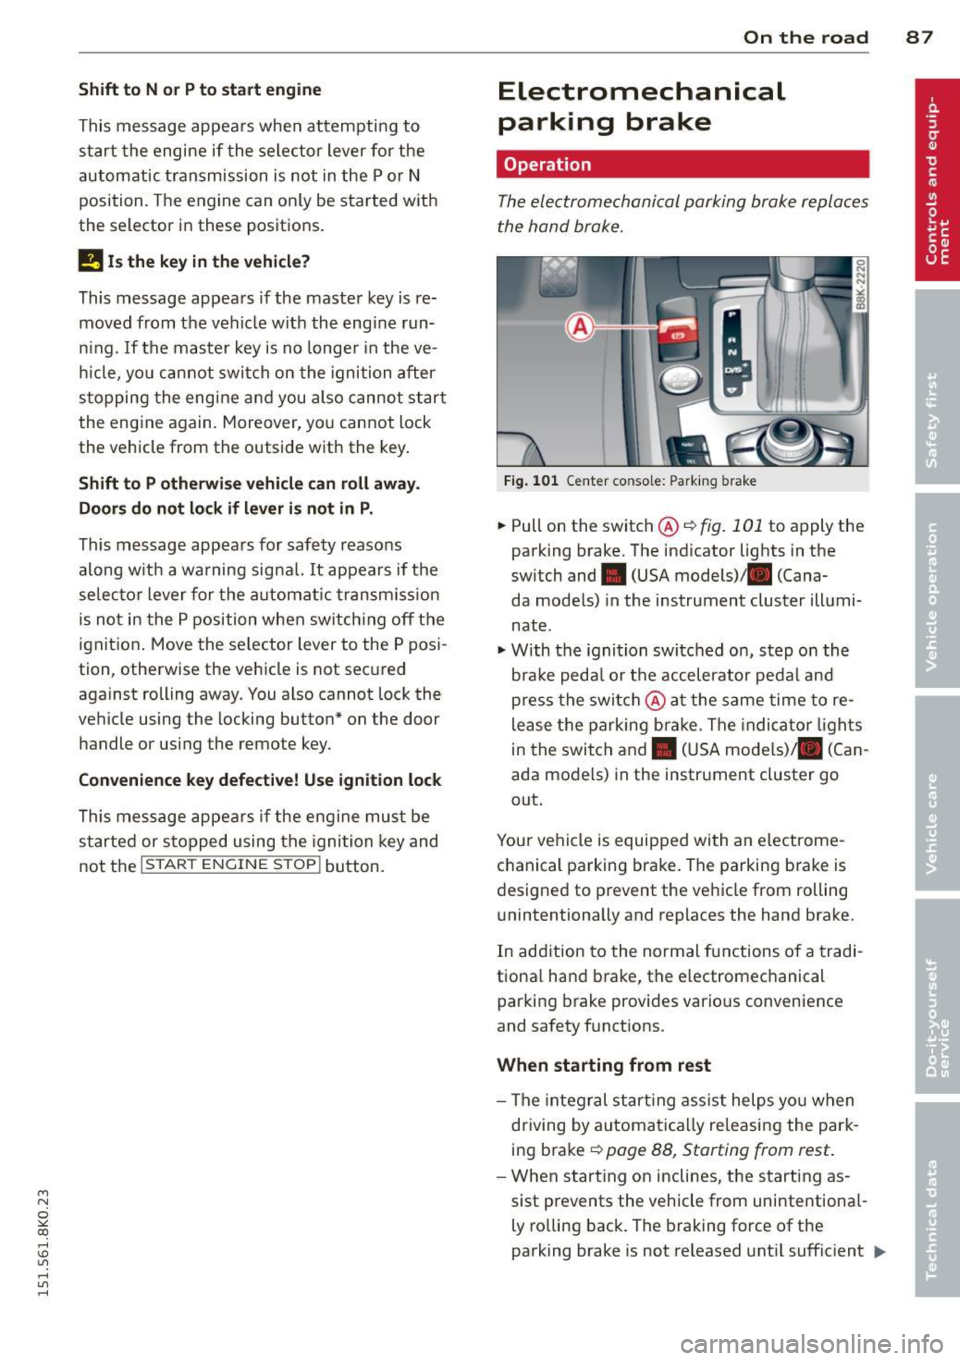
Fig. 101 Center co nsole: Parking b rake
.,. Pull on the switch@¢ fig. 101 to apply the
parking brake. The indicator lights in the
switch and • (USA models) . (Cana-
da models) in the instrument cluster illumi
nate .
"'With the ignition switched on, step on the
brake pedal or the accelerator pedal and
press the switch @at the same time to re
lease the parking brake. The indicator lights
in the switch and. (USA models)/ . (Can
ada models) in the instrument cluster go
out.
Your vehicle is equipped with an electrome
chanical parking brake. The parking brake is
designed to prevent the vehicle from rolling unintentionally and replaces the hand brake.
In addition to the normal functions of a tradi
tional hand brake, the electromechanical
parking brake provides various convenience
and safety functions .
When starting from rest
- The integral starting assist helps you when
driving by automatically releasing the park
ing brake ¢
page 88, Starting from rest.
-When starting on inclines , the starting as-
sist prevents the vehicle from unintentional-
ly rolling back. The braking force of the
parking brake is not released until sufficient
111>
Page 126 of 304
124 Park assis t
the b lue area should be on the curb. The en
ti re b lue area must fit into the parking spot.
• While the vehicle is stationary, turn the
steering wheel to the right as far as it will
go.
• Back into the park ing spot . Stop the vehicle
as soon as the blue curve touches the curb
¢ fig . 138.
• While the vehicle is stationa ry, turn the
steering wheel to t he left as far as i t wi ll go.
• Conti nue to bac k up into the park ing spot
unti l the vehicle is pa rked parallel to the
c ur b.® marks the rear bumper . You sho uld
stop dr iving in reverse as soon as and no lat
er than when the red orientation line@
abuts an object¢,&! Keep an eye on the
front of your veh icle wh ile doing this
c> (D .
Pa rking ne xt to obstacle s
When there is an obstacle (such as a wall)
next to the parking spot, choose a spot w ith
more space on the sides. Pos ition the long
side of the blue area so that there is sufficient
space from the curb . T he area must not be on
the curb . Yo u will also need to start turn ing
the steer ing whee l much ear lie r. T he re s hou ld
be a suff ic ient amoun t of sp ace between the
curb and the b lue curve, and the blue c urve
¢
fig . 138 must not touch the curb .
8_ WARNING
-The rea r view came ra does not show the
entire area beh ind the veh icle
¢
page 120, fig. 133. Watch o ut espe
cially for small children and an imals. The
rear view camera cannot a lways detect
them, pos ing risk of a n accide nt!
- Please note that objects not touch ing the
ground can appear to be further away
than they really are (for examp le, the
bumper of a pa rked vehicle, a t railer
hit ch, or the rear of a t ru ck ). In this case,
yo u shoul d no t use the help li nes to he lp
with par king, which poses danger of an
acc ident!
(D Note
In the M MI dis p lay, the direction of travel
of the vehicle rear is represented depend
i ng on the steering wheel angle . The vehi
cle front swings out more than the vehicle
rear. Mainta in plenty of dista nce from an
obstacle so that your outs ide mir ro r or a
corner of you r vehicle does not coll ide with
any obstacles - dange r of accide nt!
(D Tips
The left o r right orie ntation lines and su r
faces will be disp layed, depending on t he
t u rn s ignal being used .
Adjusting the display and warning tones
Applies to vehicles: with parking system (rear, with rear
view camera)
The display and warning tones are adjus ted in
the radio or MMI*.
.. Select: !CAR I function button> Parking sys
tem .
Or
--.. Select: !C AR I func tion but ton> Car systems "
control butto n> Driver assist > Parking aid .
Di splay
- Off -when the parking system is switched
on, on ly aud ib le signals are given .
-On -when the par king system is switched
on, the picture from the rear view camera is
disp layed.
Warning tones
- Rear volum e -
rear sensor vo lume
- Rear frequency -rear senso r frequency
- Music volume whil e parking -when the
parking system is sw itched on, the volume
of the active audio sour ce is lowered.
The newly ad justed value is briefly heard from
the sig nal generato r. The sett ings are auto
matically stored and assigned to the remote
control key. ..,