phone AUDI S4 2017 Owners Manual
[x] Cancel search | Manufacturer: AUDI, Model Year: 2017, Model line: S4, Model: AUDI S4 2017Pages: 386, PDF Size: 96.32 MB
Page 5 of 386
<( a, .... N ,....
N .... 0 0
3 a,
Electromechanical power steering,
dynamic steering . . . . . . . . . . . . . . . . . . . . 137
All whee l drive (quattro) . . . . . . . . . . . . . . 137
Energy management . . . . . . . . . . . . . . . . . 138
Notice about data recorded by the Event
Data Recorder and vehicle control
modules . . . . . . . . . . . . . . . . . . . . . . . . . . . 139
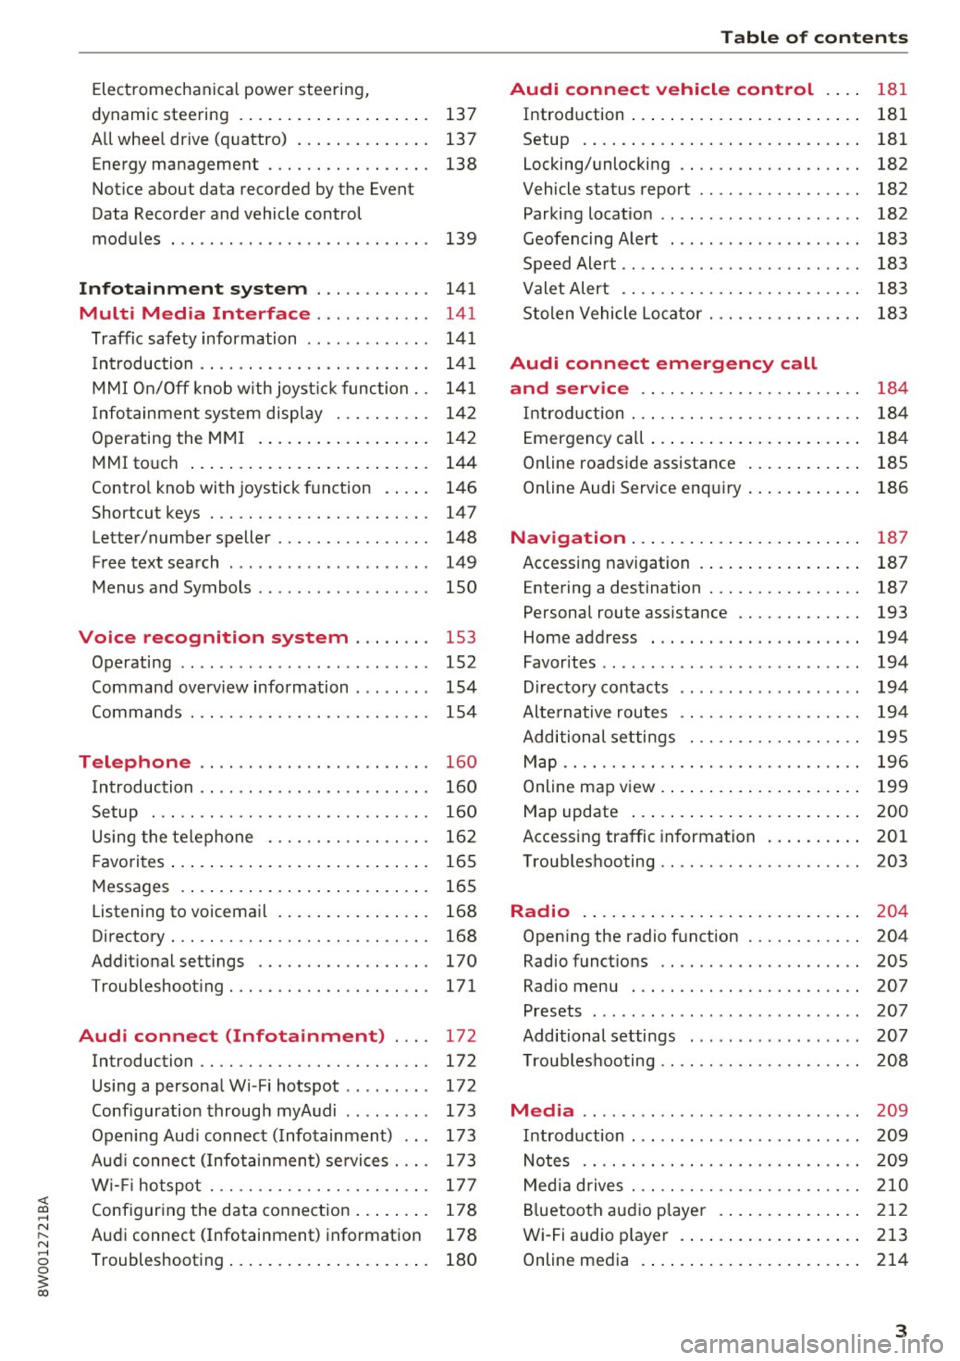
Infotainment system . . . . . . . . . . . . 141
Multi Media Interface . . . . . . . . . . . . 141
Traffic safety information . . . . . . . . . . . . . 141
Introduction . . . . . . . . . . . . . . . . . . . . . . . . 141
MMI On/Off knob w ith joyst ick function. . 141
Infotainment system display . . . . . . . . . . 142
Operating the MMI . . . . . . . . . . . . . . . . . . 142
MMI touch . . . . . . . . . . . . . . . . . . . . . . . . . 144
Control knob with joystick function . . . . . 146
Shortcut keys . . . . . . . . . . . . . . . . . . . . . . . 147
Letter/number speller . . . . . . . . . . . . . . . . 148
Free text search . . . . . . . . . . . . . . . . . . . . . 149
Menus and Symbols . . . . . . . . . . . . . . . . . . 150
Voice recognition system . . . . . . . . 153
Operating . . . . . . . . . . . . . . . . . . . . . . . . . . 152
Command overview information . . . . . . . . 154
Commands . . . . . . . . . . . . . . . . . . . . . . . . . 154
Telephone . . . . . . . . . . . . . . . . . . . . . . . . 160
Introduction . . . . . . . . . . . . . . . . . . . . . . . . 160
Setup . . . . . . . . . . . . . . . . . . . . . . . . . . . . . 160
Using the telephone . . . . . . . . . . . . . . . . . 162
F avorites . . . . . . . . . . . . . . . . . . . . . . . . . . . 165
Messages . . . . . . . . . . . . . . . . . . . . . . . . . . 165
List ening to voicemail . . . . . . . . . . . . . . . . 168
Directory. . . . . . . . . . . . . . . . . . . . . . . . . . . 168
Additional settings . . . . . . . . . . . . . . . . . . 170
Troubleshooting ..... .... .... ... .. .. . 171
Audi connect (Infotainment) . . . . 172
Introduction . . . . . . . . . . . . . . . . . . . . . . . . 172
Using a personal Wi- Fi hotspot . . . . . . . . . 172
Configuration through myAudi . . . . . . . . . 173
Opening Audi connect (Infotainment) . . . 173
Aud i connect (Infotainment) services . . . . 173
W i-F i hotspot . . . . . . . . . . . . . . . . . . . . . . . 177
Configuring the data connection . . . . . . . . 178
Audi connect (Infotainment) informat ion 178
Troubleshooting . . . . . . . . . . . . . . . . . . . . . 180
Table of contents
Audi connect vehicle control . . . .
181
Introduction . . . . . . . . . . . . . . . . . . . . . . . . 181
Setup . . . . . . . . . . . . . . . . . . . . . . . . . . . . . 181
Locking/unlocking . . . . . . . . . . . . . . . . . . . 182
Vehicle status report . . . . . . . . . . . . . . . . . 182
Parking location . . . . . . . . . . . . . . . . . . . . . 182
Geofencing Alert . . . . . . . . . . . . . . . . . . . . 183
Speed Alert . . . . . . . . . . . . . . . . . . . . . . . . . 183
Valet Alert . . . . . . . . . . . . . . . . . . . . . . . . . 183
Stolen Vehicle Locator . . . . . . . . . . . . . . . . 183
Audi connect emergency call
and service . . . . . . . . . . . . . . . . . . . . . . .
184
Introduction . . . . . . . . . . . . . . . . . . . . . . . . 184
Emergency call . . . . . . . . . . . . . . . . . . . . . . 184
Online roadside assistance . . . . . . . . . . . . 185
Online Audi S ervice enquiry . . . . . . . . . . . . 186
Navigation . . . . . . . . . . . . . . . . . . . . . . . . 187
Accessing navigation . . . . . . . . . . . . . . . . . 187
Entering a destination . . . . . . . . . . . . . . . . 187
Personal route assistance . . . . . . . . . . . . . 193
Home address . . . . . . . . . . . . . . . . . . . . . . 194
Favorites . . . . . . . . . . . . . . . . . . . . . . . . . . . 194
Directory contacts . . . . . . . . . . . . . . . . . . . 194
Alternative routes . . . . . . . . . . . . . . . . . . . 194
Additional settings . . . . . . . . . . . . . . . . . . 195
Map...... .. .. . ... ......... ...... .. 196
Online map view. . . . . . . . . . . . . . . . . . . . . 199
Map update . . . . . . . . . . . . . . . . . . . . . . . . 200
Accessing traffic information . . . . . . . . . . 201
Troubleshooting . . . . . . . . . . . . . . . . . . . . . 203
Radio ........ .. .. ................ . 204
Opening the radio function . . . . . . . . . . . . 204
Radio functions . . . . . . . . . . . . . . . . . . . . . 20S
Radio menu . . . . . . . . . . . . . . . . . . . . . . . . 207
Presets . . . . . . . . . . . . . . . . . . . . . . . . . . . . 207
Additional settings . . . . . . . . . . . . . . . . . . 207
T roubleshooting . . . . . . . . . . . . . . . . . . . . . 208
Media ........ .. .. ... ........... ... 209
Introduction . . . . . . . . . . . . . . . . . . . . . . . . 209
Notes .. .. .... .. .... ............. .. 209
Media drives . . . . . . . . . . . . . . . . . . . . . . . . 210
Bluetooth audio player . . . . . . . . . . . . . . . 212
Wi-Fi audio player . . . . . . . . . . . . . . . . . . . 213
Online media . . . . . . . . . . . . . . . . . . . . . . . 214
3
Page 6 of 386
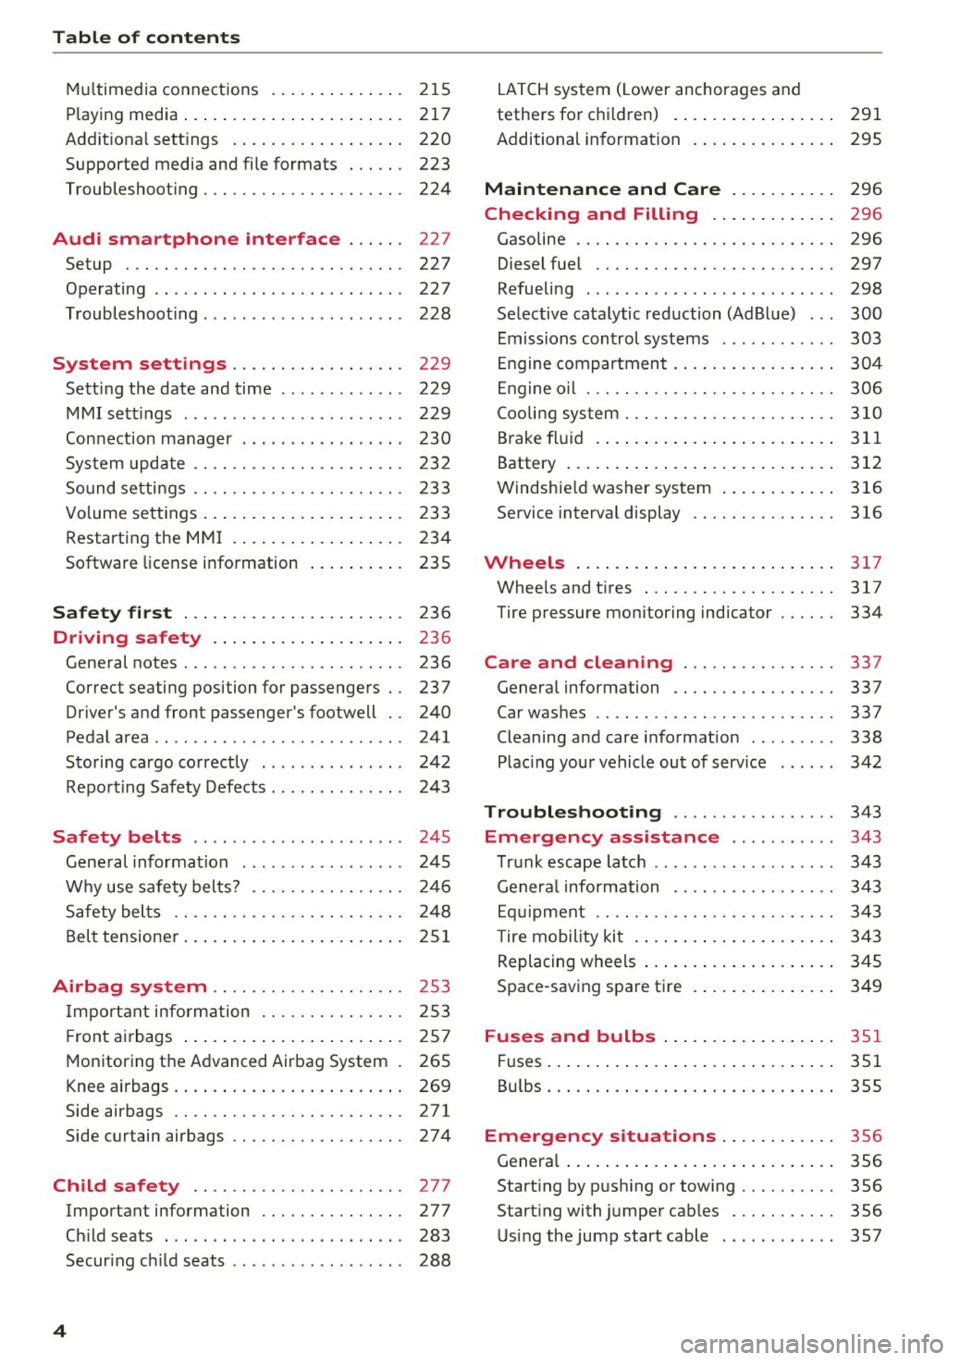
Table of content s
Multimedia connections . . . . . . . . . . . . . . 215
P laying m edia . . . . . . . . . . . . . . . . . . . . . . . 217
Addit iona l sett ings . . . . . . . . . . . . . . . . . . 220
Suppo rted media and file formats . . . . . . 223
Troubleshoot ing. . . . . . . . . . . . . . . . . . . . . 224
Audi smartphone interface . . . . . . 227
Setup . . . . . . . . . . . . . . . . . . . . . . . . . . . . . 227
Operating . . . . . . . . . . . . . . . . . . . . . . . . . . 227
Troubleshoot ing . . . . . . . . . . . . . . . . . . . . . 228
System settings . . . . . . . . . . . . . . . . . . 229
Sett ing the date and time . . . . . . . . . . . . . 229
MMI sett ings . . . . . . . . . . . . . . . . . . . . . . . 229
Con nection manager . . . . . . . . . . . . . . . . . 230
System update . . . . . . . . . . . . . . . . . . . . . . 23 2
So und setti ngs .. .... ......... .... .. .
Volume sett ings .... .. ..... ... .. .. .. .
R estarting the M MI . .. ..... ... .. .. .. .
Software license information 233
233
234
235
Safety first .
.. ... .. ..... ... .. .. ... 23 6
Driving safety . . . . . . . . . . . . . . . . . . . . 236
General notes . . . . . . . . . . . . . . . . . . . . . . . 236
Correct seating position for passengers . . 23 7
Driver's and fron t passenger's footwell . . 240
Pedal area . . . . . . . . . . . . . . . . . . . . . . . . . . 241
Storing cargo co rrectly . . . . . . . . . . . . . . . 242
Repo rting Safety Defects . . . . . . . . . . . . . . 243
Safety belts . . . . . . . . . . . . . . . . . . . . . . 245
Gene ral information . . . . . . . . . . . . . . . . . 24 5
W hy use safety belts? . . . . . . . . . . . . . . . . 246
Safety bel ts . . . . . . . . . . . . . . . . . . . . . . . . 248
B el t tensioner ... ... ... .... ... .. .. ... 251
Airbag system . . . . . . . . . . . . . . . . . . . . 25 3
I mportant inform ation . . . . . . . . . . . . . . . 253
Fr ont ai rbags . . . . . . . . . . . . . . . . . . . . . . . 257
M onitoring the Advanced Airbag System . 265
K nee airbags. . . . . . . . . . . . . . . . . . . . . . . . 269
Side airbags . . . . . . . . . . . . . . . . . . . . . . . . 271
Side curtain airbags ........... .... ... 274
Child safety . . . . . . . . . . . . . . . . . . . . . . 277
Important information . . . . . . . . . . . . . . . 277
Ch ild seats . . . . . . . . . . . . . . . . . . . . . . . . . 283
Secur ing ch ild seats . . . . . . . . . . . . . . . . . . 288
4
LATCH system (Lower anchorages and
tethers for c hildren) . . . . . . . . . . . . . . . . . 291
Additional informat ion . . . . . . . . . . . . . . . 295
Maintenance and Care . . . . . . . . . . . 296
Checking and Filling . . . . . . . . . . . . . 296
Gasoline . . . . . . . . . . . . . . . . . . . . . . . . . . . 296
Diesel fuel . . . . . . . . . . . . . . . . . . . . . . . . . 297
Refueling . . . . . . . . . . . . . . . . . . . . . . . . . . 298
Se lective catalytic reduction (AdBlue) . . . 300
Emissions control systems . . . . . . . . . . . . 303
En gine compartment .. ............. . .
E ngine o il ... .. .. .. .. .. ........... . .
Cooli ng sys tem . .. .. .. ............. . .
B rake fl uid . ... .. .. .. .. .. .. .... ... . .
Battery ... .. .. .. .. .. ... . .. .... ... . .
Windshie ld washer system .. ..... ... . .
Service interva l display 304
306
3
10
311
312
316
316
Wheels .. .. .. .. .. .. ... . .. .... ... .. 317
Wheels and t ires . .. .. ............... 317
Tire pressure monitoring indicator . . . . . . 334
Care and cleaning . . . . . . . . . . . . . . . . 337
General information . . . . . . . . . . . . . . . . . 337
Car washes . . . . . . . . . . . . . . . . . . . . . . . . . 337
Cleaning and care information . . . . . . . . . 338
Plac ing your vehicle out of serv ice . . . . . . 342
Troubleshooting . . . . . . . . . . . . . . . . . 343
Emergency assistance . . . . . . . . . . . 343
T runk escape latch . . . . . . . . . . . . . . . . . . . 343
Genera l information . . . . . . . . . . . . . . . . . 343
E q ui pment . . . . . . . . . . . . . . . . . . . . . . . . . 343
T ire mobility kit . . . . . . . . . . . . . . . . . . . . . 343
Replacing wheels . . . . . . . . . . . . . . . . . . . . 3 45
Space -sav ing spa re tire . . . . . . . . . . . . . . . 349
Fuses and bulbs ... ... . .. .... ... .. 351
Fuses.. ... .. .. .. .. .. .. .. .. .... ... .. 351
Bul bs. . . . . . . . . . . . . . . . . . . . . . . . . . . . . . 355
Emergency situations . . . . . . . . . . . . 356
Genera l . . . . . . . . . . . . . . . . . . . . . . . . . . . . 356
Start ing by push ing or tow ing . . . . . . . . . . 356
Start ing with j umper cables . . . . . . . . . . . 356
Using the jump start cable . . . . . . . . . . . . 357
Page 11 of 386
<( a, .... N ,....
N .... 0 0
3 a,
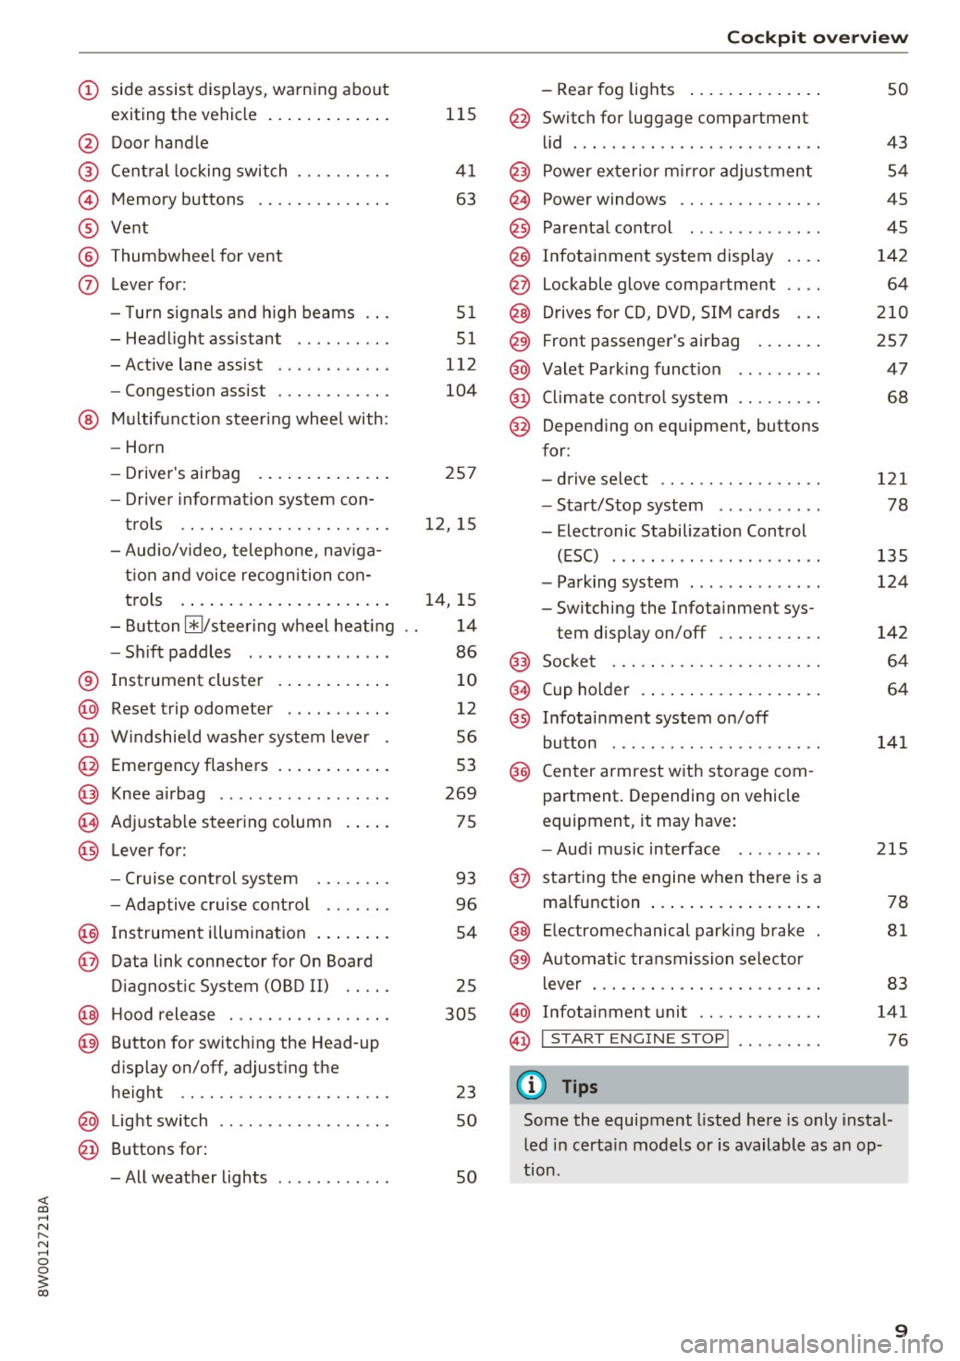
(!) side assist displays, warning abo ut
exiting the vehicle ..... ... .. .. .
@ Door handle
@ Cent ral locking switch ....... .. .
@ Memory buttons ........... .. .
® Vent
® Thumbwhee l for vent
(J) Lever for:
- T urn signals and h igh beams
- Headl ight assistant ......... .
- Active lane assist .. ..... ... . .
- Congestion assist ....... .. .. .
@ Mul tifunction steer ing wheel with:
- Horn
- Driver's airbag . ..... ... .. .. .
- Drive r information system con -
t rols .. .. ............. .. .. .
- Audio/v ideo, telephone, nav iga
t ion and voice recognition con-
trols . ... .... .. .... ... .. .. .
- Button ~/steering wheel heating
- Sh ift paddles .............. .
® Instrument cluster ....... .. .. .
@
@
@
@
~
@
Reset trip odometer ........ .. .
W indshie ld w asher system lever
Emergency flashers .... ... .. .. .
Knee a irbag ........ ... .. ... . .
Adjustable steer ing column
Lever for:
- Cruise cont rol system ..... .. .
- Adaptive cruise cont rol .. ... . .
@ Instrument i llum ination ... .. .. .
@ Data link connector for On Board
Diagnostic System (OBD II) .. .. .
@ H ood release . ........... .. .. .
@ Button for switching the Head-up
d isplay on/off, adjust ing the
height .. .. ............... .. .
@ Lig ht switch ............... .. .
@ Buttons for :
- All weather lights
llS
41
63
5 1
5 1
112
104
25 7
12, 15
14, 15
1 4
86
10
12
56
53
269
75
93
96
54
25
305
23 50
50
Coc kpit o ve rv iew
-Rear fog lights .. .. .. ..... .. .
@ Switch for luggage compartment
li d .... ... .. .. .. .... .. ... .. . .
@ Power exterior m irro r adjustment
@ Power windows .............. .
@ Parental cont rol ............. .
@ Infotainment system dis play . .. .
@ Lockable glove compartment ... .
@ Drives for CD, DVD, SI M cards .. .
@ Front passenger's airbag .... .. .
@ Valet Park ing funct ion ........ .
@ Climate cont ro l system ........ .
@ Depend ing on equ ipment, buttons
for:
- drive select .. .. ............ .
- Start/Stop system . ... ... .. . .
- Electronic Stabilization Control
(ESC) ..... .. .. ... ....... .. .
- Parking system . .... . ..... .. .
- Switching the Infota inment sys-
tem disp lay on/off .......... .
@) Socke t ... .. .. .. ............ .
@ Cup holder . ... .. .... . ..... .. .
@ Infotai nment system on/off
button ... .. .. .. .... .. ... .. . .
@ Center armrest w ith sto rage com
partment . Depending on vehicle
equipment, it may have:
- Aud i m usic interface ........ .
@ starting the engine when the re is a
ma lfunction .. ... .... . ..... .. .
@ E lectromechanical parking brake
@ Automa tic transmission se lector
lever ... .. .. . ... ............ .
@ Infotainment unit ............ .
@ I START EN GIN E STOP ! ........ .
(D Tips
50
43 54
45
45
142 64
2 10
257 47
68
121
78
135
124
142
64
64
141
215
78
81
83
141
76
Some the equipment listed here is only instal
l ed in certa in models or is available as an op-
tion .
9
Page 15 of 386
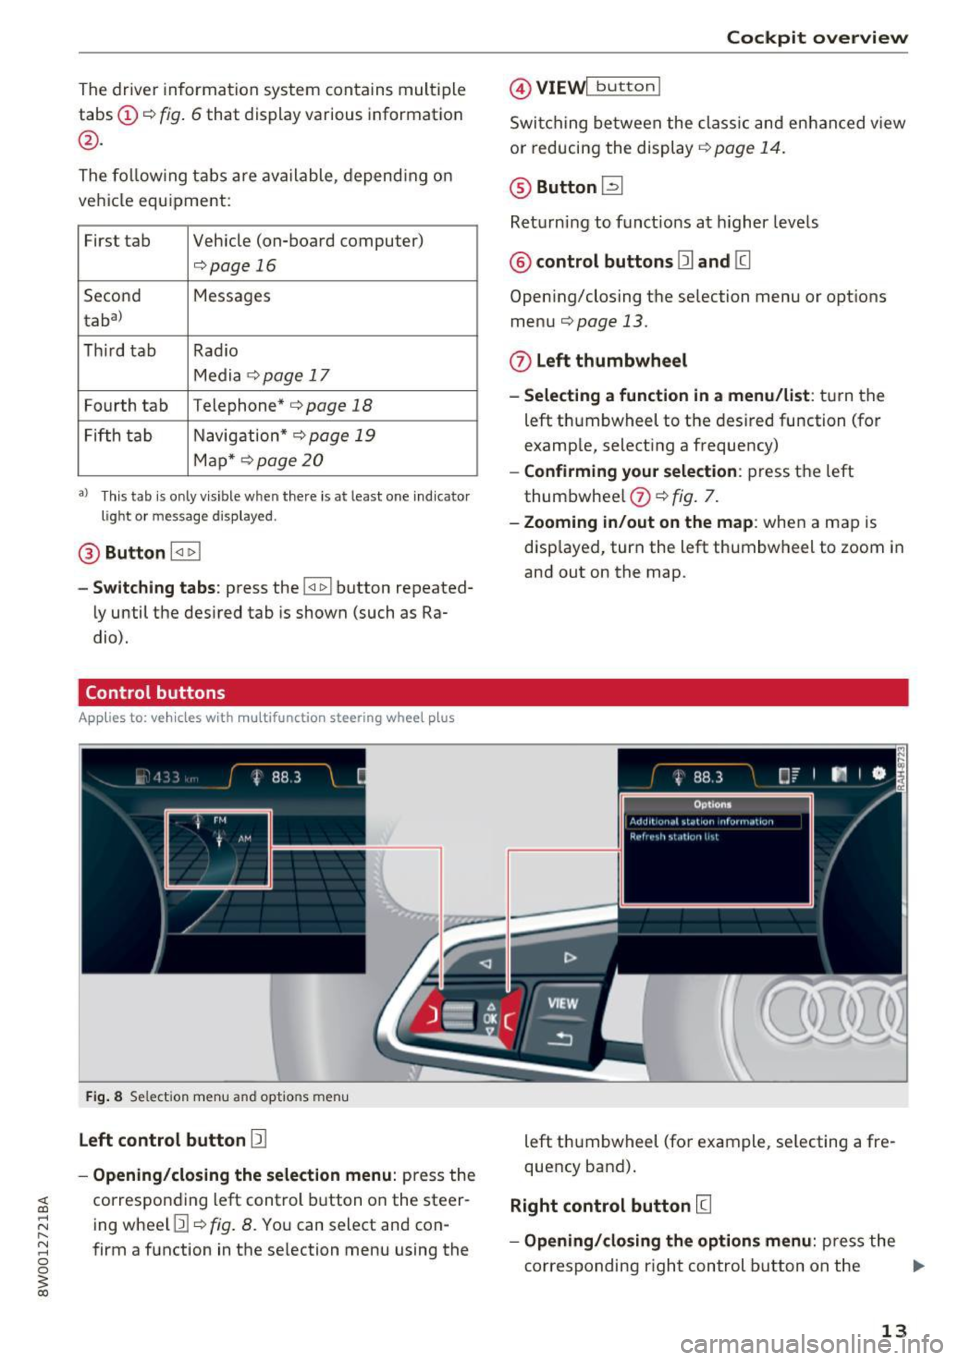
The driver informa tion system contains mult iple
tabs ©¢
fig. 6 that display various information
@.
The fo llow ing tab s are ava ilable, depend ing o n
ve hicl e equ ipment:
First tab Veh icle (on-board computer)
<=>page 16
Se co nd Messages
taba l
Thir d tab Rad io
Media ¢
page 17
Fourth tab
Telephone"<=> page 18
Fifth tab N
avig ation*¢ page 19
Map * <=> page 20
a) This tab is onl y v is ibl e w hen there is a t least one ind icato r
l ig ht or mess ag e dis play ed .
@ Button l
-Switching tabs : press the !<1 1>! button repeated
ly until the des ired tab is shown (such as Ra
dio) .
Control buttons
App lies to: ve hicles with multifunction steering wheel plus
Fig. 8 Se lect ion menu and opt io n s m en u
Left control button 12]
-Opening/closing the selection menu : press the
~ correspo nding left control button o n the steer-
;:::: ing whee l Ill<=>
fig. 8. Yo u can select and con-
" ~ firm a f unction in the se lection menu using the 0 0
~ co
Cockpit overview
@ VIEW! bu tton I
Swi tc h ing between the clas sic a nd en han ced v iew
or reducing the display¢
page 14.
® Button ~
Return ing to funct ions at higher levels
@ control buttons 12] and [g
Open ing/closing the se lection menu or opt ions
menu
<=>page 13.
0 Left thumbwheel
- Selecting a function in a menu/list :
tur n the
left thumbwheel to the des ired function (fo r
examp le, select ing a frequency)
-Confirming you r sele ction : press t he left
thum bwhee l
0 ¢ fig. 7.
-Zooming in/out on the map : when a map is
disp layed, turn the left thumbw heel to zoom in
and out on the map.
left th umbwheel (fo r ex am ple, se lecting a fre
quency band) .
Right control button [g
-Opening /closing the options menu : pre ss the
c o rresp onding r igh t control button o n th e ..,.
13
Page 16 of 386
Cockpit overview
steering wheel [I q fig. 8. You can change any
context-dependent functions and settings us
i ng the left thumbwheel (for example, addi
tiona l station information) .
(D Tips
-Please note that the function of the control
buttons is reversed when Arabic is selected
as the menu language.
- The availability of a selection menu or op
tions menu depends on the function that is
se lected.
View in driver information system
App lies to: veh icles w ith multifunct ion steering wheel plus
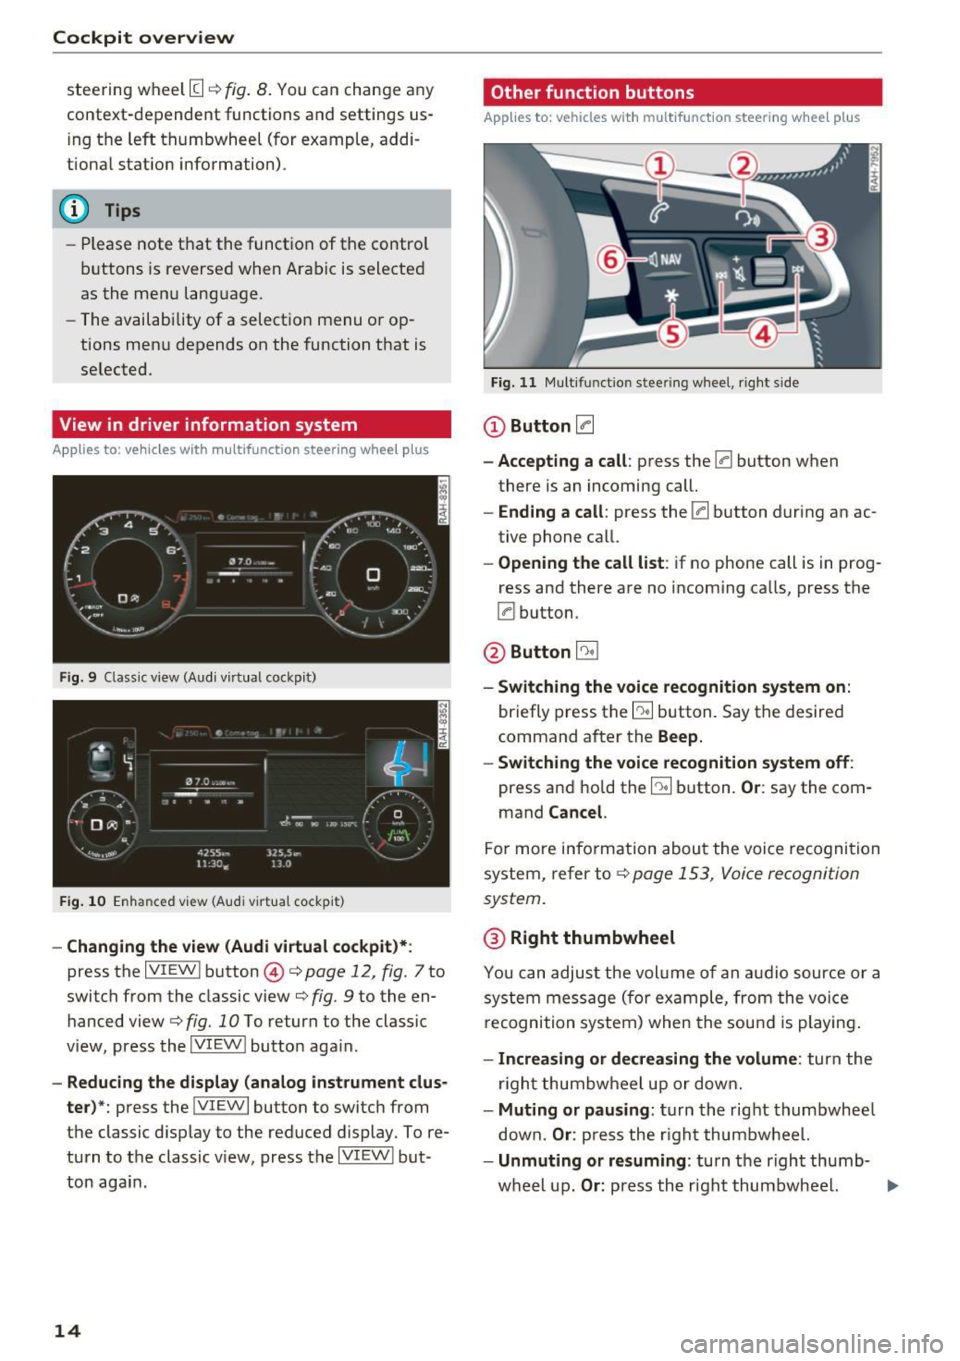
Fig. 9 Classic view (Aud i virtual cockp it)
Fig. 10 Enhanced view (Audi virtua l cockpit)
- Changing the view (Audi virtual cockpit)*:
press the IVIEW I button @i=> page 12, fig . 7 to
switch from the classic view¢
fig. 9 to the en
hanced view
c> fig. 10 To return to the classic
view, press the IVIEW ! button aga in.
- Reducing the display (analog instrument clus
ter) *:
press the !VIEWI button to switch from
the classic d isplay to the reduced display. To re
turn to the classic v iew, press the IVIEW I but
ton again .
14
Other function buttons
Applies to: vehicles with mult ifunction steering whee l plus
Fig. 11 Multifu nct io n stee ring wheel, right side
Q)Button 0
- Accepting a call :
press the [a button when
there is an incoming call.
- Ending a call: press the [a button during an ac
tive phone call.
-Opening the call list: if no phone call is in prog
ress and there are no incoming calls, press the
[a button.
@Button 5l
- Switching the voice recognition system on:
briefly press the~ button. Say the desired
command after the
Beep.
- Switching the voice recognition system off :
press and hold the l2!I button. Or: say the com
mand
Cancel.
For more information about the voice recogni tion
system, refer to
¢page 153, Voice recognition
system.
@ Right thumbwheel
You can adjust the volume of an audio source or a
system message (for example, from the voice
r ecognition system) when the sound is playing.
- Increasing or decreasing the volume : turn the
r ight thumbwheel up or down.
-Muting or pausing : turn the right thumbwheel
down.
Or: press the righ t thumbwheel.
- Unmuting or resuming : turn the right thumb-
wheel up.
Or: press the right thumbwheel. .,..
Page 17 of 386
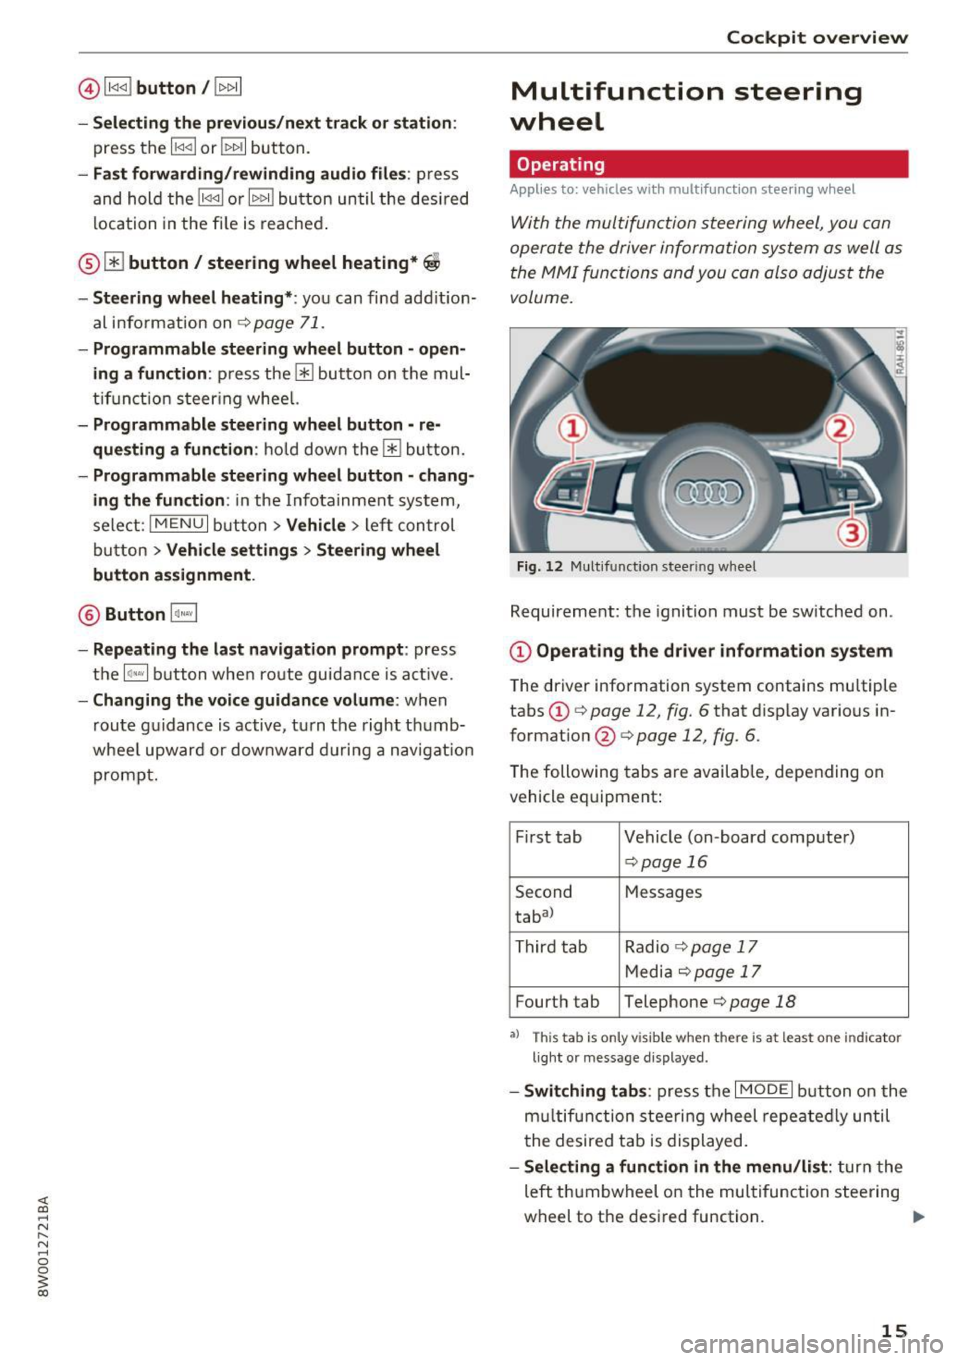
@l1<1<1 I button /!1>1> 11
- Selecting the previous/next track or station :
press the l1<1<1 I or !1>1>1 1 button.
- Fast forwarding/rewinding audio files : press
and hol d the !1<1<1 1 o r 11>1> 1! bu tton un til the des ired
location in the fi le is re ached .
® [i] button / steering wheel heating*~
- Steering wheel heating* :
you can fin d ad ditio n
al info rmat ion on
~ page 71.
-Programmable steering wheel button -open
ing a function :
press the 0 butto n on the mul
t ifun ction steer ing whee l.
-Programmable steering wheel button -re
que sting a function :
ho ld down the [i] bu tton.
- Programmable ste ering whe el button -chang
ing the function :
in the Info tainment sys tem,
sele ct:
IMENU I button> Vehicle > lef t con trol
bu tton >
Vehicle settings > Steering wheel
button assignment .
@ Button 1~·" 1
-Repeating the last navigation prompt : press
t h e
lq ,w l bu tton whe n route guidance is a ct ive.
- Changing the voice guidance volume : when
route g uidance is active, turn the right th umb
whee l upwar d or downward during a navigat ion
p rompt.
Cockpit overview
Multifunction steering
wheel
Operating
Applies to: veh icles w ith multifunction steering wheel
With the multifun ction steering wheel, you con
opera te the driver information system a s well as
t he MMI functions and you con also adjust the
volume.
Fig . 12 Mu ltifunction steer ing whee l
Requireme nt: the ignition must be sw itched on .
(D Operating the dr iver information system
T he driver information system contains mu ltiple
tabs
(D c:> page 12, fig. 6 that d isplay various in
format ion @
c:> page 12, fig. 6.
The following tabs are availab le, depending on
vehicle equipment:
F irst tab Vehicle (on-board comp ute r)
c:> pag e 16
Second M
essages
tabal
T hird tab Radio
c:> page 17
M edi a c:> page 1 7
Fourth tab Telephone c:> page 18
•> T h is tab is only v isible when th ere is at least one ind icator
l ig ht or message d isp layed.
- Swit ching tab s: press the I MODE i button o n the
m ultif unct ion stee ring wheel repea te dl y until
t he de sired tab is displayed.
-Selecting a function in the menu /list : turn the
left t humbwheel on the multifu nction steering
wheel to the desired function. ..,.
15
Page 20 of 386
Cockpit overv iew
-Sele ctin g a radio station from the source li st:
select and confirm To radi o.
- Playing an audio /video file :
select and conf irm
a file .
-Pau sing /re suming playba ck : p ress the r igh t
thumbwheel @q
page 14, fig. 11 . To resume
playback, press the right thumbwheel again.
- Res tarting pla yba ck of an audio file : select the
file that is cur rently playing, if necessary . Press
the left thumbwheel.
- Opening additional track inform ation : select:
right cont rol button>
Addition al track info .
(D Tips
-The media d rives do not play files that are
prote cted by ORM and that are identified
with the symbol~.
- Please note that only the p laylists within a
media so urce in the driver i nfo rmat io n sys
tem ca n be played, that were selected
th rough the control panel
r:!;> page 218 .
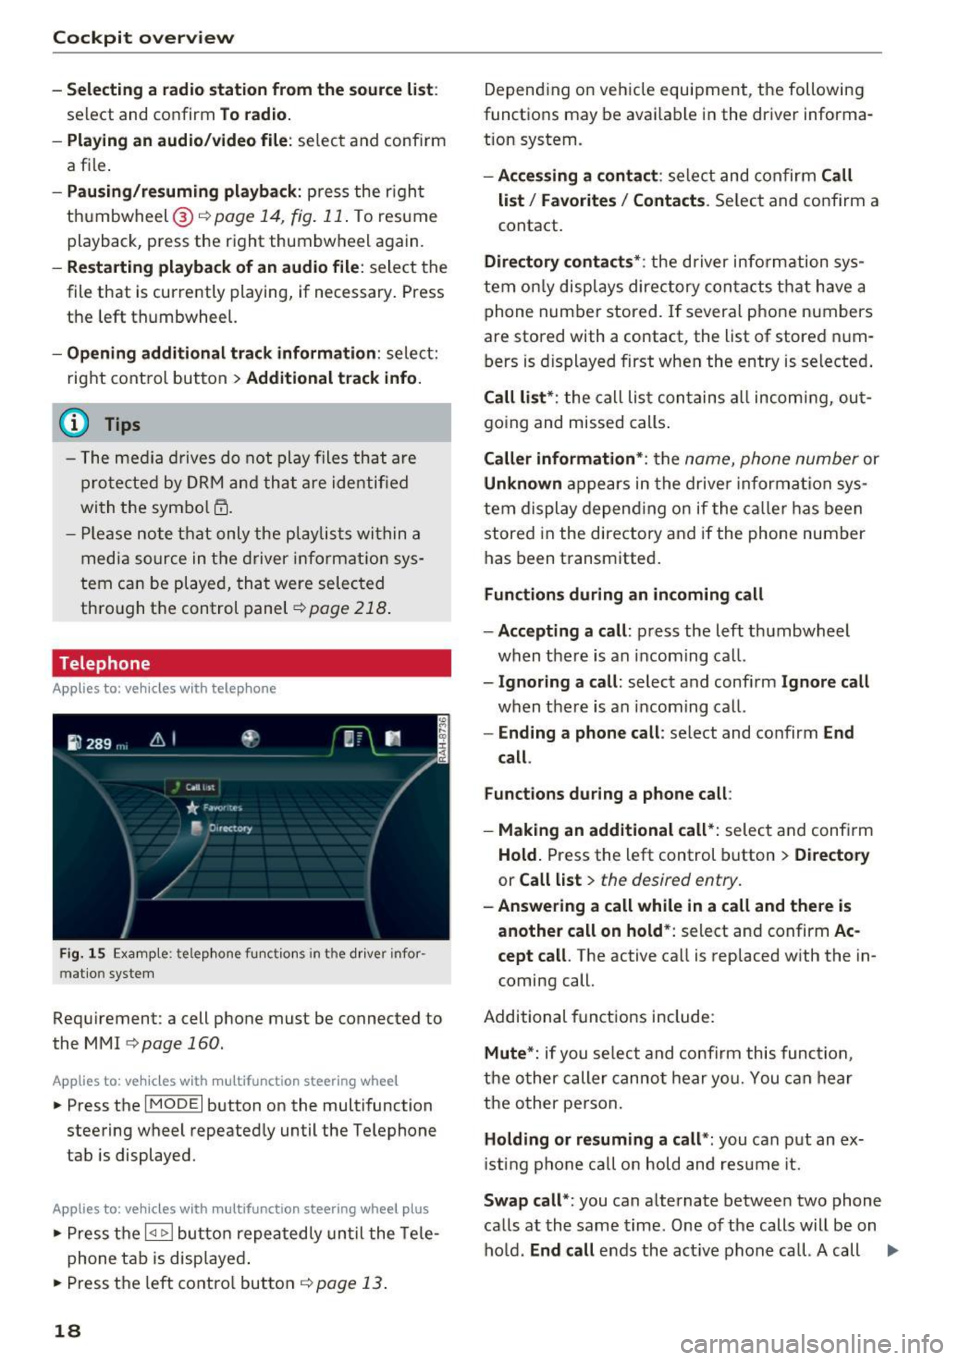
Telephone
Applies to: vehicles with telephone
Fig. 15 Examp le: te lep hone f unctions in t he dr iver infor
m at io n system
Requirement: a cell phone must be connected to
the MMI
¢ page 160.
Applies to: veh icles w ith multifunct ion steering wheel
.. Press the I MODEi button on the multifunction
steering wheel repeated ly until the Te lephone
tab is displayed.
Applies to: vehicles with multifunction steering wheel plus
.. Press the l<11> I butto n repeated ly until the Tele
phone tab is displayed .
.. Press the left contro l button
q page 13 .
18
Depending on vehicle equipment, the following
functions may be available in the driver informa
tion system .
-Acce ssing a contact : select and confirm Call
li st / Fa vori te s
I C o ntact s. Select and confirm a
contact.
Dir ectory contact s*: the driver info rmation sys
tem on ly displays directory contacts that have a
phone number stored. If several phone numbers
are stored with a contact, the list of stored n um
bers is displayed first when the entry is selected .
Call list*: the call list con tains a ll incoming, ou t
going and missed calls .
Caller information*: the name, phone number or
Unknown appears in the drive r informa tion sys
tem d isplay depend ing on if the ca ller has been
stored in the directory and if the phone number
has been transmitted.
Fun cti ons during an inc om ing call
- Acc epting a call :
press the left thumbwheel
when there is an incoming call.
- Ignoring a c all : select and confirm Ignore call
when there is an incoming call.
- Ending a phone call : select and confirm End
call .
F u nc tions du ring a phone call :
- Making an additional call *:
select and confi rm
Ho ld. Press the left control button > D irect o ry
or Call li st > the desired entry.
- Answering a call while in a call and the re is
another call on hold *:
select and confirm Ac
c ept call .
The active ca ll is replaced with the in
coming call.
Additional functions include:
Mute *: if you se lect and confirm this function ,
the o ther caller cannot hear you. You can hear
the other person.
H ol ding or re sumi ng a call *: you can put an ex
i st ing phone call on hold and resume it.
S wap call*: you can alternate between two phone
calls at the same time . One of the calls will be on
ho ld .
End call ends the act ive phone ca ll. A call .,..
Page 21 of 386
that was p laced on hold st ays on ho ld and can be
taken
off ho ld wit h Resume.
Conferen ce* :
a call on ho ld and up to five ac tive
p art ies ( depend ing o n the ce ll phone serv ice p ro
vider) can be added to a conference call . To ma ke
an ad ditional call, put all part ici pants i n the c ur
rent confe rence call on ho ld usin g
Hold*. By
p ressing the left cont rol b utton, you can make
addit io nal calls from t he d irectory o r the call list .
Resume * takes all part ies off hold .
(D Tips
-The telephone functions can only be con
troll ed w it h the multifunction stee ring
whee l if the te lepho ne e qui pme nt was in
stalled
at the f actory.
- The telephone functions depend on the cell
p hone and whethe r th ey a re s up porte d by
you r ce ll phone servic e prov ider or not.
- The
Call waiting * function must be activa t
ed in your c ell phone and in the MMI to be
a lert ed to an inco ming call dur ing an act ive
call
9 pa ge 1 70. Th e call options d epend
on t he ce ll p hone and s ervice pr ovider. Y ou
c an obtain m ore in for mat ion from your c ell
p hone service provi der.
Navigation
Applies to: ve hicles with navigation system
R equ irement: a dest ination must be entered
¢
page 187 and the route g uidance must be
started .
~ Press the l<1 1>I butto n repeated ly unt il the Navi-
gatio n tab is displayed .
~ Press the left contro l button ¢ page 13.
Dependin g on vehicle equipmen t, the following
fu nctions may be avai lab le in t he dr ive r informa
tion system.
- Displaying navigation during active route
guidance :
select and confi rm Map* / Street
view* or Arrow view*.
- Showing the map when route guidance is not
active* :
select and co nfirm Map *.
- Accessing last destinations :
select and confirm
Last destinations > the desired destina tion.
Cockpit overview
- Accessing favorites* :
select and confirm Favor
ites
> the desired destination.
- Starting route guidance to the stored home
address :
se lect and confir m Cancel route guid
ance
i f necessa ry and t hen Home address .
If you h ave not start ed any rou te g uid ance, a
c om pass (analo g instr ume nt cl us ter) or the ar
row view (monoch rome instrument cluster) is
displayed depending on the e quipment. Th e map
is d isp layed in the Aud i virtua l coc kpit *.
Canceling active route guidance
-Sele ct: r ig ht con trol butto n > Cancel route
guidance
Additional settings
- Select: r igh t con trol button > desired entry .
Depending on the function se lected, t he follow
i ng additional settings may be possible:
- Map dis p lay ¢
page 198
-Map colo rs ¢ page 198
- Map orien tati on ¢ page 1 98
- Auto mati c zo om ¢ page 1 98
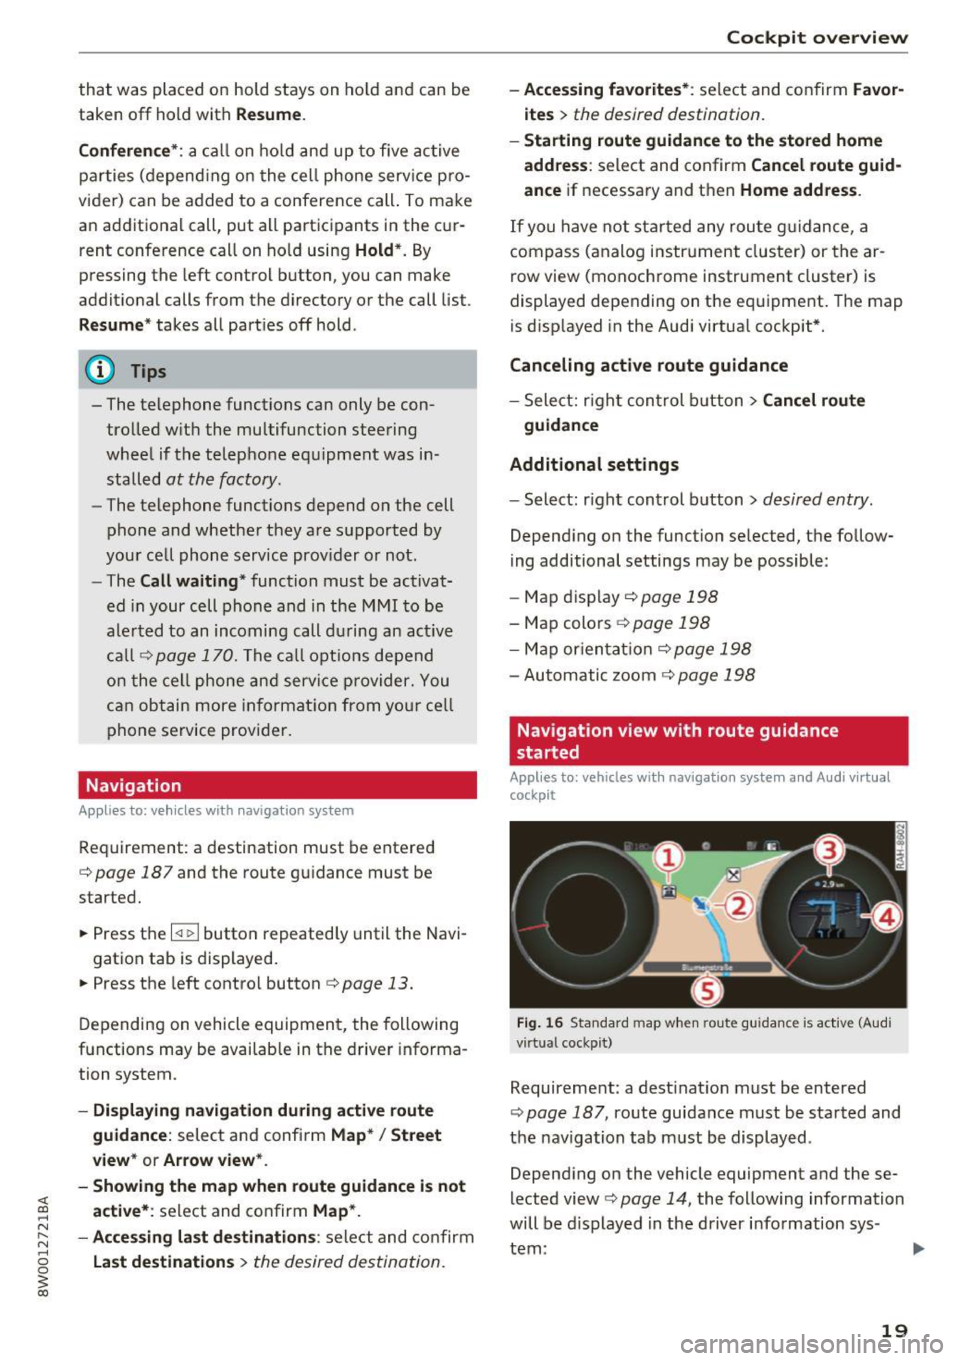
Nav igation view with route guidance
started
Appl ies to : vehicles wit h navigat ion system and Aud i v irtual
cockp it
Fig. 16 Sta ndard map w he n ro ute guida nce is active (A udi
vi rtua l cockpit)
Requireme nt: a dest ina tion must be entered
¢
pag e 18 7, ro ute guidance must be sta rted and
t h e nav iga tion tab m ust be displayed .
Depen ding on the vehicle equipment a nd t hese
lected view¢
page 14, the follow ing information
will be di splayed in the d river info rmatio n sys -
tem:
~
19
Page 40 of 386
Opening and closing
Key set
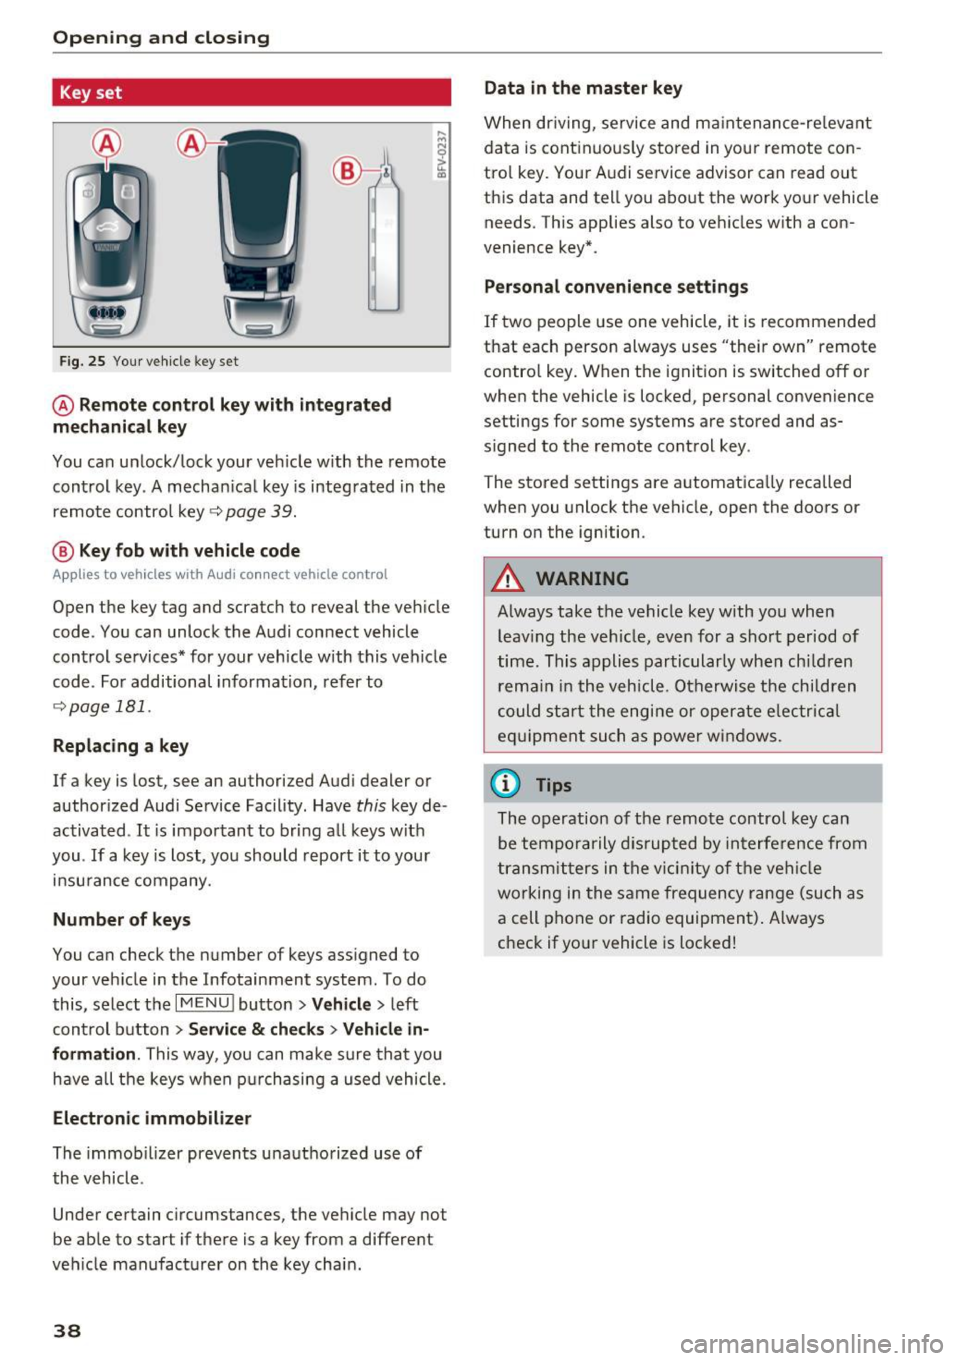
Fig. 25 Your veh icle key set
@ Remote control key with integrated
mechanical key
You can unlock/lock your veh icle w ith the remote
control key . A mechan ical key is integrated in the
remote control key~
page 39.
@ Key fob with vehicle code
Applies to veh icles with Audi connect vehicle control
Open the key tag and scratch to reveal the veh icle
code . You can unlock the Audi connect vehicle
control se rvices* for your vehicle with this vehicle
code . For additional information, refer to
~ page 181 .
Replacing a key
If a key is lost, see an authorized Audi dealer or
authorized Audi Service Facility. Have
this key de
activated .
It is important to bring all keys with
you .
If a key is lost, you should report it to your
insurance company.
Number of keys
You can check the number of keys assigned to
your vehicle in the Infotainment system . To do
this, select the
IM ENU I button > Vehicle > left
control button
> Service & checks> Vehicle in·
formation .
This way, you can make sure that you
have all the keys when purchasing a used vehicle.
Electronic immobilizer
The immob ilizer prevents unauthorized use of
the vehicle .
Under certain circumstances, the vehicle may not
be able to start if there is a key from a different
veh icle manufacturer on the key chain.
38
Data in the master key
When driving, service and maintenance-re levant
data is continuously stored in your remote con
trol key. Your A udi service advisor can read out
this data and tell you about the work your vehicle
needs . This applies also to vehicles with a con
venience key*.
Personal convenience settings
If two people use one vehicle, it is recommended
that each person always uses "their own" remote contro l key. When the ignition is switched off or
when the vehicle is locked, personal convenience
settings for some systems are stored and as
s igned to the remote control key .
The stored settings are automatically recalled
when you unlock the vehicle, open the doors or
turn on the ignition.
_&. WARNING
Always take the vehicle key with you when leaving the vehicle, even for a short period of
time. This applies particularly when children
r ema in in the vehicle . Otherwise the children
could start the engine or operate elec trical
equipment such as power windows.
(D Tips
-
The operation of the remote control key can
be temporarily disrupted by interference from
transmitters in the vicinity of the vehicle
working in the same frequency range (such as
a cell phone or radio equipment) . Always
check if yo ur vehicle is locked!
Page 46 of 386
Opening and clo sin g
- Move your foot back and forth below the bump
er¢
fig. 35. Do not touch the bumper. The lug
gage compartment lid will open/close once the
system detects the movement .
The luggage compartment lid will only open/
close if you perform the movement as described.
This prevents the luggage compartment lid from
open ing or closing due to similar movements,
such as when you walk between the rear of the
veh icle and your garage doo r.
The closing of the luggage compartment lid is in
d icated by a warning signal and can be canceled
by mak ing the described movement again.
The foot movement does not lock the vehicle.
General information
I n some s ituations, the function may be limited
or temporar ily unavai lable. This may happe n if:
- the luggage compartment lid was closed imme
diately before .
-you park close to a hedge and the branches
move back and forth under the vehicle for a
long pe riod of time.
- you clean your vehicle, for example with a pres
su re washe r or in a car wash.
- there is heavy rain .
- the bumper is
very dirty , for example after driv-
ing on salt-covered roads .
- there is interference to the radio signal from
the vehicle key, such as from cell phones or re
mote controls.
A WARNING
-Pay careful attention when closing the lug
gage compartment lid. Othe rw ise, you could
ca use serious in jury to yo urself or othe rs de
spite the pi nch protection.
- T o reduce the risk of pinch ing injur ies, al
ways m ake sure that no one is in the operat
ing area of the luggage compartmen t lid; in
cluding the h inge areas and the upper and
lower edge of the luggage compartment lid .
- Never dr ive with the luggage compartment
lid ajar or open, because poisonous gases
can enter the vehicle interior and increase
the risk of asphyxiation.
44
luggage compartment lid emergency
release
The luggage compartment lid can be released
from inside the luggage compartment in an
emergency.
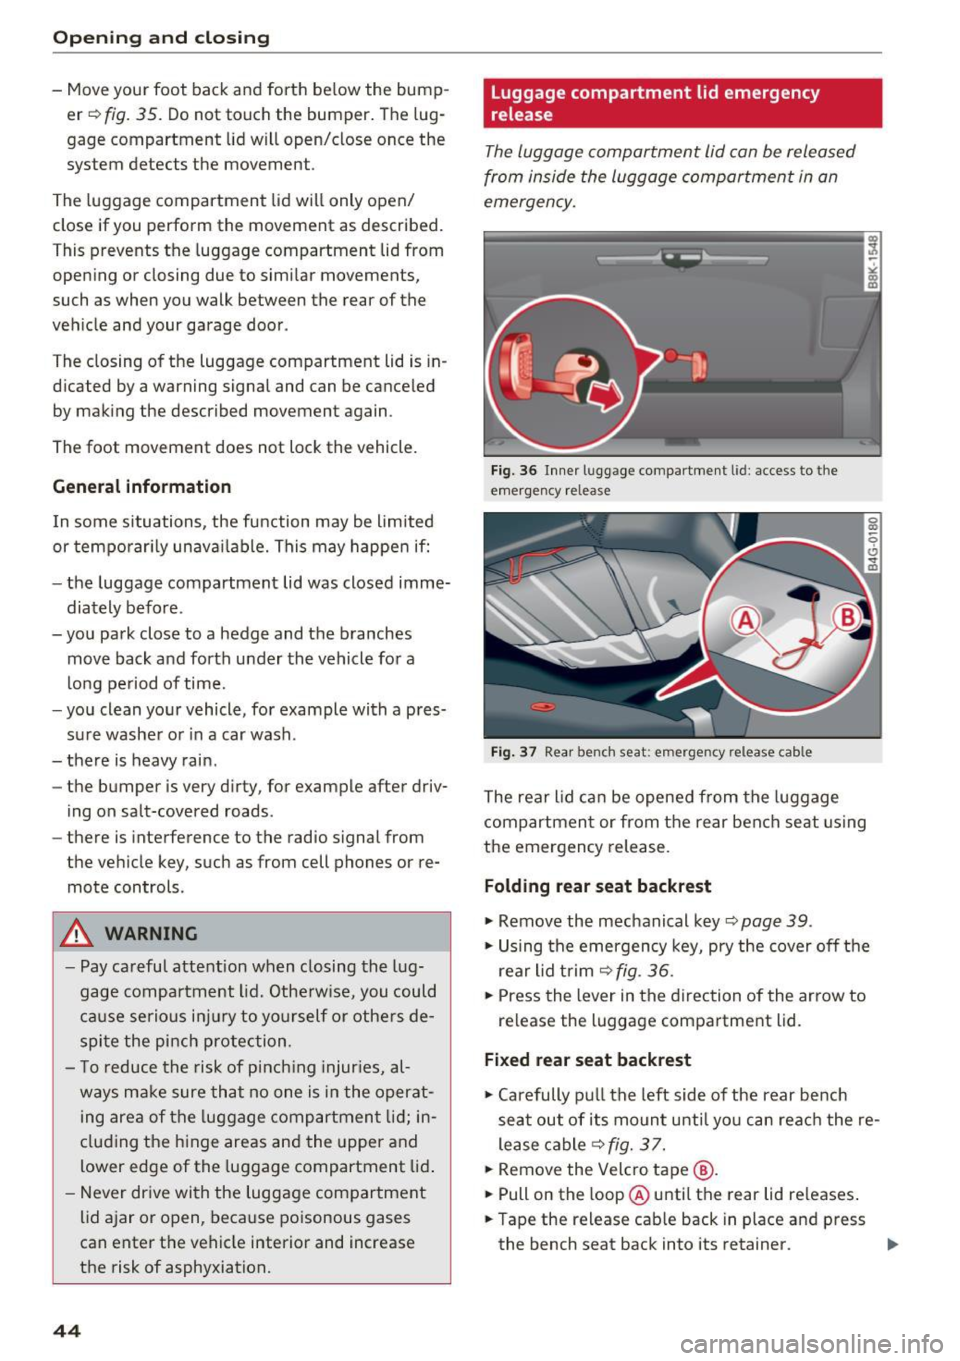
Fig. 36 Inner luggage compartment l id: access to the
emergency release
F ig . 37 Rea r bench seat: emergency release cable
The rear lid can be opened from the luggage
compartment or from the rear bench seat using
the emergency release.
Folding rear seat backrest
• Remove the mechanical key¢ page 39.
• Using the emergency key, pry the cover off the
rear lid trim ¢
fig. 36.
• Press the lever in the direction of the arrow to
release the luggage compartment lid.
Fixed rear seat backrest
• Carefully pu ll the left side of the rear bench
seat out of its mount until you can reach the re
lease cable¢
fig. 3 7.
• Remove the Velcro tape @.
• Pull on the loop @ until the rear lid releases .
• Tape the release cab le back in place and press
the bench seat back into its retainer.