reset infotainment system AUDI S4 2017 Owners Manual
[x] Cancel search | Manufacturer: AUDI, Model Year: 2017, Model line: S4, Model: AUDI S4 2017Pages: 386, PDF Size: 96.32 MB
Page 5 of 386
<( a, .... N ,....
N .... 0 0
3 a,
Electromechanical power steering,
dynamic steering . . . . . . . . . . . . . . . . . . . . 137
All whee l drive (quattro) . . . . . . . . . . . . . . 137
Energy management . . . . . . . . . . . . . . . . . 138
Notice about data recorded by the Event
Data Recorder and vehicle control
modules . . . . . . . . . . . . . . . . . . . . . . . . . . . 139
Infotainment system . . . . . . . . . . . . 141
Multi Media Interface . . . . . . . . . . . . 141
Traffic safety information . . . . . . . . . . . . . 141
Introduction . . . . . . . . . . . . . . . . . . . . . . . . 141
MMI On/Off knob w ith joyst ick function. . 141
Infotainment system display . . . . . . . . . . 142
Operating the MMI . . . . . . . . . . . . . . . . . . 142
MMI touch . . . . . . . . . . . . . . . . . . . . . . . . . 144
Control knob with joystick function . . . . . 146
Shortcut keys . . . . . . . . . . . . . . . . . . . . . . . 147
Letter/number speller . . . . . . . . . . . . . . . . 148
Free text search . . . . . . . . . . . . . . . . . . . . . 149
Menus and Symbols . . . . . . . . . . . . . . . . . . 150
Voice recognition system . . . . . . . . 153
Operating . . . . . . . . . . . . . . . . . . . . . . . . . . 152
Command overview information . . . . . . . . 154
Commands . . . . . . . . . . . . . . . . . . . . . . . . . 154
Telephone . . . . . . . . . . . . . . . . . . . . . . . . 160
Introduction . . . . . . . . . . . . . . . . . . . . . . . . 160
Setup . . . . . . . . . . . . . . . . . . . . . . . . . . . . . 160
Using the telephone . . . . . . . . . . . . . . . . . 162
F avorites . . . . . . . . . . . . . . . . . . . . . . . . . . . 165
Messages . . . . . . . . . . . . . . . . . . . . . . . . . . 165
List ening to voicemail . . . . . . . . . . . . . . . . 168
Directory. . . . . . . . . . . . . . . . . . . . . . . . . . . 168
Additional settings . . . . . . . . . . . . . . . . . . 170
Troubleshooting ..... .... .... ... .. .. . 171
Audi connect (Infotainment) . . . . 172
Introduction . . . . . . . . . . . . . . . . . . . . . . . . 172
Using a personal Wi- Fi hotspot . . . . . . . . . 172
Configuration through myAudi . . . . . . . . . 173
Opening Audi connect (Infotainment) . . . 173
Aud i connect (Infotainment) services . . . . 173
W i-F i hotspot . . . . . . . . . . . . . . . . . . . . . . . 177
Configuring the data connection . . . . . . . . 178
Audi connect (Infotainment) informat ion 178
Troubleshooting . . . . . . . . . . . . . . . . . . . . . 180
Table of contents
Audi connect vehicle control . . . .
181
Introduction . . . . . . . . . . . . . . . . . . . . . . . . 181
Setup . . . . . . . . . . . . . . . . . . . . . . . . . . . . . 181
Locking/unlocking . . . . . . . . . . . . . . . . . . . 182
Vehicle status report . . . . . . . . . . . . . . . . . 182
Parking location . . . . . . . . . . . . . . . . . . . . . 182
Geofencing Alert . . . . . . . . . . . . . . . . . . . . 183
Speed Alert . . . . . . . . . . . . . . . . . . . . . . . . . 183
Valet Alert . . . . . . . . . . . . . . . . . . . . . . . . . 183
Stolen Vehicle Locator . . . . . . . . . . . . . . . . 183
Audi connect emergency call
and service . . . . . . . . . . . . . . . . . . . . . . .
184
Introduction . . . . . . . . . . . . . . . . . . . . . . . . 184
Emergency call . . . . . . . . . . . . . . . . . . . . . . 184
Online roadside assistance . . . . . . . . . . . . 185
Online Audi S ervice enquiry . . . . . . . . . . . . 186
Navigation . . . . . . . . . . . . . . . . . . . . . . . . 187
Accessing navigation . . . . . . . . . . . . . . . . . 187
Entering a destination . . . . . . . . . . . . . . . . 187
Personal route assistance . . . . . . . . . . . . . 193
Home address . . . . . . . . . . . . . . . . . . . . . . 194
Favorites . . . . . . . . . . . . . . . . . . . . . . . . . . . 194
Directory contacts . . . . . . . . . . . . . . . . . . . 194
Alternative routes . . . . . . . . . . . . . . . . . . . 194
Additional settings . . . . . . . . . . . . . . . . . . 195
Map...... .. .. . ... ......... ...... .. 196
Online map view. . . . . . . . . . . . . . . . . . . . . 199
Map update . . . . . . . . . . . . . . . . . . . . . . . . 200
Accessing traffic information . . . . . . . . . . 201
Troubleshooting . . . . . . . . . . . . . . . . . . . . . 203
Radio ........ .. .. ................ . 204
Opening the radio function . . . . . . . . . . . . 204
Radio functions . . . . . . . . . . . . . . . . . . . . . 20S
Radio menu . . . . . . . . . . . . . . . . . . . . . . . . 207
Presets . . . . . . . . . . . . . . . . . . . . . . . . . . . . 207
Additional settings . . . . . . . . . . . . . . . . . . 207
T roubleshooting . . . . . . . . . . . . . . . . . . . . . 208
Media ........ .. .. ... ........... ... 209
Introduction . . . . . . . . . . . . . . . . . . . . . . . . 209
Notes .. .. .... .. .... ............. .. 209
Media drives . . . . . . . . . . . . . . . . . . . . . . . . 210
Bluetooth audio player . . . . . . . . . . . . . . . 212
Wi-Fi audio player . . . . . . . . . . . . . . . . . . . 213
Online media . . . . . . . . . . . . . . . . . . . . . . . 214
3
Page 11 of 386
<( a, .... N ,....
N .... 0 0
3 a,
(!) side assist displays, warning abo ut
exiting the vehicle ..... ... .. .. .
@ Door handle
@ Cent ral locking switch ....... .. .
@ Memory buttons ........... .. .
® Vent
® Thumbwhee l for vent
(J) Lever for:
- T urn signals and h igh beams
- Headl ight assistant ......... .
- Active lane assist .. ..... ... . .
- Congestion assist ....... .. .. .
@ Mul tifunction steer ing wheel with:
- Horn
- Driver's airbag . ..... ... .. .. .
- Drive r information system con -
t rols .. .. ............. .. .. .
- Audio/v ideo, telephone, nav iga
t ion and voice recognition con-
trols . ... .... .. .... ... .. .. .
- Button ~/steering wheel heating
- Sh ift paddles .............. .
® Instrument cluster ....... .. .. .
@
@
@
@
~
@
Reset trip odometer ........ .. .
W indshie ld w asher system lever
Emergency flashers .... ... .. .. .
Knee a irbag ........ ... .. ... . .
Adjustable steer ing column
Lever for:
- Cruise cont rol system ..... .. .
- Adaptive cruise cont rol .. ... . .
@ Instrument i llum ination ... .. .. .
@ Data link connector for On Board
Diagnostic System (OBD II) .. .. .
@ H ood release . ........... .. .. .
@ Button for switching the Head-up
d isplay on/off, adjust ing the
height .. .. ............... .. .
@ Lig ht switch ............... .. .
@ Buttons for :
- All weather lights
llS
41
63
5 1
5 1
112
104
25 7
12, 15
14, 15
1 4
86
10
12
56
53
269
75
93
96
54
25
305
23 50
50
Coc kpit o ve rv iew
-Rear fog lights .. .. .. ..... .. .
@ Switch for luggage compartment
li d .... ... .. .. .. .... .. ... .. . .
@ Power exterior m irro r adjustment
@ Power windows .............. .
@ Parental cont rol ............. .
@ Infotainment system dis play . .. .
@ Lockable glove compartment ... .
@ Drives for CD, DVD, SI M cards .. .
@ Front passenger's airbag .... .. .
@ Valet Park ing funct ion ........ .
@ Climate cont ro l system ........ .
@ Depend ing on equ ipment, buttons
for:
- drive select .. .. ............ .
- Start/Stop system . ... ... .. . .
- Electronic Stabilization Control
(ESC) ..... .. .. ... ....... .. .
- Parking system . .... . ..... .. .
- Switching the Infota inment sys-
tem disp lay on/off .......... .
@) Socke t ... .. .. .. ............ .
@ Cup holder . ... .. .... . ..... .. .
@ Infotai nment system on/off
button ... .. .. .. .... .. ... .. . .
@ Center armrest w ith sto rage com
partment . Depending on vehicle
equipment, it may have:
- Aud i m usic interface ........ .
@ starting the engine when the re is a
ma lfunction .. ... .... . ..... .. .
@ E lectromechanical parking brake
@ Automa tic transmission se lector
lever ... .. .. . ... ............ .
@ Infotainment unit ............ .
@ I START EN GIN E STOP ! ........ .
(D Tips
50
43 54
45
45
142 64
2 10
257 47
68
121
78
135
124
142
64
64
141
215
78
81
83
141
76
Some the equipment listed here is only instal
l ed in certa in models or is available as an op-
tion .
9
Page 14 of 386
Cockpit overv iew
is a risk of engine damage . The location where
the red zone begins varies depe nding on the
eng ine.
@ For the sake of the environment
Upshifting early helps you to save fuel and re
duces operating noise.
Fuel level
T he display (J) c:> page 10, fig. 3 or c:> page 10,
fig . 4
only functions when the ignition is switch
ed on . When the display ha s reached the reserve
mark, the bottom LED turns red and the
tD ind i
cator l ight turns on
c:> page 34 . The bottom LED
blinks red when the fuel leve l is ve ry low.
F or the tank capacity in your vehicle, refer to the
Technical Data
c:> poge 362.
(D Note
Never drive until the tank is completely emp
ty . The irregular supply of fuel that results
from that can cause engine misfires . Uncom
busted fuel will the n enter the exhaus t sys
tem. This can cause overheating and damage
to the cata lytic conve rter.
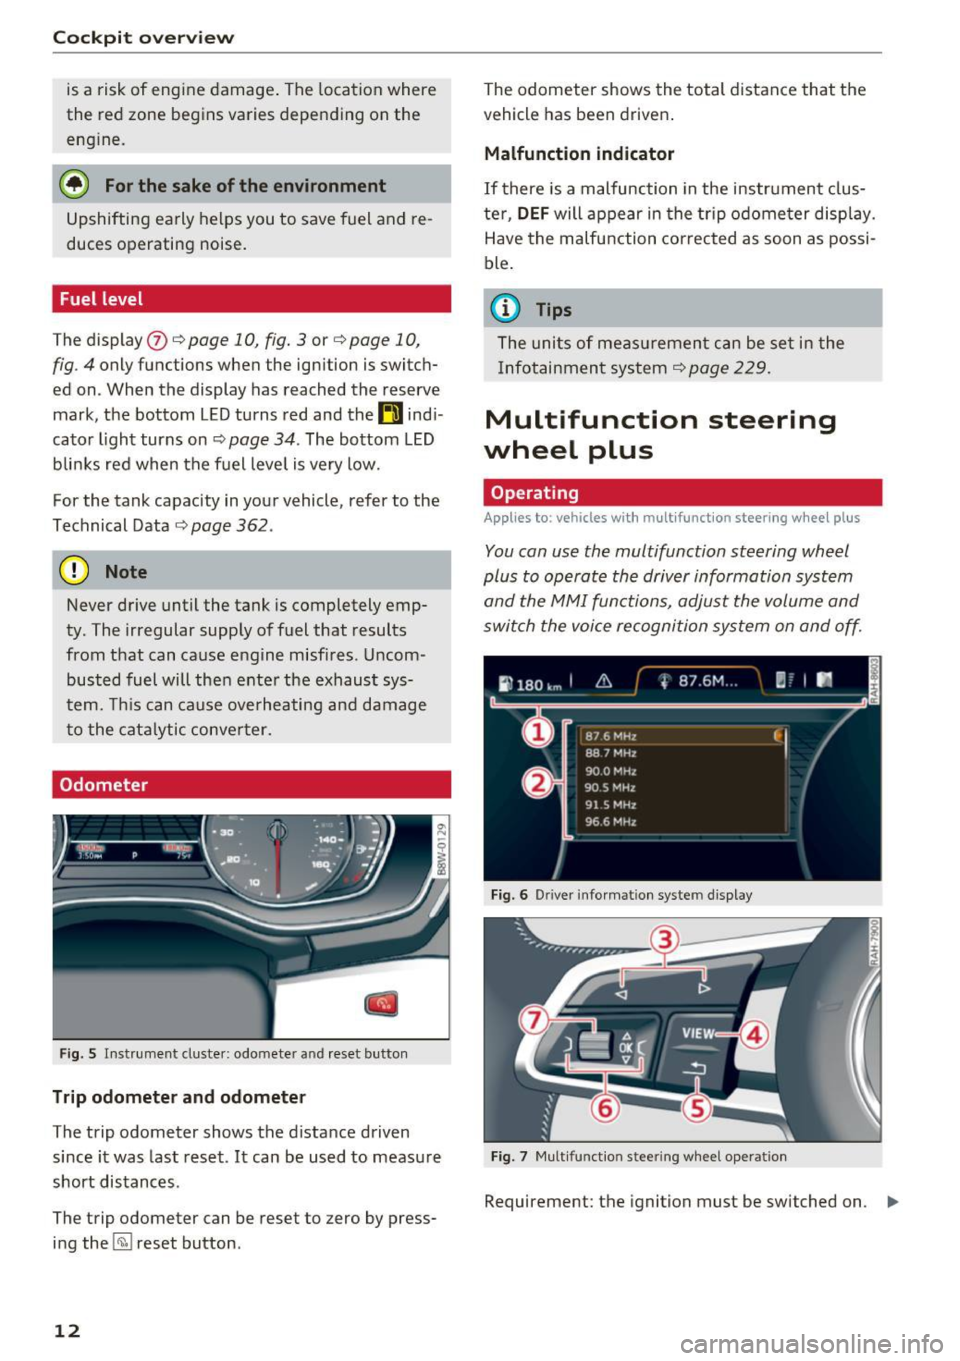
Odometer
F ig. S In strume nt cl uster : odometer a nd reset bu tton
Trip odometer and odomete r
The trip odometer shows the distance driven
since it was last reset. It can be used to measure
short distances .
The trip odometer can be reset to zero by press ing the ~ reset button .
12
The odometer shows the total distance that the
vehicle has been driven .
Malfunction indicat or
If there is a malfunction in the instrument clus
ter,
DEF will appear in the trip odometer display.
Have the malfunction co rrected as soon as possi
ble .
@ Tips
The units of measu rement can be set in the
Infotainment system
c:> page 229 .
Multifunction steering
wheel plus
Operating
Applies to: vehicles with multifunctio n steering wheel plus
You con use the multifunction steering wheel
plus to operate the driver information system
and the MMI functions, adjust the volume and
switch the voice recognition system on and off.
Fig. 6 D river informat ion syste m display
Fig. 7 Mult ifun ctio n stee rin g wheel opera tion
Requirement: the ignition must be switched on . ll>
Page 19 of 386
Fuel consumption
The current fuel consumption can be shown us
ing a bar graph¢
fig. 13. The average consump
tion stored in the short-term memory is also dis
played. If the bars are green or the gray tone on
the bars changes (depending on the equipment),
your vehicle is saving fuel by the following func
tion :
-Recuperation : electrical energy can be stored in
the battery when the vehicle is coasting or driv
ing downhill. The bar will move toward 0/0.
(D Tips
-The date, time of day and time and date for
mat can be set in the Infotainment system
¢page 229.
- If the vehicle battery is disconnected, all
memory values are erased.
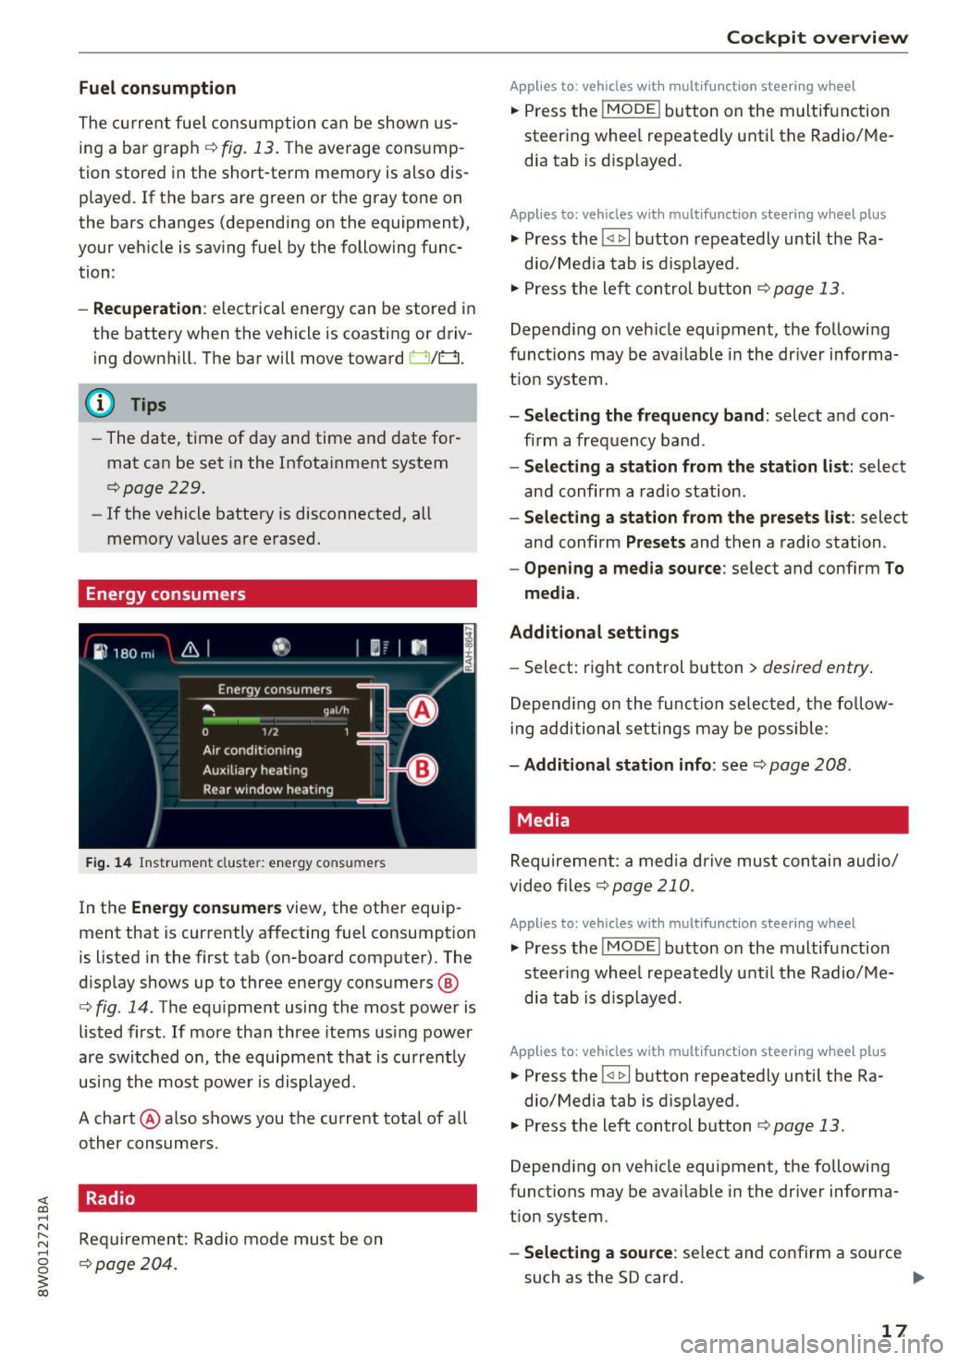
Energy consumers
Fig. 14 Instrument cluste r: energy consu mers
In the Energy consumers view, the other equip
ment that is currently affecting fuel consumption
is listed in the first tab (on-board computer) . The
display shows up to three energy consumers @
¢ fig. 14. The equipment using the most power is
listed first . If more than three items using power
are switched on, the equipment that is currently
using the most power is displayed.
A chart @ also shows you the current total of all
other consumers .
Radio
Requirement: Radio mode must be on
¢page 204.
Cockpit overview
Applies to : vehicles with mult ifunction steering wheel
.,. Press the !MODE ! button on the multifunction
steering wheel repeatedly until the Radio/Me
dia tab is displayed.
Applies to: vehicles with mult ifunction steering wheel plus
.,. Press the !<11>1 button repeatedly until the Ra-
dio/Media tab is displayed .
.,. Press the left control button ¢
page 13.
Depending on vehicle equipment, the following
functions may be available in the driver informa
tion system.
- Selecting the frequency band: select and con
firm a frequency band.
-Selecting a station from the station list: select
and confirm a radio station.
-Selecting a station from the presets list: select
and confirm
Presets and then a radio station.
-Opening a media source: select and confirm To
media.
Additional settings
- Select: right control button > desired entry.
Depending on the function selected, the follow
ing additional settings may be possible:
-Additional station info: see¢ page 208 .
Media
Requirement: a media drive must contain audio/
video files¢
page 210.
Applies to: vehicles with multifunct ion steering wheel
.,. Press the !MODE ! button on the multifunction
steering wheel repeatedly until the Radio/Me
dia tab is displayed.
Applies to: vehicles with multifunction steering wheel plus
.,. Press the !<1 1>I button repeatedly until the Ra-
dio/Media tab is displayed .
.,. Press the left control button ¢
page 13.
Depending on vehicle equipment, the following
functions may be available in the driver informa
tion system.
- Selecting a source : select and confirm a source
such as the SD card.
lli>-
17
Page 160 of 386

Voice recognition system Function
Setting voice guidance for active route guidance
Blocking a certain section on the
route
(D Tips Say:
Voice guidance on/ Voice guidance off/ Voice guidance short-
ened
/ Voice guidance complete/ Voice guidance traffic
Block route for (XV) meters/kilometers/yards/miles/ Block
next route / Avoid next section of route. you are located and which menu language
you have selected.
- Destinations may have to be spelled when
entered, depending on the country where -
Always read the chapter~
page 178, Audi
connect (Infotainment) information.
Radio
A ppl ies to: ve hicles w ith vo ice recogni tion sys te m
Requirement: the Radio must already be open.
You can say the following commands depending
on the selected frequency band:
Function Say:
Selecting the frequency band FM*/ SiriusXM* / FM / AM
Selecting a station from the station Channel (XV) / !Frequency (XV)
list
Selecting a station from favorites/
Radio presets > Line (XV)
presets
Setting the frequency
Frequency (XV) / Frequency (XV) HD 1
Correcting data input No I meant (XV)
Closing the full-screen command Close
list
Media
Appl ies to: ve hicles w ith vo ice recognition sys te m
Requirement: you must be in the Media menu. You can say the following commands depending
on the act ive media:
Function
Say:
Selecting a source directly Jukebox*/ CD/ DVD/ SD card 1 / SD card 2 / Audi music inter·
face* / iPhone* / USB* / Bluetooth* / Wi-Fi* / Media source
(XV),
for example "John's player"
Selecting audio/video files* in the
Media favorites/ Artists/ Albums/ Genres/ Tracks/ Playlists /
Jukebox* Videos
Selecting audio files on an iPod Artists I Album ,s / Genres / Tracks / Playlists /Composers /
(source: Audi music interface*) Podcasts / Audio books
Navigating within a folder struc-Folder up/ Line (XV)
tu re/list
Selecting shuffle
Shuffle on / Shuffle off
158
Page 184 of 386

Audi connect vehicl e control
Select: !MENU ! button> Audi connect > right
control button >
Aud i connect u ser manage ment
> Key user > Reset ke y user.
Warning lev els
Req uirement: the pr imary use r mus t have set one
or more warning levels . Secondary users can only
see if a warning level is active or not.
Select:
! M ENU ! button> Audi conn ect> right
control b utton >
Alert s.
A WARNING
Also read and follow the instructions regard
ing traffic safety¢
page 141.
(D) Tips
-Store the vehicle code in a secure pla ce. It
may be necessary to re-ente r the veh icle
code .
- Pay at tention to upper- and lowe r-case le t
ters when enter ing the ve hicle code.
- The vehicle code loc ks after m ultip le fai led
ent ry attemp ts. Contact an author ized A udi
dealer or authorized Audi Service Fac ility to
request a new vehicle code .
@ Tips
-If a primary user was set fo r your vehicle,
the message
One or more Audi connect
s e rv ices currentl y act ive. Fo r mor e infor
mation, p lease refer to the owne r's manual
or the Audi con nect menu.
appears every
time after the ignition is switched off .
- If you do not know the primary user of the
vehicle, reset it in the Infotainment system
¢ page 181, Resetting the primary user.
You can reg ister and verify your identity as
the new primary user on
www .audi.com /
myaudi.
If you did not receive the code re
quired for this, co ntact your authorized Audi
dealer or authori zed Audi Servi ce Fac ility.
Locking/unlocking
Applies to vehicles with Audi connect vehicle control
You can lock and un lock your vehicle using this
servi ce.
182
Requir ement
- Thi s requires the 4 -d igi t PI N that you specified
during the verification on
www.audi.com /
myaudi.
- The vehicle m ust be stationa ry.
- The ignition must be switched off.
Vehicle status report
Applies to vehicles with Audi connect vehicle control
The Dr ive r Information System collects data un
der certai n conditions and sends it to a server.
When data is stored, you can access values such
as these using the service :
- Remaining range,
- Fuel tank leve l,
- If the veh icle doors are open/closed or locked/
un locked,
- Mi leage ,
- Next service,
- Warning messages,
- Park ing l ights on/off,
For additional information on the Driver Informa
tion System, refer to¢
page 16, Driver Informa
tion System .
A WARNING
Do not ignore messages and warning or ind i
cator lights that turn on in the vehicle be
cause of the info rmation in the status report.
This could lead to break downs in on the road, a ccidents and ser ious injuries.
Parking location
Applies to vehicles with Audi connect vehicle control
The veh icle collects data unde r ce rta in cond it io ns
and sends it to a serve r.
When data is stored, you ca n access values such
as these using the se rvice :
- Vehicle location display,
- Display of one's own location,
- Route to you r vehicle .
Page 209 of 386
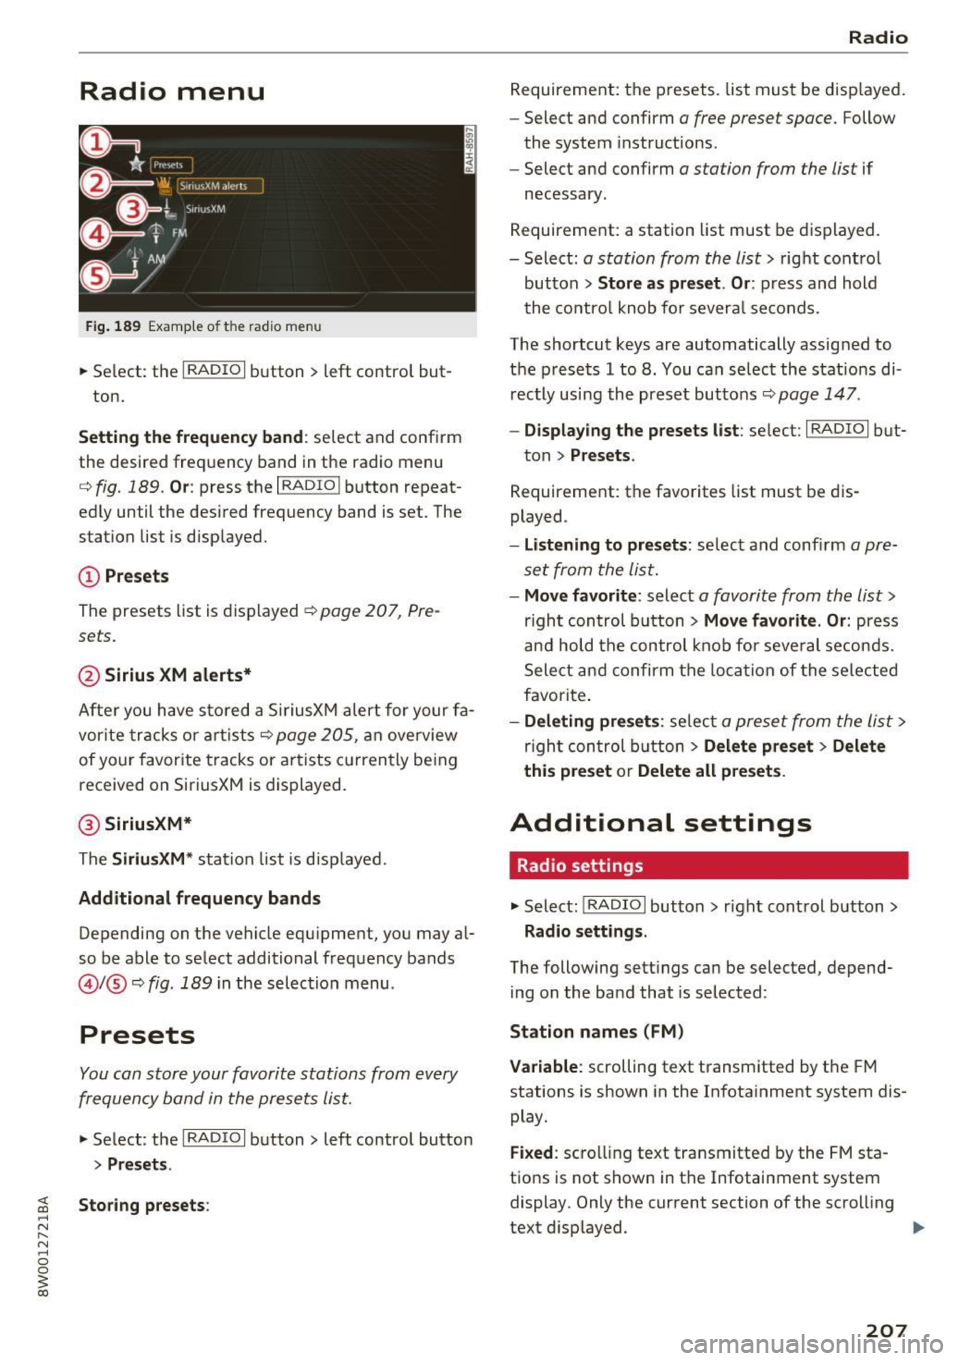
Radio menu
Fig. 1 89 Examp le of t he radio menu
.,. Se lect: the I RADIO I button > left control but-
ton.
Setting the frequenc y band : select and confirm
the desired freq uency band in the radio menu
c::> fig. 189 . Or: press the I RADIO I button repeat
ed ly until the desired frequency band is set. The
station list is disp layed.
CD Pr esets
The presets list is displayed~ page 207, Pre
sets.
@ Sirius XM alerts*
After you have s to red a Si riusXM alert for your fa
vor ite tracks or a rtists
c::> page 205, an overview
of your favor ite tracks or a rtists c urrently be ing
received on SiriusXM is displayed.
@ SiriusXM*
The Siriu sXM * station list is disp layed.
Additional frequency bands
Depending on the vehicle equipment, you may a l
so be able to select additional frequency bands
@l @c::> fig. 189 in the selec tion menu .
Presets
You can store your favorite stations from every
frequency band in the presets list.
.,. Select : the I RADIO I button > left control button
> Presets.
Storing presets :
Radio
Requirement: the presets. list must be disp layed.
- Select and confirm
a free preset space. Follow
the system instruct ions .
- Select and confirm
a station from the list if
necessary .
Requirement: a station list must be d isplayed.
- Select:
a station from the list> right contro l
button >
Store as preset . Or : press and hold
the contro l knob fo r severa l se conds.
The shortcut keys are automatically assig ned to
the prese ts 1 to 8. You can se lect the stat io ns di
rectly using the preset butto ns
c::> page 147.
- Displ aying the presets li st: se lect: I RADIO I but-
ton >
Presets .
Requirement: the favorites list must be dis
played .
-Listening to preset s: select and confi rm a pre
set from the list.
- Move favorite : select a favorite from the list>
right con trol button > Move favorite . Or : press
an d hold the control knob for seve ral se con ds.
Select an d confirm t he loca tion of the selected
f a vorite .
-Deleting pre set s: selec t a preset from the list >
righ t con trol b utton > Delete preset > Delete
this preset
o r Delete all preset s.
Additional settings
Radio settings
.,. Select: !RADIO I button> r ight cont rol button>
Radio settings .
The following sett ings can be selected, depend
ing on the band that is selected :
Station name s (FM)
Variable:
scrolling text transm itted by the FM
stations is shown in the In fotainment system dis
play .
Fixed : scro lli ng text transmitted by the FM sta
tions is not shown in the Infotainment system
display. Only the current section of the scroll ing
text d isplayed. .,_
207
Page 224 of 386

Media
Audio track1l
You can manually set the a udio trac k (langu age
and audio format). The language and aud io for
mat options depend on the v ideo DVD.
Subtitles1l
You can set s ubt it les for playback manua lly . T he
lang uages ava ilable depend on t he DV D.
Aspect
Aud i recomme nds the Automatic setting for the
p icture format . You can set the picture format
depending on the active fi le o r sou rce (fo r exam
p le video file*, DVD*).
Picture for-
Description
mat
Automatic
T he MM I detects the p icture for-
mat of the source and disp lays the
i mage in the optim um ratio. Black
bars may appea r on the s ides of
the display, depending on the
source format and the Infotain-
ment system disp lay that is instal-
led.
Zoom The im age is enlarged to fill the
entire Infotainment system dis -
p lay . Switch the function off if the
image is disto rted.
Cinema-Use t his setting for films in c inema
s cope format 21:9. Black ba rs are show n
in t he upper and lower edges o f the
I nfo tainment system display.
l ) Depe nding o n th e DVD , thi s may not be possib le d uring
p layba ck.
222
Picture for· Description
mat
Or iginal
The image is d isp layed in the ratio
of the source format. Select this opt ion if the image is distorted o r a
section of the image is cut off
when
Auto is se lected .
4:3 The image is f ixed in t he 4 :3 pie -
ture format. Blac k bars are shown
on the sides of the Infota inment
system d isplay .
16:9 The image is f ixed in the 16:9 p ie-
ture format . Black bars are s hown
in the upper and lower e dges of the
Infotainment system d isplay.
{!) Tips
- Not all video DVDs have parenta l cont rol.
- The secur ity levels fo r the
Parental control
are based on the US standar ds from the Mo
t ion Picture Associat ion of Ame rica (MPAA) .
Note that the age levels for v ideo DVDs in
E uropean countries may differ.
- Password entry fo r
Parental control will be
locked for approximately one m inute if you
enter the incorrect password th ree t imes in
a row . T he passwo rd can only be reset by an
au thorized Audi dealer.
Page 232 of 386
System settings
Speech training (only when the vehicle is station
ary): you can adapt the voice recognition system
to your voice or pronunciation in order to improve
the system's ability to recogni ze your speech. In
dividual training is comprised of 20 speech en
tr ies that consist of commands and sequences of
numbers . You ca n delete the programmed voice
training with the
Reset individual speech train·
ing
function.
Display brightness
Display brightness:
you can adjust the bright
ness of the Infotainment system display by turn
ing the control knob .
Factory settings
The follow ing functions can be reset to the facto
ry default settings :
-Sound settings
- Radio
- Media settings
-Jukebox*
- Directory
- Telephone
- Bluetooth and Wi-Fi*
- Navigation settings *
- Navigation and online memory*
- Speech dialog system*
- Message settings*
- Shortcut keys
- Apps *
- Tool tips
- Audi connect*
- Audi smartphone interface*
You can select the des ired functions individually
or all at once with the option
Select all entries .
Select and confirm Restore factory settings.
@ Tips
-Make sure that not only the settings were
deleted but also the stored data, if applica
ble.
- If you reset the
Navigation and online
memory *, Apps * or Audi connect*
to the
factory default settings, the system auto
matically restarts after approximately 20
seconds . The Infotainment system display
230
will be black for several minutes when re
starting.
Connection manager
Introduction
The connection manager gives you an overview
of your connected devices and their network sta tus .
Settings Conne-ction manager I
===---- · MyPhone (, • Phone :
t MyPhone
• Second telephone:
• Data conn ection :
• MM I connect App :
• Audio player: !ill
Not connectl!d
Audi connect SI.. .
Not connected
Not connected
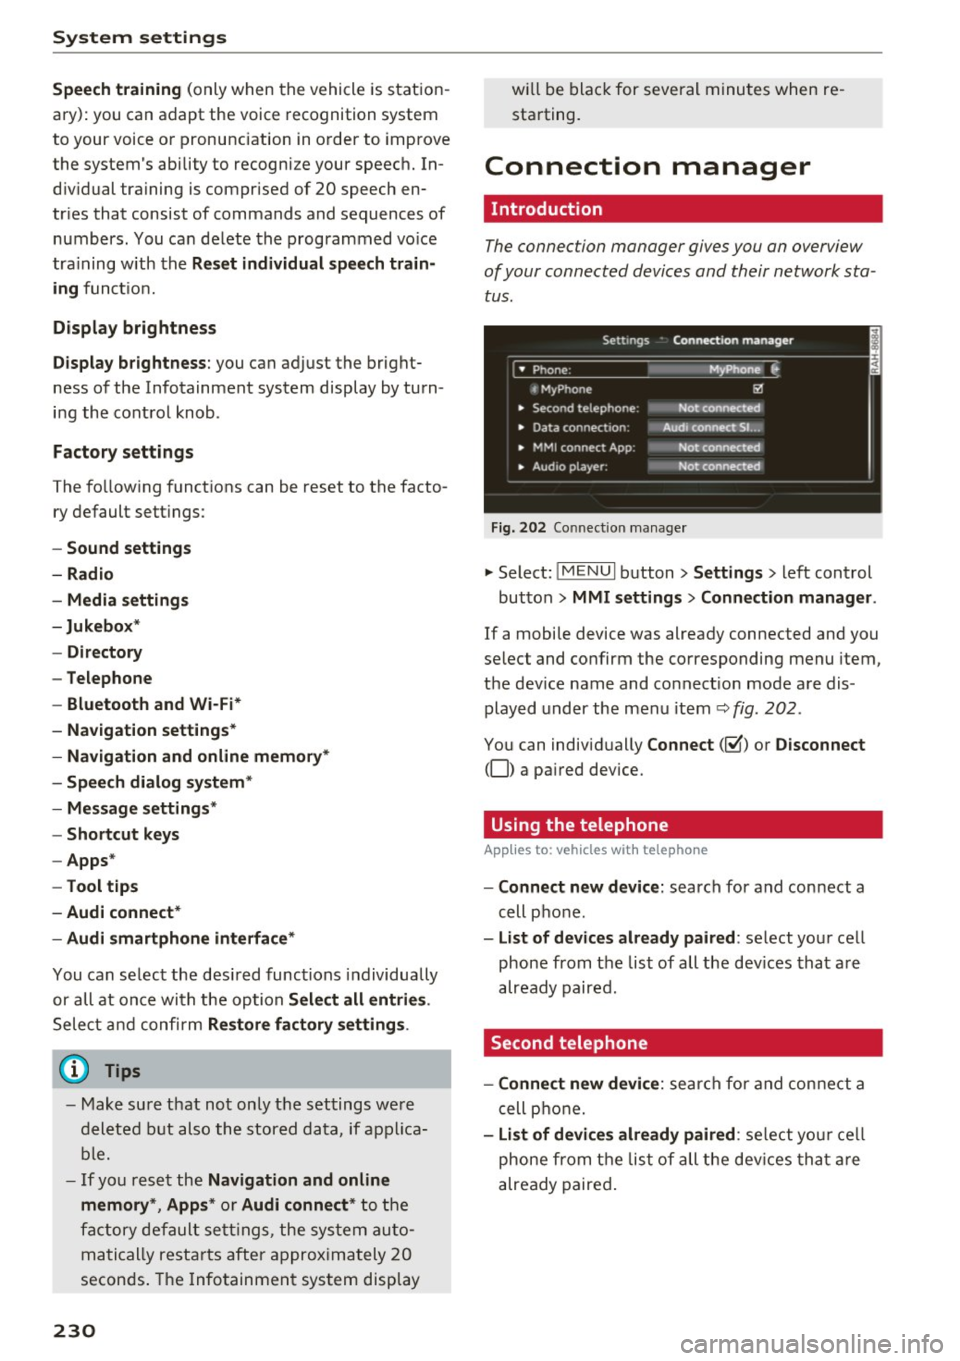
Fig. 202 Co nnect ion manager
.,. Select: !MENUI button> Settings> left control
button>
MMI settings > Connection manager.
If a mobile device was already connected and you
select and confirm the corresponding menu item,
the dev ice name and connect ion mode are dis
played under the menu item
Q fig. 202.
You can individually Connect(~) or Disconnect
(0) a pa ired device.
Using the telephone
App lies to: vehicles wit h telepho ne
- Connect new device: search for and connect a
cell phone .
-List of devices already paired: select your cell
phone from the list of all the dev ices that are
already paired.
Second telephone
- Connect new device:
search for and connect a
cell phone.
-List of devices already paired : select your cell
phone from the list of all the devices that are
already paired.
Page 318 of 386
Check ing and F illing
Windshield washer
system
.........
w •
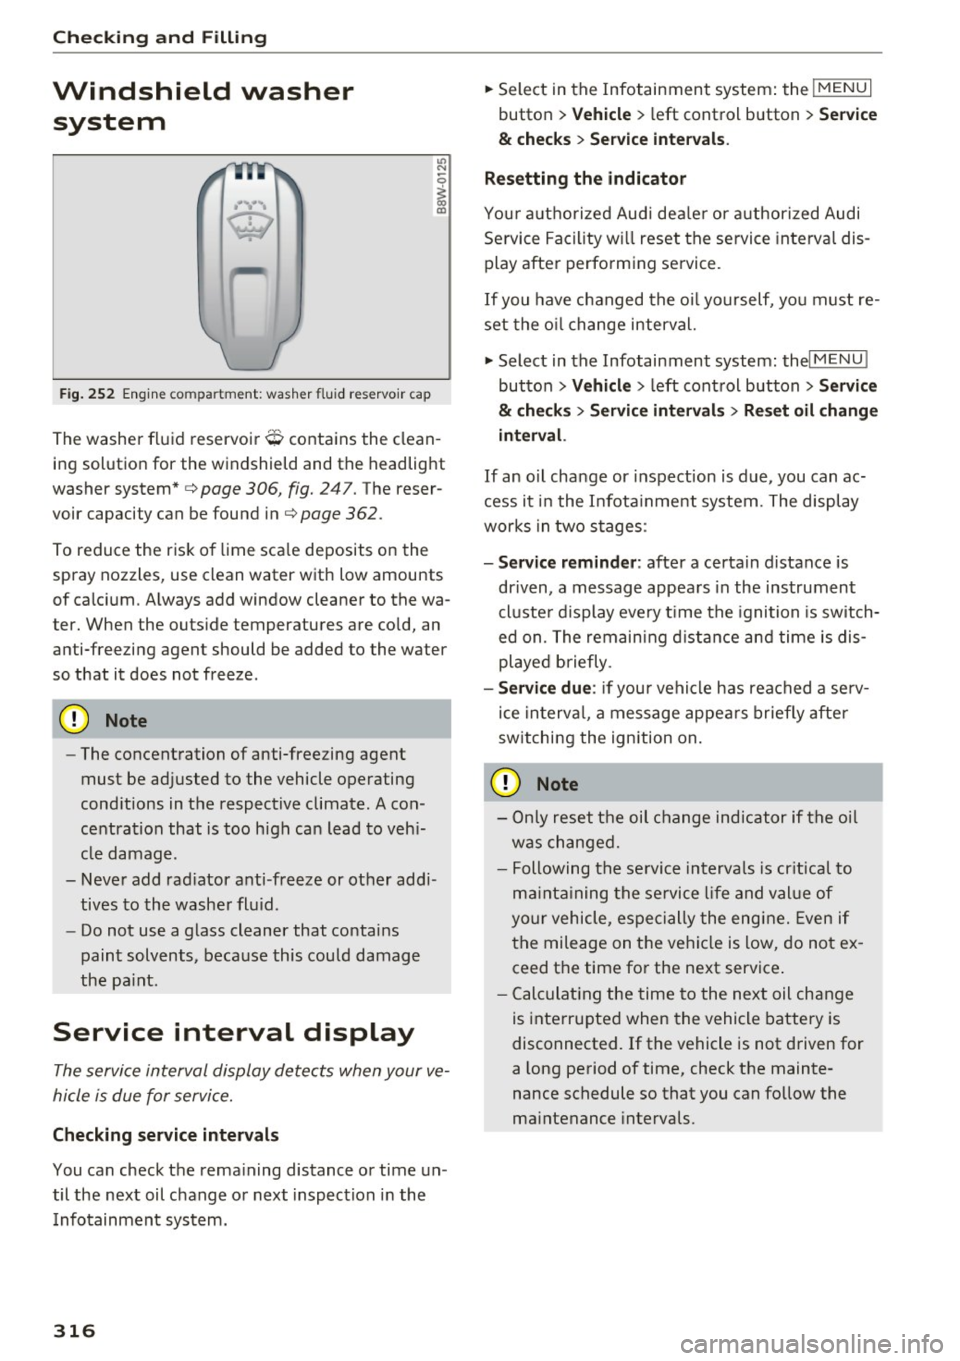
F ig. 252 Engin e comp artm ent : wash er fluid r ese rvoir cap
"' N
0
~ 00 m
The washer fluid reservoir O contains the clean
ing solution for the windshield and the headlight
washer system* c>
page 306, fig. 24 7. The reser
voir capacity can be found inc>
page 362 .
To reduce the risk of lime sca le deposits on the
spray nozzles, use clean water with low amounts
of calci um. Always add window cleaner to the wa
t er. When the outside temper atures are co ld, an
anti-free zing agent should be added to the water
so that it does not freeze .
Cl) Note
-The concentration of anti-free zing agent
must be adjusted to the vehicle operating
conditions in the respective climate. A con
centration that is too high can lead to veh i
cle damage .
- Never add rad iator anti -freeze or other addi
tives to the washer fluid .
- Do not use a glass cleaner that contains
paint solvents, beca use this could damage
the pa int.
Service interval display
The service interval display detects when your ve
hicle is due for service.
Checking se rv ice intervals
You can check the rema ining distance or time un
til the next oil change or next inspection i n the
I nfotainment system .
316
.. Select in the Infotainment system : the !MENUI
button > V ehicle > left control button > Se rvice
& che cks > Ser vice inte rvals .
Resettin g the indicator
You r authorized Audi dea le r or authorized Audi
Se rvice Facility w ill reset the se rvice interval dis
play after performing service.
If you have changed the oi l yourself, yo u must re
set the o il change interval.
.. Select in the Infotainment system: thel
M ENU !
button > Vehicle > left control button > Ser vic e
& check s > Service int erv al s > Re set oil chang e
int erva l.
If an o il cha nge or inspection is due, you can ac
cess it i n the Infota inment system. The display
works in two stages :
-Se rv ice re mind er: after a certain distance is
dr iven, a message appears in the instrument
cluste r display eve ry t ime the ignition is switch
ed on. The remaining d istance and time is dis
played briefly .
-Serv ic e due : if your vehicle has reached a se rv
ice in terva l, a message appears briefly after
sw itching the ignition on.
(D Note
- Only reset the oil change indicator if the oi l
was changed.
- Following the se rvice interva ls is cr itical to
ma inta ining the se rvice l ife and val ue of
yo ur vehicle, especially the engine. Even if
the mileage on the vehi cle is low, do not ex
ceed the time for the next service .
- Calc ulat ing the time to the next oil change
is interrupted when the vehicle battery is
disconnected.
If the vehicle is not driven for
a long period of time, check the mainte
nance schedule so that you can fo llow the
maintenance intervals .