seats AUDI S4 2017 Owners Manual
[x] Cancel search | Manufacturer: AUDI, Model Year: 2017, Model line: S4, Model: AUDI S4 2017Pages: 386, PDF Size: 96.32 MB
Page 4 of 386
Table of contents
About this Owner's Manual ... .. .
Cockpit ... .. ............... .... .. .
Cockpit overview ................ .
Controls at a glance ... .......... .. .. .
Instrument cluster .. .......... .. .. .. .
Multifunction steering wheel plus ... .. .
Multifunction steering wheel ......... .
Driver Informat ion System ..... .. .... .
H ead-up Display .... .. .. ..... ... .. .. .
Camera-based traff ic sign recognition .. .
O n Board Diagnostic System (OBD) .... .
I ndicator l ights .............. .... .. .
Starting and driving
Opening and closing Cent ral Lock ing .............. .... .. .
L uggage compa rtment lid ... ..... .. .. .
Child safety lock .... .......... .. .. .. .
Power window ... .. .......... .. .. .. .
Sliding/tilting sunroof ......... .... .. .
Valet parking function ............. .. .
Garage door opener (Homelink) . .. .. .. .
L ights and Vision .............. .. .
Exterior lighting . .. . .......... .. .. .. .
Interior lighting ...... ........... ... .
V1s1on ....... .. ................ ... .
Windshield wipers . ... .... .... .. .. .. .
Digital compass . ............. .... .. .
Seats and storage ............ ... .
General information .......... .. .. .. . 6
8
8
8
10
12
15
16
23
24
25
26
37
37
3 7
43
45
45
47
47
48
so so
53
54
56
58
6 1
61
Front seats . . . . . . . . . . . . . . . . . . . . . . . . . 61
H ead restraints . . . . . . . . . . . . . . . . . . . . . 62
Memory function . . . . . . . . . . . . . . . . . . . . 63
Sockets . . . . . . . . . . . . . . . . . . . . . . . . . . . . 64
Storage . . . . . . . . . . . . . . . . . . . . . . . . . . . . 64
Luggage compartment . . . . . . . . . . . . . . . 65
Roof rack . . . . . . . . . . . . . . . . . . . . . . . . . . 66
Warm and cold . . . . . . . . . . . . . . . . . . . 68
Climate control system . . . . . . . . . . . . . . . 68
3 zone deluxe automatic climate control . 69
Steer ing whee l heating . . . . . . . . . . . . . . .
7 1
2
Driving ..... .. .. .. .. ... .......... . .
General information . ... ........... . .
Steering .......... .. .. . .......... . .
Start ing and stopping the eng ine ..... . .
Start/Stop system .. .. ............. . .
E le ctromechanical parking brake ...... .
Automat ic transmission
Trailer towing ... .. ... .. ..... ... . .
Driving with a trailer .. ........ ..... . .
Trailer towing information
Driver assistance .. ............ .. .
Assist ........... ... .............. .
Electronic speed limiter ... .. ... ... .. . . 73
73
75
76
78
81
83
90
90
91
93
93
93
Speed warning system . . . . . . . . . . . . . . . . 93
Cruise control system . . . . . . . . . . . . . . . . 93
Predictive efficiency assist . . . . . . . . . . . . . 95
Audi adaptive cruise control . . . . . . . . . . . 96
Predictive control (efficiency assist) . . . . .
102
Congestion assist . . . . . . . . . . . . . . . . . . . . 104
Distance ind icator and distance warning 105
Messages . . . . . . . . . . . . . . . . . . . . . . . . . . 106
Audi pre sense . . . . . . . . . . . . . . . . . . . . . . 107
Audi pre sense basic. . . . . . . . . . . . . . . . . . 108
Audi pre sense front . . . . . . . . . . . . . . . . . 108
Audi pre sense rear . . . . . . . . . . . . . . . . . . 110
Audi pre sense city . . . . . . . . . . . . . . . . . . . 110
Settings in the Infotainment system . . . . 111
Driver messages . . . . . . . . . . . . . . . . . . . . . 111
Audi active lane assist . . . . . . . . . . . . . . . . 112
Audi sid e ass ist . . . . . . . . . . . . . . . . . . . . . 115
Audi drive select . . . . . . . . . . . . . . . . . . . . . 121
Parking systems . . . . . . . . . . . . . . . . . 124
Genera l information . . . . . . . . . . . . . . . . . 124
Rear parking system . . . . . . . . . . . . . . . . . 125
Parking system plus . . . . . . . . . . . . . . . . . . 125
Rearview camera . . . . . . . . . . . . . . . . . . . . 126
Peripheral cameras . . . . . . . . . . . . . . . . . . 128
Adjusting park assist . . . . . . . . . . . . . . . . . 131
Error messages . . . . . . . . . . . . . . . . . . . . . 132
T railer hitch . . . . . . . . . . . . . . . . . . . . . . . . 132
Intelligent Technology . . . . . . . . . . 134
Electronic Stabilization Control (ESC) . . . . 134
Braking . . . . . . . . . . . . . . . . . . . . . . . . . . . . 136
Page 6 of 386
Table of content s
Multimedia connections . . . . . . . . . . . . . . 215
P laying m edia . . . . . . . . . . . . . . . . . . . . . . . 217
Addit iona l sett ings . . . . . . . . . . . . . . . . . . 220
Suppo rted media and file formats . . . . . . 223
Troubleshoot ing. . . . . . . . . . . . . . . . . . . . . 224
Audi smartphone interface . . . . . . 227
Setup . . . . . . . . . . . . . . . . . . . . . . . . . . . . . 227
Operating . . . . . . . . . . . . . . . . . . . . . . . . . . 227
Troubleshoot ing . . . . . . . . . . . . . . . . . . . . . 228
System settings . . . . . . . . . . . . . . . . . . 229
Sett ing the date and time . . . . . . . . . . . . . 229
MMI sett ings . . . . . . . . . . . . . . . . . . . . . . . 229
Con nection manager . . . . . . . . . . . . . . . . . 230
System update . . . . . . . . . . . . . . . . . . . . . . 23 2
So und setti ngs .. .... ......... .... .. .
Volume sett ings .... .. ..... ... .. .. .. .
R estarting the M MI . .. ..... ... .. .. .. .
Software license information 233
233
234
235
Safety first .
.. ... .. ..... ... .. .. ... 23 6
Driving safety . . . . . . . . . . . . . . . . . . . . 236
General notes . . . . . . . . . . . . . . . . . . . . . . . 236
Correct seating position for passengers . . 23 7
Driver's and fron t passenger's footwell . . 240
Pedal area . . . . . . . . . . . . . . . . . . . . . . . . . . 241
Storing cargo co rrectly . . . . . . . . . . . . . . . 242
Repo rting Safety Defects . . . . . . . . . . . . . . 243
Safety belts . . . . . . . . . . . . . . . . . . . . . . 245
Gene ral information . . . . . . . . . . . . . . . . . 24 5
W hy use safety belts? . . . . . . . . . . . . . . . . 246
Safety bel ts . . . . . . . . . . . . . . . . . . . . . . . . 248
B el t tensioner ... ... ... .... ... .. .. ... 251
Airbag system . . . . . . . . . . . . . . . . . . . . 25 3
I mportant inform ation . . . . . . . . . . . . . . . 253
Fr ont ai rbags . . . . . . . . . . . . . . . . . . . . . . . 257
M onitoring the Advanced Airbag System . 265
K nee airbags. . . . . . . . . . . . . . . . . . . . . . . . 269
Side airbags . . . . . . . . . . . . . . . . . . . . . . . . 271
Side curtain airbags ........... .... ... 274
Child safety . . . . . . . . . . . . . . . . . . . . . . 277
Important information . . . . . . . . . . . . . . . 277
Ch ild seats . . . . . . . . . . . . . . . . . . . . . . . . . 283
Secur ing ch ild seats . . . . . . . . . . . . . . . . . . 288
4
LATCH system (Lower anchorages and
tethers for c hildren) . . . . . . . . . . . . . . . . . 291
Additional informat ion . . . . . . . . . . . . . . . 295
Maintenance and Care . . . . . . . . . . . 296
Checking and Filling . . . . . . . . . . . . . 296
Gasoline . . . . . . . . . . . . . . . . . . . . . . . . . . . 296
Diesel fuel . . . . . . . . . . . . . . . . . . . . . . . . . 297
Refueling . . . . . . . . . . . . . . . . . . . . . . . . . . 298
Se lective catalytic reduction (AdBlue) . . . 300
Emissions control systems . . . . . . . . . . . . 303
En gine compartment .. ............. . .
E ngine o il ... .. .. .. .. .. ........... . .
Cooli ng sys tem . .. .. .. ............. . .
B rake fl uid . ... .. .. .. .. .. .. .... ... . .
Battery ... .. .. .. .. .. ... . .. .... ... . .
Windshie ld washer system .. ..... ... . .
Service interva l display 304
306
3
10
311
312
316
316
Wheels .. .. .. .. .. .. ... . .. .... ... .. 317
Wheels and t ires . .. .. ............... 317
Tire pressure monitoring indicator . . . . . . 334
Care and cleaning . . . . . . . . . . . . . . . . 337
General information . . . . . . . . . . . . . . . . . 337
Car washes . . . . . . . . . . . . . . . . . . . . . . . . . 337
Cleaning and care information . . . . . . . . . 338
Plac ing your vehicle out of serv ice . . . . . . 342
Troubleshooting . . . . . . . . . . . . . . . . . 343
Emergency assistance . . . . . . . . . . . 343
T runk escape latch . . . . . . . . . . . . . . . . . . . 343
Genera l information . . . . . . . . . . . . . . . . . 343
E q ui pment . . . . . . . . . . . . . . . . . . . . . . . . . 343
T ire mobility kit . . . . . . . . . . . . . . . . . . . . . 343
Replacing wheels . . . . . . . . . . . . . . . . . . . . 3 45
Space -sav ing spa re tire . . . . . . . . . . . . . . . 349
Fuses and bulbs ... ... . .. .... ... .. 351
Fuses.. ... .. .. .. .. .. .. .. .. .... ... .. 351
Bul bs. . . . . . . . . . . . . . . . . . . . . . . . . . . . . . 355
Emergency situations . . . . . . . . . . . . 356
Genera l . . . . . . . . . . . . . . . . . . . . . . . . . . . . 356
Start ing by push ing or tow ing . . . . . . . . . . 356
Start ing with j umper cables . . . . . . . . . . . 356
Using the jump start cable . . . . . . . . . . . . 357
Page 63 of 386
Seats and storage
General information
A WARNING
Refer to Q page 236, Driving safety for im
portant information, tips, suggestions and
warnings that you should read and follow for
your own safety and the safety of yo ur pas
senge rs.
Front seats
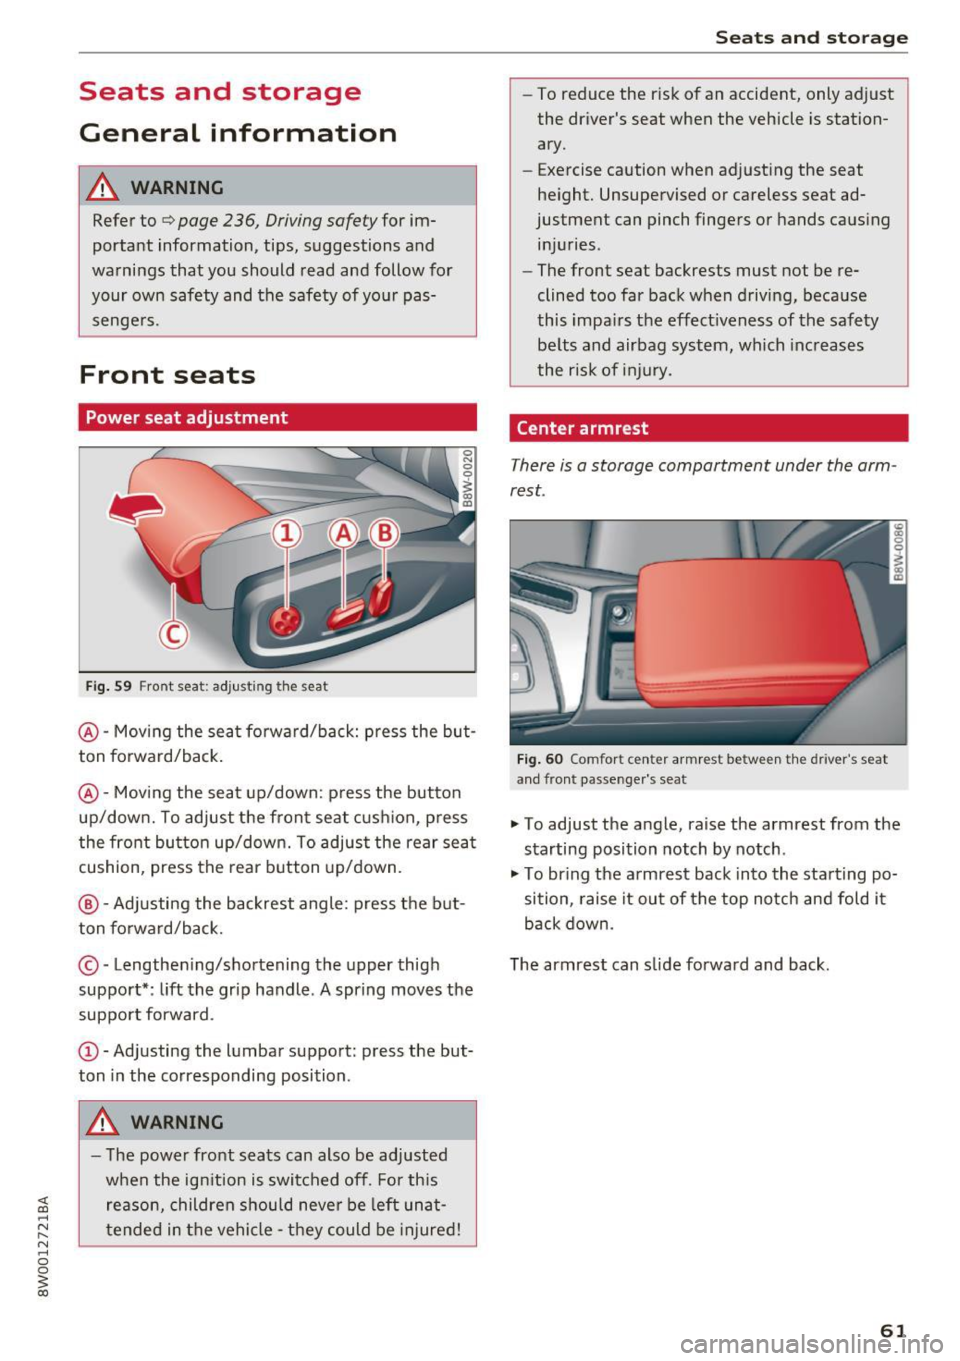
Power seat adjustment
F ig. 59 Front seat: adj usting the seat
@ -Moving the seat forward/back: press the but
ton fo rward/back .
@-Moving the seat up/down: p ress the button
up/dow n. To adjust the front seat cush ion, p ress
the fro nt bu tton up/down. To adjust the rear sea t
cushion, press the rear b utton up/down.
@ -Adjusting the backrest angle: press the but
ton fo rward/back.
© -Lengthen ing/shortening the upper thigh
support* : lift the grip handle . A spring moves the
support forward .
CD -Adjusting the lumbar suppo rt: press the but
ton in the corresponding position.
A WARNING
- The power front seats can also be adjusted
when the ig nition is switched off. For this
reason, children should neve r be left unat
tended in the vehicle -they could be injured!
Seats and storag e
-To reduce the r isk of an accident, only adjust
the dr iver's seat when the vehicle is station
ary.
- Exercise caution when adjust ing the seat
he ight. Unsupervised or careless seat ad
justment can pinch fingers or hands caus ing
injuries .
- The front seat backrests must not be re
clined too far back when driving, beca use
this impa irs the effect iveness of the safety
be lts and airbag system, which increases
the risk of injury.
Center armrest
There is a storage compartment under the arm
rest.
F ig . 60 Comfo rt center armrest be tween the driver's seat
and front passenger 's seat
.,. To adjust the angle, raise the armrest from the
starting position notch by notch .
.,. To br ing the armrest back into the starting po
sition, raise it out of the top notch and fold it
back down.
The armrest can s lide forward and back .
61
Page 64 of 386

Seats and storage
Head restraints
Front head restraints
•
Fig. 61 Front seat : adjust ing the comfo rt head restra in t*
Adj ust the head restraints so the upper edge is as
even as possible wi th the top of your head. If that
is not possible, try to adjust as close to this posi
tion as possible.
~ To adjust the head restraint, press the side but
ton and place the head restraint in the desired
position until it locks into place
i:::.> fig. 61.
_& WARNING
Always read and fo llow the applicable warn
ings ¢
page 239, Proper adjustment of head
restraints.
Rear head restraints
Fig. 62 Rear seat: adjust ing th e hea d restra int
62
Fig. 63 Rear seat: removing the head restrai nt
If passengers are sitting in the outer rear seats,
adjus t the head restraints so that the upper edge
of the head restraint is as level as possible with
the upper part of their head.
If that is not possi
bl e, try to adjust as close to this position as pos
sible. Adjust the head restraint in the center seat
to be all the way up
c:> _& .
Adjusting the head restraints
~ To move the head restraint upward, hold it at
th e sides with both hands and slide it upward
until it clicks into place
c:> fig. 62.
~ To move the head restraint downward, press
the button -arrow-
c:> fig. 62 and slide the head
restraint downward .
Removing the head restraints
~ Move the head restraint upward as far as it can
go .
~ Press the re lease point ,:::., fig. 63 using the me
chanical key
c:> page 38, Key set and press the
button
c:> fig. 62. Pull the head restraint out of
the backrest at the same time ¢_& .
Installing the head restraints
~ Slide the posts on the head restraint down into
the guides until the posts click into place.
~ Press the button -arrow-c:> fig. 62 and slide the
head restraint all the way down. You should not
be able to remove the head restraint from the
backrest without pressing the button .
_& WARNING
-Always read and follow the applicable warn
ings
i:::.> page 239, Proper adjustment of
head restraints.
Page 65 of 386
-Only remove the head restraints from the
rear seats when it is necessary for installing
a child seat¢
page 2 77, Child safety. In
stall the head restra int aga in immediately
once the child seat is removed. D riving w ith
the head restra ints removed o r not in the
upr ight position in creases the risk of ser io us
lnJUry.
Memory function
Description
Applies to: vehicles with memory function
Using the memory funct ion, you can quickly and
eas ily store a personal seat profile for the driver
and recall the settings later. The memory func
tion is controlled by the remo te control key and
the memory bu ttons in the drive r's door.
The driver's seat profile is stored again and as
signed to t he remote contro l key each time the
ve hicle is locked . Whe n you open the door, the
seat profi le is automat ically reca lled. If two peo
p le use t he vehi cle, it i s recomme nded that each
person always uses "their own" remote cont ro l
key.
Up to 2 seat prof iles can be stored in the memory
bu tto ns in the dr iver's door. O nce they are sto r
ed, these sea t profiles can be sele cted at any
time .
The fo llow ing settings are stored :
Remote con-Memory but-
trot key ton
Driver Dr iver
Seat X X
Both exterior
X X mirrors*
Remote control key
Applies to: vehicles with memory function
The driver's sea t profile can be assigned to the
remo te control key when the vehicle is locked .
.. Se lect in the Infotainment system: !MENUI b ut
ton
> Vehicle > left contro l bu tto n > Vehicle
Seats and storag e
setting s > Seats > Driver 's seat > Store set
ting s on remo te control key.
(D Tips
If you do not wish to have t he seat profi le for
another drive r assigned to the remote cont rol
key, switch the memory fu nction off in t he In
fotainment system.
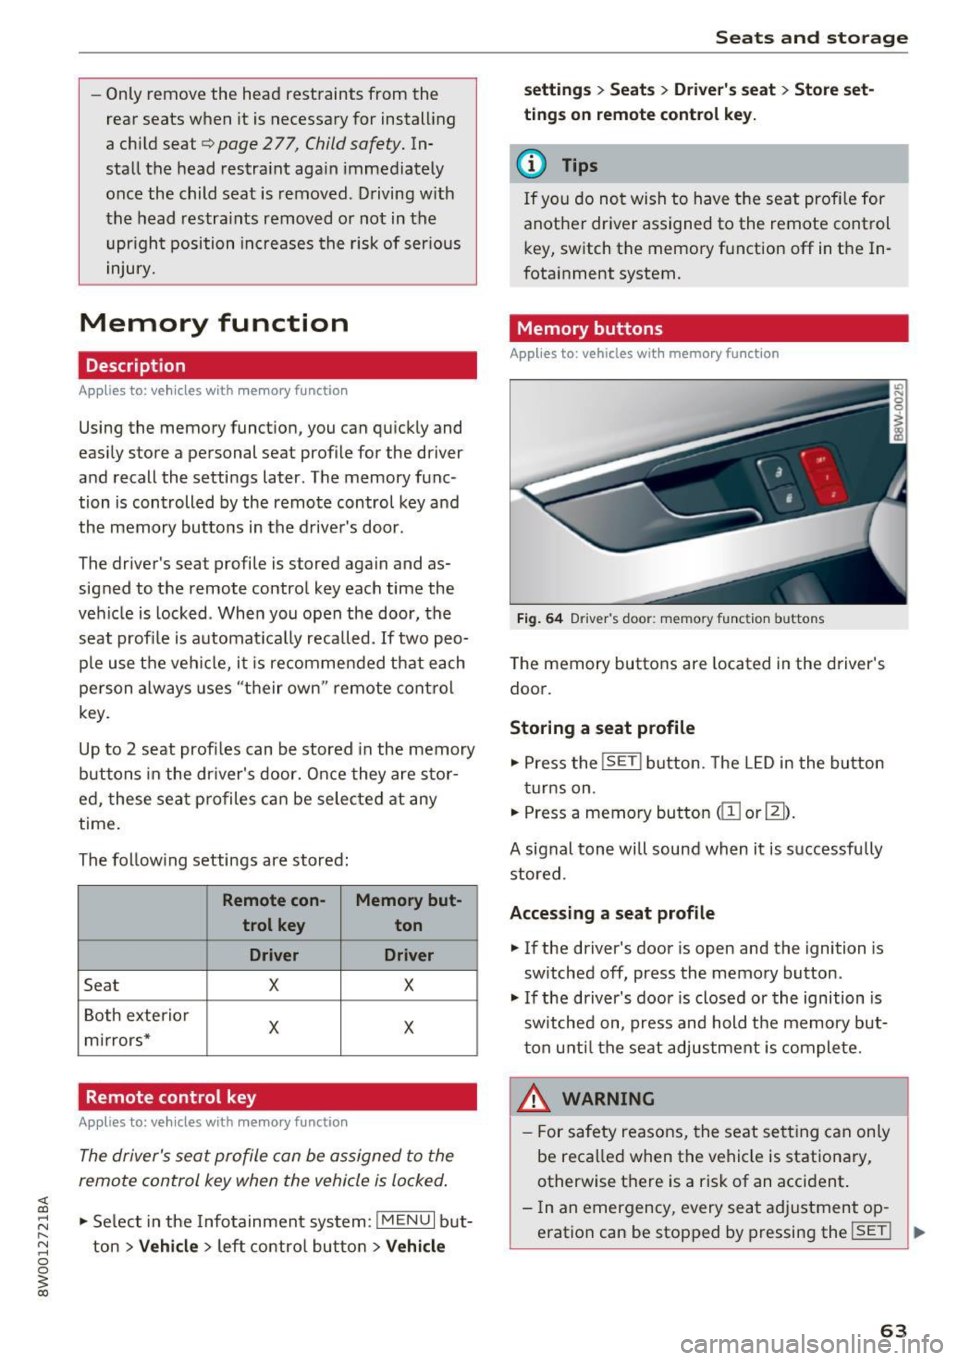
Memory buttons
Applies to: vehicles with memo ry function
Fig. 64 Drive r's door : memory function buttons
The memory butto ns are located in the driver's
doo r.
Storing a seat profile
.. Press the !SET I button. The LED in the button
t ur ns on .
.. Press a memory bu tton
dil or~).
A signal tone will sound when it is s uccessfu lly
stored.
Accessing a seat profile
.. If the driver's door is open and the ignition is
sw itched off, press the memory button .
.. If the driver's door is closed or the ignition is
sw itched on, press and hold the memory but
t on u nti l the seat adjustment is com plete.
,&_ WARNING
- F or s afety reasons, the seat se tting can on ly
be reca lled when the vehicle is stationa ry,
otherwise t here is a risk of an accident.
- In an emergency, every sea t ad justment op
eration can be stopped by pressing the
!SET ! ..,.
63
Page 67 of 386

- Glove compartment: the glove compartment can be locked using the mechanical key
¢ page 38, Key set.
-In the door trim panels
- Storage compartment under the front center
armrest
- Storage compartment* in the rear center arm-
rest
- Storage compartment* under the light switch
- Garment hooks above the rear doors
- Nets* on the backrests of the front seats
- Nets* on the left/right luggage compartment
trim panel
A WARNING
-Always leave the lid on the glove compart
ment cover closed while driving to reduce
the risk of injury.
- Make sure that the view to the rear is not
obstructed by hanging garments.
- Hang only lightweight cloth ing and be sure
that there are no heavy or sharp-edged ob
jects in the pockets.
- Do not use clothes hangers to hang gar
ments, because this could reduce the effec
tiveness of the side curtain airbags*.
- Only use the storage compartments in the
door trim panels to store small objects that
will not stick out of the compartment and
impair the range of the side airbags.
Luggage compartment
General information
A WARNING
Read and follow the important safety precau
tions in ¢
page 242, Storing cargo correctly.
-
Seats and storage
Increasing the size of the luggage
compartment
Applies to : vehicles wit h folding backrests
The rear seat backrests can be folded forward ei
ther separately" or together.
Fig. 68 Backrest: release lever, securing knob an d lock*
Fig. 69 Backrest: fold ing in the center backrest
Folding the outer rear backrests forward and
backward
.,. Pull the release lever @in the direction of the
arrow and fold the backrest forward .
.,. Fold the backrest back up again until it latches
and the red marking @ is no longer visible
¢&, .
Folding the center rear backrest forward and
backward
.,. Pull on the upper release lever© and fold the
backrest forward@¢
fig. 69 .
.,. Fold the backrest backward until it locks into
place.
The engaged backrest can be locked © using the
mechanical key¢
page 39. This would block ac
cess into the luggage compartment from the ve
hicle interior. You can only enlarge the luggage
compartment if the backrest is not locked. .,..
65
Page 73 of 386

To keep the rear window defogger on continuously, press the
Qi!) REAR button longer than 3 sec
onds. Th is is stored until the ignition is sw itched
off.
SYNC
Synchronizat ion
Use the rocker switch ® to select the fu nct ion .
When synchronization is switched on, the set
tings for the driver's side are applied to the front
passenger's side and the rear (except for seat
heating/ventilation*). When the settings on the
front passenger's s ide or in the rear are changed,
the synchronization is automatically sw itched off
and
3-zone appears in the display .
SET REAR
function
Use the rocker switch ® to select the funct ion.
When the function is switched on, you can adjust
all settings for the rear using the climate control
system controls in the cockpit . The rear climate
control system controls can not be operated at
the same time. This function switches off a uto
matically after a certain period of time or after
l eav ing the menu.
Air vents
You can open or close the center and rear vents in
the cockpit and the vents in the rear center con
sole using the ridged thumbwheels. The levers
adjust the direction of the airflow from the vents.
The wide ve nt is opened and closed using the
rocker switch ®·
Residual heat
You can activate the residual heat funct ion when
the ignition is switched off by pressing the knob
(D. The res idual heat from the coolant is used to
h eat the vehicle inte rior. The residual heat fu nc
tion switches off automatically after about 15
minutes .
A WARNING
-You should not use the recirculation mode
for an extended period of time since no
fresh a ir is drawn in. With the air-condition
ing switched off, the windows can fog up,
wh ic h increases the r isk of an accident.
Warm and cold
-Individuals with reduced sensit ivity to pain
or temperature could develop burns when
using the seat heating function. To reduce
the risk of injury, these individuals should
not use seat heating.
(D Note
To avoid damage to the heating elements in
the seats, do not knee l on the seats or place
heavy loads on a small area of the seat.
Basic settings
The climate control system basic settings are ac
cessed in the Infotainment system.
.,. Select in the Infotainment system: I MENU ! but
ton
> Vehicle > left control button > Air condi
tioning
Automatic recirculation
When switched on, automatic rec irculat ion con
trols the recircu lation mode automatically . You
must press the@
MAX button if fog forms on
the windows.
Automatic auxiliary heater*
T he auxi liary heater he lps to warm the vehicle in
terior more quickly.
Steering wheel heating
Applies to: veh icles w ith stee ring w hee l heat ing
The steering wheel rim can be heated.
Fi g. 75 Steering whee l: steer ing whee l heating button
.,. Press the button to sw itch the steering wheel
heating on and off~-The message
Steering
wheel heating: on /Steering wheel heating: off
appears in the instrument cluster displa y. IJ,,
71
Page 174 of 386
Audi connect (Infotainm ent )
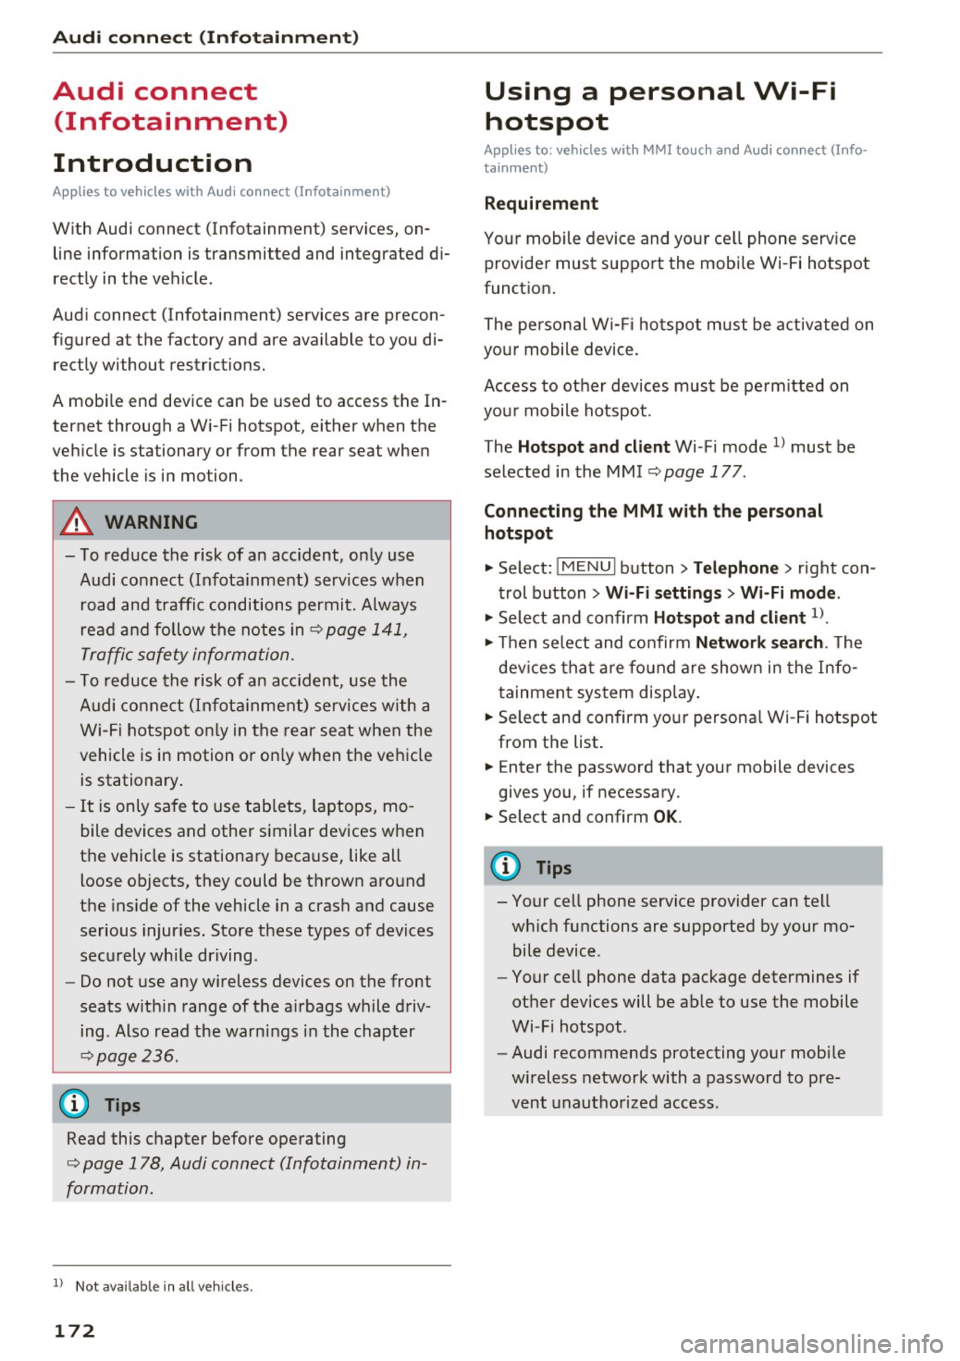
Audi connect
(Infotainment)
Introduction
A pp lies to ve hicles with A ud i co nn ect (Infotainment)
With Audi connect (Infotainment) se rvices, on
line information is transmitted and integrated di
rectly in the vehicle.
Audi connect (Infotainment) services are precon
figured at the factory and are available to you di rectly without restrictions.
A mobile end device can be used to access the In
ternet through a Wi-Fi hotspot, either when the
vehicle is stationary or from the rear seat when the vehicle is in motion .
A WARNING
- To reduce the risk of an accident, only use
Audi connect (Infota inment) serv ices when
road and traffic conditions permit. Always
read and follow the notes in
Q page 141,
Traffic safety information.
- T o reduce the risk of a n accident, use the
Audi connect (Infota inment) serv ices w ith a
Wi-Fi hotspot on ly in the rear seat when the
vehicle is in motion o r on ly when the vehicle
is stationary .
-It is only safe to use tab lets, laptops, mo
bile devices and other similar devices when
the vehicle is stationary because, like all
loose objects, they could be thrown around
the ins ide of the vehicle in a crash and cause
serious injur ies. Store these types of devices
securely while driving .
- Do not use any w ireless devices on the front
seats w ith in range of the a irbags while driv
ing . Also read the warnings in the chapter
¢ page 236.
@ Tips
Read this chapter before operating
¢ page 178, Audi connect (Infotainment) in
formation.
1> Not availa ble in a ll veh icl es.
172
-
Using a personal Wi-Fi
hotspot
App lies to : vehicles wi th MMI touch and Audi co nnect (Info
t a inm ent)
Requir ement
You r mobile device and your ce ll phone serv ice
provider must suppo rt the mobile Wi -Fi hotspot
function .
The perso nal W i- F i hotspot m ust be activated on
you r mobile device.
Access to other devices must be perm itted on
you r mobile hotspot .
The
Hot spot and cli ent W i-F i mode l) must be
selected in the MMI
Q page 177 .
Connecting the MMI with the per sonal
hotspot
"' Select: !ME NUI button> Telephone > right con
trol b utton >
Wi-Fi setting s > Wi-Fi mode .
"'Select and confirm Hotspot and client l).
"' Then select and confirm Network search . The
dev ices that a re fo und are shown in the Info-
tainment sys tem disp lay.
"' Select and confirm your persona l Wi -Fi hotspot
from the list .
"' Enter the password that your mobile devices
gives you, if necessary.
"' Select and confirm
OK.
(D Tips
- Your cell phone service provider can tell
wh ich functions are supported by your mo
bile device .
- Your cell phone data package determines if
other devices will be able to use the mobile
Wi-Fi hotspot .
- Audi recommends protecting your mobi le
wi reless network with a password to pre
vent unautho rized access.
Page 178 of 386
Audi connect (Infotainm ent )
After opening the travel g uide, travel tips in your
area will be displayed including current ratings as
well as the corresponding category .
"' Press the left control button to change the cat
egory (such as bars nearby).
A WARNING
- It is only safe to use tablets, laptops, mo
bile devices and other s imilar devices when
the vehicle is stationa ry because, like all
loose objects, they could be throw n aro und
the ins ide of the vehicle in a crash and cause
serious injuries . Store these types of devices
sec urely whi le driving.
- Do not use any wireless devices on the front
seats within range of the ai rbags while driv
ing. Also read the warnings in the chapter
c::, page 236.
(D Tips
Units of measurement, language settings and
time are shown in the Infotainment system
disp lay based on how they were set in the sys
tem sett ings
e> page 229.
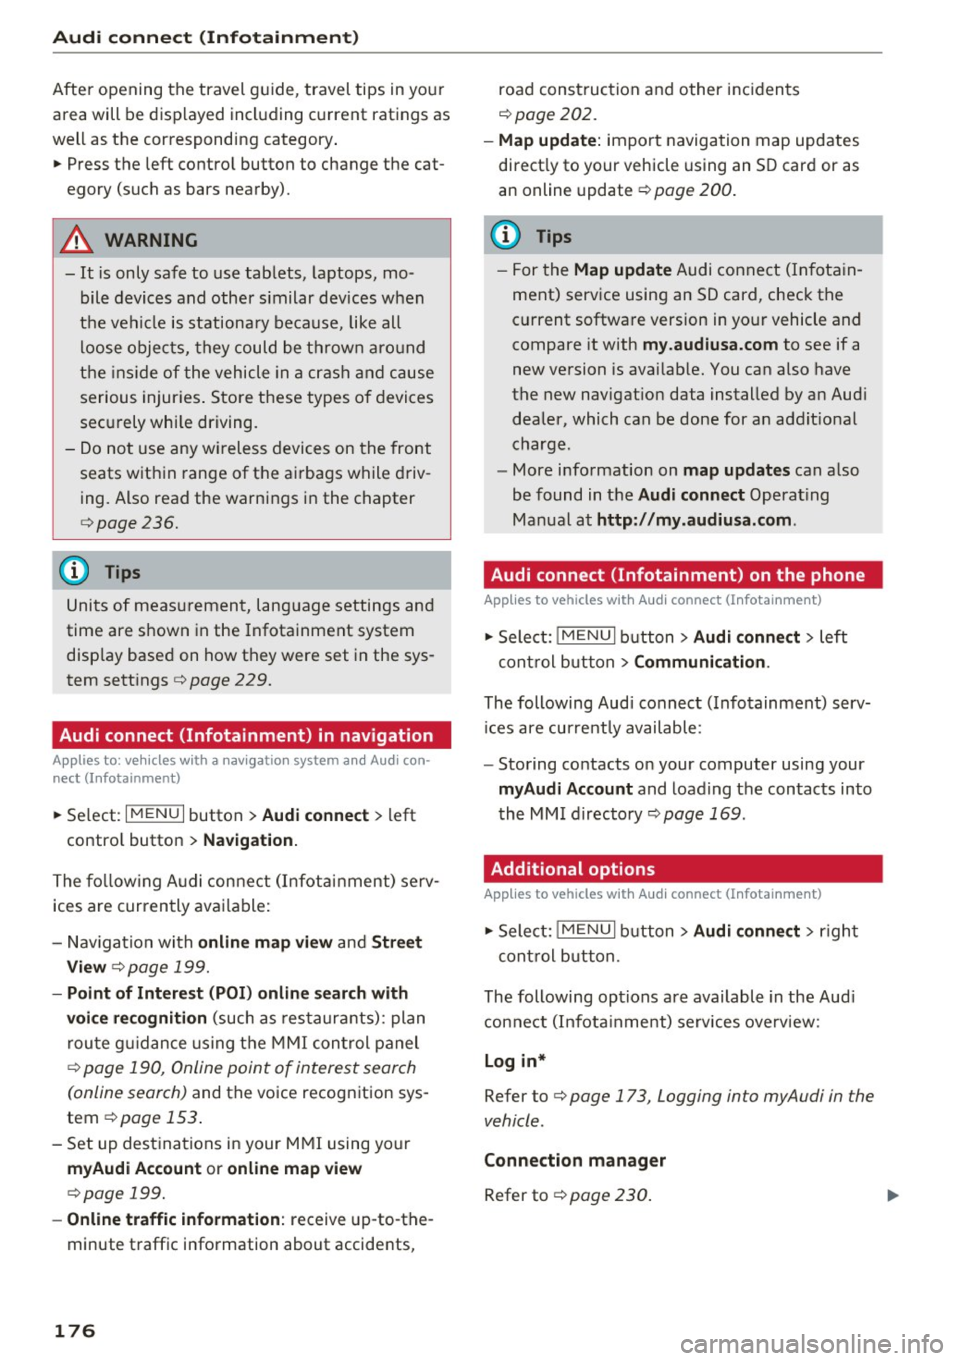
Audi connect (Infotainment) in navigation
Applies to: vehicles with a navigation system and Audi con
nect (Infotainment)
.. Se lect: I MENU I button > Audi connect > left
contro l button >
Na vigation.
The fo llow ing A udi connect (Infota inment) serv
ices are currently available :
- Nav igation with
o nline map vi ew and Stre et
View
c::, page 199.
- Poin t of Interest (PO I) online search with
voi ce re cognition
(such as res taurants): plan
r ou te g uidance using the MMI con trol panel
c::> page 190, Online point of interest search
(online search)
and the voice recognition sys
tem
c::> page 153.
- Set up dest inations in your M MI using your
myAud i Account or onl ine map view
c::, page 199.
- Online traffic inform ation:
receive up -to-the
minute t raffic information about accidents,
176
road construction and other incidents
c::> page 202.
- M ap upd ate:
import navigation map updates
direct ly to your vehicle using an SD card or as
an online update
c::> page 200.
(D Tips
- For the Map update Audi connect (Infota in
ment) serv ice using an SD card, check the
current software version in your vehicle and
compare it with
my.audiusa.com to see if a
new version is avai lab le. You can also have
the new navigat ion data installed by an Aud i
dealer, which can be done for an addit ional
charge.
- More informat ion on
map updates can also
be found in the
A udi connect Operat ing
Manual at
http: / /my .audiu sa.com .
Audi connect (Infotainment) on the phone
Applies to vehicles with Audi connect (Infotainment)
"'Sele ct: !MENUI b utton> Aud i conn ect> left
cont rol b utton >
C o mmuni cation .
The following Aud i connect (Infotainment) serv
i ces are currently available :
- Storing co ntacts on your computer using your
m yA udi Account and loading the contacts into
the MMI directory
c::> page 169.
Additional options
Applies to vehicles with Audi connect (Infotainment)
"'Sele ct: !MENUI b utton> Aud i conne ct > righ t
cont rol button.
The following options are available in the Aud i
connect (Infota inme nt) services overview:
Log in*
Refer to c::, page 173, Logging into myAudi in the
vehicle .
C onnection manag er
Refer to c::, page 230 .
Page 179 of 386
<( a, .... N ,....
N .... 0 0
3 a,
License s ubs cript ion
The validity and expiration date of you r licenses
are displayed. When
W arnin g befor e licen se ex
pir es
is activat ed, a m essage will be display ed
warning you that your license is about to expire .
Refresh
The content of the selected Audi connect (Info
tainment) service o r the entire Audi connect list
is updated .
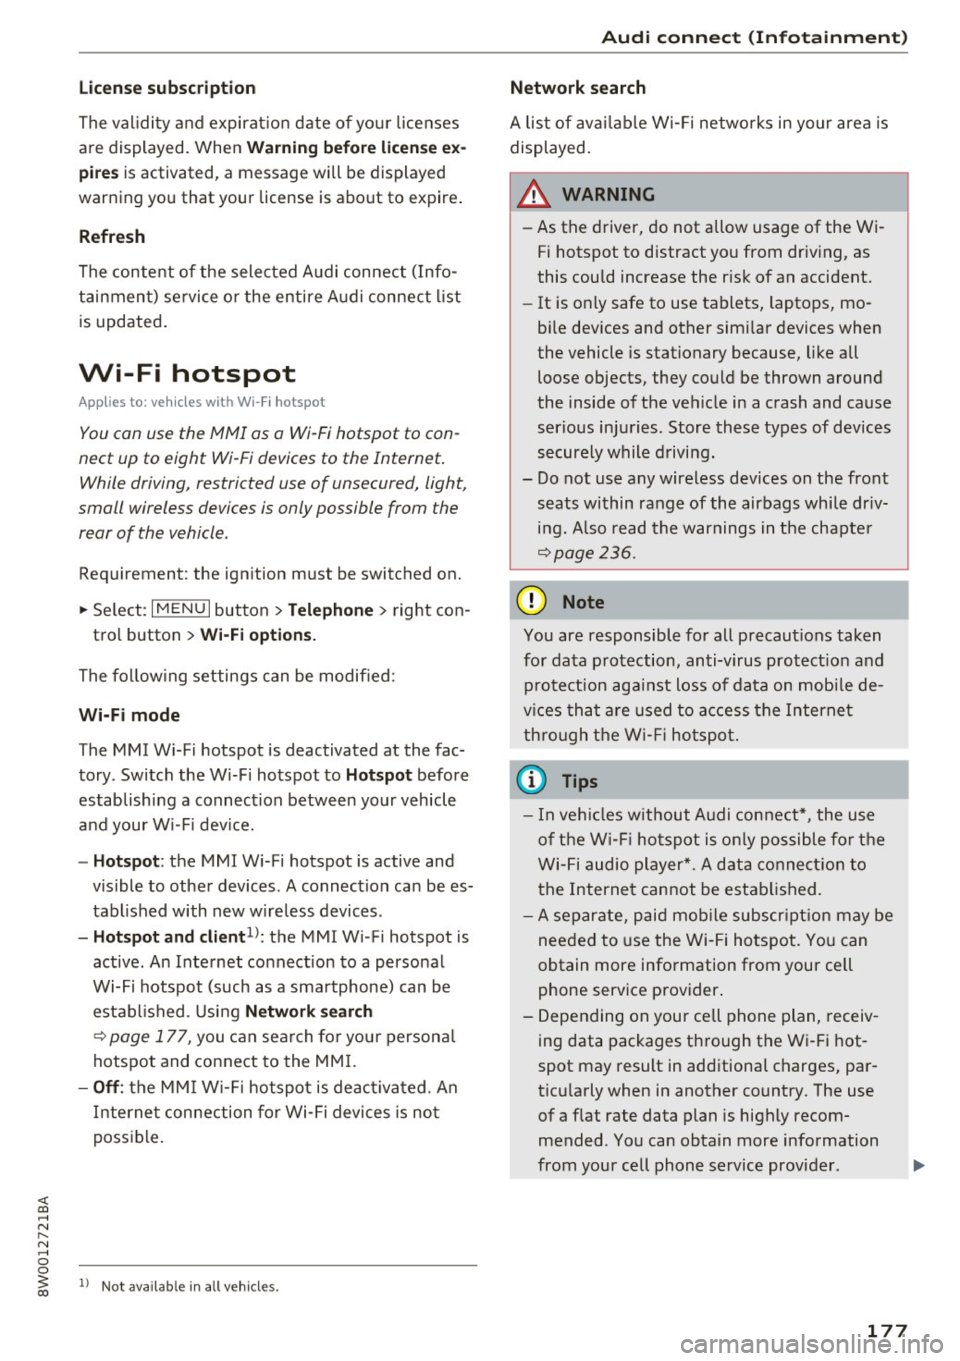
Wi-Fi hotspot
Appl ies to: ve hicles with Wi -Fi hotspot
You con us e the MMI as a Wi-Fi hotspot to con
n ect up to eight Wi-Fi d evic es to th e Intern et.
While driving , re stri cted use of unsecured, light,
s mall wirele ss device s is only po ssible from the
rear of the vehicle .
Requirement: the ignition must be switched on.
.. Se lect :
I MENU I button >Telep hon e> right con -
tro l button
> Wi-Fi opti ons.
The fo llow ing settings can be modified :
Wi-Fi mode
The MMI Wi-Fi hotspot is deactivated at the fac
tory . Switch the Wi-Fi hotspot to
H otspot before
establishing a connection between your vehicle
and your Wi- Fi dev ice.
- Hotspot : the MMI Wi- Fi hotspot is active and
v is ible to other devices. A connection can be es
tabl ished with new w ire less devices .
-Hot spot and clie nt1l: the MM I W i- F i hotspot is
active. An Internet connection to a personal
Wi-Fi hotspot (such as a smartphone) can be establ ished . Using
Netw ork search
~ page 177, you can sea rch fo r you r persona l
hotspot and connect to the MM I.
-Off : the MM I W i-Fi hotspot is deac tivated. An
Internet connection for Wi-Fi devices is not
possible .
1) Not avail able in al l veh icl es.
Audi c onn ect ( Inf ota inm ent )
Network search
A list of ava ilab le Wi- Fi netwo rks in your area is
displayed.
A WARNING ~
- As the driver, do not allow usage of the Wi-
Fi hotspot to distract you from driving, as
this cou ld increase the risk of an accident.
- It is only safe to use tablets, laptops, mo
b ile dev ices and other similar devices when
the vehicle is stationary because, like all loose objects, they could be thrown around
the inside of the vehicle in a crash and cause
serious injuries . Store these types of devices
securely while driving.
- Do not use any wireless devices on the front seats within range of the airbags while dr iv
i n g. Also read the warnings in the chapte r
~page 236.
(D Note
You are responsible for all precaut ions taken
fo r data p rotection, anti-v irus protect ion and
protection aga inst loss of data on mobi le de
v ices that a re used to access the Internet
th ro ugh the W i- Fi hotspot.
(D Tips
-In vehicles w ithout Audi connect* , the use
of the W i-F i hotspot is on ly possible for t he
Wi-Fi audio player*. A data connect ion to
the Internet cannot be established.
- A separate, paid mob ile subscr ipt ion may be
needed to use the Wi -Fi hotspot. You can
obtain more info rmation from your cell
phone serv ice provider .
- Depending on your cell phone plan, receiv
ing data packages through the Wi-Fi hot
spot may result in additional charges, par
ticu larly when in another country . The use
of a f lat rate data plan is highly recom
mended . You can obtain more information
from your cell phone service provider .
177