bolt pattern AUDI S4 2018 Owners Manual
[x] Cancel search | Manufacturer: AUDI, Model Year: 2018, Model line: S4, Model: AUDI S4 2018Pages: 403, PDF Size: 66.81 MB
Page 350 of 403

a co .... N ,....
N .... 0 0
3 co
be f ive 150 lb s. pa ssenge rs in
yo ur ve hicle, th e amo unt of
ava ila bl e c argo a nd lu ggag e
l oa d cap acity is 650 lb s.
(1400-750 (5 X 150) = 650
lb s.)
5 . Determin e th e co mbined
we ig ht of lu ggag e and cargo
bein g load ed on the ve hicle .
Th at w eight may not sa fely ex
c e e d th e ava ilabl e ca rgo a nd
lugg age l oad ca paci ty ca lc ul at
e d in St ep 4 .
6 . If yo ur vehicle will b e to wing a
tr ailer, load from y our tr ailer
will b e tran sferr ed to y our v e
hi cle . C on sul t thi s manual t o
dete rmin e how this re duces
th e av ailabl e c argo and lug
ga ge load capac ity o f your vehi
c le.
..,.Ch eck the tire side wall
(c:> page 334, fi g . 2 7 4) to d eter
min e the de sign ated load r ating
for a sp ecifi c tire.
Wheel bolts and rims
Wheel bolts
Wheel bolts must be clean and loosen/t ighten
eas ily .
Rims
Rims with a bolted rim ring* or with bolted wheel
covers* consist of mu ltip le pieces. These compo
nents were bolted together using special bolts
Wh eel s
and a special procedu re. Yo u must not repair or
disassemb le them
~ &. .
A WARNING
-Wheel bo lts that are tightened or repaired in-
correct ly can become loose and resu lt in loss
of vehicle contro l, wh ich increases the risk of
an accident. For the cor rect tighten ing specifi
cation,
see¢ page 366, Finishing .
-Always keep the wheel bolts and the
threads in the wheel hub clean and free of
g rease .
- Only use wheel bolts that fit the rim.
- Always have damaged rims repaired by an
author ized Audi dealer or author ized Audi
Serv ice Facility . Never repair or disassemb le
rims yourself, because th is increases the r isk
of an a cc ident.
Winter tires
Winter tires signific ant ly imp rove the vehicle 's
handling when dr iv ing in winter conditions . B e
ca use of their construct ion (w idth, compound,
tread pattern), summer tires provide less t rac
tion on ice and snow .
.,. Use winter tires on all four wheels.
.,. Only use winter tires that are approved for your
vehicle.
.,. Please note that the maximum permitted
speed may be lower with winter
tires ¢,& . An
author ized Audi dealer or authorized Audi Serv
ice Facility can inform you about the maximum permitted speed for your tires .
.,. Check the tire pressure after installing wheels
~page 344 .
The effectiveness of winter tires is reduced great
ly when the tread is wo rn down to a depth of
0.16 in (4 mm). The cha racteristics of w inte r
ti res a lso decrease g reatly as the ti re ages, re
gardless of the rema in ing t read.
A WARNING
-
- Never drive fas ter than the max imum per
mitted speed for your tires . This could cause
the tires to heat up too much. This increases
..,.
349
Page 366 of 403

could slip and cause an injury if it does not
have sufficient hold on the vehicle.
- To reduce the risk of an accident, never start
the engine when the vehicle is raised.
- To reduce the risk of injury, support the ve
hicle securely with suitable stands if work is
to be performed underneath the vehicle.
- To help prevent injury to yourself and your
passengers:
- Do not raise the vehicle until you are sure the jack* is securely engaged.
- Passengers must not remain in the vehicle when it is jacked up.
- Make sure that passengers wait in a safe
place away from the vehicle and well away
from the road and traffic.
- Make sure jack position is correct, adjust as necessary and then continue to raise
the jack*.
- If work has to be done under the vehicle, ensure that it is safely supported on suita
ble stands
-risk of injury!
- Never start the engine when the vehicle is on the jack*
-risk of accident!
(D Note
Do not lift the vehicle by the sill. Position the
vehicle jack* only at the designated mounting points on the side sill. Otherwise, your vehicle
will be damaged.
Removing and installing a wheel
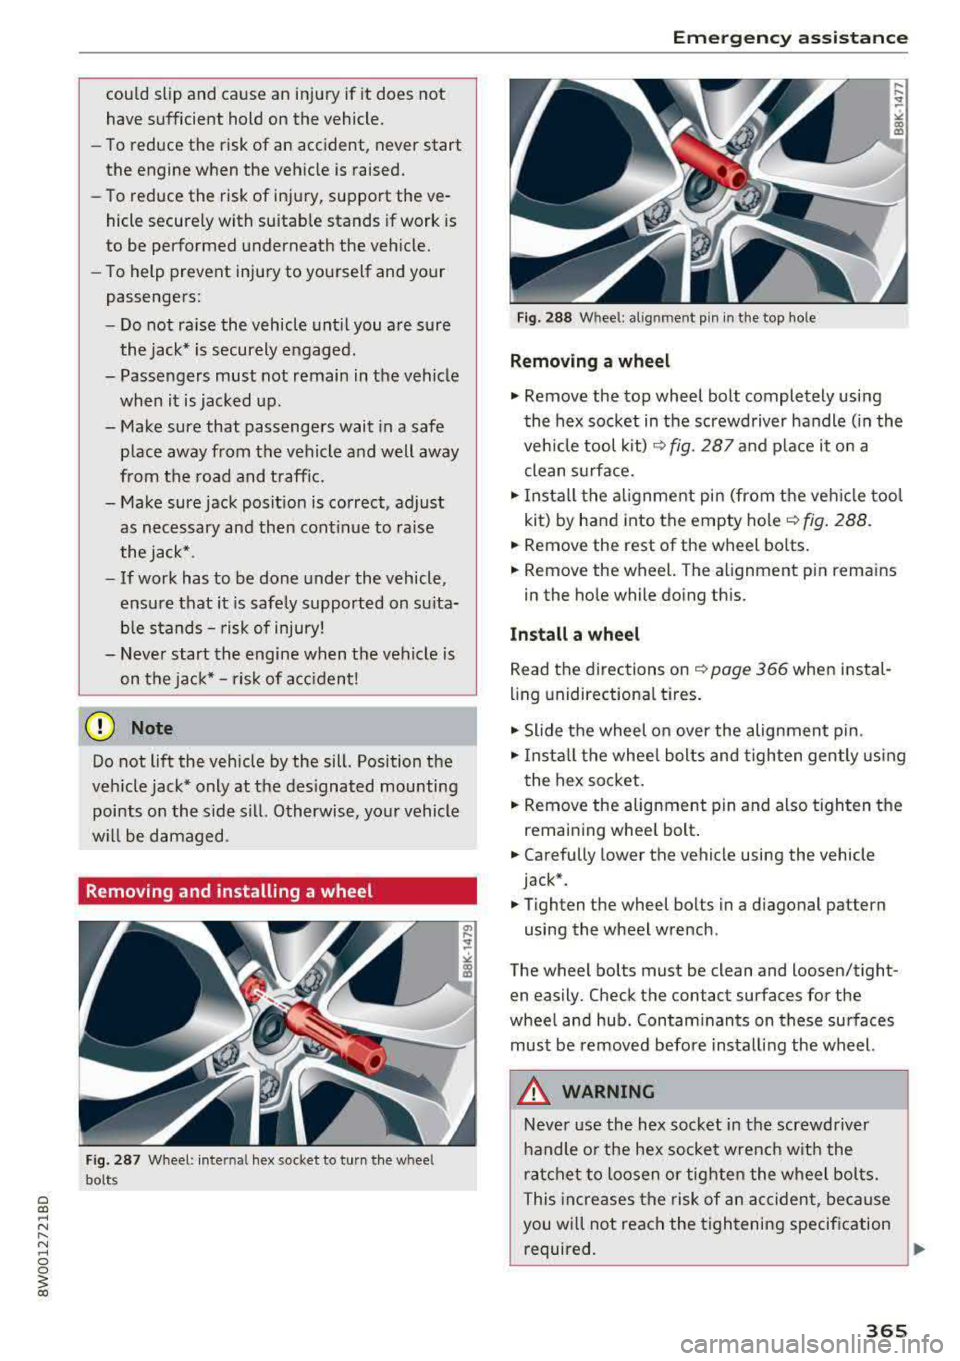
Fig. 287 Wheel: inte rnal hex socket to turn the whee l
bolts
Emergency assistance
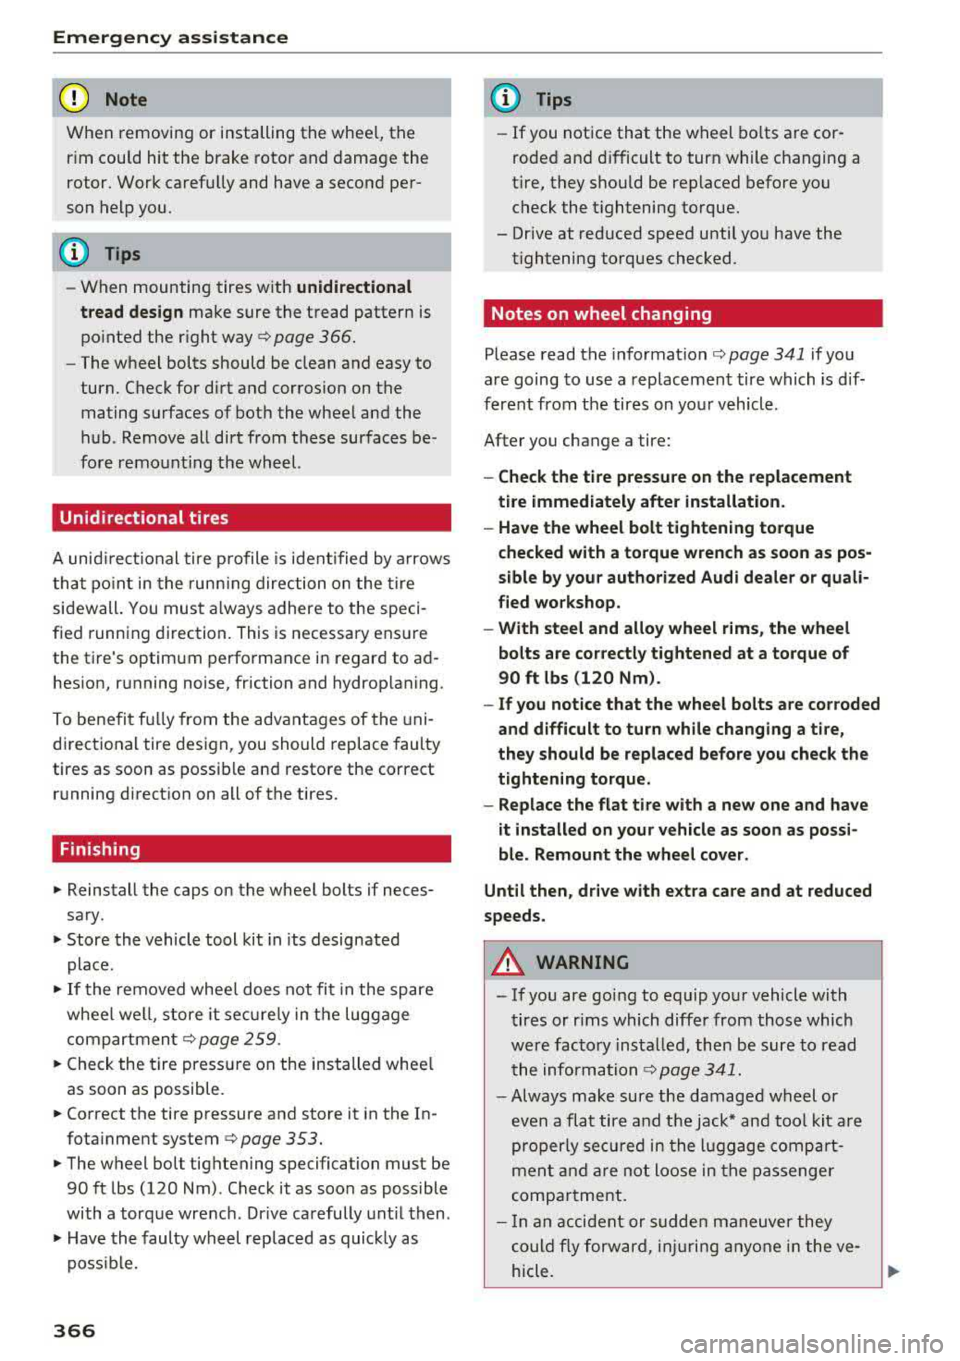
Fig. 288 Whee l: alignment pin in the top ho le
Removing a wheel
.,. Remove the top wheel bolt completely using
the hex socket in the screwdriver handle (in the
vehicle tool kit)
~fig. 287 and place it on a
clean surface.
.,. Install the alignment pin (from the vehicle tool
kit) by hand into the empty
hole ~ fig. 288.
.,. Remove the rest of the wheel bolts.
.,. Remove the wheel. The alignment p in remains
in the hole while doing this.
Install a wheel
Read the directions on~ page 366 when instal
ling unidirectional tires.
.,. Slide the wheel on over the alignment pin .
.,. Install the wheel bolts and tighten gently using
th e hex socket.
.,. Remove the alignment pin and also tighten the
remai ning wheel bolt.
.,. Carefully lower the vehicle using the vehicle
jack*.
.,. Tighten the wheel bolts in a diagonal pattern
using the wheel wrench .
The wheel bolts must be clean and loosen/tight
en easily. Check the contact surfaces for the
wheel and hub . Contaminants on these surfaces
must be removed before installing the wheel.
A WARNING
Never use the hex socket in the screwdriver
handle or the hex socket wrench with the
ratchet to loosen or tighten the wheel bolts.
This increases the risk of an accident, because
you will not reach the tightening specification
required .
~
365
Page 367 of 403

Emergency assistance
CJ) Note
When removing or installing the whee l, the
r im could hit the brake rotor and damage the
rotor. Work ca ref ull y and have a second pe r
son help you.
@ Tips
- When mounting tires w ith unidirectional
tread design
ma ke s ure the t read pattern is
po inted the r ight
way ¢ page 366.
-The wheel bolts should be clean and easy to
turn. Check for d irt and cor ros ion on the
mating s urfaces of both the wheel and the
h ub. Remove all dirt from t hese surfaces be
fo re re mo unt ing th e wheel.
Unidirectional tires
A unid irec tional tire p rofile is ident ified by a rrows
th at poin t in the run nin g dir e cti on o n the tire
sidewall. You mus t always a dhere to the speci
fied running d irec tion. This is necessary ens ure
the t ire's optim um perfo rmance in regar d to a d
hes ion, r unning noise, fr iction and hydrop la ning.
T o be nefi t fu lly fro m the adv ant ages of the uni
d irect ional tire des ign, you sho uld replace faulty
tires as soon as possi ble an d restore the correct
r u nning di rect io n on all of the tires.
Finishing
.,. Reinstall the caps on the whee l bolts if neces
sary .
.,. Store the vehicle tool kit in its designated
place .
.,. If the re m oved whee l does not fi t in the spa re
whee l we ll, store it se cur ely in t he luggage
com partmen t¢ page 2 59.
.,. Check the tire press ure on the ins talled whee l
as soon as possible.
.,. Co rrect the tire p ressure and store it in the I n
fota inment system
¢ page 353 .
.,. The wheel bo lt tightening specification must be
90 ft lbs (120 Nm) . Check it as soon as poss ible
with a torq ue wrenc h. Dr ive ca refully unt il t hen .
.,. Have th e faulty wheel rep laced as quic kly as
poss ible.
366
(D Tips
-If you not ice that t he w heel bo lts a re cor
rode d and difficult to tur n while changing a
t ir e, t hey s hou ld be replaced befo re yo u
check the t ightening torque.
- Drive at red uce d speed unti l yo u have the
t ightening to rques checked.
· Notes on wheel changing
Please read t he informat ion¢ page 341 if yo u
are going to use a replacemen t tire which is d if
ferent from the tires on yo ur vehicle .
After you change a tire:
- Check the tire pressure on the replacement
tire immediately after installation.
- Have the wheel bolt tightening torque
checked with a torque wrench as soon as pos
sible by your authorized Audi dealer or quali
fied workshop.
- With steel and alloy wheel rims, the wheel
bolts are cor rectly tightened at a torque of
90
ft lbs (120 Nm) .
- If you notice that the wheel bolts are corroded
and difficult to turn while changing a tire,
they should be replaced before you check the
tightening torque .
- Replace the flat tire with a new one and have
it installed on your vehicle as soon as possi
ble. Remount the wheel cover .
Until then, dr ive with e xtra care and at reduced
speeds.
A WARNING
- If you are going to equip yo ur vehicle wi th
t ires or r ims which diffe r from those which
we re fac to ry insta lled , th en be su re to read
t he
informa tion ¢ page 341.
- Always make sure the damage d w heel or
ev en a fla t tire and the jack* an d tool kit are
p ro p erl y se cured in t he lug gage com part
me nt an d ar e no t lo o se in the pas senge r
c o mp artme nt.
- I n an ac cident or su dde n man euver they
co uld fl y forw ard , injur ing an yone i n t he ve
hicle.