low beam AUDI S4 CABRIOLET 2009 Owners Manual
[x] Cancel search | Manufacturer: AUDI, Model Year: 2009, Model line: S4 CABRIOLET, Model: AUDI S4 CABRIOLET 2009Pages: 340, PDF Size: 77.32 MB
Page 21 of 340
CRUISE
ti(')
~
i::::3
D
BRAKE
Q
Controls and equip
ment
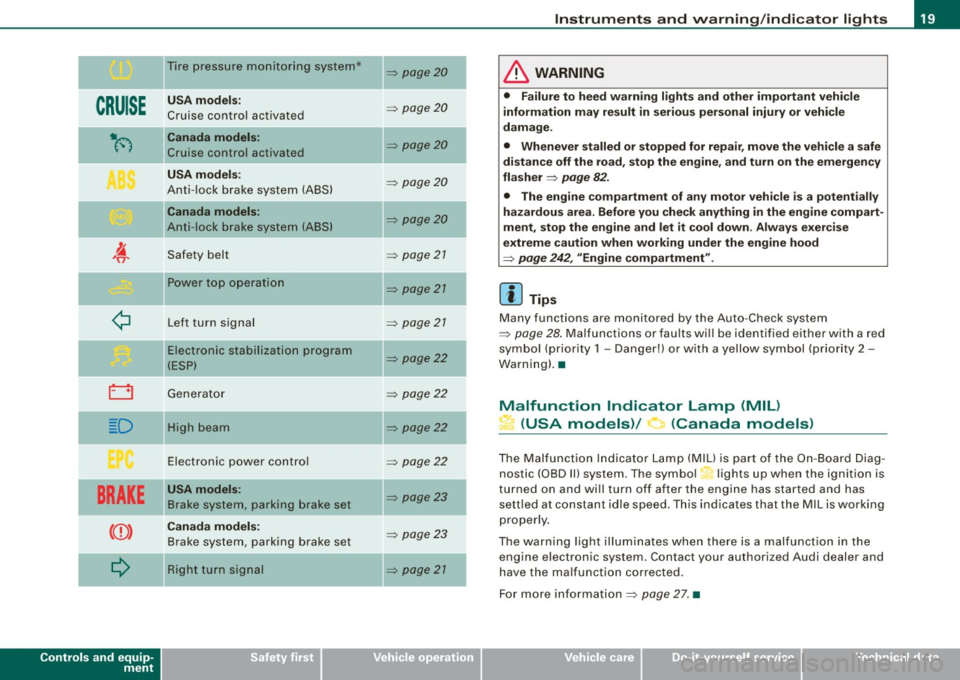
Tire pressure monitoring system*
USA models:
Cruise control activated
Canada models:
Cruise control activated
USA models:
Anti-lock brake system (ABS)
Canada models:
Anti -lock brake system (ABS)
Safety belt Power top operation
Left turn signal
Electronic stabilization program
(ESP)
Generator
High beam
Electronic power control
USA models:
Brake system, parking brake set
Canada models: Brake system, parking brake set
Right turn signal
~ page 20
~ page20
~ page20
~ page20
~ page20
~ page 21
~ page21
~ page 27
~ page22
~ page22
~ page22
~ page22
~ page23
~ page23
~ page21
Instruments and warning/indicator lights
& WARNING
• Failure to heed warning lights and other important vehicle
information may result in serious personal injury or vehicle
damage .
• Whenever stalled or stopped for repair, move the vehicle a safe
distance off the road, stop the engine, and turn on the emergency
flasher
~ page 82.
• The engine compartment of any motor vehicle is a potentially
hazardous area. Before you check anything in the engine compart
ment, stop the engine and let it cool down . Always exercise
extreme caution when working under the engine hood
~ page 242, "Engine compartment" .
[ i] Tips
Many functions are monitored by the Auto-Check system
~ page 28. Malfunctions or faults will be identified either with a red
symbol (priority 1 -Danger!) or with a yellow symbol (priority 2 -
Warning) .•
Malfunction Indicator Lamp (MIL)
L.i (USA models)/ (Canada models)
The Malfunction Indicator Lamp (MIU is part of the On-Board Diag
nos tic (OBD Ill system. The symbol,.. lights up when the ignition is
turned on and will turn off after the engine has started and has
settled at constant idle speed . This indicates that the MIL is wo rking
properly.
The warning light illuminates when there is a malfunction in the
engine electronic syst em . Contact your authori zed Audi d ealer and
have the malfunction corrected.
For more information
~ page 27 . •
Page 24 of 340
Inst rum ents and warnin g/indi cato r li ghts
If one of the turn signal light bulbs burn out, the turn signal will
flash twice as fast as normal. •
Electronic Stabilization Program (ESP)
The warning/indicator light monitors the electronic stabi
lization program.
The warning/indicator light has the following functions :
• it flashes while you are driving , when the ESP is working .
• it illuminates when you switch on the ignition for approximately
2 seconds as a function check .
• it illuminates when there is a ma lfunction in the ESP.
• it illuminates after the battery has been disconnected.
• it illuminates continuous ly when the ESP is switched off.
• it illuminates if there is a malfunction in the ABS, since the ESP
is part of the ABS system.
If the ESP warning/indicator light i lluminates and stays on after you
have started the engine , this may mean that the control system has
temporari ly switched off the ESP. If this is case, you can reactivate
the ESP by switching the ignition o ff and then on again. The
warning/indicator light should go out to show that the system is
fully functional again.
If the battery terminals were disconnected and re-connected, the
vehic le was jump started or the battery is very weak, the ESP sensor
system goes through a learning process for the first few yards.
During this time, the indicator light illuminates. It goes out as soon
as the learning process is comp lete .
For more information about the ESP~
page 22. •
Generator 0
T his warning/indicator light detects a malfunction in the
generator or in the vehicle's electrical system .
The D warning/indicator light illuminates when you switch on the
ign itio n and must go out after the engine has started.
If the
D warning/indicator light illuminates while you are driving,
you shou ld contact your authorized Audi dealer . Since the vehicle
battery is discharging, you should switch off any unnecessary elec
trical consumers (for example, the air conditioner) .
0 Note
If the -t warning/indicator light (ma lfunction in the engine coo ling
system) in the instrument cluster shou ld illuminate~
page 31, stop
the vehicle and turn off the engine. The coo lant pump is not working
- this can cause engine damage! •
High beam ~D
The@:Dwarning/indicator light illuminates when the high beams are
on or when you use the headlight flasher. For more information
about using the high beams, see~
page 83. •
Electronic power control p
This warning/indi cator light monitors the electronic
power control.
The warning/indicator light (Electronic Power Control) il lumi-
nates when you switch on the ignition as a function check .
Page 35 of 340
II
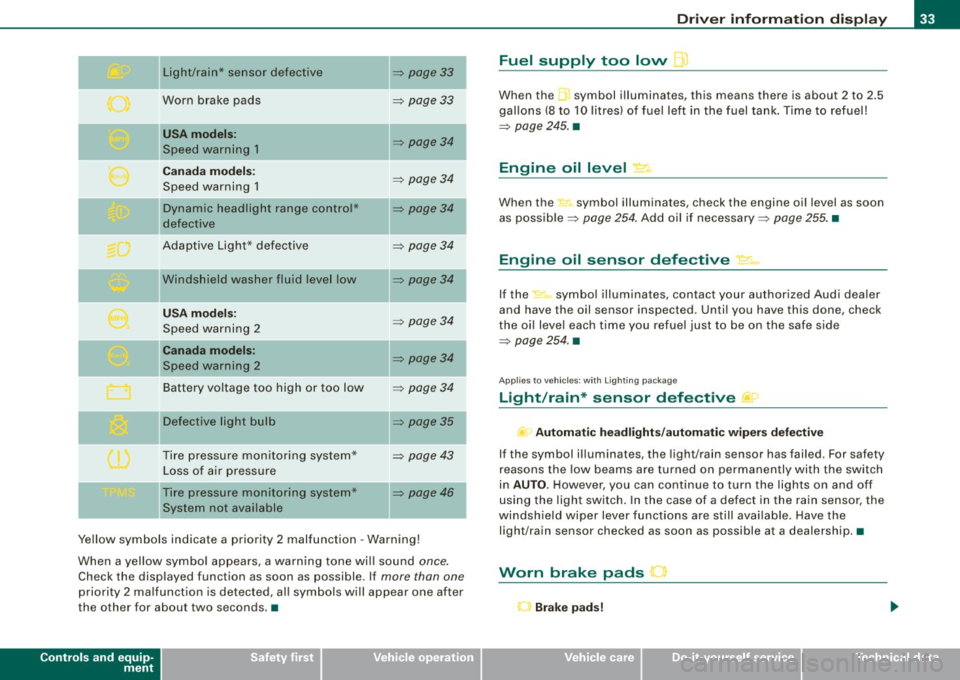
Light/rain* sensor defective
Worn brake pads
USA m odels :
Speed warning 1
Canad a m od els:
Speed warning 1
Dynamic headlight range con trol*
defective
Adaptive Light* defective
Windshield washer fluid level low
U SA mod els:
Speed warning 2
Canada mod els:
Speed warning 2
Battery voltage too high or too low
D efective light bu lb
Tire pressure monitoring system* Loss of air pressure
Tire pressure monitoring system*
System not available
~ page33
~ page 33
~ page34
~ page 34
~ page34
~ page34
~ page34
~ page 34
~ page34
~ page 34
~ page35
~ page 43
~ page46 I
Ye llow symbols indicate a priority 2 malfunction -Warning!
When a yellow symbo l appears, a warning tone wi ll sound
once.
Check the displayed function as soon as possible. If more than one
priority 2 ma lfunction is detected, all symbols will appear one after
the other for about two seconds. •
Controls and equip
ment
Driv er inf ormati on di spl ay
Fuel supply too low l
When the -,symbol illuminates, this means there is about 2 to 2.5
gallons (8 to 10 litres) of fue l left in the fuel tank . Time to refuel!
~ page 245. •
Engine oil level '7.:.
When the-=· symbol illuminates, check the engine oil level as soon
as possib le ~
page 254 . Add oil if necessary ~ page 255. •
Engine oil sensor defective • ..
If the .,_,ft symbol illuminates, contact your author ized Audi dea ler
and have the oil sensor inspected. Until you have this done, check
the oi l leve l each time you refuel just to be on the safe side
~ page 254. •
Applies to vehic les: with Lighting package
Light/rain* sensor defective >
- Automa tic headl ight s/autom atic wiper s def ective
If the symbol il luminates, the light/rain sensor has failed. For safety
reasons the low beams are turned on permanently with the switch
in
AUTO . However, you can continue to turn the lights on and off
using the light switch. In the case of a defect in the rain sensor, the
windsh ield wiper lever functions are still avai lable. Have the
light/rain sensor checked as soon as possible at a dealership. •
Worn brake pads J
r Brake p ad s!
Page 79 of 340
Applies 10 vehic les: with light senso r package
Sensor activated head -and tail light control
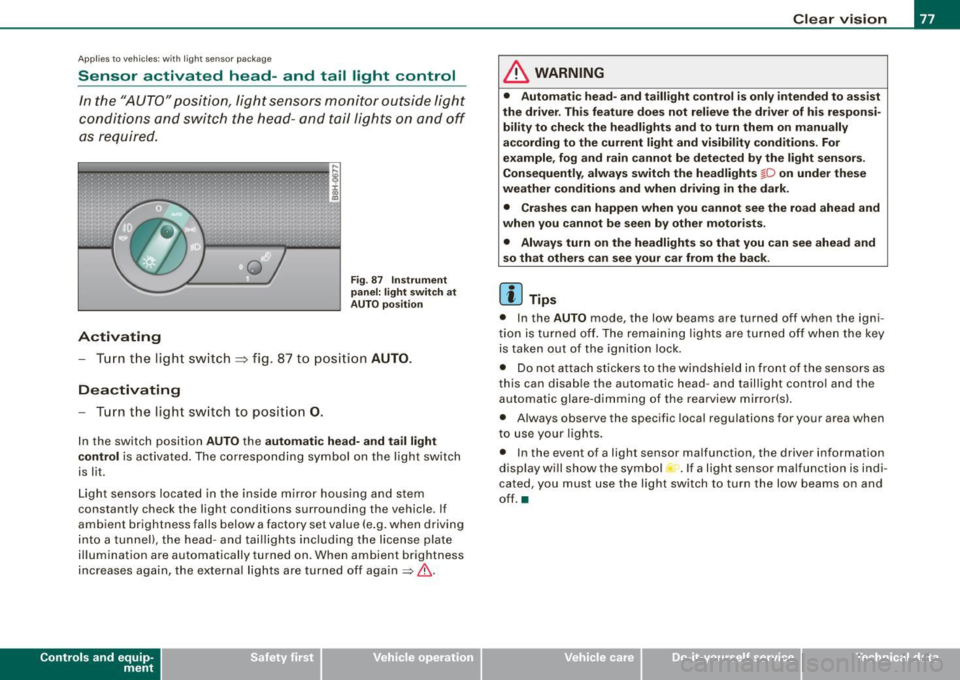
In the "AUTO" position, light sensors monitor outside light
conditions and s witch the head- and t ail lights on and off
as required.
Activating
F ig . 87 Instru men t
p an el: li ght sw itch at
A UTO pos ition
- Tur n the light switch ~ fig. 87 to positi on AUTO.
Deactivating
- Turn the light switch to posit ion 0.
In the switch position AUTO the automati c head -a nd ta il light
contr ol
is activated . The corresponding symbol on the light switch
is lit.
Light sensors located in the ins ide mirror housing and stem
constantly check the light conditions surrounding the vehicle . If
ambient brightness falls below a factory set value (e .g. when driving
into a tunnel), the head -and tai llights including the license plate
illumination are automatically turned on. When ambient brightness
increases again, the external lights are turned off again
=> & -
Contro ls and eq uip
ment
Cle ar v ision
& WARNING
• Autom ati c head - and tailli ght control is only int ended to a ss is t
the driver . Th is feature does not reli ev e th e driver of h is res pon si
bilit y to che ck the headl ights and to turn them on m anuall y
according to the current light and vi sibilit y condition s. For
e xa mple , fo g and r ain cannot be dete cted by the light s en sor s.
Consequently , alw ay s swit ch th e headlights
fD on under the se
we ather condition s and when driving in th e da rk .
• Crashe s can happen when you cannot s ee the road ahead and
w hen you cannot be seen by oth er m otori sts .
• Alway s turn on the headlight s so that you can see ahead and
s o that others ca n s ee your car fr om th e back.
[ i ] Tip s
• In the AUTO mode , the low beams are turned off when the igni
tion is turned off. The remaining lights are turned off when the key is taken out of the ignition lock.
• Do not at tach stickers to the windshield in front of the sensors as
this can disable the automatic head- and taillight contro l and the
automatic glare -dimming of the rearview mirror(s).
• Always observe the specific local regulations for your area when
to use your lights .
• In the event of a light sensor malfunction, the driver information
display wi ll show the sy mbol -.
If a light sensor malfu nction is indi
cated, you must use the light switch to turn the low beams on and
off. a
~ehicle care irechnical data
Page 80 of 340
Clear vision
Ap plies to vehi cles: with d ayt ime running ligh ts
Daytime running lights (DRL) (USA models)
Use the activation switch to turn the daytime running
lights on or off.
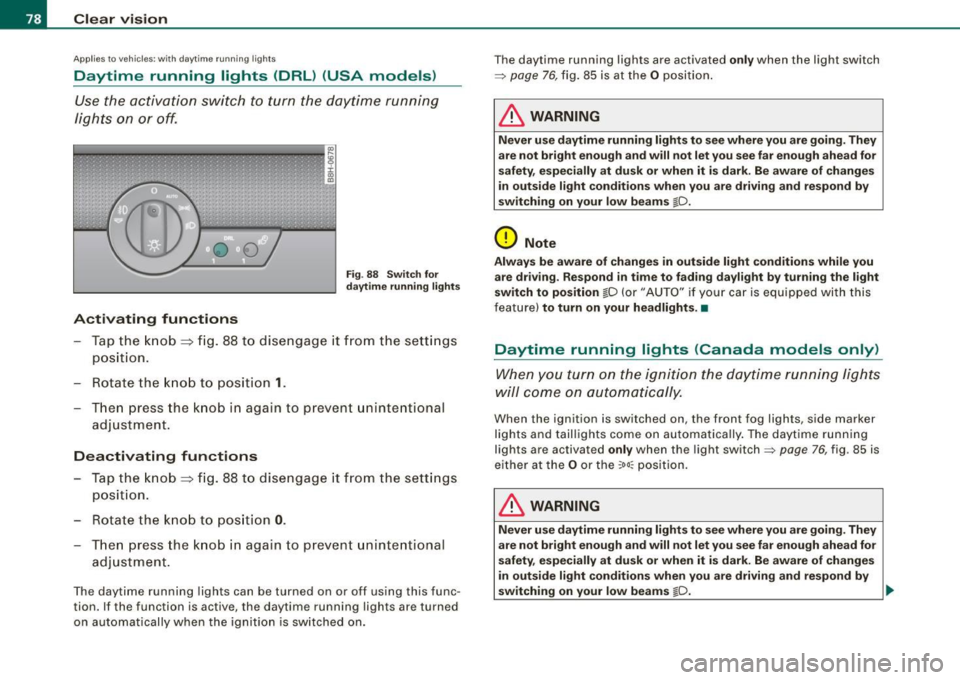
Activating functions
Fi g. 88 Sw itch for
d ayt ime runn ing light s
-Tap the knob ==> fig. 88 to dise ngage it from the sett ings
position.
- Rot ate the k nob to positi on
1.
T hen p ress the knob i n again to prevent unintentional
adjustment .
Deactivating functions
-Tap the knob==> fig. 88 to disengage it from the sett ings
posit ion.
- Rota te th e kn ob to p osition
0 .
- T hen p ress the knob in aga in to p reve nt uninte ntiona l
adjustment .
The daytime running lights can be turned on or off using this func
tion. If the function is active, the daytime running lights are turned
on automatically when the ignition is sw itched on . The daytime running lights are activated
only when the light switch
=>
page 76, fig. 85 is at the O posi tion .
& WARNING
Never u se daytime running lights to see where you are going. They
are not bright enough and will not let you see f ar enough ahead for
s afety , e spe cially at dusk or when it i s dark. Be aware of change s
i n out side light condition s when you are driving and re spond by
s witching on your low beams
@-0.
0 Note
Alway s be aware of change s in outside light conditions while you
are dr iving . Re spond in tim e to fading da ylight b y turning the light
s witch to po sition
@-0 {or "AUTO" if you r car is equipped with this
feature)
to turn on your headlight s.•
Daytime running lights (Canada models only)
When yo u tur n on the igni tion t he da ytime running ligh ts
w ill c ome on au toma tic ally.
When the ignition is switched on , the front fog lights, side marker
lights and taillights come on au toma tica lly . The daytime runn ing
lights are activated
only when the light switch=> page 76, fig. 85 is
e ithe r at the
O or the ~o o:: pos ition.
& WARNING
Never u se dayt ime running lights to see where you ar e going. They
ar e not bright enough and will not let y ou see far eno ugh ahead for
s afet y, espe cially at dusk or when it is dark. Be aware of changes
i n out side light conditions whe n you are dri ving a nd respond by
s witching on your low beam s
@-0. ~
Page 85 of 340
Turn signals -¢ Q and high beam ~D lever
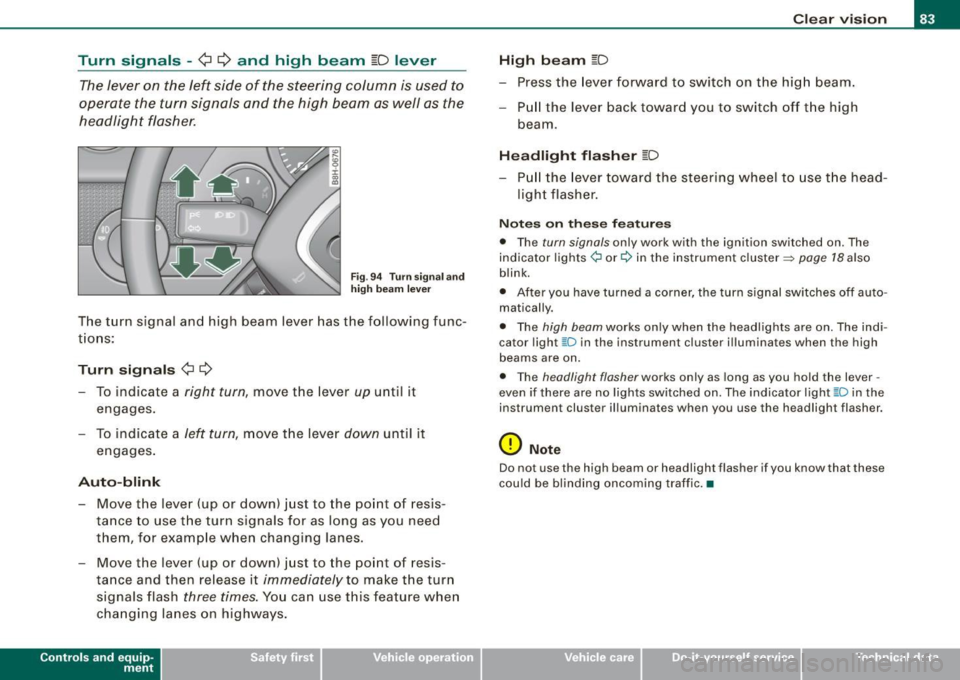
The lever on the left side of the steering column is used to
operate the turn signals and the high beam as well as the
headlight flasher.
Fig . 94 Turn signal and
high beam lever
The turn signal and high beam lever has the following func
tions:
Turn signals ¢ ¢
- To indicate a right turn, move the lever up until it
engages.
- To indicate a
left turn, move the lever down until it
engages.
Auto-blink
- Move the lever (up or down) just to the point of resis
tance to use the turn signals for as long as you need
them, for example when changing lanes.
- Move the lever (up or down) just to the point of resis
tance and then release it
immediately to make the turn
signals flash
three times. You can use this feature when
changing lanes on highways.
Contro ls and eq uip
ment
Clear vision
High beam
[D
- Press the lever forward to switch on the high beam.
- Pull the lever back toward you to switch off the high
beam .
Headlight flasher [D
-Pull the lever toward the steering wheel to use the head
light flasher.
Notes on these features
• The turn signals only work with the ignition switched on. The
indicator lights¢ or¢ in the instrument cluster~ page 18 also
blink.
• After you have turned a corner, the turn signal switches off auto
matically.
• The high beam works only when the headlights are on. The indi
cator light ~Din the instrument cluster illuminates when the high
beams are on.
• The headlight flasher works only as long as you hold the lever -
even if there are no lights switched on. The indicator light ~D in the
instrument cluster illuminates when you use the headlight flasher.
0 Note
Do not use the high beam or headlight flasher if you know that these
could be blinding oncoming traffic.•
~ehicle care irechnical data
Page 87 of 340
Wiper and washer system
r.-·.
Windshield wiper ~
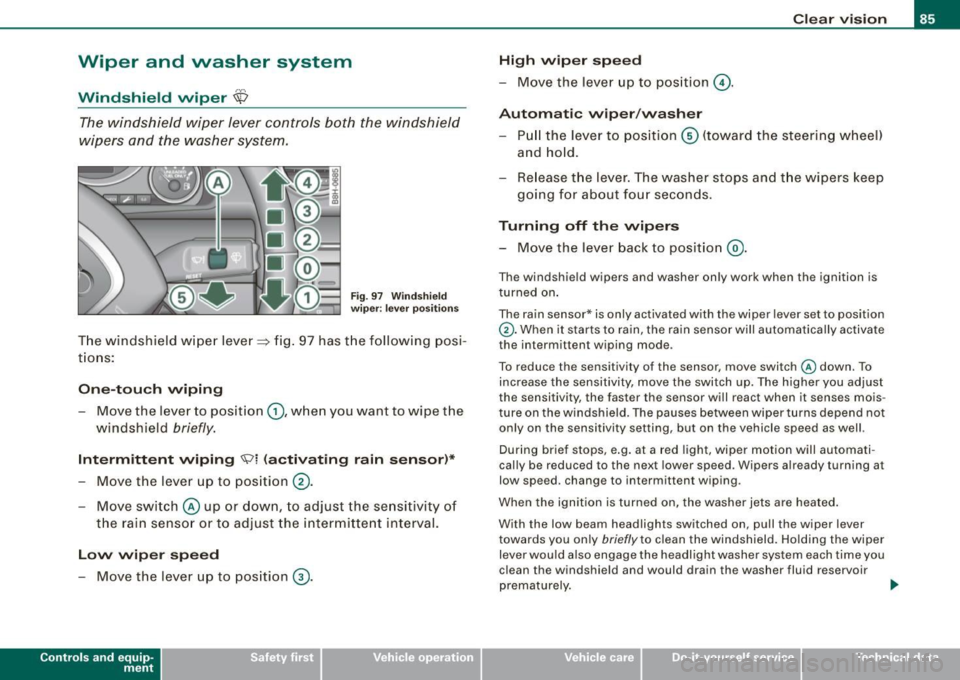
The windshield wiper lever controls both the windshield
w ipers and the washer system.
Fig. 9 7 W ind sh ie ld
wip er: leve r posi tion s
The windshield w iper lever=> fig. 97 has t he following posi
t io ns:
On e-tou ch wiping
- Move the lever to position G), whe n you want to wipe the
windshield
briefly .
Intermittent wiping ~l (activating rain sensor )*
- Move the lever up to position 0 -
- Move swit ch @ up or down, to adjust the se nsitivity of
the rain senso r or to adjust the intermitte nt interval.
Low wip er speed
- Move the lever up to pos ition ® ·
Contro ls and eq uip
ment
Cle ar v ision
High wiper sp eed
-Move the lever up to position @.
Automatic wiper /washer
- Pull the lever to pos iti on © (toward the steering w heel)
and ho ld.
Re lease t he lev er. The washer stops and t he wipers keep
going for about fou r seconds.
Turning off the wipers
- Move the lever back to position @ .
The windshie ld wipers and washer on ly work when the ignition is
turned on .
The rain sensor* is only activated with the wiper lever set to position
G). When it starts to rain, the rain sensor will automatically activate
the intermittent wiping mode .
To reduce the sensitivity of the sensor ,
move switch @down . To
increase the sensitivity, move the switch up. The highe r you adjust
the sensitivity, the faster the sensor wi ll react when it senses mois
ture on the windshield. The pauses between wiper turns depend not
only on the sensitivity setting, but on the vehicle speed as well.
During brief stops, e.g. at a red light, wiper motion will automati
cal ly be reduced to the next lower speed. Wipers already turning at
low speed. change to intermittent wiping.
When the ignition is turned on, the washer jets a re heated .
With the low beam headlights switched on, pull the wiper
lever
towards you only briefly to clean the windshield. Ho lding the wiper
lever would also engage the headlight washer system each time you
clean the windshield and would drain the washer fluid reservoir
prematurely. ..
~ehicle care irechnical data
Page 303 of 340
![AUDI S4 CABRIOLET 2009 Owners Manual _________________________________________________ F_ u_ s_ e_s _ a_n _ d_ b_ u_lb _ s ____ llll
[ i ] Tip s No . Equipm ent Amps
You are wel l adv ised to keep a supply of spare fuses in you AUDI S4 CABRIOLET 2009 Owners Manual _________________________________________________ F_ u_ s_ e_s _ a_n _ d_ b_ u_lb _ s ____ llll
[ i ] Tip s No . Equipm ent Amps
You are wel l adv ised to keep a supply of spare fuses in you](/img/6/57654/w960_57654-302.png)
_________________________________________________ F_ u_ s_ e_s _ a_n _ d_ b_ u_lb _ s ____ llll
[ i ] Tip s No . Equipm ent Amps
You are wel l adv ised to keep a supply of spare fuses in your vehic le.
15 Instrument c luster, Navigation system 10
Fuses with the proper ampere ratings are available at your Audi 16 Garage door opener 5
dea ler. •
17 Level , tire pressure control , park assist, 10 light/rain sensor
Fuse list Automatic headlig ht range control, left 5
Fuses which con be replaced. 19 Fog lights 15
Vacant
N o. Equipm ent Amps
21 Vacant
1 Air conditioner 10
22 Doors 15
2 Footwell illumination 5 23 Vacant
3 Heated washer jets 5 Central convenience electrical system 20
Radiator fan 5 25 Heater blower 30
5
Telephone, oil level sensor, multifunction 10 Rear window defogger 30 switch, rear heated seat, shift gate
Air conditioner (air quality sensor), air pressure
27 Socket for tra iler towing (controller) 30
6 5
sensor 28 Fuel pump 20
Electronic Stabil izat ion Program (ESP), bra ke 29 Vacant
7 light switch, clutch peda l switch, steering angle 10
sensor
30 Power top control un it 30
8 Telephone 5 31
Automatic transmission, mirror dimming, diag-15 nosis socket
9 Brake booster (vacuum pump) 15 Towing assembly 15
10
Automatic headl ight beam adjustment, auto -5 33 Cigarette
lighter 20 matic headlight range control, right
34 Electrical socket 20
11
Airbag control unit, front passenge r seat recog -10 nition USA (bladder mat) 35 Luggage compartment socket 20
Diagnosis socket 10 Windshield wiper system 30
13
Steering c olumn module 10
37 Pump for windshie ld an d head light washer* 30
14
Brake lights 10
system
• Do-it-yourself service
Page 331 of 340
______________________________________________ A_ l_,_ p _h_ a_ b_e _t_i c_ a _ l _in _ d_e _ x __ fflll
Front seats
Adjusting .... ........... .... .... 149
Adjusting the manual seats ........ . 94
Child restraints in the front seat .... 170
Heated seat . . . . . . . . . . . . . . . . . . . . . 116
Frontal collisions and the laws of physics 160
Fuel Additives ............. .... .... ... 244
Blended gasoline ................. 244
Capacity ................. ....... 314
Consumption ..................... 37
Filler neck .. ...... .... ...... ... .. 245
Fuel gauge ...... .... .... ... .... .. 16
Gaso li n e ... .. .... .... ... .... .... 244
Gaso line additives ..... ... .... .... 245
Low fuel level ... .. .... .... .... . 16, 33
Octane rating ............. ....... 244
Recommendation ................ 244
Refuelling ..... ... ....... ..... ... 246
Reserve . .......... ............... 16
Unlocking the fuel filler flap by hand 248
Fuel filler cap . ...... .... .... ... .... .. 27
Fuse arrangement ... .... .... ... .... . 30 1
G
Garage door opener .. ...... .... .... . 139
Garage door opener {Homelink®) ..... 139
Gas discharge lamps .. ...... ... .... . 302
Gauges Eng ine coolant temperature ... ... .. 13
Fuel gauge ....................... 16
Speedome ter . ....... ..... ... .... . 15
Controls and equip
ment Safety first
T
achometer .... ... .. ... ... .. .... . 13
Trip odometer ...... .. .... ....... . 15
Genera l illus tration
Instruments and controls .... ... .. .. 11
Generator Warning/ind icator lights ...... .... .. 22
G lossary of tire and loading terminology .. .
268
G love compar tment . .... .... .... .... 107
A ir vent ilat ion . ........ .... ....... 108
Gross Vehicle Weight Rating {GVWR) ... 313
H
Head restraints .. .... ...... ... ...... 151
Adjusting .......... .......... 95, 151
Rear seats ... , .. , ...... , ........ , 101
Headlight range c ontr ol
Defective ... .. ... .... .... .... .... . 34
Headlights ...... ... .... .... .... .... . 76
adaptive ligh t .... ... .... .... ..... . 79
De fective ... .. ... .... .... .... .... . 35
Fr ont fog light s ...... .... .... .... . 79
Swi tching off .... .... .... .... .... . 76
Switching on .... .... .... .... .... . 76
Washer system .... ........ ........ 86
Headrest
See Head restrain ts . ...... .... .... . 95
Heated rear seats ....... ....... ... .... .. 117
Heated outside mirrors .... .... ....... . 89
Heated seats rear ... .. .... ...... ... .. .... .... 1 17 Heated washer jets
Wiper and washer system ... .... ... . 85
Heavy cl othing and safety belts .. ...... 162
High beam ....................... 76, 83
Warning/ind icator lights ............ 22
High vo ltage warning label ........... 312
Home link® ...... .... ... .... .... ... 1 39
Homelink® universal remote control .. . 139
Hood Release lever ... ........ ... ..... .. 249
Horn . ...... .... .... .... ... .... .... . 11
How many airbags does my vehicle have? ..
175
How often should I check my tire pressures?
275
How safety be lt p retensioners wo rk .... 166
Hydroplaning ....................... 279
I
Ignition key ............ ........ .... . 119
Ign it io n l ock
Positions ...... .... ... .... .... ... 11 9
Immob ilizer ...... ....... .... ....... . 15
Important things to do before driving .. 146
Imp roperly w orn safety be lts .. ....... . 166
Indicator light
Airbag system ............... 179, 180
PASSENGER A IR BAG OFF .......... 180
Indicator lights ... .... .... ..... .. .... . 18
Vehicle operation Vehicle care Do-it-yourself service Technical data
Page 332 of 340
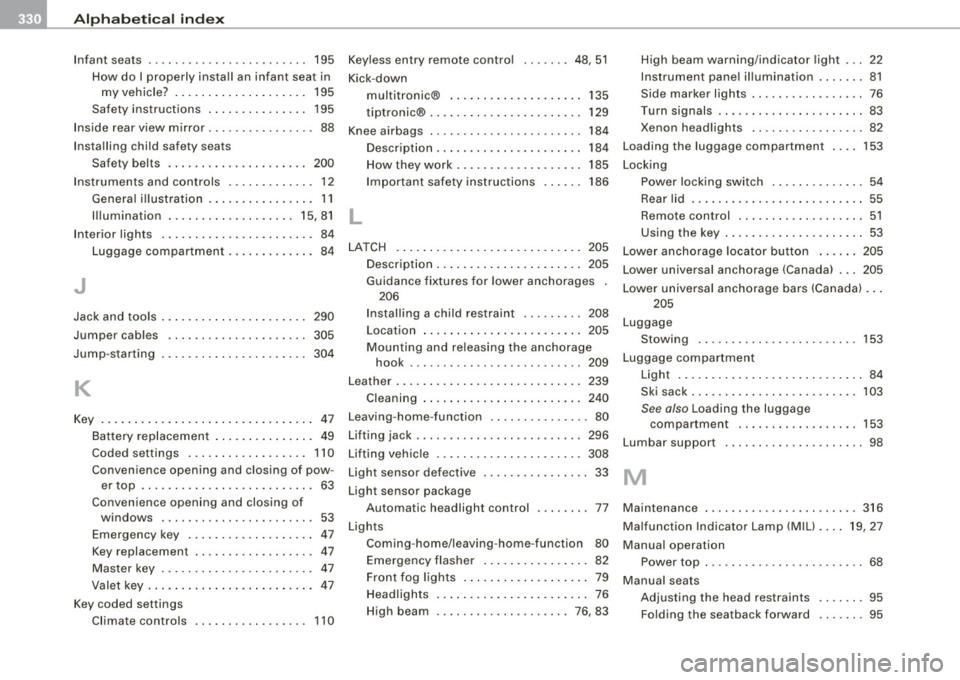
___ A---=- lp_h_ a_b_ e_ t _i_ c _ a_ l_ in_ d_ e_x ______________________________________________ _
Infant seats . . . . . . . . . . . . . . . . . . . . . . . . 195
How do I properly ins tall an infant seat in
my vehicle? ...... .... .... .... .. 195
Safety instructions . . . . . . . . . . . . . . . 195
Inside rear view mirror ..... .. .... .... . 88
Installing child safety seats
Sa fet y bel ts . . . . . . . . . . . . . . . . . . . . . 200
Instruments and controls ............. 12
Genera l ill ustration .... ... .... .... . 11
Illumination ...... ... . ......... 15, 81
Interior lights . ...... ... ........ .... . 84
Luggage compartment .. ...... ... .. 84
J
Jack and tools . . . . . . . . . . . . . . . . . . . . . . 290
Jumpe r cables . . . . . . . . . . . . . . . . . . . . . 305
Jump -starting 304
K
Key ...... ... .... .... .... .... ....... 47
Battery replacement . . . . . . . . . . . . . . . 49
Coded sett ings . . . . . . . . . . . . . . . . . . 110
Conveni ence op ening and closing of pow -
er top . ... .. .... .... .... ........ 63
Convenience opening and closing of w indows ....... ........ .... ... . 53
Emergency key . . . . . . . . . . . . . . . . . . . 47
Key replacement . . . . . . . . . . . . . . . . . . 47
Master key . . . . . . . . . . . . . . . . . . . . . . . 47
Valet key . . . . . . . . . . . . . . . . . . . . . . . . . 47
Key coded s ettings
Clima te con trols ... ...... ... . .... 110 Keyless
entry remote control
Kick -down 48, 51
multitronic® . . . . . . . . . . . . . . . . . . . . 135
tiptronic® ............. .... ... ... 129
Knee airbags . .... ..... .. .... .... ... 184
Description ... ... ... ... .... .... .. 184
How they work . . . . . . . . . . . . . . . . . . . 185
Important safety instructions 186
L
LATCH .................. .... .... .. 205
Description ... ... ... ... .... .... .. 205
Guidance fixtur es for lower anchorages .
206
Installing a child restraint .. .... ... 208
Location ... .. .... .. .. ... .. .. .... 205
Mounting and re leasing the anchorage
hook .... ... .... .. .. .. .. .. .. ... 209
Leather .. ... .. ... .. . ..... .... .... .. 239
Cleaning .............. .... .... .. 240
Leaving-home-function ...... .... .... . 80
Lifting jack .. . ... .... ... .. ...... .... 296
Lifting vehicle . .... ................. 308
Light sensor defec tive . ...... ...... ... 33
Ligh t se nsor package
Auto mat ic headligh t control ... .... . 77
Lights Coming -home /leavi ng-home -function 80
Emergency flasher .......... ...... 82
Front fog lights . ...... .... .... .... 79
Headligh ts . .... ....... .... .... ... 76
High beam .... .... .... .... .... 76 , 83 High bea
m wa rning /indicator light ... 22
Ins trumen t panel illum ination ... .... 81
Side marker lights ..... ... ........ . 76
Turn signals ... .... ... ... . ... ..... 83
Xenon headlights .. .... ... .... .... 82
Load ing the luggag e compartmen t 153
Locking Power locking switch .............. 54
Rear lid .... ... .... ............... 55
R emote control .. .. ........... .. .. 51
Using the key ...... .... ... .... .. .. 53
Lower anchorage locator button ...... 205
Lower universal anchorage (Canada) ... 205
Lower universal anchorage bars (Canada) ...
205
Luggage
Stowing 153
Luggage compartment
Light .......... ....... .. .. .... ... 84
Sk i sack . . . . . . . . . . . . . . . . . . . . . . . . . 103
S ee also Loading the luggage
c ompartment .......... . ... .... 153
Lumbar support . ........... . ... ..... 98
M
Maintenance .. ..... .. .... .... ...... 316
Malfunction Indicator Lamp (MIU .. .. 19 , 27
Manual operat ion
Power top . . . . . . . . . . . . . . . . . . . . . . . . 68
Manual s eats
Adjus ting the h ead restra ints ... .... 95
Fold ing the seatback forward ... ... . 95