jack AUDI S5 2008 8T / 1.G Owners Manual
[x] Cancel search | Manufacturer: AUDI, Model Year: 2008, Model line: S5, Model: AUDI S5 2008 8T / 1.GPages: 294, PDF Size: 12.13 MB
Page 47 of 294
Downloaded from www.Manualslib.com manuals search engine Doors and windows45
Controls
Safety
Driving tips
General maintenance
Self-help
Technical data door is unlocked. The remote control key has to be within a range of
about 1.5 metres of the relevant door or the boot lid. It does not
matter where you carry the key, for instance whether it is in your
jacket pocket or in a briefcase.
The unlocking function may be affected if the sensor area on the
door handle is touched while the vehicle is being unlocked.
The locking function may be affected if you grasp the door handle
while the vehicle is being locked.
Once the doors have been locked, they cannot be opened again
immediately. This will enable you to check that the doors are prop-
erly closed.
The system will either unlock both the doors or one door only,
depending on the settings you have chosen on the sound system or
MMI* ⇒page 43.
WARNING
Do not leave anyone (especially children) in the car if it is locked
from the outside and the deadlock mechanism is activated: the
doors and windows cannot then be opened from the inside.
Locked doors could delay assistance in an emergency, potentially
putting lives at risk.
Note
Please note the following points if the vehicle is left parked for long
periods:•
To save electrical power, the proximity sensors are switched off
after a few days. You will then need to pull the door handle once to
unlock the vehicle, and a second time to open it.
•
To prevent the battery from becoming discharged and thus
maintain the vehicle's starting ability for as long as possible, the
power management system will gradually switch off convenience
functions that are not required. In this case you may not be able to
unlock the vehicle with this convenience function.
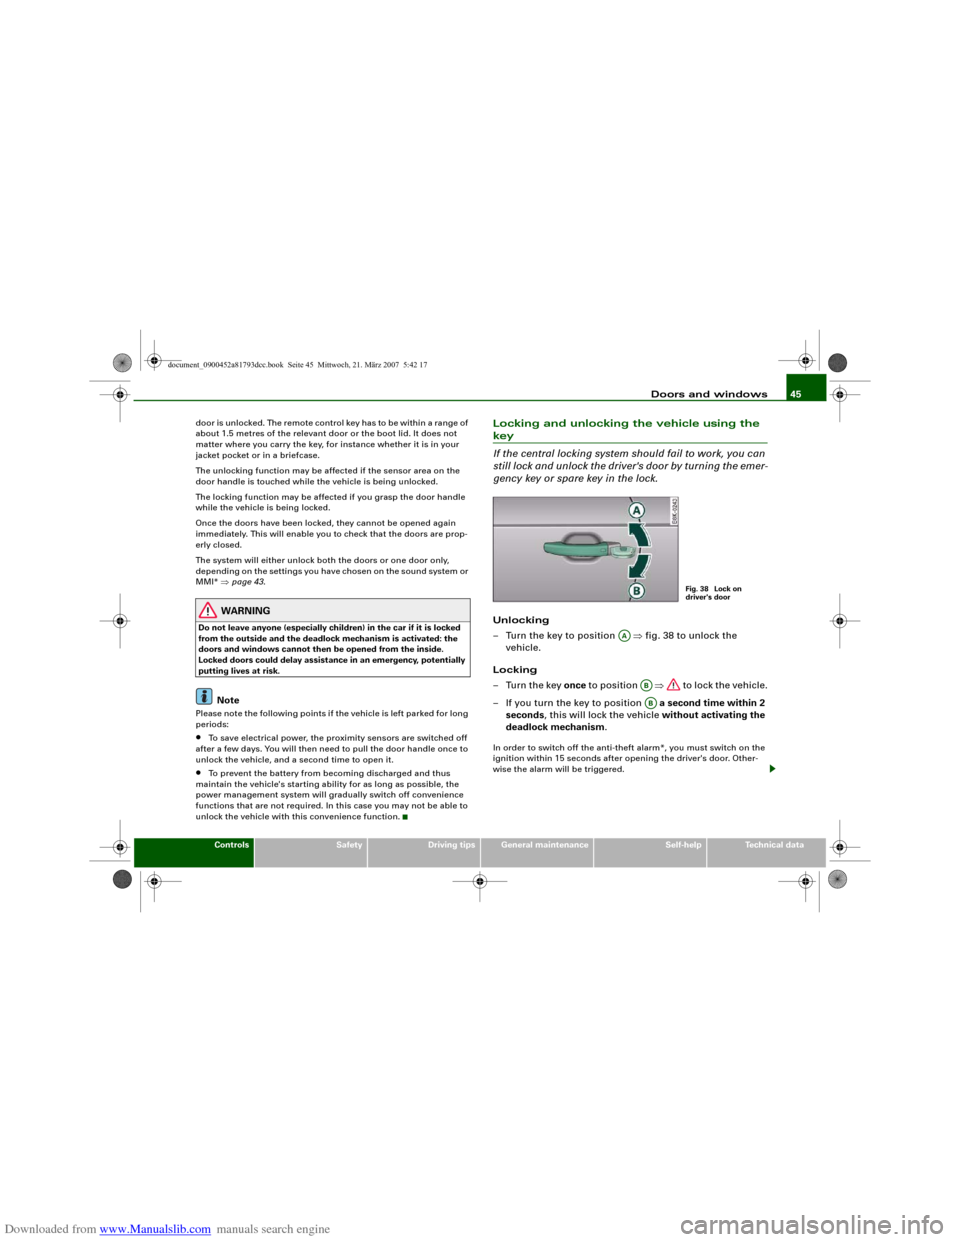
Locking and unlocking the vehicle using the key
If the central locking system should fail to work, you can
still lock and unlock the driver's door by turning the emer-
gency key or spare key in the lock.Unlocking
– Turn the key to position ⇒fig. 38 to unlock the
vehicle.
Locking
–Turn the key once to position ⇒ to lock the vehicle.
– If you turn the key to position a second time within 2
seconds, this will lock the vehicle without activating the
deadlock mechanism.In order to switch off the anti-theft alarm*, you must switch on the
ignition within 15 seconds after opening the driver's door. Other-
wise the alarm will be triggered.
Fig. 38 Lock on
driver's door
AA
ABAB
document_0900452a81793dcc.book Seite 45 Mittwoch, 21. März 2007 5:42 17
Page 163 of 294
Downloaded from www.Manualslib.com manuals search engine Seat belts161
Controls
Safety
Driving tips
General maintenance
Self-help
Technical data
Important safety instructions for using seat belts
There are a number of safety points concerning the seat
belts which you should remember. This will help to reduce
the risk of injury in an accident.
WARNING
•
The seat belts can only provide maximum protection if the
seats are adjusted properly ⇒page 70, “Seats and storage”.
•
To ensure proper protection, it is important to wear the seat
belts in the correct position ⇒page 163, “How to wear seat belts
properly”. Ensure that the seat belts are worn exactly as recom-
mended in this chapter. Belts which are not worn properly can
increase the risk of injury in accidents considerably.
•
Do not allow the seat belt to become twisted or jammed, or to
rub on any sharp edges.
•
Never allow two passengers (even children) to share the same
seat belt. It is especially dangerous to place a seat belt over a child
sitting on your lap.
•
Do not wear the belt over hard or fragile objects (such as
glasses or pens, etc.) because this can cause injuries.
•
Loose, bulky clothing (such as an overcoat over a jacket)
impairs the proper fit and function of the belts.
•
The belts must be kept clean, otherwise the retractors may not
work properly ⇒page 216, “Seat belts”.
•
The slot in the seat belt buckle must not be blocked with paper
or other objects, as this can prevent the latch plate from engaging
properly.
•
The latch plate of the belt must always be engaged in the
correct buckle for that seat, otherwise the belt will not be fully
effective.
•
Check the condition of the seat belts at regular intervals. If you
notice that the belt webbing, fittings, retractor mechanism or buckle of any of the belts is damaged, the belt must be replaced
by a qualified workshop.
•
The seat belts must not be removed or modified in any way. Do
not attempt to repair a damaged belt yourself.
•
Seat belts which have been worn in an accident and stretched
must be replaced by a qualified workshop. The belt anchorages
should also be checked.
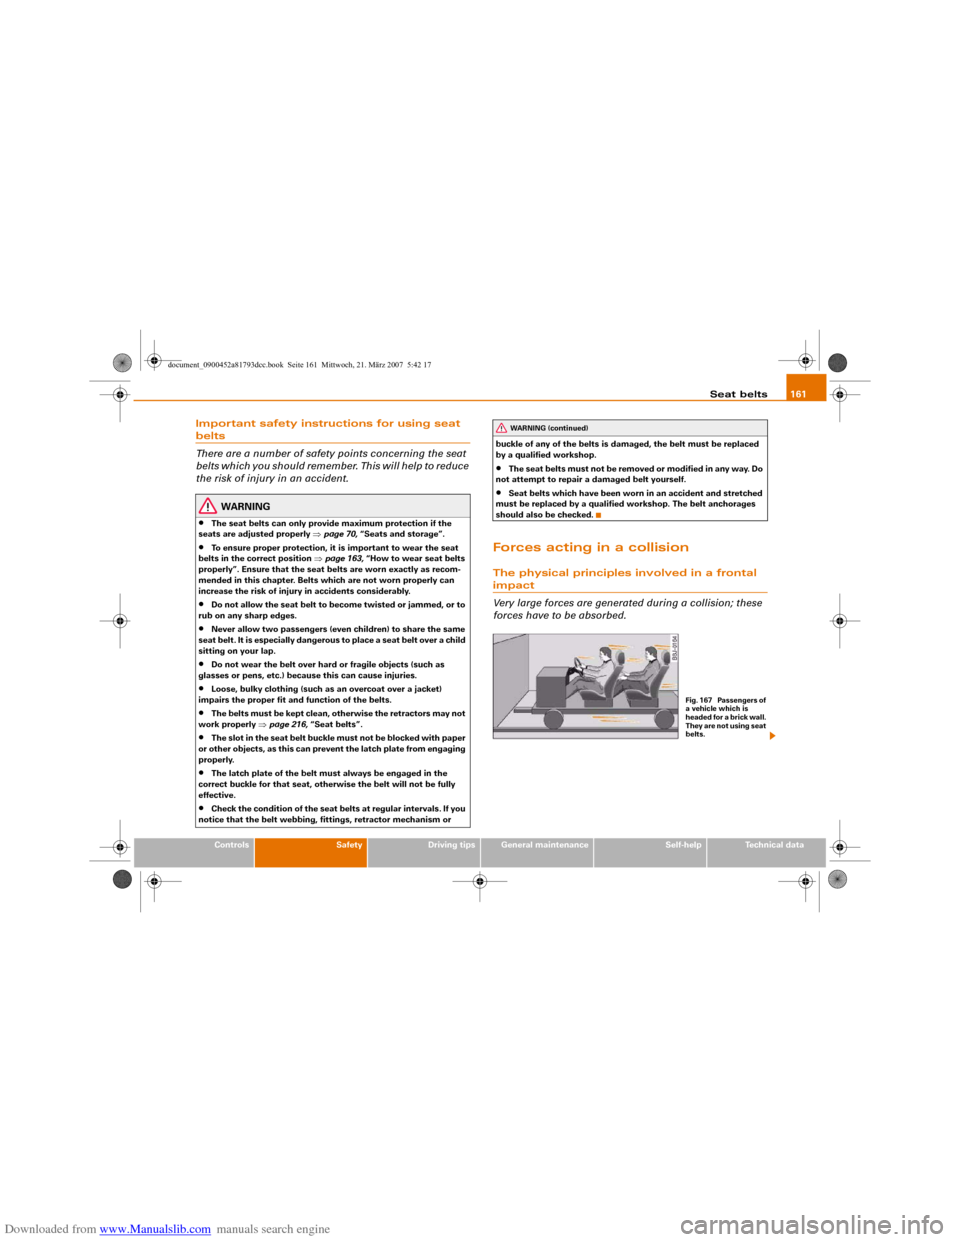
Forces acting in a collisionThe physical principles involved in a frontal impact
Very large forces are generated during a collision; these
forces have to be absorbed.
WARNING (continued)
Fig. 167 Passengers of
a vehicle which is
headed for a brick wall.
They are not using seat
belts.
document_0900452a81793dcc.book Seite 161 Mittwoch, 21. März 2007 5:42 17
Page 201 of 294
Downloaded from www.Manualslib.com manuals search engine Towing a trailer199
Controls
Safety
Driving tips
General maintenance
Self-help
Technical data additional mirrors fitted. Both exterior mirrors should be mounted
on hinged extension brackets. Adjust the mirrors to give sufficient
vision to the rear.
Power supply
When you remove the ignition key the power supply to the trailer is
interrupted.
Removable ball joint coupling
Vehicles with a factory-fitted towing bracket are equipped with a
removable ball joint coupling. It is carried under the floor panel on
the left-hand side of the luggage compartment.
Note
We recommend having the car serviced between the normal inspec-
tion intervals if it used frequently for towing a trailer.Applies to vehicles: with towing bracketTrailer stabilisation system
Trailer stabilisation helps to reduce the risk of the vehicle
skidding when towing a trailer.When is the trailer stabilisation system activated?
Trailer stabilisation is active when the following requirements are
met:•
The ESP must NOT be switched off ⇒page 186,
•
The trailer connector must be properly secured in the vehicle
socket.
•
Vehicle speed must be higher than approx. 60 km/h.
How trailer stabilisation works:
In many cases, the driver can stabilise a swaying trailer by manually
braking the vehicle.However, if the ESP detects that the trailer is swaying and this is
affecting the towing vehicle, it will automatically brake the vehicle
to stabilise the trailer by slowing it down. The warning lamp
will
light up in the instrument cluster. If possible, do not turn the
steering wheel at this stage.
In order to warn traffic behind you, the brake lights will come on
during this automatic braking operation.
A trailer weighing less than 70% of the kerb weight of the towing
vehicle may sway quite considerably without the trailer stabilisation
system intervening. This can happen when the swaying movements
of the light-weight trailer are not or hardly passed on to the towing
vehicle and are therefore not detected by the ESP.
If the system for activating the trailer brake lights is defective, this
will be indicated in the instrument cluster display ⇒page 36, “Bulb
monitor ”.
Requirements for correct functioning of the trailer
stabilisation system
If these conditions are not met in full, the trailer stabilisation system
will only intervene to a limited extent or not at all ⇒.
•
The electrical connection between the towing vehicle and the
trailer must be functioning correctly, without any defects.
•
The load on the trailer must be properly secured.
•
The tyre pressures on both the vehicle and the trailer must be
adapted to the load that is being carried.
•
Where possible, operate the trailer with the maximum permitted
draw bar weight.
•
The trailer overrun brake must be set correctly. This is important
to ensure that the trailer can be braked correctly, to avoid the vehicle
and trailer “jack-knifing” and to prevent excess braking of the trailer.
•
In low outside temperatures, both the towing vehicle and the
trailer should be fitted with winter tyres.
document_0900452a81793dcc.book Seite 199 Mittwoch, 21. März 2007 5:42 17
Page 202 of 294
Downloaded from www.Manualslib.com manuals search engine Towing a trailer 200
WARNING
It is essential that you adjust your speed to suit the weather, road
and traffic conditions. Do not let the trailer stabilisation system
tempt you into taking any risks when driving – this can cause acci-
dents.•
The ESP and trailer stabilisation system cannot defy the laws
of physics. This should be kept in mind, particularly on slippery
and wet roads and when towing a trailer with a light load.
•
The trailer stabilisation system is functional, regardless of
whether the trailer has a mechanical overrun brake or not.
•
The trailer stabilisation system is not always able to detect
swaying of trailers with a light load and will therefore not inter-
vene.
•
A trailer can still “jack-knife” on slippery roads with little grip,
even if the towing vehicle is equipped with the trailer stabilisation
system.
•
Trailers with a high centre of gravity may even tip over before
they start to sway sideways.
•
If you are not towing a trailer, but the trailer socket is being
used (e.g. for an illuminated bicycle rack), the trailer stabilisation
system may be activated in extreme driving conditions.
•
Please note the additional information and warnings
⇒page 200.
Notes on towing
Driving with a trailer always requires extra care.Weight distribution
Try to avoid towing a loaded trailer with an unladen vehicle. If this
cannot be avoided, drive extra slowly to allow for the unbalanced
weight distribution.Speed
The stability of the car and trailer is reduced with increasing speed.
For this reason it is advisable not to drive at the maximum permis-
sible top speed in unfavourable road, weather or wind conditions.
This applies especially on a downhill gradient.
You should always reduce speed immediately if the trailer shows
the slightest sign of swaying. Never try to stop the swaying by accel-
erating further.
Always brake in good time. If the trailer has an overrun brake, apply
the brakes gently at first and then firmly. This will prevent the jerking
that can be caused by the trailer wheels locking. Change down in
good time before going down a steep hill so that you can use the
engine braking effect to slow down the vehicle.
Swaying and pitching can be reduced by stabiliser aids. We recom-
mend having stabiliser aids installed when towing trailers with a
high trailer weight. They can be purchased and installed at an Audi
dealer.
Overheating
When climbing long hills in hot weather with the engine running
fast in low gear, you should keep an eye on the coolant temperature
gauge ⇒page 11. Reduce speed immediately if the needle moves to
the top end of the scale. If the temperature warning lamp
in the
instrument cluster should start flashing, stop the car and let the
engine cool down by running it at idling speed for a few minutes.
document_0900452a81793dcc.book Seite 200 Mittwoch, 21. März 2007 5:42 17
Page 247 of 294
Downloaded from www.Manualslib.com manuals search engine Self-help245
Controls
Safety
Driving tips
General maintenance
Self-help
Technical data
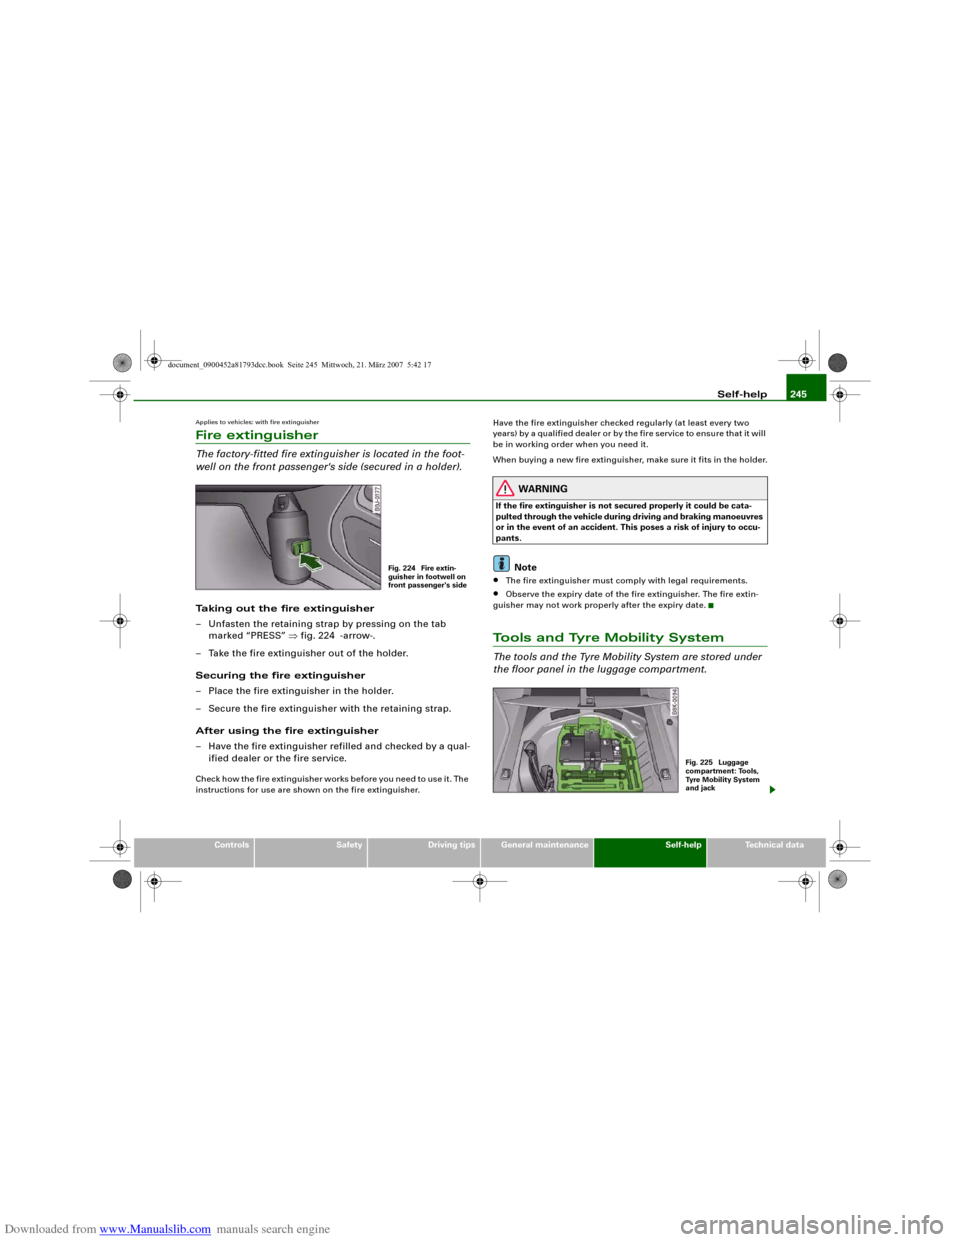
Applies to vehicles: with fire extinguisherFire extinguisherThe factory-fitted fire extinguisher is located in the foot-
well on the front passenger's side (secured in a holder).Taking out the fire extinguisher
– Unfasten the retaining strap by pressing on the tab
marked “PRESS” ⇒fig. 224 -arrow-.
– Take the fire extinguisher out of the holder.
Securing the fire extinguisher
– Place the fire extinguisher in the holder.
– Secure the fire extinguisher with the retaining strap.
After using the fire extinguisher
– Have the fire extinguisher refilled and checked by a qual-
ified dealer or the fire service.Check how the fire extinguisher works before you need to use it. The
instructions for use are shown on the fire extinguisher.Have the fire extinguisher checked regularly (at least every two
years) by a qualified dealer or by the fire service to ensure that it will
be in working order when you need it.
When buying a new fire extinguisher, make sure it fits in the holder.
WARNING
If the fire extinguisher is not secured properly it could be cata-
pulted through the vehicle during driving and braking manoeuvres
or in the event of an accident. This poses a risk of injury to occu-
pants.
Note
•
The fire extinguisher must comply with legal requirements.
•
Observe the expiry date of the fire extinguisher. The fire extin-
guisher may not work properly after the expiry date.
Tools and Tyre Mobility SystemThe tools and the Tyre Mobility System are stored under
the floor panel in the luggage compartment.
Fig. 224 Fire extin-
guisher in footwell on
front passenger's side
Fig. 225 Luggage
compartment: Tools,
Tyre Mobility System
and jack
document_0900452a81793dcc.book Seite 245 Mittwoch, 21. März 2007 5:42 17
Page 248 of 294
Downloaded from www.Manualslib.com manuals search engine Self-help 246If you need the tools, the Tyre Mobility System or the jack*, you will
have to open the floor panel and take out the spare wheel*
⇒page 246.
The tool kit includes:•
A hook for removing hub caps
•
Pin for mounting a wheel
•
Screwdriver with reversible blade
•
Tool for changing bulbs
•
Interchangeable socket (Torx socket for changing bulbs)
•
Crank handle for jack
•
Adapter for anti-theft wheel bolts*
•
Jack*
•
Box spanner for wheel bolts
•
Towline anchorage
Some of the parts listed are only fitted on certain models or are
optional extras.
Before stowing the jack* again, wind down the arm of the jack as far
as it will go.
WARNING
•
Do not use the hexagonal socket in the screwdriver handle to
tighten the wheel bolts. It is not possible to tighten the bolts with
the required torque – risk of accident.
•
The jack supplied by the factory is only designed for changing
wheels on this model. On no account attempt to use it for lifting
heavier vehicles or other loads – risk of injury.
•
Never start the engine when the vehicle is on the jack - risk of
accident.
•
If work has to be done under the veh i cl e , e n su re t h a t i t is sa fe l y
supported on stands designed for the purpose, otherwise there is
a risk of injury.
Applies to vehicles: with compact temporary spare wheelCompact temporary spare wheel*The spare wheel is carried in the wheel well under the
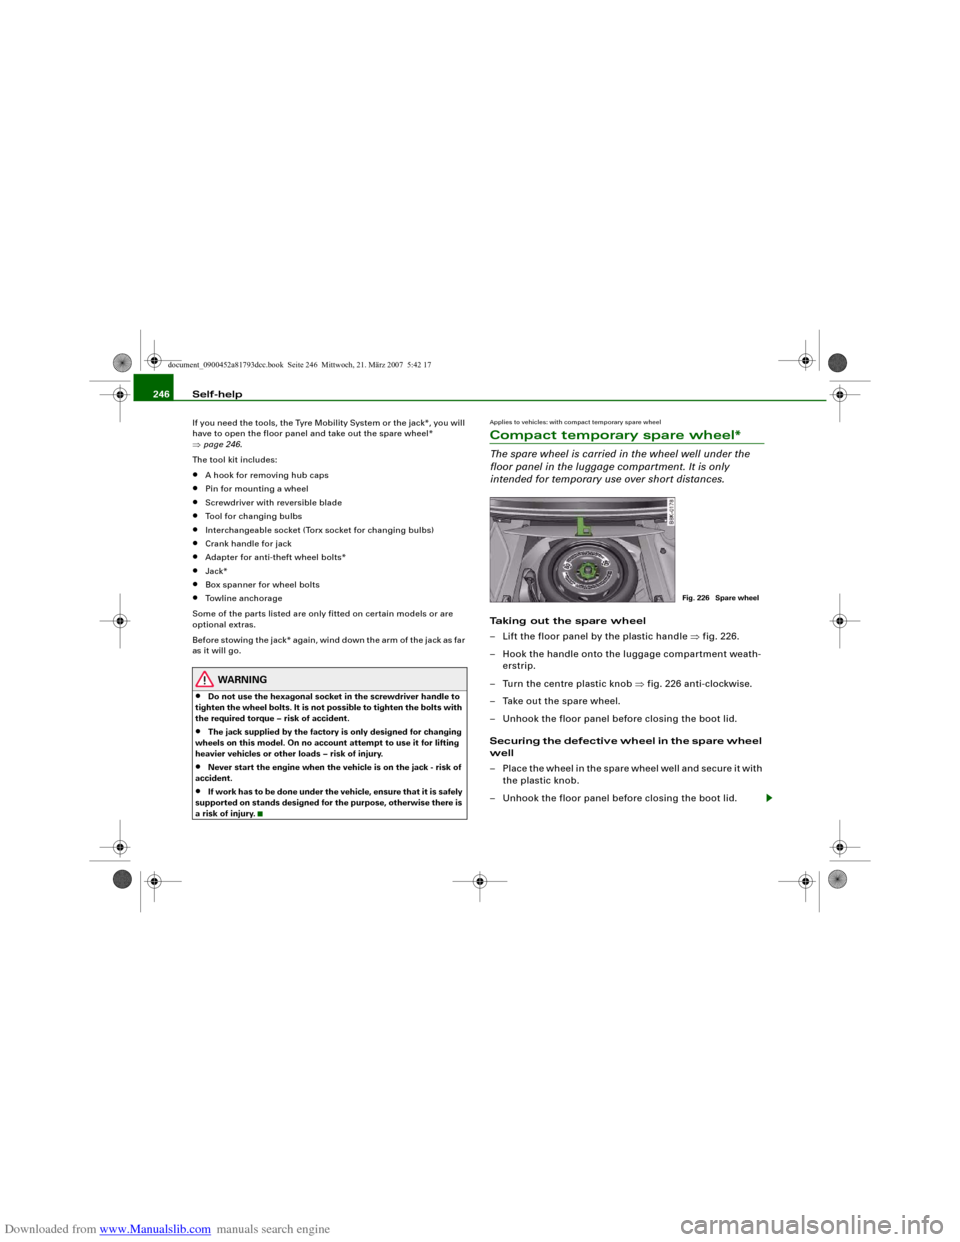
floor panel in the luggage compartment. It is only
intended for temporary use over short distances.Taking out the spare wheel
– Lift the floor panel by the plastic handle ⇒fig. 226.
– Hook the handle onto the luggage compartment weath-
erstrip.
– Turn the centre plastic knob ⇒fig. 226 anti-clockwise.
– Take out the spare wheel.
– Unhook the floor panel before closing the boot lid.
Securing the defective wheel in the spare wheel
well
– Place the wheel in the spare wheel well and secure it with
the plastic knob.
– Unhook the floor panel before closing the boot lid.
Fig. 226 Spare wheel
document_0900452a81793dcc.book Seite 246 Mittwoch, 21. März 2007 5:42 17
Page 252 of 294
Downloaded from www.Manualslib.com manuals search engine Self-help 250
CautionTake special care if you have to repair a tyre on a gradient.
Note
•
Do not use the compressor for longer than 6 minutes at a time,
as it could overheat. When the compressor has cooled down, you
can use it again.
•
If tyre sealant should leak out, leave it to dry and then pull it off
like foil.
•
After carrying out a tyre repair remember to buy a new tyre
sealant can at a qualified workshop. This will ensure that the Tyre
Mobility System is operative again.
•
Please observe the relevant regulations.
Changing a wheelPreparations
Some preparations are necessary before changing a
wheel.– If you have a flat tyre, stop the car well away from moving
traffic. Choose a location that is as level as possible.
– All passengers should leave the car. They should wait in
a safe place (for instance behind the roadside crash
barrier).
– Apply the parking brake to stop the vehicle moving acci-
dentally.
–Engage first gear (manual gearbox) or move selector
lever to position P (automatic gearbox).– When towing a trailer: unhitch the trailer from your
vehicle.
– Take the tools ⇒page 245 and the spare wheel*
⇒page 246 out of the luggage compartment.
WARNING
If you have a puncture in moving traffic, switch on the hazard
warning lights and place the warning triangle in a visible location.
This is for your own safety and also warns other road users.
Caution
If you have to change the tyre on a gradient, block the wheel oppo-
site the wheel being changed by placing a stone or similar object
under it to prevent the vehicle from rolling away.
Note
Please observe the relevant regulations.How to change a wheel
Change the wheel as described below.–Pull off the hub cap. Also refer to ⇒page 251, “Hub
caps”.
–Loosen the wheel bolts ⇒page 251.
–Raise the car with the jack* ⇒page 252.
–Ta k e o f f the wheel with the flat tyre and then put on the
spare wheel* ⇒page 253.
–Lower the vehicle to the ground.
document_0900452a81793dcc.book Seite 250 Mittwoch, 21. März 2007 5:42 17
Page 253 of 294
Downloaded from www.Manualslib.com manuals search engine Self-help251
Controls
Safety
Driving tips
General maintenance
Self-help
Technical data
– Tighten the wheel bolts firmly i n d i a g o n a l s e qu e n c e w i t h
the box spanner ⇒page 251.
–Fit the hub cap back on.After changing a wheel
What you must do after changing a wheel.– Place the wheel with the defective tyre in the spare wheel
well and secure it.
– Put the tools and the jack* back in the luggage compart-
ment.
–The inflation pressure of the newly fitted spare tyre must
be checked as soon as possible.
–Have the tightening torque of the wheel bolts checked as
soon as possible with a torque wrench. The correct tight-
ening torque is 120 Nm.
– Have the flat tyre replaced as quickly as possible.
Note•
If you notice that the wheel bolts are corroded and difficult to
turn when changing a wheel, they must be replaced before having
the tightening torque checked.
•
In the interest of safety, drive at moderate speeds until the tight-
ening torque of the wheel bolts has been checked.
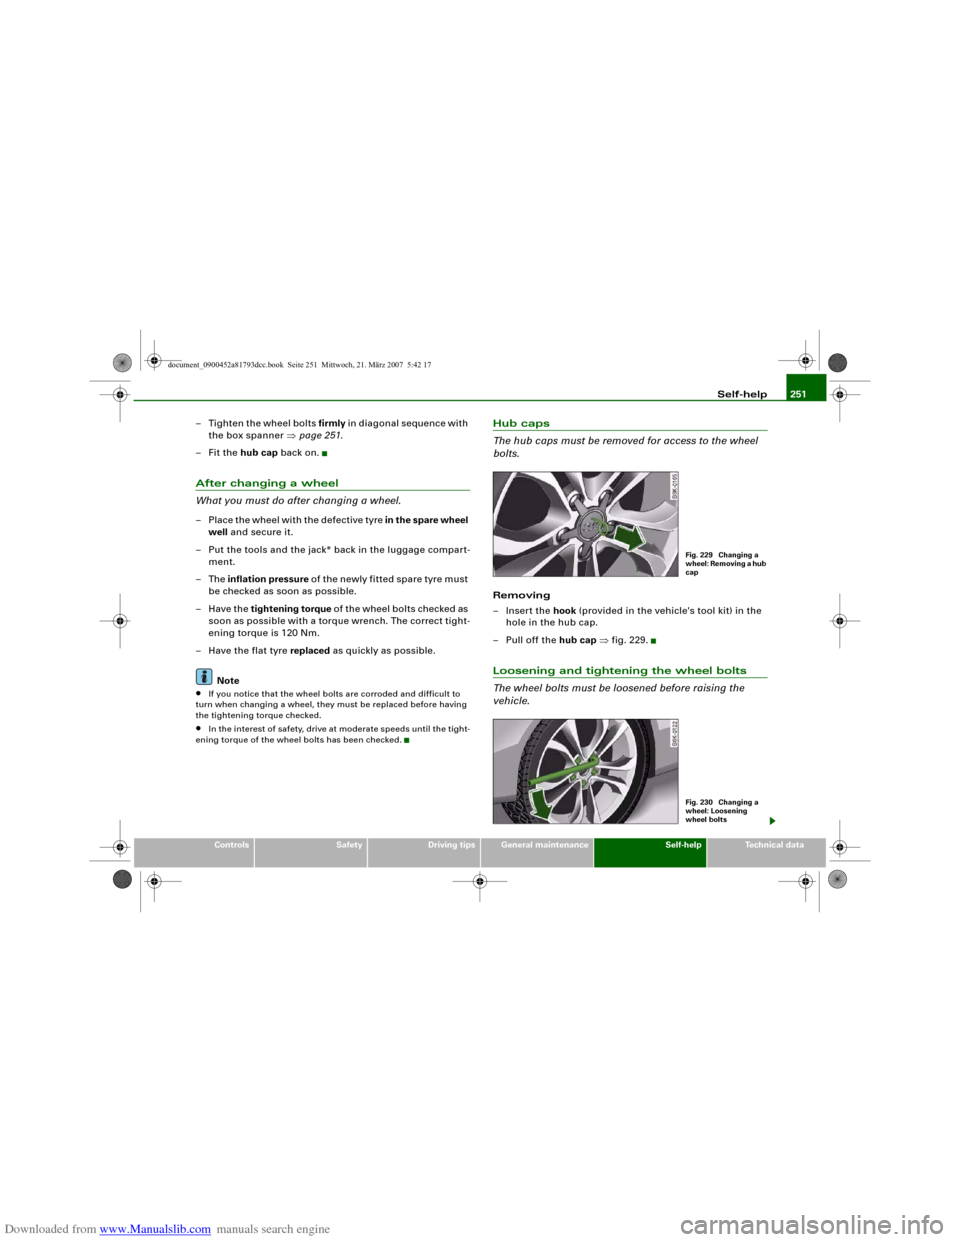
Hub caps
The hub caps must be removed for access to the wheel
bolts.Removing
– Insert the hook (provided in the vehicle's tool kit) in the
hole in the hub cap.
–Pull off the hub cap ⇒fig. 229.Loosening and tightening the wheel bolts
The wheel bolts must be loosened before raising the
vehicle.
Fig. 229 Changing a
wheel: Removing a hub
capFig. 230 Changing a
wheel: Loosening
wheel bolts
document_0900452a81793dcc.book Seite 251 Mittwoch, 21. März 2007 5:42 17
Page 254 of 294
Downloaded from www.Manualslib.com manuals search engine Self-help 252
Loosening
–Fit the box spanner as far as it will go over the wheel
bolt
7).
– Grip the box spanner as close to the end as possible and
turn the wheel bolts about one turn anti-clockwise
⇒page 251, fig. 230 -arrow-.
Tightening
– Fit the box spanner as far as it will go over the wheel
bolt7).
– Grip the box spanner as close to the end as possible and
tighten the bolt firmly by turning clockwise.
WARNING
To avoid accidents, the wheel bolts should only be loosened
slightly (about one turn) before raising the vehicle with the jack*.
Note
•
Do not use the hexagonal socket in the screwdriver handle to
loosen or tighten the wheel bolts.
•
If the wheel bolt is very tight, it may be possible to loosen it by
pushing down the end of the spanner carefully with your foot. Hold
on to the car for support and take care not to slip.
Raising the vehicle
The vehicle must be raised with the jack* to remove the
wheel.Each jacking point is marked by a recess underneath the
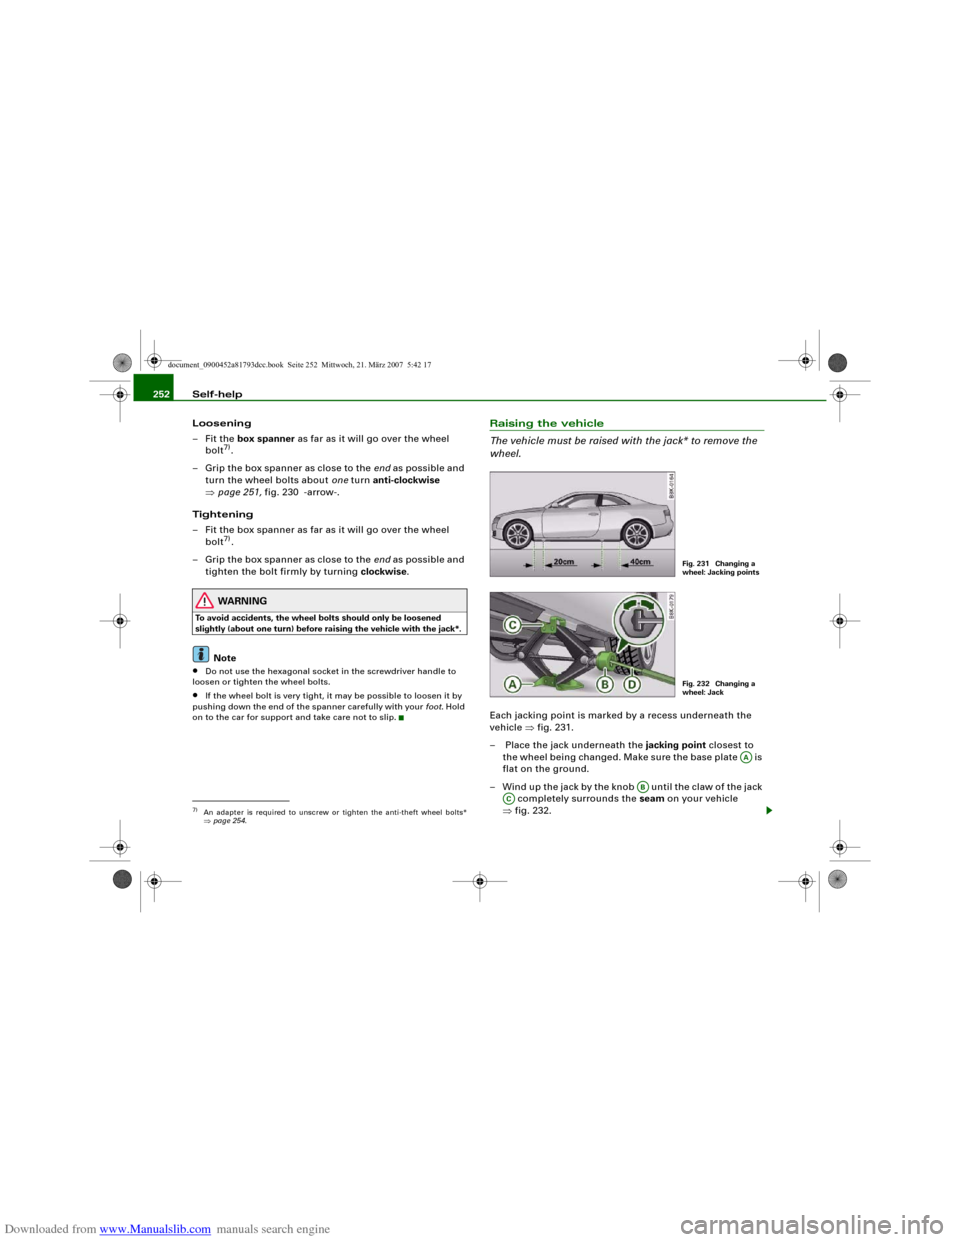
vehicle ⇒fig. 231.
– Place the jack underneath the jacking point closest to
the wheel being changed. Make sure the base plate is
flat on the ground.
– Wind up the jack by the knob until the claw of the jack
completely surrounds the seam on your vehicle
⇒fig. 232.
7)An adapter is required to unscrew or tighten the anti-theft wheel bolts*
⇒page 254.
Fig. 231 Changing a
wheel: Jacking pointsFig. 232 Changing a
wheel: Jack
AA
AB
AC
document_0900452a81793dcc.book Seite 252 Mittwoch, 21. März 2007 5:42 17
Page 255 of 294
Downloaded from www.Manualslib.com manuals search engine Self-help253
Controls
Safety
Driving tips
General maintenance
Self-help
Technical data
– Now fit the crank handle onto the jack by inserting it
in the opening on the knob ⇒page 252, fig. 232. Turn the
crank handle clockwise or anti-clockwise to secure it in
place.
– Raise the vehicle by winding the crank handle until the
defective wheel is clear of the ground.Recesses at the front and rear of the door sills mark the jacking
points ⇒page 252, fig. 231. There is one jacking point for each
wheel. The distance from the jacking points to the wheel arches is
approximately 20 cm at the front and 40 cm at the rear. The jack may
only be applied at the seam of the jacking points shown.
An unstable surface under the jack may cause the vehicle to slip off
the jack. Always provide a firm base for the jack on the ground. If
necessary use a large, strong board or similar support. On a hard,
slippery surface (such as tiles) use a rubber mat or similar to prevent
the jack from slipping.
WARNING
•
Prevent the base of the jack from slipping – risk of injury.
•
The car can be damaged if the jack is not applied at the correct
jacking points. There is also a risk of injury since the jack can slip
off suddenly if it is not properly engaged.
Taking off the wheel and putting on the spare wheel
Step-by-step instructions for taking off the wheel and
putting on the spare wheel.Change the wheel as described below after loosening the
wheel bolts and raising the vehicle with the jack*.
Taking off the wheel
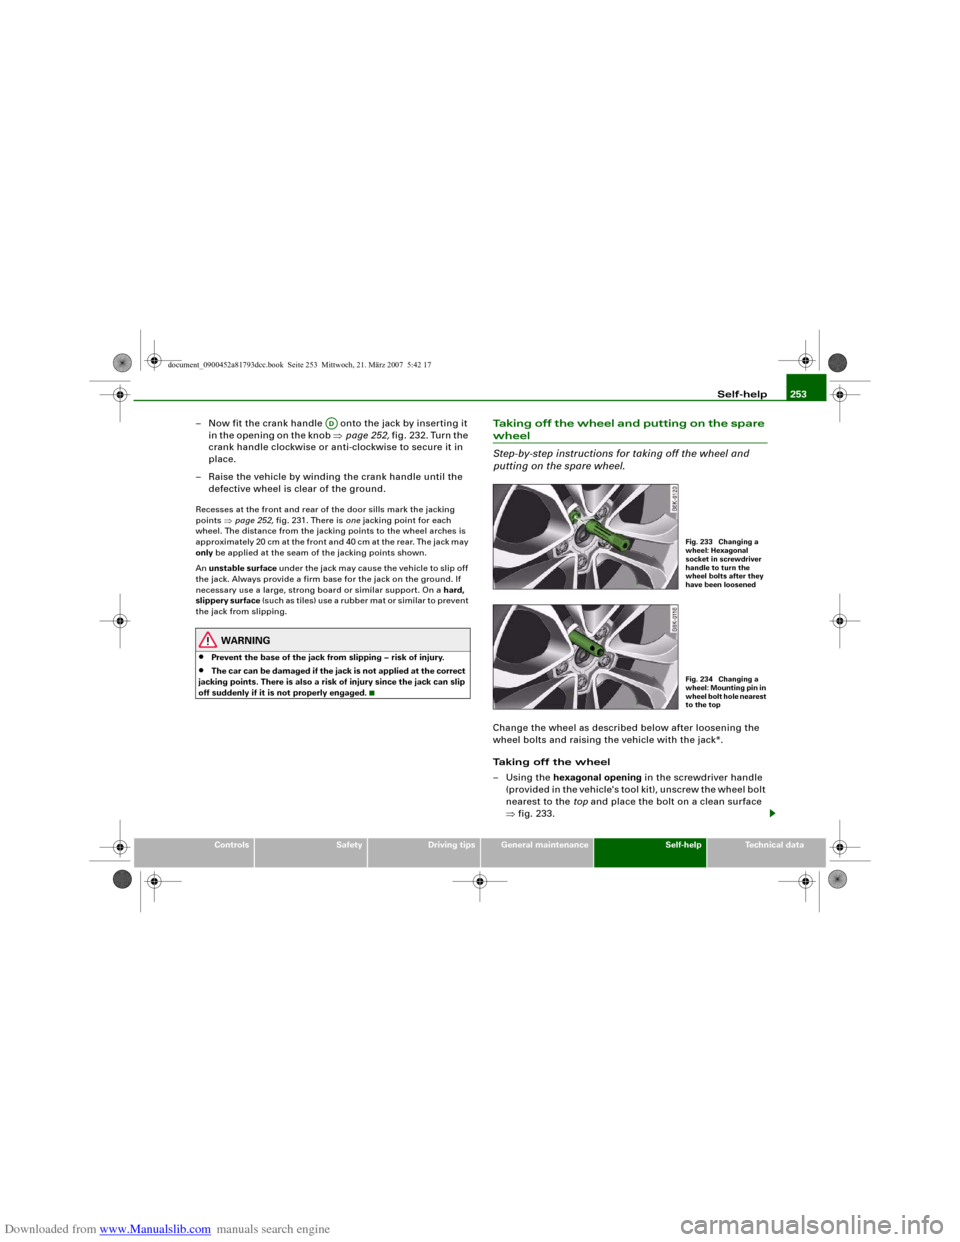
–Using the hexagonal opening in the screwdriver handle
(provided in the vehicle's tool kit), unscrew the wheel bolt
nearest to the top and place the bolt on a clean surface
⇒fig. 233.
AD
Fig. 233 Changing a
wheel: Hexagonal
socket in screwdriver
handle to turn the
wheel bolts after they
have been loosenedFig. 234 Changing a
wheel: Mounting pin in
wheel bolt hole nearest
to the top
document_0900452a81793dcc.book Seite 253 Mittwoch, 21. März 2007 5:42 17