torque AUDI S5 2008 8T / 1.G Owners Manual
[x] Cancel search | Manufacturer: AUDI, Model Year: 2008, Model line: S5, Model: AUDI S5 2008 8T / 1.GPages: 294, PDF Size: 12.13 MB
Page 178 of 294

Downloaded from www.Manualslib.com manuals search engine Child safety 176•
If children lean forward or are otherwise out of position when
the car is moving, they are at greater risk of injury in an accident.
This is particularly the case if the child is travelling on the front
passenger's seat and the airbag system is triggered in an accident.
There is then a risk of serious or potentially fatal injury.
•
To ensure proper protection, it is important to wear the seat
belts in the correct position ⇒page 163, “How to wear seat belts
properly”. Always check that the belt is properly positioned
according to the instructions provided by the manufacturer of the
child safety seat. Incorrectly worn seat belts can give rise to inju-
ries even in a minor collision.
•
Never install a rearward-facing child safety seat on the front
passenger's seat if the front passenger's airbag has not been deac-
tivated ⇒page 176.
•
Extra caution is advised if you are installing a child safety seat
using the same mounting bolts as the existing car seat belts. The
bolts must be screwed in all the way to the full depth of the
mounting holes and tightened to a torque of 50 Nm. Failure to
observe this precaution could result in potentially fatal injury. We
recommend having the installation performed by a qualified
workshop.
Using a child safety seat on the front passenger's seat
Whenever possible, child safety seats should always be
installed on the rear seat.For safety reasons, we recommend that child safety seats should be
installed on the rear seats whenever possible. However, if you have
to use a child seat on the front passenger's seat when there is no
other alternative, it is most important to note the following warn-
ings:
WARNING
•
Do not use a rearward-facing child safety seat on the front
passenger's seat unless the front passenger's airbag has been
deactivated. The child seat would be directly in the path of the
airbag as it inflates, and the child could sustain serious or fatal
injuries if the airbag were to be deployed.
•
However, if you have no alternative but to use a rearward-
facing child seat on the front passenger's seat, the front
passenger's airbag must be deactivated beforehand by means of
the key-operated switch* ⇒page 173. Failure to observe this
precaution could result in serious or potentially fatal injury.
•
Make sure that the front passenger's airbag is reactivated by
means of the key-operated switch* as soon as the child seat is no
longer needed on the front passenger's seat.
•
When using a child safety seat of the type which faces in the
direction of travel, the front passenger's seat must be moved back
to the rearmost position.
Child safety seatsChild seat categories
Only use child restraint systems that are officially
approved and suitable for the child.Child restraint systems are covered by the European standard
ECE R 44 (issued by the Economic Commission of Europe).
The child seats are divided into 5 categories:
WARNING (continued)
document_0900452a81793dcc.book Seite 176 Mittwoch, 21. März 2007 5:42 17
Page 248 of 294

Downloaded from www.Manualslib.com manuals search engine Self-help 246If you need the tools, the Tyre Mobility System or the jack*, you will
have to open the floor panel and take out the spare wheel*
⇒page 246.
The tool kit includes:•
A hook for removing hub caps
•
Pin for mounting a wheel
•
Screwdriver with reversible blade
•
Tool for changing bulbs
•
Interchangeable socket (Torx socket for changing bulbs)
•
Crank handle for jack
•
Adapter for anti-theft wheel bolts*
•
Jack*
•
Box spanner for wheel bolts
•
Towline anchorage
Some of the parts listed are only fitted on certain models or are
optional extras.
Before stowing the jack* again, wind down the arm of the jack as far
as it will go.
WARNING
•
Do not use the hexagonal socket in the screwdriver handle to
tighten the wheel bolts. It is not possible to tighten the bolts with
the required torque – risk of accident.
•
The jack supplied by the factory is only designed for changing
wheels on this model. On no account attempt to use it for lifting
heavier vehicles or other loads – risk of injury.
•
Never start the engine when the vehicle is on the jack - risk of
accident.
•
If work has to be done under the veh i cl e , e n su re t h a t i t is sa fe l y
supported on stands designed for the purpose, otherwise there is
a risk of injury.
Applies to vehicles: with compact temporary spare wheelCompact temporary spare wheel*The spare wheel is carried in the wheel well under the
floor panel in the luggage compartment. It is only
intended for temporary use over short distances.Taking out the spare wheel
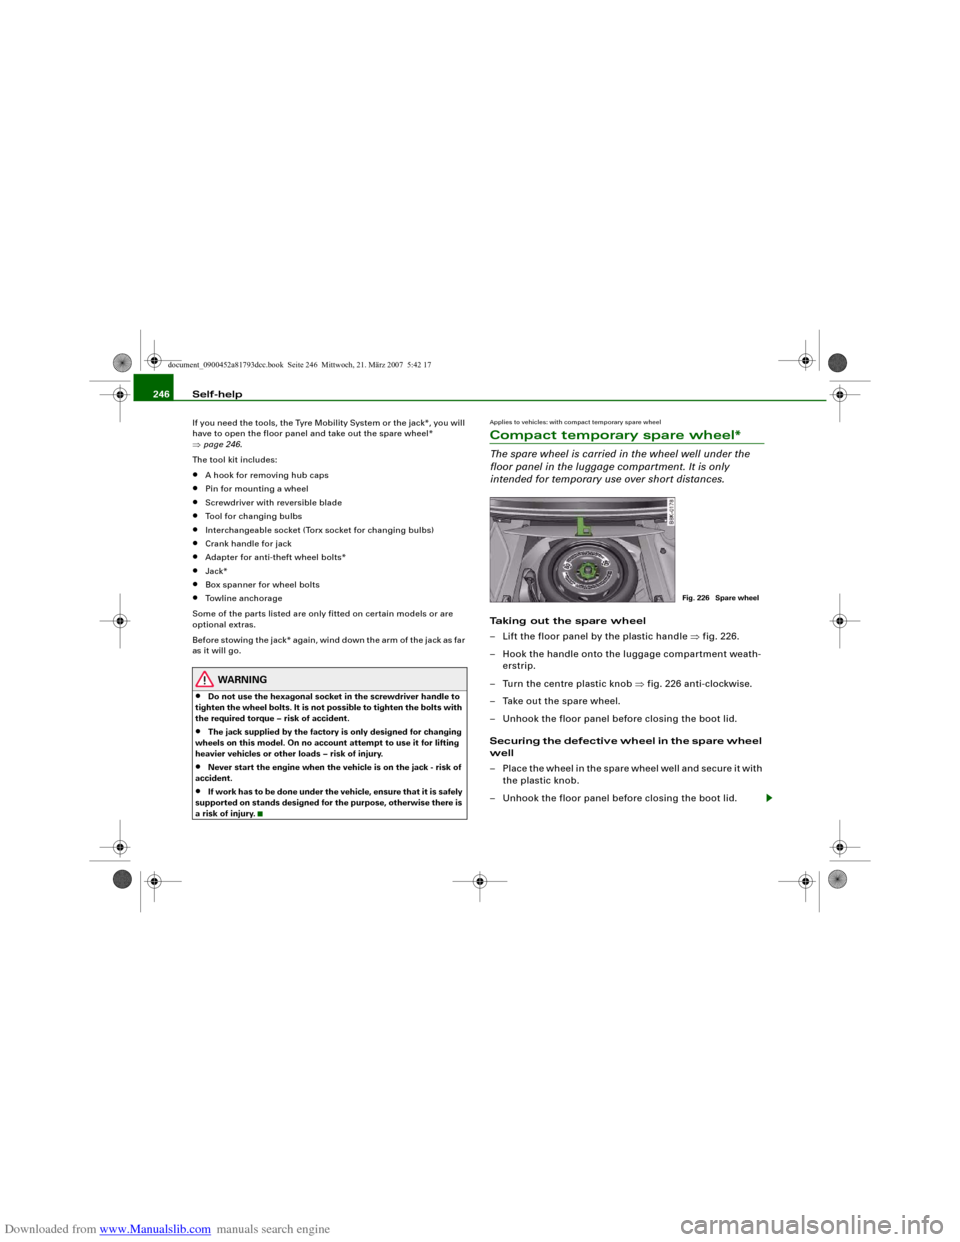
– Lift the floor panel by the plastic handle ⇒fig. 226.
– Hook the handle onto the luggage compartment weath-
erstrip.
– Turn the centre plastic knob ⇒fig. 226 anti-clockwise.
– Take out the spare wheel.
– Unhook the floor panel before closing the boot lid.
Securing the defective wheel in the spare wheel
well
– Place the wheel in the spare wheel well and secure it with
the plastic knob.
– Unhook the floor panel before closing the boot lid.
Fig. 226 Spare wheel
document_0900452a81793dcc.book Seite 246 Mittwoch, 21. März 2007 5:42 17
Page 253 of 294

Downloaded from www.Manualslib.com manuals search engine Self-help251
Controls
Safety
Driving tips
General maintenance
Self-help
Technical data
– Tighten the wheel bolts firmly i n d i a g o n a l s e qu e n c e w i t h
the box spanner ⇒page 251.
–Fit the hub cap back on.After changing a wheel
What you must do after changing a wheel.– Place the wheel with the defective tyre in the spare wheel
well and secure it.
– Put the tools and the jack* back in the luggage compart-
ment.
–The inflation pressure of the newly fitted spare tyre must
be checked as soon as possible.
–Have the tightening torque of the wheel bolts checked as
soon as possible with a torque wrench. The correct tight-
ening torque is 120 Nm.
– Have the flat tyre replaced as quickly as possible.
Note•
If you notice that the wheel bolts are corroded and difficult to
turn when changing a wheel, they must be replaced before having
the tightening torque checked.
•
In the interest of safety, drive at moderate speeds until the tight-
ening torque of the wheel bolts has been checked.
Hub caps
The hub caps must be removed for access to the wheel
bolts.Removing
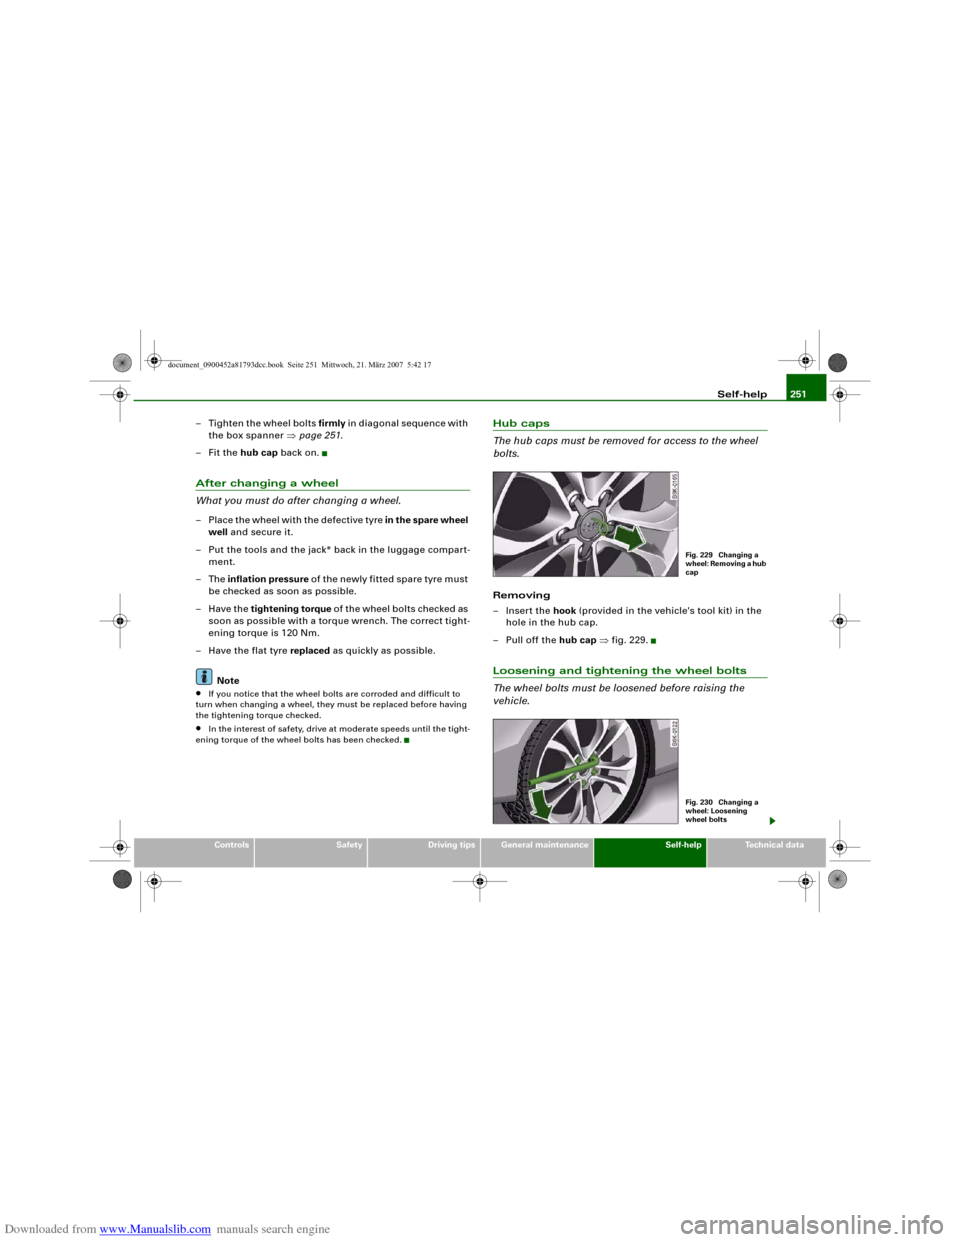
– Insert the hook (provided in the vehicle's tool kit) in the
hole in the hub cap.
–Pull off the hub cap ⇒fig. 229.Loosening and tightening the wheel bolts
The wheel bolts must be loosened before raising the
vehicle.
Fig. 229 Changing a
wheel: Removing a hub
capFig. 230 Changing a
wheel: Loosening
wheel bolts
document_0900452a81793dcc.book Seite 251 Mittwoch, 21. März 2007 5:42 17
Page 283 of 294

Downloaded from www.Manualslib.com manuals search engine Performance, weights and dimensions281
Controls
Safety
Driving tips
General maintenance
Self-help
Technical data
Performance, weights and dimensionsS5 4.2 quattroEngine data
Performance figures
WeightsMaximum trailer weights
2)
Engine oil1) With slight loss of power2) The specified trailer weights apply only to vehicles with a factory-
fitted towing bracket.
Power output
260 kW at 6800 rpm
Maximum torque
440 Nm at 3500 rpm
Cylinders, capacity
8 cylinders, 4163cm
3
Fuel
Super Plus unleaded 98 RON or
premium unleaded not less than
95 RON
1)
Maximum speed
km/h
MG = 250
Acceleration from 0 - 100 km/h
sec.
MG = 5.1
Gross vehicle weight
kg
MG = 2130
Kerb weight (unladen weight)
kg
MG = 1705
Maximum front axle weight
kg
MG = 1130
Maximum rear axle weight
kg
MG = 1090
Trailer with brakes on
gradients up to 8%
kg
MG = 2100
Trailer with brakes on
gradients up to 12%
kg
MG = 1900
Weight of vehicle and
trailer on gradients up to 12%
kg
MG = 4060
Trailer without brakes
kg
MG = 750
LongLife Service
VW 503 00, VW 504 00
Inspection Service
VW 502 00, VW 503 00, VW 504 00
Engine oil capacity
(including filter change)
approx. 8.8 litres
document_0900452a81793dcc.book Seite 281 Mittwoch, 21. März 2007 5:42 17