ignition AUDI S6 2009 Owners Manual
[x] Cancel search | Manufacturer: AUDI, Model Year: 2009, Model line: S6, Model: AUDI S6 2009Pages: 398, PDF Size: 43 MB
Page 4 of 398
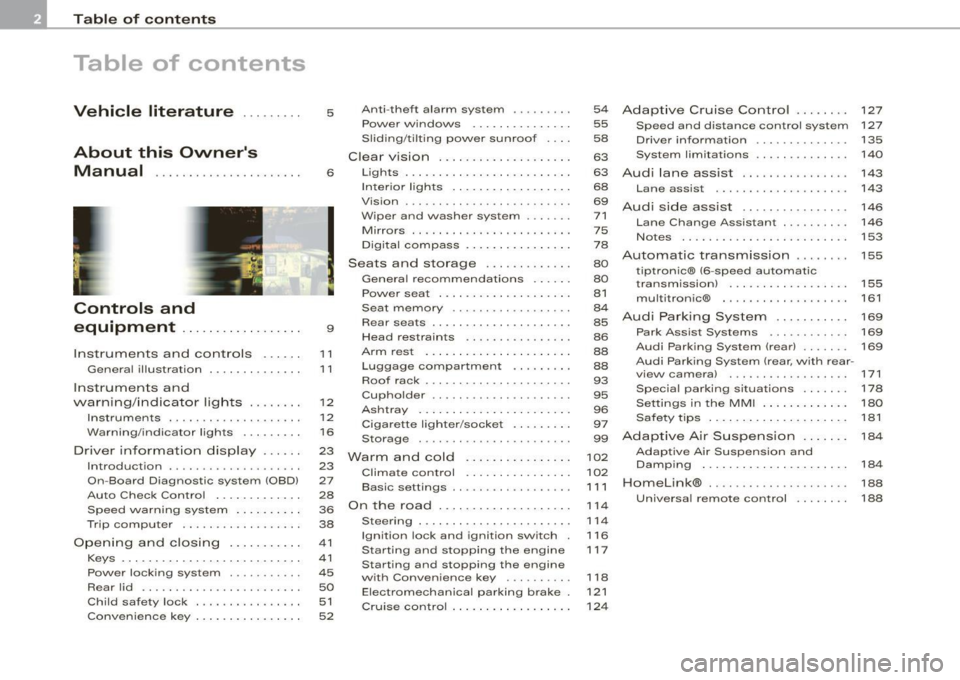
Table of contents
Table of contents
Vehicle literature ........ .
About this Owner's Manual .............. ...... . .
Controls and
equipment ............ ..... .
Instruments and controls ..... .
General il lustration ............. .
Instruments and
warning/indicator lights ....... .
Instruments .............. ..... .
Warning/indicator lights ........ .
Driver information display ..... .
Introduction ................... .
On-Board Diagnostic system (OBD)
Auto Check Control ............ .
Speed warning system ..... .. .. .
Trip computer ..... ... .. .. ... .. .
Opening and closing .......... .
Keys ... ..... .......... ... ..... .
Power locking system ..... ... .. .
Rear lid ....................... .
Child safety lock .... ......... .. . 5
6
9
11
1
1
12
12
16
23
23
27
28
36
38
41
41
45
50
51
Convenience key . . . . . . . . . . . . . . . . 52 Anti-theft
alarm system ........ .
Power windows ... ... .... .... .
S liding/ti lting power sunroof . .. .
Clear vision . .... .. .. .......... .
Lights ... ................ ... .. .
In ter ior l ights ...... ... .. .. .. .. .
Vision ... ... ......... ...... ... .
Wiper and washer system ...... .
Mirrors .................... ... .
Digital compass ............... .
Seats and storage ..... .... ... .
General recommendations ..... .
Power seat . ... ... ......... ... .
Seat m emory ...• ........ .... ..
Rear seats .......... ....... ... .
Head restraints ........ ..... .. .
Arm rest ....... ... ... ... ... •..
Luggage compartment ..... ... .
Roof rack ..... .......... ... .• ..
Cupholder .. ...... ... .. ... ..• ..
Ashtray ................... ... .
Cigarette lighter /socket ........ .
Storage ............ ....... ... .
Warm and cold ............... .
Climate control ........ .. ... .. .
Basic settings ......... •. ... ....
On the road . ... ..... .. ..... ... .
Steering .................... .. .
Ignition lock and ignition switch .
Starting and stopping the engine
Starting and stopping the engine
with Convenience key ....... .. .
Electromechanical parking brake .
Cruise control ......... ........ .
54
55
58
63
63
68
69
71
75
78
80
80
81
84
85
86
88
88
93
95
96
97
99
102
102
1 1 1
114
114
116
117
118
121 124
Adaptive Cruise Control ....... .
Speed and distance control system
Driver informa tion ....... ...... .
System limitations ............. .
Audi lane assist ............... .
Lane assist ......... ........ .. .
Audi side assist ............... .
Lane Change Assistant .. ..... .. .
Notes ....................... •.
Automatic transmission ....... .
tiptronic® (6-speed automatic
transmission) ... .... ... ... .... .
multitronic® ..........•........
Audi Parking System ......... . .
Park Assist Systems .... ... .... .
Audi Park ing System (rear) ...... .
Audi Parking System (rear, with rear-
view camera) .... .. ...... ..... .
Specia l parking situations ..... •.
Settings in the MMI ....... ..... .
Saf ety tips . ............ .... ... .
Adaptive Air Suspension ...... .
Adaptive Air Suspension and
Damping ............. ........ .
Homelink® . ................ ... .
Universal remote control ....... . 127
127
135
140
143
143
146
146
153
155
155
161
169
169
169
171
178
180
181
184
184
188
188
Page 13 of 398
Instruments and controls
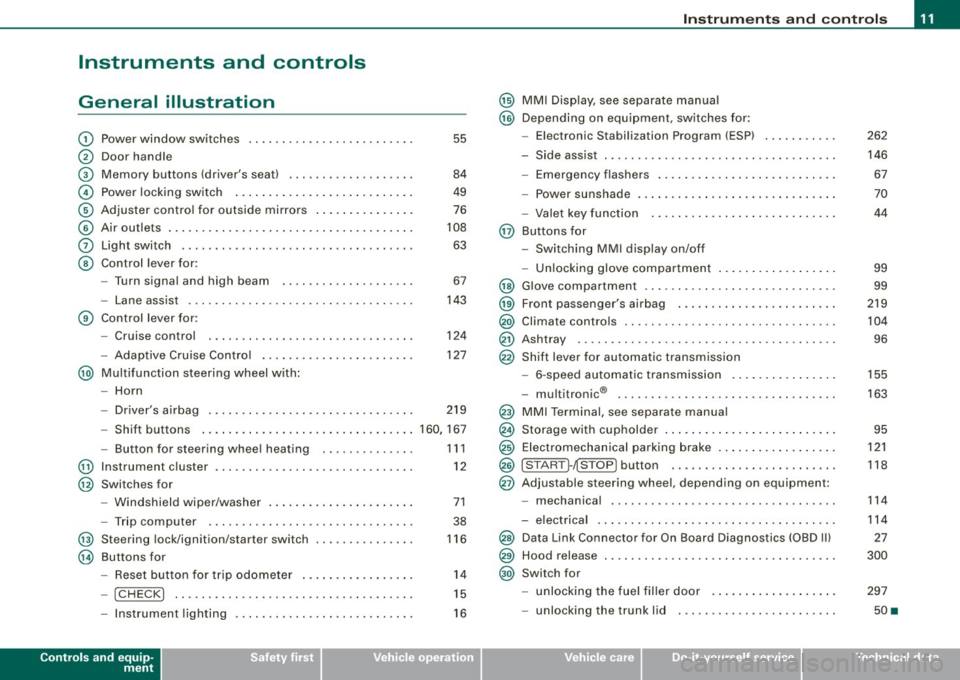
General illustration
G)
0
©
©
©
©
0
©
Power window switches ...... .... ..... .. ....... .
Door handle
Memory buttons (driver's seat)
Power locking switch .......................... .
Adjuster control for outside mirrors .. .... .... .... .
Air outlets ........ ... ...... .... ...... .... ... .. .
Light switch .... .... ........... .... .... .... ... .
Control lever for :
- Turn signal and high beam
- Lane assist .... .... ... .... .... .... .......... .
Control lever for:
- Cruise control
- Adaptive Cruise Contro l .......... ...... .... .. .
@ Multifunction steering wheel with:
- Horn
55
84
49
76
108
63
67
143
124
127
- Driver's airbag . . . . . . . . . . . . . . . . . . . . . . . . . . . . . . . 219
- Shift buttons ................................ 160, 167
@
@
@
@
-Button for steering wheel heating
Instrument cluster ... .... ... .... ...... ......... .
Switches for
- Windshield wiper/washer ..... ...... ..... .. ... .
- Trip computer ..... .. ..... ... .... ...... ... .. .
Steering lock/ignition/starter switch
Buttons for
- Reset button for trip odometer ... .. .... .... ... .
!CHECK] .. .... ....... .... .... ....... .... ... .
Instrument lighting .... ... .... .... ... ..... ... .
Controls and equip
ment
1 1 1
12
71
38
116
14
15
16
Instruments and controls
@ MMI Display, see separate manual
@ Depending on equipment, switches for:
- Electronic Stabilization Program (ESP)
- Side assist .. ... ..... .. .. .. .... .... .... ... ... .
- Emergency flashers .......................... .
- Power sunshade .... .... .... .... ... .... ..... . .
- Valet key function .... ....... ...... .... ...... .
@ Buttons for
- Switching MMI display on/off
- Unlocking glove compartment
@ Glove compartment ........... .... .... ......... .
@ Front passenger's airbag .. .... .... ... .. ...... .. .
@) Climate controls ......... .. .. .... .... .... .. . .. . .
@ Ashtray ..... .... .... ....... .... .... .... ... ... .
@ Shift lever for automatic transmission
- 6-speed automatic transmission .. .. .... .... ... .
I . .
® -
mu t1tron1c ... .... .... .... .... .... ... ...... .
@ MMI Terminal, see separate manual
@ Storage with cupholder . ........ ... .. .... .... ... .
@ Electromechanical parking brake ... .... .... .... .. .
@ ISTART ]-~STOP ] button .. ... ..... ... .... .... ... .
@ Adjustable steering wheel, depending on equipment:
- mechanica l .. .. .... .... ..... .. .... ..... ... .. .
- electrica l ... ...... .... ... .. .... .... ...... ... .
@) Data Link Connector for On Board Diagnostics (OBD II)
@ Hood release . .... .... ...... ... .. .... .... ... ... .
@) Switch for
unlocking the fuel filler door ..... ...... .... ... .
- unlocking the trunk lid . .... .... .... .... ... ... .
I • •
262
146 67
70
44
99
99
219
104
96
155
163
95
121
118
114
114
27
300
297
50 •
Page 14 of 398
Instruments and warning /indicator lights
Instruments and warning/indicator lights
Instruments
Instrument cluster and controls
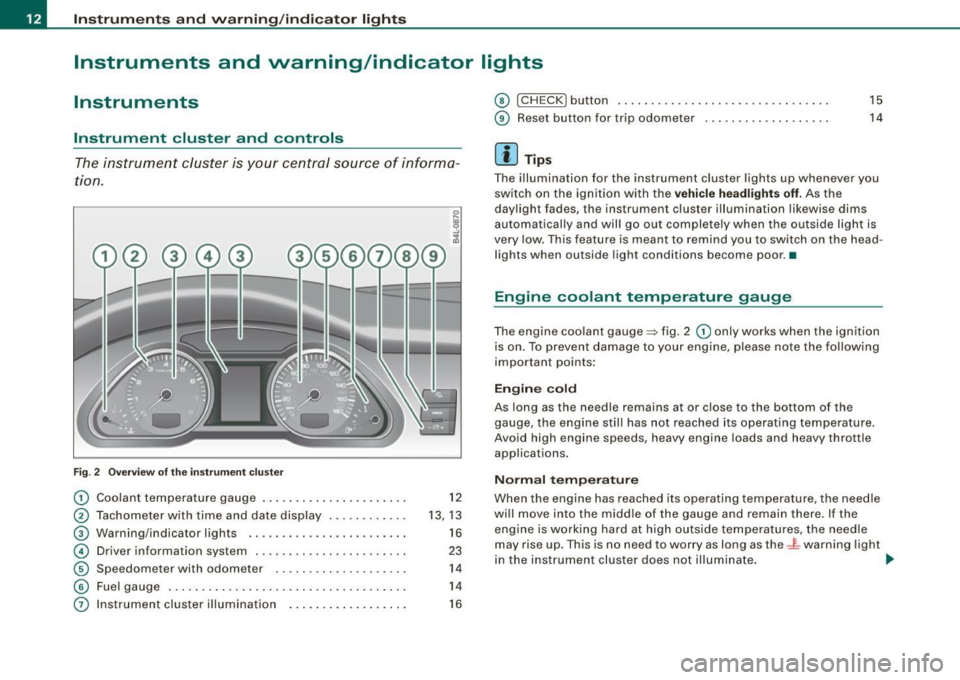
The instrument cluster is your central source of informa
tion.
Fig. 2 Overview of the instrument cluster
G) Coolant temperature gauge ....... ........ ...... .
@ Tachometer with time and date display .. .... .... . .
G) Warning/indicator lights .. ............. ...... .. .
© Driver information system ...................... .
© Speedometer with odometer . .... ........ .... .. .
© Fuel gauge .... .... ... ...... .... ...... .... ... . .
0 Instrument cluster illumination ................ . .
12
13, 13
16
23
14
14 16
© I CH ECK] button ............. ..... .... ... ..... •.
® Reset button for trip odometer .................. .
[ i ] Tips
15
14
The illumination for the instrument cluster lights up whenever you
switch on the ignition with the
vehicle headlights off. As the
daylight fades, the instrument cluster illumination likewise dims
automatically and wil l go out complete ly when the outside light is
very low . This feature is meant to remind you to switch on the head
lights when outside light conditions become poor. •
Engine coolant temperature gauge
The engine coolant gauge~ fig. 2 G) only works when the ignition
is on. To prevent damage to your engine, please note the fo llowing
important points:
Engine cold
As long as the needle remains at or close to the bottom of the
gauge, the engine still has not reached its operating temperature .
Avoid high engine speeds, heavy engine loads and heavy throttle
applications .
Normal temperature
When the engine has reached its operating temperature, the needle
will move into the middle of the gauge and remain there. If the
engine is working hard at high outside temperatures, the needle
may rise up. This is no need to worry as long as the -~-warning light
in the instrument cluster does not illumina te. ..,.
Page 16 of 398
Instruments and warning /indicator lights
[ i J Tips
• The digital clock and the odometer are turned on for about 30
seconds when the driver's door is opened.
• When the ignition is turned off, the odometer reading and the
digital clock with date display can be switched on for about
30 seconds by pressing the
I CHECK) button => page 15, fig. 5. •
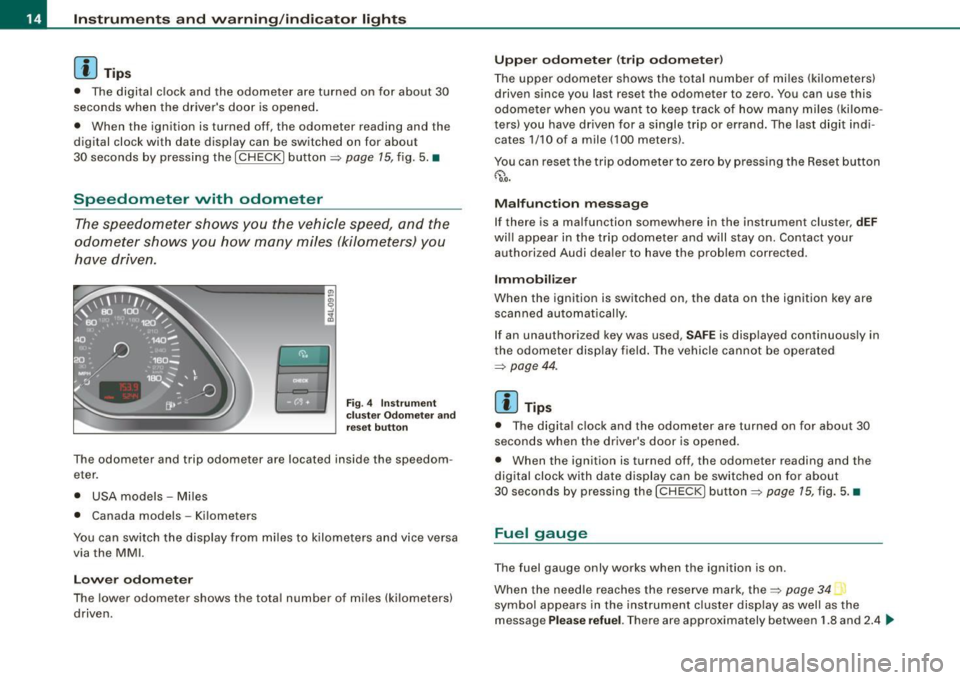
Speedometer with odometer
The speedometer shows you the vehicle speed, and the
odometer shows you how many miles (kilometers) you
have driven.
Fig . 4 Instrument
c luster Odometer and
reset button
The odometer and trip odometer are located inside the speedom
eter.
• USA models -Miles
• Canada models -Kilometers
You can switch the display from miles to kilometers and vice versa
via the MMI.
Lower odometer
The lower odometer shows the total number of miles (kilometers)
driven. Upper
odometer (trip odometer )
The upper odometer shows the total number of mil·es (kilometers)
driven since you last reset the odometer to zero. You can use this
odometer when you wan t to keep track of how many miles (kilome
ters) you have driven for a single trip or errand. The last d igit indi
cates 1/10 of a mile (100 meters) .
You can reset the trip odometer to zero by pressing the Reset button
~0-
Malfunction message
If there is a malfunction somewhere in the instrument cluster,
dEF
wi ll appear in the trip odometer and will stay on. Contact your
authori zed Audi dealer to have the prob lem corrected .
Immobilizer
When the ignition is switched on, the data on the ignition key are scanned automatically.
If an unauthorized key was used,
SAFE is disp layed continuously in
the odometer display field . The vehicle cannot be operated
=>
page 44 .
[ i J Tips
• The digita l clock and the odometer are turned on for about 30
seconds when the driver's door is opened.
• When the ignition is turned off, the odometer reading and the
digital clock with date display can be switched on for about
30 seconds by pressing the
I CHECK) button=> page 15, fig. 5. •
Fuel gauge
The fuel gauge only works when the ignition is on.
When the needle reaches the reserve mark, the~
page 34 _,,,
symbo l appears in the instrument cluster display as well as the
message
Please refuel. There are approximately between 1.8 and 2.4 .,_
Page 17 of 398
gallons (7-9 liters) of fuel left. Th is message is meant to remind you
to
refuel.
The tota l tank capacity of your vehicle is listed in => page 369.
0 Note
Never run the tank completely dry . An irregular supp ly of fuel can
cause engine misfiring and fuel could enter the exhaust system . The
cata lytic converter could then overheat and be damaged. •
[ CHECK] button
You con perform different functions with this button.
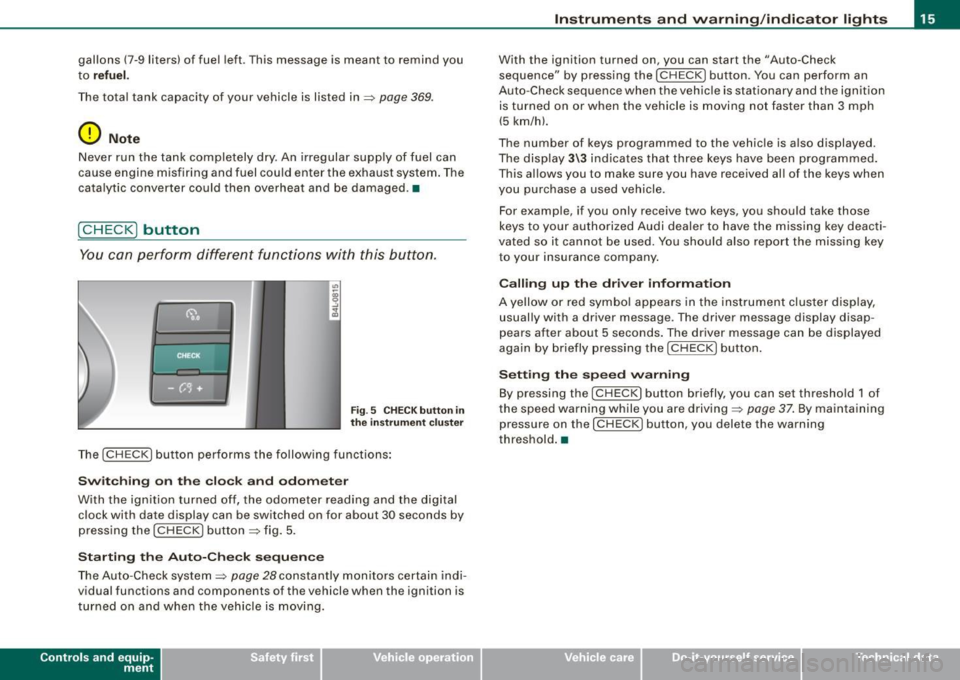
Fig. 5 C HECK button in
the instrument cluster
The [ CHECK I button performs the following functions:
Switching on the clock and odometer
With the ignition turned o ff, the odometer reading and the digital
clock with date display can be switched on for about 30 seconds by
pressing the
(CHECK I button ~ fig. 5.
Starting the Auto-Check sequence
The Auto -Check system=> page 28 constantly monitors certain indi
vidual functions and components of the vehicle when the ignition is
turned on and when the vehicle is moving.
Contro ls and eq uip
ment
Instruments and warning /indicator lights
With the ignition turned on, you can start the "Auto-Check
sequence" by pressing the
[CHECK ] button. You can perform an
Auto-Check sequence when the vehicle is stationary and the ignition
is turned on or when the vehicle is moving not faster than 3 mph
(5 km/h).
The number of keys programmed to the vehicle is also displayed.
The display
3\3 indicates that three keys have been programmed.
This allows you to make sure you have received al l of the keys when
you purchase a used vehicle.
For example, if you only receive two keys, you should take those
keys to your authorized Audi dealer to have the missing key deacti
vated so it cannot be used. You should also report the missing key
to your insurance company .
Calling up the driver information
A yellow or red symbol appears in the instrument cluster display,
usually with a driver message . The driver message display disap
pears after about 5 seconds . The driver message can be displayed
again by briefly pressing the
I CHECK I button.
Setting the speed warning
By pressing the [ CHECK] button briefly, you can set threshold 1 of
the speed warning while you are driving=>
page 37. By maintaining
pressure on the [
CHECK] button, you delete the warning
threshold .•
Vehicle care I I irechnical data
Page 18 of 398
Inst rum ent s a nd warning /indi cato r li ghts
Instrument cluster illumination
The basic brightness of the illumination for the instru
ments, the center console and the display can be
adjusted .
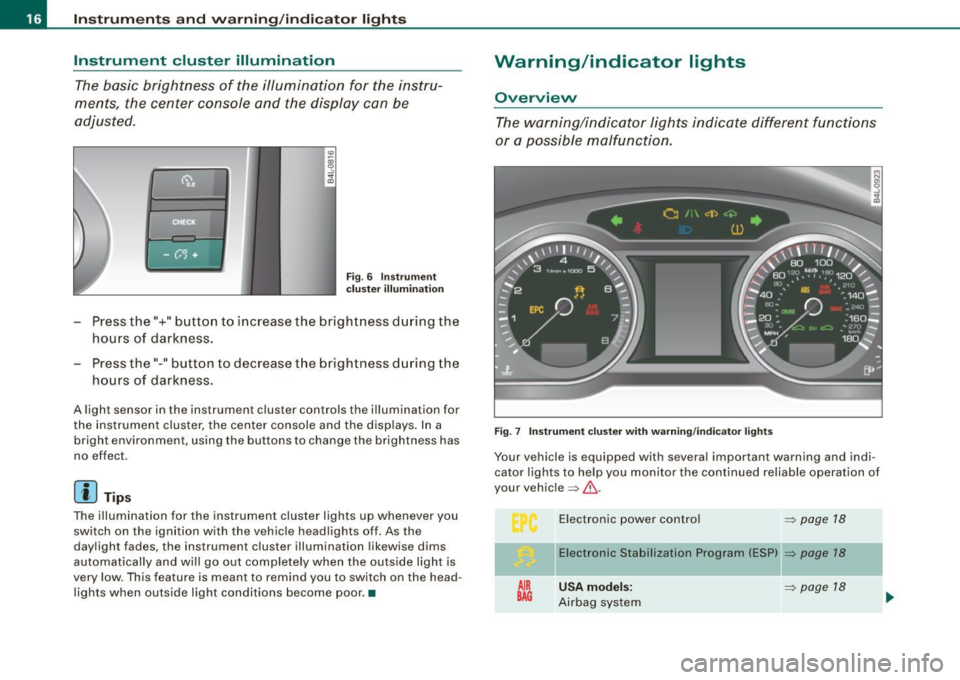
Fig. 6 Instrume nt
c lu ster illu minat io n
Press the"+" button to increase the brightness during the
hours of darkness.
- Press the" -" button to decrease the brightness during the
hours of darkness.
A light sensor in the instrument cluster controls the illumination for
the instrument cluster, the center console and the displays. In a
bright environment, using the buttons to change the brightness has
no effect.
[ i J Tip s
The illumination for the instrument cluster lights up whenever you
switch on the ignition with the vehicle headlights off . As the
daylight fades, the instrument cluster illumination likewise dims
automatically and will go out completely when the ou ts ide light is
very low. This feature is meant to remind you to switch on the head
lights when outside light conditions become poor .•
Warning/indicator lights
Overview
The warning/indicator lights indicate different functi ons
or a possible malfunction.
F ig. 7 Instr um ent clu ste r wi th w arnin g/indica tor lights
Your vehicle is equipped with several important warning and indi
cator lights to he lp you monitor the continued reliab le operation of
your vehic le => & .
AIR
BAG
E lectronic power contro l
=> page 18
Electronic Stabili zation Program (ES P) => page 18
U SA model s: => page 18
Airbag system
Page 20 of 398
![AUDI S6 2009 Owners Manual Inst rum ents and w arnin g/indi cat or li ghts
[ i ] Tip s
Many functions are mon itored by the Auto -Check system
=> page 28. Malfunctions or faults wil l be identified either wit AUDI S6 2009 Owners Manual Inst rum ents and w arnin g/indi cat or li ghts
[ i ] Tip s
Many functions are mon itored by the Auto -Check system
=> page 28. Malfunctions or faults wil l be identified either wit](/img/6/57595/w960_57595-19.png)
Inst rum ents and w arnin g/indi cat or li ghts
[ i ] Tip s
Many functions are mon itored by the Auto -Check system
=> page 28. Malfunctions or faults wil l be identified either with a red
symbol (priority 1 - Danger!) o r w ith a yel low sy mbol (priority 2 -
Warning). •
Electronic power control I'
This warning/indicator light monitors the electronic
power control.
The warning/indicator light (Electronic Power Control) i llumi -
nates when you turn on the ignition as a function check.
[ i ] Tip s
If this warning/indicator light illuminates whi le you are driv ing, then
there is a malfunction in the engine electronics . Have the malfunc
tion corrected as soon as possible by your authorized Audi dea ler or
qualified repair facility. •
Electronic stabilization program (ESP) at.
This warning/indicator light monitors the electronic stabi
lization program .
The warning/indicator light has the following functions:
• It blinks while you are dr iving when the ESP is working.
• It illuminates when you sw itch on the ignition for approximately
2 seconds as a function check.
• It illuminates when there is a malfunction in the ESP .
• It illuminates when ESP or ASR (Anti -Slip Regu lation) is deacti
vated. • I
t illuminates if there is a malfunction in the ABS, since the ESP
is part of the ABS sys tem.
If the battery terminals were disconnected and re-connected , the
vehic le was jump started or the battery is very weak, the ESP sensor
system goes through a learning process for the first few yards. The
warning/indicator light illuminates. The warning/indicator light
goes out as soon as the learning process is complete .
I f the ESP warning/indicator light illuminates and stays on after you
have started the engine, this may mean that the control system has
temporarily switched off the ESP . If this is case, you can reactivate
the ESP by turning the ignition off and then on again . The
warning/indicator light should go out to show that the system is
fully functional again.
For more information about the ESP=>
page 262. •
Airbag system
~ (USA models) / !lr (Canada models)
This warning/indicator light monitors the airbag and the
pretensioner systems.
The ~ (USA models) IJ.!r (Canada mode ls) warning light illuminates
for a few seconds each time you switch on the ignition .
If the ~ (USA mode ls)
tJ.! r (Canada models) warning light does not
go out, or if it i lluminates whi le you are driving, or if it starts to b link,
t hen there is a malfunction somewhere in the system. If the light
does not il luminate when you switch on the ignition, this a lso
means there is a malfunction .
& WARNING
If you have a m alfuncti on in the airb ag sy ste m, cont act your autho
ri zed A udi dealer imm ed ia te ly. Othe rwise the airb ag or the belt
preten sioner may not work p roperly in an accident. •
Page 21 of 398
Tire pressure monitoring system -telltale
indicator lamp
The warning/indicator light appears in the event of a
significant loss of tire pressure or if there is a malfunc
tion.
The indicator light' il lum inates to check the function when you
switch on the ignition.
If the
l symbol remains on or blinks after you switch on the igni
tion, there is a loss of tire pressure or a system malfunction . If there
is a system malfunction, see your authorized Audi dea ler as soon as
poss ible .
Detailed information on the tire pressure monitoring system can be
found in=>
page 336. •
Turn signals ¢ ¢
The indicator light blinks when you use either turn signal.
Whenever you use the left¢ or the right Q turn signal, the indicator
light blinks. When you use the emergency flashers, both indica tor
lights flash .
If one of the turn signa l light bu lbs burn out, the turn signal will
blink twice as fast as normal. •
Malfunction Indicator Lamp (MIL) )
The Malfunction Indicator Lamp (MIU is part of the On -Board Diag
nostic (OBD Ill system. The symbol
~ lights up when the ignition is
turned on and wi ll turn off after the engine has started and has
sett led at a constant id le speed . This indicates that the MIL is
working proper ly.
Controls and equip
ment
In st rum ent s a nd w arnin g/indi cato r ligh ts
The warning light il luminates when there is a malfunction in the
engine electronic system. Contact your authorized Audi dealer and
have the malfunction corrected.
An imprope rly c losed fu el filler cap ma y als o ca use t he MIL light to
illuminat e
=> page 297.
For more information => page 27. •
Applies to vehi cles : wi th l ane ass ist
Lane assist (system is ready) Ii
The indicator light shows that the system is ready to use. A warn ing
a lerts the driver when the vehicle drives over detected lane
boundary lines .
More information about lane assist=>
page 143. •
Applies to vehi cles : wi th la ne a ssi st
Lane assist (system is not ready) /'
The indicator light shows that the system is turned on but unable to
send a warning.
More informat ion about lane assist=>
page 143. •
Safety belts ~-
This warning/indicator light reminds y ou to put on your
safety belt.
The t warning/indicator light i lluminates when the ignition is
switched on to remind the driver and (on USA models on ly) any front
passenger to put on the safety belt . Additiona lly, an acoustic
warning (gong) will also sound.
For more Information =>
page 205, "Safety belt warning light 4". •
I • •
Page 22 of 398
Instruments and warning/indicator lights
Adaptive Air Suspension
+>
This warning/indicator light has the fol lowing functions:
• It illumin ates for a few seconds after the ignition is turned on as
function check and then goes out.
• If th e warning/indicator light illuminates or blinks continuously,
there is a system fault in the Adaptive Air Suspension. A system
fault can result in limited ride comfort and
low ground clearance.
Drive safely to the nearest authorized Audi dealer or qualified work
shop, and have the fault corrected.
• If the warning/indicator light flashes, you should not drive the
vehic le. The flashing warning/indicator light points to an extreme
High level. A very
pronounced lifting of the vehicle (extreme High
level) can resu lt, for example, when a heavy load is removed from
the vehicle. As soon as the level has returned to normal, the
warning/indicator light stops flashing, and you can drive away.
• If the warning/indicator light flashes in conjunction with the
<::i:,
warning/indicator light, you should not drive off immedia tely in
order to prevent damage to the underbody. The two warning/indi
cator lights flashing together points to an extreme Low level. A very
pronounced lowering of the vehicle (extreme Low level) can resu lt,
for example, from a heavy load. As soon as the level has returned to
normal, the warning/ind icator lights stop flashing, and you can
drive away.
0 Note
If the warning/indicator light flashes in conjunction with the <::i:,
warning/ indicator light, you should not drive the vehic le because
low -lying vehic le parts can bottom out as you drive over uneven
ground and be damaged as a result. •
Adaptive Air Suspension ~
This warning/indicator light has the following functions: •
It illuminates for a few seconds after the ignition is turned on as
function check and then goes out.
• It comes on for approximately 15 seconds as a warning of
reduced ground clearance , if the dynamic mode is activated and if
the ignition is switched on~
page 185, "Chassis controls".
• If the warning/ind icator light flashes in conjunction with the
warning/indicator light, you should not drive the vehicle immedi
ately in order to prevent damage to the underbody. The two
warning/indicator lights flashing together points to an extreme Low level. A very
pronounced lowering of the vehicle (extreme Low level)
can resu lt, for example , from a heavy load . As soon as the level has
returned to normal, the warning/indicator lights stop flashing, and
you can drive away.
0 Note
If the warning/indicator light flashes in conjunction with the~
warning/indicator light, you should not drive the vehicle because
low-lying vehicle parts can bottom out as you drive over uneven
ground and be damaged as a result. •
High beam ~D
The ~D warning/indicator light illuminates when the high beams are
on or when you use the headlight flasher. For more information
about using the high beams, see~
page 67 . •
Cruise control
CRUISE (USA models) /Ari (Canada models )
The warning/indicator light illuminates when the cruise control is
activated. •
Page 23 of 398
Anti-lock brake system (ABS)
/ .J (USA models) / ~ (Canada models)
This warning/indicator light monitors the ABS and the
electronic differenti al l ock (EDLJ.
T he warning/indicato r ligh t will come on fo r a few seconds whe n the
ignition is switched on . The light will go out after an automatic
check sequence is completed .
There is a malfunction in the ABS when:
• The war ning/indi cat or l igh t does no t illu minate w he n yo u swi tch
on the ignition.
• The war ning/i ndicat or light does not go out aft er a few seconds .
• T he warning/indicator light il luminates while driving.
The brake system will still respond even without the assistan ce of
the ABS system. See you r authorized Audi dealer as soon as
possible to restore full braking performance.
For mo re in form ati on
re garding the ABS~
page 266 .
The ABS warning light and the brake warning light come on
together. The ABS will not work and you will notice a change in braking response and performance.
Malfun ction in the brake system
If the brake warning light~ page 22and the ABS warning illuminate
together there may be a malfunction in the ABS, a nd there may also
be a ma lfunction in the bra ke system itself~& .
I n the even t of a
malfunction in the brake system th e wa rn in g/in di
cator light
BRAKE (USA mode ls)/ (©) (Canada models) in the instrument
c lus ter flas hes . B y pres sing the [ C HE CK ] bu tton, you ca n bring u p a
driver message wh ich explains the malfunction in more deta il.
P lease note
~ page 30.
Controls and equip
ment
Instruments and warning /indi cator lights
Malfun ction in the electroni c differential lock (EDL )
The ED L wo rks toge ther wit h the ABS. T he ABS wa rn ing light w ill
come on if there is a ma lfunction in the EDL system~
page 263 . See
yo ur aut ho rized Aud i dea ler as soon as poss ib le.
& WARNING
• If the AU (USA models )/u (Canada models ) warning light
does not go out , or if it comes on while driving , the ABS system is
not working properly. The vehicle can then be stopped only with
the standard brakes (without ABS ). You will not have the protec
tion ABS provides. Contact your Audi dealer as soon as possible .
• USA models :
If the BRAKE warning light and the -warning
light come on together , the rear wheels could lock up first under
hard b raking . Rear wheel lock -up can cause loss of vehicle control
and an accident. Have your vehicle repaired immediately by your
autho riz ed Audi dealer or a qualified workshop. Drive slowly and
avoid sudden, hard brake applications .
• Canada models : If the brake warning light (CD) and the ABS
warning light ~ come on together , the rear wheels could lock up
first unde r hard braking . Rear wheel lock -up can cause loss of
vehicle control and an a ccident . Have your veh icle rep aired imme
diately by your authorized Audi dealer or a qualified workshop .
Drive slowly and avoid sudden, hard brake applications . •
Electromechanical parking brake
~E (USA models) / (®) (Canada models)
The warning/indicator li ght m onit ors the e lec tromech an
i c al park ing brake.
W ith the parking brake a pplied and th e ignition tur ned on, the
warning/ indicator light i lluminates. After t he ignition has been
tu rn ed off , th e warni ng/ indicato r ligh t co ntin ues to i llu mina te fo r
about 30 seconds . If t he parking brake is applied with t he ignition _,,
I • •