hood release AUDI S6 2012 Owners Manual
[x] Cancel search | Manufacturer: AUDI, Model Year: 2012, Model line: S6, Model: AUDI S6 2012Pages: 298, PDF Size: 74.43 MB
Page 11 of 298
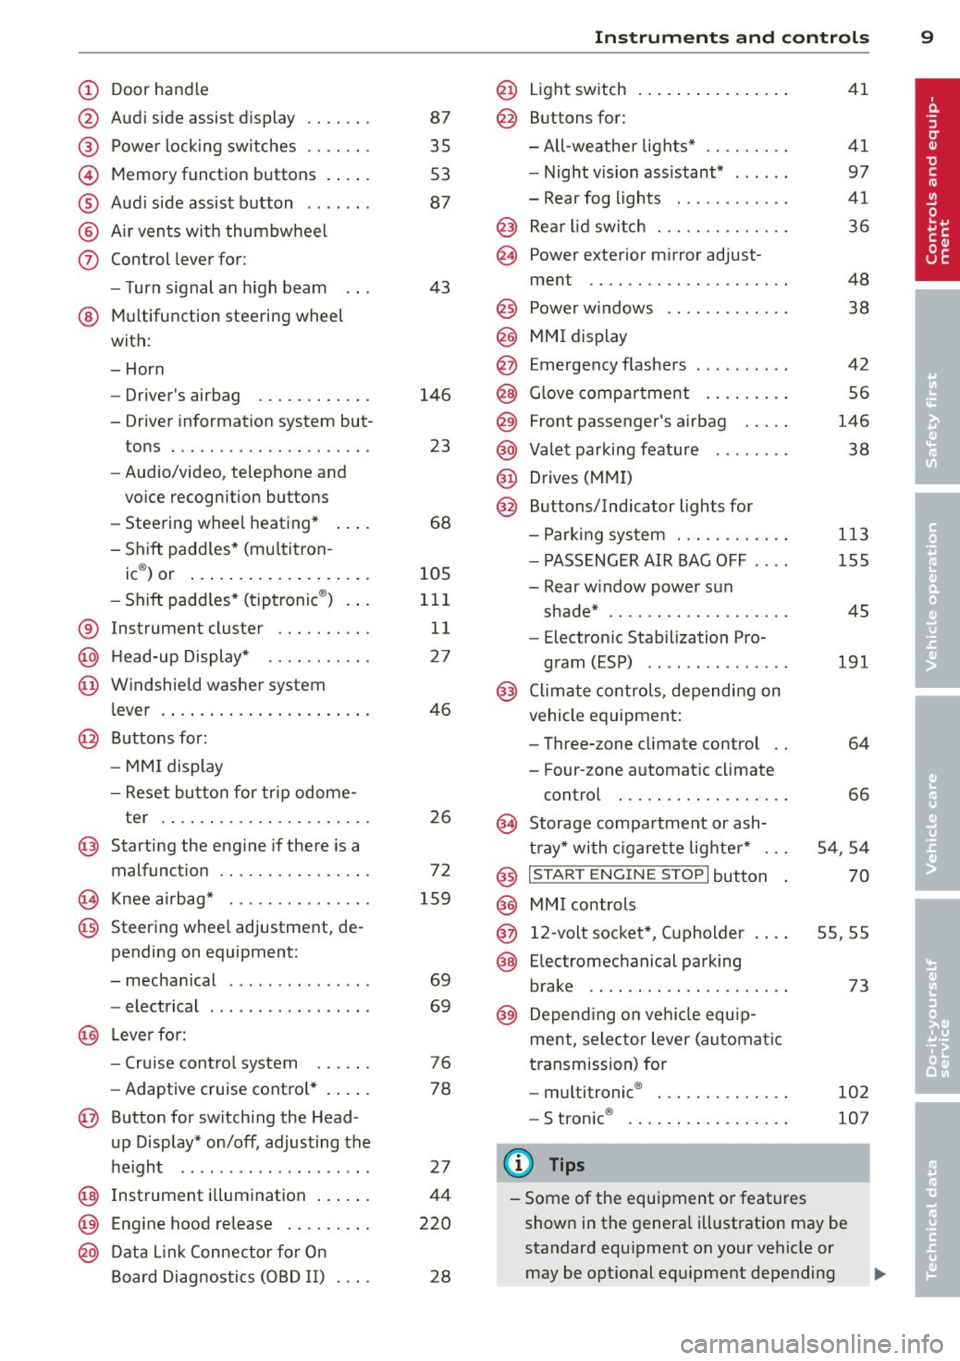
(!) Door handle
@
®
©
®
®
(j)
Audi side assist d isplay
Power locking sw itches
Memory function buttons . ... .
Aud i side assist button .. .. .. .
A ir vents with thumbwheel
Control lever for :
- T urn signal an h igh beam
@ Multifunction steering wheel
with:
- Horn
- Driver's airbag
- Driver information system but-
tons . .. ............. .... .
- Audio/video, telephone and
vo ice recogn ition buttons
- Steering wheel heating* ... .
- Shift padd les* (mu ltit ron -
. ®) 1c or ... .... .. .. ... .. .. .
- Shift padd les* (tiptronic ®) . . .
® Instrument cluster ..... .. .. .
@ H ead-up Display* ...... .. .. .
@ Windsh ield washer system
l ever .... .. .. ... ..... ... .. .
@ Buttons for :
- MM I display
- Reset button for tr ip odome-
ter .. .. ................. .
@ Starting the engine if there is a
malfunction ........... .... .
~ Knee airbag* .......... .... .
@ Steering whee l adjustment, de
pending on equipment:
- mechanical . ............. .
- electrical ......... ...... . .
@ Leverfo r:
- Cruise contro l system
- Adaptive cruise cont ro l* . ... .
@ Button for switch ing the Head
up Display* on/off, adjusting the
h eight .. ................ . .
@ Instrument illumination ... .. .
@ Eng ine hood release .... .. .. .
@ D ata Link Connector for On
Board Diag nos tics ( OBD II) . .. .
87
35
53
87
43
146
23
68
105
11 1
11
27
46
26
72
159
69
69
76
78
27
44
220
28
In strument s and control s 9
@ Light sw itch ..... . .. .. ..... .
@ Buttons for :
- All -weathe r lights*
- Night vision assistant* .. ... .
- Rear fog lights . .......... .
@) Rear lid switch . .... ........ .
@ Power exterior m irror adjust-
ment .. .. .. .. ............ .
@) Power w indows .... ........ .
@ MMI display
@ Emergency flashers .. .. .. ... .
@ Glove compar tment ........ .
@ Front passenger's airbag .... .
@ Valet parking feature ....... .
@ Drives (MMI)
@ Buttons/Indicator ligh ts for
- P arking system ........... .
- PASSENG ER AIR BAG OFF ... .
- Rear w indow power sun
shade* ....... ...... ..... .
- Electron ic Stabilization Pro-
gram (ESP) .. .. .......... .
@) Climate controls, depending on
vehicle equipment:
- Three-zone cl imate control ..
- Four-zone automat ic climate
contro l ... .. ............ .
@ Storage compa rtment or ash-
t ray* with c igaret te lig hte r* ...
@ I S TAR T ENGINE ST OPI button
@ MMI controls
@ 12-volt socket *, ( upholder
@ Elec tromechanical parking
brake .. .. .. .. .... ... .... . .
@ Depend ing o n veh icle equ ip
ment, selector lever (a utomatic
t ransmission) for
- m ultitronic ® ............. .
- S tronic ®
(D Tips
41
41
97
41
36
48
38
42 56
146
38
113
155
45
191
64
66
54 ,54
70
55 ,55
73
102
107
- Some of the equipment o r feat ures
shown in the genera l ill ustration may be
standard equ ipment on your vehicle or
may be opt ional equ ipment depending
Page 17 of 298
Instrument s and warnin g/indic ator ligh ts 15
malf u ncti on in th e ele ctri cal sys tem. In th is
c as e, co nt act yo ur Audi de aler.
If the b rake system warning/ind icator light
turns on, there is a brake system malfunction.
- (USA models) JIIII (Canad a model s)
St op veh icle and ch ec k brak e fluid l evel
If the indicator lig ht turns on and the mes
sage appears, proceed as follows :
.. Pull off the road .
.. Stop the vehicle.
.,. Turn off the engine .
.. Check the brake fluid level
c::> page 229 .
.,. Contact your nearest authorized repa ir fa-
c ili ty if necessary.
W arnin g! Fau lt in brake syst em . Contact
de aler
If the ABS indicator light ii] (USA models)/ §
(Canada models), the ESP indicator light
G1
and the brake system indicator light
- (USA models)/ . (Canada models) turn
on and the message appears, the ABS, ESP
and b raking distribution are not wo rking
c::> .&,. .
Carefully drive to your authorized Audi dealer
immed iately to have the malfunction correct
ed
c::> .&,. .
- (U SA mode ls)/. (Can ada mode ls)
P a rk ing br ake: system f ault! Pl ease conta ct
d ea ler
- If the indicator light and the message ap
pear
when s tat ionar y or a fter sw itch ing the
i gn ition on ,
check if you can release the
park ing brake. After releas ing t he parking
brake, carefully dr ive to your authorized Au
di dealer immediate ly to have the malfunc
t ion corrected. If you cannot re lease the
parking brake, seek pro fessional assistance.
- If the indicator light and the message ap
pear
wh ile drivin g, the eme rgency braking
func tion may not be ava ilable.
It may not be
possib le to set the parking brake or release
it once it has been set. Seek professional as
sistance . (USA mode
ls): If the warning light - and
the warning light
Ei] appea r together, imme
diately contact your authorized Audi dealer or
qualified workshop to have a ll brake pads in
spected
c::> page 20.
When the light comes on , an audible warning
s ignal is also g iven.
_& WARNING
-Always observe the warn ings in
c::> page 214, Engine compartment, be
fore opening the hood and check ing the
brake fluid .
- Driving with low brake fluid is a safety
hazard . Stop the car and get professional
assistance .
-USA models: If the - warning light,
the
G] warning light and the m warn
ing light come on together, the rear
wheels could lock up f irst under hard
brak ing. Rear wheel lock-up can ca use
loss of vehicle control and an accident .
Have your vehicle repaired immediately
by your authorized Audi dealer or a quali
fied workshop. Dr ive slowly and avoid
sudden, hard brake applications.
- Canada models: If the brake warning
light ., the
DJ warn ing light and the
ABS warning light
(il come on together,
the rear wheels could lock up first under hard braking. Rea r wheel lock-up can
cause loss of vehicle contro l and an acci
dent. Have your veh icle repa ired immedi
ately by your a uthorized Audi dea ler or a
qua lified workshop. Drive s low ly and
avoid sudden, hard brake applications .
- I f the b rake w arning/ind icator light does
not go out after a few seconds and the
parking brake released, or lights up wh ile
you are driving, the fluid level in the brake fluid reservoir is too low. If you be
lieve that it is safe to do so, proceed im
mediately at low speed to the nearest
author ized Audi dealer or qualified repair
facility and have the b rake system in-
spected.
~
Page 18 of 298
16 Instrum ent s and w arn ing /indic ato r light s
-Always keep in mind that after several
brake applicat ions, you will need greater
pressure on the brake pedal to stop your
vehicle . Do not rely on strained brakes to
respond w ith maximum stopp ing power
in critical situations. You must a llow for
increased bra king distances. The extra
distance used up by fad ing brakes could
lead to an acc ident .
PARK /(®) Electromechanical parking
brake
The warning/indicator light monitors the
electromechanical parking brake .
If the indicator light - (USA models) ;II
(Canada models) turns on, the park ing brake
was set. If the parking brake is set when the ignition is
off, the indicator light turns off af
ter about 20 seconds .
The warning/indicator light will go out when
the parking brake is released .
-(USA model s) /. (Canad a mo dels )
Caution : Vehi cle parke d too s teep
If the indicator light blinks and the message
appears, there is not enough braking power to
keep the vehicle from ro lling. The brakes have
ove rheated. The vehicle could ro ll away even
on a small incline.
Pre ss brak e pedal to r eleas e parking br ake
To release the parking brake, press the brake
pedal and press the button~ or start driving
with start ing ass ist at the same time
¢ page 74.
Pleas e rele ase p ark ing brake
To release the parking brake manua lly, press
the brake pedal and press the button ~ at the
same time. The parking brake on ly release au
tomatically if the dr iver's safety belt is fas
tened.
BJ Par king brake!
If the BJ indicator lig ht t urns on and this
message appears, there is a parking brake
malfunction . Drive to your authorized Audi dealer or qualified workshop immediately to
have the malfunction corrected.
-L Engine cooling system malfunction
A malfunction in the engine cooling system
must be repaired as soon as possible.
• Switch off en gine and che ck cool ant le vel
If the indicator light turns on and the mes
sage appears, the coolant temperature is too
high or the coolant level is too low.
.. Pull
off the road .
.. Stop the vehicle .
.,. Turn
off the engine .
.,. Check coolant leve l~
page 22 7 .
.. Add coo lant if necessary ~
page 228.
.,. Continue dr iv ing on ly after the engine cool
ant warning/indicator light goes out .
.. Contact your authorized Audi dealer for as-
sistance if necessary.
If the engine coo lant level is correct, then the
radiator fan may be the ca use of the malfunc
tion .
• Cool ant t emp erature too hi gh! Pl ease l et
en gin e r un wit h ve hicl e s tat ion ary
If the indicator light turns on and the mes
sage appea rs in trailer mode*, let the eng ine
run at idle for a few minutes to cool down .
A WARNING
- If your vehicle should break down for
mechanical or other reasons, park at a
safe distance from moving traffic, turn
off the eng ine and turn on the hazard
warn ing lights
¢ page 42, Emergency
flasher.
-
- Never open the hood if you see or hear
steam or coo lant escaping from the en
g ine compartment -you risk being scald
ed. Wait unt il you can no longer see or
hear steam or coolant escap ing .
- The engine compartment of any vehicle is a dangerous area . Before you perform
any wo rk in the engine compartment,
turn of the engine and allow it to cool.
Page 104 of 298
102 Autom atic Tran smi ssi on
-When the selector lever is in a driving
position, the veh icle may creep, even at
id le speed. Therefore do not release
the park ing brake or foot brake until
you are ready to move, because power
is transmitted to the wheels as soon as
a driving posit ion is engaged.
- Do not accelerate while selecting a
driving position. At this time the en
g ine must be at idle speed so that un
d ue stress is no t placed on the clutches
in the t ransmission.
- Remembe r: Even when stopped briefly
with the automatic transmission in D/S
or R, engine power is being transmit
ted to the whee ls. Yo ur vehicle could
"creep" forward or backward . When
stopped, keep the brake peda l fully de
pressed and use the parking brake if
necessary to keep the vehicle from roll
ing .
-If the selector lever is unintentionally
moved into N wh ile you are driving, take
yo ur foot off the accele rator pedal and
wa it for the engine to return to idle
speed befo re selec ting a drivi ng position.
- Never shift into R or P when the veh icle is
in mo tion.
- Never get out of the dr iver's seat when
the engine is runn ing.
- If you must get out of the vehicle, move
the se lector lever securely into the P po
si ti on a nd apply the park ing brake fi rm ly.
- If the eng ine must remain running, never
have any driv ing pos ition engaged when
chec king under the hood. Make sure the
selector lever has securely engaged and
is locked in P with the parking brake
firmly set¢
page 214, Engine comport
ment .
Otherwise, any increase in engine
speed may set the vehicle in mot ion,
even with the parking brake applied.
Selector lever positions
Applies to vehicles: wit h mult itronic
This section describes the selector lever posi
tions and driving ranges.
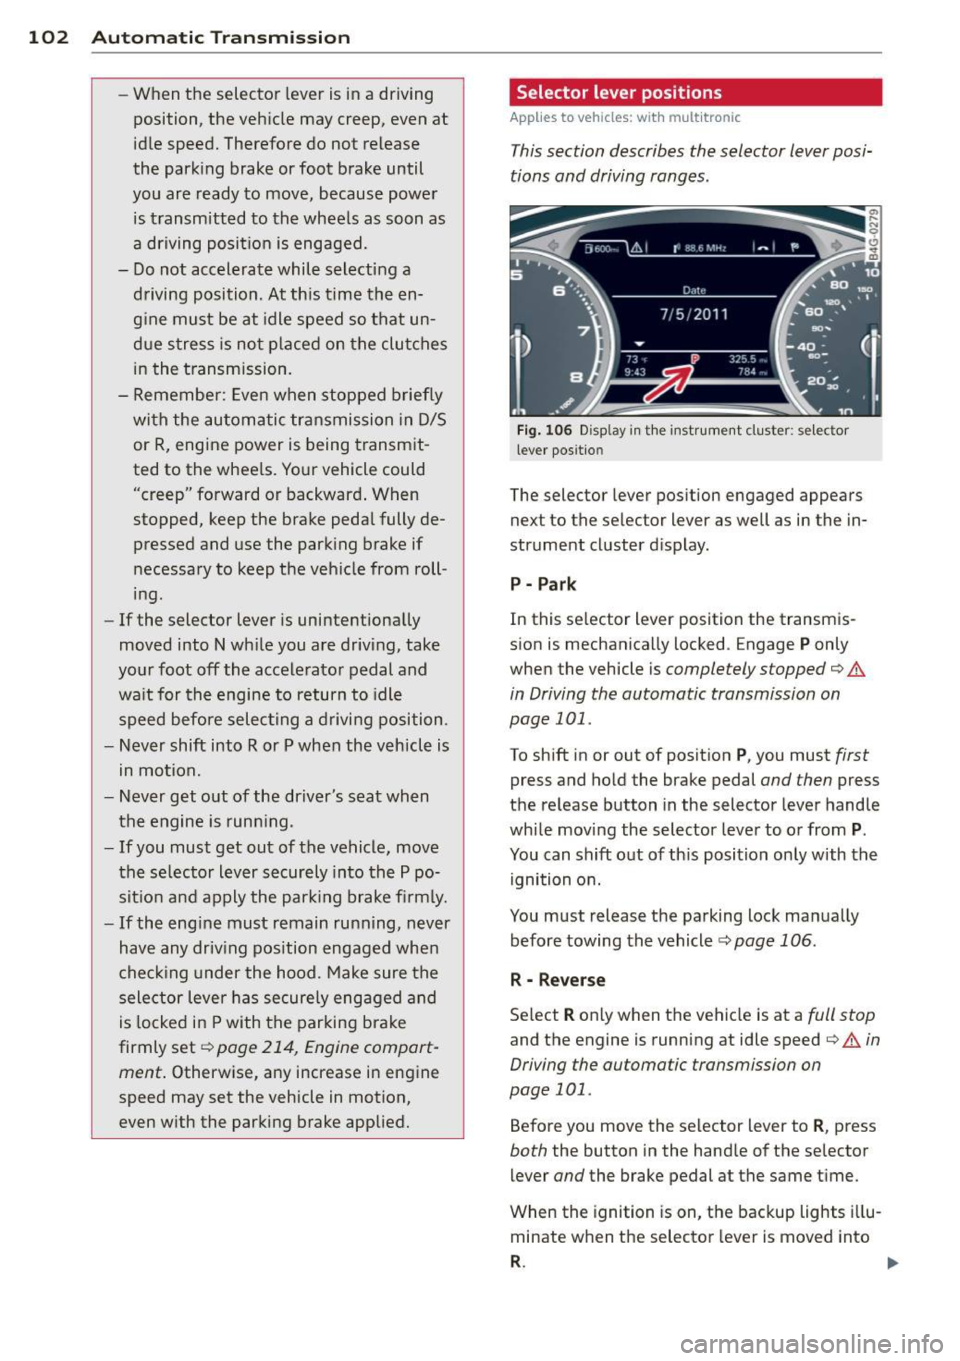
F ig . 106 Display in th e inst rument cluster: se lector
l ever positio n
The selector lever position engaged appears
next to the selector lever as well as in the in
strument cluster d isplay.
P - Par k
In this se lector lever position the transm is
sion is mechanically locked . Engage
P only
when the vehicle is
completely stopped¢.&
in Driving the automatic transmission on
page 101 .
To shift in or out of posit ion P , you must first
press and hold the brake pedal and then press
the re lease button in the selector lever handle
whi le moving the selector lever to o r from
P .
You can shift out of th is position only with the
ignition on.
You must release the parking lock manually before towing the vehicle ¢
page 106.
R - Reverse
Se lect R only when the vehicle is at a full stop
and the engine is running at idle speed¢.& in
Driving the automatic transmission on
page 101.
Before you move the selector lever to R , press
both the button in the hand le of the se lector
lever
and the brake pedal at the same t ime.
When the ignition is on, the backup lights i llu
minate when the selector lever is moved into
R . 1111-
Page 110 of 298

108 Automatic Transmission
-If you must g et out of the vehicle, move
the selector lever securely into the P po
sition and apply the parking brake f irmly.
-If the engine must remain running, never
have any driving position engaged when
checking under the hood. Make sure the
selector lever has securely engaged and
is locked in P with the parking brake
firmly set
r:!;> page 214, Engine compart
ment.
Otherwise, any increase in engine
speed may set the vehicle in motion,
even with the parking brake applied.
Selector lever posit ions
Appl ies to vehicles: with tiptronic
This section describes the selector lever posi
tions and driving ranges.
Fig. 113 Display in the instrume nt cluster: se lector
lever pos itio n
The selector lever position engaged appears
next to the selector lever as well as in the in
strument cluster display.
P - Park
In this selecto r lever position the transmis
sion is mechanically locked . Engage
P only
when the vehicle is
completely stopped ¢ A
in Driving the automatic transmission on
page 107 .
To shift in or out of position P, you must first
press and hold the brake pedal and then press
the release button in the selector lever handle
while moving the selector lever to or from
P.
You can shift out of this position only with the
ignition on.
You must release the parking lock manually
before towing the vehicle
<:!;>page 112.
R -Reverse
Select R only when the vehicle is at a full stop
and the engine is running at idle speed r:!;> ,& in
Driving the automatic transmission on
page 107.
Before you move the selector lever to R, press
both the button in the handle of the selector
l ever
and the brake pedal at the same time.
When the ignition is on, the backup lights illu
minate when the selector lever is moved into
R.
N - Neutral
The transmission is in neutral in this position .
Shift to this position for standing with the
brakes applied
<:!;>page 109.
When the vehicle is stationary or at speeds
below 3 mph (5 km/h), you must always apply
the footbrake before and while moving the
lever out of
N.
D/S - Normal position for driving forward
In the D/S position, the transmission can be
operated either in the normal D mode or in
the S sport mode . To select the S sport mode,
pull the selector lever back briefly. Pulling the
lever back again will select the normal D
mode. The instrument cluster display shows
the selected driving mode.
In the
normal mode D , the transmission auto
matically selects the best gear ratio.
It de
p ends on engine load, vehicle speed and the
dynamic control program (DRP).
Select the
sport mode S for sporty driving.
The vehicle makes full use of the engine's
power. Shifting is more noticeable when accel
erating.
When the vehicle is stationary or at speeds
below 3 mph (5 km/h), you must always apply
the foot brake before and while moving the
lever to
D/S out of N .
In certain circumstances it may be advanta
geous to temporarily switch to the manual
shift program to manually select gear ratios .,..
Page 222 of 298
220 Checking and filling
Checking and filling Engine hood
Releasing the engine hood
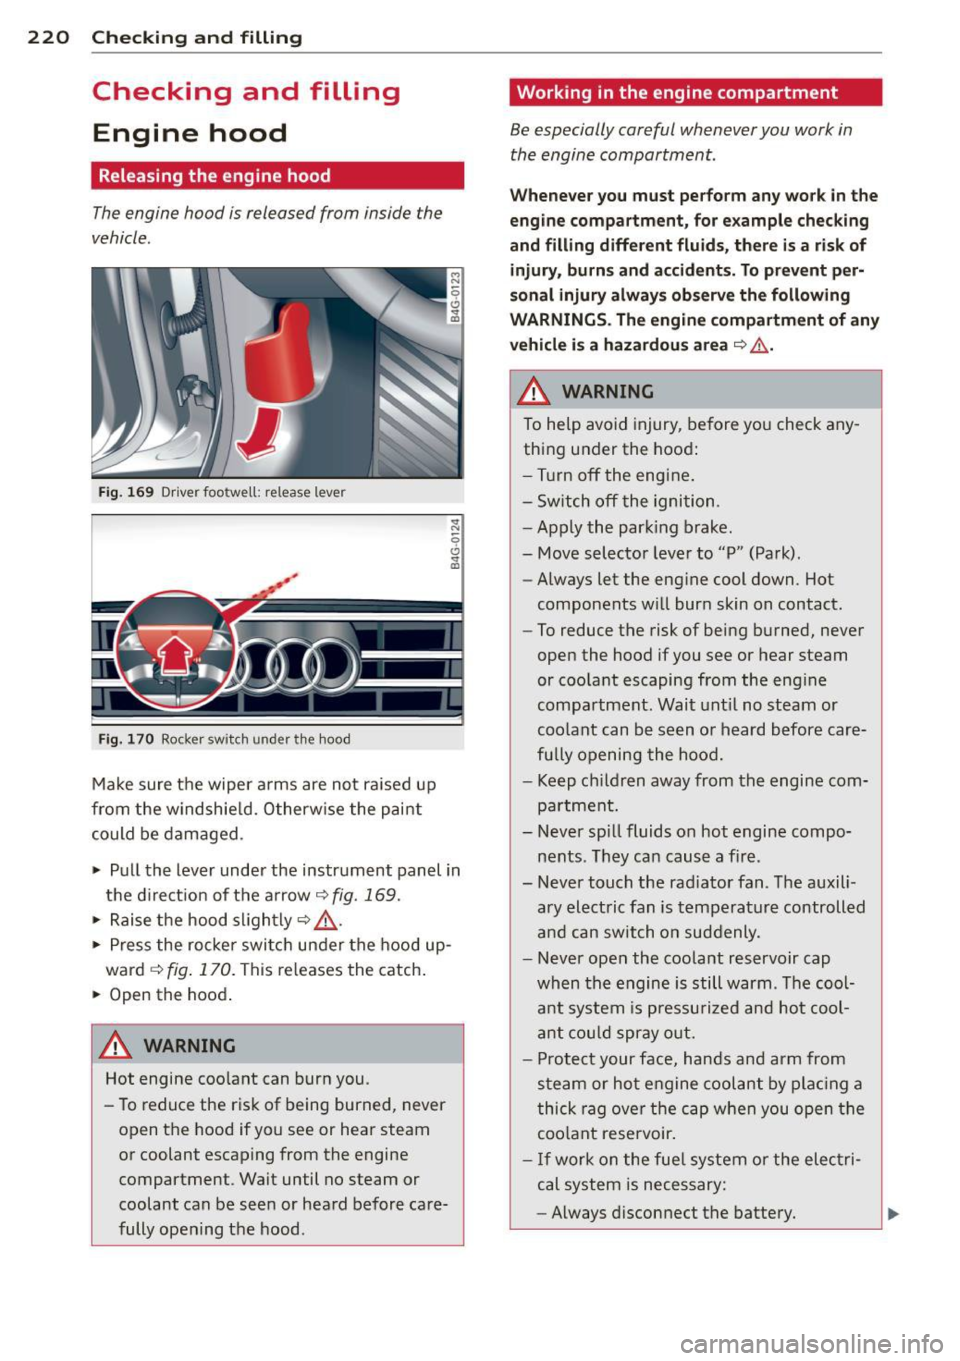
The engine hood is released from inside the
vehicle .
Fig. 169 Driver foo twell: release lever
Fig. 170 Rocker switch un der the hood
Make sure the wiper arms are not raised up
from the windshield. Otherwise the paint
could be damaged .
.,. Pull the lever under the instrument panel in
the direction of the arrow
~ fig. 169.
.,. Raise the hood slightly~.&_ .
... Press the rocker switch under the hood up
ward
~ fig. 170. This releases th e catch.
... Open the hood.
&_ WARNING
Hot engine coolant can burn you.
- To reduce the risk of being burned, never
open the hood if you see or hear steam
or coolant escaping from the engine compartment . Wait until no steam or
coolant can be seen or heard before care
fully opening the hood .
' Working in the engine compartment
Be especially careful whenever you work in
the engine compartment.
Whenever you must perform any work in the
engine compartment, for example checking
and filling different fluids, there is a risk of injury, burns and accidents. To prevent per
sonal injury always observe the following
WARNINGS. The engine compartment of any
vehicle is a hazardous area
~ ,&. .
/n.. WARNING
To help avoid injury, before you check any
thing under the hood:
- Turn off the engine.
- Switch off the ignition .
- Apply the parking brake.
- Move selector lever to "P" (Park) .
- Always let the engine cool down. Hot
components will burn skin on contact.
- To reduce the risk of being burned, never
open the hood if you see or hear steam
or coolant escaping from the engine
compartment. Wait until no steam or
coolant can be seen or heard before care
fully opening the hood.
- Keep children away from the engine com
partment.
- Never spill fluids on hot engine compo
nents . They can cause a fire .
- Never touch the radiator fan. The auxili
ary electric fan is temperature controlled
and can switch on suddenly .
- Never open the coolant reservoir cap
when the engine is still warm . The cool
ant system is pressurized and hot cool
ant could spray out.
- Protect your face, hands and arm from
steam or hot engine coolant by placing a
thick rag over the cap when you open the
coolant reservoir.
- If work on the fuel system or the electri
cal system is necessary:
- Always disconnect the battery.
Page 288 of 298
286 Index
Homelink ® un iversal remote control .. 281
Remote control key ......... .. .... . 281
DEF
What does this mean when it appea rs in
the trip odometer display? ... .. .... ..
26
Defective light bulb warning ...... ..... 21
Defrosting (windows)
autom atic cl imate control .. .. .. .... ..
6 7
climate control . . . . . . . . . . . . . . . . . . . . . 65
Determining correct load limit ....... . 244
Dimensions .. ... ... ... .... .. .. .. .. .
275
Dimming the rearview mirror . ... .. .. .. 48
Distance . . . . . . . . . . . . . . . . . . . . . . . . . . . 24
Door/re ar lid warning . . . . . . . . . . . . . . . . .
23
Doors
Pow er child safety lock ..... ... .. ... . 37
Driver information system
CD/radio display . . . . . . . . . . . . . . . . . . . .
23
Door/rear lid warning . . . . . . . . . . . . . . . 23
Efficiency program . . . . . . . . . . . . . . . . . . 25
Exterior temperature display ..... .. .. 23
On-board computer ... .... .. .. .... .. 24
Driver seating position .... .. .. .. .. .. .
124
drive select .. .......... ...... ... .. .. 95
Adaptive dampers . . . . . . . . . . . . . . . . . . 95
Cornering light ............... .. ... . 95
Safety belt tensione r ...... .. .. .. .. . . 95
Driving safely . . . . . . . . . . . . . . . . . . . . . . 123
Driving through water ........ .. .... . 198
D .
. t· 24
riving 1me .... ... .... ..... .. .. .. . .
Duplicate key . . . . . . . . . . . . . . . . . . . . . . . 30
Dust filter
refer to Pollutant filter . . . . . . . . . . . . . . 63
E
Easy entry featu re .......... .. .. .. .. .. 70
Efficiency program . . . . . . . . . . . . . . . . . . . 25
Fuel economy messages . . . . . . . . . . . . . 25
Other equipment . . . . . . . . . . . . . . . . . . . 25
Electrical accessories (sockets) . . . . . . . . . 55
Electro-mechanical power assist .. .. ... 193
Elec tromechanical parking brake
Emergency braking ........... .. .. ..
75
Operation . . . . . . . . . . . . . . . . . . . . . . . . . 73
Parking .. .. .... ......... .. .. .. .. ..
74
Releasing and closing ..... .... .... .. 73 Starting
assist . . . . . . . . . . . . . . . . . . . . . 7 4
Starting from rest ..................
74
Starting off w ith a trailer . . . . . . . . . . . . . 7 4
Warning/ind icator lights ........ .... . 16
Electronic differential lock (EDL) ....... 189
Warning/ind icator lights ............. 19
Electronic immob ilizer . . . . . . . . . . . . 26, 31
Electronic power control ( EPC)
warning/indicator ligh t ......... .. .. .
20
Electronic speed limiter .......... ..... 29
Electronic stabilizat ion program (ESP) .. 189
Warning/indicator lights ........... .. 19
Emergency actuation
Doors .... .. .. . .................. .
36
Power sunroof ... .......... ...... .. 40
Emergency braking ................... 75
Emergency flashe r .... ... ... .... .. .. . 42
Warning/indicator lights .......... .. .
22
Emergency release
Selector lever . . . . . . . . . . . . . . . .
106, 112
Emergency starting .......... ..... .. 268
Emergency towing .............. .... 270
Emergency unlock ing
Rear lid .... ... .. .. ... ........... .. 37
Emergency warn ing triangle ..........
256
Energy management . .. ...... ... .. .. 194
Engine
Compar tment .. .. ............. ....
222
Coolant ...... ... .. .............. . 227
Data .... ... .. .. .. ...... ..... .. .. 276
starting . .. .. .. .. .... ... . .. ... .. .. . 70
Starting with jumper cables ....... .. 268
Stopping .... .. .. .. ... .. .. .... .... . 72
Engine compartment ............... . 222
Closing the hood .... ... .... ..... .. 221
Opening the hood ................ . 220
Safety instructions ................. 220
Working in the engine compartment .. 220
Engine coolant .. .. ..... ........... . 22 7
Adding coolant ... ..... ........... .
228
Checking the engine coo lant level ..... 227
Expansion tank ... ... .......... .. .. 227
Malfunction symbol ............ .. .. . 16
Radiator fan ..... .. ........... .. .. 229
Temperature gauge ............. ... . 11
Page 290 of 298
288 Index
Gauges Engin e coolant t emp erature .. .... .. .. 1 1
F ue l gauge . . . . . . . . . . . . . . . . . . . . . . . . 1 2
Speedometer . . . . . . . . . . . . . . . . . . . . . . 26
Tachometer . . . . . . . . . . . . . . . . . . . . . . . 12
Trip odometer . . . . . . . . . . . . . . . . . . . . . 26
Gene ral i llustration ..... ... .. .. .... .. . 8
Gene rato r (warn ing/ indicato r lights) .... 17
Glossary of t ire and load ing termino logy 236
Glove compartmen t (cooled) ... .. .... . . 56
Gross Veh icle Weig ht Rat ing (GVWR) .. . 274
H
Head-up Display ........... .... .... .. 27
Headlig hts
C leaning system .. ..... ... .. .. .... .. 46
Defective . . . . . . . . . . . . . . . . . . . . . . . . . 21
Headlight range control . . . . . . . . . 22, 41
Washer reservoir ........... .. .... . 234
Head rest raints . . . . . . . . . . . . . . . . . 52, 127
Ad justing . .... .. ..... ... .. .. .... . 127
Front seats . . . . . . . . . . . . . . . . . . . . . . . . 52
Rear seats . . . . . . . . . . . . . . . . . . . . . . . . . 52
Remov ing ................. .. .... .. 52
Hea ted
exterior mirrors .. ..... ... .. .. .... .. 48
rear w indow (automatic climate contro l) 67
rear window (cl imate control) . .. ...... 65
seats (au tomatic climate control) . . . . . . 67
seats (cl imate control) . .. .. .. .. .. .. . . 65
windsh ie ld washer spray nozzles .. .... 46
H eating ... .. .. . .. ..... ... .. .. .... .. 63
H eavy clo thing and safety belts . .. .. ... 136
H igh beam . .. .... ........... .. .... .. 43
High voltage warning label . ... .. .. ... 274
H omelink ® universal remote cont rol .. . 120
Hood (release lever) .......... .. .. .. . 220
H orn . .. .. .. .. . ... ....... .. .. .. .. .. . 8
H ow are c hild restra in t sys tem anchors re-
l at ed to child safety ........ .. .. .. .. . 182
How many airbags does my vehicle have? 150
H ow o ften sho uld I check my t ire pres-
sures? .... .. ... ... .... ... .. .. .... . 2 42
H ow safety belt pretensioners wo rk . ... 140
H ydroplaning . .. . ...... ... .. .. .... . 246
I
Immobilizer . . . . . . . . . . . . . . . . . . . . . . . . 26
Important t hings to do before drivi ng .. 123
Improperly worn safety belts .... .. .. .. 139
In dic ator lights
refer to Warn ing/ indica to r li ghts . .. .. . 12
Infan t seats .. .. .. .......... ...... . 17 4
Installing child safety seats Safety be lts . . . . . . . . . . . . . . . . . . . . . . 179
Installing t he up per te ther s trap on the
an chorage . ..... .. .. .... .... ... .. .. 18 5
Instruments Adjust ing the light ing ............. .. 44
Instruments and controls General illustration . . . . . . . . . . . . . . . . . . 8
I nstrument cluster . . . . . . . . . . . . . . . . . . 11
Interior light ing
Amb ienc e light ing . ... .. .... ... .. .. . 44
Front and rear . .. ............. .... . 44
Inte rmit ten t (w indshie ld w ipers) .. .. .. . 46
J
Jack ... .... .... .. ............. .... 257
Jump-starting ... .. ............. .... 268
Jumper cables ..... ... .. ..... ... .. .. 269
K
Key ...... .. .... .. ................. . 30
B attery replacement maste r key .. .... . 31
E mergency key . . . . . . . . . . . . . . . . . . . . . 30
Key rep lacement ... ... ..... ... .. .. . 30
Master key . . . . . . . . . . . . . . . . . . . . . . . . 30
Mechan ica l key . .. ............. .. .. . 31
Valet key . . . . . . . . . . . . . . . . . . . . . . . . . . 30
Ki ck -down
tiptronic . . . . . . . . . . . . . . . . . . . . 104, 109
K nee a irbags .... ............. ...... 159
Des cription .. .. .. .. ... .... .... .... 159
How they wor k ... ............. .. .. 161
Impo rtant sa fety instructions . .... . .. 161
L
LATCH 182
D esc ription .. .. .. ............. .. .. 183
Installing a ch ild restra int .... .... . .. 18 4