checking oil AUDI S6 2013 Owners Manual
[x] Cancel search | Manufacturer: AUDI, Model Year: 2013, Model line: S6, Model: AUDI S6 2013Pages: 306, PDF Size: 76.92 MB
Page 229 of 306
Checking and filling 22 7
Engine compartment
Engine compartment overview
These are the most important items that you can check.
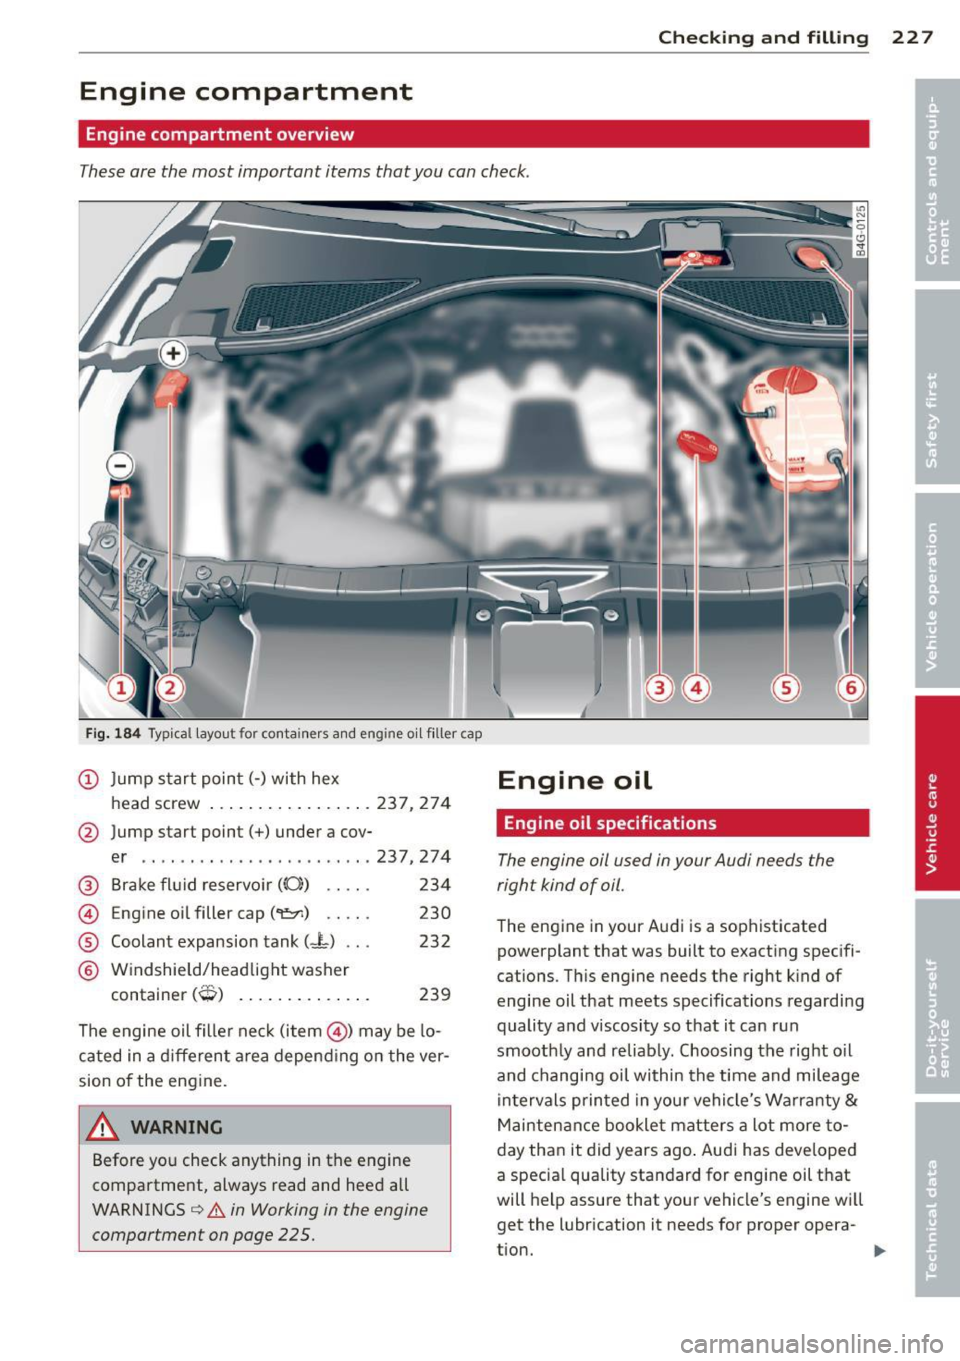
Fig. 184 Typical layout for conta iners and engine o il filler cap
@ Jump start poin t(-) with hex
head screw .. .............. . 237,274
@ Jump start point(+) under a cov-
®
©
®
©
er .. .. ... ..... ...... ...... 237,274
Brake fluid r eservo ir
((0)) . . . . . 234
Eng ine oil filler cap
("1:::r.) . . . . . 230
Coolant expansion tank
(-L) .. .
Windshield/headlight washer
t . ('"') con ainer O ......... .... .
232
239
The engine oil filler neck (item@) may be lo
cated in a different area depending on the
ver
sion of the eng ine.
Before you check anything in the engine
compartment, always read and heed all
WARNINGS
c::> &. in Working in the engine
compartment on page 225.
Engine oil
Engine oil specifications
The engine oil used in your Audi needs the
right kind of oil.
The engine in your Audi is a sophisticated
powerplant that was built to exacting specifi
cations. This eng ine needs the right kind of
engine oil that meets specifications regardi ng
quality and viscosity so that it can run smoothly and reliably. Choosing the right oil
and changing oil within the time and mileage
intervals p rinted in you r vehicle's Warranty
&
Maintenance booklet matters a lot more to
day than it did years ago . Audi has developed
a special quality standard for engine oil that
will hel p assure that your vehicle's engine will
get the lubrication it needs for proper opera
tion.
Page 232 of 306
230 Checking and filling
Checking the engine oil level
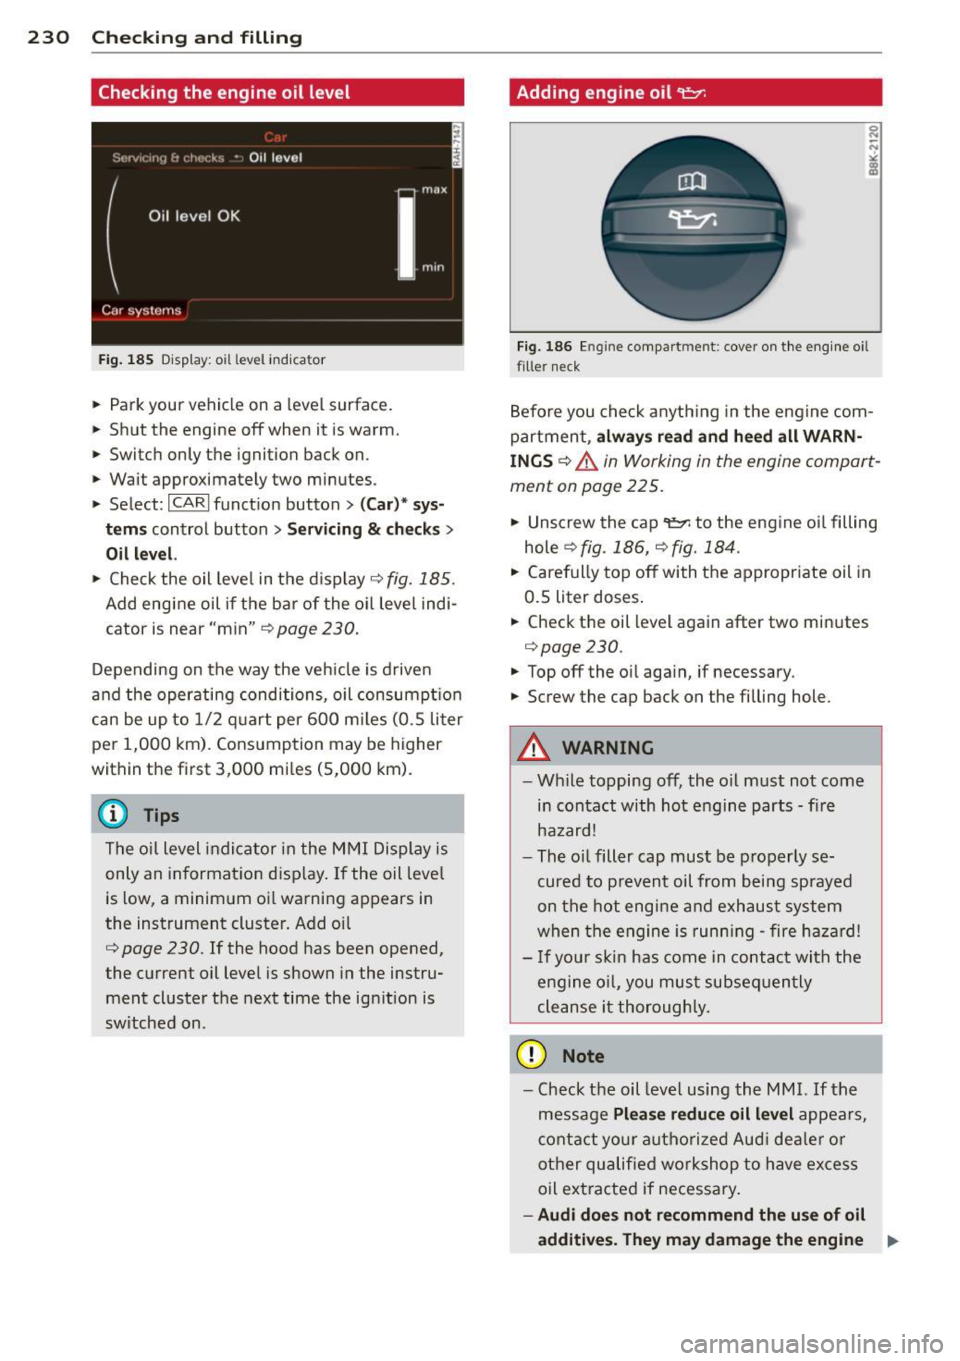
Fig. 185 Disp lay: o il level indica tor
• Park your vehicle on a level surface.
• Shut the engine off when it is warm.
• Switch only the ignition back on.
• Wait approximately two minutes.
• Select:
ICARI function button> (Car)* sys
tems
control button > Servicing & checks >
Oil level.
• Check the oil level in the display c::> fig. 185.
Add engine oil if the bar of the oil level indi
cator is near "min"
c::> page 230.
Depending on the way the vehicle is driven
and the operating conditions, oil consumption
can be up to 1/2 quart per 600 miles (0.5 liter
per 1,000 km) . Consumption may be higher
within the first 3,000 miles (5,000 km).
@ Tips
The oil level indicator in the MMI Display is
only an information display. If the oil level
is low, a minimum oil warning appears in
the instrument cluster. Add oil
c::> page 230. If the hood has been opened,
the current oil level is shown in the instru
ment cluster the next time the ignition is
switched on .
Adding engin e oil 't:::r.
Fig. 186 Engine compart men t: cover on the engine oil
fille r neck
Before you check anything in the engine com
partment,
always read and heed all WARN
INGS
c::> .&. in Working in the engine compart
ment on page 225.
• Unscrew the cap 't=1'l to the engine oil filling
hole
c::> fig . 186, c::> fig. 184.
• Carefully top off with the appropriate oil in
0.5 liter doses.
• Check the oil level again after two minutes
<=:>page 230.
• Top off the oil aga in, if necessary.
• Screw the cap back on the filling hole.
A WARNING
-- While topping off, the oil must not come
in contact with hot engine parts -fire
hazard!
- The oil filler cap must be properly se
cured to prevent oil from being sprayed
on the hot engine and exhaust system
when the engine is running -fire hazard!
- If your skin has come in contact with the
engine oil, you must subsequently
cleanse it thoroughly.
(D Note
- Check the oil level using the MMI. If the
message
Please reduce oil level appears,
contact your authorized Audi dealer or
other qualified workshop to have excess
oil extracted if necessary.
-Audi does not recommend the use of oil
additives. They may damage the engine ..,_.
Page 234 of 306
232 Check ing and filling
Engine cooling system
Coolant
The engine coolant performs two functions: it
keeps the engine from overheating and it pro
tects the engine from freezing in the winter .
The cooling system is sealed and generally re
quires little attention.
The cooling system has been filled at the fac
tory with a permanent coolant which does not need to be changed. The coolant consists of a
mixture of water and the manufacturer's gly
col-based coolant additive Gl3 ant ifreeze
with ant icorros ion add itives (50% for USA
models; 60% for Canad ian models). This mix
ture both assu res the necessary frost protec
tion and protects metal components in the
engine's cooling system from corrosion and
scaling. It also raises the boiling point of the
coolant.
Do not reduce the concentration o f the coo l
ant in the summer by adding plain water .
The
propo rtion of coolant add it iv e mu st be at
l eas t 50 % but not mo re than 6 0%
to main
tain antifree ze protection and cooling efficien
cy. If the coolant frost protect ion is too low,
the coolant could freeze and damage the veh i
cle heating and eng ine cooling system .
For year-round driving, antifree ze is added at
the factory for temperatures down to:
- -31°F(-35°C)USA
- - 40 ° F ( -40 °C) Canada.
A WARNING
Before yo u check anything in the engine
compartment, always read and heed all
WARNINGS
c:> &. in Working in the engine
compartment on page 225.
- Before winter sets in, have the coolant
checked to see if the coo lant addit ive in
your vehicle is suffic ient to meet the cli
mate cond itions. Th is is especially impor
tant if you live in a region where the w in- ter is extreme
ly cold . If necessary, in
crease the proportion of coo lant additive
to 60%.
- When adding coolant additive to your
cooling system, remember:
- We recommend us ing only coolant ad
d itive Gl2++ or G l3 (check the labe l)
fo r your vehicle. This coolant additive is
ava ilable at a utho rized Aud i dea le rs.
Other types of antifreeze can sign ifi
cantly reduce corros ion protection. The
res ulting corrosion can cause a loss of
coolant and serious engine damage.
- Do not add any type of radiator leak seal
ant to yo ur vehicle's engine coolant .
Add ing radiator repair flu id may adverse
ly affect the function and performance of
your cooling system and could resu lt in
damage not covered by your New Veh icle
Limited War ranty.
Checking the engine coolant level
The engine coolant level can be checked with
a quick glance .
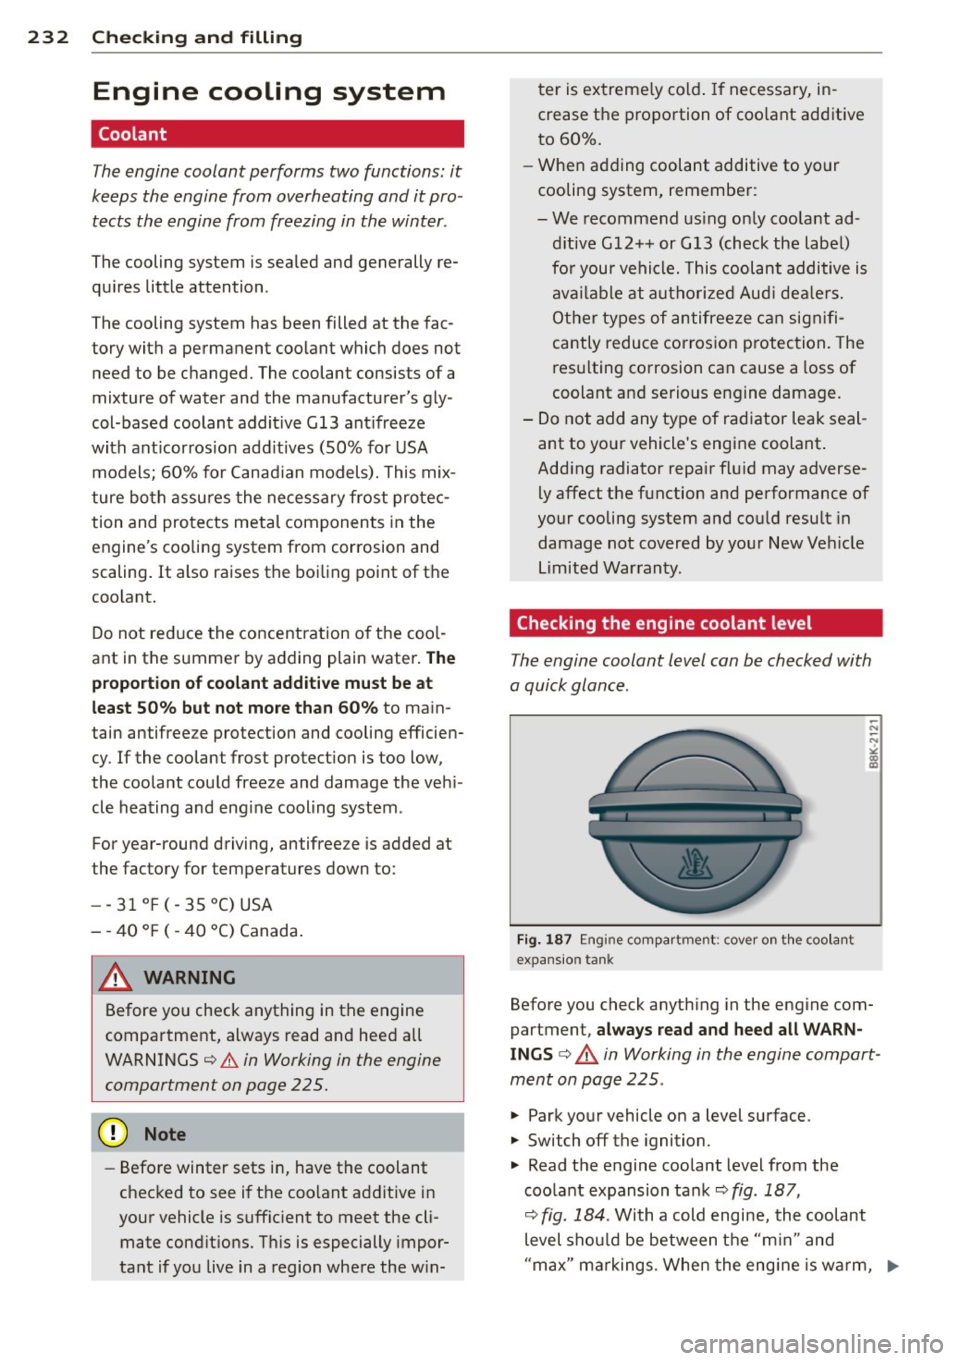
Fig. 1 87 Engin e compar tmen t: cover on t he coo la nt
expansio n ta nk
Before you check anyth ing in the engine com
partment,
alwa ys read and heed all WARN
I NGS c:> &. in Working in the engine compart
ment on page 225 .
.. Park your vehicle on a level surface .
.. Switch off the ignition.
.. Read the engine coolant level from the
coola nt expansion tank
c:> fig . 187,
c:> fig. 184 . With a cold engine, the coolant
level shou ld be between the "min" and
"max" markings. When the eng ine is wa rm, ..,.
Page 235 of 306
the level may be slightly above the "max"
marking .
The location of the coolant expansion tank
can be seen in the engine compartment illus
tration ¢ page 22 7.
To obtain an accurate reading, the engine must be switched
off.
The expansion tank in your vehicle is equipped
with an electric coolant level sensor.
When the coolant level is too low, the warning
light in the Auto-Check System ¢page 16will
illuminate until you add coolant and the level
has been restored to normal. Even though
there is an electric coolant level sensor , we
still recommend you check the coolant level
from time to time.
Coolant loss
Coolant loss may indicate a leak in the cooling
system. In the event of coolant loss, the cool
ing system should be inspected immediately
by your authorized Audi dealer.
It is not
enough merely to add coolant.
In a
sealed system, losses can occur only if
the boiling point of the coolant is exceeded as
a result of overheating.
& WARNING
The cooling system is under pressure and
can get very hot. Reduce the risk of scald
ing from hot coolant by following these
steps.
- Turn
off the engine and allow it to cool
down.
- Protect your face, hands and arms from
escaping fluid and steam by covering the
cap with a large, thick rag.
- Turn the cap slowly and very carefully in
a counter-clockwise direction while ap
plying light, downward pressure on the
top of the cap.
- To avoid being burned, do not spill anti freeze or coolant on the exhaust system or hot engine parts . Under certain condi
tions, the ethylene glycol in engine cool
ant can catch fire .
Checking and filling 233
@ Note
Do not add any type of radiator leak seal
ant to your vehicle's engine coolant. Add
ing radiator repair fluid may adversely af
fect the function and performance of your
cooling system and could result in damage not covered by your New Vehicle limited
Warranty .
Adding coolant
Be very careful when adding engine coolant.
Before you check anything in the engine com
partment,
always read and heed all WARN
INGS ¢ & in Working in the engine compart
ment on page 225 .
.,. Turn
off the engine .
.,. let the engine cool down.
.,. Place a thick rag over the coolant expansion
tank ¢ fig .
187 and carefully twist the cap
counter-clockwise ¢&_ .
.,. Add coolant.
.,. Twist the cap on again tightly.
Replacement engine coolant must conform to
exact specifications ¢ page
2 32, Coolant. We
recommend using only coolant additive G12+
+, G13 or in an emergency G12+. Do
not use a
different additive. In an emergency use plain
water until you can get the correct additive
and can restore the correct ratio. This should
be done as soon as possible.
If you have lost a considerable amount of
coolant, then you should add cold antifreeze
and cold water only when the engine is cold.
Always use new engine coolant when refilling.
Do not fill coolant above the "MAX" mark. Ex
cess coolant will be forced out through the pressure relief valve in the cap when the en
gine becomes hot.
A WARNING
- The cooling system is under pressure and
can get very hot. Reduce the risk of
II-
•
•
Page 259 of 306
@ Tips
Where snow chains are mandatory oncer
tain roads, this normally also applies to
veh icles with all-wheel dr ive.
Wheel bolts
Wheel bolts must always be tightened to the
correct torque .
The design of whee l bolts is matched to the
factory insta lled rims . If different rims are fit
ted, the correct wheel bolts with the right
length and correctly shaped bolt heads must
be used. This ensures that wheels are f itted
securely and that the brake system functions
correctly .
In certain circumstances, you may not use
wheel bolts from a different vehicle -even if it
is the same model
<=> page 287.
.&_ WARNING
Improperly tightened or maintained wheel
bolts can becom e loose caus ing loss of
cont ro l, a co llision and serious persona l in
Jury .
- Always keep the wheel bolts and the
threads in the wheel hubs clea n so the
w heel bolts can t urn easily and be prop
erly t ightened .
- Never grease or oil the wheel bolts and
the threads in the wheel hubs. They can
become loose while d riving if greased or
oi led, even if tightened to the specif ied
torque.
- Only use whee l bolts that belong to the
rim being installed .
- Never use different whee ls bolts on your
vehicle.
- Always maintain the co rrect tighten ing
torq ue for the wheel bo lts to reduce the
risk of a wheel loss . If the tightening tor
que of the wheel bolts is too low, they
can loosen and come out when the vehi
cle is moving. If the tightening torque is
too high, the whee l bolts and threads
Tire s an d wheel s 257
can be damaged and the whee l can be
come loose.
(D Note
The specified torque for the whee l bolts is
90 ft lb (120 Nm) with a tolerance of± 7,4
ft lb(± 10 Nm) . Torq ue whee l bolts diago
nally. After changing a whee l, the torq ue
must be checked as soon as possible with a
torque wrench -preferably by an author
i zed Audi dealer or qualified workshop.
Low aspect ratio tires
You r Aud i is facto ry-equ ipped w it h low aspect
ra tio tires. These tires have been tho ro ughly
tested and been se lec ted spe cifically for you r
model for their superb perfo rmance, road fee l
and handling under a variety of driving condi
tions. Ask your authorized Audi dealer for
more details .
T he low aspect ratio of these t ires is ind icated
by a numera l of
55 or le ss in the tire's s ize
designation. The numera l represents the ratio
of the t ire's sidewa ll height in relation to its
tread width expressed in percentage. Conven
tiona l tires have a he ight/w idth rat io of 60 or
more .
The performance of low-aspect -ra tio tire s is
particularly sens it iv e to improper inflation
pressure. It is therefore important that low
aspect ratio t ires are inflated to the specified
pre ssure and that the inflation pressur e is
regularly che cked and maintain ed. Tire pre s
s ures should be checked at least on ce a
m onth and alwa ys before a long trip
¢ page 246, Checking tire pressure .
What you can do to avoid tire and rim
damage
Low aspect ratio tires can be damage d mo re
easily by impact w ith potholes, curbs, g ull ies
or ridges on t he road, partic ularly if the tire is
u nderinflated.
Ill>-
•
•
Page 296 of 306
294 Index
------------------------------------
Data .... ....... ......... ... .... . 282
Start-Stop-System . . . . . . . . . . . . . . . . . . 76
start ing .. .. ................ ..... .. 71
Startingwithjumpercables .. .. ..... 274
Stopping . . . . . . . . . . . . . . . . . . . . . . . . . . 73
Engine compartment ........ .... ... . 227
C losing the hood .......... ... .... . 226
Opening the hood ................. 225
Safety instructions ........ .. .. .... . 225
Working in the engine compartment .. 225
Engine coolant .................... . 232
Adding coolant ............ ... .... . 233
Checking the engine coolant level .... . 232
Expansion tank ........... .. .. .. .. . 232
Malfunction symbol ....... .. .. .... .. 16
Radiator fan .............. ... .. .. . 234
Temperature gauge ........ ..... .. .. 11
Engine oil ... ................ ..... . 227
Adding .. .... ........... .... .... . 230
Additives . .. ............. .. .. .. ... 230
Changing .... ... .... .... .. .. .. .. . 231
Check ing the engine oil level .. .. .. .. . 230
I ndications and cond it ions requ iring ex-
tra checking .. ........... .. .. .... . 230
I ndicator light ........... .. .. .. .. .. 18
O il consumption .......... .... .... . 229
Oil grades . ................. ..... . 227
Oil level symbol .................... 21
Pressure malfunction ....... ... .. .. .. 17
Recommended oil check intervals ..... 230
Sensor defective . . . . . . . . . . . . . . . . . . . . 21
Specification and viscosity .. .. .. .. .. . 227
Engine sound .............. ... .... .. 98
E ng ine speed limitation ....... .. .. .. . . 21
Engine start-stop mode
refer to Star t-Stop-System ... .. .. .. .. 78
Engine start system (indicator lights) . ... 18
Environment Break-in period ......... .. .. .. .. .. . 199
Cata lytic converter ........ .. .. .. .. . 200
Disposing of your vehicle battery . ... . 239
Driving at high speeds .............. 202
Driving to minimize pollution and noise 201
Fuel . .. .. ............... .. .. .... . 222
Fuel economy ............ .... .... . 201
Leaks under your vehicle ... .. .. .. .. . 225
Lett ing the vehicle stand and warm up . 202
Proper disposal of drained brake fluid . 235 Proper disposal of d
rained engine cool-
ant ..... ..... .. .. .............. . 233
Proper disposal of drained eng ine
oil . . . . . . . . . . . . . . . . . . . . . . . . . 230,231
Recycling used engine oil ........ .... 230
Unleaded fuel .. .. ................ . 220
What should I do with an old battery? . 239
ESC (Electronic Stabilization Control) Warning/indicator lights ........ .. .. . 19
Event Data Recorder (EDR) ........ .. .. 192
Exhaust tail pipes .. .......... ...... . 214
Expansion tank .... ................ . 232
Exterior lighting . ... ............ .. .. . 41
Exterior mirrors Adjusting ..... .. .. ........ ...... .. 48
Dimming .. .. .. .. .. ..... ...... .. .. . 48
Heating ...... ... .. .............. .. 48
Exterior temperature display ...... .. .. . 23
F
Fastening
Booster seats . . . . . . . . . . . . . . . . . . . . . 180
Convertible child safety seats . . . . . . . . 178
Infant seats ... .. ............. .... 177
Floor mats . ..... .. ................ . 131
Foot pedals ..... .. ..... ........... . 131
For the sake of the environment Gasoline fumes and the environment .. 222
Reducing engine noise by early upshift-
ing ...... .... ... .. ................ 11
Refueling ... .. .. ....... ...... .. .. 222
Sav ing fuel by early upsh ifting . .. .. .. . 11
Four- zone automatic climate control . .. . 67
Front airbags
Description .... .. ................ . 149
How they work ... ................ . 155
Frontal coll is ions and the laws of phys ics 137
Front seats . . . . . . . . . . . . . . . . . . . . . . . . . 50
Adjusting ... .. .. ....... ...... .. .. 128
Child restraints in the front seat ...... 147
Fuel Additives .. .... .. ............. .... 220
Blended gasoline .............. .... 220
Current consumption .............. .. 24
Economy messages (efficiency program) 26
Fuel filler flap emergency release ... .. 223