window AUDI S6 2014 Owners Manual
[x] Cancel search | Manufacturer: AUDI, Model Year: 2014, Model line: S6, Model: AUDI S6 2014Pages: 304, PDF Size: 76.32 MB
Page 4 of 304
2 Table of contents Vehicle literature .. .. .. .. .. ... .
5
About this Owner's Manual . . . 6
Controls and equipment ..... .
Instruments and controls ... .
General illustration ......... .. ... .
Instruments and warning/
indicator lights ............... .
Instruments ............ ... .. ... .
Warning/indicator lights ..... ... .. .
Driver information display ... ... ... .
On-Board Diagnostic system (OBD) .. .
Opening and closing .. .. .... . .
Keys .......................... .
Power locking system ............ .
Rear lid ...................... .. .
Child safety lock for the rear doors .. .
Power windows ........... ... .. . .
Valet park ing ................... .
Sliding/tilting sun roof ............ .
Clear vision ................... .
Lights ......................... .
I nter ior lights ................... .
V1s 1on .......... ......... ... ... .
Wiper and washer system ... .... .. .
Mir rors .... .............. ... ... .
Seats and storage ......... ... .
General recommendations ... .... . .
Front seats ..................... .
Head restraints ................. .
Seat memory ................... .
Ashtray .. .. ... ... .... ......... . .
C igarette lighter .............. ... .
12-vo lt sockets .................. .
Storage ........ .............. .. .
Roof rack .... ................ .. .
L uggage compartment ...... ... .. .
Pass-through with ski sack ... .. ... . 8
8
8
11
11
12
24
30
32
32
34
38
40
40
41
41
43
43
46
47
48
so
52
52
53
55
56
58
58
59
59
61
63
65
Warm and cold . . . . . . . . . . . . . . . . 67
Climate controls . . . . . . . . . . . . . . . . . . 67
Three-zone climate control . . . . . . . . . 68 Four-zone
automatic climate control
Steering wheel heating ........... . 70
72
On the road
. . . . . . . . . . . . . . . . . . . 73
Steer ing . . . . . . . . . . . . . . . . . . . . . . . . 73
Starting and stopping the engine . . . . 74
E lectromechanical parking brake . . . . 77
Start-Stop-System . . . . . . . . . . . . . . . . 79
Speed warning system . . . . . . . . . . . . . 82
Cruise control . . . . . . . . . . . . . . . . . . . . 82
Audi adaptive cruise control
and braking guard . . . . . . . . . . . .
84
Introduction . . . . . . . . . . . . . . . . . . . . . 84
Genera l information . . . . . . . . . . . . . . 84
Audi adaptive cruise control . . . . . . . . 86
Audi braking gua rd . . . . . . . . . . . . . . . 90
Messages . . . . . . . . . . . . . . . . . . . . . . . 91
Audi active lane assist . . . . . . . . 93
Active lane assist . . . . . . . . . . . . . . . . . 93
Audi side assist . . . . . . . . . . . . . . . 96
Lane Change Assistant. . . . . . . . . . . . . 96
Audi drive select . . . . . . . . . . . . . . 100
Driving settings . . . . . . . . . . . . . . . . . . 100
Raising/lowering the vehicle . . . . . . . . 102
Driver messages . . . . . . . . . . . . . . . . . . 102
Night vision assistant . . . . . . . . . 103
Night vision assistant with detected
pedes trian marking . . . . . . . . . . . . . . . 103
Automatic Transmission . . . . . . 107
multitronic, S tronic, tiptronic. . . . . . . 107
Parking systems . . . . . . . . . . . . . . 114
General information . . . . . . . . . . . . . . 114
Parking system plus . . . . . . . . . . . . . . . 115
Rearviewcamera ................. 116
Peripheral cameras . . . . . . . . . . . . . . . 119
Adjusting the d isplay and the warning
tones. . . . . . . . . . . . . . . . . . . . . . . . . . . 124
Page 34 of 304
32 Opening and clo sing
Opening and closing
Keys
Key set
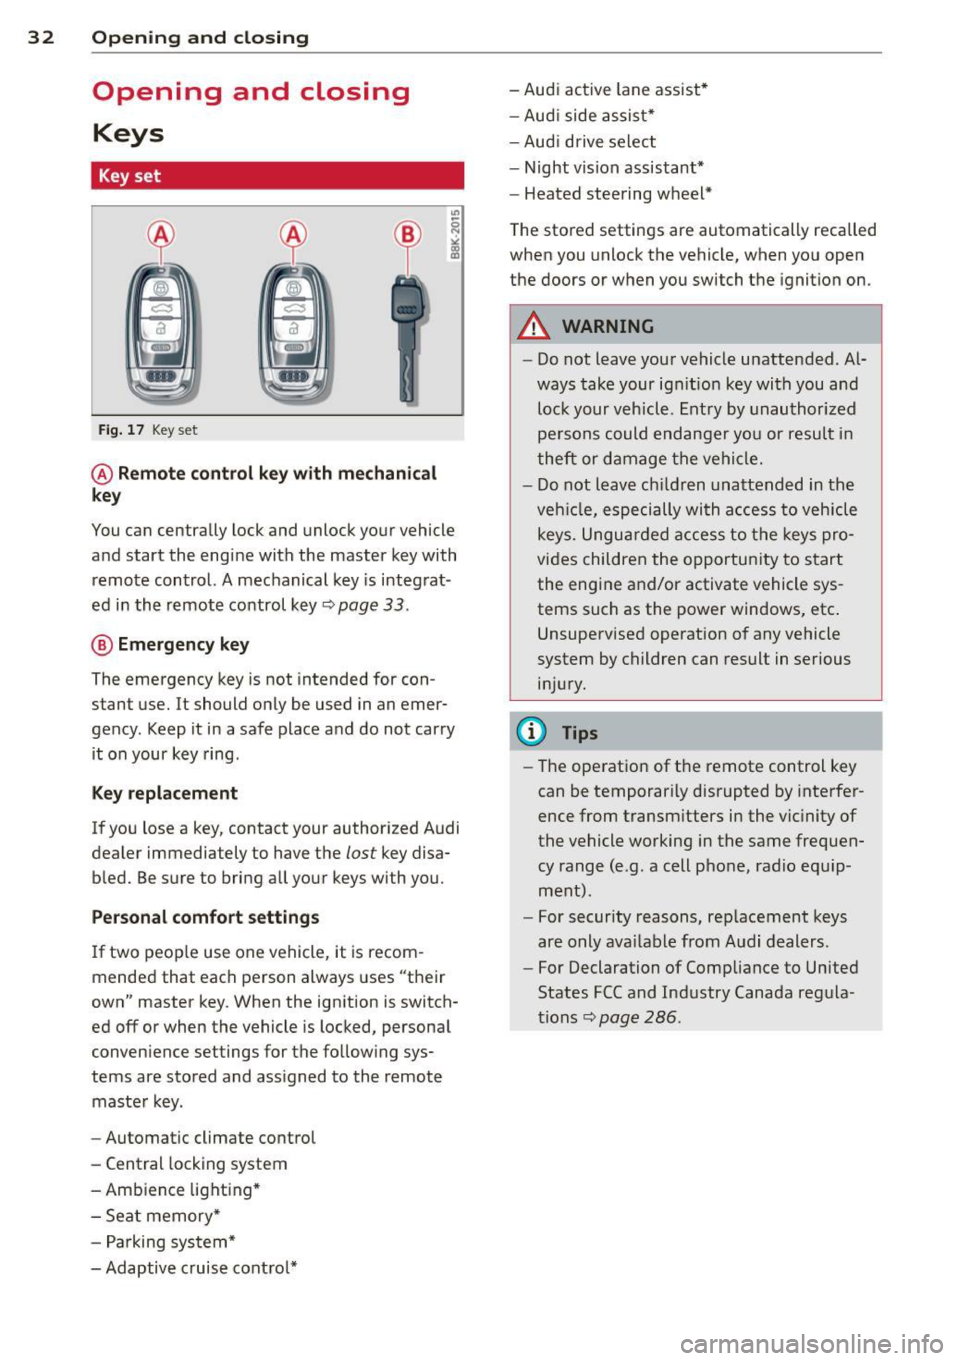
Fig . 17 Key set
@ Remot e control k ey w ith m echan ical
ke y
You can centrally lock and unlock your vehicle
and start the engine with the master key with
remote control. A mechanical key is integrat
ed in the remote control key
r:::;, page 33 .
@ Eme rgenc y ke y
The emergency key is not intended for con
stant use.
It should only be used in an emer
gency. Keep it in a safe place and do not carry it on your key ring .
Key replac em ent
If you lose a key, contact your authorized Audi
dealer immediately to have the
lost key disa
bled. Be sure to bring all your keys with you.
P er sonal c omfo rt se ttin gs
If two peop le use one vehicle, it is recom
mended that each person always uses "their
own" master key . When the ignition is switch
ed off or when the vehicle is locked, personal
convenience settings for the follow ing sys
tems are stored and assigned to the remote master key .
- Automatic climate control
- Central locking system
- Amb ience light ing*
- Seat memory*
- Parking system*
- Adaptive cruise control* - Audi active
lane assist *
- Aud i side assist*
- Aud i drive select
- Night vision assistant*
- Heated steering wheel*
The stored settings are automatically recalled
when you unlock the vehicle, when you open
the doors or when you switch the ignition on.
A WARNING
-- Do not leave your vehicle unattended . Al-
ways take your ignit ion key with you and
lock your vehicle . Entry by unauthorized
persons could endanger yo u or resu lt in
theft or damage the vehicle.
- Do not leave ch ildren unattended in the
veh icle, especially with access to vehicle
keys. Unguarded access to the keys pro
vides children the opportunity to start the engine and/or activate vehicle sys
tems such as the power windows, etc .
Unsupervised operation of any vehicle
system by children can result in serious
injury.
(1) Tips
- The operation of the remote control key
can be temporar ily disrupted by interfer
ence from transm itters in the vic inity of
the vehicle working in the same frequen
cy range (e.g. a cell phone, radio equip
ment).
- For security reasons, rep lacement keys
are only ava ilable from Audi dealers.
- For Declaration of Compliance to United
States FCC and Industry Canada regula
tions
r:::;, page 286.
Page 35 of 304
Removing the mechanical key
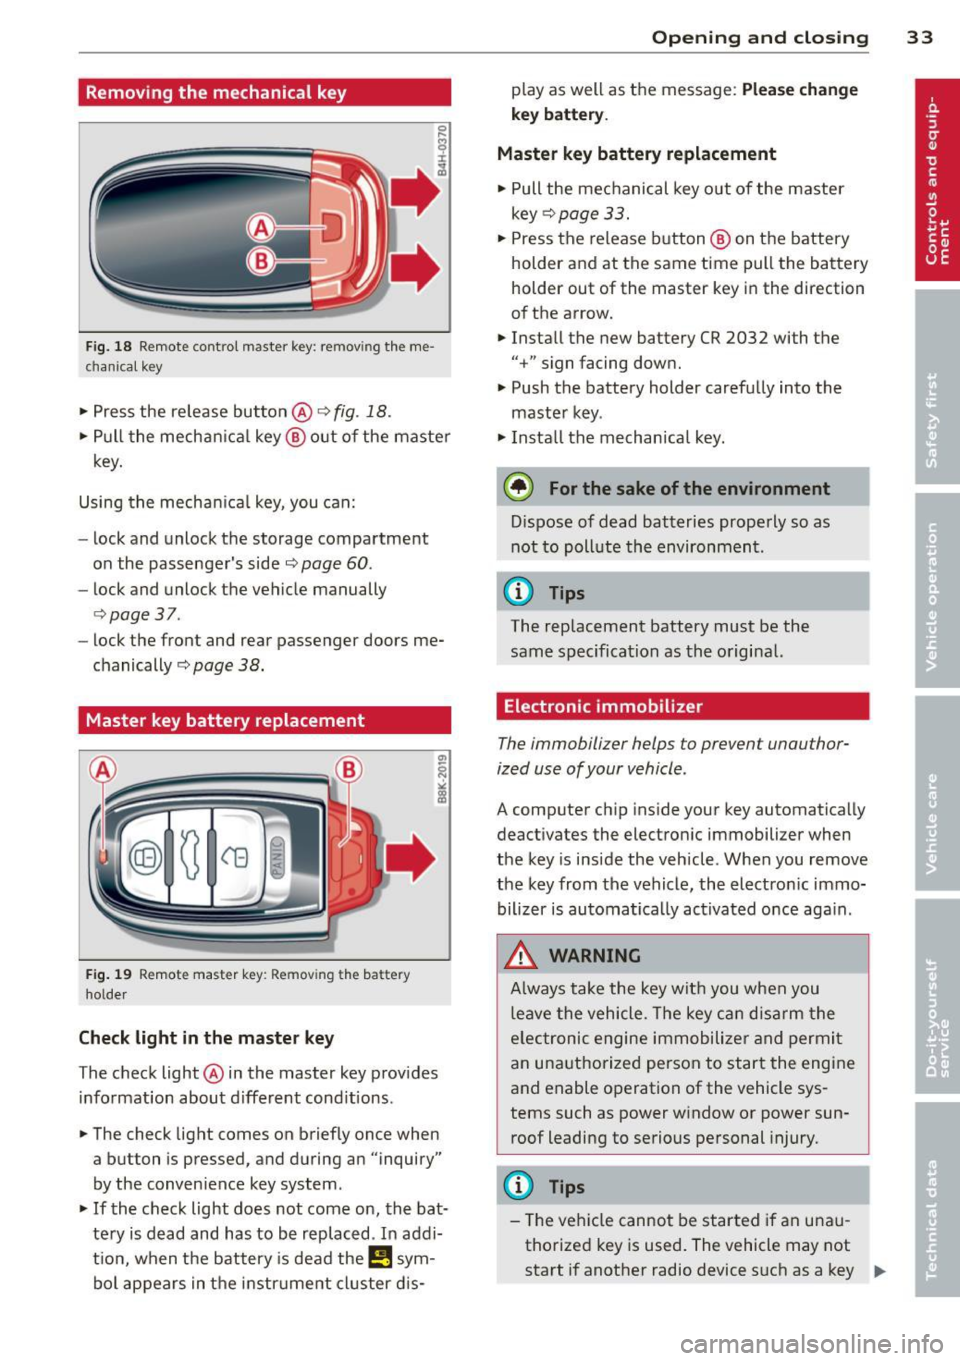
Fig. 18 R emo te contro l master key : remov ing the me
chanica l key
• Press the release button @ c:> fig. 18.
• Pull the mechanica l key @ out of the master
key.
Using the mechan ica l key, you can:
- lock and unlock the storage compartment
on the passenger's side
c::> page 60.
- lock and unlock the vehicle manually
c::>page 37 .
-lock the front and rear passenger doors me
chanically
c:> page 38.
Master key battery replacement
F ig . 19 Remote master key: Removing the battery
holde r
Check light in the master key
The check light @ in the master key provides
information about different cond itions .
• The check light comes on briefly once when
a button is pressed, and during an "inquiry"
by the conven ience key system .
• If the check light does not come on, the bat
tery is dead and has to be replaced. In addi
t ion, when the battery is dead the
I!! sym
bol appears in the instrument cluster dis-
Opening and closing 33
play as well as the message: Please change
key battery .
Master key battery replacement
• Pull the mechanical key out of the master
key
c::> page 33.
• Press the release button @ on the battery
holder and at the same time pull the battery
holder out of the master key in the direction
of the arrow.
• Install the new battery CR 2032 with the
"+" sign facing down.
• Push the battery holder carefully into the
master key .
• Install the mechanical key.
@ For the sake of the environment
Dispose of dead batteries properly so as
not to poll ute the environment.
(D Tips
The replacement battery must be the
same specification as the original.
, Electronic immobilizer
The immobilizer helps to prevent unauthor
ized use of your vehicle.
A comp uter chip inside your key automatica lly
deactivates the electronic immobilizer when
the key is inside the vehicle. When you remove
the key from the vehicle, the electronic immo
bilizer is automatically activated once again .
A WARNING
-
Always take the key with you when you
leave the vehicle. The key can disarm the
e lectronic engine immobilizer and permit
an unauthorized person to start the engine
and enable operation of the vehicle sys
tems such as power window or power sun
roof leading to serious personal injury.
(D Tips
- Th e vehicle cannot be started if an unau
thorized key is used. The vehicle may not
start if another radio device such as a key .,.
Page 36 of 304
34 Opening and closing
for another vehicle or a transponder is
located on the key ring.
- For Declaration of Compliance to United
States FCC and Industry Canada regula
tions ¢
page 286.
Power locking system
General description
The power locking system locks or unlocks all
doors and the rear lid simultaneously.
You can lock and unlock the vehicle centrally.
You have the following choices:
- Remote master key¢
page 35,
-Door handles with convenience key*
¢page 36,
-Lock cylinder at the driver's door
<=?page 37, or
- Power locking switch inside
<=? page 37.
Selective unlocking
When you lock the vehicle, the power locking
system w ill lock the doors and the rear lid .
When unlocking, you can set in the MMI
whether only the driver's door or the entire
vehicle should be unlocked <=?
page 35.
Automatic locking
The automat ic locking feature locks all the ve
h icle doors and the rear lid when you drive
faster tha n 9 mph (15 km/h).
The car is unlocked again, when the opening
function in the power locking system sw itch
or at one of the door levers is actuated .
Anti-theft alarm warning system
If the anti-theft alarm warning system de
tects a break- in into the vehicle, acoust ic and
visual warning signals are triggered .
The anti-theft warning system is activated au
tomatically when you lock the vehicle . It is de
activated when u nlocking using the remote
key, with the mechanical key, and when you
switch the ignition on.
The alarm also turns off when the alarm cycle has expired.
Turn signals
When you unlock the vehicle, the turn s ignals
flash twice. When you lock the vehicle the
turn signals flash once. If they do not flash ,
one of the doors, the rear lid or the hood is
not locked .
Unintentionally locking yourself out
In the follow ing cases there safeguards to
prevent you locking your remote master key in
the vehicle:
- The vehicle does not lock w ith the central
locking switch <=?
page 37 if the driver's
door is open.
- On veh icles with convenience key*, if the
most recently used master key is in the lug
gage compartment, the rear lid is automati
cally un locked again after it is closed.
Do not lock your veh icle w ith the
remote mas
ter key or convenience key*
unti l all doors
and the rear lid are closed. In this way you
avoid locking yourself out accidentally .
Power side door closer*
The veh icle doors are equipped with a power
s ide door closer . When closing a door, you on
ly have to let it fall light ly into the latch . The
door will then automatically close by itself
¢& .
A WARNING
-- When you lock your vehicle from outside,
nobody - especially children -should re
main inside the vehicle. Remember,
when you lock the vehicle from the out
side the windows cannot be opened from
the inside.
- When you leave the vehicle, always take
the ignition key with you . This will pre
vent passengers (children, for example)
from accidentally being locked in the ve
hicle should they accidentally press the
power locking switch in the doors.
- Do not leave children inside the vehicle
unsupervised. In an emergency it would
be impossible to open the doors from
the o utside without the key.
Page 42 of 304
40 Opening and clo sing
Child safety lock for
the rear doors
The power child safety lock locks the rear win
dows and prevent the rear doors from being
opened from the inside.
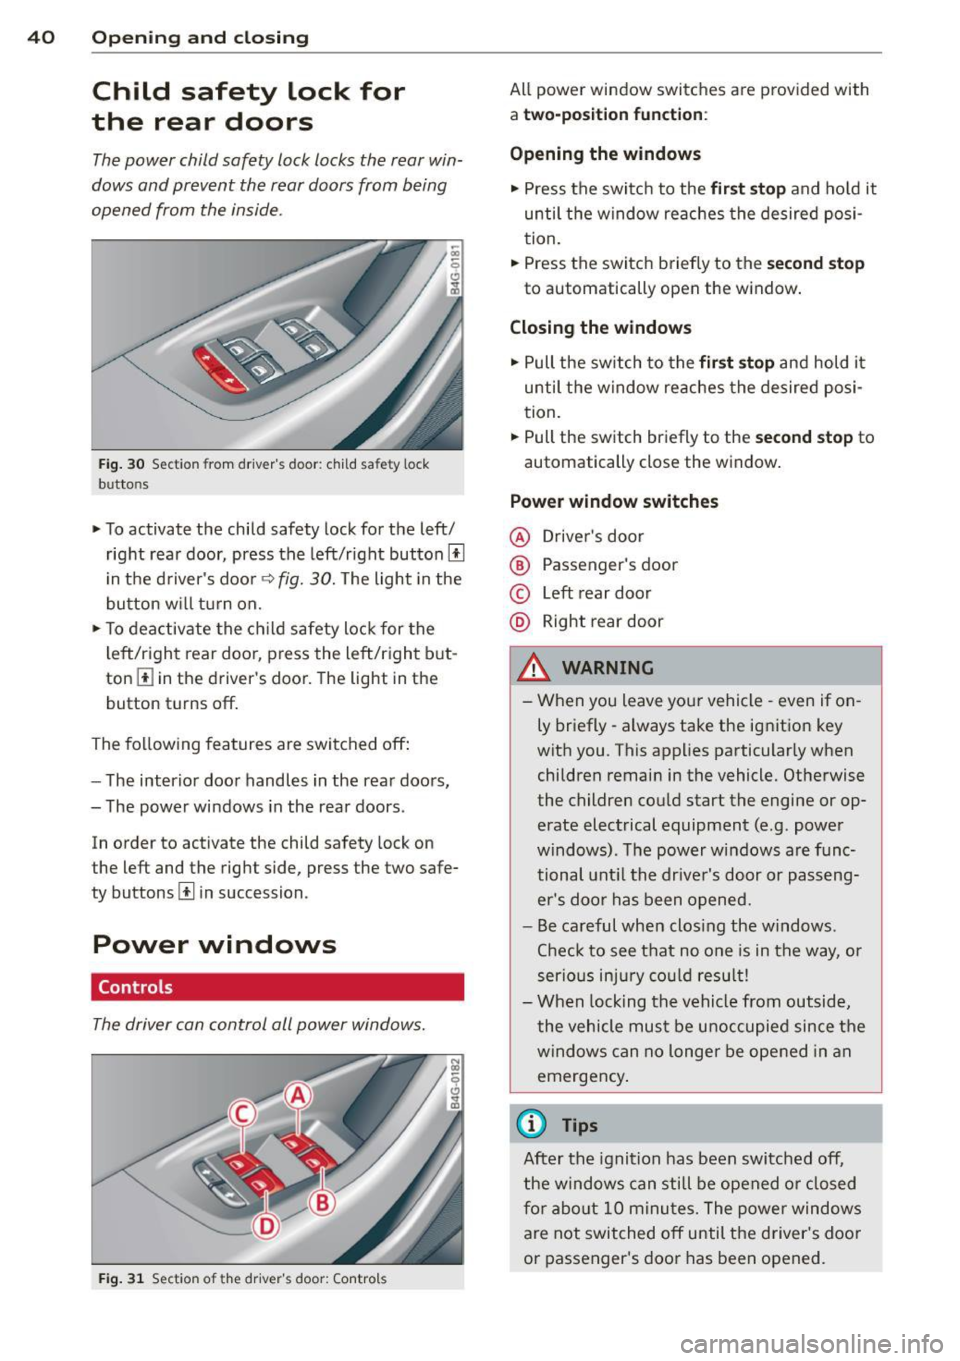
Fig. 30 Section from driver's door: child safety lock
buttons
• To activate the child safety lock for the left/
right rear door, press the left/right button[!]
i n the d river's door
q fig. 30. The light in the
button w ill turn on.
• To deactivate the ch ild safety lock for the
l eft/right rear door, press the left/right b ut
ton
III in the driver's door. The light in the
button turns off.
The following features are switched off:
- The interior door handles in the rear doors,
- The power windows in the rear doors .
In order to activate the child safety lock on
the left and the right side, press the two safe
ty buttons[!] in succession.
Power windows
Controls
The driver can control all power windows.
Fig . 31 Section of the driver's door: Controls
All power window switches are provided with
a two-po sition function :
Opening the windows
• Press the switc h to the fir st sto p and hold it
until the window re aches the desired posi
tion.
• Press the switch briefly to the
second stop
to automatically open the window .
Closing the windows
• Pull the sw itch to the fir st stop and hold it
until the window reaches the desired posi
tion .
.. Pull the switch br iefly to the
s e cond stop to
automatically close the window.
Power window switches
@ Drive r's door
® Passenger's door
© Left rear door
@ Right rear door
& WARNING
- When you leave you r vehicle -even if on
ly briefly -always take the ignition key
wit h you . This applies particularly when
children remain in the vehicle. Otherwise
the children could start the engine or op
erate electrical equipment (e.g. power
windows). The power windows are func
tional unt il the drive r's door or passeng
er 's doo r ha s been opened.
- Be careful when clos ing the w indows .
Chec k to see that no o ne is in the way, or
serio us inju ry co uld resu lt!
- When lock ing the vehicle from outside,
the vehicle mu st be u noccupied since the
windows can no longer be opened in an
emergency .
{1) Tips
After the ignition has been switched off,
the windows can still be opened o r closed
fo r a bout 10 m inu tes. The power windows
are not switched off until the driver 's doo r
or passenger 's door has been opened.
Page 43 of 304
What to do after a malfunction
The one-touch open and close function must
be reactivated if the battery has been discon
nected.
.,. Pull and hold the power window switch until
the window is fully closed.
.,. Release the switch and then pull it again for
at least one second.
Valet parking
The valet parking feature protects the lug
gage compartment from unauthorized ac cess.
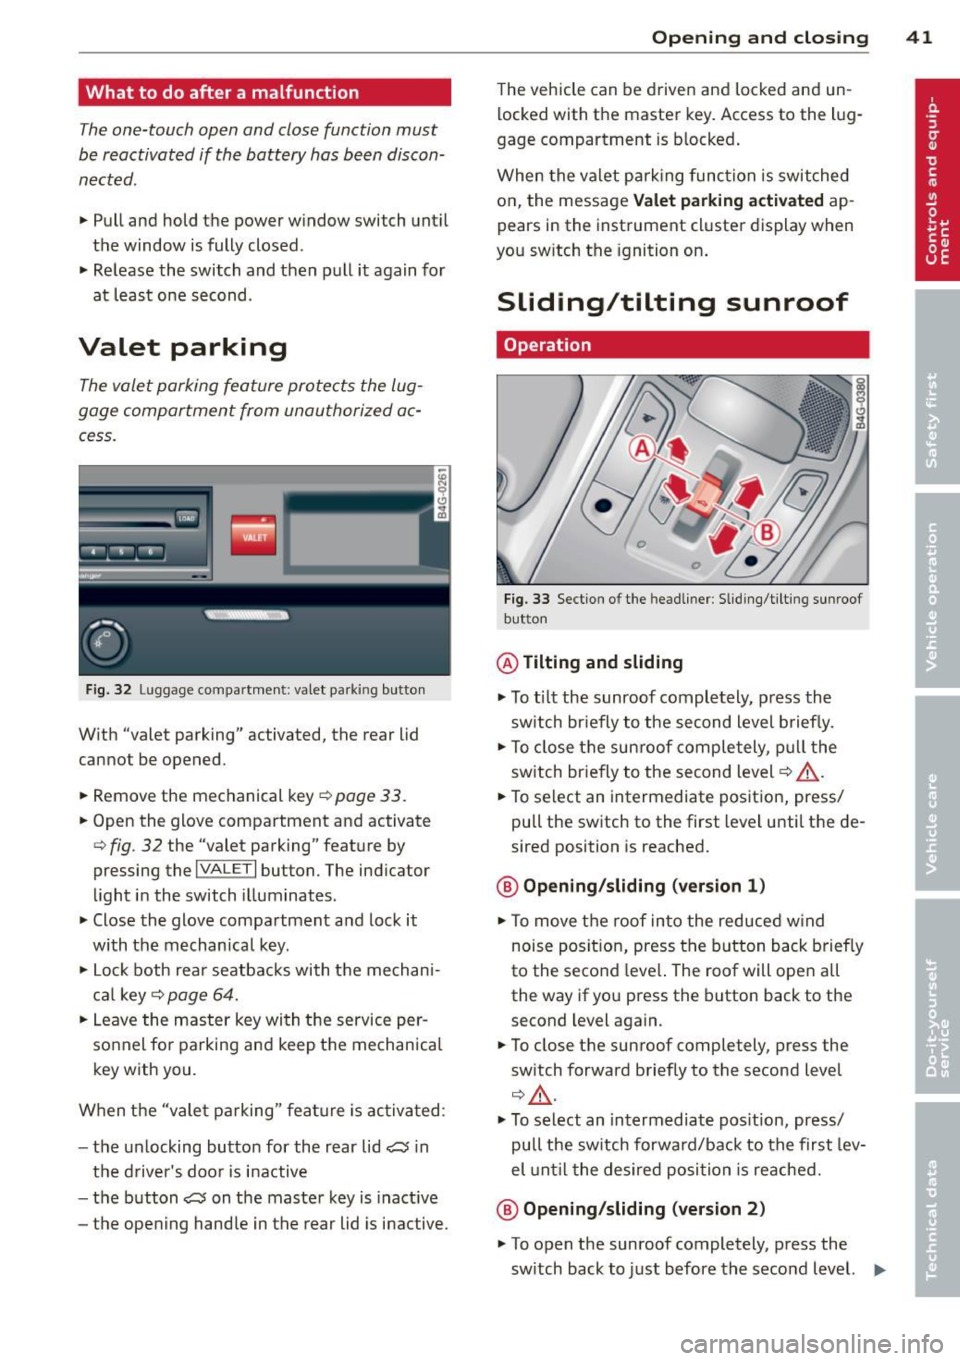
Fig. 32 Lugg age compartment: valet parking button
With "valet parking" activated, the rear lid
cannot be opened.
.,. Remove the mechanical key
¢ page 33.
.,. Open the glove compartment and activate
¢ fig . 32 the "valet parking" feature by
pressing the
I VALET I button. The indicator
light in the switch illuminates .
.,. Close the glove compartment and lock it
with the mechanical key.
.,. Lock both rear seatbacks with the mechan i
cal key ¢
page 64.
.,. Leave the master key with the service per
sonnel for parking and keep the mechanical
key with you.
When the "vale t parking" feature is activated :
- the un locking button for the rear lid
a in
the driver's door is inactive
- the button
a on the master key is inactive
- the opening handle in the rear lid is inactive.
Opening and closing 41
The vehicle can be driven and locked and un
locked with the master key. Access to the l ug
gage compartment is blocked.
When the valet park ing function is switched
on, the message Valet parking activated ap
pears in the instrument cluster display when
you sw itch the ignition on .
Sliding/tilting sunroof
Operation
Fig. 33 Section of the headliner: Sliding/ti lting sunroof
button
@ Tilting and sliding
.,. To tilt the sunroof completely, p ress the
sw itch briefly to the second level briefly.
.,. To close the sunroof completely , pull the
switch briefly to the second level¢_&. .
.,. To select an intermediate position, press/
pull the switch to the first level until the de
sired position is reached.
@ Opening /sliding (version 1)
.,. To move the roof into the reduced w ind
noise posit ion, press the button back briefly
to the second leve l. The roof will open all
the way if you press the button back to the
second level again.
.,. To close the sunroof completely, press the
sw itch forward briefly to the second level
¢,&. .
.,. To select an intermediate position, press/
pull the sw itch forwa rd/back to the first lev
el until the desired posi tion is reached.
@ Opening/sliding (version 2)
.,. To open the sunroof completely, press the
sw itch back to just before the second level. .,.
Page 49 of 304
@ Tips
The instrument illumination (for dials and
needles) lights on when the ign it ion is
sw itched on and the vehicle lig hts are
turned off. As the daylight fades, the illu
m ination of the dials likewise dims auto
mat ically and w ill go out comp lete ly when
the o utside lig ht is ve ry low. This fea ture is
meant to remi nd you t o swit ch on the
headl igh ts when o utside light condi tions
become poor.
Vision
Sun visors
( J
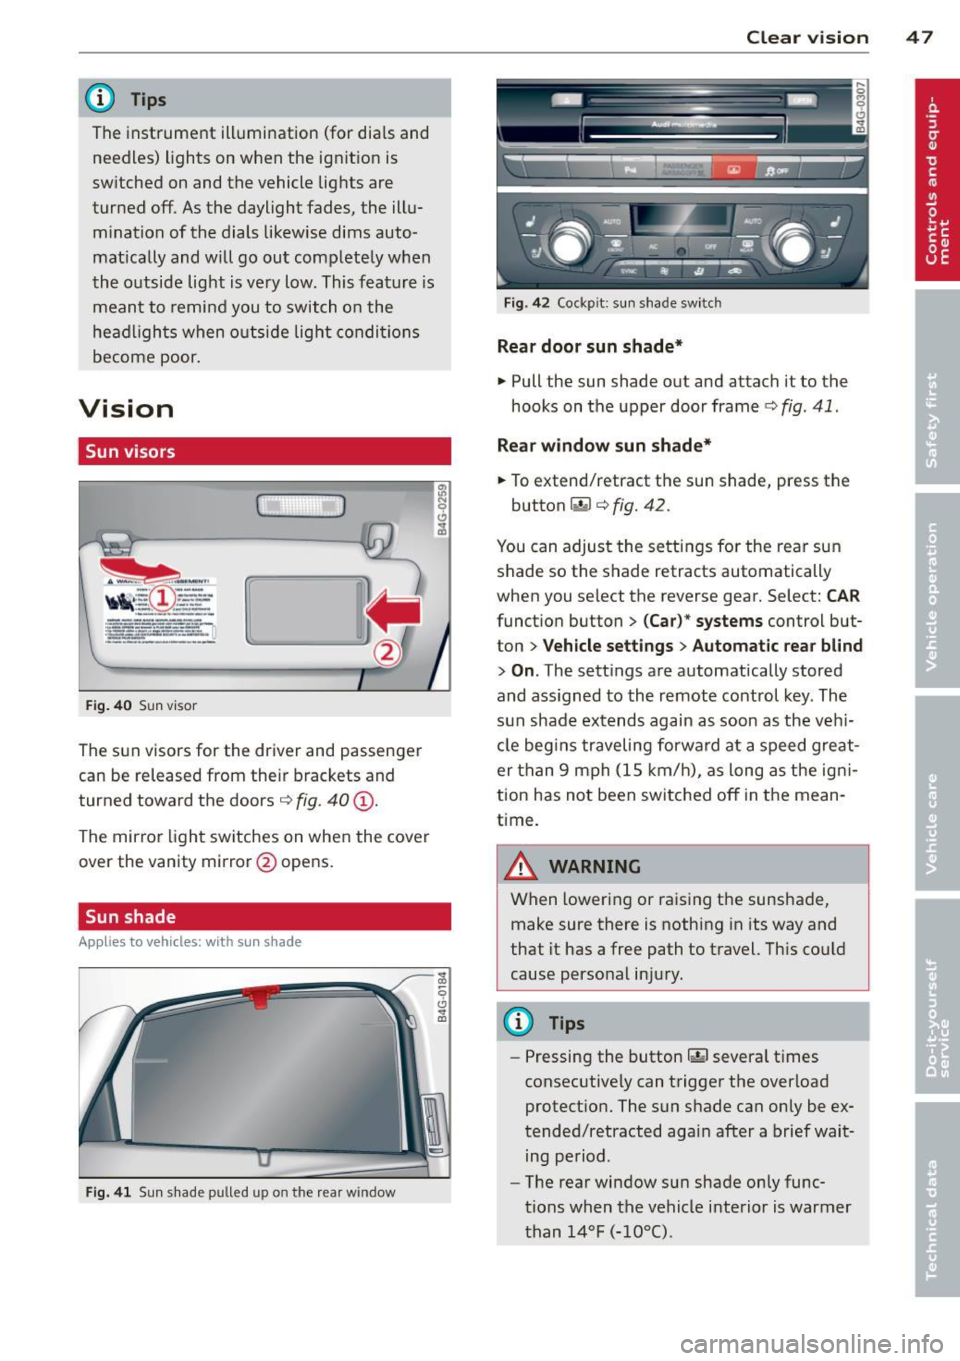
F ig . 40 Sun visor
The sun visors for the driver and passenger
can be released from their brackets and
turned toward the doors¢
fig. 40@.
The mirror light switches on when the cover
over the vanity mirror @opens.
Sun shade
Applies to vehicles: with sun shade
F ig . 41 Sun shade pulled up on the rea r window
Clear vi sion 4 7
Fig . 4 2 Cockp it: sun shade switch
Rear door sunshade*
.. Pull the sun shade out and attach it to the
hooks on the upper door frame¢
fig. 41 .
Rear window sun shade*
.. To extend/retract the sun shade, press the
button~ ¢
fig. 42.
You can adjust the settings for the rear sun
shade so the shade retracts automatically
when you select the reverse gear. Select:
CAR
function button > (Car )* systems control but
ton >
V ehicle settings > Automatic rea r bl ind
> On .The sett ings are automatically stored
and ass igned to the remote control key . The
s u n shade extends again as soon as the v ehi
cle beg ins traveling forwa rd at a speed gre at
er than 9 mph (1S km/h), as long as the ig ni
tion has not been switched off in the mean
time.
A WARNING
When lowering or raising the sunshade, make sure there is nothing in its way and
that it has a free path to t ravel. Th is cou ld
cause perso nal inju ry.
@ Tips
-
- Pressing the button rn severa l t imes
consec utive ly can trigger the overload
protect ion. The sun s hade can only be ex
tended/retracted again after a brief wait ing period.
- The rear window sun shade only func
tions when the vehicle i nterior is warmer
than
1 4°F ( -10°() .
Page 53 of 304
Dimming the mirrors
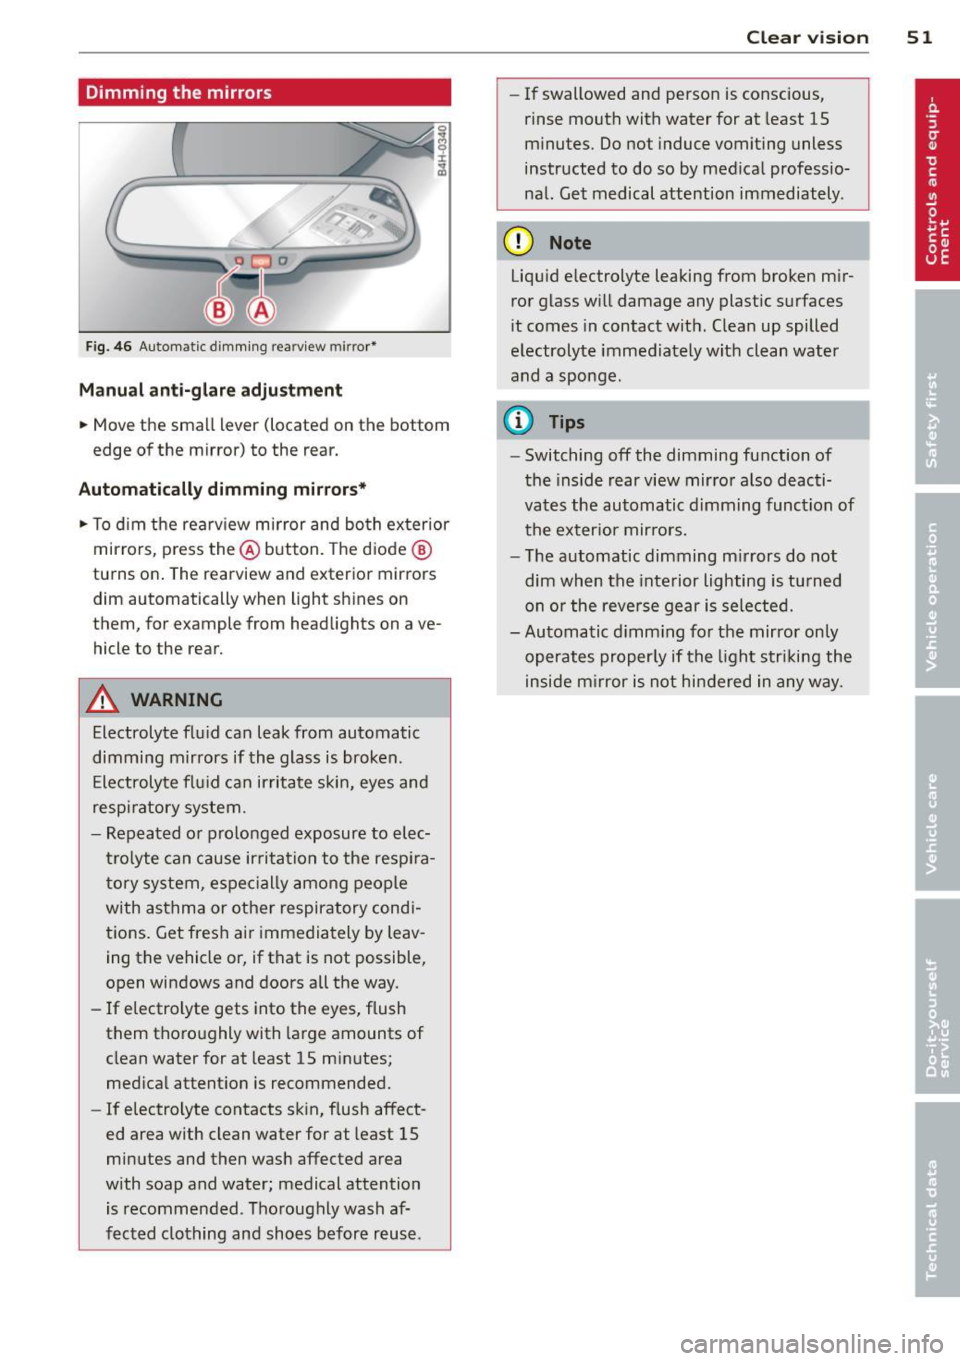
Fig. 46 Automatic d imm ing rearv iew mirro r*
M anual ant i-glar e adjustment
.. Move the small lever (located on the bottom
edge of the mirror) to the rear.
Automatic ally dimming mirror s*
.. To d im the rearv iew mirror and bo th ex terior
mirrors, p ress the @button. The d iode @
turns on. The rearview and exterior mirrors
dim automatically when light shines on
them, for example from headlights on ave
hicle to the rear.
&_ WARNING
Electrolyte flu id can leak from automatic
dimming mirrors if the glass is broken.
Ele ctrolyte fl uid can irritate s kin, eyes and
respi ratory system.
- Repeated or prolonged exposure to elec
tr olyte can cause ir ritation to the resp ira
tory syste m, espec ially among people
with asthma or othe r respiratory cond i
tions. Get fres h ai r i mmedia tely by leav
ing the vehicle or, if that is not possible,
open windows and doors all the way.
- If electrolyte gets into the eyes, flush
them thoro ughly with large amounts of
clean water for at least 15 m in utes;
med ica l attent ion is recommended.
- If electrolyte contacts sk in , flush affect
ed area with clean water for at least 15
minutes and then wash affected area
w ith soap and water; medical attention
is recommended. T ho roughly wash af
f e cted clothing and sho es befor e reuse.
Clear vi sion 51
- If swallowed and perso n is conscious,
rinse mouth with water for at least 15
m inutes. Do not induce vomiting unless
instructed to do so by med ica l professio
nal. Get medical attention immediately .
(D Note
Liqu id e lectrolyte leaking from broken m ir
ror glass w ill damage any plastic surfaces
i t comes in contact wit h. Clea n up spilled
electrolyte immed iately w it h clean water
and a sponge.
@ Tips
- Switching off the dimming function of
the inside rear view mir ro r also deacti
vates the automatic d imming function of
t he ex ter ior mirro rs.
- T he automatic dimming m irrors do not
dim when the inte rior lighting is tu rned
on or the reve rse gear i s sele cted.
- Automatic d imm ing fo r th e mirror only
operates proper ly if the light s trik in g the
inside m irror is not hin dered in any way.
Page 63 of 304
- Compartments* on the back of the front seat backrests
- Garment hooks on the sides of the pillars in
the rear of the vehicle and in the rear grab handles
- Compartment in the rear center armrest
- Two mounting hooks* unde r the base of the
rear window inside the luggage compart
ment. You can attach light ob jects to these
hooks. The mounting hooks are spring-load
ed and will return to thei r no rmal position
when not in use.
A WARNING
-
- Always remove objects from the instru
ment panel. Any items not stored could
sl ide around inside the vehicle while driv
ing or when accelerating or when apply
ing the brakes or when driving a round a
corner.
- When you are driving make sure that
anything you may have placed in the cen
ter console or other storage locations cannot fa ll out into the footwells. In case
of sudden braking you would not be able
to brake or accelerate.
- Always keep the lid of the compartment
for (sun)glasses* closed while driving to
reduce the risk of injury during a sudden
braking maneuver or in the event of an
accident .
-Any articles of clothing that you have
hung up must not interfere with the driv
er's v iew . The coat hooks are designed
only for lightweight clothing . Never hang
any clothing w ith ha rd, pointed or heavy
objects in the pockets on the coat hooks.
During sudden braking or in an accident -
especially if the airbag is deployed -
these objects cou ld injure any passen
gers inside the vehicle .
- To reduce the risk of persona l injury in an
accident or sudden stop, always keep the
glove compartment closed while driving .
- Read and fo llow all WARN INGS
¢ page 169, Important safety instruc
tions on the side airbag system.
S ea ts a nd s to rage 61
- Hang clothes in such a way that they do
not impair the driver's vision .
- The coat hooks must only be used for
lightweight clothing. Do not leave any
heavy or sharp edged objects in the pock
ets which may interfere with the side cur
tain airbag deployment and can cause pe rsonal injury in a crash .
- Do not use coat hangers for hanging
cloth ing on the coat hooks as th is can in
terfere with prope r deployment of the
side curta in a irbags in an acc ident.
- Do not hang heavy objects on the coat
hooks, as they could cause personal in
jury in a sudden stop.
- For strength-re lated reasons, the mount
ing hooks can only be used to secure ob
jects weigh ing up to 10 lb . (5 kg). Heavi
er objects will not be adequately sec ured
- there is a risk of injury .
(D Note
Objects located on the rear shelf that rub
against the rea r window could damage the
hea ting wires for the rear window defog
ger.
Roof rack
Description and mounting locations
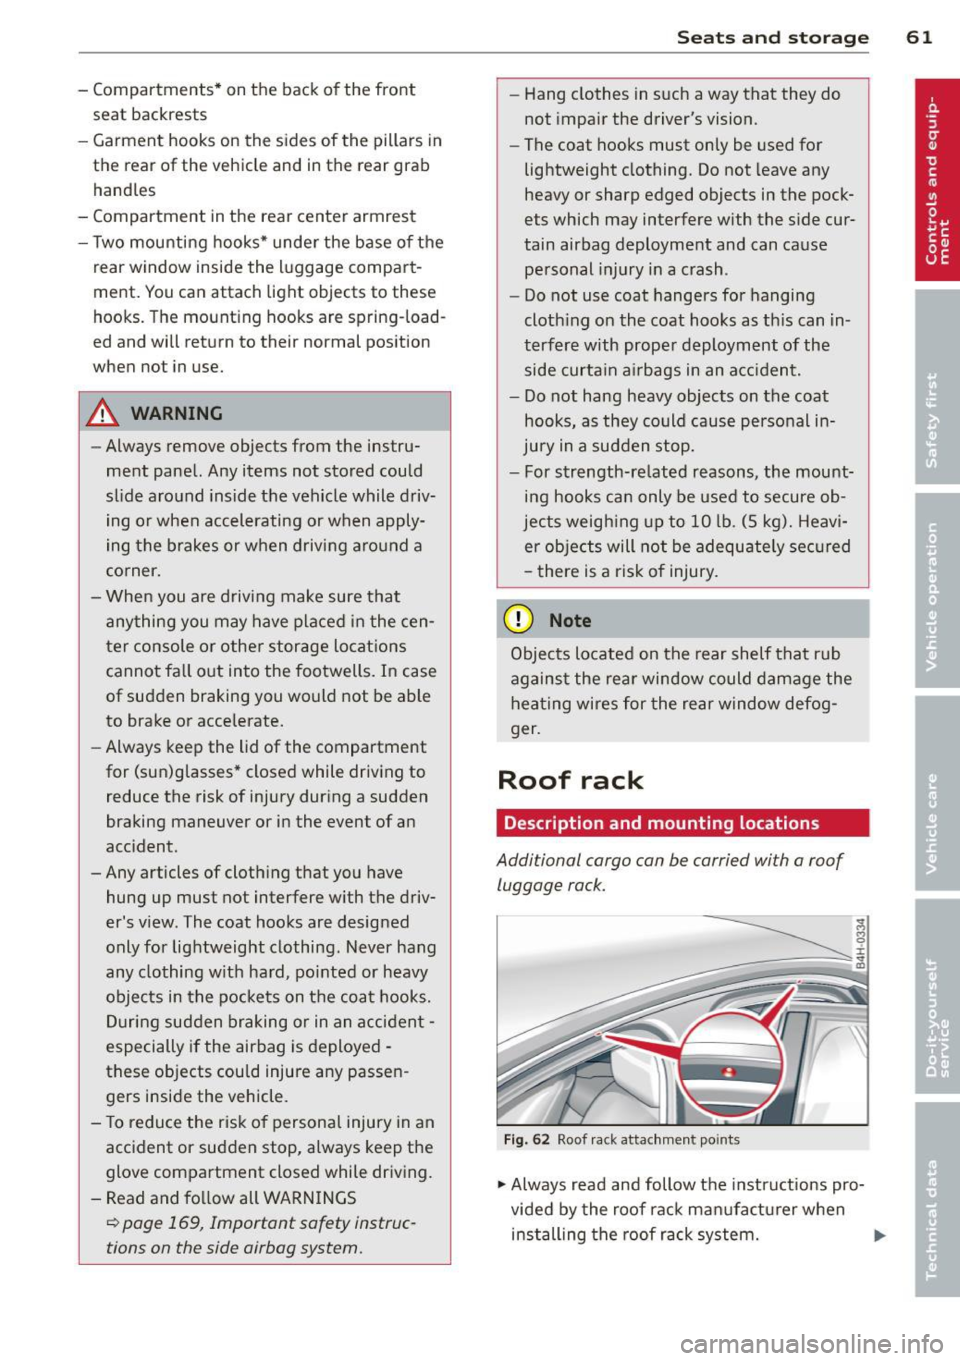
Addi tional cargo can be carried with a roof
luggage rack.
F ig. 62 Roof r ack atta ch m ent points
.., Always read and follow the instructions pro
vided by the roof rack manufa ctu rer when
installing the roof rack system. .,.
Page 69 of 304
Warm and cold Climate controls
Description
App lies to vehicles: with three -zone cl imate contro l or
four -zone a uto mat ic climate contro l
The climate control system warms, cools and
adds humidity to the air in the vehicle interior .
It is the most effective when the windows and
sunroof* are closed . If the temperature inside
the parked veh icle becomes very warm, open
i ng the w indow br iefly will speed up the cool
ing process.
In all heating mode functions except
defrost,
the blower on ly switches to a higher speed
once the engine coolant has reached a certain
temperature.
Condensat ion from the cooling system can
drip and form a puddle of wate r under the ve
h icle. This is normal and does not mean there
is a leak .
Pollutant filt er
The pollutant filter removes pollutants such
as dust and po llen from the air.
The air pollutants filter must be changed at
the intervals specified in your Warranty
&
Maintenance booklet, so that the air condi
tioner can properly work .
If you drive your vehicle in an area with high
a ir pollution, the filter may need to be
changed more frequently than specified in
your Aud i Warranty
& Ma intenance booklet. If
i n doubt, ask your authori zed Audi Service Ad
visor for adv ice.
K ey coded settings
Three-zone climate control: T he b lower set
ting and air d istribution are stored automati
cally and ass igned to the remote control key
that is in use .
Four-zone automatic climate control: The cli
mate contro l settings are automatica lly stor
ed and assigned to the remote control key
that is in use .
Warm and c old 67
A WARNING
-
Reduced visibi lity is dangerous and can
cause acc idents .
- For safe driving it is very important that
all windows be free of ice, snow and con
densat ion.
- Comp letely fam il iarize yourse lf with the
proper use and funct ion of the heat ing
a nd ventilation system and especially
how to defog and defrost the w indows.
- Never use the windshield wiper/washer system in freez ing weathe r unt il you
have wa rmed the windshie ld first, using
the heating and ventilation system. The
washer sol ution may freeze on the wind
shie ld and red uce visibi lity.
CJ) Note
- If you s uspect that the air conditioner
has been damaged, switch the system
off to avoid furt her damage and have it
inspected by a qualified dea lership .
- Repairs to the Audi air conditioner re
quire specia l technical know ledge and
special tools. Contact an authorized Audi
dealer fo r ass istance.
@ For the sake of the envi ronment
By reducing the amount of f uel you use,
you also red uce the amount of pollutants
emitted into the air.
(D Tips
- Keep the air intake s lo ts ( in front of the
w indshield) free from ice, snow and de
bris in order to maintain the proper func
tion of the climate control system.
- The energy ma nagement system may
switch the seat heating* or rear window defroster off temporar ily. These systems
are available again as soon as the energy
balance has been restored .
- Air escapes through vents under the rear window. When plac ing items of cloth ing
on the luggage compartment cover, en
sure that the openings are not covered.