gear AUDI S8 2009 Owners Manual
[x] Cancel search | Manufacturer: AUDI, Model Year: 2009, Model line: S8, Model: AUDI S8 2009Pages: 408, PDF Size: 91.63 MB
Page 15 of 408
If the indicator goes all the way to the right side inside the coolant
temperature gauge, then the engine coolant temperature is too
high.
Pull off the road to safe location, turn off the engine and let it
cool down.
If the warning light comes on again after you have driven
a short distance, contact a qualified workshop.
& WARNING
• Always observe the warning in :::::, page 301, "Engine compart
ment", before opening the hood and checking the engine coolant
level.
• Never open the engine hood if you see or hear steam, or if you
see engine coolant dripping from the engine compartment. You
could burn yourself. Let the engine cool off first so that you cannot
hear or see any steam or engine coolant.
0 Note
• Mounting additional lights or accessories in front of the air inlets
reduces the cooling effect of the radiator. At high outside tempera
tures or high engine load, the engine could overheat.
• The front spoiler has been designed to properly distribute the
cooling air when the vehicle is moving . If the spoiler is damaged,
this could reduce the cooling effect and the engine could then over
heat. Ask your authorized Audi dealer for assistance. •
Tachometer (engine rev counter)
The tachometer indicates the engine RPM (revolutions per
minutes).
The tachometer 0:::::, page 12, fig . 2 is the left of the two large clock
type displays.
The engine turns at a speed
1,000 times the single digit in the
display, e.g. if the needle is pointing at the "2" the engine is turning
at 2,000 RPM.
Controls and equip
ment
Instruments and warning/indicator lights
If engine RPM drops below 1,500, you should downshift to the next
lower gear. The red area at the end of the scale indicates maximum
permissible engine RPM after the break-in period. Before reaching
this area, move the selector lever to position "D (Drive)" or ease your
foot off the accelerator pedal.
0 Note
The tachometer needle should not move into the red range . If it
does, then only for a very short period of time. You could damage
your engine by driving at high RPM.
<£> For the sake of the environment
Upshifting early saves fuel and reduces engine noise .•
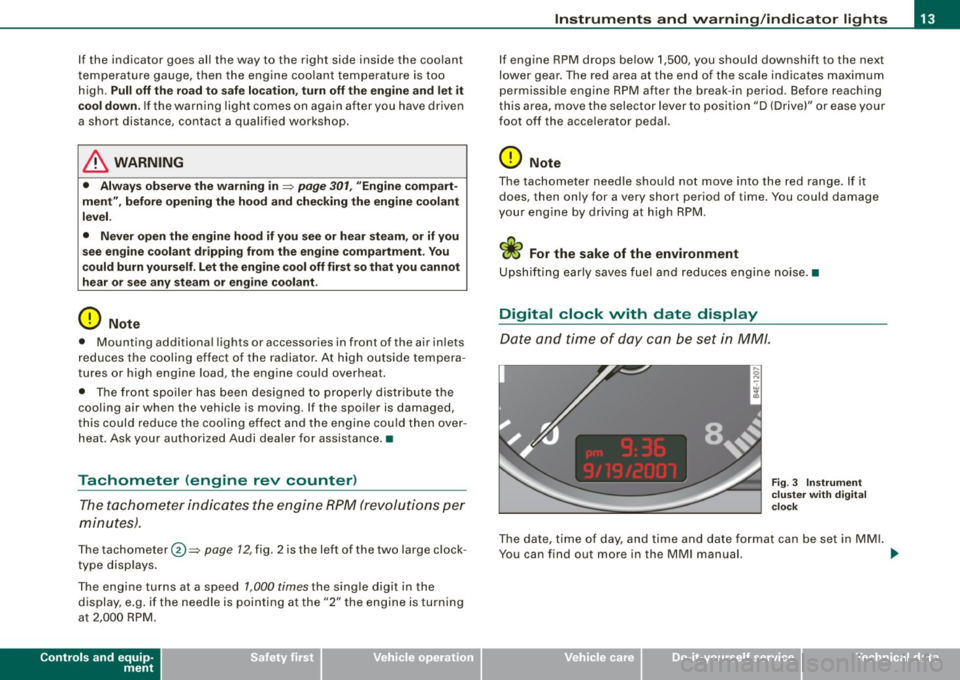
Digital clock with date display
Date and time of day can be set in MM/.
Fig . 3 Instrument
cluster with digital
clock
The date, time of day, and time and date format can be set in MMI.
You can find out more in the MMI manual. ..,.
I • •
Page 31 of 408
If a component is malfunctioning or if the need for an urgent repair
has been detected, this will appear in the instrument cluster display.
You will also hear an audible warning tone. The displays are color
coded in either red or yellow depending on their level of priority.
A red symbol means
Danger, a yellow symbol indicates Warning . In
certain situations, information message for the driver appear in
addition to the red and yellow symbols.
Function test: automatic transmission
The Auto-Check Control will automatically perform a test each time
you switch on the ignition. With the selector lever in
P or N, the
following message appears in the display:
When stationary apply foot brake while selecting gear.
When you a select a different gear (for example: R, D, etc.), the
message will disappear and the Auto-Check function is displayed.
I f there is a malfunction, then the malfunction message will appear
about 15 seconds after the you start the vehicle. At the same time
you will hear a warning tone. •
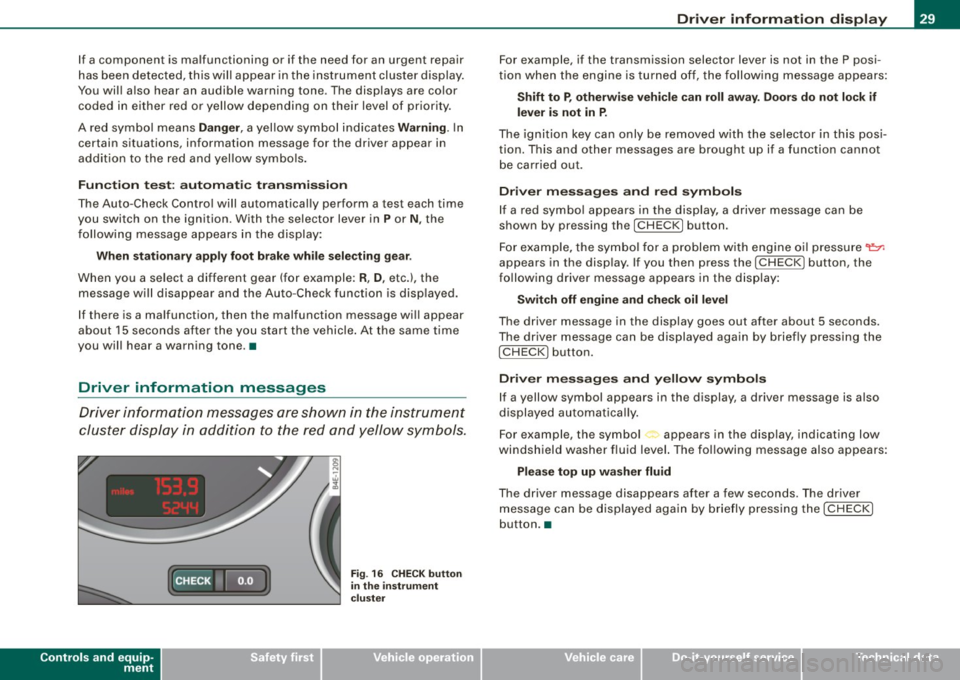
Driver information messages
Driver information messages are shown in the instrument
cluster display in addition to the red and yellow symbols.
Controls and equip
ment
Fig . 16 CHECK button
in the instrument
cluster
Driver information display
For example, if the transmission selector lever is not in the P posi
tion when the engine is turned off, the following message appears:
Shift to P, otherwise vehicle can roll away. Doors do not lock if
lever is not in P.
The ignition key can only be removed with the selector in this posi
tion. This and other messages are brought up if a function cannot
be carried out.
Driver messages and red symbols
If a red symbol appears in the display, a driver message can be
shown by pressing the
I CHECK] button.
For example, the symbol for a problem with engine oil pressure~
appears in the display. If you then press the !CHECK ] button, the
following driver message appears in the display:
Switch off engine and check oil level
The driver message in the display goes out after about 5 seconds.
The driver message can be displayed again by briefly pressing the
I CHECK] button.
Driver messages and yellow symbols
If a yellow symbol appears in the display, a driver message is also
displayed automatically.
For example, the symbol<., appears in the display, indicating low
windshield washer fluid level. The following message also appears:
Please top up washer fluid
The driver message disappears after a few seconds. The driver
message can be displayed again by briefly pressing the
I CHECK]
button. •
I • •
Page 85 of 408
Rem oving a wip er blad e
-Bring the windshield wipers to the service position
~ page 82.
-Lift the wiper arm away from t he windshield.
- Pu sh t he locking piece on the wip er blade in the direction
of the arrow @~ page
82, fig. 78. Hold the wiper blade
firmly.
- Remove the wiper b lade @.
Inst alling wiper bl ad e
- Place the new wiper blade in the retainer on the wiper
arm ©~ page
82, fig. 79.
- Pu sh t he locking piece on the wiper blade in the direction
of the arrow@ until you feel it click into place on the
wiper arm .
Clean your wiper blades regularly with a windshield washer solution
to prevent streaking . If the bla des are very dirty, for example with
insects, carefully clean the b lades with a sponge or a soft brush.
I f the wiper b lades begin to s treak the windshie ld, this could be
caused by residue left on the windshield by automatic car washes.
Fill the windshield washer container with a special solution avail
able at your authorized Audi deale r to remove the residue .
& WARNING
Be sure to in spect the cond itio n of your wiper blade s regula rly . See
y our authori zed Audi de aler f or repla ceme nt bl ade s.
0 Note
To prevent damage to the wiper system:
Controls and equip
ment
Cl ea r vision
• Always loosen blades which are frozen to the windshield before
operat ing wipers.
• Do not use gaso line, kerosene, paint thinner, or other solvents on
or near the wiper blades .
• Do not attempt to move the wipers by hand.
[ i ] Tip s
Commercial hot waxes applied by automatic car washes affect the
c leanabi lity of the windshield .•
Mirrors
Rear view mirror
When the ignition is on, the interior mirror will darken automatically
depending on the amount of light striking the mirror (such as head
lights shining into the vehic le from the rearl. The mirror will retu rn
to the origina l state (anti -glare off) when you move the manual gear
shift/gear selector lever into
Reverse or when you turn on the inte
rior lights.
[ i ] Tips
The automatic anti-g lare feature on the mirror will not operate prop
erly if the light shining on the inside mirror is b locked by other
objects. •
I • •
Page 86 of 408
Clear vision
Outside mirrors
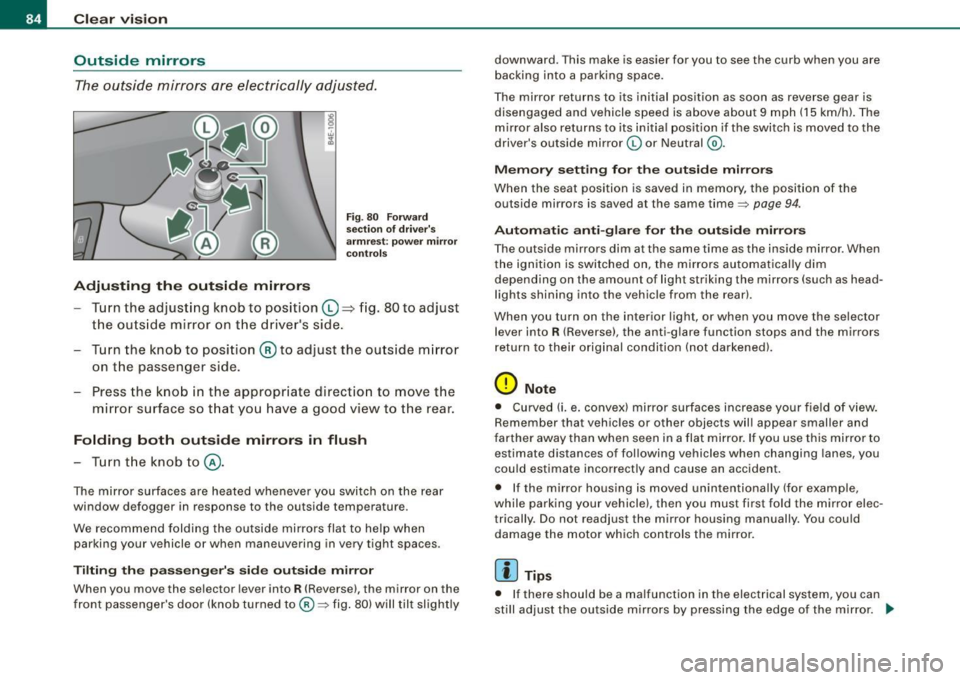
The ou tside mirrors are electrically adjusted.
Adjusting the outside mirrors
Fig . 8 0 F orw ard
s ect ion of drive r's
a rmre st: powe r m irror
c ontr ols
Turn the adjusting knob to position ©=:> fig. 80 to adjust
t h e ou ts ide mir ror on t he dr iver's side .
Turn the knob to posi tion
@ to adjust th e outs ide m irror
on the passenger side.
Press th e kno b in the appropr iate direct io n to move the
m irror surface so t hat you have a good view to the rear.
Folding both outside mirrors in flush
- Tur n t he knob to @ .
The mirror surfaces a re heated whenever you switch on the rear
window defogger in response to the outside temperature.
We recommend folding the outside mirro rs flat to help when
parking your vehicle or when maneuvering in very tight spaces.
Tilting the pas senger's side out side mirr or
When you move the selector lever into R (Reverse), the mirror on the
front passenger's doo r (knob turned to@ => fig. 80) will til t slight ly downward
. This make is easier for you to see the curb when you are
b acking in to a parking space.
The mirror returns to its initial pos ition as soon as reverse gear is
disengaged and vehicle speed is above about 9 mph (15 km/hl. The
m irror also returns to its ini tia l p osition if the switch is move d to the
driver's outside mirror
(0 or Neutral @.
Memory setting for the outside mirrors
When the seat position is saved in memory, the posit ion of t he
outside mirrors is saved at the same t ime =>
page 94.
Automatic anti -glare for the outside mirror s
The outside mirrors dim at the same time as the inside mirror . When
the ignition is switched on, the mirrors automatical ly dim
depending on the amount of light str ik ing the mirrors (such as head
lights shining into the vehicle from the rearl.
When you turn on th e interior l ight, or when y ou m ove the se lect or
lever into
R (Reverse), the anti -g lare function stops and the mirrors
r eturn to their original c ondi tion (n ot dar ken ed).
0 Note
• Curve d (i. e . convex) mirror sur faces increase your field o f view.
Remember that vehic les or other objects wil l appear smaller and
farther away than when seen in a flat mi rror . If you use this mirror to
estimate distances of fol lowing vehic les when changing lanes, you
cou ld estimate incorrectly and cause an accident .
• I f the mirror housing is moved unintentional ly (for example,
while park ing your vehicle), then you must fi rst fo ld the mirror elec
trically . Do not readjust the mirror housing manually. You could
damage the motor which controls the mirror .
[ i ] Tip s
• I f there shou ld be a malfunction in the elect rical system, you can
st ill adjust the outsid e m irrors by pressing the edge of t he m irror .
~
Page 137 of 408
On the road -
----------------
Parking
To prevent a parked vehicle from rolling away, there are a
few things you should do.
When you park your vehicle , do the following
- Stop the vehicle using the brake peda l.
- Pull the switch to app ly th e electromechanical park ing
brake .
- Move t he selector lever into the
P positio n ~ &-
- Switch off the engine and remove the ignitio n key f rom
the ignition loc k.
When you park your vehicle on hills , do the
following
- Stop the vehicle using the brake peda l.
- Pull the switch to app ly th e electromechanical par king
brake.
- If you are parkin g headed
downhill , turn t he fro nt whee ls
toward the curb.
- If you are parking headed
uphill , turn t he front w heels
awayfrom the curb.
- Move the se lector lever into the
P position.
- Sw itch off the engine and rem ove the ignitio n key f rom
the ign ition lock.
& WARNING
Thi s is how you can reduce the r isk of injury when l eav ing your
v ehicle.
Controls and equip
ment
& WARN ING (c ontinued )
• Neve r p ark the vehi cle wh ere it c an come in cont act with dry
gra ss, s pilled fuel or any oth er fl amm able m ater ials.
• Wh en p arking on hill s, always turn the w hee ls s o that the front
wheel s will fir st roll into the cu rb , if the veh icle should start to roll.
• Never allo w anyone -e spe ciall y small ch ildren -to r em ain in the
vehi cle when it i s lo cked . Lo cked doors make it more diffi cult fo r
r e s cuers to acce ss the pa ssenger compartment in the event of an
emergen cy. Danger t o life!
• Never le ave chi ldren un supervi sed in the vehicle . Children
c ould release the p arking brake or mo ve the gear shift le ve r o ut of
g ear. The vehicle could start to roll away and cau se an a ccident.
• No matt er w hat the se a son i s, the temper atu re in a pa rked
vehicle can rea ch d angerou s levels.
0 Note
• Please exe rcise care when you park your vehicle in pa rking areas
with parking barriers or curbs . Parking barriers and curbs vary in
height and cou ld damage your bumper and re lated components as
the front of your vehicle moves over a barrier or curb that is too high, as you park or as you back out of a parking spot . In order to be
sure that no such damage can occur , you may w ish to stop short of
having the front tires of your car touch the parking barrier or curb.
• Please also exercise exceptional care when you drive up or down
steep ramps or drive over curbs or other obstacles, for which the
vehicle is not designed, because components of the vehicle close to
the ground, such as bumper covers, spoilers and suspension and exhaust system components, may become damaged. •
I • •
Page 138 of 408
• .___O_ n_ t_h _e _ r_o _a_ d __________________________________________________ _
Starting off with a trailer
T o prevent rolling back unintentionally on an incline, do
the following:
- Keep the switch pulled and depress the accelerator. The
parking brake stays applied and preve nts the vehicle
f rom rolling backward .
- You can release the switch o nce you are sure t hat you are
deve lop ing enough forward momentum at the whee ls as
you depress the accelerator.
Depending on the weight of the rig (vehicle and trailer) and the
severity of the incline, you may roll backwards as you start. You can
prevent rol ling backwards by holding the parki ng brake sw itch
pul led out and acce lerating -just as you would when starting on a
h ill with a conventional hand brake. •
Emergency braking
In the event that the conventi on al b rake system fails or
locks.
- Pull th e swi tch and continu e to pull it to slow you r veh icle
with t he par king brake in an emergency .
- As soon as you r elease the switch or acc elerate, the
braking pro cess s tops .
If you pull the swi tch and hold it above a speed of about 5 mph (8
km/h), the emergency braking function is initiated . T he vehicle is
braked at all fou r whee ls by activating the hydraulic brake system .
Brake performance is similar to making an emergency stop~&.
So that emergency braking is not activated by mistake, an audib le
warning tone (buzzer) sounds when the switch is pulled . As soon as the switch is released, or the accelerator pedal is depressed, emer
gency b raking stops .
& WARNING
Emergency braking should only be u sed in an emergen cy, when
the normal foot br ake has f ailed or the br ake ped al i s obstructed .
U sing the parking brake to perform emergen cy brakin g will slow
yo ur vehicle a s if yo u had made a full brake app lication . The law s
of phy sic s cannot be su spe nded even with E SP and it s asso ciated
c ompon ents ( AB S, ASR, EDS ). In corner s and whe n ro ad or
w eather conditions are bad , a full brak e application can cau se the
vehi cle to skid or the r ear end to break a way -ri sking an
ac cident .•
Driver messages in the instrument cluster
Caution: Vehicle parked too steep
T his message appears when the parking brake is applied on an
incline that exceeds about 30%.
I n this case the b raking power of the park ing brake may
not be
adequ ate
to prevent the vehicle from rol ling unintentionally.
Plea se relea se parking br ake
This message appears, when a gear is selected and the acce lerator
pedal is depressed -release the parking brake.
Pre ss brake peda l to release parking brake
T his driver message appears when the switch to release the parking
brake was pressed. The parking brake can only be released if you
press the brake or accelerator peda l and press the switch at the
same time .
Parking brake malfun ction !
This d river message appears together with the yellow
when there is a parking brake malfunction. symbol
Page 168 of 408

• ..__A_ u_t _o _m_ a_ t_ i_c _ t _r_ a_ n_ s_m _ is_ s_ io_ n ___________________________________________ _
Automatic transmission
tiptronic® (6-speed automatic
transmission)
General information
Your vehicle is equipped with an e lectronica lly controlled automatic
transmission. Upshifting and downshifting takes place
automati
cally.
The transmission is also equipped with tiptronic®. It allows the driver to shift gears
manually if desired => page 170 . •
Driving the automatic transmission
Start ing the en gin e
- T he selector lever must be in
N or P.
Start ing off
- Press and hold the bra ke pedal.
Fi g. 185 Sh ift gate o n
t h e ce nter c onsole :
selec tor le v er wit h
re lease butto n
- Press and hold the release button in the se lector lever
hand le and move the selector lever from
P or N to D and
release the button
=:> & .
- Wait br iefly u ntil the transm ission has shifted (you will
feel a sligh t movement).
- Remove your foot f rom t he brake pedal and accelerate .
Rocking back and forth to be com e unstu ck
- Sh ift only between
D and R when the ve hicle is at a fu ll
stop and the engine is running at idle speed.
Stopping
- Press and h old the brake pedal unti l the vehicle has come
to a comp lete stop.
Keep the brake pedal depressed so that the vehic le
cannot ro ll forward or backward while it is idling =:>& .
- Once stopped,
do not depress the acce lerator pedal to
rev up the engine=:>&.
Par king
- Press and h old the brake pedal unti l the vehicle has come
to a comp lete stop.
- Set the parking brake firmly=:>
page 135, "Parking" .
- Press and hold the release button in the selector lever
handle, m ove the selector lever i nto
P and then let go of
the release button =:> & . ._
Page 169 of 408

_______________________________________________ A_ u_t _o _ m_ a_ t _i_ c_ t_r _a _n _ s_ m __ is_s_ i _o _ n __ !II
T he selector lever must be in Nor P. If one of the driving positions
is engaged a safety switch w ill preven t the eng ine from being
started. See also=>
page 130.
Before you move the selector lever from the P position, you must
a lways apply the brake pedal before and while depressing the
button in the hand le of the se lector lever .
_& WARNING
• Unintended v ehicle movement c an cause serious injury .
- When the selector lever i s in a driving po sition , the vehicle
may creep, even at idle speed . Therefore do not release the
parking brake or foot brake until you are ready to move ,
be cau se power is tran smitted to the wheel s as soon as a
driving po sition i s engaged.
- Do not accelerate while selecting a driving pos ition . At this
time the engine must be at idle speed so that undue stress is
not placed on the clut che s in the t ransmission .
-Remember : - even when stopped briefly with the automatic
transmi ssion in "D" or "R ", engine po wer is being tr ansmitted
to the wheels. Your vehicle could "creep " forward or ba ckward .
When stopped , keep the brake pedal fully depres sed and u se
the parking brake if ne ces sary to keep the vehicle from rolling.
• If the selecto r leve r is unintentionally mo ved into N whi le you
are dr iving, take your foot off the accelerator pedal and wait for
the eng ine to return to idle speed before sele cting a dr iving posi
tion .
• Never shift into "R " or "P " when the ve hicle is in motion .
• Never get out of the driver 's seat when the eng ine i s running .
• If you must get out of the vehicle , move the selector lever
s ecurely into the P po sition and apply the park ing brake firmly.
• If the engine must remain running , never have any driving po si
tion engaged when che cking under the hood . Make sure the
selector lever has securely engaged and is locked in "P" with the
p ark ing br ake firmly set =>
page 301 , "E n gine compart ment ".
Controls and equip
ment
& W ARNING (continued )
Otherwise , any in crease in engine speed may set the vehi cle in
motion , even with the parking brake applied. •
Selector lever positions
This section describes the selector lever positi ons and
drivi ng ra nges .
Fig . 18 6 D ispl ay in the
in strument cluste r:
s elec tor lev er in po si
tion D
The selector leve r posi tion engaged appears next to the selec tor
lever as wel l as in the instrument c luster display . A lso, the current
gear engaged is sh own in positi ons D and S .
P -Park
In this selector leve r pos it ion the transmission is mechanica lly
locked . Engage
P on ly when the vehicle is completely stopped=> &
in "Driving the automatic transm ission" on page 166 .
To shift in or out of position P, you must first press and hold the
brake peda l
and then press the re lease bu tton in t he se lecto r leve r
handle while moving the selector lever to or from
P . You can shift
out of this position only with the ignit ion on.
R -Re ver se
The transmission wi ll au tomatically select the lowest gear ratio
when you shift into reverse .
I • •
Page 170 of 408
• ..__A_ u_ t _o_ m_ a_ t_ i_ c _ t_r _a _n_ s_ m_ is_ s_io _ n ________________________________________________ _
Select R only when the vehicle is at a full stop and the engine is
running at idle speed=>
& in "Driving the automatic transmission"
on
page 166.
Before you move the selector lever to R, press both the button in the
handle of the selector lever
and the brake pedal at the same time.
When the ignition is on, the backup lights illuminate when the
selector lever is moved into
R.
N -Neutral
The transmission is in neutral in this position. Shift to this position
for standing with the brakes applied =>
page 168 .
When the vehicle is stationary or at speeds below 3 mph (5 km/h),
you must always apply the footbrake before and while moving the
lever out of
N.
D -Normal position for driving forward
Position Dis for normal city and highway driving. It ranges from zero
to top speed and all six gears shift automatically, depending on
engine load, driving speed and automatically selected shift
programs.
When the vehicle is stationary or at speeds below 3 mph (5 km/h),
you must always apply the foot brake before and while moving the
lever to
D out of N.
In certain circumstances it may be advantageous to temporarily
switch to the manual shift program to manually select gear ratios to
match specific driving conditions=>
page 170.
S -Sport position
Select this position for sportier performance. In this position, the
transmission will not upshift as soon, allowing the vehicle to use the increased power available at higher engine speeds to achieve live
lier acceleration.
When the vehicle is stationary or at speeds below 3 mph (5 km/h),
you must always apply the foot brake before and while moving the lever to
S out of N.
& WARNING
Read and follow all WARNINGS => & in "Driving the automatic
transmission" on
page 166.
0 Note
Coasting downhill with the transmission in N and the engine not
running will result in damage to the automatic transmission and
possibly the catalytic converter. •
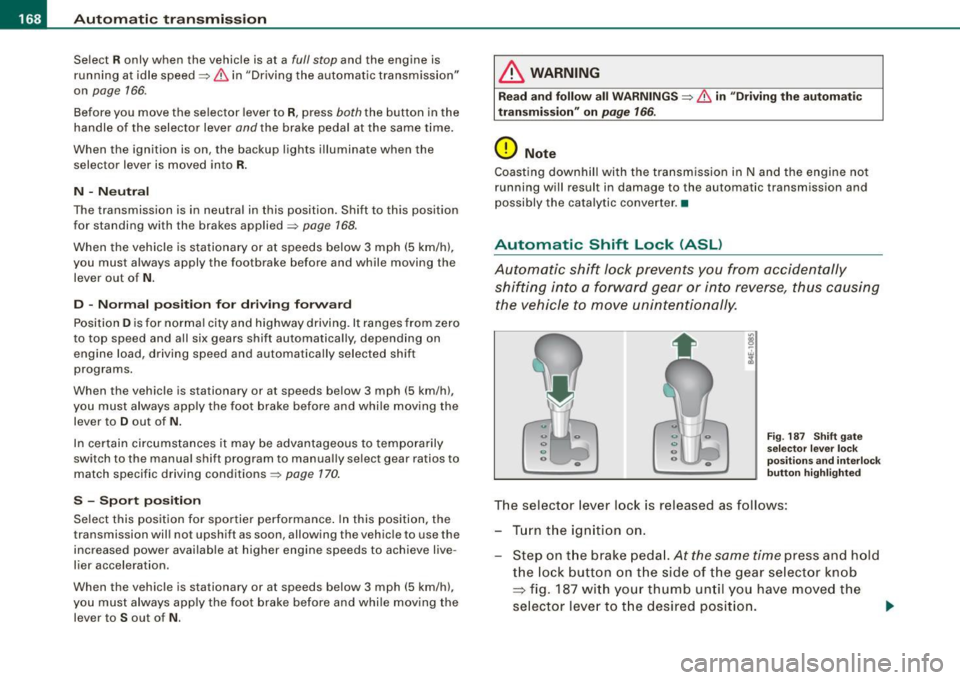
Automatic Shift Lock (ASL)
Automatic shift lock prevents you from accidentally
shifting into a forward gear or into reverse, thus causing the vehicle to move unintentionally.
Fig. 187 Shift gate
selector lever lock
positions and interlock
button highl ighted
The selector lever lock is released as follows:
- Turn the ignition on.
Step on the brake pedal.
At the same time press and hold
the lock button on the side of the gear selector knob
=> fig. 187 with your thumb until you have moved the
selector lever to the desired position.
~
Page 171 of 408
_______________________________________________ A_ u_t _o _ m_ a_ t _i_ c_ t_r _a _n _ s_ m __ is_s_ i _o _ n __ lfflll
Autom ati c selec to r l eve r lock
The se lector lever is locked in the P and N positions when the igni
tion is turned on. To move the lever from these positions the driver
must depress the brake pedal. As a reminder to the driver, the
follow ing warning appears in the instrument cluster disp lay when
the selector is in
P and N:
When stationary app ly foot brake while s electing gear
A time delay e lement prevents the selector lever from locking when
it is moved through the
N position (going from R to Dl. The locking
e lement will lock the selector lever if the lever is left in N (Neutral)
for more than approximately 1 second, without the brake peda l
being pressed.
At speeds above about 3 mph (5 km/h) the Automatic Shift Lock is
automatically deactivated in the
N posi tion .
Interl ock button
The lock button on the selector lever prevents the lever from being
accidentally shifted into certain positions. Pressing this button
deactivates the selector leve r lock. Dependi ng on the direction of
the shift, the selector lever locks at different positions. The positions
are highligh ted in the illus trati on =>
page 168, fig . 187.
Igniti on k ey saf ety in te rlo ck
The key canno t be removed from the ignition un less the selector
lever is in the
P park position. When the ignition key is removed, the
selector lever wil l be l ocked in the
P posi tion .•
Kick -down
T he kick-down feature allows the vehicle to genera te
maximum accelera tion.
When you press the acce lerator pedal beyond the resistance point
that is reached at ful l throttle, the transmission wi ll select a lower
gear ratio based on vehic le speed and engine RPM . The engine RPM
wil l be control led to produce maximum vehic le acceleration as long
Controls and equip
ment
as you continue to press the acce lerator pedal beyond this resis
t ance poin t.
& WARNING
Be careful when u sing the ki ck -down feature on slippery road s.
Rapid acceleration ma y cause the vehicle to skid . •
Dynamic shift program (DSP)
T he aut omatic tr ans mission is electro nically c ontrolle d.
The transmission is se lf adapting and will automaticall y select the
b est shi ft program su ited to the driving conditio ns and driving style.
The transmission will select one of the
e conomy programs when
you drive at a s teady speed or a g radually changing speed without
heavy acceleration. This achieves optimum fuel efficiency, with ear ly
upshifting and delayed downshifting .
The trans mission will au tomatically select the
sporty shift progra ms
when you drive at higher speeds, or with heavy acce leration and
frequent ly cha nging speeds . Upshifts ar e delayed t o make f ull use
of engine power . Downshifting takes place at higher engine speeds
than in t he ec onomy p rograms .
The selection of the most su itable shift program is a continuous,
automatic process . The driver can a lso make the transmission
sw itch to a sporty progra m by
quickly pressing down the gas peda l.
This causes the transmission to shift down to a lower gear to
achiev e rapid acc elerati on, e.g . fo r q uickly pass ing another vehicle .
You do not need to press the gas pedal into the kick-down range.
After the transm ission has upshifted, the original progra m is
selected according to your driving sty le.
An additiona l shift program allows the automatic transmission to
select the proper gear fo r uph ill and downhi ll gradients.
This prevents the transmission from upshifting and downshifting unnecessa rily o n hills . The transm ission wi ll shift down to a lower _,.
I • •