emergency towing AUDI S8 2011 Owners Manual
[x] Cancel search | Manufacturer: AUDI, Model Year: 2011, Model line: S8, Model: AUDI S8 2011Pages: 302, PDF Size: 76.07 MB
Page 6 of 302
4 Table of content s
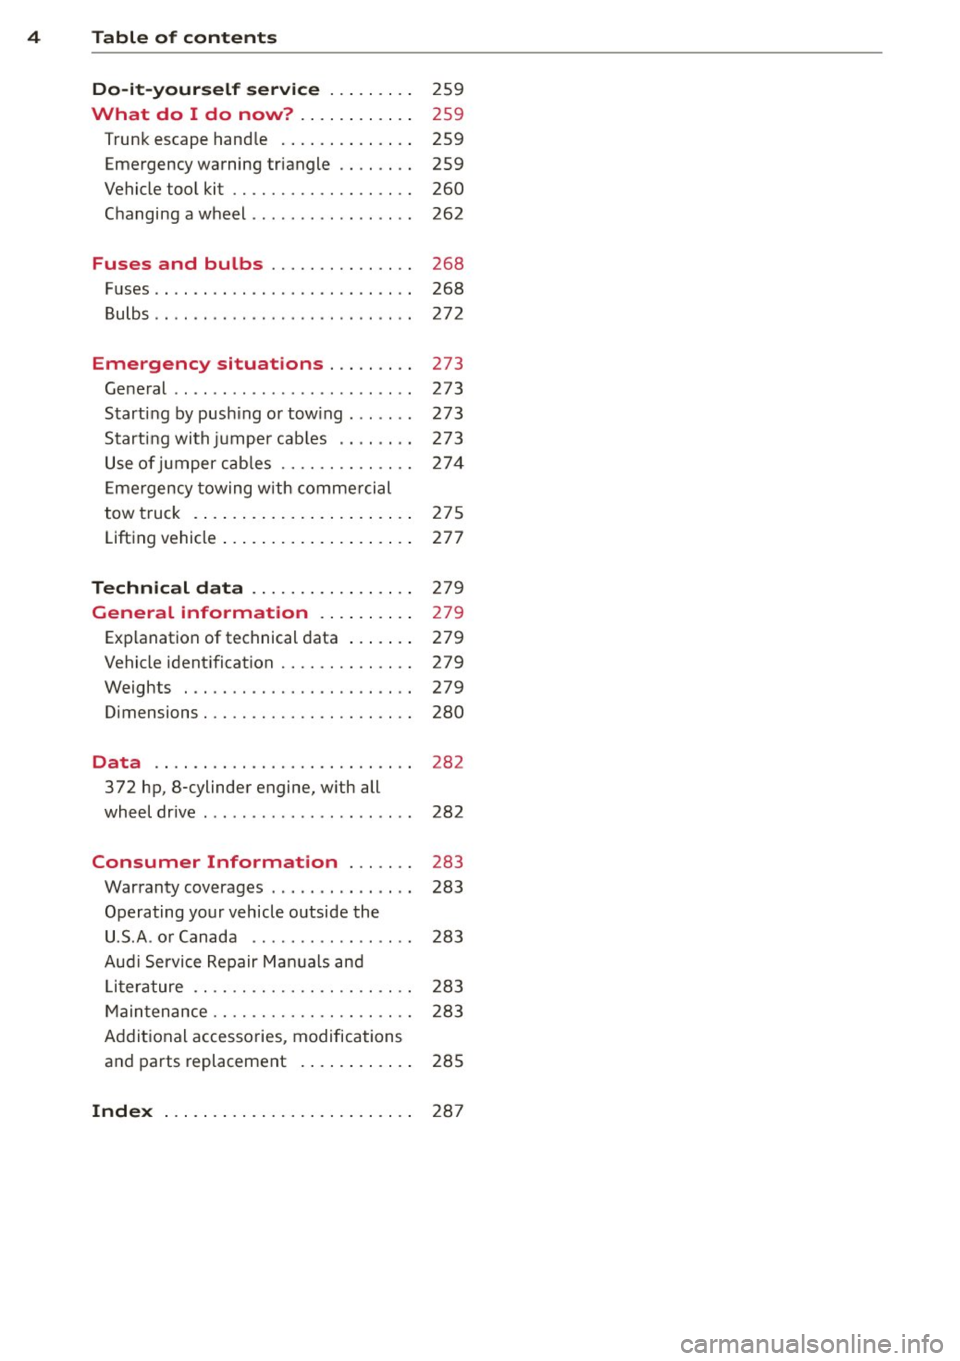
D o-it- yourself ser vice . . . . . . . . .
259
What do I do now? . . . . . . . . . . . . 259
Trunk escape hand le . . . . . . . . . . . . . . 259
Emergency warning triangle . . . . . . . . 259
Vehicle tool kit . . . . . . . . . . . . . . . . . . . 260
Changing a wheel . . . . . . . . . . . . . . . . . 262
Fuses and bulbs . . . . . . . . . . . . . . . 268
Fuses .. .... ..... ..... ...... ... .. 268
Bulbs . . . . . . . . . . . . . . . . . . . . . . . . . . . 272
Emergency situations . . . . . . . . . 273
General . . . . . . . . . . . . . . . . . . . . . . . . . 273
Starting by push ing or tow ing . . . . . . . 273
Starting with jumper cables . . . . . . . . 273
Use of jumper cab les . . . . . . . . . . . . . . 274
E mergency towing with commercial
tow truck . . . . . . . . . . . . . . . . . . . . . . . 275
Lifting vehicle . . . . . . . . . . . . . . . . . . . . 277
Techni cal d ata . . . . . . . . . . . . . . . . . 279
General information . . . . . . . . . . 279
Explanation of technical data . . . . . . . 279
Vehicle ident ification . . . . . . . . . . . . . . 279
Weights . . . . . . . . . . . . . . . . . . . . . . . . 279
Dimensions. . . . . . . . . . . . . . . . . . . . . . 280
Data . . . . . . . . . . . . . . . . . . . . . . . . . . . 282
372 hp, 8-cylinder engine, w ith all
wheel drive . . . . . . . . . . . . . . . . . . . . . . 282
Consumer Information . . . . . . . 283
Warranty coverages . . . . . . . . . . . . . . . 283
Operating your vehicle outside the U.S.A . or Canada . . . . . . . . . . . . . . . . . 283
Audi Service Repair Ma nuals and
L it erature . . . . . . . . . . . . . . . . . . . . . . . 283
M ain tenance . . . . . . . . . . . . . . . . . . . . . 283
Addit ional accessories , modifications
and parts replacement . . . . . . . . . . . . 285
Inde x . . . . . . . . . . . . . . . . . . . . . . . . . . 28 7
Page 24 of 302
22 Instruments and warning/indicator lights
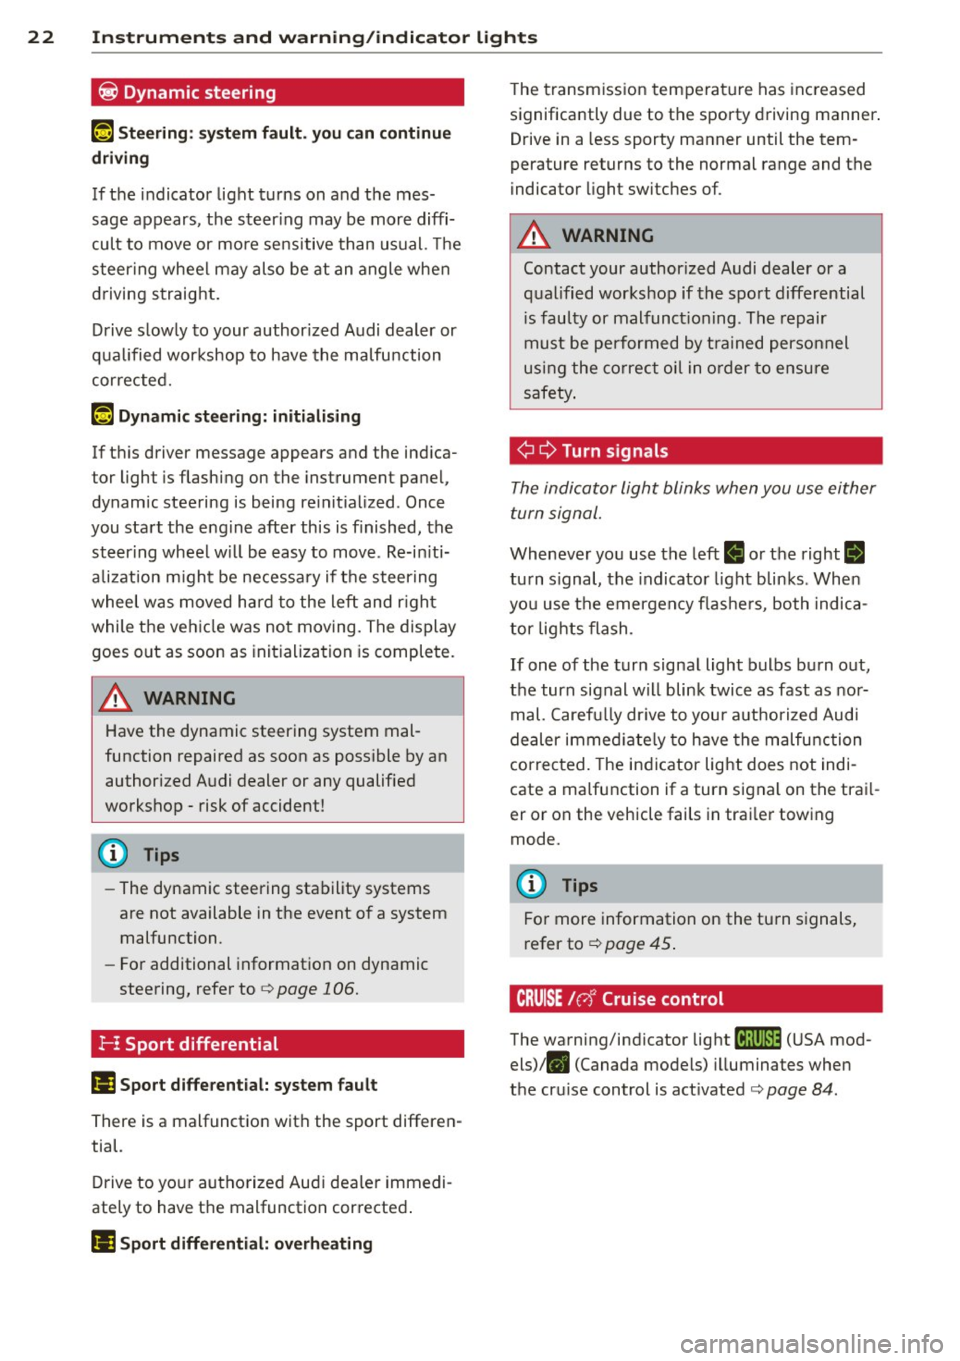
~ Dynamic steering
t1r- J Steering: system fault. you can continue
driving
If the indicator light turns on and the mes
sage appears, the steer ing may be more diffi
cult to move or mo re sensitive than usual. The
steer ing wheel may also be at an angle when
driving straight.
Drive slow ly to your author ized Audi dealer or
qual ified workshop to have the malfunction
corrected.
t 1r J Dynamic steering: initialising
If this driver message appears and the ind ica
tor light is flashing on the instrument panel,
dynamic steering is being reinitialized . Once
you start the engine after this is finished, the steering wheel w ill be easy to move . Re-in iti
a lization m ight be necessary if the steering
wheel was moved hard to the left and r ight
while the vehicle was not moving. The display
goes out as soon as initialization is complete.
A WARNING
Have the dynamic steering system mal
function repaired as soon as possible by an authorized Audi dealer or any qualified
workshop - risk of accident!
@ Tips
- The dynamic steering stability systems
are not available in the event of a system
malfunction.
- For additional information on dynamic
steering, refer to
c> page 106.
I- I Sport differential
l'I Sport differential: system fault
There is a malfunction with the sport differen
tial.
Drive to you r authorized Aud i dea ler immedi
ate ly to have the malfunction corrected .
Ill Sport differential: overheating T
he transmission temperature has increased
significantly due to the sporty driving manner .
Drive in a less sporty manner until the tem
perature returns to the normal range and the
indicator light switches of.
A WARNING Co....- -
Contact your authorized Audi dealer or a
qualified workshop if the sport differential
i s faulty or malfunct ioning. The repair
must be performed by trained personnel
using the correct oil in order to ensure
safety .
¢¢ Turn signal s
The indicator light blinks when you use either
turn signal.
Whenever you use the left ll or the right rl
turn s ignal, the indicato r light blinks . When
you use the emergency f lashers, both indica
tor lights flash .
If one of the turn signal light bulbs burn out,
the turn signal will blink twice as fast as nor
mal. Carefully drive to your authorized Aud i
dealer immed iate ly to have the malfunction
corrected. The indicator light does not indi
cate a ma lfunction if a turn signal on the trai l
er or on the vehicle fails in trai ler towing
mode.
(D Tips
For more information on the turn signals,
refer to
c> page 45.
CRUISE /C'J' Cruise control
The warning/indicator light
f;;(l)~i~ (USA mod
els)/ . (Canada models) illuminates when
the cruise control is act ivated
c> page 84 .
Page 46 of 302
44 Clear vision
Highway light function*
(vehicles with LED
headlights) -this function adapts the lighting
for highway driving based on vehicle speed.
.&_ WARNING
- Automatic headlights are only intended
to assist the driver . They do not relieve
the driver of his responsibility to check the headlights and to turn them on man
ually according to the current light and
visibility conditions . For example, fog
cannot be detected by the light sensors.
So always switch on the headlights §,0
under these weather conditions and
when driving in the dark.
- Crashes can happen when you cannot see the road ahead and when you cannot be seen by other motorists. Always turn on
the headlights so that you can see ahead
and so that others can see your car from
the back .
(D Note
The rear fog lights should only be turned
on in accordance with traffic regulation, as
the lights are bright for following traffic.
(D Tips
- In the event of a light sensor malfunc
tion, the driver is notified in the instru
ment cluster display
q page 21 .
-You will hear a warning tone if you open
the driver door when the exterior lights
are switched on.
- Please observe legal regulations when
using the lighting systems described .
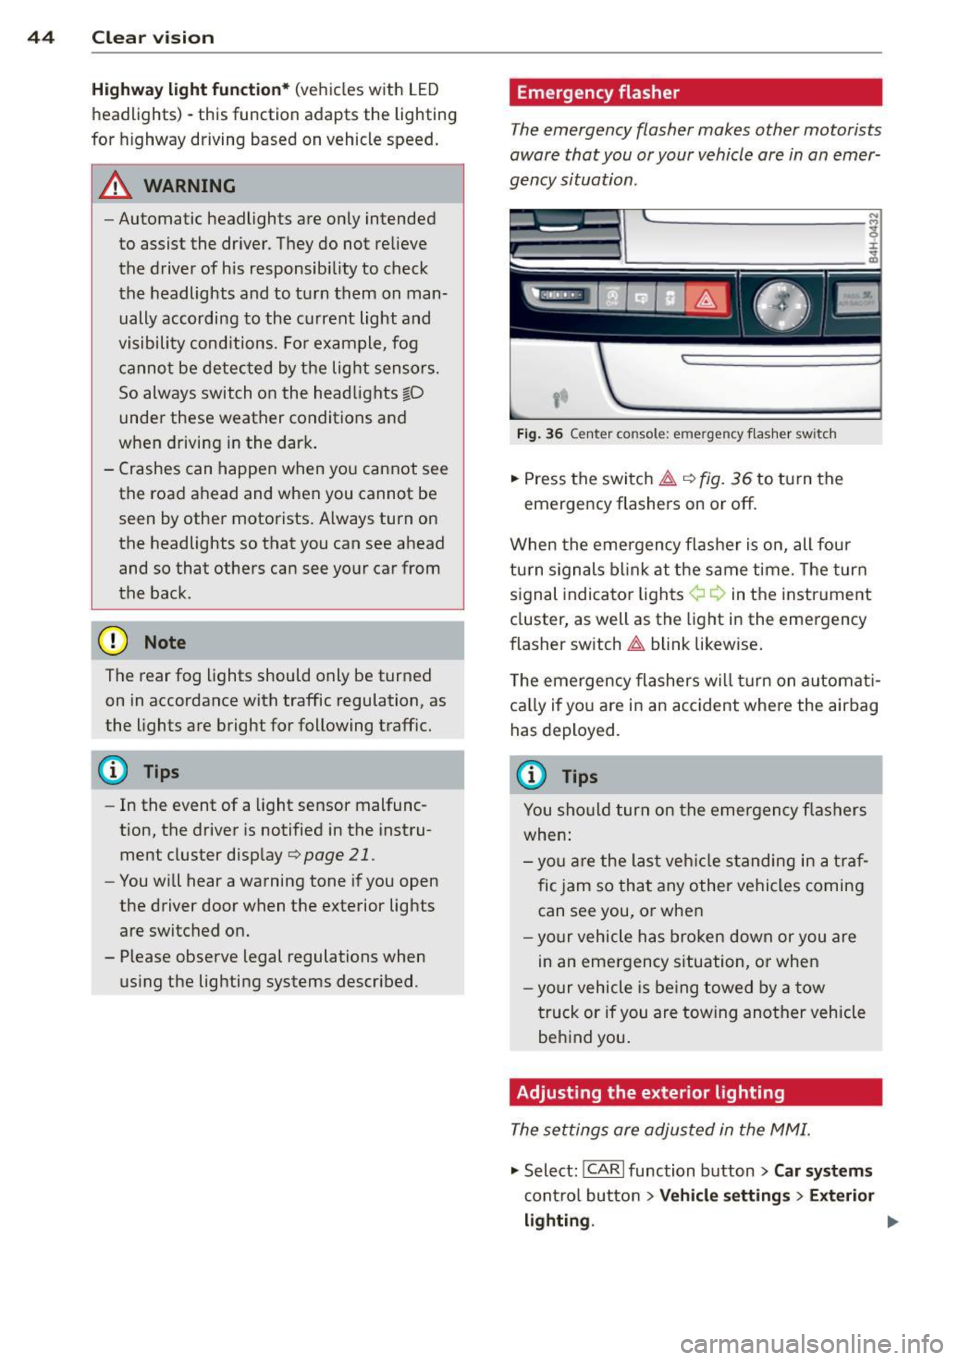
Emergency flasher
The emergency flasher makes other motorists
aware that you or your vehicle ore in on emer
gency situation .
Fig. 36 Ce nte r co nso le: em erg en cy flash er sw itch
.,. Press the switch~ c:> fig. 36 to turn the
emergency flashers on or off.
When the emergency flasher is on, all four
turn signals blink at the same time. The turn
signal indicator lights¢¢ in the instrument
cluster, as well as the light in the emergency
flasher switch
~ blink likewise.
The emergency flashers will turn on automati
cally if you are in an accident where the airbag
has deployed.
@ Tips
You should turn on the emergency flashers
when:
- you are the last vehicle standing in a traf
fic jam so that any other vehicles coming
can see you, or when
- your vehicle has broken down or you are
in an emergency situation, or when
-your vehicle is being towed by a tow
truck or if you are towing another vehicle
behind you.
Adjusting the exterior lighting
The settings ore adjusted in the MMI.
"'Select: !CARI function button> Car systems
control button > Vehicle settings > Exterior
lighting. ""
Page 82 of 302
80 On the road
(D Note
-Avoid hig h engine rpm, fu ll throttle and
heavy engine loads unti l the engine has
reached operating temperat ure -other
wise you risk eng ine damage.
- The engine cannot be started by pushing
or towing the vehicle.
- If the engine has been under heavy load
for an extended period, heat b uilds up in
the engine compartment after the en
gine is switched off - there is a risk of
damaging the engine . Allow the eng ine
to run at idle for about 2 minutes before
switching it off.
@ Tips
If you open the driver's door with the igni
tion on, a buzzer sounds and the message
Igniti on is on appears in the instrument
cluster display. Sw itch the ignition off .
Stopping the engine
• Bring your vehicle to a complete stop.
.. Move the se lector lever to the
P or N pos i
t ion .
.. Pre ss the I STAR T ENGINE ST OP I button
r:> page 79, fig. 80 .
Emergency off
If necessary, the engine can be switched off
with the selector lever in the
R , D or S posi
tions . The engine stops if you press the
I S TAR T ENGINE ST OP ! button at speeds be low
6 mph (10 km/h).
A WARNING
- Never turn off the eng ine unti l the vehi
cle has come to a complete stop.
- The brake booster and power steer ing
only work when the engine is runn ing .
If
the engine is off, you have to use more
force when steering or braking. Because
you cannot steer and brake as you usua l
ly wo uld, this could lead to crashes and
serious injuries. -
For safety reasons, you should a lways
park your vehicle w ith the selector lever
in P . Otherwise, the vehicle could inad
vertently roll away .
- After the engine has been switched off,
the radiator fan can cont inue to run for
up to 10 minutes -even with the ignition
sw itched off. It can also sw itch on again
after some time if the coolant tempera
ture rises as the result ofa heat bu ildup
or if the engine is hot and the engine
compartment is additionally heated by
the sun's rays .
(D Note
Do not stop the eng ine immedia tely after
hard o r extended driving. Keep the engine
running for approximate ly two minutes to
prevent excessive heat bui ld-up.
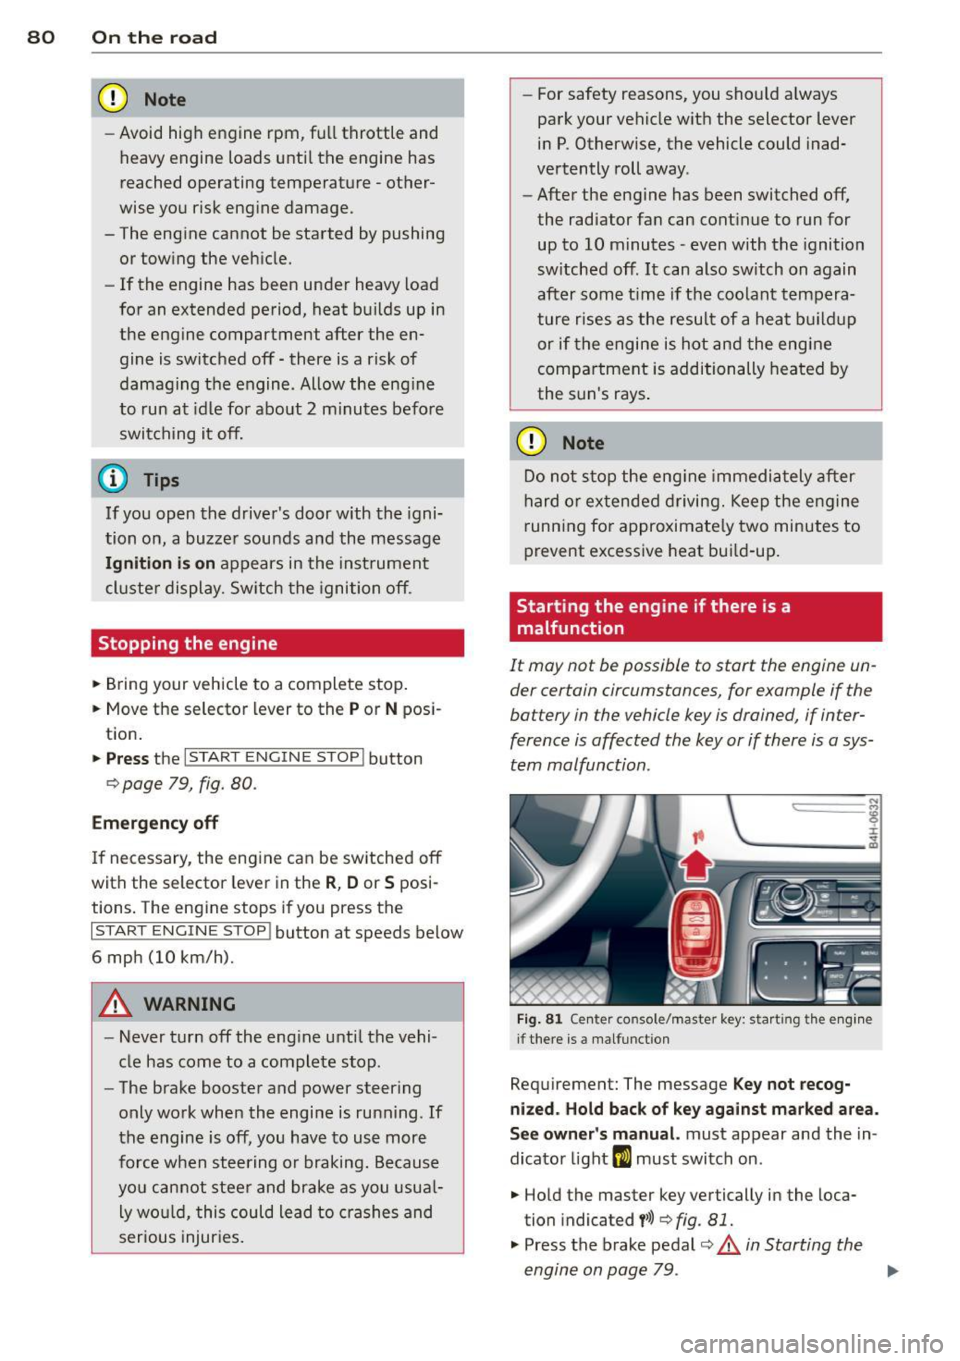
Starting the engine if there is a
malfunction
It may not be possible to start the engine un
der certain circumstances, for example if the
battery in the vehicle key is drained, if inter
ference is affected the key or if there is a sys
tem malfunction.
"' ij
:c
-- --- -~
Fig . 81 Ce nter co nsole/master key: start ing the e ngin e
i f there is a malfunct ion
Requirement: The message K ey not recog
niz ed . Hold back of ke y again st ma rked are a.
See o wner's manual.
must appear and the in
dicator light
m must switch on .
.. Hold the master key vertically in the loca
tion indicated
y >>) <=> fig . 81.
• Press the brake pedal r=> & in Starting the
engine on page 79 .
IJ>,
Page 115 of 302
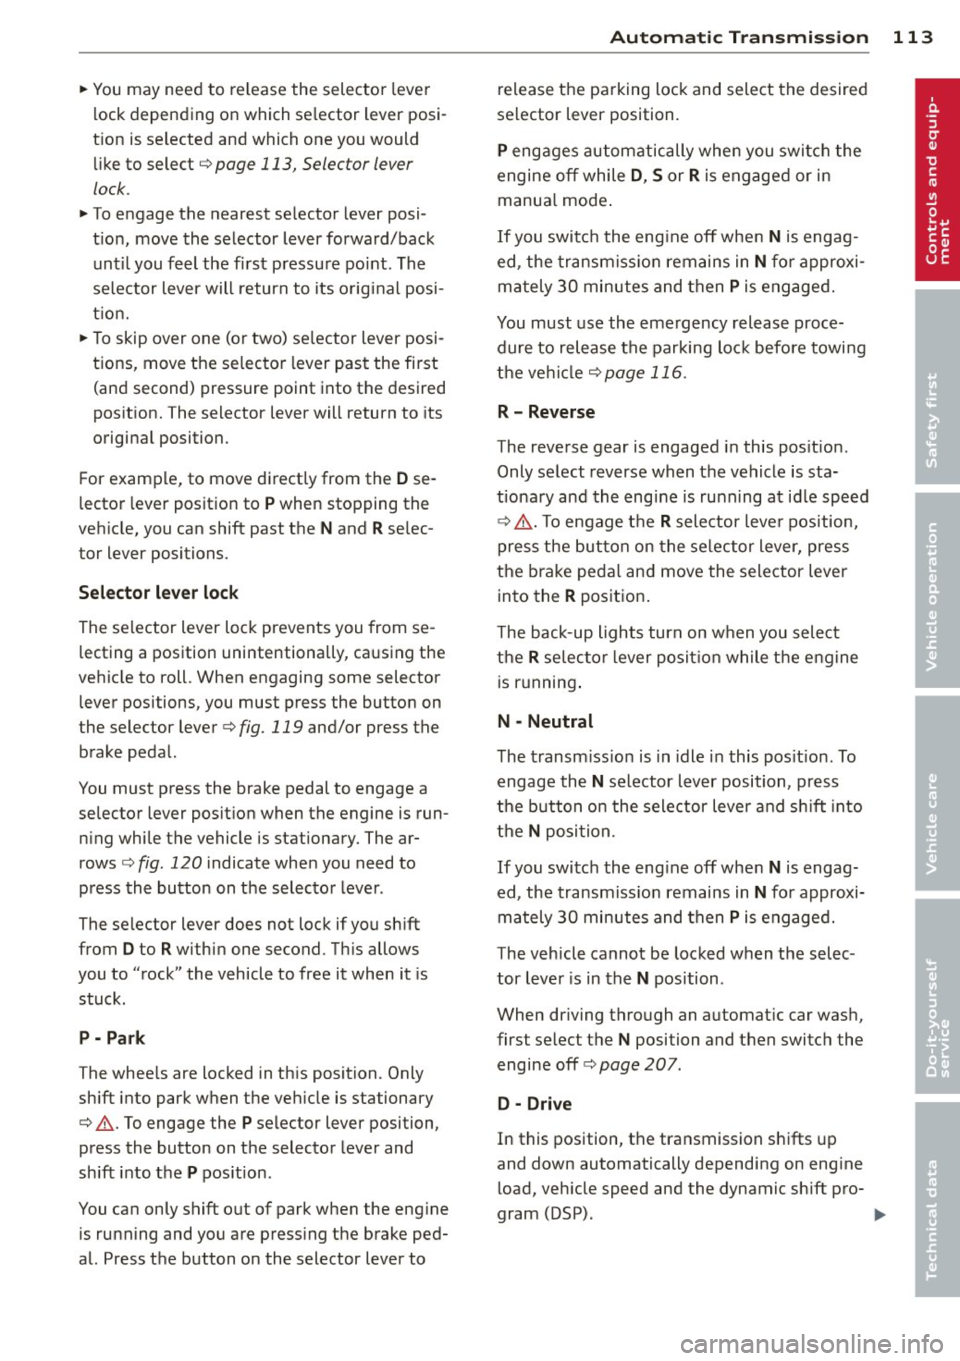
~ You may need to release the selector lever
lock depending on which se lector lever posi
t ion is selected and which one you would
like to select ¢
page 113, Selector lever
lock .
~ To engage the nearest selector lever posi
t ion, move the selector lever forward/back
until you feel the first pressure po int. The
selector lever will return to its original posi
tion.
~ T o skip over one (or two) se lector lever posi
tions, move the se lector lever past the first
(and second) pressure point into the desired
pos it ion. The selector lever will return to its
original position.
F or example, to move directly from the
D se
lector lever position to
P when stopping the
vehicle, you can shift past the
N and R selec
tor lever positions.
Selector lever lock
The selector lever lock prevents you from se
lecting a position unintentionally, causing the
vehicle to roll. When engaging some selector
lever positions, you must press the button on
the selector lever¢
fig. 119 and/or press the
brake pedal.
You must press the brake pedal to engage a
selector lever position when the engine is run
ning while the vehicle is stationary. The ar
rows ¢
fig. 120 indicate when you need to
press the button on the selector lever.
The selector lever does not lock if you shift from
D to R within one second. This allows
you to "rock" the vehicle to free it when it is
stuck .
P- Park
The whee ls are locked in this position. Only
shift into park when the vehicle is stationary
¢ & .To engage the
P selector lever position,
press the button on the selector lever and
shift into the
P position .
You can only shift out of park when the eng ine
is running and you are pressing the brake ped
al. Press the button on the selector lever to
Automatic Transmission 113
release the parking lock and select the desired
selector lever position.
P engages automatically when you switch the
engine off while
D, Sor R is engaged or in
manua l mode .
If you switch the eng ine off whe n N is engag
ed, the transmission remains in
N for approxi
mately 30 minutes and then Pis engaged.
You must use the emergency release proce
dure to release the parking lock before towing
the vehi cle ¢
page 116.
R- Reverse
The reverse gear is engaged in this pos it ion .
Only select reverse when the vehicle is sta
tionary and the engine is running at id le speed
¢ & -To engage the
R selector leve r position,
press the button on the selector lever, press
the brake pedal and move the selector lever
into the
R position.
T he back-up lights turn on when you select
the
R selector lever position while the engine
' ' 1s ru nning .
N -Neutral
The transmission is in idle in this pos it ion. To
engage the
N selector lever position, press
the button on the selector lever and shift int o
the
N posi tion.
If you switch the engine off whe n N is engag
ed, the transmission remains in
N for approxi
mately 30 minutes and then Pis engaged.
The vehicle cannot be locked when the selec
tor lever is in the
N position .
When dr iving through an automat ic car wash,
first select the
N position and then switch the
engine off¢
page 207.
D - Drive
In this position, the transmission shifts up
and down automatically depending on engine load, veh icle speed and the dynamic shift pro-
gram (DSP) .
IJJ,,
Page 118 of 302
116 Automatic Transmission
The transmission temperature has increased
significantly due to the sporty driving manner.
Drive in a less sporty manne r until the tem
perat ure returns to the norma l range and the
indicator light switches of.
[O] Gearbo x malfunction: you can continue
driving
T here is a sys tem m alfu nction in the tr ansmis
sion. You may continue driving. Drive to your
authorized Audi dealer or qualified repair fa
cility soon to have t he mal function corrected .
[o]tli] Gearbox malfunction: you can contin
ue driving in D only until engine is off
There is a sy stem ma lf u nction in t he transmis
sion . T he tra nsmi ssion i s sw itch ing t o emer
gency mo de. If yo u t urn t he eng ine off, you
will not be a ble to se lect any other se lector
leve r positions after starting the engine again .
Drive to yo ur autho rized Audi dealer o r quali
f ied repair fac ility immediately to have the
malfunction cor rected.
[O] Gearbox malfunction: you can continue
driving (limited fun ction ality )
There is a sys tem m alfu nction in the tr ansmis
sion. The transmission is sw itching to emer
gency mo de. Th is mode only shifts into cer
tain gears or will not longer shift at all . The
engine may sta ll. Drive to your authori zed Au
d i dea ler or qualified repa ir facility immed i
ately to have the malfunction corrected.
[ojtli] Gea rbox malfunction: no reverse gear
(you can continue driving)
There is a sys tem ma lf u nction in t he transmis
sion. The transm issi on is sw itchi ng to emer
gency mode. Th is mode only sh ifts into cer
tain gea rs or will not longer sh ift at a ll. You
cannot engage the reverse gear . Drive to y our
author ized Audi dealer immed iately to have
the m alfu nct ion co rrected .
[O] Vehicle may roll! Cannot sh ift to P. Please
apply parking brake
- The pa rking lock was released using t he
eme rgency release
c:> page 116. Or -
The parking b rake canno t engage au toma ti
cally . Drive to yo ur a uth o rize d Audi deale r or
qua lified repair fac ility immediately to have
the ma lfu nction corrected .
[O] Gearbox malfunction: Stop and shift to P
Do not con tinue dr iving . S e lect the P sele ctor
l ever p osition and see your auth o riz ed A udi
de aler or qua lifi ed rep air fac ility for ass is
tance .
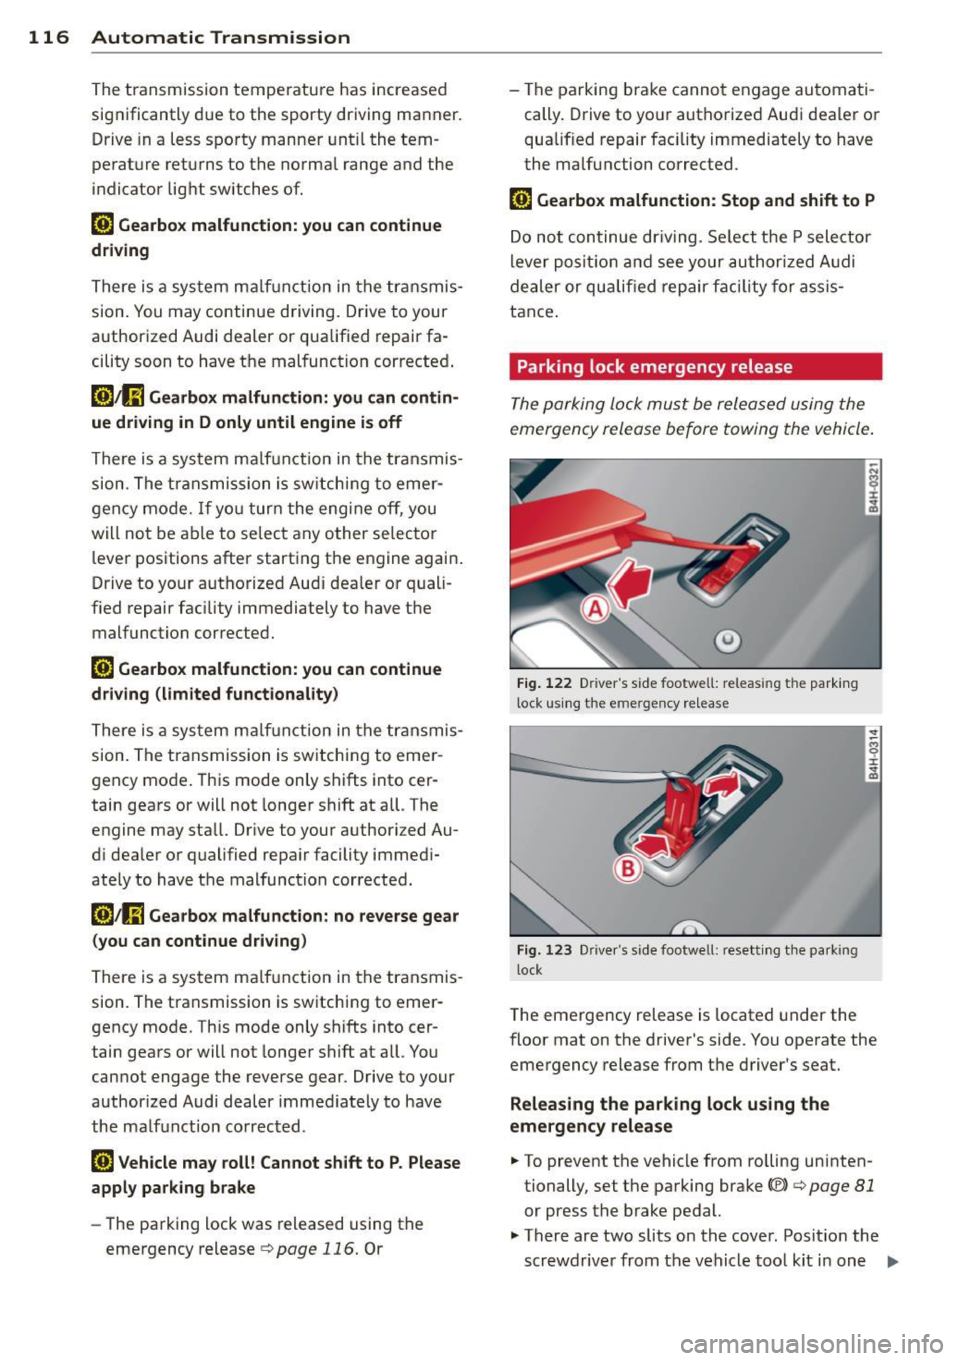
Parking lock emergency release
The p ark ing lock mu st be relea sed using the
emerge ncy release before towing the vehicle .
@)
Fig. 122 Driver 's s ide footwell: releas ing t he pa rk in g
l ock u sin g the eme rge ncy re lease
Fig . 1 2 3 Drive r's side foo twell: rese tt in g t he park ing
l ock
T he eme rgency release is located under the
floor mat on t he driver's side . You operate the
emergency release from t he d river 's seat.
Releasing the parking lock us ing the
emergency release
.. To prevent the vehicle from ro lling uninten
tionally, set the parking brake(®)
c:> page 81
or press t he brake pedal.
.. There are two slits on the cover. Posit io n the
scr ewdrive r from the vehicle too l kit i n one
IJI,
Page 275 of 302
Emergency situations
General
This chapter i s intended for trained emer
gency crews and working personnel who have the necessary tools and equipment to
perform these operations.
Starting by pushing or
towing
CD Note
Ve hicles w ith an automatic tra nsmission
cannot be started by pus hing o rtowi ng.
Starting with jumper
cables
If necessary, the engine can be started by
connecting it to the battery of another vehi
cle.
If the engine shou ld fail to start because of a
discha rged o r wea k battery, the battery can be
connected to the battery o f
another vehicle,
using a
pair of jumper cables to start the en
g ine.
Jumper c ables
Use only jumper cables of sufficiently la rge
c ross section to carry the starter c urrent safe
l y . Refer to the man ufacturer's specifications.
Use only jumper cables with
insulated te rm i
na l clamps wh ic h are d istinctly mar ked:
plus(+) cable in mos t cases co lore d red
minus (-) cable
in most cases colored black .
A WARNING
Batterie s contain e lec tricity, ac id, an d gas.
Any of these can cause ve ry ser io us or fatal
inju ry. Follow the ins tructions below f or
safe han dling of your veh icle's b attery .
- Alway s sh ield you r eye s and avoid lean
i n g over the bat te ry w henever possib le.
- A dis ch arged battery c an free ze at tem
pera tures ju st below 3 2 °F ( 0 °C ). Befo re
Emergency situations 273
connecting a jumpe r cab le, you must
thaw the fr ozen battery c omp lete ly, ot h
erwise it could explode.
- Do not allow battery acid to contact eyes
or skin. Fl ush any contacted area with
wate r immediately .
- Improper use of a booster battery to start a vehicle may cause an explosion.
- Vehicle batter ies genera te exp losive gas
es. Keep spar ks, flame and lighted c iga
rettes away from batte ries.
- Do not try to jump start any ve hicle w ith
a low ac id leve l in the battery.
- The vo ltage of the booste r batte ry m ust
a lso have a 12-Vol t rating. T he capacity
(Ah) of the booster battery sho uld not be
lowe r tha n that of the discharged bat
tery . U se of batte rie s of d iffe ren t voltage
or substantially d iffe rent "Ah" rat ing
may c au se an exp losion and persona l in
Ju ry.
- N ever cha rge a fro zen battery. Gas tr ap
pe d in the i ce m ay cause a n ex plosion.
- Never cha rge or use a batte ry tha t h as
been fr ozen . T he battery case may have
be weakened.
- Us e of batter ies of differe nt voltage or
sub stant ia lly diffe ren t ca pa city (Ah) rat
i ng may c ause an exp losion an d injury .
Th e capac ity (Ah) of the booster bat tery
should not be lower than that of the dis
charged batte ry .
- Before you chec k any thing in the engine
compa rtment, always read and hee d all
WARNINGS
¢page 216, Engine com
partment.
CD Note
- App lying a higher voltage booster ba t
tery will cause expens ive damage to se n
sit ive e lectronic components, such as
cont rol units, relays, rad io , etc.
- There must be no electrical contact be
tween the vehicles as otherwise current
cou ld already start to f low as soon as the
posit ive(+) term inals a re connected. ..,. •
•
Page 277 of 302

-When connecting jumper cables, make
sure that they cannot get ca ught in any
moving parts in the eng ine compart
ment .
- Before you check anything in the engine
compartment, always read and heed all
WARNINGS ¢
page 216, Engine com
partment.
(D Note
Imprope r hook-up of jumper cables can r u
in the generator.
- Always connect POSITIVE( +) to POSI
TIVE(+), and NEGA TIVE( -) to NEGATIVE
( - ) ground post of the battery manager
control u nit.
- Check that all sc rew plugs on the battery
ce lls are screwed in firmly. If not, tighten
pl ugs p rio r to conn ecting clamp on nega
tive batt ery terminal.
- P lease note that the procedure for con
nect ing a jump er cable as describe d
above applies spec ifica lly to the case of
you r vehi cle be ing j ump s tarte d. When
you are giv ing a jump star t to an othe r ve
hicle, do
not connec t the negative( -) ca
b le to the negat ive (-) term inal on the
discharged battery@¢
fig. 210. In
stead, securely connect the negative(-)
cable to e ithe r a solid metal component
that is firmly bolted t o th e engine block
or to the engine block itself.
If the bat
te ry tha t is b eing cha rged does not vent
to the outside, es ca ping b attery gas
could ignite and ex plode!
Emergency towing
with commercial tow
truck
General hints
Your Audi requires special handling f or tow
ing .
The fo llow ing informa tion is to be us ed by
commercia l tow tr uck operators who know
h ow to ope rate thei r equipmen t sa fe ly.
Emergency s itu ations 2 7 5
- Ne ver tow your Audi. Towing will caus e
damage to the engine and tran smission.
- Never wrap the safety chain s or winch ca
ble s around the brake lines.
- To prevent unnece ssary damage , your Audi
must be transported with a flat bed truck.
- To load the vehicle on to the fl at bed , use
the towing loop found in the vehicle tools
and attach to the front o r rear anchora ge
¢page 275 and ¢page 276.
_& WARNING
A vehicle being towed is not safe for pas
sengers. Never allow anyo ne to ride in a
vehicle be ing towed, for any reason.
-
Front towing loop
Only install the front towing loop when it is
needed.
F ig. 21 1 Front bu mpe r: cove r
Fig. 212 Front bu mpe r: in stall ing t he tow ing loop
There are threads located behind the right
s ide of the front b umpe r where a towing loop
can be installed. The th reads are located be
hind a cover.
.. Remove the tow ing loop from the vehicle
t oo l kit .
Page 292 of 302

290 Index .:..:..:..::....::.....:..._ ___________________________ _
Doors
M echanical child safety lock .. .... .. .. 38
Power child safety lock . . . . . . . . . . . . . . 38
Driver information system
CD/radio display . . . . . . . . . . . . . . . . . . . . 23
Door/r ear lid warning . . . . . . . . . . . . . . . 23
Efficiency program . . . . . . . . . . . . . . . . . . 25
Exterior temperature display ... .. .. .. 23
On-board computer . . . . . . . . . . . . . . . . . 24
Driver seating position ............... 128
drive select .................... ... . 106
adaptive air suspension/sport ........ 106
Adaptive dampers ........ .. .. .... . 106
Cornering light ......... .. .. .. .. .. . 106
Dynamic steering ......... .... .... . 106
Safety belt tensioner ....... .... ... . 106
Sport differential .......... ... .... . 106
Driv ing safely .............. ... .. .. . 127
Driving through water ............... 199
Driving tim e . . . . . . . . . . . . . . . . . . . . . . . . 24
Duplicate key . . . . . . . . . . . . . . . . . . . . . . . 29
Dynamic steering . . . . . . . . . . . . . . . 22, 106
E
Easy entry feature ............ .. .... .. 78
Efficiency program . . . . . . . . . . . . . . . . . . . 25
Fu el economy messages . . . . . . . . . . . . . 25
Other equipment . . . . . . . . . . . . . . . . . . . 25
Elect rical accessoires (sockets) . . . . . . . . . 63
Electrical accessories (sockets) . . . . . . . . . 69
Electromechanical parking brake
Emergency braking . . . . . . . . . . . . . . . . . 83
Operation ......................... 81
Parking .... ................ ..... .. 82
Releasing and closing ........... ... . 81
Starting assist ............ ... .... .. 82
Starting from rest ........ .. .. .... .. 82
Starting off with a trailer ..... .. .. .. . . 82
Warning/indicator lights ..... .. .... .. 15
Electronic differential lock (EDL) ... ... . 190
Warning/indicator lights ......... .. .. 19
E lectronic immobilizer . . . . . . . . . . . . 26, 30
Electronic power co ntrol (EPC)
warning/indicator light ..... .... ..... 20
Electronic speed limiter . . . . . . . . . . . . . . . 28 Electronic
stabilization program (ESP) . . 190
Warning/indicator lights ............. 18
Emergency actuation
Doors .. .. .. .. .. ............. .. .. . 3S
Parking lock ... .. ............. .... 116
Pow er sunroof ... .................. 41
R ea r lid ... .... .. ............. ..... 37
Emerg ency braking . ... .......... .. .. . 83
Emergency flasher .............. .. .. . 44
Warning/indicator lights ........ .. .. . 22
Emergency operation Panoramic sunroof ................ .. 42
Sun shade (roof) . ............... .. . 42
Emerg ency starting ... .......... .. .. 273
Emergency towing .................. 275
Emergency warning triangle ......... . 259
Energy management . ........... .. .. 195
Engine Compartment .. .. ... .......... .. .. 224
Coolant ......... .. .............. . 229
Data 282
starting ........................... 79
Start ing with jumper cables ......... 273
Stopping .. .. .. .. .. ........... .... . 80
E ngine compartment ............... . 224
Closing the hood ... ..... ........ .. 223
Opening the hood .......... ...... . 222
Safety instructions ............... .. 222
Working in the eng ine compartment .. 222
Engine coolant .. ................... 229
Adding coolant ... .. ..... ........ .. 230
Checking the engine coo lant level ..... 229
Expansion tank ................ .... 229
Malfunction symbol ............ .... . lS
Radiator fan ..... ................ . 231
Temp erature gauge ................ . 10
Engine oil ..... ... .. .............. . 224
Adding ... .. .. .. .. ........... .... 227
Additives .. .. .. .. ............. .. .. 227
Changing ..... .. ................. 228
Checking the engine oil leve l ......... 227
Indications and conditions requiring ex-
tra checking ..... ............. .... 227
Indicator light ... ... .......... .. .. . 17
Oil consumpt ion .. ............. .... 226
Oil grades ..... .................. . 224
Oil level symbol . . . . . . . . . . . . . . . . . . . . 20
Page 295 of 302
_______________________________ I~ n~ d:::: e~x 293
Leaving home ... ... .... ... .. .. .. ... .
Lifting jack ....................... .
Lifting points 45
265
277
Lifting vehicle ............. .... .. ... 277
Light
Ambience lighting ......... ...... ... 46
Com ing/Leaving home ............ ... 45
D aytime r unning lights ..............
43
Emergency flashers . . . . . . . . . . . . . . . . . 44
Exterior lighting ....... ... .. .. ......
43
Headlig ht range contro l ... .. .. .. .. .. 43
High beam ..... ...... ... .. .. .. .... 45
Low beam .. ............. .... .. ....
43
Park ing lights . ........... .. .. .. .... 43
Rear fog lights ..................... 43
Turn signa ls ....................... 45
Light/rain sensor Headlights . .. ........... .. .. .. ....
43
Intermittent (windshield wipers) .. .. .. 48
Sensor defective . . . . . . . . . . . . . . . . . . . . 21
Loading the roof rack . . . . . . . . . . . . . . . . . 68
Locking
Powe r locking switch . . . . . . . . . . . . . . . .
34
Rear lid .. .. .. ........... .. .. .. .... 35
Remote control .......... .. .. .. .. ..
3 2
Using the key ... ...... ... .. .. .. ... .
Low beams 34
43
Lower universal anchorages (Canada) 181
Lugg age compartmen t
L uggage compartment net ... .. .. ....
65
Pass-t hro ugh with ski sack . . . . . . . . . . . 66
Stowing luggage . ..... ... .. .. .. .. .
133
Tie-downs . . . . . . . . . . . . . . . . . . . . . . . . . 65
L umba r su pport
Fr ont seats . . . . . . . . . . . . . . . . . . . . . . . .
5 6
Rear seats .. .... .. .... ... .. .. .. .... 57
M
M ain tenance . ............. .... .. ... 283
Malfunct ion Indicator Lamp (MIL) 20, 27
Massage function
Front seats . . . . . . . . . . . . . . . . . . . . . . . .
56
Rear seats .. ............. .... .. .... 57
Reclining rear seat ........ .. .. .. .. .. 60
Mechanical key . . . . . . . . . . . . . . . . . . . . . .
30
Mir ro rs
Adjusting th e exterior mirrors .... .. .. .
51
Compass . ... .. .. .. . .. ... .... ... .. . 52
d' . 1mming .... .. .. ................. . 51
Vanity mirrors . . . . . . . . . . . . . . . . . 47, 48
Moni toring the Advanced Airbag System 156
Mult ifunct ion steer ing whee l ......... .. 24
N
Natura l leather .. ... ................ 213
New ti res and wheels
NH TSA
Co ntacting
N ight vision assistant ............... .
Cleaning camera lens .............. .
N umber of seats ...... .. .. ..... ... . .
0
249
135
109
208
137
Occ upant seating positions .... ... .. .. 128
Octane rat ing ... ... ................ 218
Odometer . . . . . . . . . . . . . . . . . . . . . . . . . . 26
OFF (automa tic climate control) ... .. .. . 75
Oil
refer to Engine oil ................ . 224
On-board computer . . . . . . . . . . . . . . . . . . 24
On-Boa rd Di agnost ic System (O BD)
Data Link Conne ctor (D LC) ............
28
Electronic speed limi ter . ..... ... .. .. . 28
Malfunction Indicator Lamp (MIL) . ... . 27
Open door/hood/rear lid wa rni ng ....... 27
Opening
Hood ....... .. ...... .............
222
Panoramic sunroof .. . .. .. ..... ... .. . 41
Power w indows .................... 39
Rea r lid . . . . . . . . . . . . . . . . . . . . . . . 36, 37
Slid ing/ti lting s unroof .......... .... .
40
Sun shades . . . . . . . . . . . . . . . . . . . . 42 , 47
Operate your vehicle economically and
minimize pollution ..................
199
Other equipment (efficiency program) . .. 25
p
Paint
T o uch -up . ... .. .... . ... ...... ... ..
210
Pa int No. 279
•
•