window AUDI S8 2016 Owners Manual
[x] Cancel search | Manufacturer: AUDI, Model Year: 2016, Model line: S8, Model: AUDI S8 2016Pages: 302, PDF Size: 75.68 MB
Page 4 of 302
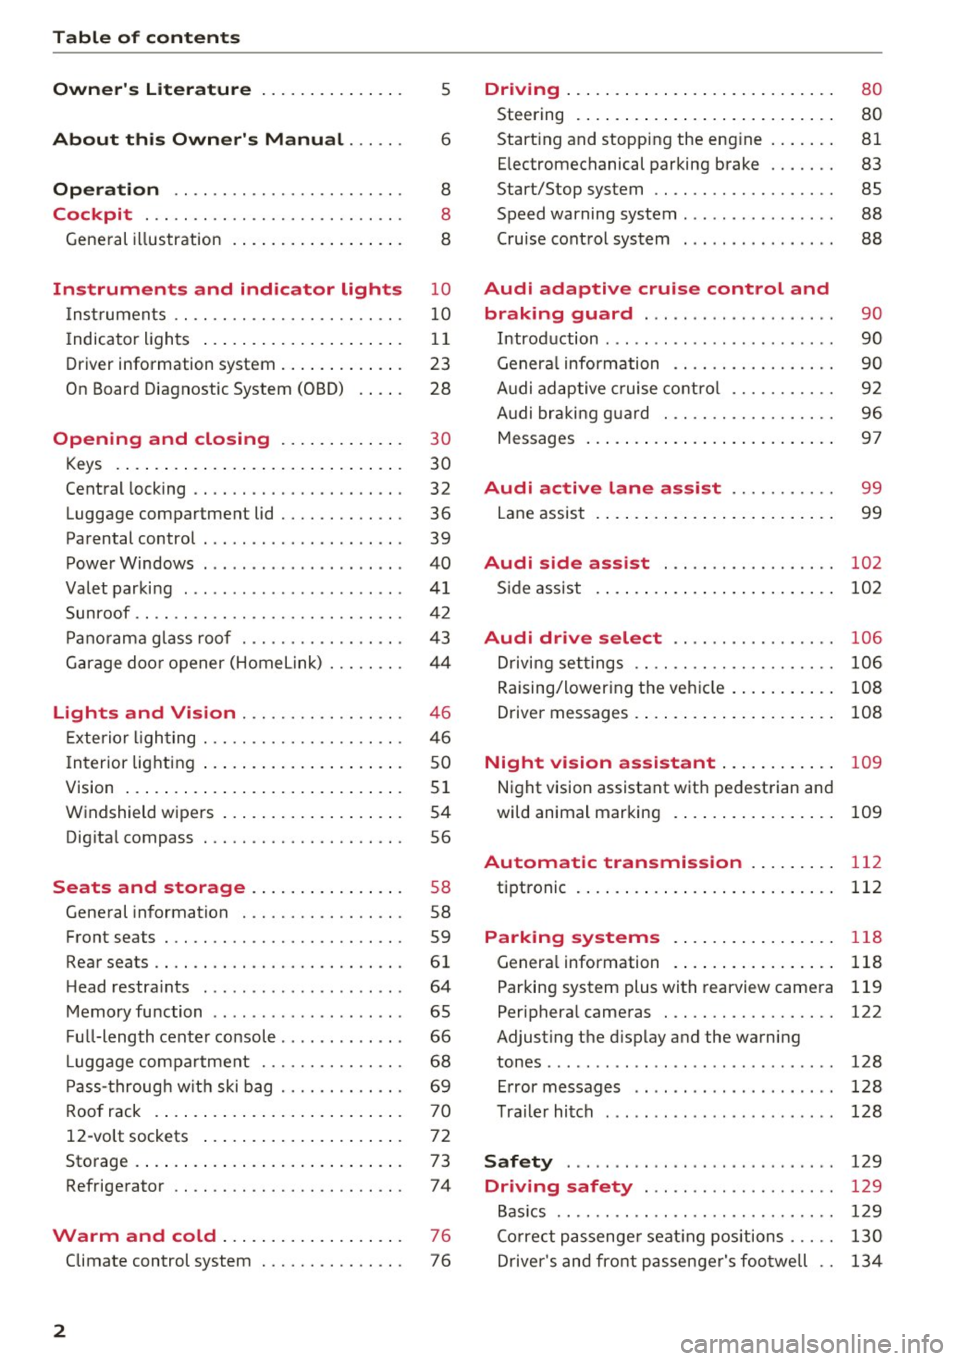
Table of content s
Owner' s Lit e rature
5
About thi s Own er' s Manual . . . . . . 6
Opera tion . . . . . . . . . . . . . . . . . . . . . . . . 8
Cockpit . . . . . . . . . . . . . . . . . . . . . . . . . . . 8
General illustration . . . . . . . . . . . . . . . . . . 8
Instruments and indicator lights 10
I nstruments . . . . . . . . . . . . . . . . . . . . . . . . 10
I ndicator lights . . . . . . . . . . . . . . . . . . . . . 11
Driver informat ion system . . . . . . . . . . . . . 23
On Board Diagnostic System (OBD) . . . . . 28
Opening and closing . . . . . . . . . . . . . 30
K eys . . . . . . . . . . . . . . . . . . . . . . . . . . . . . . 30
Central locking . . . . . . . . . . . . . . . . . . . . . . 32
Luggage comp art men t lid . . . . . . . . . . . . . 36
Parental control . . . . . . . . . . . . . . . . . . . . . 39
Power Windows . . . . . . . . . . . . . . . . . . . . . 40
Va let parking . . . . . . . . . . . . . . . . . . . . . . . 41
Sunroof. . . . . . . . . . . . . . . . . . . . . . . . . . . . 42
P ano rama glass roof . . . . . . . . . . . . . . . . . 43
Garage doo r opener (Home Link) . . . . . . . . 44
Lights and Vision . . . . . . . . . . . . . . . . . 46
E xterio r ligh ting . . . . . . . . . . . . . . . . . . . . . 46
I n terior lighting . . . . . . . . . . . . . . . . . . . . . 50
V1s1on . . . . . . . . . . . . . . . . . . . . . . . . . . . . . 51
Windshi eld wip ers . . . . . . . . . . . . . . . . . . . 54
Dig ital compass . . . . . . . . . . . . . . . . . . . . . 56
Seats and storage . . . . . . . . . . . . . . . . 58
General information . . . . . . . . . . . . . . . . . 58
Front seat s . . . . . . . . . . . . . . . . . . . . . . . . . 59
Rearseats .. .. .... .... .... ....... .. . 61
H ead restra ints . . . . . . . . . . . . . . . . . . . . . 64
Memory function . . . . . . . . . . . . . . . . . . . . 65
F u ll -length center console . . . . . . . . . . . . . 66
L uggage compartment . . . . . . . . . . . . . . . 68
P ass-through w it h ski bag . . . . . . . . . . . . . 69
Roof rack . . . . . . . . . . . . . . . . . . . . . . . . . . 70
12-volt sockets . . . . . . . . . . . . . . . . . . . . . 72
Storage . . . . . . . . . . . . . . . . . . . . . . . . . . . . 73
Refrigerator . . . . . . . . . . . . . . . . . . . . . . . . 7 4
Warm and cold . . . . . . . . . . . . . . . . . . . 76
Climate control system . . . . . . . . . . . . . . . 7 6
2
Driving .... . .. .. .. .. ... . .. .... ... . .
Steering . ... .. .. .. .. .. .. .. .... ... . .
Start ing and stopping the eng ine
E lec tromechanical parking brake ... .. . .
S ta rt/Stop sys tem .. .. ...... ... .. .. . .
Speed warning system ............... .
Cru ise cont rol system ..... ... ... ... . .
Audi adapt ive cru ise control and
braking guard ... .. .... ... ... ... . .
Introduction ...... ................. .
Genera l information .. ...... ... .. .. . .
A udi adaptive cruise contro l ... ...... . .
Audi bra kin g g uard . .. ........ ..... . .
Messages ... .. .. .. .. .. .. .. .... ... . .
Audi active lane assist .. .... .... .
Lane assist . ... .. .. .. .. . ... .... ... . . 80
80
81
83
85
88
88
90
90
90
92
96
97
99
99
Audi side assist . . . . . . . . . . . . . . . . . . 102
S ide assist . . . . . . . . . . . . . . . . . . . . . . . . . 102
Audi drive select . . . . . . . . . . . . . . . . . 106
D riving settings . . . . . . . . . . . . . . . . . . . . . 106
Raising/lower ing the veh icle . . . . . . . . . . . 108
Driver messages . . . . . . . . . . . . . . . . . . . . . 108
Night vision assistant . . . . . . . . . . . . 109
Night vision assistant with ped estrian and
wild animal marking . . . . . . . . . . . . . . . . . 109
Automatic transmission . . . . . . . . . 112
tiptronic . . . . . . . . . . . . . . . . . . . . . . . . . . . 112
Parking systems . . . . . . . . . . . . . . . . . 118
G enera l information . . . . . . . . . . . . . . . . . 118
Parking syst em plus with rearvi ew came ra 119
Periphera l cameras . . . . . . . . . . . . . . . . . . 122
Adjusting the d isplay and the w arning
tones . . . . . . . . . . . . . . . . . . . . . . . . . . . . . . 1 28
E rror messages . . . . . . . . . . . . . . . . . . . . . 128
T railer hitch . . . . . . . . . . . . . . . . . . . . . . . . 128
Safety . . . . . . . . . . . . . . . . . . . . . . . . . . . . 129
Driving safety . . . . . . . . . . . . . . . . . . . . 129
Bas ics . . . . . . . . . . . . . . . . . . . . . . . . . . . . . 129
Co rrect passenge r seat ing positions . . . . . 130
Driver 's and front passenger's foo twell . . 134
Page 11 of 302
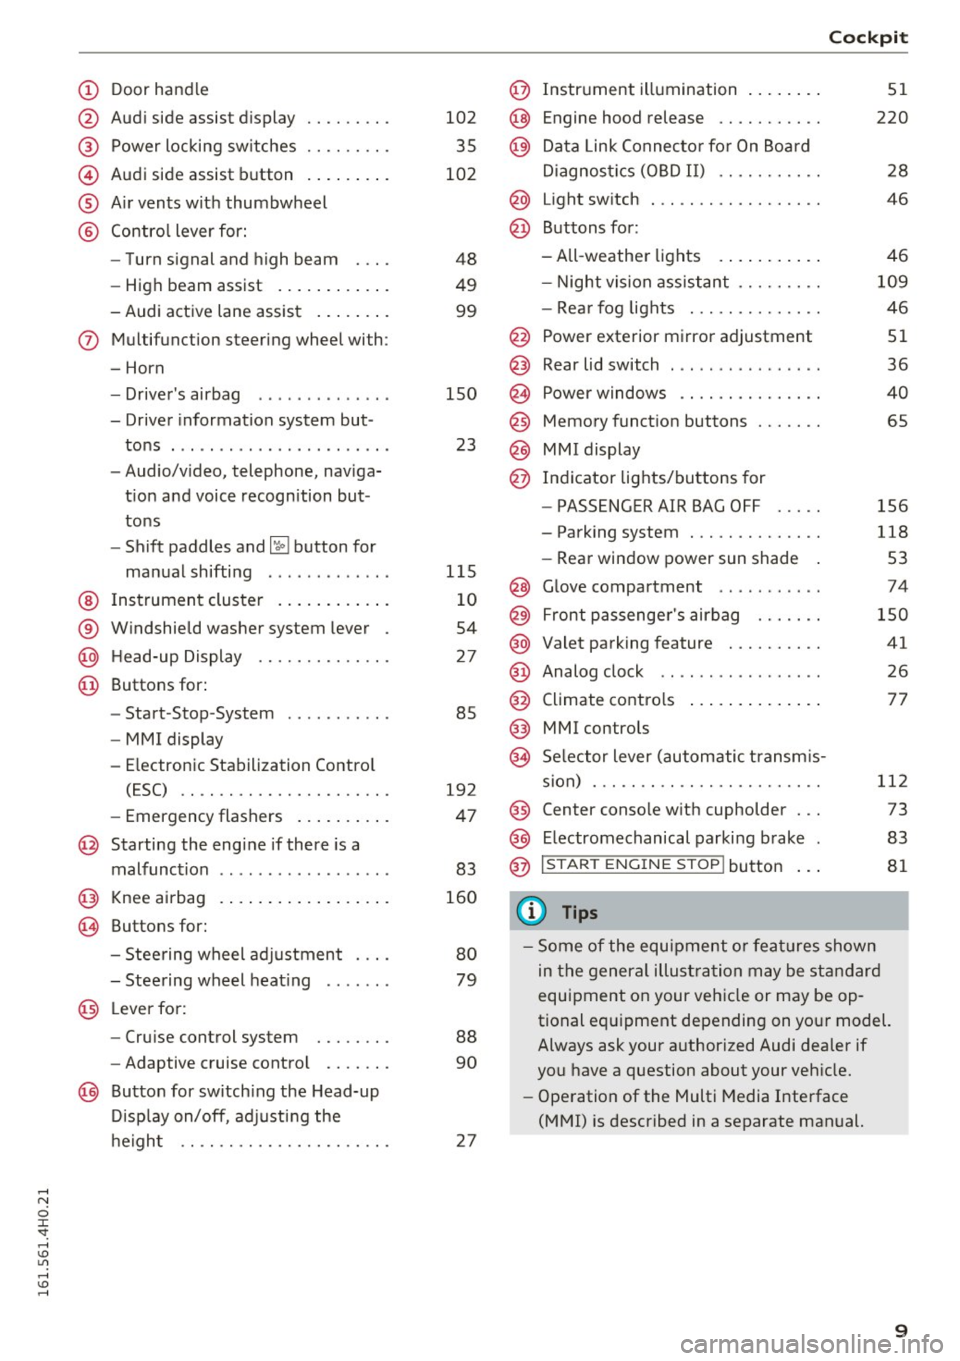
(!) Door handle
@
®
©
®
®
Audi side assist display
Power locking sw itches
Audi side assist button ........ .
A ir vents with thumbwheel
Contro l lever for:
- Turn signal and high beam
- High beam assist .......... . .
- Audi active lane assist ....... .
(J) Multifunction steering wheel with:
- Horn
- Driver's airbag .... ..... ... . .
- Driver information system but-
tons . ......... ....... ..... .
- Audio/video, telephone, naviga
tion and voice recognition but
tons
- Shift paddles and~ button for
manual shifting ... ..... ... . .
@ Instrument cluster .......... . .
® Windshield washer system lever
@ Head-up Display ........... .. .
@ Buttons for:
- Start -Stop -System . ..... ... . .
- MMI display
- Electronic Stabilization Control
(ESC) .. .. ............. .. .. .
- Emergency flashers ........ . .
@ Starting the engine if there is a
malfunction ..... ....... ..... .
@ Knee airbag ................ . .
~ Buttons for:
- Steering wheel adjustment ... .
- Steering wheel heating .. .... .
@ Lever for:
- Cruise control system ..... .. .
- Adaptive cruise control .... .. .
@ Button for switching the Head-up
Display on/off, adjusting the
height .. .. ............... .. .
102
35
102
48
49
99
150
23
115 10
54
27
85
192
47
83
160
80
79
88
90
27
Cockpit
@ Instrument illumination ....... .
@ Engine hood release .......... .
@) Data Link Connector for On Board
Diagnostics (OBD II) .......... .
@ Light switch . .. .............. .
@ Buttons for :
-All-weather lights .......... .
- Night vision assistant ........ .
- Rear fog lights ............. .
@ Power exterior mirror adjustment
Rear lid switch ... ...... ...... .
Power windows .............. .
Memory function buttons ...... .
MMI display
Indicator lights/buttons for
- PASSENGER AIR BAG OFF
- Parking system ............. .
- Rear window power sun shade
@ Glove compartment .... ...... .
@ Front passenger's airbag ...... .
@ Valet parking feature ......... .
@ Analog clock .. .. ............ .
@ Climate contro ls ............. .
@) MMI controls
<.§ Selector lever (automatic transmis-
sion) . .. .. .. .. .............. .
@ Center console with cupholder .. .
@ E lectromechanical parking brake
@ IS TAR T ENGINE ST OP !button
{I) Tips
51
220
28
46
46
109
46
51
36
40
65
156
118
53
74
150
41 26
77
112 73
83
81
- Some of the equipment or features shown
in the general illustration may be standard
equipment on your vehicle or may be op
tional equipment depending on your model.
Always ask your authorized Audi dealer if
you have a question about your vehicle.
- Operation of the Multi Media Interface
(MMI) is described in a separate manual.
9
Page 32 of 302
Opening and closing
Opening and closing
Keys
Key set
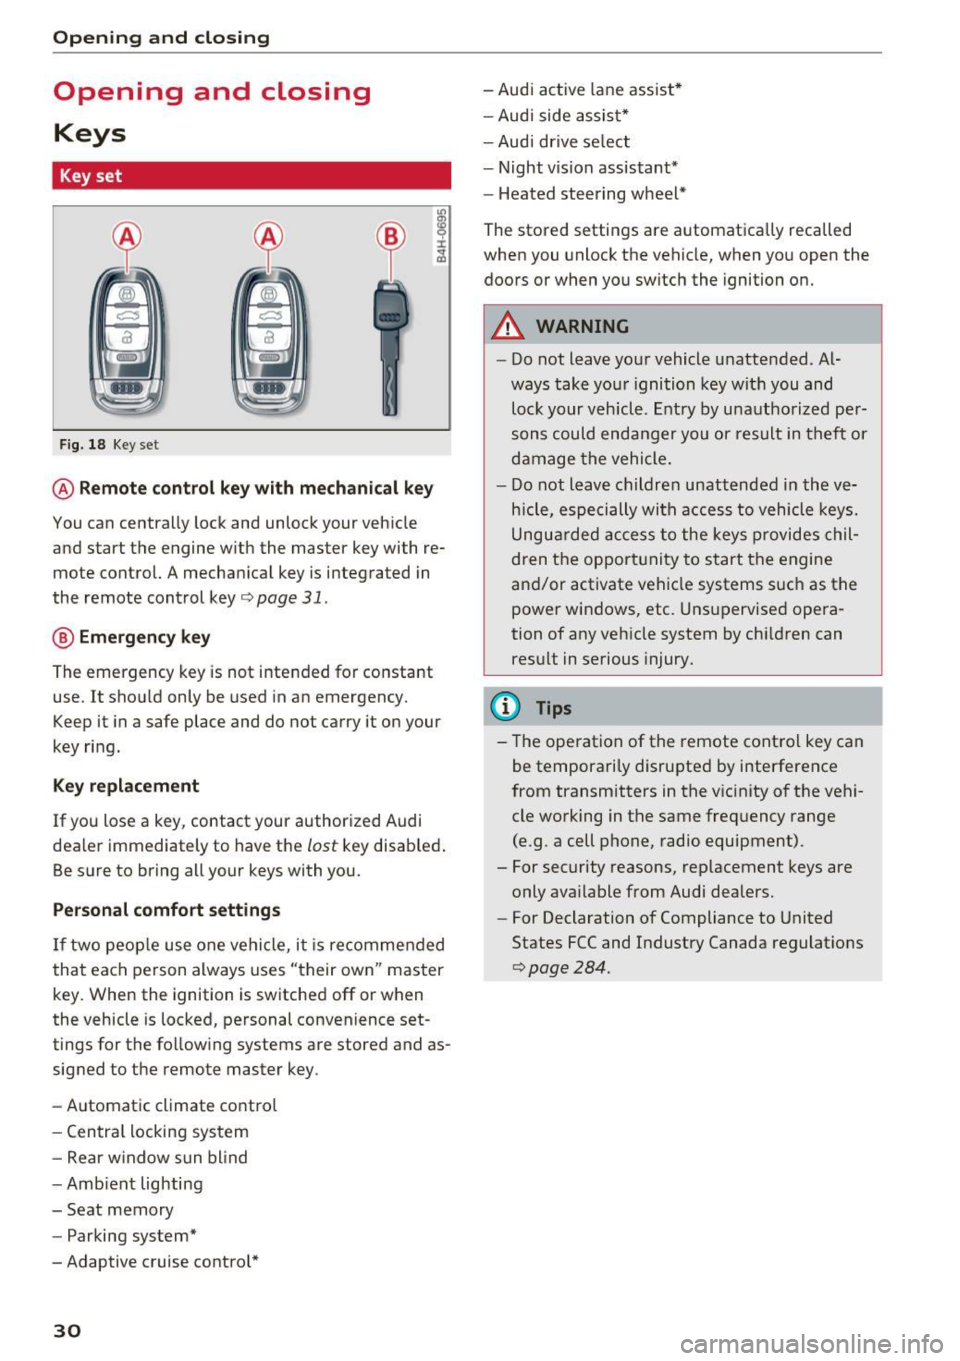
Fig. 18 Key set
@ Remote control key with mechanical key
You can centrally lock and unlock your vehicle
and start the engine w ith the master key with re
mote control. A mechanical key is integrated in
the remote control key¢
page 31.
@ Emergency key
The emergency key is not intended for constant
use. It shou ld only be used in an emergency.
Keep it in a safe place and do not carry it on your
key ring.
Key replacement
If you lose a key , contact your authorized Audi
dealer immediately to have the
lost key disab led .
Be sure to bring all your keys with you.
Personal comfort settings
If two people use one vehicle, it is recommended
that each person always uses "their own" master
key. When the ignition is switched off or when
the vehicle is locked , personal convenience set
tings for the following systems are stored and as
signed to the remote master key .
- Automatic climate contro l
- Central locking system
- Rear w indow sun blind
- Amb ient lighting
- Seat memory
- Parking system*
-Adaptive cruise contro l*
30
- Audi active lane assist*
- Audi side assist*
- Audi drive select
- Night vision assistant*
- Heated steering wheel*
The stored settings are automatica lly recalled
when you unlock the vehicle, when you open the
doors or when you switch the ignition on.
A WARNING
-
- Do not leave your vehicle unattended . Al
ways take your ignition key with you and
lock your vehicle. Entry by unauthorized per
sons could endanger you or result in theft or
damage the vehicle.
- Do not leave children unattended in the ve
hicle, especially with access to vehicle keys.
Ungua rded access to the keys provides chil
dren the opportunity to start the engine
and/or activate vehicle systems s uch as the
power windows, etc . Unsupervised opera
tion of any veh icle system by ch ildren can
result in serious injury.
(D Tips
- The operation of the remote control key can
be temporarily disrupted by interference
from transmitters in the v icinity of the vehi
cle working in the same frequency range
(e.g . a cell phone, radio equipment).
- For security reasons, replacement keys are
only available from Audi dealers.
- For Declaration of Compliance to United
States FCC and Industry Canada regulat ions
C?page 284.
Page 33 of 302

Removing the mechanical key
Fig. 19 R emote control master key: removing the mechani·
ca l key
• Press the release button @¢fig. 19.
• Pull the mechanical key @ out of the master
key.
Using the mechan ica l key, you can:
- lock and unlock* the storage compartment on
the passenger's side¢
page 73.
- lock and unlock the vehicle manually
¢page 35.
-lock the front and rear passenger doors me
chanically¢
page 36.
-unlock the luggage compartment lid manually
¢page 39.
Check light and battery in the master key
Fig. 20 Remote master key: Remov ing the battery holder
Check light in the ma ste r key
The check light®¢ fig. 20 in the master key
provides information about different conditions.
• The check light turns on briefly once when a
button is pressed, and during an "inquiry" by
the conven ience key system.
Open ing and closing
• If the check light does not come on, the battery
is dead and has to be replaced. In addition,
when the battery is dead the
!I ind icator light
appears in the instrument cluster display as
well as the message
Please change the key
battery .
Ma ster key battery replacement
• Remove the mechanical key ¢page 31.
• Press the re lease button @¢ fig. 20 on the
battery holder and at the same time pull the
battery holder out of the master key in the di
rection of the arrow .
.. Install the new batte ry CR 2032 with the"+"
sign facing down.
.. Push the battery holder carefully into the mas
ter key .
.. Insta ll the mechanical key .
@ For the sake of the environment
Dispose of dead batteries properly so as not
to pol lute the environment.
(D Tips
The replacement battery must be the same
specification as the original.
Electronic immobilizer
The immobilizer helps to prevent unauthorized
use of your vehicle.
A computer ch ip inside your key automatically
deact ivates the electronic immob ilizer when the
key is inside the vehicle. When you remove the
key from the vehicle, the elect ronic immob ilizer
is automatically activated once again .
& WARNING
-
Always take the key with you when you leave
the vehicle. The key can disarm the electronic
engine immobilizer and permit an unauthor
i zed person to start the engine and enable op
eration of the vehicle systems such as power
window or power sunroof leading to serious
personal injury.
31
Page 42 of 302
Opening and closing
• To switch off the child safety lock, turn the key
in the opposite direction to the arrow.
When the child safety locks are activated, the in
side door handles do not work and the doors can
only be opened from the outs ide.
Power child safety lock for the rear doors
A pp lies to: ve hicles w ith power c hild safe ty lock in the rea r
do ors
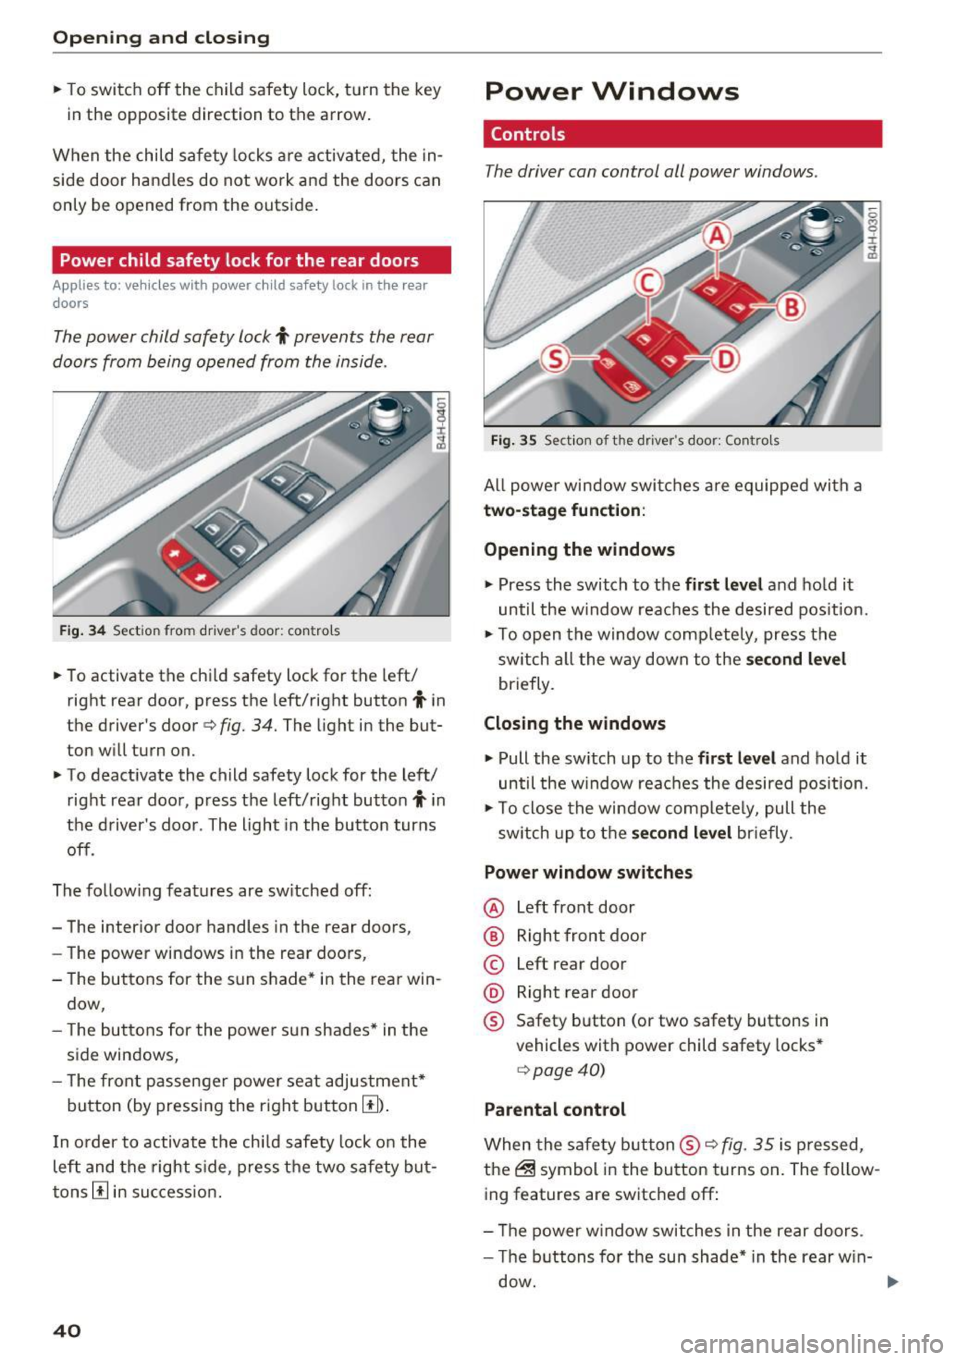
The power child safety lock i prevents the rear
doors from being opened from the inside.
Fig . 34 Sect ion from drive r's doo r: contro ls
• To activate the child safety lock for the left/
right rear door, press the left/right button
i in
the driver's door
Q fig. 34. The light in the but
ton will turn on.
• To deactivate the child safety lock for the left/
right rear door, press the left/right button
i in
the driver's door . The light in the button turns
off.
The fo llow ing features are sw itched off:
- The interior door handles in the rear doors,
- The power windows in the rear doors,
- The buttons for the sun shade* in the rear win-
dow,
- The buttons for the power sun shades* in the
side windows,
- The front passenger powe r seat adjustment*
button (by pressing the right button
[I) .
In order to activate the ch ild safety lock on the
left and the right s ide, press the two safety but
tons
[I in success ion.
40
Power Windows
Controls
The driver can control all power windows.
Fig. 35 Section of t he driver 's doo r: Contro ls
All power window switches are equipped with a
two-stage function :
Opening the windows
• Press the switch to the first level and hold it
until the w indow reaches the desired pos ition.
• To open the window comp letely, press the
sw itch all the way down to the
second level
briefly.
Closing the windows
• Pull the sw itch up to the first level and hold it
until the window reaches the desired position.
• To close the window complete ly, pull the
sw itch up to the
second level briefly.
Power window switches
@ Left front door
@ Right front door
© Left rear door
@ Right rear door
® Safety button (or two safety buttons in
vehicles with power child safety locks*
Q page40)
Parental control
When the safety button ® Q fig. 35 is pressed,
the@ symbol in the button turns on. The follow
ing features are switched off:
- Th e power window switches in the rear doors .
- The buttons for the sun shade* in the rear w in-
dow.
Page 43 of 302

-The buttons for the power sun shades * in the
side windows.
- The button for the front passenger's seat ad
justment*.
A WARNING 1=
- Always take the vehicle key with you when
leaving the vehicle, even for a short period
of time. This applies particularly when chil
dren rema in in the vehicle . Otherwise the
children could start the engine or operate
electrical equipment such as power win
dows. The power windows a re functional un
ti l the driver's door or passenge r's door has
been opened.
- Pay ca reful attention when closing the win
dows.
It could cause injury by pinching.
- When locking the veh icle from outside, the
vehicle must be unoccupied since the win dows can no longer be opened in an emer
gency.
@ Tips
- Using the switches © and @, the driver can
also operate the power sunshades* in the
side windows.
- After tu rning the ignition off you can st ill
open and close the w indows for app roxi
ma tely 10 minutes. The powe r windows are
not switched off until the driver's door or
passenger's door has been opened.
What to do after a malfunction
-
The one -touch open and close function must be
reactivated if the battery has been disconnected .
.,. Pull and hold the power w indow switch unt il
the window is fully closed.
.,. Release the switch and then pull it again for at
least one second.
Openin g an d clos ing
Valet parking
The valet parking feature protects the luggage
compartment from unauthorized access.
Fig. 36 Valet parking button
With "valet parking" act ivated, the luggage com
partment lid cannot be opened .
.,. Remove the mechanical key
c::> page 31.
.,. Open the glove compartment and activate
c::> fig. 36 the "valet parking" feature by press
ing the
!VA LE T I button. The indicator light in
the switch illumina tes.
.,. Close the glove compartment and lock it with
the mechanical key.
.,. Leave the master key with the service personnel
for parking and keep the mechanical key with
you .
When the "valet parking" feature is activated:
- the unlocking button fo r the luggage compart
ment lid~ in the driver's door is inactive
- the button~ on the master key is inactive
- the opening handle in the luggage compart-
ment lid is inactive.
The vehicle can be driven and locked and un
locked with the master key . Access to the lug
gage compartment is b locked.
When the valet parking function is switched on,
the message
V ale t p arki ng activat ed appears in
the instrument cluster d isp lay when you switch
the ignition on.
4 1
Page 54 of 302
Lights and Vision
and farther away. Your may estimate incor
rectly when you use these mirrors to gauge
your distance from the vehicles behind you
when changing lanes, which increases the risk of an accident .
CD Note
-If the mirror housing was moved by outside
forces (such as an impact when maneuver
ing), you must use the power folding func
tion to fold the mirror all the way out. The
mirror housing must not be moved back in
to place by hand because this would impair
the function of the mirror mechanism.
- If you wash the vehicle in an automatic car
wash, you must fold the exterior mirrors in
to reduce the risk of damage to the mirrors.
Never fold power folding exterior mirrors by
hand. Only fold them in and out using the
power controls.
@ Tips
- If the power adjusting function malfunc
tions, the glass in both mirrors can be ad
justed by pressing on the edge of it by hand.
- The exterior mirror settings are stored with
the memory function"~
page 65.
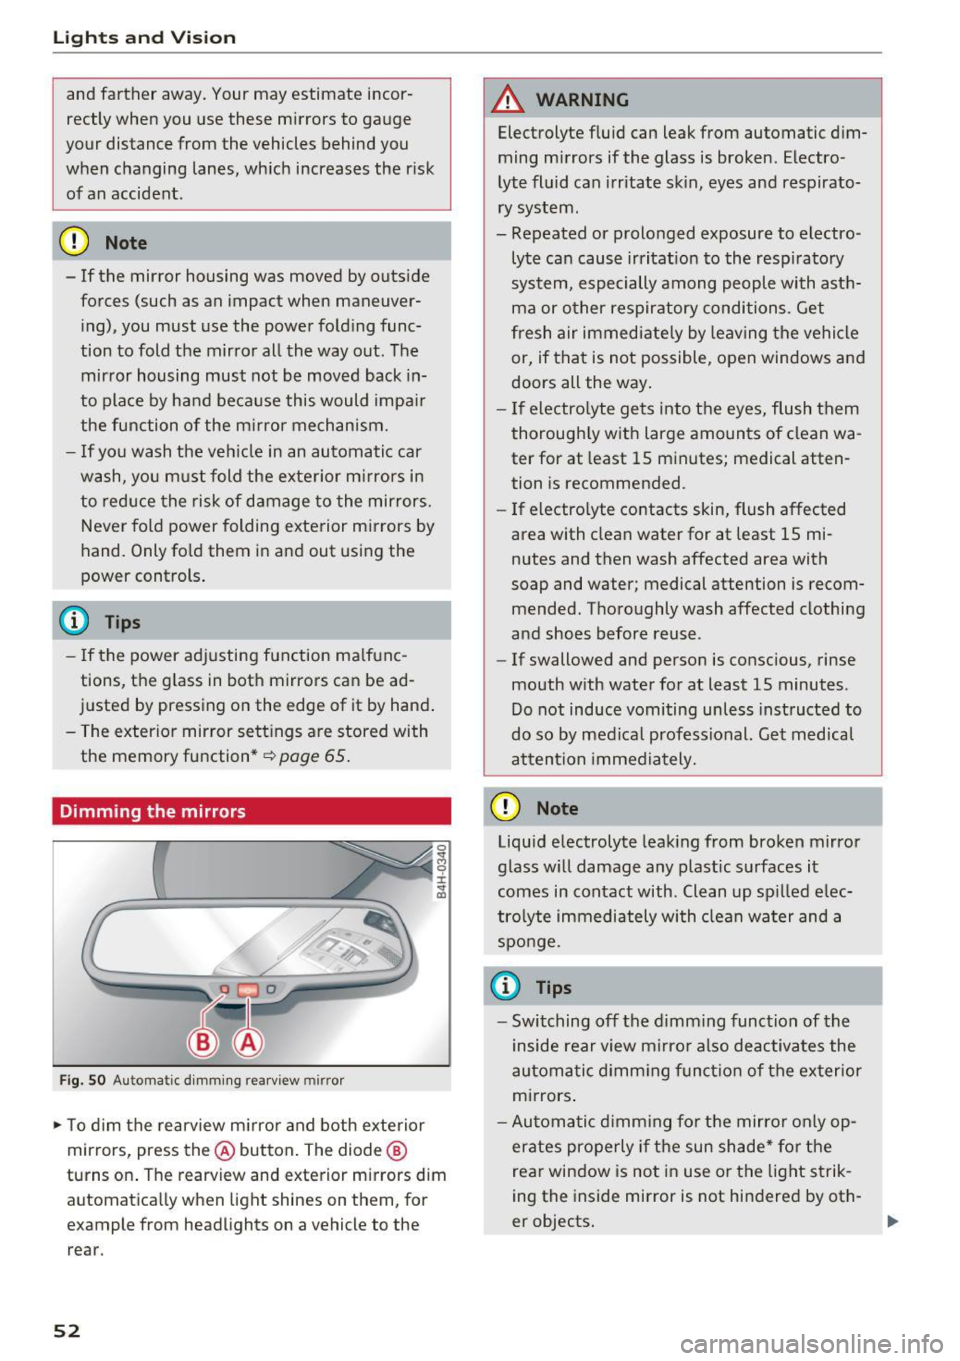
Dimming the mirrors
Fig. SO Automa tic dimming rearview mirror
0 ... M 9 :x:
~
~ To dim the rearview mirror and both exterior
m irrors, press th e@ button. The diode ®
turns on. The rearview and exterior mirrors dim
automatically when light shines on them, for
example from headlights on a vehicle to the rear .
52
A WARNING
Electrolyte fluid can leak from automatic dim
ming mirrors if the glass is broken. Electro
lyte fluid can irritate skin, eyes and respirato
ry system .
- Repeated or prolonged exposure to electro
lyte can cause irritation to the respiratory
system, especially among people with asth
ma or other respiratory conditions. Get
fresh air immediately by leaving the vehicle
or, if that is not possible, open windows and
doors all the way.
- If electrolyte gets into the eyes, flush them
thoroughly with large amounts of clean wa
ter for at least 15 minutes; medical atten
tion is recommended .
- If electrolyte contacts skin, flush affected
area with clean water for at least 15 mi
nutes and then wash affected area with
soap and water; medical attention is recom
mended. Thoroughly wash affected clothing
and shoes before reuse .
- If swallowed and person is conscious, rinse
mouth with water for at least 15 minutes .
Do not induce vomiting unless instructed to
do so by medical professional. Get medical
attention immediately.
CD Note
Liquid electrolyte leaking from broken mirror
glass will damage any plastic surfaces it
comes in contact with . Clean up spilled elec
trolyte immediately with clean water and a
sponge.
(0 Tips
- Switching off the dimming function of the
inside rear view mirror also deactivates the
automatic dimming function of the exterior
mirrors.
- Automatic dimming for the mirror only op
erates properly if the sun shade* for the
rear window is not in use or the light strik
ing the inside mirror is not hindered by oth-
er objects.
II>
Page 55 of 302
![AUDI S8 2016 Owners Manual -The automati c dimm ing mir rors do not dim
when the interior lig hting is turned on or
the reverse gea r is selected.
Sun visors
E ]
®
~ ~--· . _. ,
Fig. 5 1 Su n visor
The s AUDI S8 2016 Owners Manual -The automati c dimm ing mir rors do not dim
when the interior lig hting is turned on or
the reverse gea r is selected.
Sun visors
E ]
®
~ ~--· . _. ,
Fig. 5 1 Su n visor
The s](/img/6/57611/w960_57611-54.png)
-The automati c dimm ing mir rors do not dim
when the interior lig hting is turned on or
the reverse gea r is selected.
Sun visors
E ]
®
~ ~--· . _. ,
Fig. 5 1 Su n visor
The s un visors for the dr iver and passenge r can
be released from their b rackets an d turned to
ward the doors ¢
fig. 51 @. They can also be
moved back and forth lengthwise in this posit ion .
The mir ror light swi tches on when the cover over
the vanity mirror @opens .
There i s a s hade be twee n the dr iver's an d pas
se nger's sun visors that c an be used to cove r th e
ga p above the rea rview mir ror.
Sun shade
F ig. 52 Cockpit: Sun s hade switch
Lights and V ision
Fi g. 53 Rea r doo r: Sun s hade b utto n
Extending /retracting the rear window
shade*
.,. To exte nd or ret ract t he s un s hade from the
c ockpit ,
press t he l~•~ I b utt on in the ce nte r con
sole
¢ fig . 52 .
.,. To extend or retract the s un s hade from the
rear of the vehicle ,
press the GM button in the
door ¢
fig. 53.
Extending the rear door sun shades*
.,. Close the w ind ow in the re a r door.
.,. To exte nd the sun shade
from the driver's seat ,
pull the left/ right rea r power window switch ~
in the drive r's door.
.,. To extend the sun shade from the
rear of the
vehicle ,
pull the power window sw itch lilii) in the
left/ right rear door .
Retracting the rear door sun shades*
.,. To retract the s un sha de from the driver's seat ,
press the left/right rear power w indow switch
~ in the d river's doo r .
.,. To retract the sun shade from the
rear of the
vehicle ,
press the power w indow switch lia) in
t h e lef t/r ight rear door .
Yo u can adjust the sett ings fo r the rear sun shade
so the shade retracts a utomat ica lly when you se
l ect t he reverse gear . Se lect :
I CARI f u nct ion but
ton
> Car systems con trol but ton > Vehicle set
tings > Automatic rear blind > On .
The se tt ings
are au tom atically stored and assig ned to the re
mo te con trol key . T he sun sh ade e xten ds again as
soon as t he veh icle be gins traveling forward at a
s p eed greate r than 9 mph (1 5 km/h), as long as
t h e ignitio n has not been switc hed off in the
mea ntime .
53
Page 56 of 302
Lights and Vision
_&. WARNING
When lowering or raising the sunshade, make
sure there is nothing in its way and that it has
a free path to travel. This could cause person
al injury .
{!) Tips
-Pressing the button Ii.!.) several times con
secutively can trigger the overload protec
tion . The sun shade can only be extended/
retracted again after a brief wa iting period .
- The rear window sun shade only functions
when the vehicle interior is warmer than
14°F (-10°C).
Vanity mirror in the rear
Applies to: vehicles with vanity mirrors in the rear
Fig. 54 Rear he ad lin er : vanity mirro r
• Press the button to fold the m irror open. The
mirror lighting turns on automat ically .
a, N
i
• To change the mirror's ang le, move it forward/
bac k with your hand .
Windshield wipers
Switching the windshield wipers on
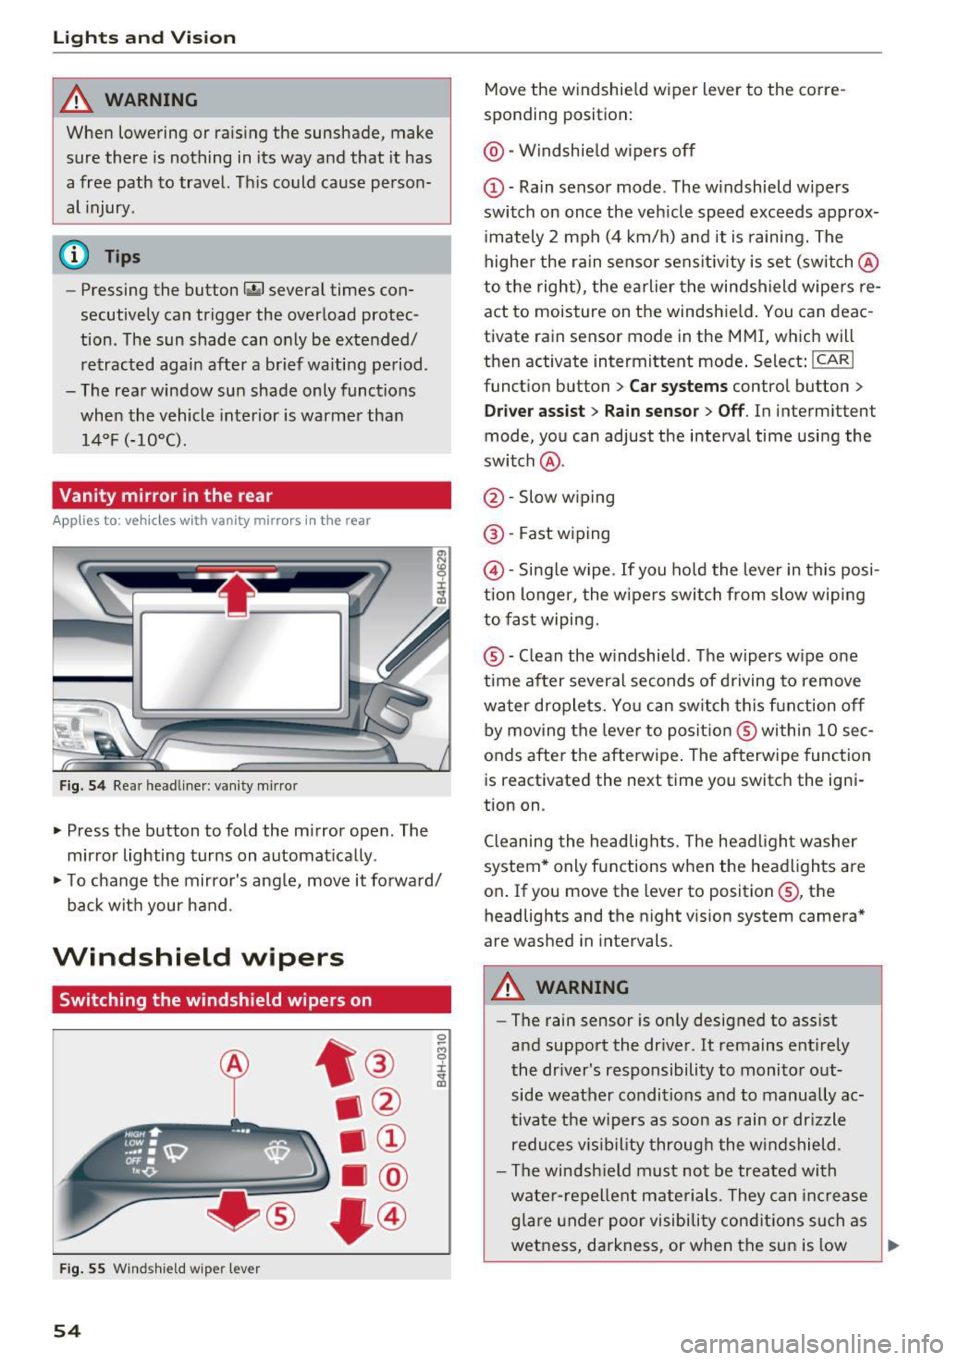
Fig. 55 Windshield wip er le v er
54
Move the windshield wiper lever to the corre
sponding position:
@ -Windshield wipers off
(D -Rain sensor mode . The windshield w ipers
switch on once the vehicle speed exceeds approx
i mately 2 mph (4 km/h) and it is raining. The
higher the rain sensor sensit iv ity is set (switch @
to the right) , the earlier the windshield wipers re
act to moisture on the windshield . You can deac
t ivate rain sensor mode in the MMI, which will
then activate intermittent mode . Select:
!CAR I
function button > Car systems control button >
Driver assist> Rain sensor> Off. In intermitten t
mode, you can adjust the interval time using the
switch @.
@ -Slow wiping
@-Fast wiping
@-Single wipe. If you hold the lever in this posi
tion longer, the wipers switch from slow wiping
to fast wiping.
® -C lean the windshield . The wipers wipe one
time after several seconds of driving to remove
water droplets . Yo u can sw itch this function off
by moving the lever to position ® within 10 sec
onds after the afterwipe . The afterwipe function
is r eactivated the next time you switch the igni
tion on .
Cleaning the headlights. The headlight washer
system* only functions when the headlights are
on . If you move the lev er to position ®, the
headlights and the night v ision system camera*
are washed in intervals.
_&. WARNING
-The rain sensor is on ly designed to assist
and support the dr iver . It remains entirely
the driver's responsibility to monitor out
side weather conditions and to manually ac
tivate the wipers as soon as rain or drizzle
reduces vis ibility through the windshield.
- The windsh ield must not be treated with
water-repellent materials. They can increase
glare under poor visibility cond itions such as
wetness, darkness, or when the sun is low
Page 57 of 302
..... N
0 J:
'SI: .....
the windshield wipers to chatter.
- Properly functioning windshield wiper
blades are required for a clear view and safe
driving
c=> page 55, Replacing windshield
wiper blades.
- In the case of frost, check whether the
windshield wiper blades are frozen to the
windshield. Switching on the windshield
wipers can damage the wiper blades!
- Prior to using a car wash, the windshield wiper system must be switched off (lever in
position @). This helps to prevent uninten
tional switching on and damage to the
windsh ield wiper system.
- Do not use the wipers to clear a frosted win dow . Using the wipers as a convenient ice
scraper will destroy the wiper blades.
@ Tips
- The windshield wipers are switched off
when the ignition is off. Activate the w ind
sh ield wipers afte r the ignit ion is switched
back on by moving the windshield wiper lev
er to any position.
- Worn or dirty windshield wipe r blades result
in streaking . This can affect the rain sensor
function. Check your windshield wipe r
blades regu larly .
- The washer fluid nozzles of the windshield
washer system are heated at low tempera
tures when the ignition is on.
- When stopping temporarily, e.g. at a traffic
light, the set speed of the windshield wipers
is automatically reduced by one speed.
Cleaning windshield wiper blades
Clean the windshield wiper blades when they be
gin to leave streaks. Use a soft cloth and glass
cleaner to clean the windshield wiper blades.
.,. Place the windshield wiper arms in the service
position. Refer to
c=> page 55.
.,. lift the wiper arm away from the front window .
Lights and Vision
A WARNING
Dirty windshield wiper blades can impair your
view. This can lead to accidents .
Replacing windshield wiper blades
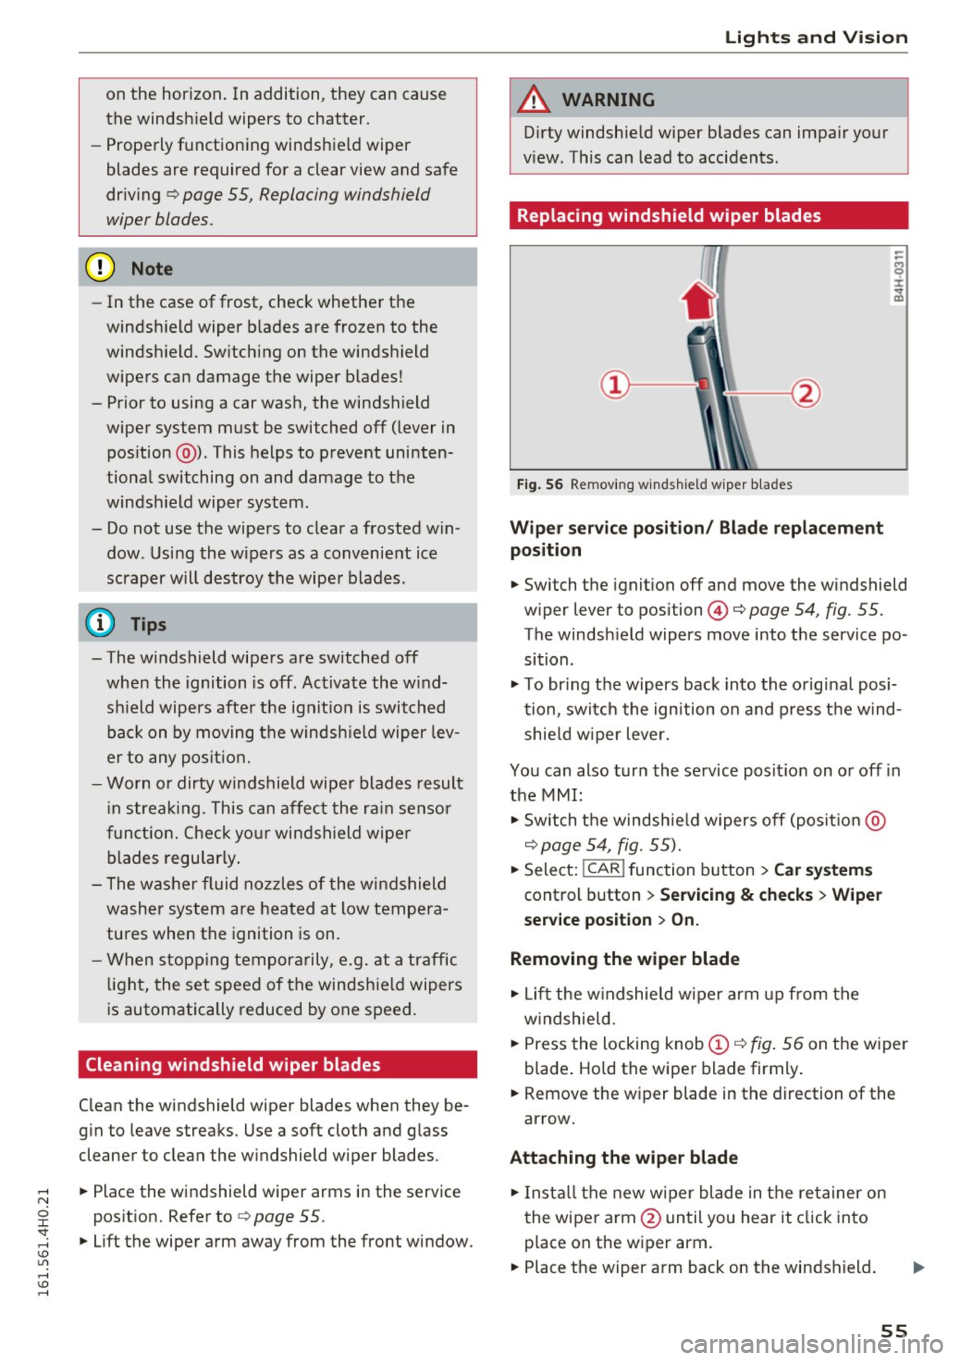
Fig. 56 Remov ing w indsh ield wiper blades
Wiper service position/ Blade replacement
position
.,. Switch the ignition off and move the windshield
wiper lever to position@¢
page 54, fig. 55.
The windsh ield wipers move into the service po
sition .
.,. To bring the wipers back into the original posi
tion, switch the ignition on and press the wind
shie ld wiper lever.
You can also turn the service posit ion on or off in
the MMI:
.,. Switch the windshie ld wipers off (posit io n @
c=> page 54, fig. 55).
.,. Select: !CAR ! function button > Car systems
control button > Servicing & checks > Wiper
service position > On.
Removing the wiper blade
.,. Lift the windshie ld wiper arm up from the
w indshie ld .
.,. Press the locking knob
(D c=> fig. 56 on the wiper
b lade . Hold the wiper blade firmly .
.,. Remove the w iper blade in the direction of the
arrow.
Attaching the wiper blade
.,. Install the new wiper blade in the re tainer on
the wiper arm @until you hear it click into
p lace on the wiper arm .
.,. Place the wiper arm back on the windshield. ..,.
55