lock AUDI TT 1995 8N / 1.G AEB ATW Engines Cooling System Components Workshop Manual
[x] Cancel search | Manufacturer: AUDI, Model Year: 1995, Model line: TT, Model: AUDI TT 1995 8N / 1.GPages: 34, PDF Size: 0.54 MB
Page 3 of 34
19-3
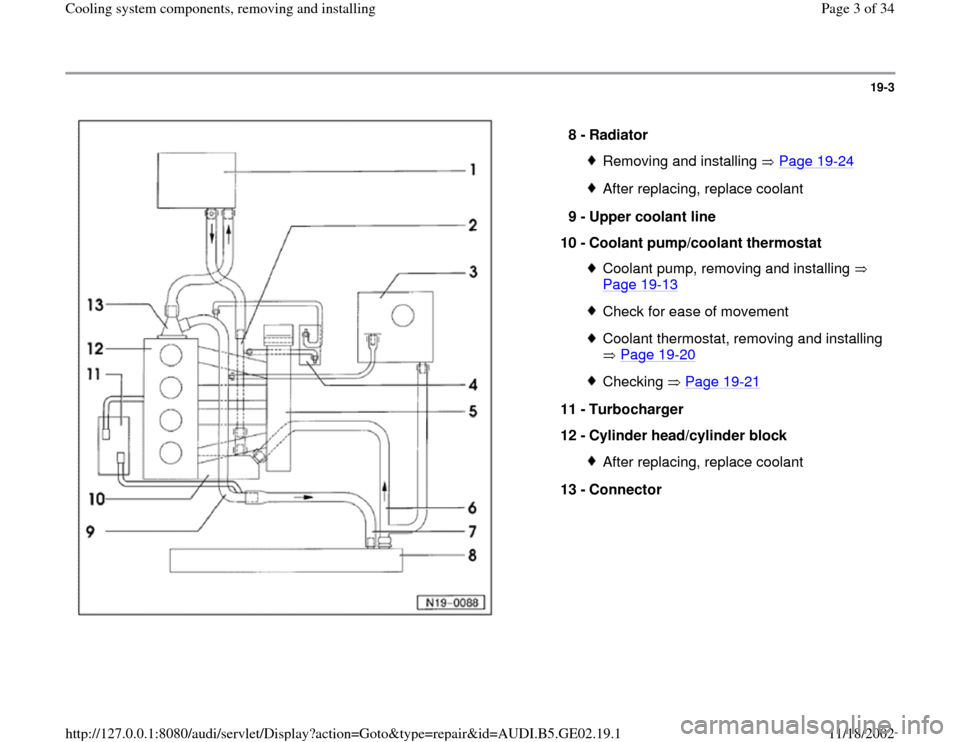
8 -
Radiator
Removing and installing Page 19
-24
After replacing, replace coolant
9 -
Upper coolant line
10 -
Coolant pump/coolant thermostat Coolant pump, removing and installing
Page 19
-13
Check for ease of movementCoolant thermostat, removing and installing
Page 19
-20
Checking Page 19
-21
11 -
Turbocharger
12 -
Cylinder head/cylinder block
After replacing, replace coolant
13 -
Connector
Pa
ge 3 of 34 Coolin
g system com
ponents, removin
g and installin
g
11/18/2002 htt
p://127.0.0.1:8080/audi/servlet/Dis
play?action=Goto&t
yp
e=re
pair&id=AUDI.B5.GE02.19.1
Page 14 of 34
19-13
Coolant pump, removing and installing
Note:
Coolant pump is bolted to bracket for generator,
power steering pump and viscous fan.
Lock carrier in service position Page 13
-1
Removing
CAUTION!
Before disconnecting the battery:
Stop the engine.
Determine the correct coding for the anti-
theft radio.
Switch the ignition off (also applies when
connecting the battery). Failure to do so may
damage the Engine Control Module (ECM).
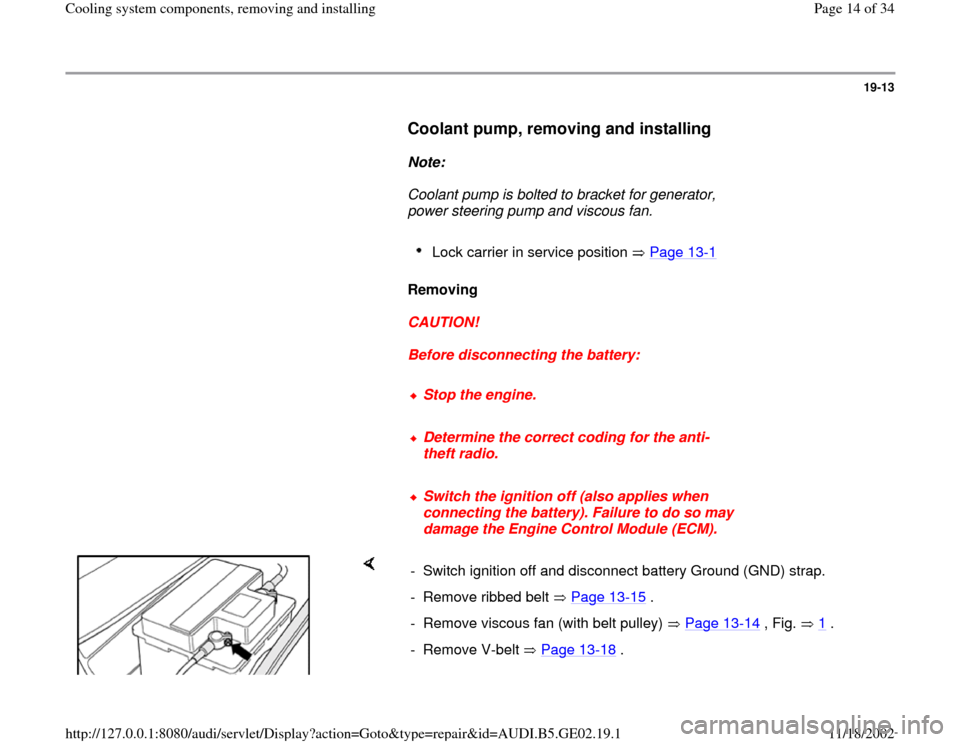
- Switch ignition off and disconnect battery Ground (GND) strap.
- Remove ribbed belt Page 13
-15
.
- Remove viscous fan (with belt pulley) Page 13
-14
, Fig. 1
.
- Remove V-belt Page 13
-18
.
Pa
ge 14 of 34 Coolin
g system com
ponents, removin
g and installin
g
11/18/2002 htt
p://127.0.0.1:8080/audi/servlet/Dis
play?action=Goto&t
yp
e=re
pair&id=AUDI.B5.GE02.19.1
Page 16 of 34
19-14
- Drain coolant Page 19
-4 .
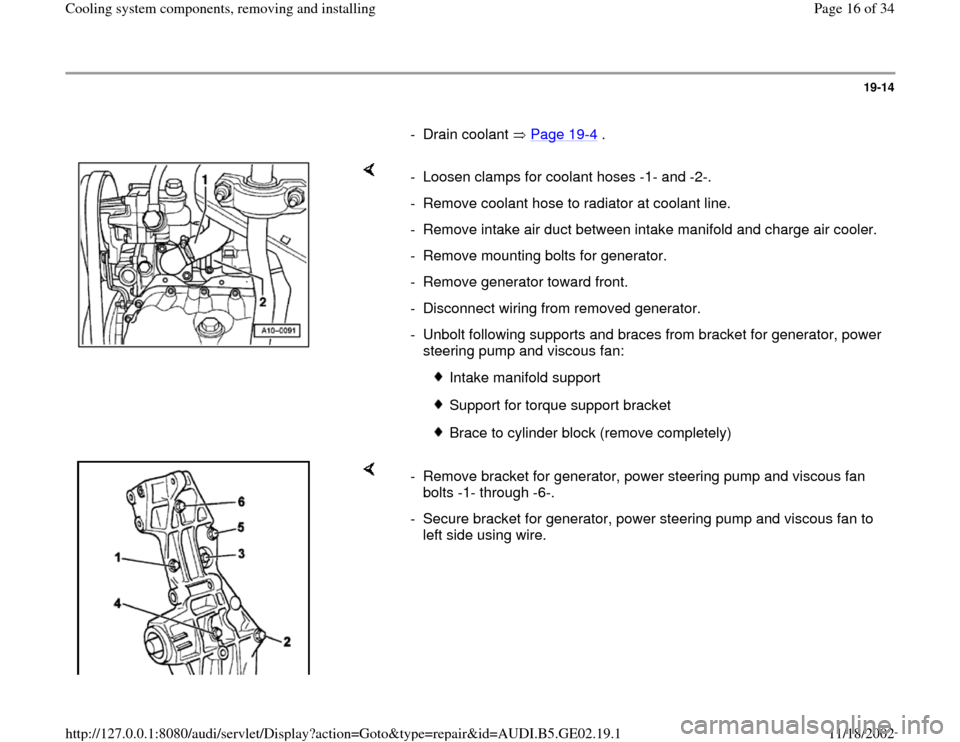
- Loosen clamps for coolant hoses -1- and -2-.
- Remove coolant hose to radiator at coolant line.
- Remove intake air duct between intake manifold and charge air cooler.
- Remove mounting bolts for generator.
- Remove generator toward front.
- Disconnect wiring from removed generator.
- Unbolt following supports and braces from bracket for generator, power
steering pump and viscous fan:
Intake manifold support
Support for torque support bracket
Brace to cylinder block (remove completely)
- Remove bracket for generator, power steering pump and viscous fan
bolts -1- through -6-.
- Secure bracket for generator, power steering pump and viscous fan to
left side using wire.
Pa
ge 16 of 34 Coolin
g system com
ponents, removin
g and installin
g
11/18/2002 htt
p://127.0.0.1:8080/audi/servlet/Dis
play?action=Goto&t
yp
e=re
pair&id=AUDI.B5.GE02.19.1
Page 18 of 34
19-16
Installing
Installation is the reverse of removal, noting the
following:
- Clean sealing surfaces of both housings.
- Replace gasket and O-ring.
- Insert T-head bolt into coolant pump bore.
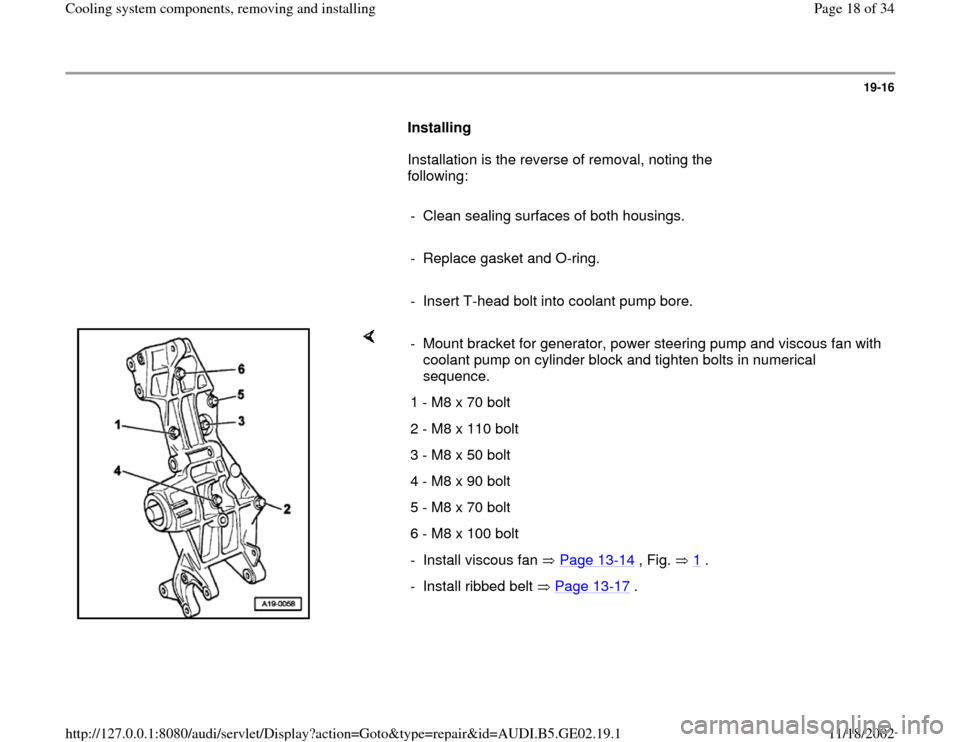
- Mount bracket for generator, power steering pump and viscous fan with
coolant pump on cylinder block and tighten bolts in numerical
sequence.
1 - M8 x 70 bolt
2 - M8 x 110 bolt
3 - M8 x 50 bolt
4 - M8 x 90 bolt
5 - M8 x 70 bolt
6 - M8 x 100 bolt
- Install viscous fan Page 13
-14
, Fig. 1
.
- Install ribbed belt Page 13
-17
.
Pa
ge 18 of 34 Coolin
g system com
ponents, removin
g and installin
g
11/18/2002 htt
p://127.0.0.1:8080/audi/servlet/Dis
play?action=Goto&t
yp
e=re
pair&id=AUDI.B5.GE02.19.1
Page 20 of 34
Radio Operating Manual
- Fully close power windows to stop.
- Operate all power window switches again for at
least one second in "close" direction to activate
"one-touch" opening/closing function.
- Set clock to correct time.
Pa
ge 20 of 34 Coolin
g system com
ponents, removin
g and installin
g
11/18/2002 htt
p://127.0.0.1:8080/audi/servlet/Dis
play?action=Goto&t
yp
e=re
pair&id=AUDI.B5.GE02.19.1
Page 21 of 34
19-18
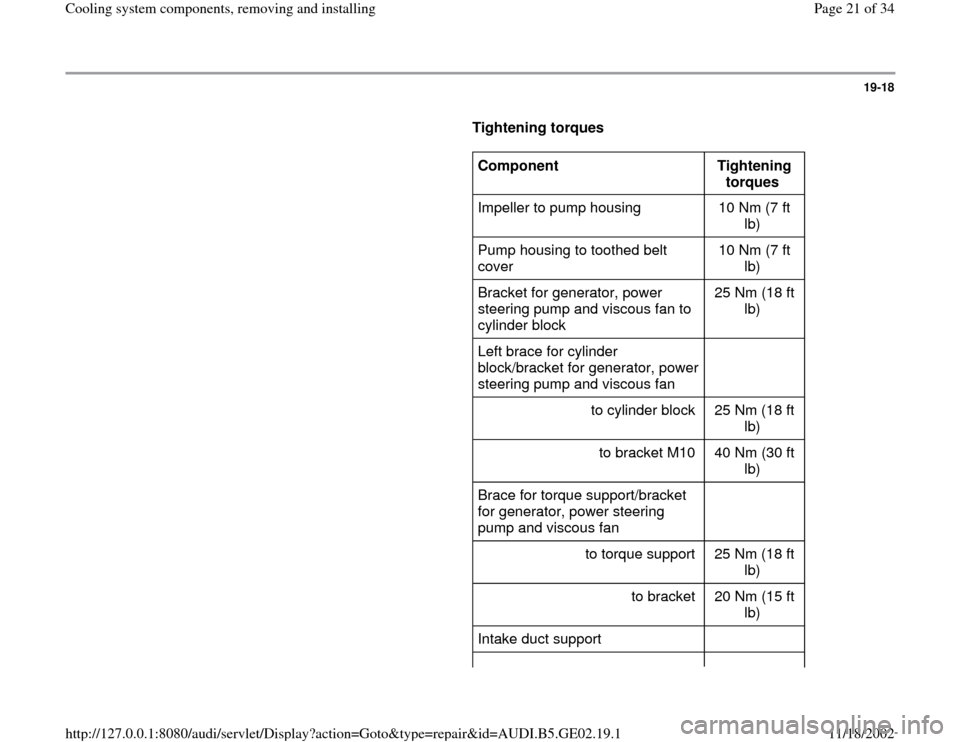
Tightening torques
Component
Tightening
torques
Impeller to pump housing 10 Nm (7 ft
lb)
Pump housing to toothed belt
cover 10 Nm (7 ft
lb)
Bracket for generator, power
steering pump and viscous fan to
cylinder block 25 Nm (18 ft
lb)
Left brace for cylinder
block/bracket for generator, power
steering pump and viscous fan
to cylinder block 25 Nm (18 ft
lb)
to bracket M10 40 Nm (30 ft
lb)
Brace for torque support/bracket
for generator, power steering
pump and viscous fan
to torque support 25 Nm (18 ft
lb)
to bracket 20 Nm (15 ft
lb)
Intake duct support
Pa
ge 21 of 34 Coolin
g system com
ponents, removin
g and installin
g
11/18/2002 htt
p://127.0.0.1:8080/audi/servlet/Dis
play?action=Goto&t
yp
e=re
pair&id=AUDI.B5.GE02.19.1
Page 29 of 34
19-25
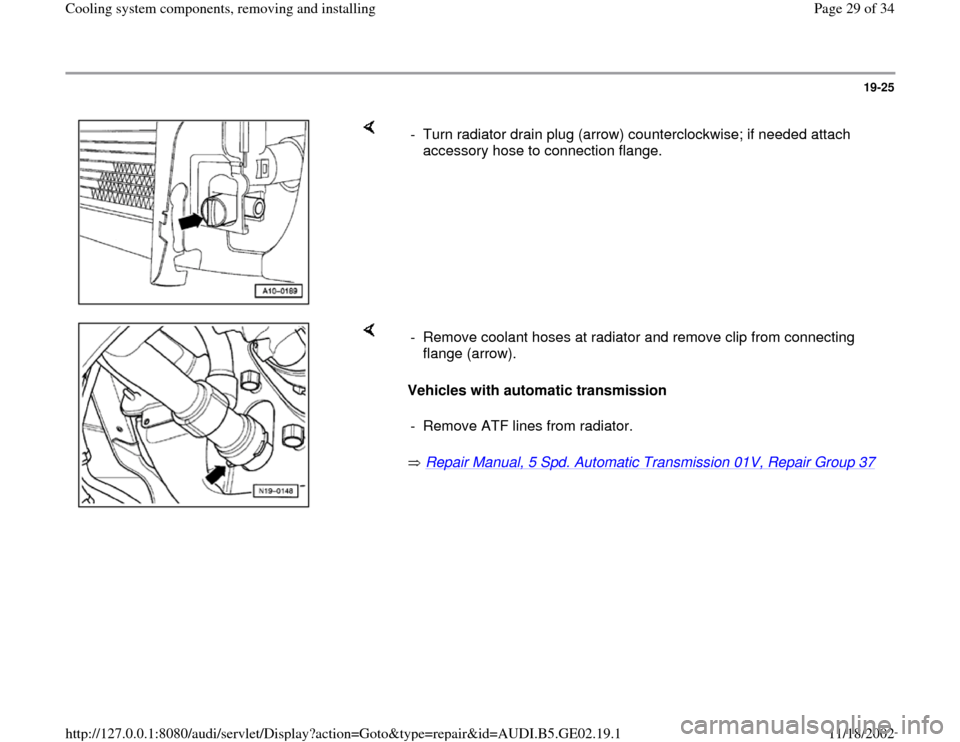
- Turn radiator drain plug (arrow) counterclockwise; if needed attach
accessory hose to connection flange.
Vehicles with automatic transmission
Repair Manual, 5 Spd. Automatic Transmission 01V, Repair Group 37
- Remove coolant hoses at radiator and remove clip from connecting
flange (arrow).
- Remove ATF lines from radiator.
Pa
ge 29 of 34 Coolin
g system com
ponents, removin
g and installin
g
11/18/2002 htt
p://127.0.0.1:8080/audi/servlet/Dis
play?action=Goto&t
yp
e=re
pair&id=AUDI.B5.GE02.19.1
Page 30 of 34
19-26
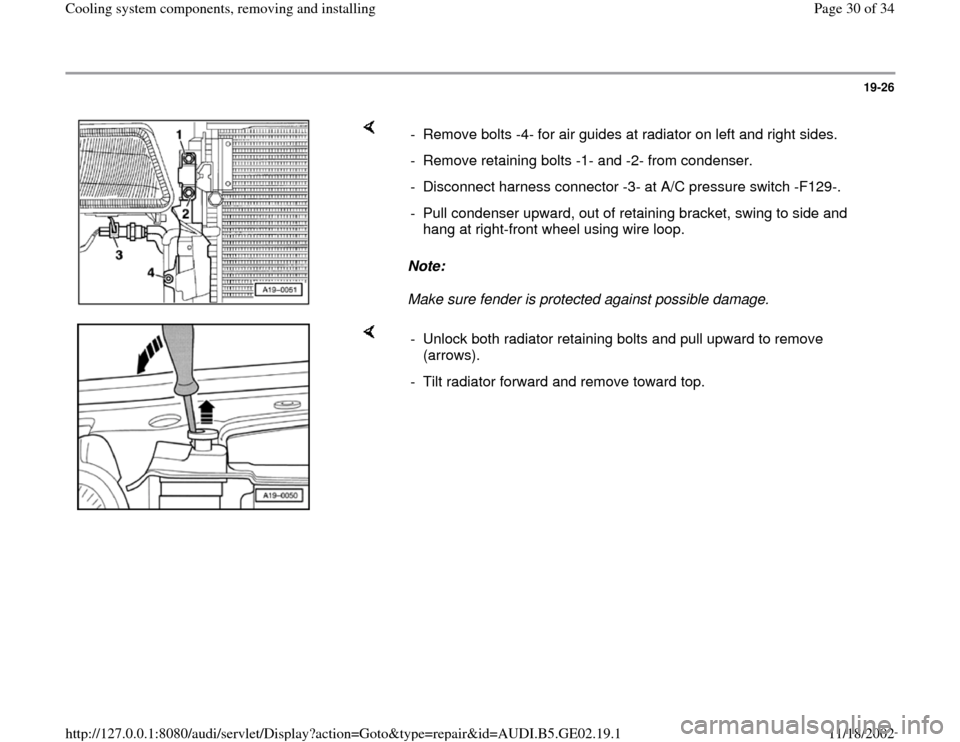
Note:
Make sure fender is protected against possible damage. - Remove bolts -4- for air guides at radiator on left and right sides.
- Remove retaining bolts -1- and -2- from condenser.
- Disconnect harness connector -3- at A/C pressure switch -F129-.
- Pull condenser upward, out of retaining bracket, swing to side and
hang at right-front wheel using wire loop.
- Unlock both radiator retaining bolts and pull upward to remove
(arrows).
- Tilt radiator forward and remove toward top.
Pa
ge 30 of 34 Coolin
g system com
ponents, removin
g and installin
g
11/18/2002 htt
p://127.0.0.1:8080/audi/servlet/Dis
play?action=Goto&t
yp
e=re
pair&id=AUDI.B5.GE02.19.1