check engine AUDI TT 2013 Owner´s Manual
[x] Cancel search | Manufacturer: AUDI, Model Year: 2013, Model line: TT, Model: AUDI TT 2013Pages: 262, PDF Size: 65.91 MB
Page 30 of 262
28 Driver information system
Service interval display
The service interval display reminds you when
your next service is due.
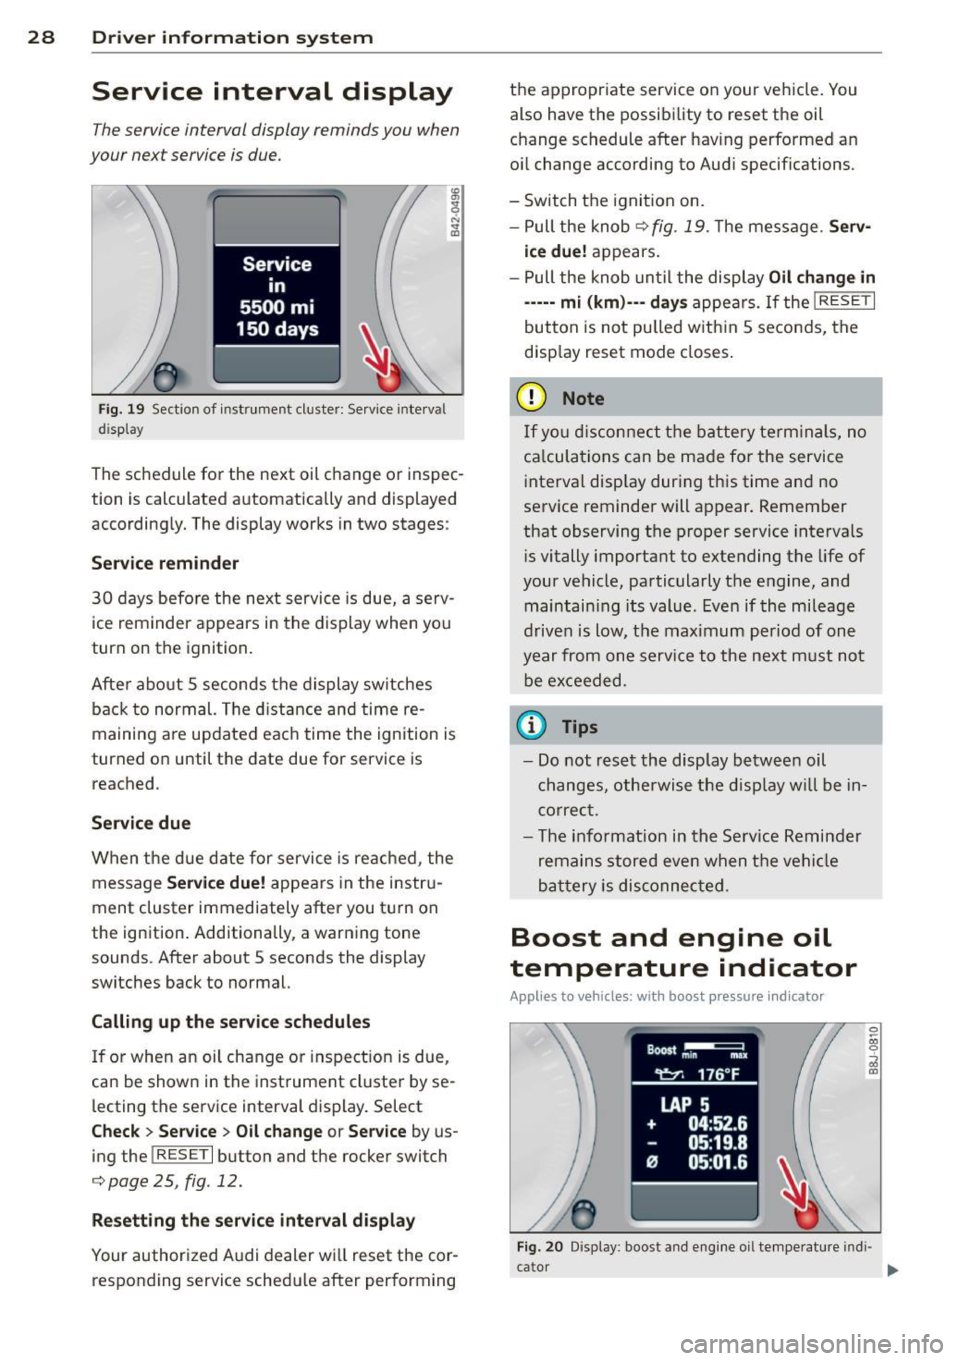
Fig. 19 Sect ion of instrument cluster: Serv ice inte rva l
d isplay
The schedule for the next oil change or inspec
tion is calculated automatically and displayed
accordingly. The display works in two stages :
Service reminder
30 days before the next service is due, a serv
ice reminder appears in the display when you
turn on the ignition.
After about
S seconds the display switches
back to normal. The distance and time re
maining are updated each time the ignition is
turned on until the date due for service is reached .
Service due
When the due date for service is reached , the
message
Service due! appears in the instru
ment cluster immediately after you turn on
the ignition. Additionally, a warning tone
sounds . After about
S seconds the display
switches back to normal.
Calling up the service schedules
If or when an oil change or inspection is due,
can be shown in the instrument cluster by se
lecting the service interval display. Select
Check > Service > Oil change or Service by us
ing the
! RESET I button and the rocker switch
c;, page25, fig.12.
Resetting the service interval display
Your authorized Audi dealer will reset the cor
responding service schedule after performing the appropr
iate service on your vehicle. You
also have the possibility to reset the oil
change schedule after hav ing performed an
oil change according to Aud i specifications.
- Switch the ignition on.
- Pull the knob¢ fig. 19. The message.
Serv-
ice due!
appears.
- Pull the knob until the display
Oil change in
----- mi (km)·-- days
appears. If the I RESET I
button is not pulled within 5 seconds, the
disp lay reset mode closes.
(D Note
If yo u disconnect the battery terminals, no
ca lculations can be made for the service
interval display during this time and no
service reminder will appear. Remember
that observing the proper service intervals
is vitally important to extending the life of
your vehicle, particularly the engine, and maintaining its value . Even if the mileage
driven is low, the maximum period of one
year from one service to the next must not
be exceeded.
(D Tips
-Do not reset the display between oil
changes, otherwise the display will be in
correct.
- The information in the Service Reminder
remains stored even when the vehicle
bat tery is disconnec ted.
Boost and engine oil
temperature indicator
Appl ies to vehicles: wit h boost pressure indicato r
0 ~ 00 0
j IX)
Fig. 20 D isplay : boost and engine oi l temperature indi·
a~r ~
Page 34 of 262
32 Opening and clo sing
Opening and closing
Keys
Key set
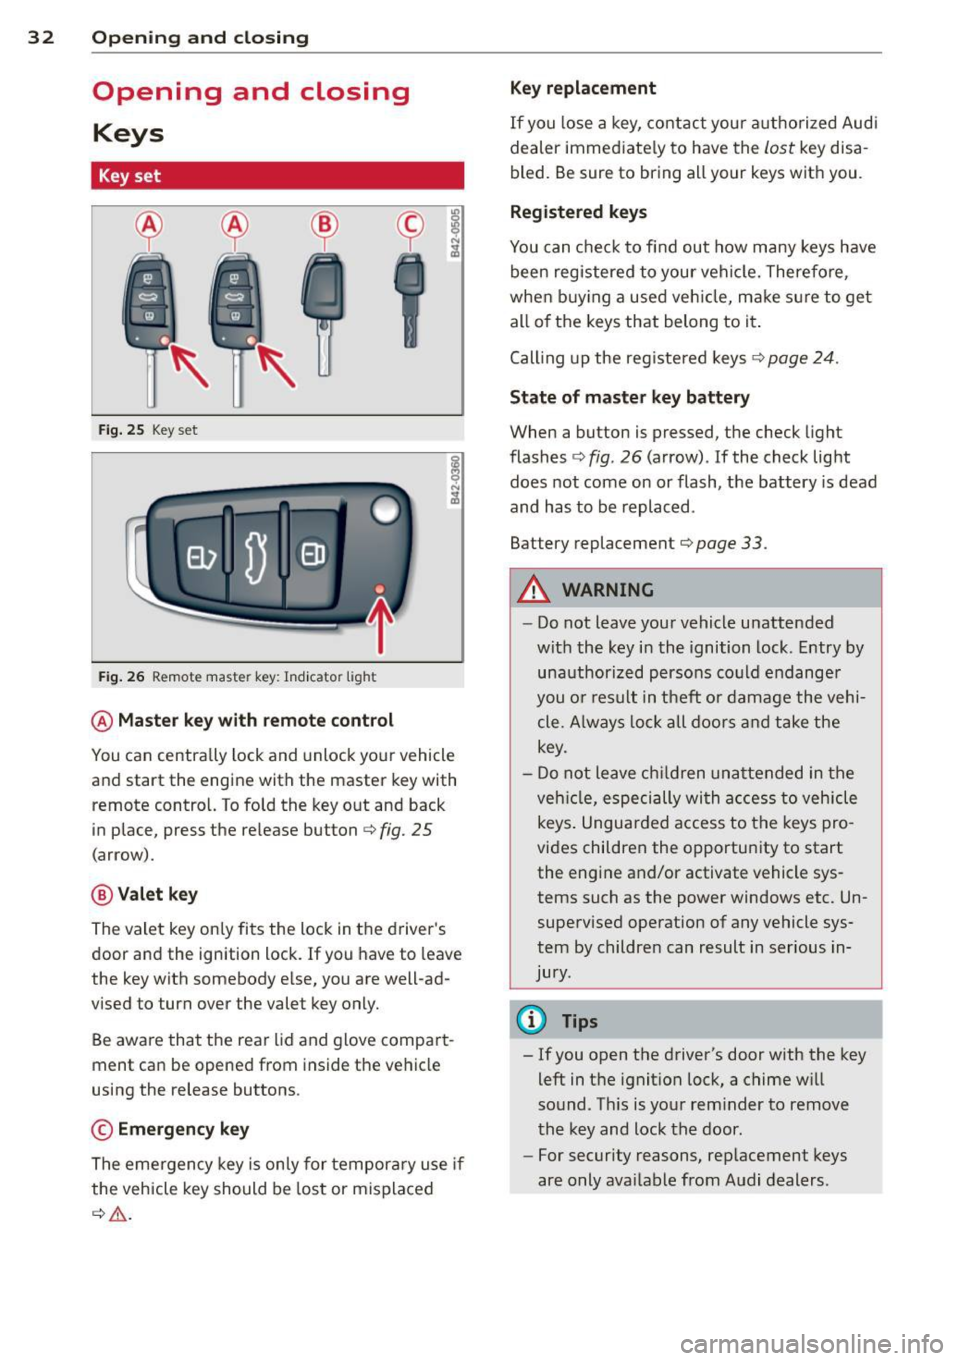
Fig . 25 Key set
Fig. 26 Remote master key : Indicator light
@ Ma ster key w ith remote control
You can centrally lock and unlock your vehicle
and start the engine with the master key with
remote control. To fold the key out and back
in place, press the re lease button
c:> fig. 25
(arrow).
@ Valet ke y
The valet key on ly fits the lock in the driver's
door and the ignition lock. If you have to leave
the key with somebody e lse, you are well-ad
vised to turn over the valet key only.
Be aware that the rear lid and glove compart
ment can be opened from inside the vehicle
using the release buttons .
© Emergency k ey
The eme rgency key is only for temporary use if
the vehicle key should be lost or misplaced
c:> & .
Ke y replac ement
If you lose a key, contact you r a uthorized Audi
dealer immed iate ly to have the
Lost key disa
bled. Be sure to bring all your keys with you .
Registered ke ys
You can check to find out how many keys have
been reg istered to your vehicle. Therefore,
when buy ing a used veh icle, make sure to get
all of the keys that belong to it.
Call ing up the reg istered keys
c:> page 24.
St ate of mas ter key b atter y
When a button is pressed, the check light
flashes
c:> fig . 26 (arrow) . If the check light
does not come on or flash, the battery is dead
and has to be replaced .
Battery replacement
c:> page 33.
_& WARNING ........... -
- Do not leave your vehicle unattended
wit h the key in the ignition lock. Entry by
unauthorized persons could endange r
you o r result in theft or damage the vehi
cle. A lways loc k all doors a nd take the
key.
- D o not leave ch ildren unattended in the
veh icle, especially wi th access to vehicle
keys . Unguarded access to the keys pro
vides children the opportunity to start
the engine and/or activate vehicle sys
tems such as the power windows etc. Un supervised operation of any vehicle sys
tem by children can result in ser ious in
jury.
{!) Tips
- If you open the driver's door with the key
left in the ignit ion lock, a chime will
sound . Th is is your rem inder to remove
the key and lock the door.
- For security reasons, rep lacement keys
are only ava ilable from Audi dealers .
Page 41 of 262
The anti-theft alarm system triggers an audi
b le alarm and turns on the emergency flasher
if an unauthor ized interference with the vehi
cle is sensed by the system.
How is the anti-theft alarm system
switched on?
T he anti -theft a larm system is switched on
when you lock the driver's door manually us
ing the fold-out key, or when you use the re
mote control. The system is activated approxi
mately 30 seconds after the veh icle is locked .
The indicator light ~
fig. 36 starts flashing
rapidly for 30 seconds and then blinks slowly.
How is the anti-theft alarm system
switched off?
The anti-theft a larm system is switched off
on ly when you use the remote contro l to un
lock your veh icle. If you do not open a door
within 30 seconds after you have un locked
with the remote cont ro l, the vehicle will lock
itself again automatically.
If you lock just the dr iver's doo r using your
key, the front passenger's door and the rear
lid remain locked.
When will the anti theft alarm system be
triggered?
When the vehicle is locked , the alarm system
monitors and protects the following pa rts of
the vehicle:
- engine compa rtment
- luggage compartment
- doors
- ignition
When the system is activated, the alarm will be triggered if one of the doors, the engine
hood or the rear lid are opened, or if the igni
tion is turned on.
The anti-theft a larm system will also go off
when the battery is disconnected.
You can also trigge r the alarm by pressing the
PANIC button on your remote-control key.
This will a lert other peop le in case of emer-
Opening and closing 39
gency. Press the PANIC button again to turn
off the alarm .
How is the anti-theft alarm switched off
when trigge red?
The alarm system is switched off when you
unlock the vehicle using the remote -control
key or when the ignition is switched on . T he
alarm will also switch itself off when it comes
to the end of its cycle .
Emergency flasher
The emergency flasher will blink briefly when
the doors, engine hood and rear lid a re prop
erly closed.
If the emergency flashers do not blink, check
the doors, engine hood and rear lid to make
sure they are properly closed. If you close a
door, the hood or the rear lid with the anti
theft alarm sw itched on, the emergency flash
ers will blink only after you have closed the
door or lid .
(!) Tips
For the anti-theft alarm system to func
tion properly, make sure all veh icle doors
and windows are closed before leaving the
vehicle.
Power windows
Controls
The driver can operate all windows .
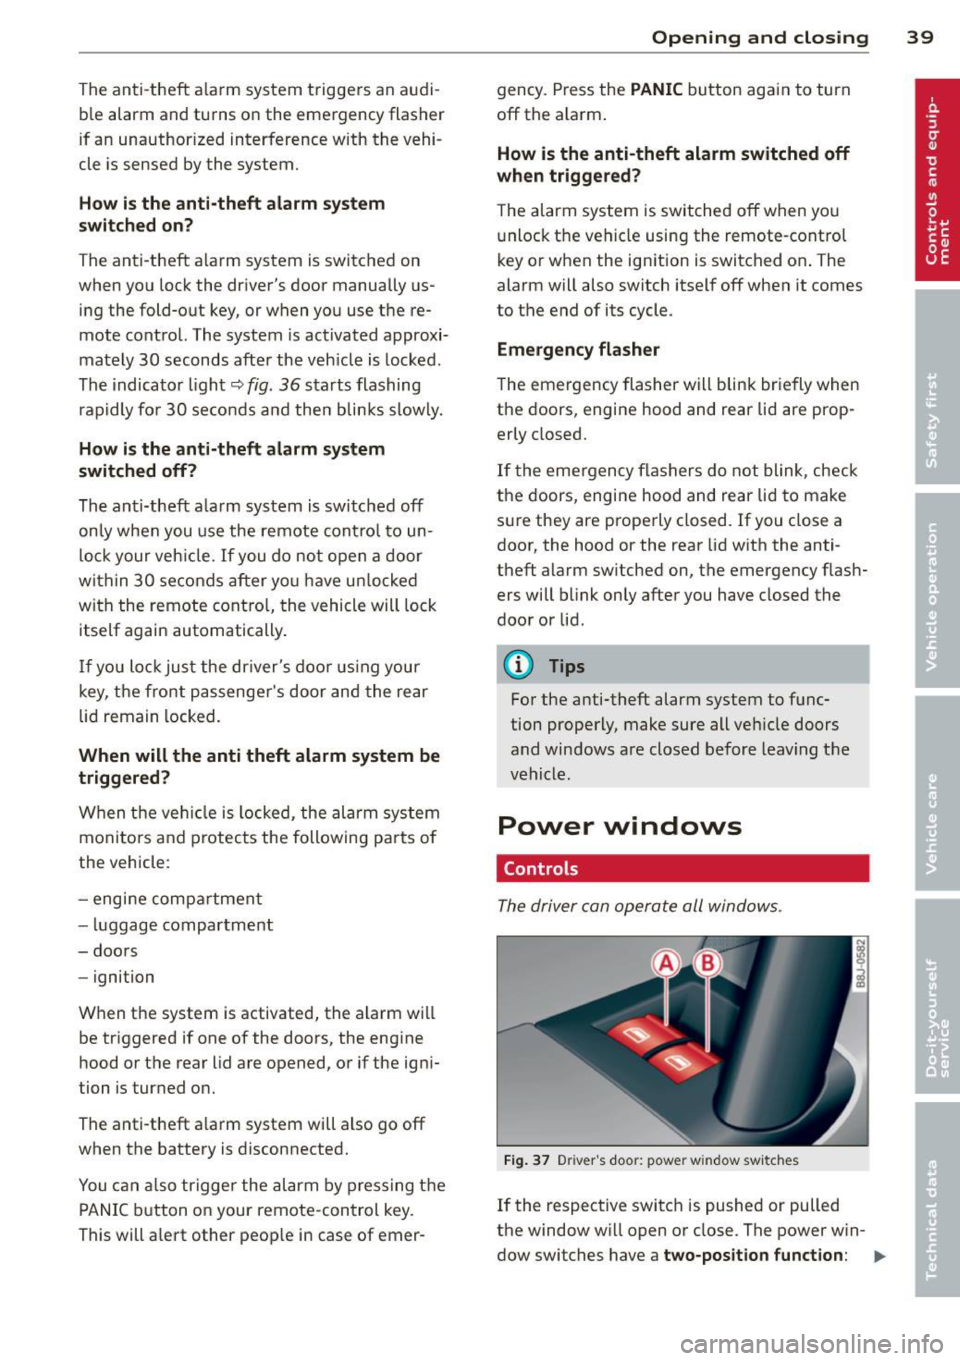
Fig. 37 Driver 's doo r: power w indow sw itches
If the respective switch is pushed or pulled
the window w ill open or close . The power w in-
dow swi tches have a
two-position function: ..,.
Page 42 of 262
40 Openin g and clo sing
Op ening th e window s
.. Press the switch and ho ld i t down until the
window has reached the des ired position.
.. Press the switch
brie fly to open the window
automatically. By briefly pressing the switch
again, the downward travel of the window
can be stopped in any posit ion
¢ ,& .
Clos ing th e windows
.. Pu ll the switch and hold it until the window
has reached the desired position .
.. Pull the switch
brie fly to close the window
automatica lly. By briefly pressing the switch
again, the upward travel of the window can
be stopped in any position
c:> ,A .
Sw itch @ c:> fig. 37 operates the window in
the dr iver's door.
Switch @operates the window in the front
passenger's door .
A WARNING
- Do not leave children unattended in the
vehicle, especially with access to vehicle
keys. Unsupervised use of the keys can
result in starting of the engine and use
of vehicle systems such as power win
dows, etc. which could resu lt in serious
injury.
- Remember -you can still open or close
the power w indows for about ten mi
nutes after the ignition is sw itched off.
Only when e ithe r of the front doors a re
opened are the power windows switched
off.
- Be careful when closing the windows .
Check to see that no one is in the way, or
serious injury could result!
- Always remove the ignition key whenever you leave your vehicle .
- If you lock your vehicle from the ou tside,
no one, especia lly children, sho uld re
main in the vehicle.
- Do not stick anything on the windows o r
the windshield that may interfere with
the driver's fie ld of vision.
(D Tips
- When the doors are opened, the win
dows are automatically lowered 10 mm .
- The windows can still be opened and
closed for about ten minutes after the
ignition has been turned off. The power
w indows are not shut off unt il one of the
front doors is opened.
Convenience close/open feature
You can close or open the windows from out
side when you lock or unlock your car with the
key.
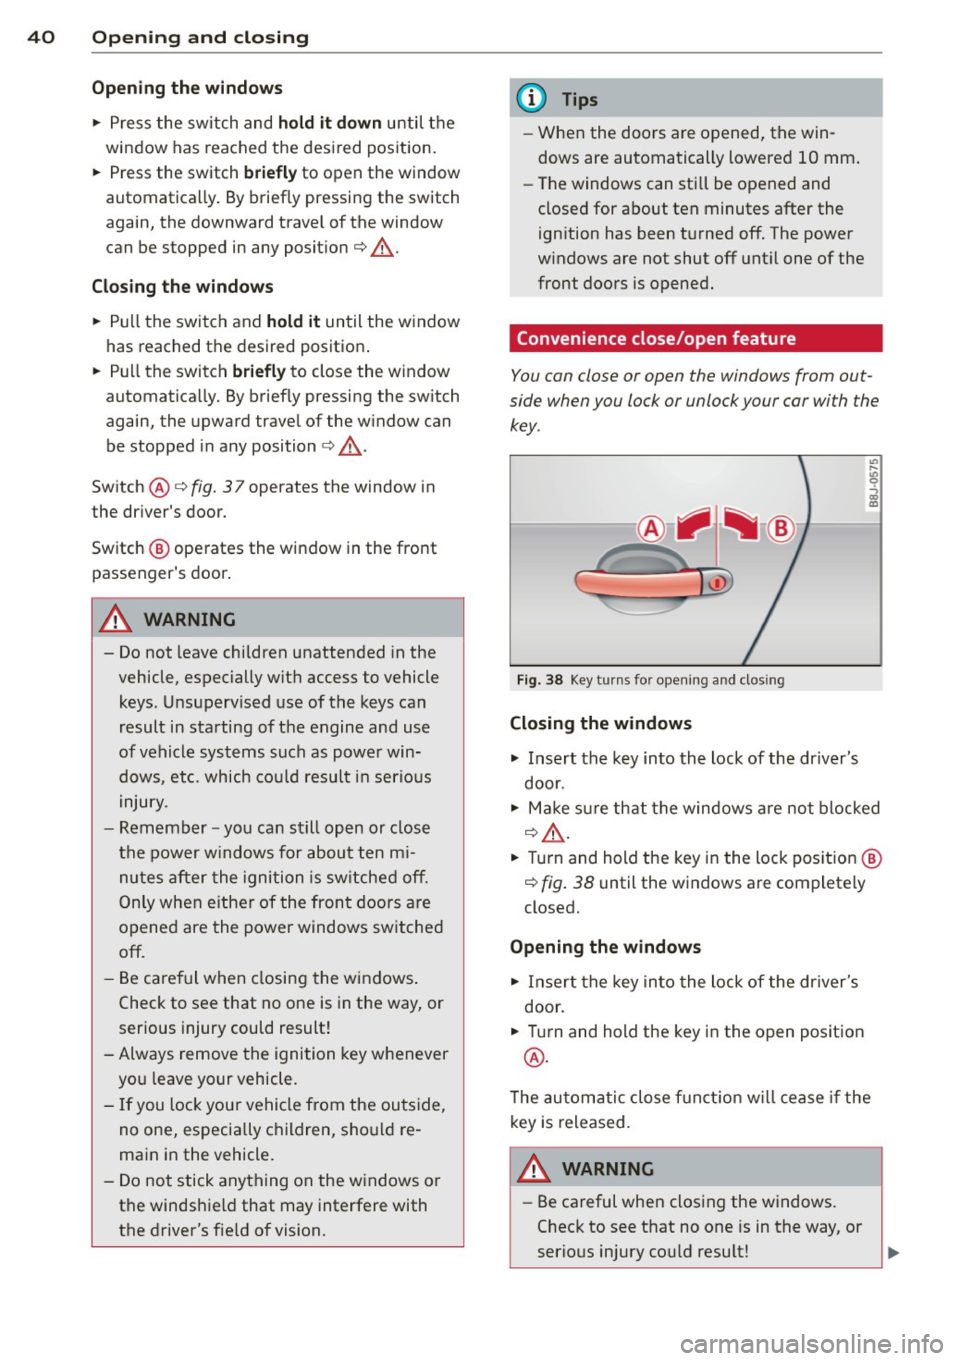
F ig. 38 Key turns for opening and dos ing
Closing the windows
.. Insert the key into the lock of the dr iver's
door.
.. Make sure that the windows a re not blocked
¢ ,& .
.. Turn and hold the key in the lock pos ition @
¢ fig. 38 until the windows are completely
closed.
Openin g the window s
.. Insert the key into the lock of the dr iver's
door .
.. Turn and hold the key in the open position
@ .
The automatic close f unct ion w ill cease if the
key is released .
A WARNING
= -
-Be careful when closing the windows.
Check to see that no one is in the way, or
serio us injury co uld resu lt!
Page 52 of 262
50 Clear vis ion
- Make sure the washe r fl ui d reservoi r in
the engine compartment is topped
off
before going on a long t rip . L oo k up
c:> page 194 for checking and fi lling the
washer container.
- The w ipers only operate w ith the hood
completely closed.
Headlight washer system
App lies to vehicles : with hea dli ght washer syste m
The headlight washer system cleans the
headlights.
., Operate the windshield wiper/washer sys
tem
c:> page 48, fig. 50 ® with the head
li ghts turned on by holding the lever for lon
ger than one second.
The washe r jets extend forward o ut of the
front bumper driven by water pressure to
spray the front headlights with water.
You shou ld inspect the headlights regularly
(for example when refue ling) and clean
off
any solid dirt or insects from the lenses .
To ensure the system wo rks properly in winter,
keep the washer jets free o f snow and remove
any ice using a de- ic ing spray.
Service position
It is only possible to change wiper blades if
you move the wiper arms to the service posi
tion .
In o rder to use the windsh ie ld w ipers, the
front lid must be comp letely closed .
Moving wiper blades to the service
position
., When there is a ris k of frost, ma ke s ure that
the wiper b lades are not frozen to the wind
shield .
.. Switch the ignition on .
., Move the wiper lever to position
0
c:> page 48, fig. 50 .
., Press the I Re set I button until the D isplay
typ e
menu appears in the Driver Informa
t ion System display . .,
Using the rocker switch and the
I R ese t! but
ton, se lect the
Set > Wipe rs > Front > Serv
ice position on
funct ion . T he w indshield
w iper arms move to the service posit ion.
Mo ving wip er blades to pa rk position
., Ma ke certain that the w iper arms are ly ing
against the windshield .
., Switch the ignitio n on and move the wiper
lever from pos ition O
to 4 c:> page 48,
fig. 50. The w iper arms will move back to
the park position.
@ Note
Never drive your veh icle when the wind
sh ield wiper arms are in the service posi
tion and pulled away from the winds hield .
When you drive faster than
4 mph (6 km/
h), the wiper a rms automatically return to
the pa rk position and cou ld cause paint
damage to the front lid!
@ Tips
- Yo u can also tur n on the se rvice posit ion,
for example, if you want to p rotect the
w indshield from icing by us ing a cover.
- The service posit ion moves to
off auto
matically whe n you ope rate the w ind
shield wiper lever, o r speed exceeds
4 mph (6 km/h) .
Page 73 of 262
On the road
Steering
Adjusting the steering wheel column
The steering wheel position can be continu
ously adjusted in height and distance.
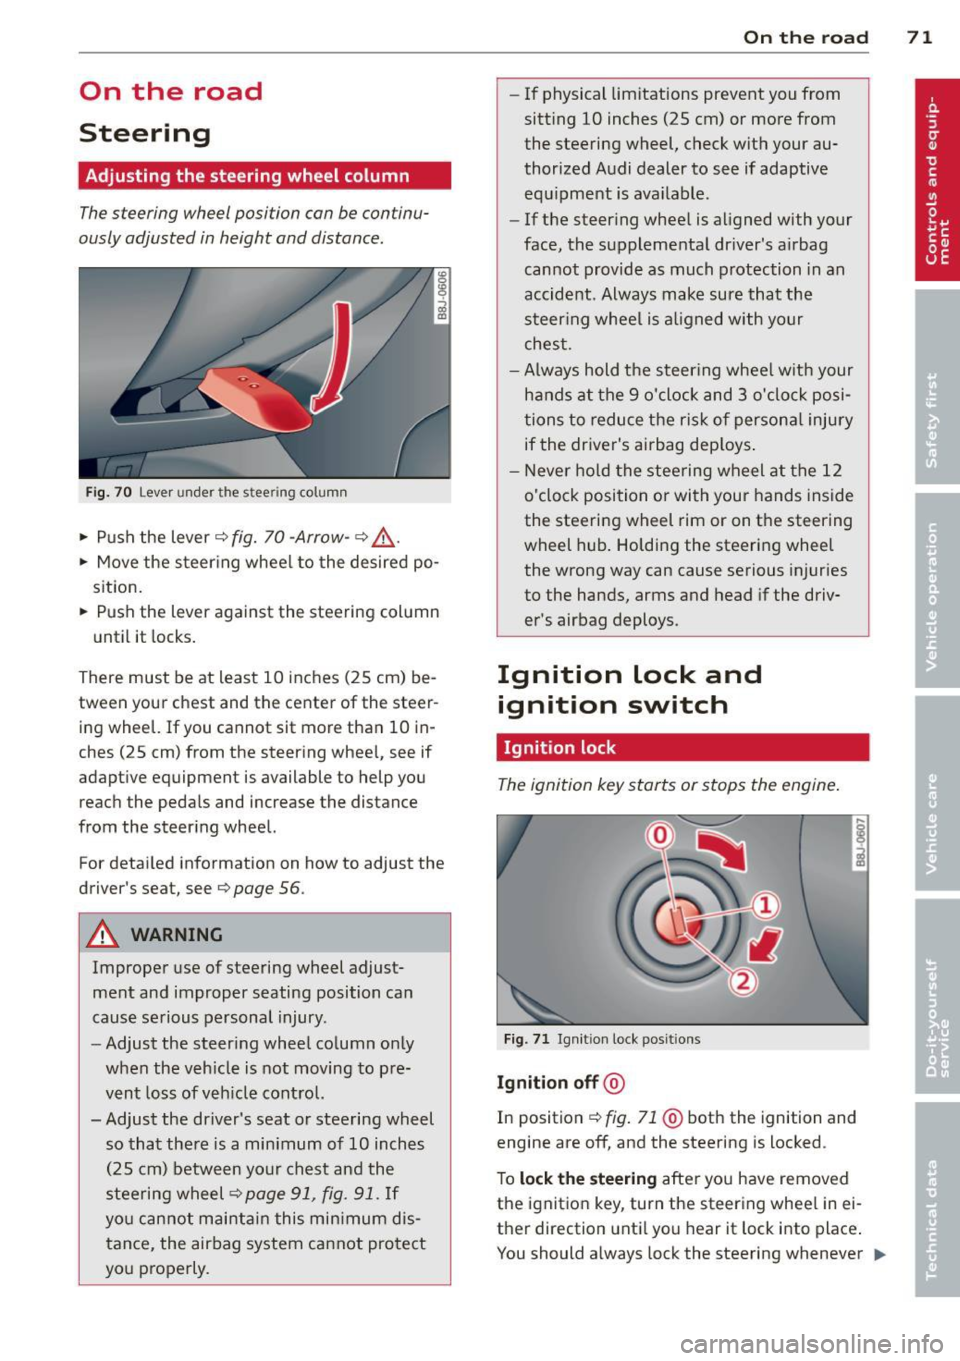
Fig. 70 Lever under the stee ring column
• Push the lever~ fig. 70 -Arrow-~ .&,..
• Move the steering wheel to the desired po
sition.
• Push the lever against the steering column
until it locks.
There must be at least 10 inches (25 cm) be tween your chest and the center of the steer
ing wheel. If you cannot sit more than 10 in
ches (25 cm) from the steering wheel, see if
adaptive equipment is available to help you
reach the pedals and increase the distance
from the steering wheel.
For detailed information on how to adjust the
driver's sea t, see
Q page 56 .
A WARNING
Improper use of steering wheel adjust
ment and improper seating position can
cause serious personal injury.
- Adjust the steering wheel column only
when the vehicle is not moving to pre
vent loss of vehicle control.
- Adjust the driver's seat or steering wheel so that there is a minimum of 10 inches
(25 cm) between your chest and the
steering wheel
~page 91, fig. 91. If
you cannot maintain this minimum dis
tance, the airbag system cannot protect
you properly.
On the road 71
-If physical limitations prevent you from
sitt ing 10 inches (25 cm) or more from
the steering wheel, check with your au
thorized Audi dealer to see if adaptive equipment is ava ilable .
- If the steering wheel is aligned with your
face, the supplemental dr iver 's airbag
cannot provide as much protection in an
accident. Always make sure that the
steering wheel is al igned with your
chest .
-Always hold the steer ing wheel w ith your
hands at the 9 o'clock and 3 o'clock posi
tions to reduce the risk of persona l injury
if the driver's airbag deploys .
- Never hold the steering wheel at the 12
o'clock position or with your hands inside
the steering wheel rim or on the steering
wheel hub. Holding the steering wheel
the wrong way can cause serious injuries
to the hands, arms and head if the driv
er's airbag deploys.
Ignition lock and ignition switch
Ignition lock
The ignition key starts or stops the engine.
Fig. 71 Ignit ion lock posit ions
Ignition off @
In position ~ fig. 71 @both the ignition and
engine are off, and the steering is locked .
To
lock the steering after you have removed
the ignition key , turn the steering wheel in ei
ther direction until you hear it lock into place .
You should always lock the steering whenever ..,.
Page 155 of 262
Rear spoiler
Applies to vehicles: with retractable rear spoiler
The rear spoiler improves vehicle handling
and enhances driver control.
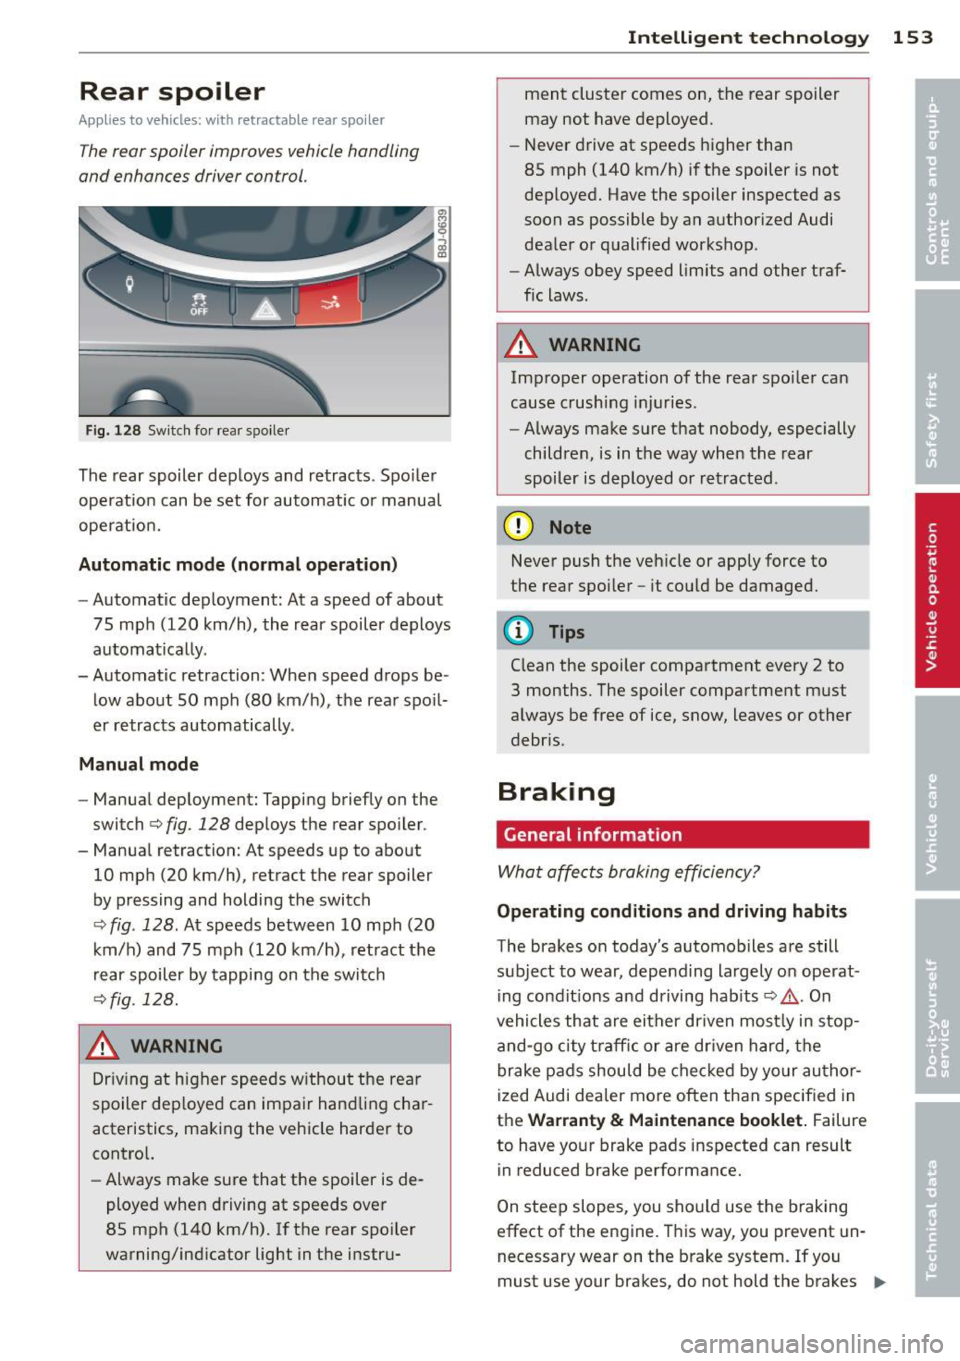
Fig. 128 Switc h for rear spo iler
The rear spoiler deploys and retracts . Spo iler
operation can be set for automatic or manua l
operation.
Automatic m ode (no rmal operat ion )
-Automatic deployment: At a speed of about
75 mph (120 km/h), the rear spoiler deploys
automatically.
-Automat ic retraction: When speed drops be
low about SO mph (80 km/h), the rear spo il
er retracts automatically .
Manu al mode
- Manual deployment: Tapping briefly on the
switch
c:> fig. 128 dep loys the rear spo iler .
- Manual retraction: At speeds up to about 10 mph (20 km/h), retract the rear spoiler
by pressing and holding the switch
c:> fig . 128 . At speeds between 10 mph (20
km/h) and 75 mph (120 km/h) , retract the
rear spoiler by tapping on the switch
c:>fig . 128.
_& WARNING
Dr iv ing at higher speeds w ithout the rear
spoiler dep loyed can impair hand ling cha r
acteristics, making the vehicle harder to
contro l.
- Always make sure that the spoiler is de
ployed when driving at speeds over
85 mph (140 km/h).
If the rear spoiler
warning/ind icator light in the instru-
Intelligen t technolog y 153
ment cluster comes on, the rear spoiler
may not have deployed .
- Never drive at speeds higher than
85 mph (140 km/h) if the spoiler is not
deployed. Have the spoiler inspected as
soon as possible by an authorized Audi
deale r o r qualified workshop .
- Always obey speed limits and other traf
fic laws.
_& WARNING
Improper operation of the rear spoiler can
cause crushing injuries.
- Always make sure that nobody, especially
children, is in the way when the rear
spoiler is deployed or retracted .
(D Note
Never push the vehicle or apply force to
the rear spoi ler -it cou ld be damaged.
{!) Tips
C lean the spoiler compartment every 2 to
3 months. The spoiler compartment must
a lways be free of ice, snow, leaves or other
debr is .
Braking
General information
What affects braking efficiency?
Ope rating cond itions and driving habits
The brakes on today's automobiles a re still
subject to wear, depe nd ing largely on operat
ing condit ions and driving hab its
c:> .&,. . On
vehicles that are either driven most ly in stop
and-go city t raff ic or are dr iven hard, the
brake pads should be checked by yo ur au thor
ized Audi dealer more often than specified in
the
Warr anty & Maintenance booklet. Failure
to have your brake pads inspected can result
in reduced brake performance.
On steep slopes, you should use the braking
effect of the engine. T his way, you prevent un
necessary wear on the brake system . If you
must use your brakes, do not hold the brakes .,.
Page 156 of 262
154 Intellig ent technolog y
down continuously. Pump the brakes at inter
va ls.
Noises may occur when braking depending on
the speed, braking force and outside condi
tions such as temperature and humidity.
Moistu re or road salt
Under certain conditions, for examp le, when
d riving through water or ve ry heavy rain, or
even after washing your vehicle , the bra king
effect can be reduced due to moisture (o r in
freezing conditions ice) on the brake pads. A
few cautious brake applications should dry off
the brake pads or remove any ice coatings.
The effectiveness of the b rakes can be reduced
when the vehicle is driven on a salt -covered
road and the brakes are not used. Likewise,
you clean off accumulated sa lt coating from
brake discs and pads with a few caut ious ap
plications of the brake
q .&. .
Co rrosion
There may be a tendency for dirt to bui ld up
on the brake pads and corrosion to form on
the discs if the car is not driven regularly or
only for short trips with little use of the brakes.
If the brakes are not used frequently, or if cor rosion has formed on the discs, it is advisable
to clean off the pads and discs by braking
f irmly a few times from a moderately high
speed
Q .&. .
Fa ults in th e brak e system
If you should notice a sudden increase in
brake peda l travel, then one of the two brake
circu its may have failed
q .&. .
Low brake flu id le vel
Malfunct ions can occur in the brake system if
the brake fluid level is too low. The brake fluid
leve l is monitored electronically.
B rake boo ste r
The brake booster increases the press ure that
you gene rate w it h the brake pedal. It works
on ly when the engine is running
.Q .&.
Brake lining wear statu s
Brake lining wear may be checked by visual in
spection of the condition of the brake pads
thro ugh the openings in the wheel. If neces
sary, the wheel may be removed for this in
spection
q page 224, What should I be
aware of when changing a tire?.
A WARNING
-- You shou ld perform braking maneuvers
for the purpose of cleaning the brake system only if road conditions permit .
Othe r road use rs must not be put at risk -
you may ca use an accident!
- Before descend ing a steep grade, reduce
speed and sh ift transmission into a lower
gear or lower dr iving range. Do not ride
the brakes or hold the pedal down too
long or too often. This could cause the
brakes to get hot and diminish braking
efficiency.
- Do not "ride the brakes" by rest ing your
foot on the pedal when you do not intend
to brake. This may cause the brakes to
overheat, premature wear and increased
stopping distance .
- Under certain climatic and operat ing
conditions such as passing through wa
ter, dr iving in heavy rain or after washing
the vehicle, the effectiveness of the b rakes can be reduced. In winte r, ice can
accumu late on the bra ke pads, lin ings,
d iscs and drums. Carefully app ly bra kes
for a test . Brakes will dry and ice coat
ings will be cleaned off after a few care
fu l brake applications.
- Driving for an extended period of time on salt-covered roads without using your brakes can a lso affect braking efficiency.
Clean off accumulated salt coating from
brake discs and pads with a few cautious
brake applications .
- If you damage the front spoiler, or if you
install a different spoiler, be sure the a ir
f low to the front brakes is not obstruct-
ed. Otherwise the brake system could
Ill>
Page 157 of 262
overheat reducing the effectiveness of
the ent ire brake system.
- Failure of one brake circuit will impair
the braking capability resulting in an in
creased stopp ing distance. Avoid driv ing
the vehicle and have it towed to the near est Aud i dealer or qualified workshop .
- Never let the vehicle roll to a stop w ith
the engine shut off.
- If the brake booster is not working, for
example when towing your ve hicle, or
because the brake booste r has somehow
been damaged, the brake pedal must be
pressed considerab ly harder to make up
for the lack of booster assistance.
Electro-mechanical
power assist
The electro-mechanical power assist helps
the driver when steering.
The degree of power assist is electronically
matched to vehicle speed.
The power steer ing system ass ists the driver
so that he can stee r the veh icle w ith red uced
phys ica l effort.
Power steering w ill not work if the engine is
off. As a result, the steering wheel w ill be hard
to turn.
& WARNING
If the system develops a prob lem, you
must seek qualified professional assis
tance.
(D Note
-
If there is an electronic malfunct ion, ser
votronic
wi ll sti ll function like a conven
tional power steering system, providing a
constant steering support force that is no
longer proportionate to the vehicle speed.
This is most noticeable when turning the
steer ing wheel at low speeds (for example
when parking), -more effort will be re
quired than usual.
Int ellig ent technolog y 155
-Be aware of the different than usual
steering response and adjust your steer
ing force accordingly.
- Have the problem checked and set right
by an authorized Audi dea ler as soon as
possible.
- If a steering malfunction occurs, this is
signaled with the,~ , or .• indicator
lights and a warn ing tone, see.
(D Tips
- If the power steering system sho uld fail,
or if the engine is not running (for exam
ple, while being towed), you will still be
able to steer the vehicle. However, more
effort will be required to do so.
- If the power steering system is not func
tioning properly, contact your authorized
Audi dealer immediately.
Driving with your
quattro ®
Applies to vehicles : wit h all -w hee l d rive
With oil -wheel drive, oil four wheels ore driv
en.
General information
With a ll-wheel drive, power is distr ibuted to
all four wheels. This happens automatically
depend ing on your driving style and the road
conditions at the time. See also
c::> page 1 SO.
The all-whee l dr ive concept is des igned for
high eng ine power. Your veh icle is except ion
ally powerfu l and has excellent driving charac
teristics both under normal driving conditions
and on snow and ice. Always read and follow
safety precautions
c::> &. .
Winter tires
When dr iving in the winter, your vehicle with
all-wheel drive has an advantage, even with
regular tires. In winter road conditions it may
be advisable to mount winter tires (or all-sea
son tires) for improved driveability and brak
ing: these tires must be mounted on
all fou r
wheels. See also c::> page 211, Winter tires. ..,_
•
•
Page 162 of 262
160 Driving and en vironm ent
Avoid damaging the
vehicle
When you are driving on poor roads, or over
curbs, steep ramps, etc ., make certain that
low-lying parts such as spoilers and exhaust
system parts do not bottom out and get dam
aged.
This is especially true for vehicles with low
slung chassis (sports chassis) and fully loaded
vehicles .
Driving through water
on roads
Note the following to avoid vehicle damage
when driving through water, for example on
flooded roads:
- T he water must not be any highe r tha n the
bottom of the vehi cle body.
- Do no t drive faster than wa lking speed.
_& WARNING
After d riving through water, m ud, slush,
etc., the brakes may be slow to take effect
because o f wet brake ro tors and pads . Dry
the brakes fi rst by braking carefully to re
store the full braking effect.
(]) Note
Vehicle components such as the engine,
transmiss ion, suspension or electrical sys
tem can be severely damaged by driving
through water.
- Check the depth o f the water before driv
ing through it.
- Do not stop the veh icle, dr ive in reverse
or switch the engine
off when driving
through water.
- Keep in mind that oncoming vehicles may c reate waves that raise the water
l evel and make it too deep for your vehi
cle to drive through safely.
- Avoid driving thro ugh salt water because
it can ca use corrosion.
-
Catalytic converter
It is very important that your emission con
trol system (catalytic converter) is function
ing properly to ensure that your vehicle is run
ning in an environmentally sound manner.
.,. Always use lead-free gasoline ¢ page 176,
Fuel supply .
.,. Never run the tank down all the way to
empty .
.,. Never put too much motor o il in your en-
gine ¢
page 185, Adding engine oil 'l::r. .
.,. Never try to push- or tow-sta rt you r vehicle.
The catalyt ic converter is an efficient "clean
u p" dev ice buil t into the exhaust system of
t h e vehi cle. The cata lytic conve rter bu rns
many of t he pollu tan ts in the exha ust gas be
f ore they are re leased into the atmosphere.
T he exclusive use of unleaded fuel is critica lly
important for the life of the catalyt ic convert
er and prope r fu nct ion ing of the engine.
A WARNING
- Do not park or operate the vehicle in
areas where the hot exha ust system may
come in contact with dry g rass, brush,
fue l spill or other material wh ich can
cause a fire.
- Do not app ly additiona l undercoating or
rustproofing on or near the exhaust
manifold, exhaust pipes, catalytic con
verter or heat sh ields. Dur ing driv ing, the
substance used fo r undercoating could
overheat and cause a fire.
(D Note
- Be aware that just one tank filling with
leaded fuel will already ser iously de-
grade the performance of the catalytic
converte r.
- Do not exceed the correct engi ne oil level
¢page 185.
-Do not drive until the fuel tank becomes
completely empty . The engine co uld mis-
fire. Unburned fuel could also get into ..,.