change wheel AUDI TT COUPE 2009 Owners Manual
[x] Cancel search | Manufacturer: AUDI, Model Year: 2009, Model line: TT COUPE, Model: AUDI TT COUPE 2009Pages: 316, PDF Size: 71.16 MB
Page 22 of 316
Instruments and warning/indicator lights
& W ARN ING (continued )
increased br aking dist ances . Trying to brake as quickly as usual
c ould lead to an a ccident. •
Anti-lock brake system , e (USA)/
(Canada)
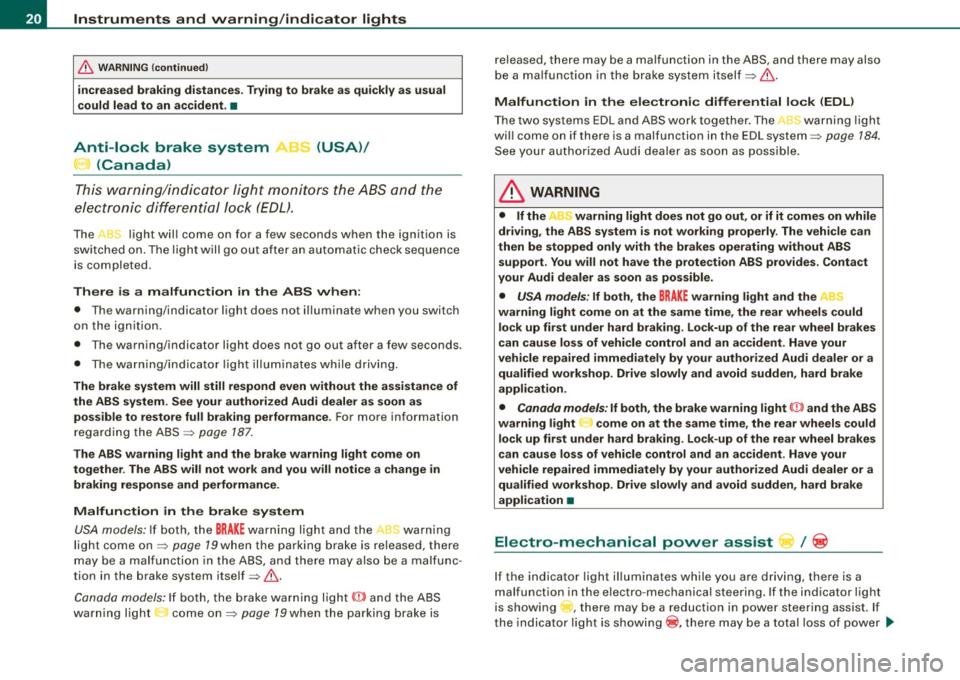
T his war ning/ indic ator ligh t moni to rs the AB S and the
elect ronic diffe ren tial lock (EDL).
The J light wil l come on for a few seconds when the ignition is
swi tc hed on. The light w ill go out aft er a n aut omat ic check seque nce
is completed.
There is a malfunction in the
ABS when :
• T he warning/indicator light does not il luminate when you switch
on the ign ition.
• T he wa rning/indicator light does not go out after a few seconds.
• The wa rnin g/ind ica tor light il luminates wh ile driv in g.
The brake system will still respond even without the assistance of
the ABS system. See your authorized Audi dealer as soon as poss ible to restore full braking performan ce . For more information
regard ing the ABS ~ page 187.
The ABS warning light and the brake warning light come on
together . The ABS will not work and you will notice a change in
braking response and performance .
Malfunction in the brake system USA models: If both, t he
BRAKE warning light and the ,,[ warning
light co me on ~ page 79when the pa rking b ra ke is r eleased, there
may be a mal function in t he ABS , and t here may also be a malfunc
tion in the brake system itself ~ & .
Canada model s: If bo th, the b rake warn ing l ig ht
(Ci) and the ABS
warning light : come on~ page 79when the parking brake is released, there may be a malfunction in the ABS, and there may also
b e a ma lfunc tio n in t he b rake system itself~ & .
Malfun ction in the electronic differential lock (EDL )
T he two sys te m s ED L and ABS w ork together . The L warning ligh t
wi ll come on if there is a malfunction in the EDL system~ page 184.
See you r au thori zed A udi deale r as so on as possible.
& WARNING
• If the "warning light does not go out , or if it comes on while
driving , the ABS system is not working properly . The vehi cle can
then be stopped only with the brakes operating without ABS support . You will not have the protection ABS provides . Contact
your Audi dealer as soon as possible.
• USA models : If both , the
BRAKE w arning light and the
warning light come on at the same time, the rear wheels could lock up first under hard braking . Lock-up of the rear wheel brakes
can cause loss of vehicle control and an accident . Have your
vehicle repaired immediately by your authorized Audi dealer or a
qualified workshop. Drive slowly and avoid sudden, hard brake
appli cation .
• Canada models: If both, the brake warning light CCI» and the ABS
warning light come on at the same time , the rear wheels could
lock up first under hard braking. Lock -up of the rear wheel brakes
c an cause loss of vehi cle control and an a ccident . Have your
vehicle repaired immediately by your authorized Audi dealer or a
qualified workshop. Drive slowly and avoid sudden , hard bra ke
application •
Electro-mechanical power assist l / @
If the indicato r light i lluminates while you a re d riv ing, t here i s a
malfunction in the e lectro -mechanica l steering . If the indicator light
is showing , there may be a reduction in powe r stee ring assist. If
t h e ind icator light is show ing® , there may be a total loss o f power
~
Page 60 of 316
Clea r vis io n
• your vehicle is being towed by a tow truck or if you are towing
another vehicle behind you. •
Turn signals -¢ ¢ and high beam ~D lever
The lever on the left side of the steering column is used to
operate the turn signals and the high beam as well as the
headlight flasher.
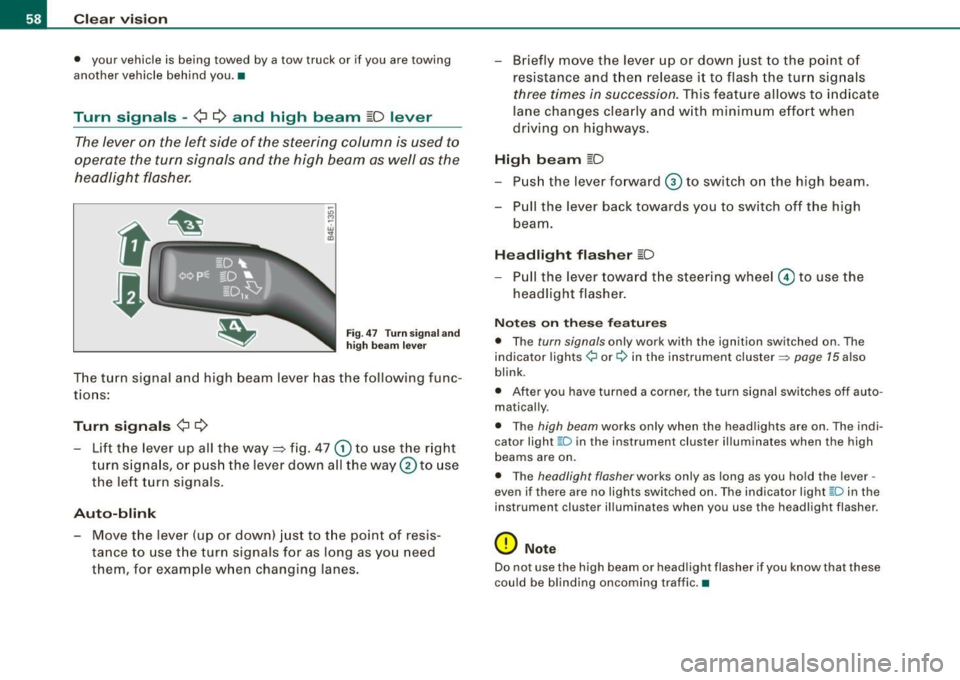
F ig. 47 Tu rn signa l a nd
h igh beam lever
The turn signal and high beam lever has the following func
tions:
Tu rn s ig na ls ¢ Q
- Lift the lever up all the way ::::, fig . 47 G) to use the right
turn s igna ls, or push the lever down all the way
0 to use
the le ft turn signals .
Auto-blink
- Move the lever (up or down) just to the point of resis
tance to use t he turn signals for as long as you need
them, for example when changing lanes. - Briefly move the
lever up or down just to the point o f
resistance and then release it to flash the turn signals
three times in succession. This feature allows to indicate
lane changes clearly and w ith minimum effort when
driving on highways.
Hi gh b eam [D
- Push the lever forward © to switch on the high beam.
- Pull the lever back towards you to switch off the high beam.
Headlight fl ash er [D
- P ull the lever toward the steering wheel© to use the
headlight flasher .
Notes o n these fea tures
• The turn signals only work with the ignition switched on . The
indicator lights ¢ or¢ in the instrument cluster => page 15 also
blink.
• After you have turned a corner, the turn signal switches off auto
matically.
• The high beam works only when the head lights are on. The indi
cator light ~D in the instrument cluster ill uminates when the high
beams are on.
• The headlight flasher works only as long as you hold the lever -
even if there are no lights switched on. The ind icator light ~D in the
instrument cluster illuminates when you use the headlight flasher.
0 Note
Do not use the high beam or head light flasher if you know that these
could be blinding oncoming traffic. •
Page 62 of 316

Clear vision
ically . It turns off when the lid is closed and the visor is folded up
again .
Between the visors for the driver and the passenger there is a
folding visor which can be used to cover the space above the rear
view mirror .•
Wiper and washer system
Windshield wiper -$
The windshield wiper lever controls bo th the windshield
wipers and the washer system.
Fi g. 50 Wiper l ever:
wind shie ld w iper l eve r
po sit io ns
T he windshield wipe r lever => fig. 50 has the fo llowing posi
t io ns:
Intermittent wiping <5;)1 (activating rain sensor)*
Move t he leve r up to pos ition G) .
- Move the in terva l set switch @, to change the in te rvals .
Low wiper speed
-Move the leve r up to pos ition @ .
High wiper sp eed
- Move the lever u p to position ®·
One-touch wiping
- Mov e the lev er t o posi tion 0 , w hen you wa nt to w ipe t he
windshield
briefly.
Automatic wiper /washer
- Pull the lever to position © (toward the steering wheel)
and hold.
- Release t he lever . The was her stops and the wipers keep
going for about four seconds.
Turning off the wipers
- Mov e the lever bac k t o posi tio n ®·
The windshield wipers and washer only work when the ign ition is
turned on. If you switch off the ignition with the windshield wiper
l ever still in the interval wipe p osition and the n come back a while
later and drive off , the rain sensor will reactivate itse lf after the
vehic le speed has exceeded 4 mph (6 km/h) .
The rai n se nsor* is only activa ted wit h the wiper lever set to posi
tion
G) . When it starts to rain , the rain sensor wil l automatically acti
vate the in termittent wipi ng mode .
To reduce the sens itiv ity of the sensor, move switch© down . To
increa se the sensitivity, move the switch up . The h igher you adjust
the sensitivity, the faster the sensor will react when it senses mois
ture on the w indshie ld. The pauses between wiper turns depend not
only on the sens itivity setting, but on the vehicle speed as well.
During brief stops, e .g . at a red light, wiper motion will automati
cally be reduced to the next lower speed. Wipers a lready turning at
low speed . change to intermittent wiping .
When the ignition is turned on, the washe r jets are heated. ...
Page 151 of 316

__________________________________________________ A_ i_ r _b _a...; g::- s_ y=--- s_t _e _m __ lllll
& W ARNING (continued )
seating position and have the airbag system inspected by your
Audi dealer .
• A tight tether or other str ap on a rearward-fac ing child restr aint
attached to the front pas senger seat can put too much pressure
on the weight-sensing mat in the seat and reg ister more weight
than i s actually on the seat. The heavier weight registered can
make the system work as though an adult were on the seat and
deploy the Advanced Airbag when it must be suppressed causing
s erious or even fatal injury to the child .
• If, in exceptional circumstance s, you mu st in stall a forward
fac ing child restra int on the front passenger seat , always move the
seat into its rearmost position in the seat 's fore and aft ad just
ment range , as far away from the airbag a s possible . The backrest
must be adjusted to an upright position . Make sure that the
PASSENGER AIR BAG OFF light comes on and stay s on all the time
whenever the ignition is switched on .
& WARNING
• If the PASSENGER AIR BAG OFF light does not go out when an
adult is sitting on the front passenger seat after taking the steps
described above, make sure the adult is properly seated and
restrained at one of the rear seating positions .
• Have the airbag system inspected by your Audi dealer before
transporting anyone on the front passenger seat .
[ i ] Tips
If the weight -sensing mat in the front passenger seat detects an
e mp ty seat, the fro nt air b ag on the pa ssenge r sid e will be t urned
off, and PASSENGER AIR BAG OFF will stay on.•
Controls and equip ment Safety first
Vehicle operation
Repair, care and disposal of the airbags
Parts of the airbag system are insta lled at many different places on
your Au di. In sta ll in g, re moving, ser vic in g or re pair in g a part in an
area of the vehicle can damage a part of an a irbag system and
pre ven t that system fro m wo rki ng p rope rly in a co llision .
There are some important things you have to know to make sure
that the effectiveness of the system will not be impai red an d that
d iscarded components do not cause inju ry or po llute t he e nv iron
ment .
& WARNING
Improper care , servicing and repair procedures can increase the
risk of personal injury and death by preventing an airbag from
deploying when needed or deploying an airbag unexpectedly:
• Never cover , obstruct , or change the steering wheel horn pad
or airbag cover or the instrument panel or modify them in any way .
• Never attach any obje cts su ch as cup holders or telephone
mountings to the surfaces covering the airbag units.
• For cleaning the horn pad or instrument panel, use only a soft ,
dry cloth or one moi stened with plain water . Solvents or cleaners
c ould damage the airbag cover or change the stiffness or strength
of the material so that the airbag cannot deploy and protect prop
erly .
• Never repair , adjust , or change any parts of the airbag system.
• All work on the steering wheel , instrument panel , front seats or
electrical system (including the installation of audio equipment ,
c ellular telephones and CB radios , etc .I must be performed by a
qualified technician who has the training and special equipment
necessary .
• For any work on the airbag system , we strongly recommend
that you see your authorized Audi dealer or qualified workshop .
• Never modify the front bumper or parts of the vehicle body .
Vehicle care Do-it-yourself service Technical data
Page 231 of 316

_____________________________________________ C_h_ e_ c _ k_in -= g_a _ n_d _ f_il _li _n ..;::g =--____.""
When instal ling the battery, make sure the ignition and all electrica l
consumers are switched off~
0.
We recommend that you use maintenance -free or c yc le-re sis
tant/leak -proof
batteries according to the standards TL 825 06 (from
December 1997) and VW 7 50 73 (from August 2001 ) .
Rep lacing the battery should be carried by a qualified workshop .
Please follow the instruct ions on the battery cover.
0 Note
• All work on the battery requ ires technical knowledge . Please
contact an Audi dealership or another authorized facility for ques
t ions about the battery -dange r of acid burns and explosion hazard!
• T he battery must not be opened! Do not try to change the
battery 's liquid level, otherwise detona ting gas will escape from the
battery -explosion hazard I
• The AGM battery in the luggage compartmen t cannot lea k,
because the electrolyte for this battery is absorbed into a special
glass mat. Th is leak -proof battery must not be replace with a
conventional battery .
• Make sure the ventilation hose on the side of the battery is
connected, otherwise fumes or battery acid can leak out.
• Battery holder and term inals a lways have to be secured correctly.
• Before all work on the battery follow the
warnings below ~ & in
"Wor king on the battery" on
page 229 .
ci' For the sake of the environment
Because of the proble m of proper d isposal of a battery, we recom
mend your authorized Audi dealer change the battery for you.
Batteries contain sul furic acid and lead and m ust always be
disposed of properly in compliance with all environmenta l regula
t ions. Disposing of vehic le batteries improperly is ve ry dangerous to
the environment . Make sure that the removed battery cannot over
balance, otherwise su lfur ic ac id might escape!
[ i ] Tip s
If your vehic le is left standing for severa l weeks at extreme ly low
temperatures, the vehicle battery should be removed and stored
where it will not freeze. Th is will prevent it from being damaged and
having to be replaced .•
Working on the battery
Be especially ca ref ul when w orking on o r near the
battery!
F ig . 144 Luggag e
co mp artment :
AGM
battery
T h e ba ttery is loca ted in t he lug gage compartmen t.
Swing up the luggage compartment floor .
Remove the cover plate by t urning the thumb wheel.
The positive ( +l battery termina l is protected by a plastic cover. This
cover must be removed to access the posit ive ( +l terminal when
connecting jumper cab les to start the engine.
Always heed the
safety warning s, when working on the vehicle
battery or the vehicle e lectrica l system to prevent injury.
Vehic le care I I irechnical data
Page 238 of 316
-~_T_ ir_e_ s_ a_ n_d _ w_ h_ e_e _l_s _________________________________________________ _
Groove
means the space between two adjacent tread ribs.
Load rating (code)
means the maximum load that a tire is rated to carry for a given
inflation pressure . You may not find this information on all tires
because it is not required by law.
Maximum load rating
means the load rating for a tire at the maximum permissible infla
tion pressure for that tire.
Maximum loaded vehicle weight
means the sum of:
(a) Curb weight
(b) Accessory weight
(c) Vehicle capacity weight, and
(d) Production options weight
Maximum (permissible) inflation pressure
means the maximum cold inflation pressure to which a tire may be
in flated. Also called "maximum inflation pressure ."
Normal occupant weight
means 150 lbs. (68 kilograms) times the number of occupants
seated in the vehicle up to the total seating capacity of your vehicle.
Occupant distribution
means distribution of occupants in a vehicle .
Outer diameter
means the overall diameter of an inflated new tire.
Overall width
means the linear distance between the exteriors of the sidewalls of
an inflated tire, including elevations due to labeling, decorations, or
protective bands or ribs .
Ply
means a layer of rubber -coated parallel cords.
Production options weight
means the combined weight of those installed regular production
options weighing over 5 lbs. (2.3 kg) in excess of those standard
items which they replace, not previously considered in curb weight
or accessory weight, including heavy duty brakes, ride levelers, roof rack, heavy duty battery, and special trim.
Radial ply tire
means a pneumatic tire in which the ply cords that extend to the
beads are laid at substantially 90 degrees to the centerline of the
tread.
Recommended inflation pressure
see =:> page 235, "Cold tire inflation pressure".
Reinforced tire
means a tire designed to operate at higher loads and at higher infla
tion pressures than the corresponding standard tire. Reinforced
tires my be identified as "XL", "xi", "EXTRA LOAD", or "RF" on the
sidewall.
Rim
means a metal support for a tire or a tire and tube assembly upon
which the tire beads are seated .
Rim diameter
means nominal diameter of the bead seat. If you change your wheel
size, you will have to purchase new tires to match the new rim diam
eter.
Rim size designation
means rim diameter and width.
Rim width
means nominal distance between rim flanges .
Page 242 of 316
-~_T_ ir_e_ s_ a_ n_d _ w_ h_ e_e _l_s _________________________________________________ _
Engin e
(displa ce
ment in
lit er) Tire designation
Tir
e pressure front Tire pressure rear
normal load full load normal load
full load
condition (up to condition c
ondition (up
condition
2 o ccupants ) to 2 occupants)
6 -cylinder
3.2 245
/45 R1 7 95H All Season
245 /45 R17 95V XL High Performan ce
245 /40 R18 93H All Season
245 /40 R18 93V XL High Performan ce
255 /35 R19 95V XL High Performance
XL
= reinforced
PSI
32
32
32
32
32
The correct tire pressure for the spare wheel is located on a label on
the driver's side B-pillar .
Because technica l changes may be made to vehicle equip ment
during the mode l year, always compare the tire size designat ion on
the tire pressure la bel on y our vehicle with the tires on your vehicle.
Make sure tha t the t ire size information on the veh icle labe l is the
same as the size of the tires on the vehicle. Th is is especially impor
t ant if the vehicle belongs to someone e lse or you boug ht the
vehic le with different rims/tires or you bought the vehicle as a previ
ously owned vehicle.
Remember, your safety and that of your passengers a lso depends
on making su re tha t load limits a re not exceeded . Vehi cle loa d
inc ludes everybody and everything in and on the vehicle. These load
limits are technically referred to as the vehicle's Gross Vehicle
Weight Rating ("GVW R"). The Gross Axle Weight Rating ("GAWR") is
the maximum load that can be applied at each of the vehicle's two
ax les. The Gross Vehicle We ight Rat ing and the Gross Ax le Weig ht
Rating are listed on the safety comp liance sticker labe l located on
t he driver's side B- pillar. The tir e pressure labe l on y our Audi lists
the maximum combined weight of a ll of the occupants and luggage
kPA PSI kPA kPA kPA
220 32 220 29 2 00 29 200
220 32 220 29 200 29 200
220 3 2 220 29 2 00 29 200
220 32 220 29 2 00 29 200
220 3 2 220 29 200 29 200
or other ca rgo that the veh ic le can carry. For the location o f the t ire
pressure label::::;, page 238, fig. 148.
& WARNING
Overloading a vehi cle can cause loss of vehicle control , a crash or
other accident, serious personal injury, and even death .
• Carrying more weight th an your vehicle was de signed to carry
will prevent the vehicle from handling properly and increase the
risk of a loss of vehicle control.
• The brakes on a vehicle that has been overloaded may not be
able to stop the vehicle within a safe distance .
• Tires on a vehicle that has been overloaded c an fail suddenly
causing loss of control and a crash .
& WARNING
• Incorrect tire pressures and/or underinflation can lead to a
s erious o r fatal a ccident .
Page 244 of 316
-~_T_ ir_e_ s_ a_ n_d _ w_ h_ e_e _l_s _________________________________________________ _
When should I check the tir e pressure?
The correct ti re pressure is especially i mpor tant a t high speeds . The
pressure should therefore be checked at least o nce a month and
a lways before star tin g a j ourn ey.
When should I adjust the tire pressures?
Adjust the tire pres sure to the loa d you are ca rrying. After changing
a wheel
or replacing whee ls you have to adjust the tire pressures on
a ll whee ls. In addition, y ou must the n ini tia lize the new tire pres
sures in the tire pressu re monitoring system*:::::,
page 253.
& WARNING
Incorrect tire pressures and /or underinflation can lead sudden tire
failure, loss of control , collision, serious personal injury or even
death .
• When the warning symbol appears in the instrument
cluster , stop and in spect the tire s.
• Incorrect tire pressure and /or underinflation can cause
increased tire wear and can affect the handling of the vehicle and
stopping ability.
• Incorre ct t ire pressures and /or underinflation can also lead to
sudden tire failure, including a blowout and sudden deflation,
causing loss of vehicle control.
• The driver is responsible for the correct tire pre ssure s for all
tires on the vehicle . The appli cable pressure values are located on
a sticker on the driver' s side B -pillar.
• Onl y when all tires on the vehicle are filled to the correct pres
sure , the tire pre ssure monitoring system* can work correctly .
• The use of incorrect tire pressure values can lead to accidents
or other damage. Therefore it is essential that the driver observe
the spe cified tire pressure values for the tires and the correct pres
sures for the function of the tire pre ssure monitoring sy stem *.
• Always inflate tires to the recommended and correct tire pres
sure before driving off.
& WARNING (continued )
• Driving with underinflated tires bend more , letting them get
too hot re sulting in tread separation, sudden tire failure and lo ss
of control .
• Excessive speed and /overloading can cause heat build -up ,
sudden tire failure and loss of control.
• If the tire pressure is too low or too high , the tires will wear
prematurely and the vehicle will not handle well.
• If the tire is not flat and you do not have to change a wheel
immediately, drive at reduced speed to the nearest servi ce station
to che ck the tire pres sure and add air as required .
0 Note
Driving without valve stem caps can cause damage to the tire
va lves. To prevent this, always ma ke sure that fac tor y in st alled va lve
stem caps on all wh eels are securely mounted on the valv e.
'£> For the sake of the environment
Underinflated tires w ill also increase the fue l consumption. •
Tires and vehicle load limits
There are limits to the amount of load or weight that any vehic le and
any tire can ca rry. A vehicle that is overloaded wil l not handle wel l
and is more difficu lt to stop . Overloading can not on ly lead to loss
of vehic le contro l, but can also damage important parts of the
ve hicle a nd can l ead to sudden t ire fa ilure, i nclud ing a b lowout an d
sudden deflation that can cause the vehicle to crash .
Yo ur sa fety an d that o f yo ur passenge rs als o dep ends on making
sure that load limits are not exceeded . Vehicle load includes every -
b ody and eve rythi ng in and on the vehic le . These loa d limits are
~
Page 257 of 316

Tires and wheels -
----------------
•
& WARNING (continued)
• Do not adjust tire pressure when tire temperature is excessive.
This could lead to serious tire damage and even cause the tire to
burst, with the additional danger of an accident.
tread life.
[ i] Tips
• Each tire should be checked monthly when the temperature of
the tires is about the same as ambient air temperature and set to the
recommended inflation pressure as specified on the tire pressure
label =>
page 238.
• The factory supplied spare wheel is equipped with a sensor for
the tire pressure monitoring system *. As long as the spare wheel is
not mounted, the tire pressure of this tire will not be monitored.
• The tire pressure monitoring system * helps the driver to keep an
eye on tire pressures. But the driver still has the responsibility for
maintaining the correct tire pressure.
• Tire pressure must only be adjusted when the temperature of the
tires is about the same as ambient air temperature.
• When tires are replaced, the sensors and valves should not be
exchanged . The valve core, nut, valve sealing and seal washer
(replacement kit) needs to be replaced. If necessary, the valve and
the wheel electronics have to be replaced.
• If you should put different wheels and tires on your vehicle (e.g.
winter wheels and tires), you must be certain that the wheels and
tires are compatible with the tire pressure monitoring system*.
Otherwise the system will register a malfunction and a fault
message will be displayed. For more information, contact your Audi
dealer. •
Adjust the tire pressure and store the pressure in the tire pres
sure monitoring system* to the load you are carrying.
• For Declaration of Compliance to United States FCC and Industry
Canada regulations =>
page 296. •
Applies to vehicles : with tire pressu re mon itoring system
Significant loss of air pressure }
The yellow symbol appears in the event of a significant
loss of air pressure.
Fig. 153 Display:
yellow symbol with message
If the I warning light in the instrument cluster comes on
and then the(•' symbol appears in the display ~ fig. 153,
pressure in at least one tire is too low.
- Stop driving as soon as possible without endangering
yourself and other drivers on the road.
Inspect all tires.
- Change the tire if necessary ~
page 268.
The, warning light in the instrument cluster comes on when the
tire is significantly underinflated .
In addition, the tire symbol
J appears in the display together with
the message Please check tire pressure=> fig. 153. .._
Vehicle care
I t •
Page 258 of 316
___ T_ i_ r_e _s_ a_ n_ d_ w_ h_ e_ e _ ls _________________________________________________ _
After a few seconds, the message disappears again. If you would
like to show the message again, press the Set/Check button
=>
page 72 , fig. 2@ .
[ i) Tips
• In the case of an intentional loss of air pressure, for example,
when re -adjusting tire pressure, this has to be stored again after
wards=>
page 256.
• Tire pressure must only be adjusted when the temperature of the
tires is about the same as ambient air tempera ture.
• The yellow symbol disappears, when the tire pressure is
correc ted and the new pressure is stored in the system=>
page 256.
• After changing a wheel or replacing a wheel with the spare tire
you have to adjust the tire pressures on all wheels. In addition , you
must then initialize the new tire pressures in the tire pressure moni
toring system*=>
page 257. •
Ap plies to vehicles: w ith tir e pressure monitor in g system
Storing tire pressures
Correct storage of specified pressure is the basic require
ment for reliable tire pressure monitoring.
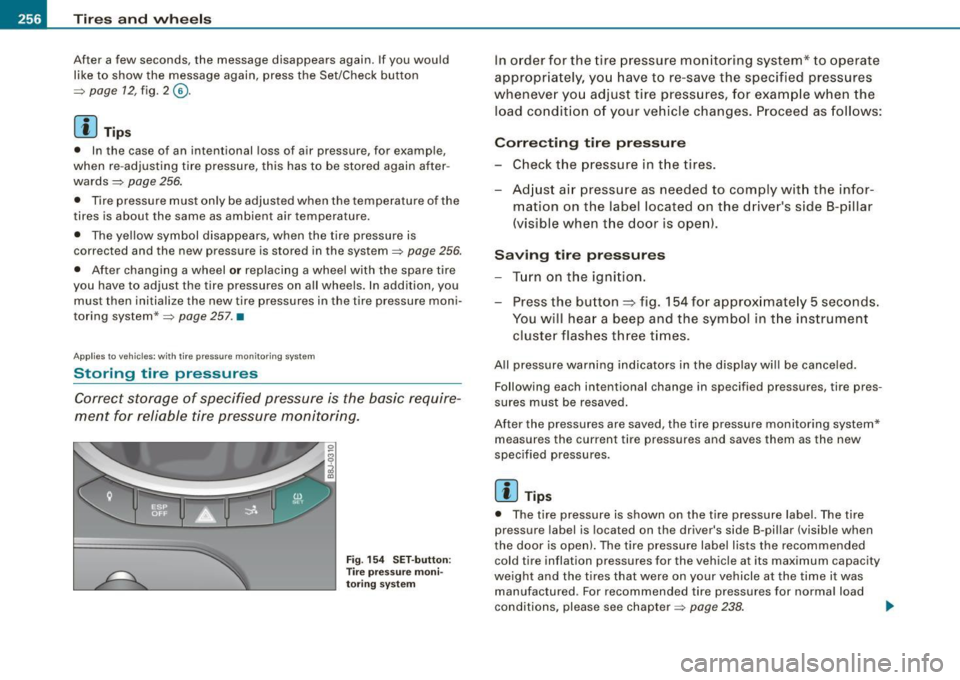
Fig. 154 SET-button :
Tire pressure moni
toring system
In order for the tire pressure monitoring system* to operate
appropriately, you have to re-save the specified pressures
whenever you adjust tire pressures, for example when the
load condition of your vehicle changes . Proceed as follows:
Correcting tire pressure
Check the pressure in the tires.
Adjust air pressure as needed to comply with the infor mation on the label located on the driver's side B -pillar
(vis ible when the door is open).
Saving tire pressures
Turn on the ignition.
Press the button=> fig. 154 for app roximately 5 seconds.
You will hear a beep and the symbol in the instrument
cluster flashes three times.
All pressure warning indicators in the display will be canceled.
Following each intentional change in specified pressures, tire pres
sures must be resaved.
After the pressures are saved, the tire pressure monitoring system* measures the current tire pressures and saves them as the new
specified pressures.
[ i J Tips
• The tire pressure is shown on the tire pressure label. The tire
pressure label is located on the driver's side B-pillar (visible when
the door is open). The tire pressure label lists the recommended cold tire inflation pressures for the vehicle at its maximum capacity
weight and the tires that were on your vehicle at the time it was
manufactured . For recommended tire pressures for normal load
conditions, please see chapter
=> page 238. .,_