navigation update AUDI TT COUPE 2014 Owners Manual
[x] Cancel search | Manufacturer: AUDI, Model Year: 2014, Model line: TT COUPE, Model: AUDI TT COUPE 2014Pages: 284, PDF Size: 34.42 MB
Page 5 of 284
Downloaded from www.Manualslib.com manuals search engine 0
N
co
....
\D L/'l
N
L/'l
.... Speller
for
letters/numbers . . . . . . . . . . . 113
Searching . . . . . . . . . . . . . . . . . . . . . . . . . . 114
Speech dialogue system . . . . . . . . . 116
How to use the system . . . . . . . . . . . . . . . 115
Notes on the command overviews . . . . . . 117
Commands . . . . . . . . . . . . . . . . . . . . . . . . .
117
Telephone . . . . . . . . . . . . . . . . . . . . . . . . 123
Introduction . . . . . . . . . . . . . . . . . . . . . . . . 123
Connecting a telephone . . . . . . . . . . . . . . . 123
Using the telephone . . . . . . . . . . . . . . . . . 127
Favourites . . . . . . . . . . . . . . . . . . . . . . . . . . 129
Messages . . . . . . . . . . . . . . . . . . . . . . . . . . 130
Listening to voicemail messages. . . . . . . . 131
Emergency call functions . . . . . . . . . . . . . 131
Directory ........................... 131
Other settings . . . . . . . . . . . . . . . . . . . . . . 134
Troubleshooting . . . . . . . . . . . . . . . . . . . . .
136
Audi connect . . . . . . . . . . . . . . . . . . . . .
137
Introduction . . . . . . . . . . . . . . . . . . . . . . . .
137
Setting up . . . . . . . . . . . . . . . . . . . . . . . . . . 137
Configuring using myAudi . . . . . . . . . . . . . 139
An overview of Audi connect services . . . . 140
Wi-Fi hotspot . . . . . . . . . . . . . . . . . . . . . . . 143
Configuring the
data connection . . . . . . . .
144
Notes on Audi connect . . . . . . . . . . . . . . . . 145
Troubleshooting . . . . . . . . . . . . . . . . . . . . . 146
Navigation . . . . . . . . . . . . . . . . . . . . . . . . 147
Calling up the navigation menu . . . . . . . .
147
Entering a destination . . . . . . . . . . . . . . . . 148
Stopping route guidance . . . . . . . . . . . . . .
152
Adding a home address . . . . . . . . . . . . . . . 153
Adding favourites . . . . . . . . . . . . . . . . . . . .
153
Adding directory contacts . . . . . . . . . . . . . 153
Other settings . . . . . . . . . . . . . . . . . . . . . . 153
Map............................... 156
Google Earth map display . . . . . . . . . . . . . 159
Calling up traffic information . . . . . . . . . . 160
Troubleshooting . . . . . . . . . . . . . . . . . . . . . 162
Listening to the radio . . . . . . . . . . . . 163
Calling up the radio . . . . . . . . . . . . . . . . . . 163
Radio functions . . . . . . . . . . . . . . . . . . . . . 163
Radio menu . . . . . . . . . . . . . . . . . . . . . . . . 165
Favourites . . . . . . . . . . . . . . . . . . . . . . . . . .
165 Table
of Contents
Other settings . . . . . . . . . . . . . . . . . . . . . . 166
Troubleshooting . . . . . . . . . . . . . . . . . . . . . 167
Media ............................. 168
Introduction . . . . . . . . . . . . . . . . . . . . . . . .
168
Notes . . . . . . . . . . . . . . . . . . . . . . . . . . . . .
168
Media drives . . . . . . . . . . . . . . . . . . . . . . . .
169
Bluetooth audio player . . . . . . . . . . . . . . .
171
Wi-Fi audio players . . . . . . . . . . . . . . . . . . 172
Online media . . . . . . . . . . . . . . . . . . . . . . . 173
Multimedia connections . . . . . . . . . . . . . . 174
Supported media and file formats . . . . . . 177
Playing media . . . . . . . . . . . . . . . . . . . . . . . 179
Other settings . . . . . . . . . . . . . . . . . . . . . . 183
Troubleshooting . . . . . . . . . . . . . . . . . . . . . 184
System settings .. . . . . . . . . . . . . . . . . 186
Setting the date and time . . . . . . . . . . . . . 186
MMI settings . . . . . . . . . . . . . . . . . . . . . . . 186
Connection manager . . . . . . . . . . . . . . . . . 187
System update . . . . . . . . . . . . . . . . . . . . . . 189
On-board handbook . . . . . . . . . . . . . . . . . . 189
Sound settings . . . . . . . . . . . . . . . . . . . . . . 190
Volume settings . . . . . . . . . . . . . . . . . . . . .
190
Restarting the MMI system (Reset) . . . . . 191
Notes on software licences . . . . . . . . . . . . 191
Safety ............................ 192
Safe driving . . . . . . . . . . . . . . . . . . . . . . 192
General notes . . . . . . . . . . . . . . . . . . . . . . . 192
Correct sitting positions . . . . . . . . . . . . . .
193
Child seats . . . . . . . . . . . . . . . . . . . . . . . . .
195
Securing a child seat ................ .
Pedal area ......................... .
Stowing luggage safely .............. .
Pedestrian protection system 198
200
201 202
Seat belts . . . . . . . . . . . . . . . . . . . . . . . .
204
Why is it so important to use seat belts? . 204
Forces acting in a collision . . . . . . . . . . . . .
205
How to wear seat belts properly . . . . . . . .
206
Belt tensioners . . . . . . . . . . . . . . . . . . . . . .
208
Airbag system. . . . . . . . . . . . . . . . . . . . 209
Description of airbag system . . . . . . . . . . .
209
Front airbags . . . . . . . . . . . . . . . . . . . . . . . 210
Side airbags . . . . . . . . . . . . . . . . . . . . . . . . 214
Head-protection airbags . . . . . . . . . . . . . . 215
3
Page 26 of 284
Downloaded from www.Manualslib.com manuals search engine Driver
information system
Controls
Applies to vehicles: with camera-based traffic sign recognition
')· ·.
I
,
,··· .. ,
,· Date
&time
12: 11 AM (.
�1\
.
I
..
' Tuesday
2014-1-21 ...
/ 223450,,,,
11:30-.i �
-- .
1009.0,m ?® Y
13.0"C �
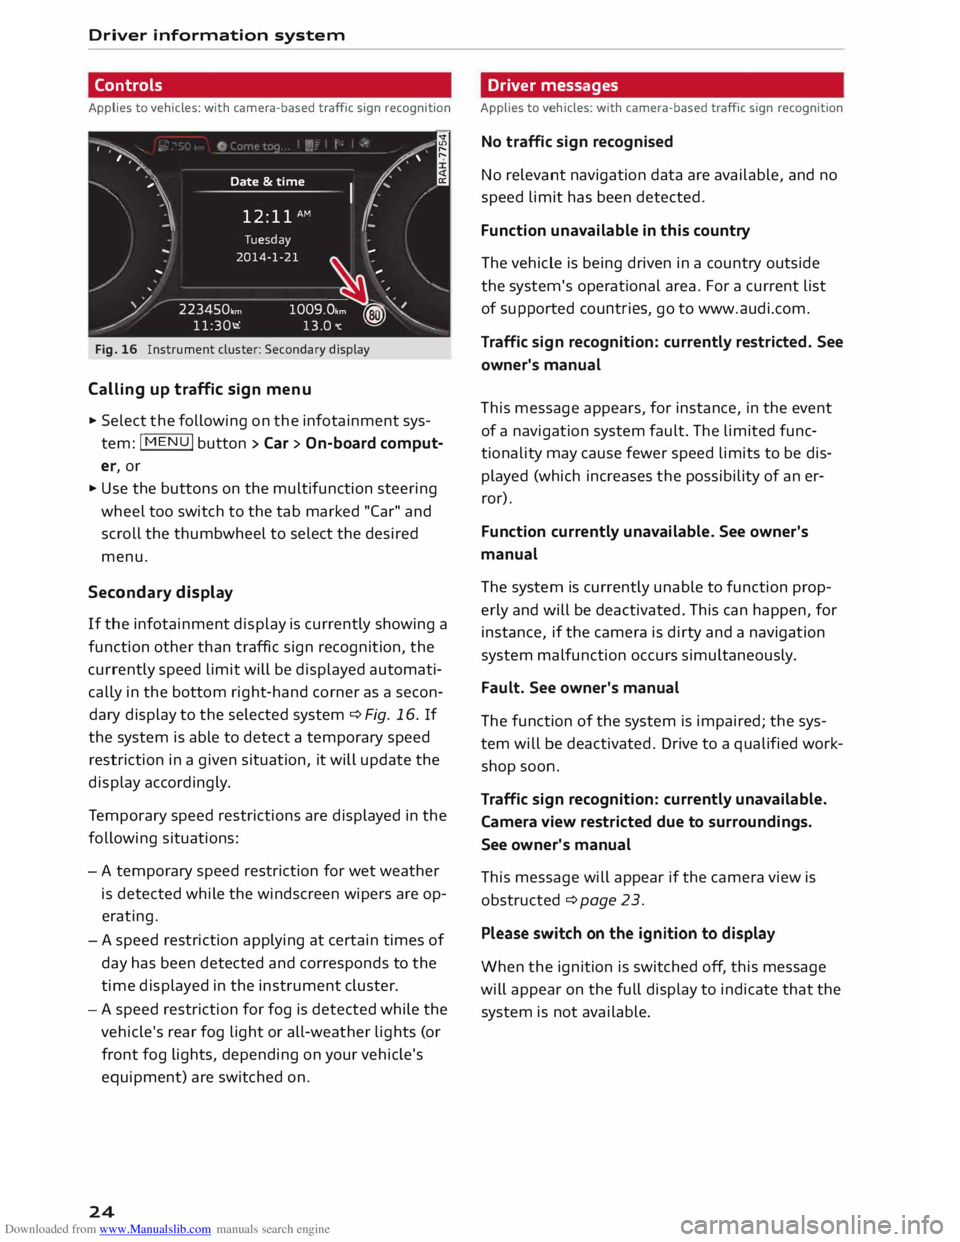
Fig. 16 Instrument cluster: Secondary display
Calling up traffic sign menu
.,. Select the following on the infotainment sys
tem: jMENUj button> Car > On-board comput
er, or
.,. Use the buttons on the multifunction steering
wheel too switch to the tab marked "Car" and
scroll the thumbwheel to select the desired
menu,
Second ary display
If the infotainment display is currently showing a
function other than traffic sign recognition, the
currently speed limit will be displayed automati
cally in the bottom right-hand corner as a secon
dary display to the selected system ¢ Fig, 16, If
the system is able to detect a temporary speed
restriction in a given situation, it will update the
display accordingly.
Te mporary speed restrictions are displayed in the
following situations:
- A temporary speed restriction for wet weather
is detected while the windscreen wipers are op
erating.
- A speed restriction applying at certain times of
day has been detected and corresponds to the
time displayed in the instrument cluster.
- A speed restriction for fog is detected while the
vehicle's rear fog light or all-weather lights (or
front fog lights, depending on your vehicle's
equipment) are switched on.
24 Driver
messages
Applies to vehicles: with camera-based traffic sign recognition
No traffic sign recognised
No relevant navigation data are available, and no
speed limit has been detected.
Function unavailable in this country
The vehicle is being driven in a country outside
the system's operational area. For a current list
of supported countries, go to www.audi.com.
Traffic sign recognition: currently restricted. See
owner's manual
This message appears, for instance, in the event
of a navigation system fault. The limited func
tionality may cause fewer speed limits to be dis
played (which increases the possibility of an er
ror).
Function currently unavailable. See owner's
manual
The system is currently unable to function prop
erly and will be deactivated. This can happen, for
instance, if the camera is dirty and a navigation
system malfunction occurs simultaneously.
Fault. See owner's manual
The function of the system is impaired; the sys
tem will be deactivated. Drive to a qualified work
shop soon.
Traffic sign recognition: currently unavailable.
Camera view restricted due to surroundings.
See owner's manual
This message will appear if the camera view is
obstructed ¢ page 23.
Please switch on the ignition to display
When the ignition is switched off, this message
will appear on the full display to indicate that the
system is not available.
Page 142 of 284
Downloaded from www.Manualslib.com manuals search engine Audi
connect
Detailed information on configuration can be
found on the Internet at www.audi.com/myaudi.
Logging into myAudi in the vehicle
Applies to vehicles: with Audi connect
Before you use some Audi connect services (e.g.
Facebook), you will need to connect your vehicle
to your myAudi account. ""
Sele ct: !ME
NU! button
> Audi connect > right
control button > Login.
"" Enter your myAudi user data. Or: Enter your
eight-character myAudi PIN.
"" Confirm the entry with OK.
You can then use all the Audi connect services.
(©) Note
You will receive your myAudi PIN after setting
up a myAudi account. For more information,
please see www.audi.com/myaudi.
An overview of Audi
connect services
Basic functions
Applies to vehicles: with Audi connect
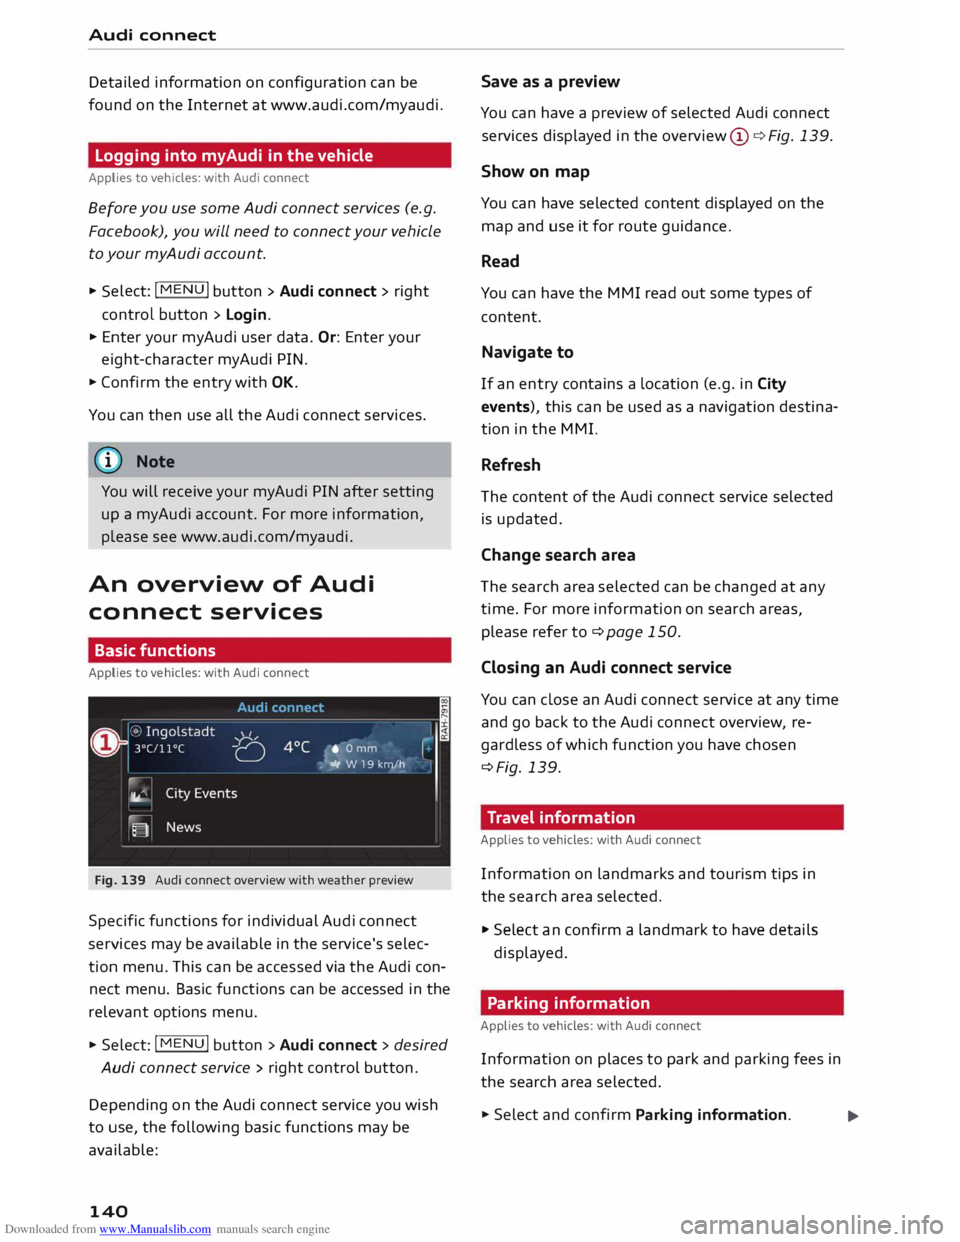
Fig. 139 Audi connect overview with weather preview
Specific functions for individual Audi connect
services may be available in the service's selec
tion menu. This can be accessed via the Audi con
nect menu. Basic functions can be accessed in the
relevant options menu.
"" Select: I MENU
I button > Audi connect > desired
Audi connect service> right control button.
Depe nding on the Audi connect service you wish
to use, the following basic functions may be
available:
140 Save
as a preview
You can have a preview of selected Audi connect
services displayed in the overview @¢ Fig. 139.
Show on map
You can have selected content displayed on the
map and use it for route guidance.
Read
You can have the MMI read out some types of
content.
Navigate to
If an entry contains a Location (e.g. in City
events), this can be used as a navigation destina
tion in the MMI.
Refresh
The content of the Audi connect service selected
is updated.
Change search area
The search area selected can be changed at any
time. For more information on search areas,
please refer to ¢page 150.
Closing an Audi connect service
You can close an Audi connect service at any time
and go back to the Audi connect overview, re
gardless of which function you have chosen
¢Fig. 139.
Travel information
Applies to vehicles: with Audi connect
Information on landmarks and tourism tips in
the search area selected.
"" Select an confirm a landmark to have details
displayed.
Parking information
Applies to vehicles: with Audi connect
Information on places to park and parking fees in
the search area selected.
""Select and confirm Parking information.
...
Page 144 of 284
Downloaded from www.Manualslib.com manuals search engine Audi
connect
templates or text blocks personalised using
myAudi.
- Where are you?: You can enter your current lo
cation and make it visible to others.
{[)) Note
- Further settings (such as Account Settings
and Privacy Settings) cannot be changed in
the MMI. If you wish to change anything in
these menus, please do so on the Facebook
website itself.
- You can only connect one Facebook account
to your myAudi account.
- You can use the Internet to add personal
templates at www.audi.com/myaudi.
- Audi connect enables you to access the
Facebook service. Audi cannot guarantee
that these services will be available indefi
nitely; this is the responsibility of Facebook.
Twitter
Applies to vehicles: with Audi connect
You can access the most important functions of
your Twitter account via the MMI.
Important: You must have a Twitter account and
have connected your myAudi account to Twitter.
.. Select Twitter > left control button > function
desired (e.g. Trends).
You can choose the following categories in the
Twitter menu:
- Tweets: All the tweets you have created are lis
ted.
- Home: All the tweets from people you are fol
lowing are displayed.
- Trends: Topics currently being favoured for dis-
cussion within a particular country.
Depending on the Twitter category chosen, dif
ferent Functions will be available to you:
- New tweet: You can send a new tweet with the
help of ready-made templates or text blocks
personalised using myAudi.
- Refresh:The Twitter function selected is upda
ted.
142 -
Favourite: You can "favourite" a tweet to show
that you like it.
- Retweet: You can repost a tweet to share it
with other people.
@ Note
- Further settings (such as your account, lan
guage, Tweet privacy, and location settings)
cannot be changed in the MMI. If you wish
to change anything in these menus, please
do so on the Twitter website itself.
- You can use the Internet to add personal
templates at www.audi.com/myaudi.
- You can only connect one Twitter account to
your myAudi account.
- Audi connect enables you to access the Twit
ter service. Audi cannot guarantee that
these services will be available indefinitely;
this is the responsibility of Twitter.
Audi connect services in the navigation
system
Applies to vehicles: with navigation system and Audi connect
The following Audi connect services are currently
available:
- Navigation with Google Earth and Google
Street View ¢page 159 .
- Point of interest search (e.g. restaurants): For
planning a route via the MMI control console
¢ page 150 and the speech dialogue system
¢page 116.
- Adding a destination to your MMI via your
myAudi account or Google Maps ¢page 159.
- Online traffic information: Up-to-the-minute
reception of information on accidents, road
works and other incidents ¢page 161.
- myAudi special destinations: Your personal
special destinations can be imported to your
MMI via an SD card.
- Navigation map update service: Navigation
map updates can be imported to your MMI us
ing an SD card.
- The Audi connect service navigation map
update service using an SD card allows you
to find out which software version is
Page 145 of 284
Downloaded from www.Manualslib.com manuals search engine 0
N
co
....
\D L/'l
N
L/'l
.... installed
in your vehicle. You can then check
whether a new version is available at
www.audi.com/myaudi. You can also have
the new navigation data installed by an Audi
dealer (carries additional charges).
- For more information on the myAudi spe
cial destinations and the navigation map
update service, please see the Operating
Manual for Audi connect at www.audi.com/
myaudi.
Audi connect services for the telephone
Applies to vehicles: with Audi connect
The following Audi connect services are currently
available:
- Creating contacts on your PC via your myAudi
account and loading the contacts into the direc
tory of your MMI system ¢page 133.
Audi connect services in the media menu
Applies to vehicles: with Wi-Fi audio player and Audi connect
- Wi-Fi audio player: To access the media centre
of your player (e.g. smartphone) connected via
Wi-Fi ¢page 172. Additionally, you can use
the Audi MMI connect app to access Internet
radio programmes*.
- Online media: With assistance from the Audi
MMI connect app, this function allows you to
access and operate various online media serv
ices using the MMI.
@ Note
Please contact an Audi dealer for more infor
mation on Wi-Fi audio players and for a list of
supported devices.
Further options
Applies to vehicles: with Audi connect
.,. Select: I MENU I button > Audi connect > right
control button.
The following options are available to you in the
overview of the Audi connect services:
- Login: ¢ page 140
- Connection manager: ¢page 187 Audi
connect
- Licence periods: The validity and the time re
maining on your licences is displayed. If the Li
cence expiry warning function is switched on, a
message will be displayed before the licence ex
pires.
Wi-Fi hotspot
Applies to vehicles: with Wi-Fi hotspot
You can use your MMI system as a Wi-Fi hotspot
for connecting to the Internet on up to eight Wi
Fi devices. Small, light Wi-Fi devices that are not
permanently attached to the vehicle must only
be operated from the rear seats while the vehicle
is moving.
Impor tant: The ignition must be switched on.
.,. Select: !TEL!
button > right control button Con-
nection manager.
.,. Select:
right control button > Wi-Fi settings.
You can access the following settings in the Wi-Fi
settings menu:
Wi-Fi mode
The Wi-Fi hotspot is deactivated when the vehicle
leaves the factory. Set the Wi-Fi hotspot to hot
spot before establishing a connection between
your vehicle and your Wi-Fi device.
- hotspot: The MMI's Wi-Fi hotspot is active and
visible to other devices. It is possible to connect
to new Wi-Fi devices.
- hotspot and client: The MMI's Wi-Fi hotspot is
active. An Internet connection to a personal
Wi-Fi hotspot (e.g. smartphone) can be estab
lished. You can search for your personal hot
spot and connect to the MMI using Network
search ¢page 144 ¢page 139.
- off: The MMI system's Wi-Fi hotspot is deacti
vated. It will not be possible to establish an In
ternet connection .
Hotspot settings
The Wi-Fi connection between your vehicle and
the Wi-Fi device (laptop or mobile phone) is en
crypted. Before a connection can be established,
you must enter the following values/settings
when setting up your Wi-Fi device (these values
can be edited as required):
..,.
143
Page 150 of 284
Downloaded from www.Manualslib.com manuals search engine Navigation
deactivation or a malfunction of several sat
ellites.
- Street and town names can change; there
fore the names stored on the MMI can in ex
ceptional cases be different from the actual
names.
- For more information on the navigation
map update service*, please see the Operat
ing Manual
for Audi connect at
www.audi.com/myaudi.
Entering a destination
Search function
Applies to vehicles: with navigation system
You can use the search function to quickly and
conveniently find a destination and use it for
route guidance.
.. Select: I NAV/MAP! button.
.. Push
the rotary pushbutton upwards.
- Enter one or more search terms in the entry
field (I)¢ page 147, Fig. 141.
- Select a destination from the results list and
confirm it.
- Select and confirm Start route guidance.
The route will be displayed as an overview on the
map. Route guidance is already active.
Narrowing the search area
- Select: right control button > Country selec-
tion.
All countries are preselected for the search func
tion at the factory. You can use the Country se
lection function to deselect any countries you do
not require. This speeds up the search and limits
the number of results in the list.
(Qj) Note
- The terms suggested by the MMI depend on
the destinations to which you have recently
driven.
- Up to 50 entries are stored in the list of des
tinations to which you have recently driven.
- For more information on the search func
tion, please refer to ¢ page 114.
148 Loading
last destination
The Last destinations are stored automatically
and can be Loaded again directly as a new desti
nation.
.. Press the I N
AV/ M
AP! button repeatedly until
the Enter destination menu is displayed
¢ page 147, Fig. 141.
The destinations to which you have recently driv
en are displayed in the Enter destination menu
and marked with the symbol ®¢ page 147,
Fig. 141.
- Select a recent destination from the list and
confirm it.
- Select and confirm Start route guidance.
Delete last destinations
- Select a recent destination from the list and
confirm it .
- Select and confirm the right control button >
Delete.
- Select and confirm Delete this recent destina-
tion or Delete all recent destinations.
The destination selected or all the recent destina
tions will be deleted and no longer displayed in
the search function.
Entering an address
Applies to vehicles: with navigation system
.. Press
the I N
A V/
M
AP! button
repeatedly until
the Enter destination menu is displayed
¢ page 147, Fig. 141.
.. Select: left control button > Enter address.
- To enter a destination via the country: Select
and confirm Country. Select a country from the
list and confirm it. Or: Search for a country via
the entry field.
- To enter a destination via the town/post code:
Select and confirm Town/post code. Enter a
town or a post code. Or: Select and confirm a
town from the list.
- Select and confirm additional details for the
destination such as Street, House number or
Centre. Select and confirm Start route guid
ance.
Page 152 of 284
Downloaded from www.Manualslib.com manuals search engine Navigation
@ Private navigation destination
- Select and confirm a postal address or a naviga
tion destination. If you select a navigation des
tination, route guidance is started immediately.
- If you select a postal address, you can check the
address details again.
- You can then select and confirm Start route
guidance.
Further directory functions in the navigation sys
tem can be found on ¢page 153.
((!) Note
- Addresses which you have imported from
your mobile phone into the MMI can also be
used as navigation destinations.
- If a directory contact is greyed out, no navi
gation destination/postal address has yet
been added for the contact.
Entering a special destination
Applies to vehicles: with navigation system
Navigation • Special destinations
Search area (In imm ediate vicinity)
Find entry
Select category
[:J myAudi special destinations
B1 Petrol station
P Parking space
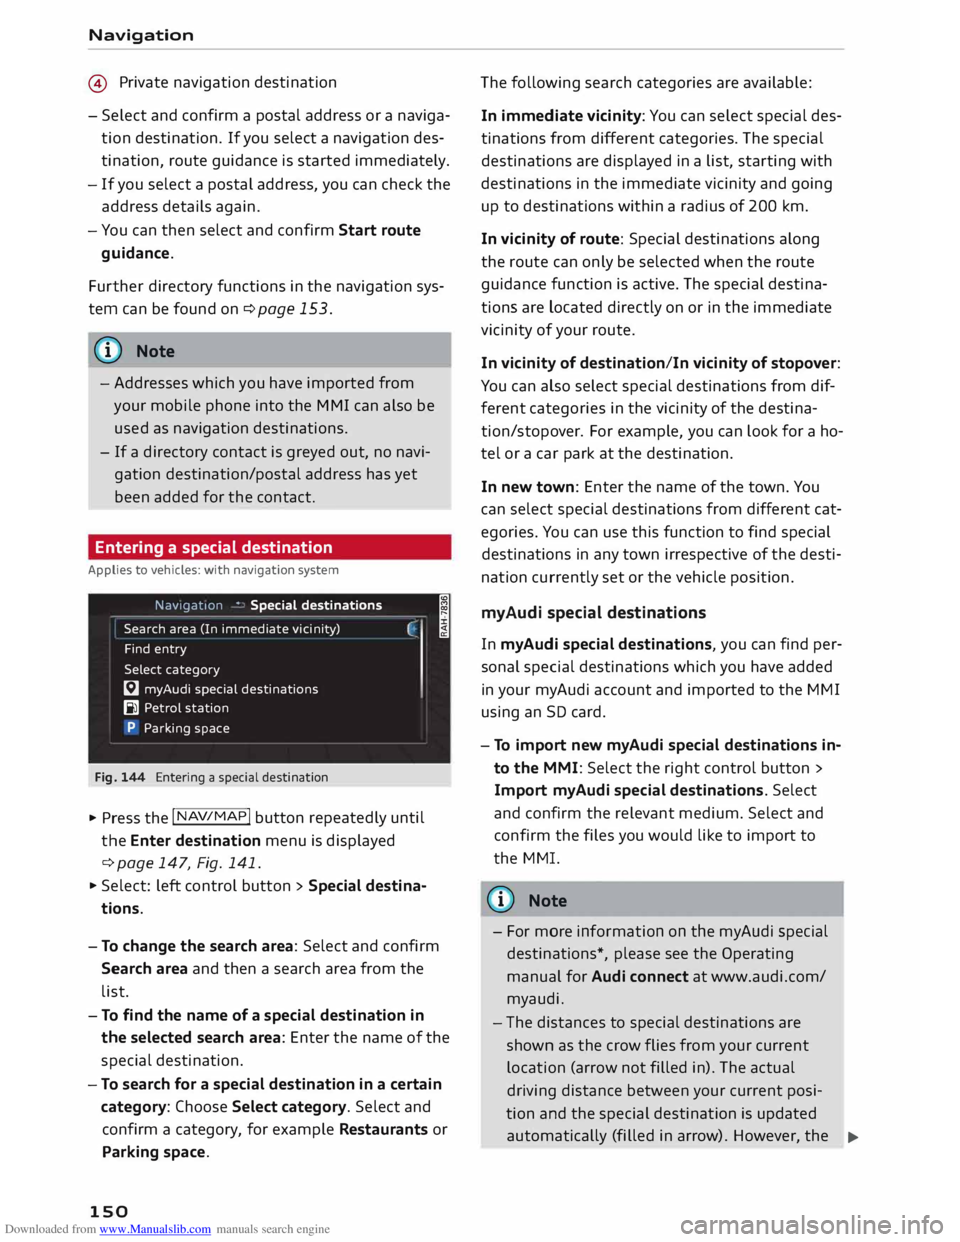
Fig. 144 Entering a special destination
.,. Press the I NAV/MAP!
button repeatedly until
the Enter destination menu is displayed
¢ page 147, Fig. 141 .
.,. Select: left control button > Special destina
tions.
- To change the search area: Select and confirm
Search area and then a search area from the
list. I
- To find the name of a special destination in
the selected search area: Enter the name of the
special destination.
- To search for a special destination in a certain
category: Choose Select category. Select and
confirm a category, for example Restaurants or
Parking space.
150 The
following search categories are available:
In immediate vicinity: You can select special des
tinations from different categories. The special
destinations are displayed in a list, starting with
destinations in the immediate vicinity and going
up to destinations within a radius of 200 km.
In vicinity of route: Special destinations along
the route can only be selected when the route
guidance function is active. The special destina
tions are located directly on or in the immediate
vicinity of your route.
In vicinity of destination/In vicinity of stopover:
You can also select special destinations from dif
ferent categories in the vicinity of the destina
tion/stopo ver. For example, you can look for a ho
tel or a car park at the destination.
In new town: Enter the name of the town. You
can select special destinations from different cat
egories. You can use this function to find special
destinations in any town irrespective of the desti
nation currently set or the vehicle position.
myAudi special destinations
In myAudi special destinations, you can find per
sonal special destinations which you have added
in your myAudi account and imported to the MMI
using an SD card.
- To import new myAudi special destinations in
to the MMI: Select the right control button >
Import myAudi special destinations. Select
and confirm the relevant medium. Select and
confirm the files you would like to import to
the MMI.
{(!) Note
- For more information on the myAudi special
destinations*, please see the Operating
manual for Audi connect at www.audi.com/
myaudi.
- The distances to special destinations are
shown as the crow flies from your current
location (arrow not filled in). The actual
driving distance between your current posi-
tion and the special destination is updated
automatically (filled in arrow). However, the
�
Page 156 of 284
Downloaded from www.Manualslib.com manuals search engine Navigation
Always display alternative routes
When this function is switched on, up to three
route suggestions are displayed on the map
¢page 155.
Filling station message
When the fuel gauge is in the reserve zone, a
message will appear when this function is on.
Confirm this message, and a list of nearby filling
stations will be displayed. When you select one
of the filling stations, the route to this station
will be calculated based on the current position
of your car.
Delete myAudi special destinations*
Destinations that you import from your myAudi
account to your MMI are automatically saved.
You can delete them individually or all at once.
Presentation mode
Use the Presentation mode to plan and "drive" a
journey effectively without the need to move the
vehicle. You can choose your start Location man
ually (Select start location) if, for example, you
would like to calculate a route starting from a dif
ferent position than the current position of the
vehicle. Start the Presentation mode to simulate
a route guidance.
Input help
When this function is switched on�, you can re
ceive additional help when entering a destination
using the search function ¢page 148. It allows
you to have list entries transferred to the entry
line. Input help is activated when the vehicle
Leaves the factory.
Route criteria
Applies to vehicles: with navigation system
.,.. Press the I NAV/MAP!
button repeatedly until
the Enter destination menu is displayed
c> page 147, Fig. 141.
.,.. Select: right control button > Route criteria.
Traffic avoidance
- automatic: The route is automatically opti
mised using the current traffic information. If
154 the
MMI system does not display a detour route
although the automatic traffic avoidance func
tion is on and a traffic jam has been reported on
the planned route, this is because the estima
ted time required for the detour is Longer than
the delay on the route with the traffic jam.
- manual: The MMI indicates that a better route
is available and informs you of the potential
time saving ¢page 160. You can then choose
which route you would like to use.
- off: The route is not updated automatically. No
optimised route is suggested.
Motorways/Vignette roads/Toll roads/Ferries/
Motorail: If you do not wish for the navigation
system to include motorways, vignette/toll
roads, ferries or car trains when calculating the
route, you can select the option avoid. You can al
so use the Vignette roads option to set the coun
tries for which you possess a vignette.
Time restricted
- avoid: Roads that are closed at certain times of
the day (e.g. pedestrian zones) are excluded
from the route calculation.
- automatic: The MMI system determines wheth
er the restricted road can be included in the
route calculation based on the time tables stor
ed in the navigation data.
- with: Roads that are closed at certain times of
the day are included in the route calculation.
Seasonally restricted
- avoid: Roads that are closed seasonally (e.g.
mountain passes) are excluded from the route
calculation.
- automatic: The MMI system determines wheth
er the seasonally restricted road can be inclu
ded in the route calculation based on the time
tables stored in the navigation data.
- with: Roads that are closed seasonally are in
cluded in the route calculation.
Voice guidance
Applies to vehicles: with navigation system
.,.. Press the I NAV/MAP!
button repeatedly until
the Enter destination menu is displayed
¢page 147, Fig.141.
Page 161 of 284
Downloaded from www.Manualslib.com manuals search engine 0
N
co
....
\D L/'l
N
L/'l
.... Google
Earth map
display
Applies to vehicles: with navigation system and Audi connect
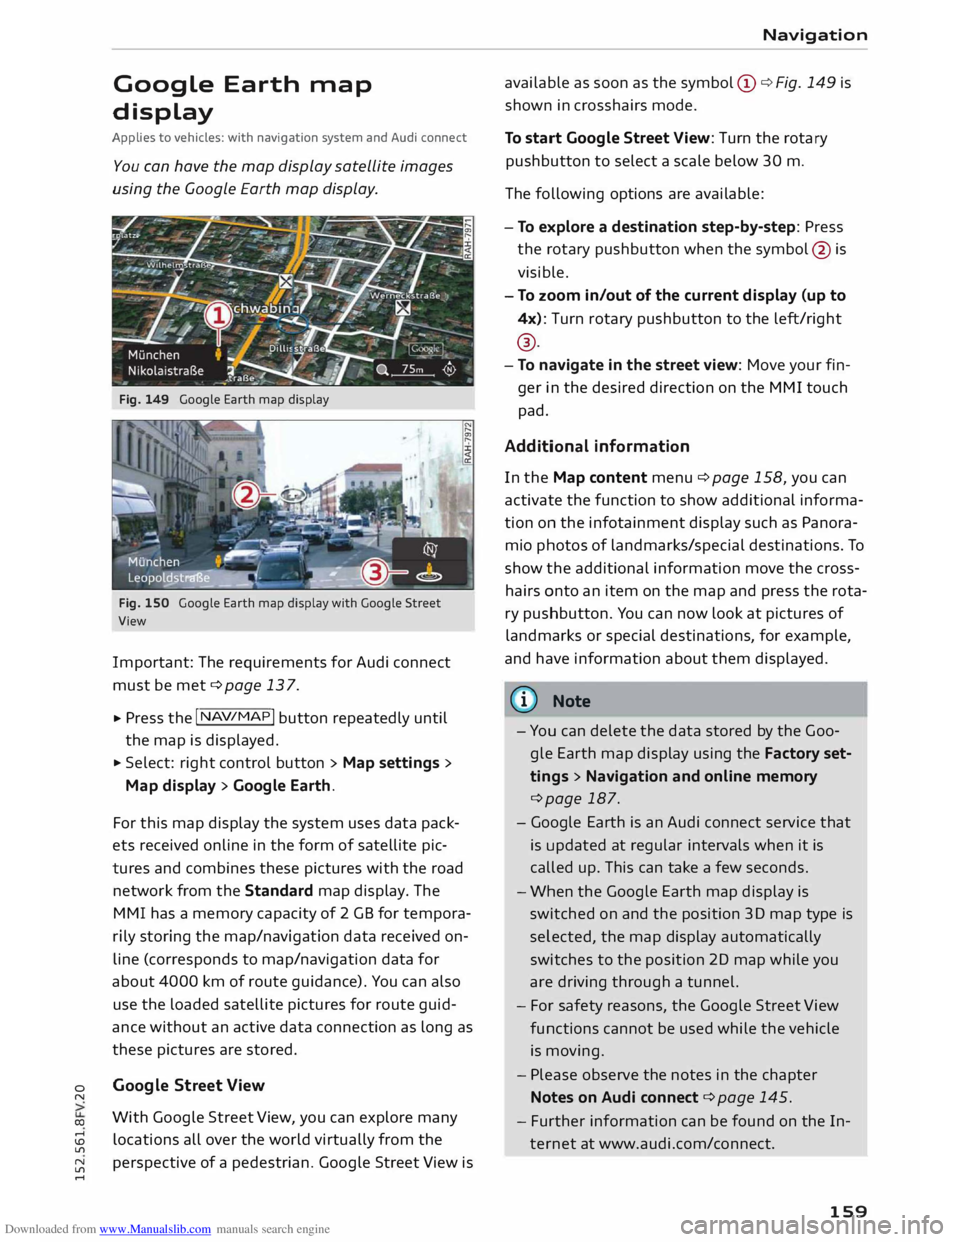
You can have the map display satellite images
using the Google Earth map display.
Fig. 149 Google Earth map display
Fig. 150 Google Earth map display with Google Street
View
Important: The requirements for Audi connect
must be met ¢page 137.
... Press
the I NAV/MAP!
button repeatedly until
the map is displayed.
... Select: right control button > Map settings>
Map display> Google Earth.
For this map display the system uses data pack
ets received on line in the form of satellite pic
tures and combines these pictures with the road
network from the Standard map display. The
MMI has a memory capacity of 2 GB for tempora
rily storing the map/navigation data received on
line (corresponds to map/navigation data for
about 4000 km of route guidance). You can also
use the loaded satellite pictures for route guid
ance without an active data connection as long as
these pictures are stored.
Google Street View
With Google Street View, you can explore many
locations all over the world virtually from the
perspective of a pedestrian. Google Street View is Navigation
available as soon as the symbol (D ¢ Fig. 149 is
shown in crosshairs mode.
To start Google Street View: Turn the rotary
pushbutton to select a scale below 30 m.
The following options are available:
- To explore a destination step-by-step: Press
the rotary pushbutton when the symbol @is
visible.
- To zoom in/out of the current display {up to
4x): Turn rotary pushbutton to the left/right
® ·
- To navigate in the street view: Move your fin-
ger in the desired direction on the MMI touch
pad.
Additional information
In the Map content menu¢ page 158, you can
activate the function to show additional informa
tion on the infotainment display such as Panora
mic photos of landmarks/special destinations. To
show the additional information move the cross
hairs onto an item on the map and press the rota
ry pushbutton. You can now look at pictures of
landmarks or special destinations, for example,
and have information about them displayed.
@ Note
- You can delete the data stored by the Goo
gle Earth map display using the Factory set
tings > Navigation and online memory
¢page 187.
- Google Earth is an Audi connect service that
is updated at regular intervals when it is
called up. This can take a few seconds.
- When the Google Earth map display is
switched on and the position 3D map type is
selected, the map display automatically
switches to the position 2D map while you
are driving through a tunnel.
- For safety reasons, the Google Street View
functions cannot be used while the vehicle
is moving.
- Please observe the notes in the chapter
Notes on Audi connect ¢page 145.
- Further information can be found on the In
ternet at www.audi.com/connect.
159
Page 188 of 284
Downloaded from www.Manualslib.com manuals search engine System
settings
System settings
Setting the date and
time
The time can be set manually or via CPS.
.,. Select: I MENU I button >Settings > left control
button > MMI settings > Date & time.
Set automatically
The time and date are automatically updated
when this function is switched on.
Time The Time can be set manually. The Set automati
cally function must be deactivated to do this.
Date
The Date can be set manually. The Set automati
cally function must be deactivated to do this.
Time zone
When selecting the correct time zone, a list of
corresponding countries is displayed as an exam
ple.
Automatic time zone*
When the automatic time zone option is activa
ted, the time is automatically adjusted to the rel
evant time zone.
Time format
When this option is set to 24h, for example
13:00 will be displayed as the time. When it is
set to AM/PM, for example 1:00 PM will be dis
played.
Date format
When this option is set to TT. MM.YYYY, for ex
ample 31.12.2013 will be displayed as the date.
When it is set to MM/DD /JJJJ, for example
12/31/ 2013 will be displayed. When it is set to
JJJ- MM-DD , for example 2013-12-31 will be dis
played.
MMI settings
.,. Select: I MENU I button >Settings > left control
button > MMI settings.
186 Language
You can change the language of the display along
with the language of the navigation cues* and
the speech dialogue system*.
The number of languages available depends on
the market .
Meas urem ent units
The following measurement units are available:
- Speed (km/h or mph)
- Dist ance (km or miles)
- Temperature (0
( or °F)
- Consumption (ltr/100 km, mpg (US), mpg (UK)
or km/ltr)
- Cap acity (litres, gallons)
Usage tips
Your MMI displays usage tips when this function
is switched on�. They will appear less often as
time goes by. You can switch the usage tips off at
any time.
Speech dialogue system*
Command display: The display of possible com
mands during a speech dialogue can be switched
on/off.
Short dialogue: This option can be switched on/
off. When it is activated, the spoken cues played
by the system are shortened.
Speech dialogue system volume: Turn the rotary
pushbutton to adjust the volume of the spoken
cues.
Individual speech training (only possible when
the vehicle is stationary): You can use the individ
ual speech training to adapt the speech dialogue
system to your voice or pronunciation so that the
speech dialogue system can then better recog
nise what you are saying. The individual speech
training prompts you to repeat 20 spoken phra
ses that consist of certain commands and blocks
of digits. If you would like to delete the stored
speech training setup, you can use the function
Reset speech training.
...,