check engine light AUDI TT COUPE 2017 User Guide
[x] Cancel search | Manufacturer: AUDI, Model Year: 2017, Model line: TT COUPE, Model: AUDI TT COUPE 2017Pages: 322, PDF Size: 79.73 MB
Page 249 of 322
Using the proper engine oil is important for the
functionality and s ervice life of the engine. Your
engine was factory-filled with a high -quality oil
which can usually be used throughout the entire
year .
Note
Your Limited New Vehicle Warranty does not
cover damage or malfunctions due to failure
to follow recommended maintenance and use
requirements as set forth in the Audi Owner's Manual and Warranty & Maintenance booklet .
- Use only a high quality engine oil that ex-
pressly complies with the Aud i oil quality
standard specified for your vehicle's engine.
Using any o ther oil can cause serious engine
damage.
- Do not mix any lubricants o r other additives
into the engine oil. Doing so can cause en
gine damage.
@ Tips
If you need to add oil and there is none availa
ble that meets the Audi o il quality standard
your eng ine requ ires, you may add a total of
no more than 0 .5 qt (0,5 l) of a h igh-quali ty
"synthet ic"oil that meets the following speci
fications.
- ACEA A3 or API SM with a v iscosity grade o f
SAE OW-30, SAE SW -30 or SAE SW-40.
- Fo r more information abou t engine o il t ha t
has been approved for your vehicle, please
contact either your authorized Audi dea ler
or Audi Custome r Relat ions at
1 (800) 822-2834 or visit our web site at
www.audiusa.com or www.audican ada.ca .
Engine oil consumption
T he engine in your vehicle depends on an ade
qua te amoun t of oil to lubricate and cool all of
i t s moving par ts.
In order to provide effective lub rication and coo l
ing of in te rnal engine components, a ll internal
~ combustion engines consume a cer tain amount
;:::: of oil. Oil consumption varies from engine to en-
" ~ gine and may change sign ificantly over the life of 0
~ the eng ine . Typically, eng ines with a spec ified c:o
Ch eck ing and Filling
break-in period (see ¢ page 55) consume more
oi l during th e break-in period than they consume
after oil consumption has stabilized.
Under normal cond itions, the rate of oil con
sumption depends on the q uality and viscos ity o f
the oil , the RPM (revolutions per minut e) at
which the engine is operated, the amb ient tem
perature and road condit ions. Further factors are
the amount of oil dilution from w ater condensa
tion or fuel resid ue and the oxidation level of the
o il. As any engine is subject to wear as mileage
builds up, the oi l consumption may increase ove r
t ime unt il repla cement of worn components may
become necessary.
With al l these variables coming into play, no
standard rate of o il consumption can be estab
l ished or spec ified . T he re is no alte rnative to reg
u la r and fre quent chec king of the o il level , see
Note .
If the yellow engine oil level warning symbo l II
in the instrument cluster lights up , you sho uld
check the o il level as soon as possible
¢
page 248 . Top off the o il at your earliest con
venience ¢
page 248.
A WARNING
Before you check anything in the engine com
partment, always read and heed all WARN
INGS¢
page 244 .
(D Note
Driving with an insufficient oil level is likely to
cause severe damage to the engine.
(D Tips
- The oil pressure warning display. is not
an indicator of the oil le vel. Do not rely on
it . Instead, check the oil level in your en·
gine at regular intervals , preferabl y each
time you refuel, and always befo re going
on a long trip.
- If you have the impression your engine con
sumes excessive amounts of oil, we recom
mend that you consult an author ized Audi
dea ler to have the cause of your concern
prope rly diagnosed . Keep in mind that the .,,.
247
Page 252 of 322
Check ing and F illing
Cooling system
Coolant
The engine coo ling system is filled with a mixture
of pur ified wate r and coolan t addit ive at the fa c
t ory . T his coo la nt must not be not changed .
The coolant leve l is monito red throug h the . in
d icator light
c::> page 12. Howeve r, we do recom
mend occasionally chec king the coo la nt level
manually.
If you must add coolant, use a m ixt ure of wa ter
a nd coo lant add it ive. Mixing the coolant additive
with d istilled water is recommended.
Coolant additive
The coolant additive is made of ant i-freezing and
corros ion protection agents. Only use the fo llow
ing coolant add it ives. These addit ives may be
m ixed w it h each other.
Coolant additive Specification
G13
TL 774 J
G12++ TL 774 G
The amount of coo lant add itive that needs to be
mixed wit h water depends on the climate where
the vehicle will be operated . If the coolant addi
tive percentage is too low, the coolant can free ze
and damage the engine.
Coolant addi- Freeze protec-
tive tion
Warm regions min . 40%, m in. -13 °F
max . 45% (
- 25 °C)
Co ld regions min. 50%, max. -40 °F
max. 55% (-40 °C)
CJ) Note
-Befo re the start of winter, have your author
i zed Audi dealer or authorized A udi Service
Fac ility check if the coolant additive in yo ur
vehicle matc hes the percentage approp riate
for the climate . Th is is especially important
whe n driving in co lde r clima tes.
- If the approp riate coolant additive is not
available in an emergency, do no t add any
other addi tive . You cou ld damage the en-
250
gine . If this h appens, on ly use wa ter and re
store the correct m ixt ure ratio with t he
specified coo lant ad ditive as soon as poss i
ble.
- Only refill w ith new coolant .
- Radiator sealant mus t not be mixed wi th
the coolant .
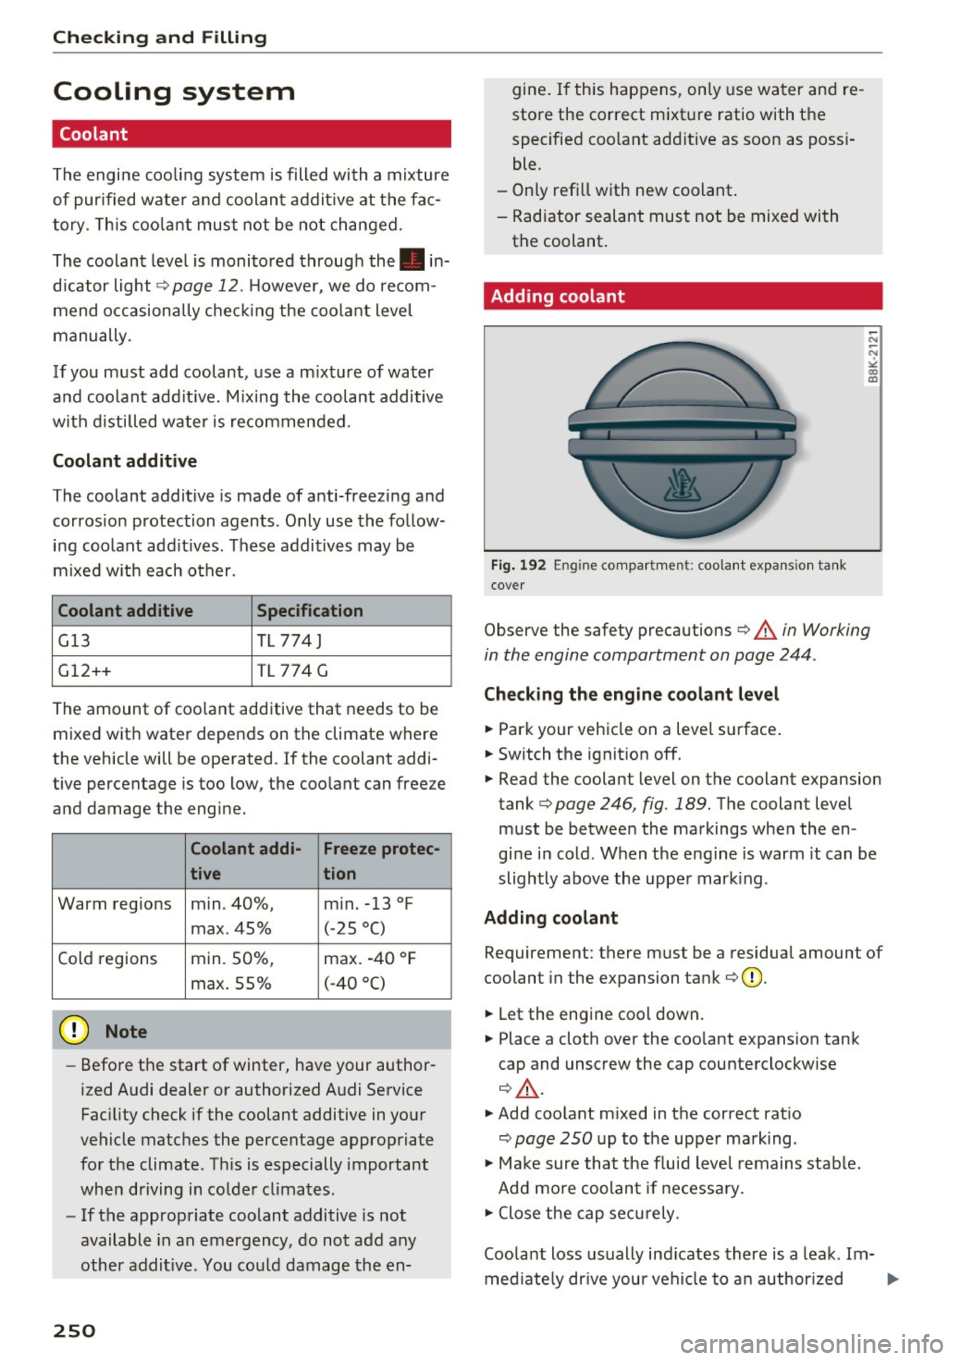
Adding coolant
Fig. 192 En gine co mpar tm ent: coo la nt expans io n ta nk
cove r
-"' -"' •
"" co a,
Observe the safety precautions c::> A in Working
in the engine compartment on page 244 .
Checking the eng ine coolant level
.,. Park your veh icle on a level s urface .
.,. Switch the ignit ion off.
.,. Read the coolant level on the coolant expansion
tank
c::> page 246, fig. 189. The coolant leve l
must be betwee n the markings when the en
gi ne i n cold . When t he e ng ine is warm it can be
slightly above the uppe r mar king .
Adding coolant
Requirement: there must be a residual amount of
coolant in the expansion ta nk
c::> (D .
.,. Let the engine coo l down.
.,. Place a clot h over the coolant expansion tan k
cap and unscrew the cap counterclockw ise
¢ .&, .
.,. Add coo lant m ixed in the cor rect rat io
c;, page 250 up to t he up per ma rk ing .
.,. Make sure that the fluid level remains stab le.
Add mo re coolan t if necess ary.
.,. Close the cap sec urely .
Coo lant loss usually ind icates there is a lea k. Im-
med iate ly dr ive you r ve hicl e to a n author ized .,.
Page 253 of 322
CD
CD
.... N
" N .... 0
0
Ill co
Audi dealer or authorized Audi Service Facility
and have the cooling system inspected. If the
cooling system is not leaking, a loss can come
from the coolant boiling through overheating
and being pushed out of the cooling system.
A WARNING
The cooling system is pressurized and can be
come very hot . To reduce the risk of burns
from hot coolant:
- Do not open the coolant expansion tank cap when the eng ine is hot. This increases the
risk of burns.
- Stop the engine and allow it to cool.
- Protect your face, hands and arms from es-
caping coolant and steam by covering the
coolant tank cap with a large, thick cloth .
- Turn the coolant tank cap counterclockwise
slowly and keep light pressure on the cap .
- To reduce the risk of burns, do not allow any
antifreeze or coolant to drip onto the ex
haust system or hot engine components .
The ethylene g lycol in engine coolant can
catch fire under certain circumstances.
- The coolant add itive and the coolant can be
dangerous to your health. For this reason,
keep the coolant in the original container
and away from children. There is a risk of
poisoning.
- When working in the engine compartment,
remember that the radiator fan can sw itch
on even if the ignition is switched off, which
increases the risk of injury.
(D Note
Do not add coolant if the expansion tank is
empty . Air could enter the cooling system and
damage the engine. If this is the case, do not
cont inue driving. See an authorized Audi deal
er or authorized Audi Service Facility for assis
tance.
Checking and Filling
Brake fluid
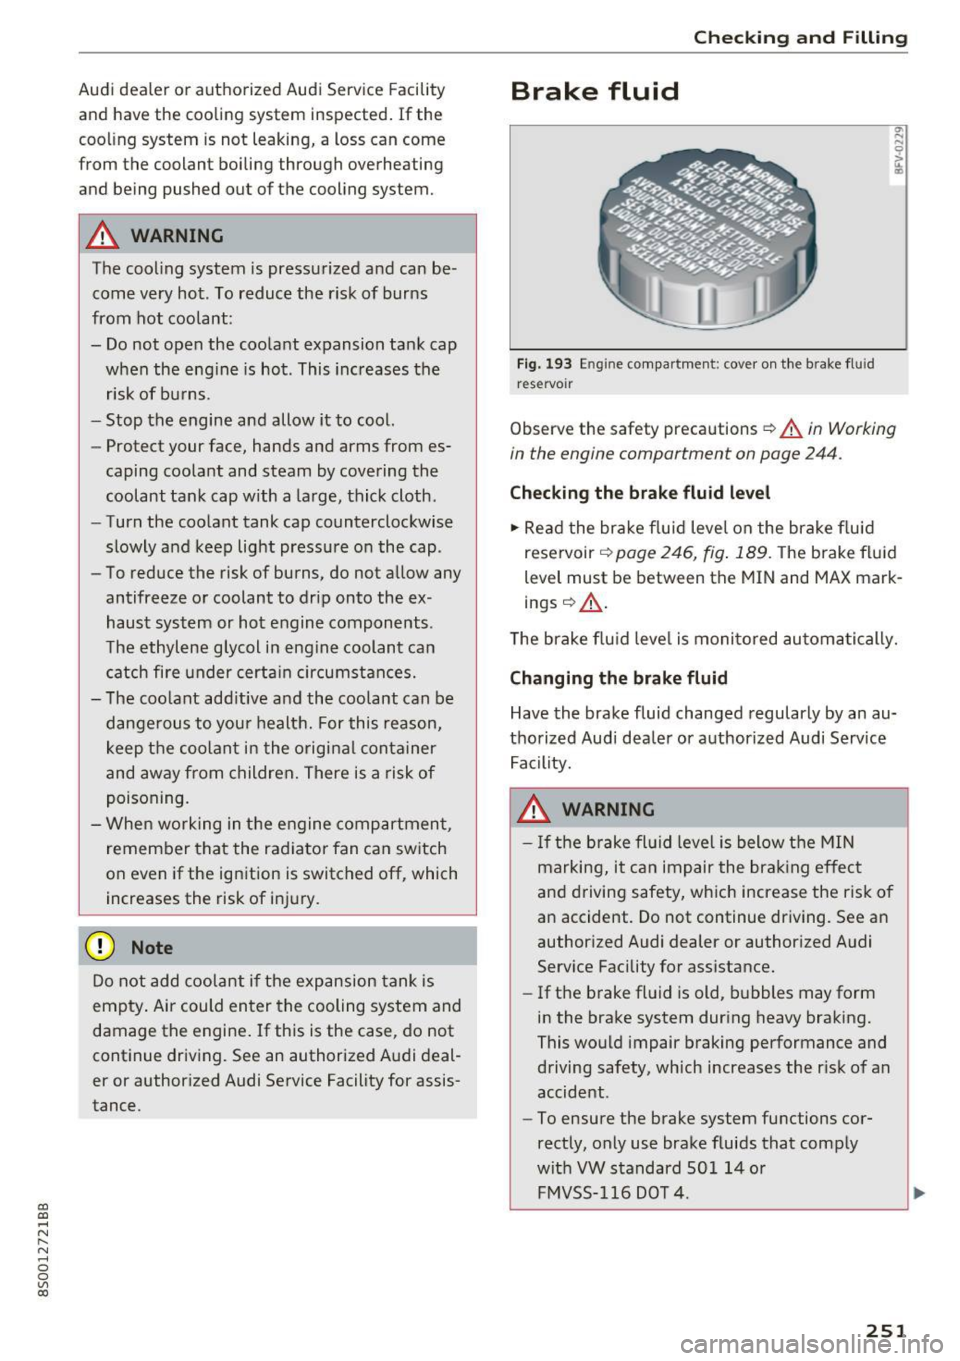
Fig. 193 En gi ne compartment: cover on the b rake fluid
rese rvoir
Observe the safety precautions QA in Working
in the engine compartment on page 244 .
Checking the brake fluid level
.,. Read the brake f luid level on the brake fluid
reservoir
Q page 246, fig . 189. The brake fluid
level must be between the MIN and MAX mark
ings
Q A .
The brake fluid level is monitored automatically.
Changing the brake fluid
Have the brake fluid changed regularly by an au
thorized Audi dealer or authorized Audi Service Facility.
.&_ WARNING
- If the brake fluid level is below the MIN
marking, it can impair the brak ing effect
and driving safety, which increase the risk of
an accident. Do not continue driving. See an
authorized Audi dealer or authorized Audi
Serv ice Facility for assistance.
- If the brake fluid is old, bubbles may form
in the brake system during heavy braking.
This would impair braking performance and
driving safety, which increases the risk of an
accident .
- To ensure the brake system functions cor
rectly, only use brake fluids that comply
with VW standard 501 14 or
FMVSS-116 DOT 4.
251
Page 255 of 322
CD
CD
.... N
" N ...... 0
0
Ill co
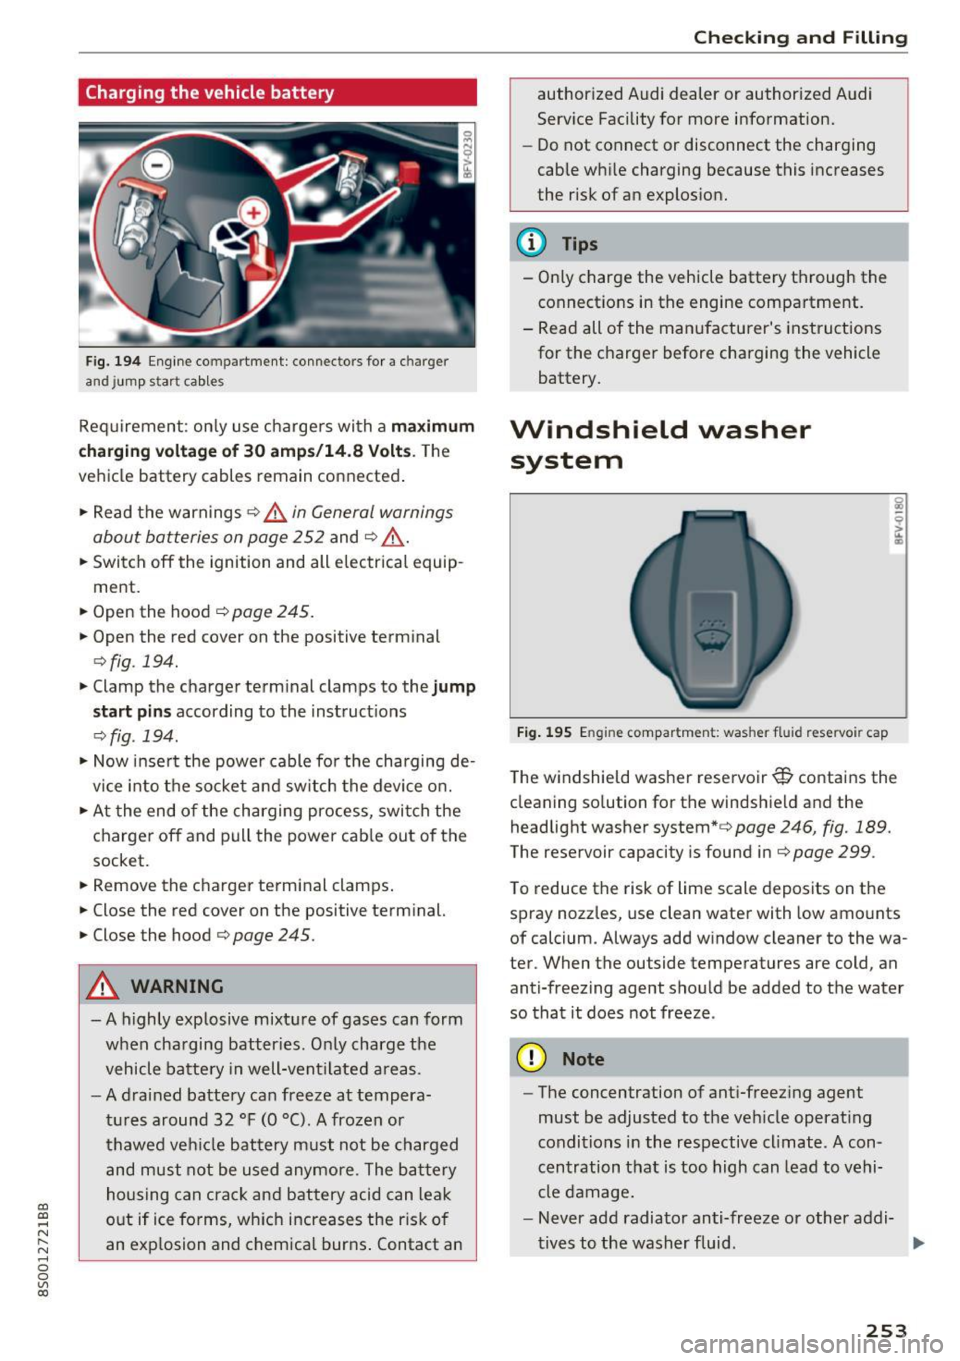
Charging the vehicle battery
Fig. 194 Engine compartment: connectors for a charger
and jump start cables
Requirement: only use chargers with a maximum
charging voltage of 30 amps/14.8 Volts.
The
vehicle battery cables remain connected .
.,. Read the warn ings¢
& in General warnings
about batteries on page 252
and ¢ ,& .
.,. Switch off the ignition and all electrical equip
ment .
.,. Open the hood¢
page 245 .
.,. Open the red cover on the positive terminal
¢fig. 194 .
.,. Clamp the charger terminal clamps to the jump
start pins
according to the instructions
¢fig. 194 .
.,. Now insert the power cable for the charging de
vice into the socket and sw itch the device on.
.,. At the end of the charging process, switch the
charger off and pull the power cable out of the
socket .
.,. Remove the charger terminal clamps.
.,. Close the red cover on the positive terminal.
.,. Close the hood¢
page 245.
A WARNING
-A highly explosive mixture of gases can form
when charging batteries. Only charge the
vehicle battery in well-ventilated areas.
- A drained battery can freeze at tempera
tures around 32 °F (0 °C). A frozen or
thawed vehicle battery must not be charged
and must not be used anymore. The battery
housing can crack and battery acid can leak
out if ice forms, which increases the risk of
an explosion and chemical burns . Contact an
Checking and Filling
authorized Audi dealer or authorized Audi
Service Facility for more information.
- Do not connect or disconnect the charging
cable while charging because this increases
the risk of an explosion.
@ Tips
- Only charge the vehicle battery through the
connections in the engine compartment.
- Read all of the manufacturer's instructions
for the charger before charging the vehicle
battery.
Windshield washer system
Fig. 19S Engine compartment: washer fluid reservoir cap
The windshield washer reservoir{!} contains the
cleaning solution for the windshield and the
headlight washer system*¢
page 246, fig. 189.
The reservoir capacity is found in ¢ page 299.
To reduce the risk of lime scale deposits on the
spray nozzles, use clean water with low amounts
of calcium. Always add window cleaner to the wa
ter. When the outside temperatures are cold, an
ant i-freezing agent should be added to the water
so that it does not freeze.
(D Note
-The concentration of anti-freezing agent
must be adjusted to the vehicle operating
conditions in the respective cl imate. A con
centration that is too high can lead to vehi-
cle damage.
- Never add radiator anti-freeze or other addi-
tives to the washer fluid. .,.
253
Page 291 of 322
CD
CD
.... N
" N ...... 0
0
Ill co
Fuses and bulbs
Electrical fuses
Replacing fuses
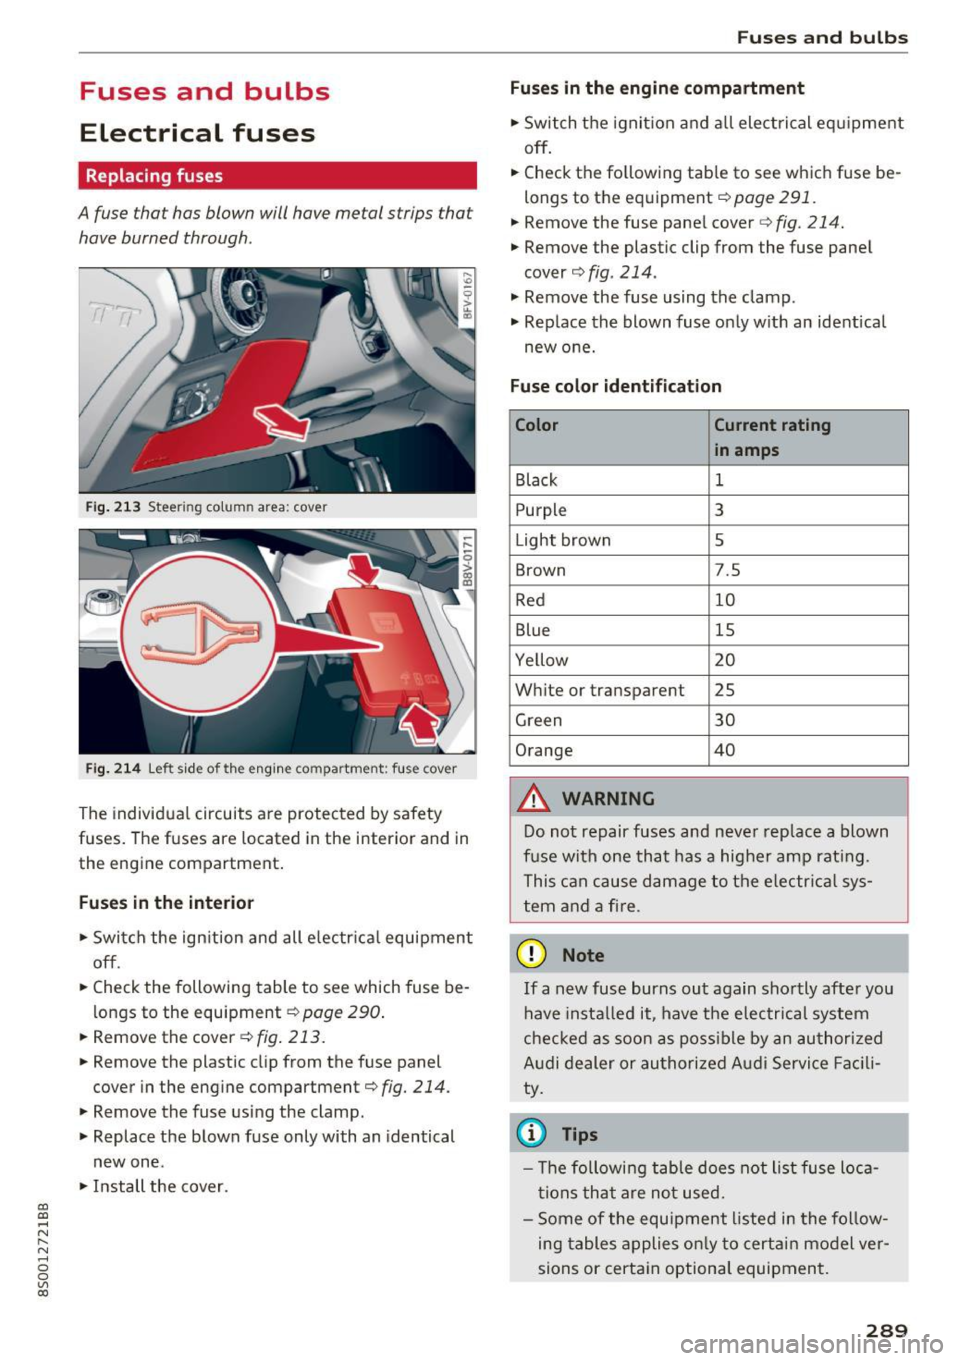
A fuse that has blown will have metal strips tha t
have burned through .
Fig. 213 Steer ing colu mn area : cove r
Fig. 214 Left side of the engin e com partment : fus e cover
The individual circuits are protected by safety
fuses. The fuses are located in the interior and in
the engine compartment.
Fuses in the interior
"S witch the ignition and all electrical equipment
off .
"C heck the following table to see which fuse be
longs to the equipment ¢
page 290.
"R emove the cover ¢
fig. 213.
"Remove the plastic clip from the fuse panel
cover in the engine compartment¢
fig. 214.
"Remove the fuse using the clamp.
" Replace the blown fuse only with an identical
new one .
"Install the cover.
Fuses and bulbs
Fuses in the engine compartment
"S witch the ignition and all electrical equipment
off .
.. Check the following table to see which fuse be
longs to the equipment¢
page 291.
.. Remove the fuse panel cover¢ fig. 214.
" Remove the plastic clip from the fuse panel
cover
¢ fig. 214 .
" Remove the fuse using the clamp .
.. Rep lace the blown fuse only with an identical
new one.
Fuse color identification
Color Current rating
in amps
Black
1
Purpl e 3
Light brown 5
Brown 7.5
Red 10
Blue 15
Ye llow 20
White or transparent 25
Green 30
Orange 40
&, WARNING
-
Do not repair fuses and never replace a blown
fuse with one that has a higher amp rating.
This can cause damage to the electrica l sys
tem and a fire .
(D Note
If a new fuse burns out again shortly after you
have instal led it, have the electrical system
checked as soon as possible by an authorized
Audi dealer or authorized Audi Service Facili
ty.
© Tips
- Th e following table does not list fuse loca
tions that are not used.
- Some of the equipment listed in the follow
ing tables applies only to certain model ver
sions or certain optional equipment.
289
Page 294 of 322
Emergency situations
Emergency situations
General
This chapter is intended for trained emergency crews and working personnel who have the nec
essary tools and equipment to perform these
operations.
Starting by pushing or
towing
CD Note
Vehicles with an automatic transmission can
not be started by pushing or towing.
Starting with jumper
cables
If necessary, the engine con be started by con
necting it to the battery of another vehicle .
If the engine should fail to start because of a dis
charged or weak battery, the battery can be con
nected to the battery of
another vehicle, using a
pair of jumper cables to start the engine.
Jumper cables
Use only jumper cables of sufficiently large cross
section
to carry the starter current safely. Refer
to the manufacturer's specifications.
Use only jumper cables with
insulated terminal
clamps which are distinctly marked :
plus(+) cable in most cases colored red
minus(-) cable
in most cases colored black .
A WARNING
Batteries contain electricity, acid, and gas.
Any of these can cause very serious or fatal in
jury. Follow the instructions below for safe hand Ling of your vehicle's battery .
-Always shield your eyes and avoid leaning
over the battery whenever possible.
-A discharged battery can freeze at tempera
tures just below 32 °F (0 °C). Before con
necting a jumper cable, you must thaw the
292
frozen battery completely, otherwise it could explode .
- Do not allow battery acid to contact eyes or
skin. Flush any contacted area with water immediately.
- Improper use of a booster battery to start a
vehicle may cause an explosion.
- Vehicle batteries generate explosive gases.
Keep sparks, flame and lighted cigarettes
away from batteries.
- Do not try to jump start any vehicle with a
low acid level in the battery .
- The voltage of the booster battery must also
have a 12-volt rating. The capacity (Ah) of
the booster battery should not be lower
than that of the discharged battery. Use of
batteries of different voltage or substantial
ly different "Ah" rating may cause an explo
sion and personal injury .
- Never charge a frozen battery. Gas trapped in the ice may cause an explosion .
- Never charge or use a battery that has been
frozen . The battery case may have be weak
ened .
- Use of batteries of different voltage or sub stantially different capacity (Ah) rating may
cause an explosion and injury. The capacity
(Ah) of the booster battery should not be
lower than that of the discharged battery.
- Before you check anything in the engine
compartment, always read and heed all
WARNINGS
~page 244.
CD Note
-Applying a higher voltage booster battery
will cause expensive damage to sensitive
electronic components, such as control
units, relays, radio, etc.
- There must be no electrical contact between
the vehicles as otherwise current could al
ready start to flow as soon as the positive
(+) terminals are connected.
@ Tips
The discharged battery must be properly con-
nected to the vehicle's electrical system. .,..
Page 295 of 322
CD
CD
.... N
" N ...... 0
0
Ill co
When jump starting or charging the battery,
never connect the negative ground cable to
the battery negative post because the battery
manager system must be able to detect the
battery's state of charge. Always connect the
negative ground cable to the negat ive ground
post of the battery manager control unit .
Use of jumper cables
Make sure to connect the jumper cable clamps in
exactly the order described below!
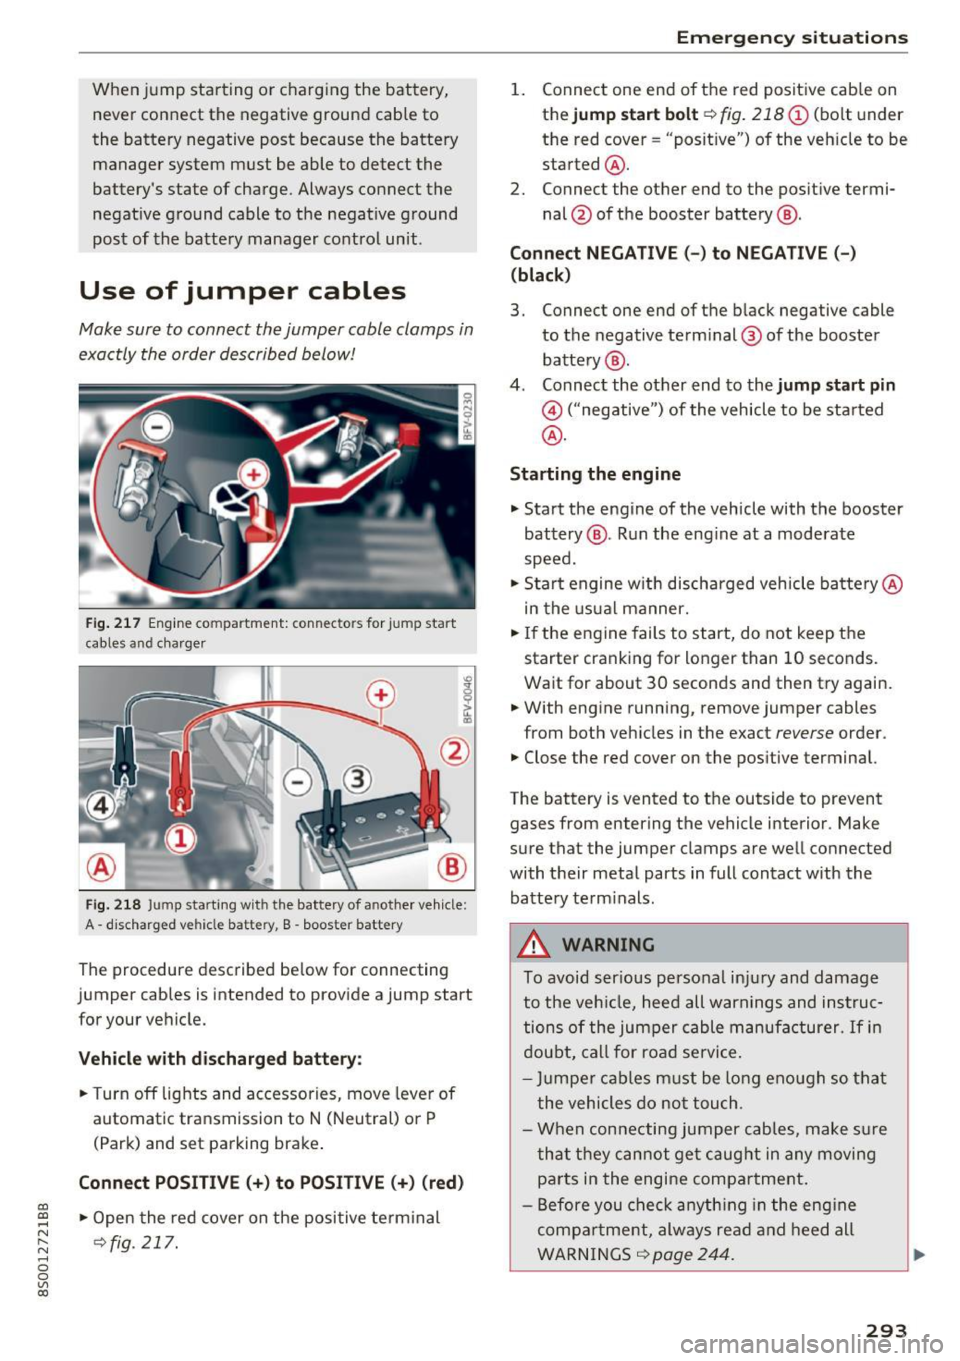
Fig. 217 Engine compartment: connectors for jump start
cables and c harger
Fig. 218 Jump starting w ith the battery of another vehicle :
A -discharged vehicle battery, B -booster battery
The proc edure desc ribed below for connecting
jumper cables is intended to provide a jump start
for your vehicle.
Vehicle with discharged battery:
.. Turn off lights and accessories, move lever of
automatic transmission to N (Neutral) or P
(Park) and set parking brake .
Connect POSITIVE(+) to POSITIVE(+) (red)
.,. Open the red cover on the positive terminal
~fig. 217.
Emergency situations
1. Connect one end of the red positive cab le on
the
jump start bolt~ fig. 218 (D (bolt und er
the red cover= "posit ive") of the veh icle to be
started @.
2. Connect the other end to the posit ive termi-
nal @of the booster battery @.
Connect NEGATIVE (-) to NEGATIVE (- )
(black)
3. Connect one end of the black negative cable
to the negative terminal @ of the booster
battery @.
4. Connect the other end to the
jump start pin
@ ("negative") of the vehicle to be started
@.
Starting the engine
.. Start the engine of the vehicle with the booster
battery @. Run the eng ine at a moderate
speed .
.,. Start engine w ith discharged veh icle battery @
in the usual manner.
.,. If the engine fails to start, do not keep the
starter cranking for longer than 10 seconds.
Wait for about 30 seconds and then try again .
.. With engine running, remove jumper cables
from both vehicles in the exact
reverse order .
.. Close the red cover on the positive terminal.
The battery is vented to the outside to prevent
gases from entering the vehicle interior . Make
sure that the jumper clamps are well connected
with their metal parts in full contact with the battery term inals .
A WARNING
To avoid ser ious personal injury and damage
to the vehicle, heed all warnings and instruc
tions of the jumper cable manufacturer.
If in
doubt, call for road service.
- Jumpe r cables must be long enough so that
the vehicles do not touch .
- When connecting jumper cables, make sur e
that they cannot get caug ht in any moving
parts in the engine compartment.
- Before you check anything in the engine
compa rtment, always read and heed all
WARNINGS ~
page 244 .
293
Page 308 of 322
Index
AUTO Automatic climate control system . . . . . . . 52
Automatic headlights . . . . . . . . . . . . . . . . . 36
Auto Lock (centra l locking) . . . . . . . . . . . . . . 25
Automatic belt retractor . . . . . . . . . . . . . . . 193
Automatic climate control system
refer to Climate control system (automatic) .5.2
Automatic key . . . . . . . . . . . . . . . . . . . . . . . . . 25
Automatic transmission . . . . . . . . . . . . . . . . . 61
Driving tips . . . . . . . . . . . . . . . . . . . . . . . . . . 64
Emergency mode . . . . . . . . . . . . . . . . . . . . . 68
Hill descent contro l . . . . . . . . . . . . . . . . . . . 66
Kick-down . . . . . . . . . . . . . . . . . . . . . . . . . . . 67
La unch Control-Program . . . . . . . . . . . . . . . 67
malfunction . . . . . . . . . . . . . . . . . . . . . . . . . 63
Selector leve r eme rgency release . . . . . . . . 69
Selector leve r lock . . . . . . . . . . . . . . . . . . . . 63
Selector lever positions . . . . . . . . . . . . . . . . 62
Shifting manually . . . . . . . . . . . . . . . . . . . . 66
Steering wheel with shift paddles. . . . . . . . 66
tiptronic . . . . . . . . . . . . . . . . . . . . . . . . . . . . 66
Automatic wipe/wash system
Automatic zoom (navigation) .......... .
Auto Safety Hotline ............ .... .. .
41
145
187
AUX input . . . . . . . . . . . . . . . . . . . . . . . . . . . 161
Average fuel consumption . . . . . . . . . . . . . . . 23
Average speed . . . . . . . . . . . . . . . . . . . . . . . . 23
Avoid damaging the vehicle . . . . . . . . . . . . . . 55
B
BACK button . . . . . . . . . . . . . . . . . . . . . . . . . . 96
Balance (sound) . . . . . . . . . . . . . . . . . . . . . . 178
Bass (sound) . . . . . . . . . . . . . . . . . . . . . . . . . 178
Battery Jump starting . . . . . . . . . . . . . . . . . . . . . . . 292
Before driving . . . . . . . . . . . . . . . . . . . . . . . . 180
Better route (navigation) . . . . . . . . . . . . . . . 149
Blended gasoline . . . . . . . . . . . . . . . . . . . . . 240
Blower (climate control system) . . . . . . . . . . 52
Bluetooth Aud io player . . . . . . . . . . . . . . . . . . . . . . . . 158
Connecting a cell phone . . . . . . . . . . . . . . 114
Settings . . . . . . . . . . . . . . . . . . . . . . . . . . . 176
Boost . . . . . . . . . . . . . . . . . . . . . . . . . . . . . . . . 24
Booster seats . . . . . . . . . . . . . . . . . . . . . . . . 230
Boost pressure indicator . . . . . . . . . . . . . . . . 24
306
Brake fluid
Checking the brake fluid level . . . . . . . . . . 251
Brakes . . . . . . . . . . . . . . . . . . . . . . . . . . . . . . . 89
Brake ass ist system . . . . . . . . . . . . . . . . . . . 88
B rake booster . . . . . . . . . . . . . . . . . . . . . . . . 89
Brake fluid ... ... .. .. ............... 251
Electromechanical parking brake . . . . . . . . 60
Indicator light . . . . . . . . . . . . . . . . . . . . . . . 10
New brake pads . . . . . . . . . . . . . . . . . . . . . . 89
B raking
Brake assist . . . . . . . . . . . . . . . . . . . . . . . . . 88
Emergency braking function . . . . . . . . . . . . 60
Worn brake pads . . . . . . . . . . . . . . . . . . . . . 15
Break-in secu rity feature . . . . . . . . . . . . . . . . 25
Breaking in
New engine . . . . . . . . . . . . . . . . . . . . . . . . . 55
New tires . . . . . . . . . . . . . . . . . . . . . . . . . . 262
Browser
refer to Media center . . . . . . . . . . . . . . . . . 164
Bu lb fai lure (indicator light) . . . . . . . . . . . . . 16
Bulb replacement . . . . . . . . . . . . . . . . . . . . . 291
Buttons Control panel (MMI) . . . . . . . . . . . . . . . . . . 96
Multifunction steering wheel . . . . . . . . 20, 22
C
Cable (USB adapter/AUX connector cable) 161
California Proposition 65 Warning . . . . . . . 244
Battery specific . . . . . . . . . . . . . . . . . . . . . 252
Call list . . . . . . . . . . . . . . . . . . . . . . . . . . . . . 117
Call options . . . . . . . . . . . . . . . . . . . . . . . . . . 124
Capacities Fuel tank. . . . . . . . . . . . . . . . . . . . . . . . . . . 299
Washer fluid reservoir . . . . . . . . . . . . . . . . 299
Care . . . . . . . . . . . . . . . . . . . . . . . . . . . . . . . . 275
Cargo area
refer to Luggage compartment. . . . . . . . . 185
CD drive (med ia drives) . . . . . . . . . . . . . . . . 157
Cell phone Playing music . . . . . . . . . . . . . . . . . . . . . . . 158
olso refer to Telephone . . . . . . . . . . . . . . . 114
Central locking . . . . . . . . . . . . . . . . . . . . . . . . 25
Centra l locking switch . . . . . . . . . . . . . . . . . 29
Emergency locking . . . . . . . . . . . . . . . . . . . . 30
Luggage compartment lid . . . . . . . . . . . . . . 30
Power windows . . . . . . . . . . . . . . . . . . . . . . 32
Page 310 of 322
Index
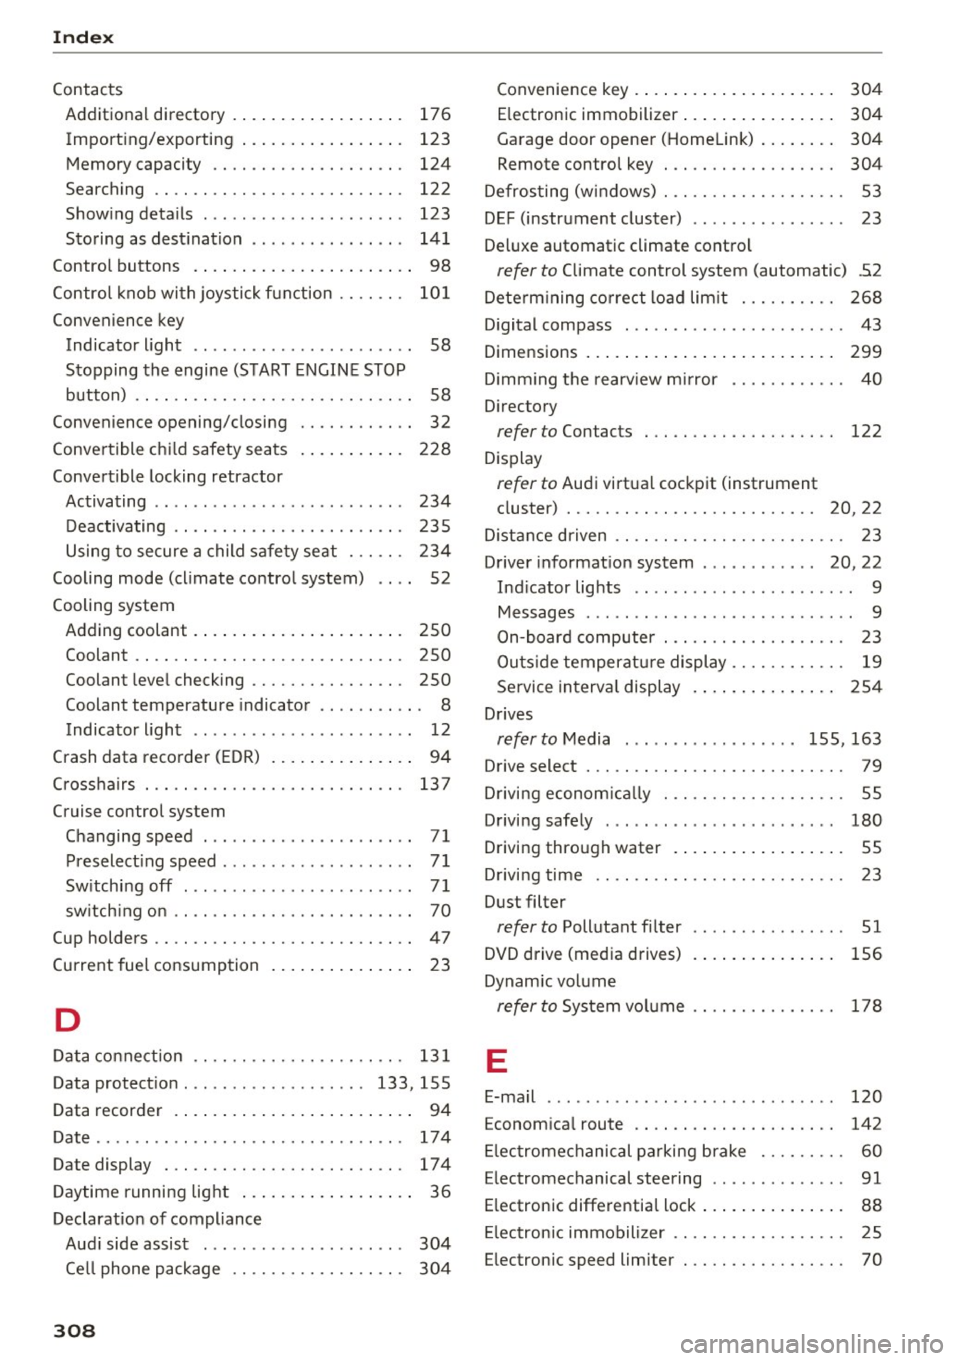
Contacts Additional directory.............. ....
176
Import ing/exporting . . . . . . . . . . . . . . . . . 123
Memory capaci ty . . . . . . . . . . . . . . . . . . . . 124
Sea rching . . . . . . . . . . . . . . . . . . . . . . . . . . 122
Showing details . . . . . . . . . . . . . . . . . . . . . 123
Storing as dest ination . . . . . . . . . . . . . . . . 141
Control buttons . . . . . . . . . . . . . . . . . . . . . . . 98
Control knob with joystick function . . . . . . .
101
Convenience key
Indicator light . . . . . . . . . . . . . . . . . . . . . . .
58
Stopping the engine (START ENGINE STOP
button) . . . . . . . . . . . . . . . . . . . . . . . . . . . . .
58
Conven ience opening/closing . . . . . . . . . . . . 32
Convertible child safety seats . . . . . . . . . . . 228
Convertible locking retractor
Activating . . . . . . . . . . . . . . . . . . . . . . . . . .
234
Deactivating .. .... ...... ......... .. . 235
Using to secure a child safety seat . . . . . . 234
Cooling mode (climate control system) . . . . 52
Cooling system
Adding coolant . . . . . . . . . . . . . . . . . . . . . .
250
Coolant . . . . . . . . . . . . . . . . . . . . . . . . . . . . 250
Coolant level checking . . . . . . . . . . . . . . . . 250
Coolant temperature indicator . . . . . . . . . . . 8
Indicator light . . . . . . . . . . . . . . . . . . . . . . .
12
Crash data r ecorder (EDR) . . . . . . . . . . . . . . . 94
Crosshairs . . . . . . . . . . . . . . . . . . . . . . . . . . .
137
Cruise cont rol system
Changing speed . . . . . . . . . . . . . . . . . . . . . .
71
Preselecting speed . . . . . . . . . . . . . . . . . . . . 7 1
Switching off . . . . . . . . . . . . . . . . . . . . . . . . 71
sw itch ing on . . . . . . . . . . . . . . . . . . . . . . . . . 70
Cup holders . . . . . . . . . . . . . . . . . . . . . . . . . . . 47
Current fuel consumption . . . . . . . . . . . . . . . 23
D
Data connection . . . . . . . . . . . . . . . . . . . . . . 131
Data protection . . . . . . . . . . . . . . . . . . . 133 , 155
Data recorder . . . . . . . . . . . . . . . . . . . . . . . . . 94
Date ...... .. .. .. .... ......... .... .. .
174
Date display . . . . . . . . . . . . . . . . . . . . . . . . . 174
Daytime running light . . . . . . . . . . . . . . . . . . 36
Declaration of compliance
Audi side assist . . . . . . . . . . . . . . . . . . . . .
304
Ce ll phone package . . . . . . . . . . . . . . . . . . 304
308
Convenience key . . . . . . . . . . . . . . . . . . . . . 304
E lectronic immobili zer . . . . . . . . . . . . . . . . 304
Garage door opener (Homelink) . . . . . . . . 304
Remote control key . . . . . . . . . . . . . . . . . . 304
Defrosting (windows) . . . . . . . . . . . . . . . . . . . 53
DEF (instrument cluster) . . . . . . . . . . . . . . . . 23
Deluxe automatic climate control
refer to Climate control system (automatic) .52
Determ ining correct load limit . . . . . . . . . .
268
Digital compass . . . . . . . . . . . . . . . . . . . . . . . 43
Dimensions . . . . . . . . . . . . . . . . . . . . . . . . . . 299
D imm ing the rearview mirror . . . . . . . . . . . .
40
Directory
refer to Con tacts . . . . . . . . . . . . . . . . . . . . 122
Display
ref er to Audi virtual cockpit (instrument
cluster)
20,22
D istance driven . . . . . . . . . . . . . . . . . . . . . . . . 23
Driver information system . . . . . . . . . . . . 20, 22
Indicator lights . . . . . . . . . . . . . . . . . . . . . . . 9
Messages . . . . . . . . . . . . . . . . . . . . . . . . . . . . 9
On-board computer . . . . . . . . . . . . . . . . . . .
23
Outs ide temperature display. . . . . . . . . . . . 19
Service interval display . . . . . . . . . . . . . . .
254
Drives
refer to Media . . . . . . . . . . . . . . . . . . 155, 163
Drive select . . . . . . . . . . . . . . . . . . . . . . . . . . . 79
Driving econom ically . . . . . . . . . . . . . . . . . . .
55
Driving safely . . . . . . . . . . . . . . . . . . . . . . . . 180
Driving through wat er . . . . . . . . . . . . . . . . . . 55
Driving time . . . . . . . . . . . . . . . . . . . . . . . . . . 23
Dust filter
refer to Pollutant filter . . . . . . . . . . . . . . . . 51
DVD drive (media drives) 156
Dynamic volume
refer to System volume . . . . . . . . . . . . . . . 178
E
E-mail 120
Economical route . . . . . . . . . . . . . . . . . . . . . 142
Electromechanical parking brake . . . . . . . . . 60
Electromechanical steering . . . . . . . . . . . . . . 91
Electronic differential lock . . . . . . . . . . . . . . . 88
Electronic immobilizer . . . . . . . . . . . . . . . . . .
25
Electronic speed limite r . . . . . . . . . . . . . . . . . 70
Page 311 of 322
co
co
.... N
" N .... 0
0
Vl c:o
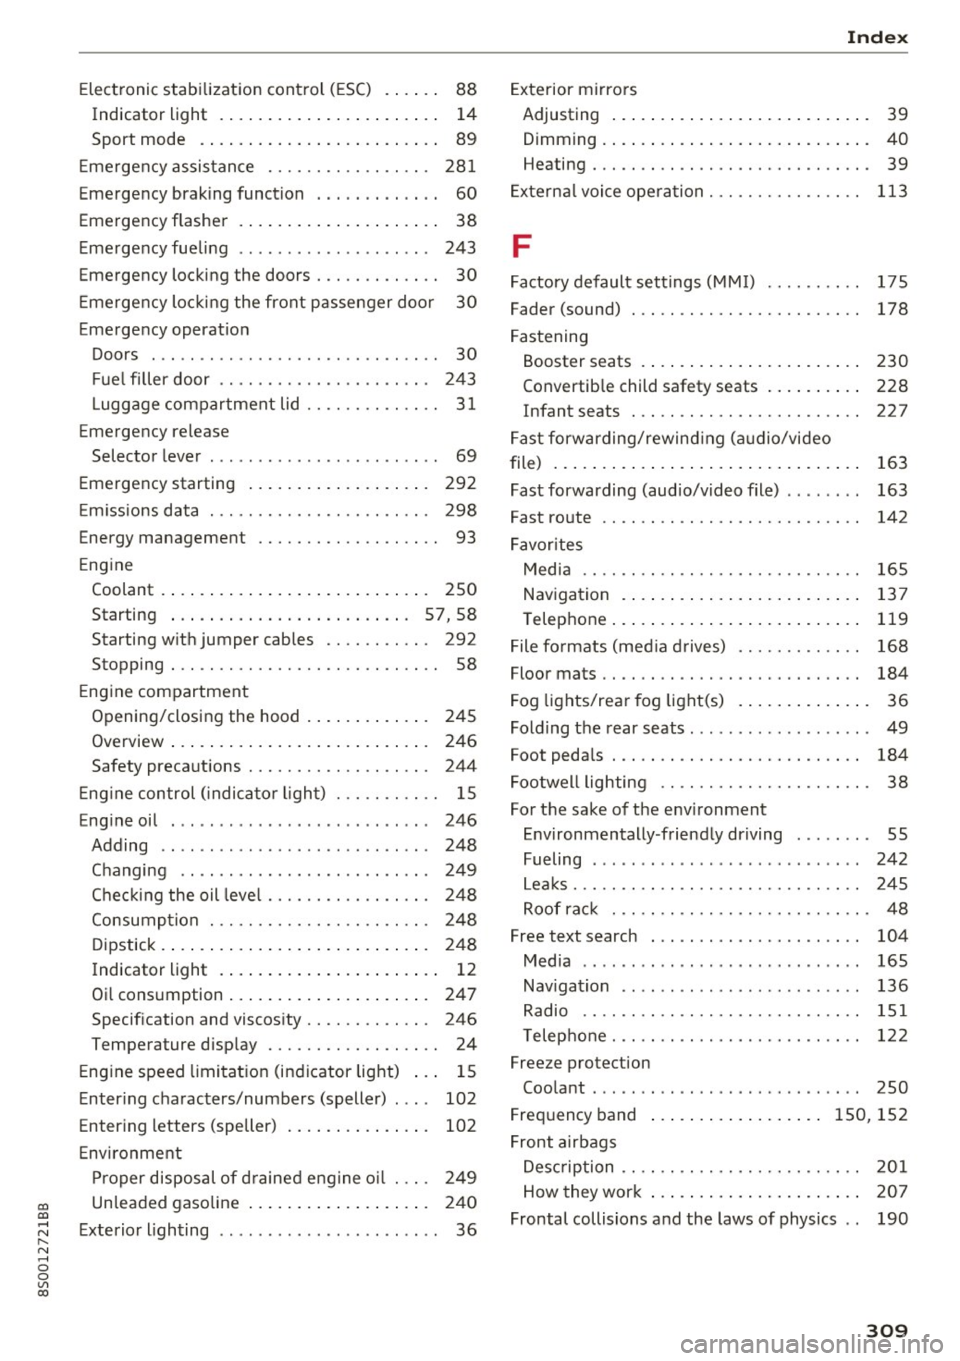
Electronic stabilization control (ESC) . . . . . . 88
Indicator light . . . . . . . . . . . . . . . . . . . . . . . 14
Sport mode . . . . . . . . . . . . . . . . . . . . . . . . . 89
E mergency assistance . . . . . . . . . . . . . . . . . 281
Emergency braking function . . . . . . . . . . . . . 60
Emergency flasher . . . . . . . . . . . . . . . . . . . . . 38
Emergency fueling . . . . . . . . . . . . . . . . . . . . 243
Emergency locking the doors . . . . . . . . . . . . . 30
Emergency locking the front passenger door 30
Emergency operation Doors . . . . . . . . . . . . . . . . . . . . . . . . . . . . . . 30
Fuel filler door . . . . . . . . . . . . . . . . . . . . . . 243
L uggage compartment lid . . . . . . . . . . . . . . 31
Emergency release Selector lever . . . . . . . . . . . . . . . . . . . . . . . . 69
Emergency starting . . . . . . . . . . . . . . . . . . . 292
E m issions data . . . . . . . . . . . . . . . . . . . . . . . 298
Energy management . . . . . . . . . . . . . . . . . . .
93
Engine
Coolant . . . . . . . . . . . . . . . . . . . . . . . . . . . . 250
Starting . . . . . . . . . . . . . . . . . . . . . . . . . 57, 58
Starting with jumper cables . . . . . . . . . . . 292
Stopping . . . . . . . . . . . . . . . . . . . . . . . . . . . . 58
Engine compartment
Opening/closing the hood . . . . . . . . . . . . . 245
Overview . . . . . . . . . . . . . . . . . . . . . . . . . . . 246
Safety precautions . . . . . . . . . . . . . . . . . . . 244
Engine control ( indicator light) . . . . . . . . . . . 15
Engine oil . . . . . . . . . . . . . . . . . . . . . . . . . . . 246
Adding .. .. .. ........ ..... ... ... .. . 248
Changing . . . . . . . . . . . . . . . . . . . . . . . . . . 249
Checking the oil level . . . . . . . . . . . . . . . . . 248
Consumption . . . . . . . . . . . . . . . . . . . . . . . 248
Dipstick . . . . . . . . . . . . . . . . . . . . . . . . . . . . 248
Indicator light . . . . . . . . . . . . . . . . . . . . . . . 12
Oil consumption . . . . . . . . . . . . . . . . . . . . . 247
Specification and viscosity . . . . . . . . . . . . . 246
Temperature display . . . . . . . . . . . . . . . . . . 24
Engine speed limitation (indicator light) . . . 15
Entering characters/numbers (speller) . . . . 102
Entering letters (speller) . . . . . . . . . . . . . . . 102
E nvironment
Proper disposal of d rained engine o il . . . . 249
Unleaded gasoline . . . . . . . . . . . . . . . . . . . 240
Exterior lighting . . . . . . . . . . . . . . . . . . . . . . . 36
Index
Exterior mirrors
Adjusting . . . . . . . . . . . . . . . . . . . . . . . . . . .
39
Dimming ... ... .. .. ................. . 40
Heating . . . . . . . . . . . . . . . . . . . . . . . . . . . . .
39
External voice operation . . . . . . . . . . . . . . . . 113
F
Factory default settings (MMI) . . . . . . . . . . 175
Fader (sound) . . . . . . . . . . . . . . . . . . . . . . . . 178
Fastening Booster seats . . . . . . . . . . . . . . . . . . . . . . . 230
Convertible child safety seats . . . . . . . . . . 228
Infant seats . . . . . . . . . . . . . . . . . . . . . . . . 227
Fast forwarding/rewind ing (audio/video
file) . . . . . . . . . . . . . . . . . . . . . . . . . . . . . . . . 163
Fast forwarding (audio/video file) . . . . . . . . 163
Fast route
Favorites Media 142
165
Navigation . . . . . . . . . . . . . . . . . . . . . . . . . 137
Telephone..... .. .. ................ . 119
File formats (med ia drives) . . . . . . . . . . . . . 168
Floor mat s . . . . . . . . . . . . . . . . . . . . . . . . . . . 184
Fog lights/rear fog light(s) . . . . . . . . . . . . . . 36
Folding the rear seats . . . . . . . . . . . . . . . . . . . 49
Foot pedals . . . . . . . . . . . . . . . . . . . . . . . . . . 184
Footwell lighting . . . . . . . . . . . . . . . . . . . . . . 38
For the sake of the environment Environmentally -friendly driving . . . . . . . . 55
Fueling . . . . . . . . . . . . . . . . . . . . . . . . . . . . 242
Leaks. .... .... .. ................. .. 245
Roof rack . . . . . . . . . . . . . . . . . . . . . . . . . . . 48
Free text search . . . . . . . . . . . . . . . . . . . . . . 104
Media . . . . . . . . . . . . . . . . . . . . . . . . . . . . . 165
Navigation . . . . . . . . . . . . . . . . . . . . . . . . . 136
Radio . . . . . . . . . . . . . . . . . . . . . . . . . . . . . 151
T elephone. . . . . . . . . . . . . . . . . . . . . . . . . . 122
Freeze protection Coolant . . . . . . . . . . . . . . . . . . . . . . . . . . . . 250
Frequency band . . . . . . . . . . . . . . . . . . 150, 152
Front airbags Description . . . . . . . . . . . . . . . . . . . . . . . . . 201
How they work . . . . . . . . . . . . . . . . . . . . . . 207
Frontal collisions and the laws of physics . . 190
309