service indicator AUDI TT ROADSTER 2008 Owners Manual
[x] Cancel search | Manufacturer: AUDI, Model Year: 2008, Model line: TT ROADSTER, Model: AUDI TT ROADSTER 2008Pages: 316, PDF Size: 70.1 MB
Page 14 of 316
Inst rum ent s a nd warning /indi cato r li ghts
Instruments and warning/indicator lights
Instruments
Instrument cluster and controls
The instrument cluster is your central source of informa
tion .
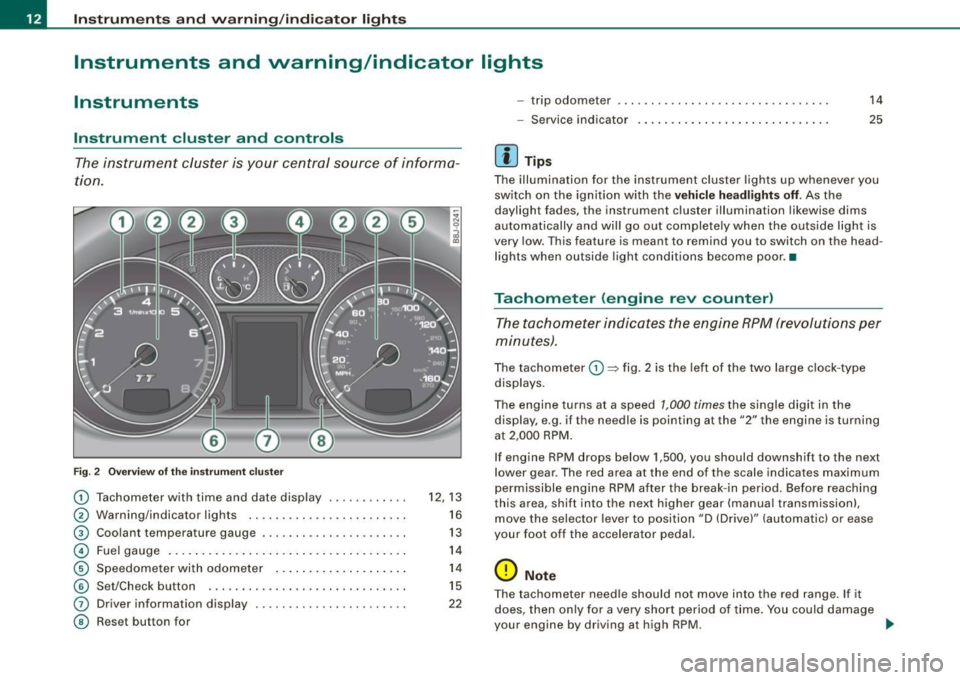
6
Fig . 2 Ove rv iew of the ins trum ent cluster
0
0
0
©
©
©
G)
©
Tachometer with time and date display ......•.....
Warning/indicator lights .. ... ..... ... ........ .. .
Coolant temperature gaug e .... ... ...... ...... .. .
Fuel gauge .. .... ... .. ...... .... ... ..... ... ... .
Speedome ter with odometer ..... .... ... .. .. ... .
Set/Chec k button ..... ... ..... ..... ... ........ .
Driver information display
Reset but ton for
~
"' N 9
i
12, 13
16
13
14
14
15
22
- trip odometer
- Service indicator
[ i ] Tip s
14
25
The illumination for the instrument cluster lights up whenever you
switch on the ign ition with the
ve hicle hea dlight s off. As the
daylight fades, the instrument cluster illumination likewise dims
automatically and wil l go out completely when the outside light is
very low. This feature is meant to remind you to switch on th e head
lights when outside light conditions become poor. •
Tachometer (engine rev counter)
The tachometer indicates the engine RPM (revolutions per
minutes) .
The tachometer 0 ~ fig. 2 is the left of the two large c lock -type
displays.
The engine turns at a speed
1,000 times the single digit in the
display, e.g . if th e ne edle is pointing a t the
"2" the engine is turning
at 2,000 RPM .
If engine RPM drops below 1,500, you should downshif t to the next
lower gear . The red ar ea at the end of th e scale indica tes maximum
permissible engine RPM after the break- in period. Before reaching
th is area , shift into the next higher gear (manua l transmission),
move the selec tor lever to position "D (Drive)" (automatic) or ease
your foot off the accelerator pedal.
0 Note
T he tachometer need le should not move into the red range . If it
does, then on ly for a very short period of time . You could damage
your engine by driving a t high RPM. ...
Page 24 of 316
Driver inf ormation sy ste m
Driver information system
Introduction
General notes
The driver information display inside the instrument
cluster provides you, the driver, with important informa
tion.
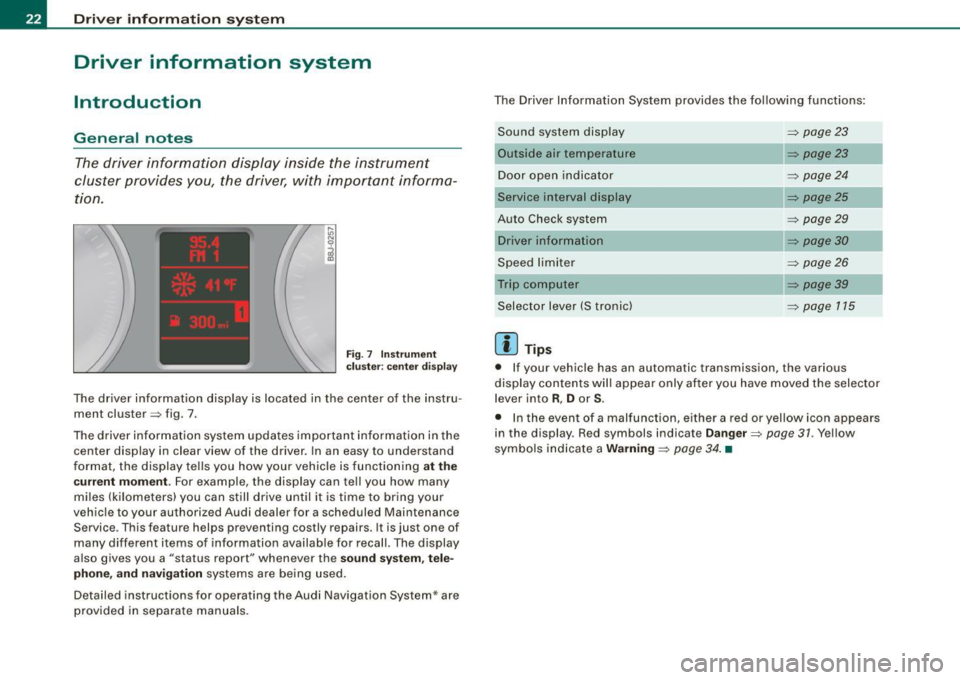
F ig. 7 In st rum ent
c luster : center d is p lay
The driver information display is located in the center of the instru
ment cluster => fig . 7 .
The driver information system updates important information in the center display in clear view of the driver. In an easy to understand
format, the display tells you how your vehicle is functioning
at t he
cu rre nt m omen t.
For example, the display can tell you how many
miles (kilometers) you can still drive until it is time to bring your
vehicle to your authorized Audi dealer for a scheduled Maintenance Service . This feature helps preventing costly repairs. It is just one of
many different items of information availab le for recall. The display
a lso gives you a "status report" whenever the
so und s ystem , tel e
ph on e, a nd navi gation
systems are being used.
Detailed instructions for operating the Audi Navigation System* are provided in separate manuals . The Driver Information System provides the following functions:
Sound system display
Outside air temperature
Door open indicator
Service interval display
Auto Check system
Speed limiter
Selector lever (S t ronic)
[ i ] Tip s
=> page 23
=> page23
=> page 24
=> page25
=> page29
=> page30
=> page 26
=> page 39
=> page 115
• If your vehicle has an automatic transmission, the various
display contents will appear only after you have moved the selector
lever into
R , D or S.
• In the event of a malfunction, e ither a red or yellow icon appears
in the display. Red symbols indicate
D anger => page 31 . Yellow
sy mbols indicate a
W arning => page 34 . •
Page 27 of 316
If, however, the Malfunction Indicator Lamp (MIU comes on,
always drive to your nearest authorized Audi dealer or qualified
workshop and have the vehicle checked.
For more information =>
page 216, "Refuelling".•
Service interval display
The service interval display reminds you when your next
service is due.
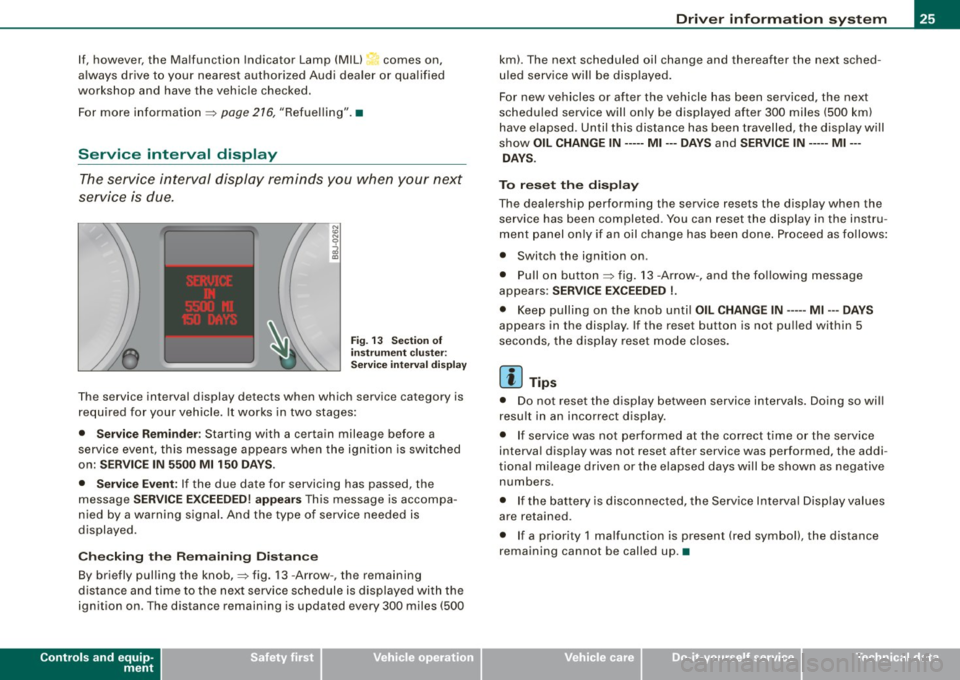
Fig. 13 Section of
instrument cluster:
Service interval display
The service interval display detects when which service category is
required for your vehicle. It works in two stages:
• Service Reminder : Starting with a certain mileage before a
service event, this message appears when the ignition is switched
on:
SERVICE IN 5500 Ml 150 DAYS.
• Service Event:
If the due date for servicing has passed, the
message
SERVICE EXCEEDED! appears This message is accompa
nied by a warning signal. And the type of service needed is
displayed.
Checking the Remaining Distance
By briefly pulling the knob,=> fig. 13 -Arrow -, the remaining
distance and time to the next service schedule is displayed with the
ignition on . The distance remaining is updated every 300 miles (500
Controls and equip
ment
Driver information system
km). The next scheduled oil change and thereafter the next sched
uled service will be displayed.
For new vehicles or after the vehicle has been serviced, the next
scheduled service will only be displayed after 300 miles (500 km)
have elapsed. Until this distance has been travelled, the display will
show
OIL CHANGE IN----- Ml ---DAYS and SERVICE IN----- Ml --
DAYS.
To reset the display
The dealership performing the service resets the display when the service has been completed . You can reset the display in the instru
ment panel only if an oil change has been done. Proceed as follows:
• Switch the ignition on .
• Pull on button=> fig.
13 -Arrow-, and the following message
appears:
SERVICE EXCEEDED !.
• Keep pulling on the knob until OIL CHANGE IN ---- -Ml ---DAYS
appears in the display. If the reset button is not pulled within 5
seconds, the display reset mode closes.
[ i] Tips
• Do not reset the display between service intervals. Doing so will
result in an incorrect display.
• If service was not performed at the correct time or the service
interval display was not reset after service was performed, the addi
tional mileage driven or the elapsed days will be shown as negative
numbers.
• If the battery is disconnected, the Service Interval Display values
are retained.
• If a priority 1 malfunction is present (red symbol), the distance
remaining cannot be called up. •
I • •
Page 28 of 316
Driver inf ormation sy ste m
On-Board Diagnostic system (08D)
Malfunction Indicator Lamp (MIL )
The Malfunction Indicator Lamp (MIU in the instrument cluster
=:> page 16, fig. 6 is part of the On -Board Diagnos tic (OBD II) system.
The warning/indicator ligh t ill uminates when the ignition is
switched on and goes out after the engine starts and the idle has
stabilized . This indicates that the MIL is working properly .
If th e light d oes not go out after the engine is started, or illuminates
while you are driving, a ma lfunction may exist in the engine system.
If the light starts flashing, the catalytic converter cou ld be damaged .
Continue driving
w ith redu ced pow er (avoiding sustained high
speeds and/or rapid acce lerations) and have the condition
corrected. Contact your authorized Audi dealer.
If the light illuminates, the e lectronic speed limiter may also be
malfunctioning. For more information=:>
page 26, "E lectronic speed
limiter".
An imprope rly clo sed fuel filler c ap m ay als o c au se th e MIL light t o
illumi nate =:. page 216. •
On-Board Diagnostics
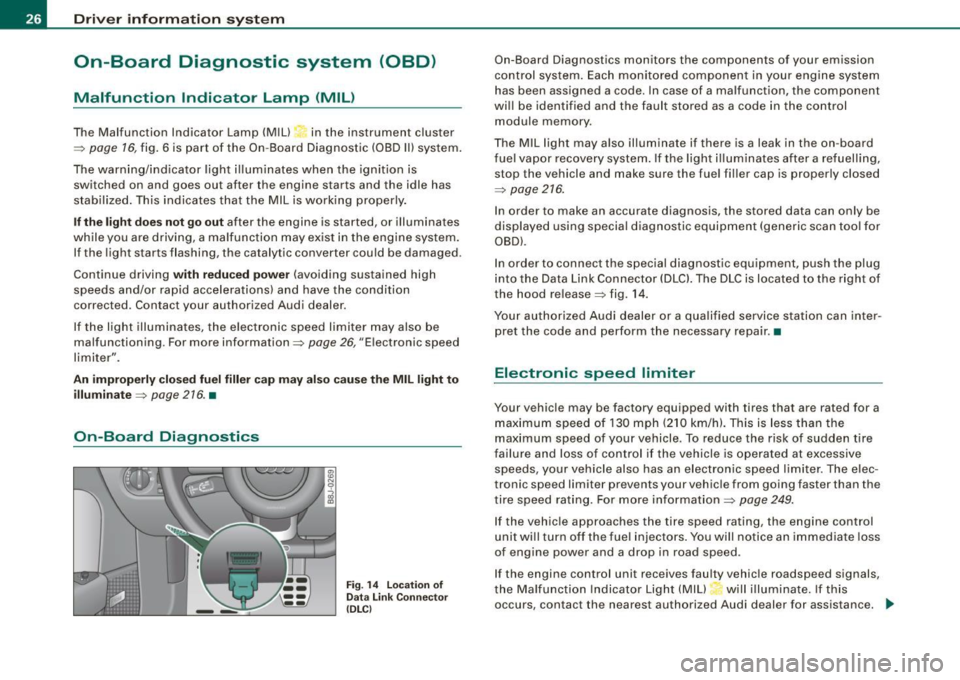
F ig . 14 L ocation of
Data Link Co nnector
( DL Cl
On -Board Diagnostics monitors the components of your emission
control system. Each monitored component in your engine system
has been assigned a code. In case of a malfunction, the component
will be identified and the fault stored as a code in the control
module memory .
The MIL light may also illuminate if there is a leak in the on -board
f ue l vapor recovery system. If the light i lluminates after a refuelling,
stop the vehicle and make sure the fuel filler cap is properly closed
=:>
page 216.
In order to make an accurate diagnosis, the stored data can only be
displayed using special diagnostic equipment (generic scan too l for
OBD).
In order to connect the special diagnostic equipment, push the plug
into the Data Link Connector (DLCl. The DLC is located to the right of
the hood release =:> fig . 14.
Your authorized Audi dealer or a qualified service station can inter
pret the code and perform the necessary repair. •
Electronic speed limiter
Your vehicle may be factory equipped with tires that are rated for a
maximum speed of 130 mph (210 km/h). This is less than the
maximum speed of your vehicle. To reduce the risk of sudden tire
failure and loss of control if the vehicle is operated at excessive
speeds, your vehicle also has an electronic speed limiter . The elec
tronic speed limiter prevents your vehic le from going faster than the
tire speed rating. For more in formation=:>
page 249.
If the vehicle approaches the tire speed rating, the engine control
unit will turn off the fue l injectors. You will notice an immediate loss
of engine power and a drop in road speed .
If the engine control unit receives faulty vehicle roadspeed signals,
the Ma lfunction Indicator Light (MIU will illuminate. If this
occurs, contact the nearest authorized Audi dealer for assistance.
~
Page 35 of 316
-Contact your authorized Audi dealer for assistance if
necessary.
If the engine coolant level is correct, then the radiator fan may be
the cause of the malfunction.
If the generator warning/indicator light should also illuminate
=> page 19 , then the fan belt may be damaged.
& WARNING
• If your vehicle should break down for mechanical or other
reasons, park at a safe distance from moving traffic, turn off the
engine and turn on the hazard warning lights
=> page 75, "Emer
gency flasher A".
• Never open the hood if you see or hear steam or coolant
escaping from the engine compartment -you risk being scalded.
Wait until you can no longer see or hear steam or coolant
escaping.
• The engine compartment of any vehicle is a dangerous area.
Before you perform any work in the engine compartment, turn of
the engine and allow it to cool. Follow the warning stickers
=> page 212, "Engine compartment".
0 Note
Do not continue driving if the _F_ symbol illuminates. There is a
malfunction in the engine cooling system -you could damage your
engine. •
Controls and equip
ment
Driver information system
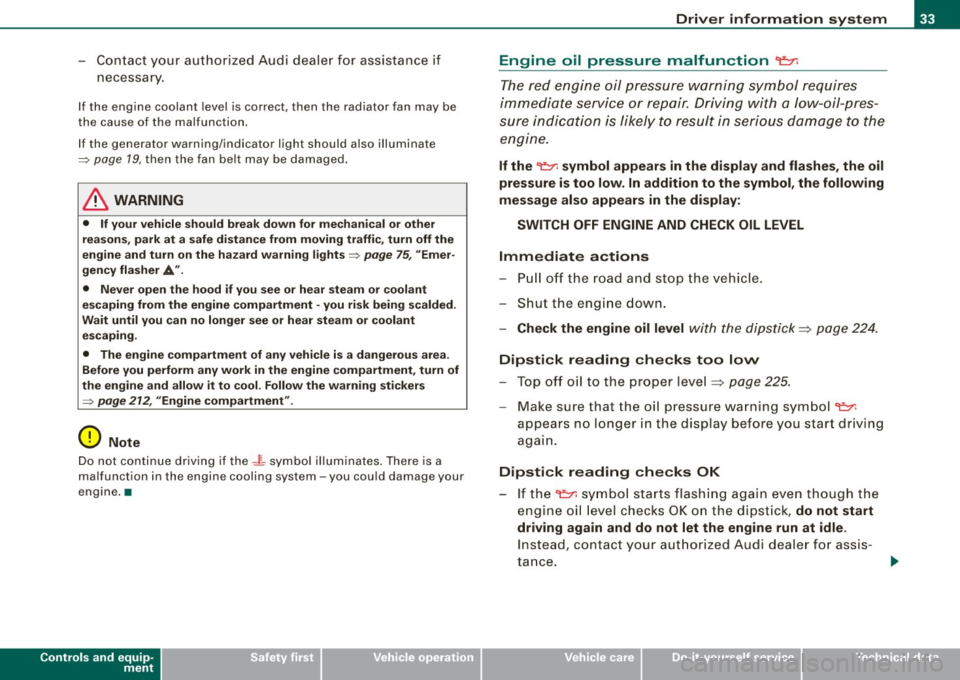
Engine oil pressure malfunction 'l=;:f.
The red engine oil pressure warning symbol requires
immediate service or repair. Driving with a low-oil-pres
sure indication is likely to result in serious damage to the
engine.
If the ~ symbol appears in the display and flashes, the oil
pressure is too low. In addition to the symbol, the following
message also appears in the display:
SWITCH OFF ENGINE AND CHECK OIL LEVEL
Immediate actions
- Pull off the road and stop the vehicle.
- Shut the engine down.
- Check the engine oil level with the dipstick=> page 224.
Dipstick reading checks too low
- Top off oil to the proper level
=> page 225.
- Make sure that the oil pressure warning symbol ~
appears no longer in the display before you start driving
again.
Dipstick reading checks OK
- If the ~ symbol starts flashing again even though the
engine oil level checks OK on the dipstick ,
do not start
driving again and do not let the engine run at idle .
Instead, contact your authorized Audi dealer for assis
tance.
I • •
Page 36 of 316
![AUDI TT ROADSTER 2008 Owners Manual Driver information system
[ i] Tips
• The engine oil pressure symbol 9:::r. is not an indicator for a low
engine oil level. Do not rely on it. Instead, check the oil level AUDI TT ROADSTER 2008 Owners Manual Driver information system
[ i] Tips
• The engine oil pressure symbol 9:::r. is not an indicator for a low
engine oil level. Do not rely on it. Instead, check the oil level](/img/6/57671/w960_57671-35.png)
Driver information system
[ i] Tips
• The engine oil pressure symbol 9:::r. is not an indicator for a low
engine oil level. Do not rely on it. Instead, check the oil level in your
engine at regular intervals, preferably each time you refuel, and
always before going on a long trip.
• The yellow oil level warning indication · requires oil refill or
workshop service without delay. Do not wait until the red oil pres
sure warning symbol
9:::r. starts to flash before you respond to the
low oil level warning . By then, your engine may already have
suffered serious damage. •
Yellow symbols
A yellow symbol means WARNING.
Yellow symbols mean:
Low fuel level
Check engine oil level Engine oil sensor malfunction
-
Worn brake pads
USA models:
Speed warning 1
Canada models:
Speed warning 1
-
USA models:
Speed warning 2
-Canada models:
Speed warning 2 =>
pag
e35
=> page35
=> page35
-
=> page35
=> page35
=> page35
=> page35
-
=> page35
Dynamic headlight range con
trol* defective => page35
Windshield washer fluid level low
=> page 35
Battery voltage too high or too
low
Defective light bulb
USA models:
Defective brake light
Canada models:
Defective brake light =>
page35
=> page36
=> page36
=> page36
Light/rain
sensor defective (auto-=> page 36
matic headlights) * defective
Adaptive Light* defective =>
page 36
Tire pressure monitoring system * => page 37
Yellow symbols indicate a priority 2 malfunction -Warning!
When a yellow symbol appears, a warning tone will sound
once .
Check the displayed function as soon as possible . If more than one
priority 2 malfunction is detected, all symbols will appear one after
the other for about two seconds.
To display driver information
As an example, the[} symbol appears in the display . If you now
press the button =>
page 12, fig. 2 ©, the following driver message
appears in the display:
PLEASE REFUEL
The driver message in the display goes out after about 5 seconds.
You can display the driver message again by briefly p ressing the
button. •
Page 38 of 316
Driver information system
Also see if the generator warning/indicator light illuminates
=> page 19. •
Defective light bulb warning
The defective light bulb warning tells you when a vehicle
light bulb has become defective.
If a defective bulb has been detected by the system or a light bulb
burns out, the symbol with a message appears in the display to
tell you which bulb is burnt out and where it is located. For example:
REAR LEFT TURN SIGNAL
After 5 seconds, the message disappears. If you want to recall the
message into the display, press the CHECK button.
There are three reasons why the defective bulb message would appear in the display:
• the light bulb has burnt out=> page 277.
• the fuse is "blown" => page 273, "Replacing a fuse".
• the wire connection to the light bulb is defective.
Have the bulb replaced or the connection repaired by your autho
rized Audi Service department.
& WARNING
• Light bulbs are pressurized and could explode while they are
being changed causing serious personal injury.
• Work with due care when handling the high-voltage section of
gas discharge (xenon) lamps*. Failing to do so could result in death
or serious injury! •
Brake light defective K: U (USA
models) / (Canada models)
In case of a malfunction or component failure, the acoustic warning
will sound and the symbol&;
l[ (USA models)/ (Canada
models) can appear.
The following electrical components should be checked, repaired or
replaced, as necessary :
• Brake light bulbs
• All wiring connections
• Brake light switch
Contact your authorized Audi dealer for assistance if necessary.
[ i] Tips
The brake light switch is only inspected as part of the functional
check after the engine is started. •
Applies to vehicles: with automat ic headlights and rain sensor
Light /rain sensor defective >
AUTOMATIC HEADLIGHTS/AUTOMATIC WIPERS DEFECTIVE
If the symbol illuminates, the light sensor has failed. For safety
reasons the low beams are turned on permanently with the switch
in
AUTO. However , you can continue to turn the lights on and off
using the light switch. In the case of a defect in the rain sensor, the
windshield wiper lever functions are still available. Have the
light /rain sensor checked as soon as possible at a dealership. •
Applies to veh ic le s: w ith Adaptive Light
Adaptive Light defective
ADAPTIVE LIGHT DEFECTIVE
•
'
Page 84 of 316
Clear vision
& WARNING
• Clea n your wiper blade s regu larly w ith a w indshi eld w asher
s oluti on t o prev ent stre aking . If the wiper blade s are very dirt y, for
exa mpl e wit h inse cts, c arefull y cle an th e wi per blades w ith a
sponge or a soft bru sh .
• For yo ur safety , you should rep lac e th e w iper b lade s on ce or
twi ce a ye ar. S ee y our auth orized Audi de aler f or replacement
b lad es.
0 Note
• The wiper blades may on ly be changed=> page 80 in service
posit ion! Otherwise, you risk damaging the paint on the hood or the
windshield wiper motor .
• To prevent damage to the wiper system:
-Always loosen blades which are fro zen to the windshield
before operating wipers.
- Do not use gasoline , kerosene , paint th inner , or other solvents
on or near the wiper blades .
- Do not attempt to move the wipers by hand.
[ i ] Tip s
Commercial hot waxes applied by automatic car washes affect the
cleanab ility of the g lass surface .
• The front wiper blades are different lengths; the blade on th e
driver's side is longer. •
Mirrors
Manual glare dimming
Standard setting
- Move the small leve r !located on the bottom edge of t he
m irror) to the front.
Anti -glare setting
Move the small lever (located on the bottom edge of t he
m irror) to the rear. •
Applies to vehic les: wit h autom atically dimm in g inside rearview mirro r
Automatically dimming inside mirror
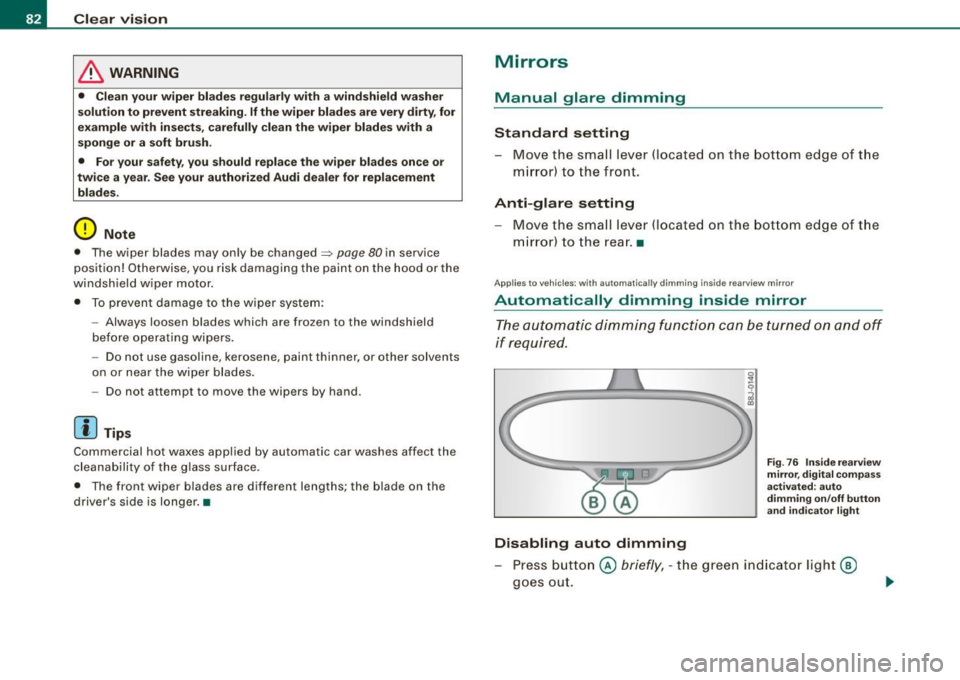
The automatic dimming function can be turned on and off
if required.
Disabling auto dimming
F ig . 76 Insid e rea rview
mir ror, d ig ital co m pa ss
activate d: au to
d imm in g on /off butt on
an d in dicator light
Press button @ briefly, -the green indicator light@
goes out.
Page 155 of 316
Airbag syst em -----------------=~-
& WARN ING (co ntinued)
• Make s ure th at the PA SSENGER AIR BAG OFF light come s on
a nd sta y s o n all the tim e whene ver the ign ition i s sw itched on . •
Advanced Airbag System components
The front passenger seat in your vehicle has a lot of very important
parts of the Advanced Airbag System in it. These parts inc lude the
weight -sensing mat, sensors, wiring, brackets, and more. The func
tion of the system in the front passenger seat is checked by the e lec
tronic contro l unit when the igni tion is on. The control unit monitors
the Advanced Airbag System and turns the airbag indicator light on
when a malfunction in the system components is detected . The
function of the airbag indicator light is described in greater detail
below. Because the front passenger seat contains important parts
of the Advanced Airbag System, you must take care to prevent it
from being damaged. Damage to the seat may prevent the
Advanced Airbag for the front passenger seat from doing its job in a crash.
T he front A dvance d Airb ag Syst em con sis ts of th e
following:
• Crash sensors in the front of the vehicle that measure vehicle
acceleration/dece leration to prov ide information to the Advanced
Airbag System about the severity of the crash .
• An electronic control unit, with integrated crash sensors for front
and side impacts. The control unit "decides" whether to fire the
front airbags based on the information received from the crash sensors. The contro l unit a lso "decides" whether the safety belt
pretensioners should be activated .
• A dual -stage Advanced Airbag with gas generator for the driver
inside the steering wheel hub .
• A dual -stage Advanced Airbag and gas generator inside the
instrument pane l for the front passenger .
Controls and equip
ment Safety first Vehicle operation
•
A weight -sensing mat under the upholstery padding of the front
passenger sea t cushion that measures the total weight on the seat .
The information registered is sent continuously to the e lectronic
control unit to regula te dep loyment of the front Advanced Airbag on
the passenger side.
• An airbag monitoring syste m and indica tor l ight in the instru
ment cluster=>
page 157.
• The PASSENGER AIR BAG OFF light comes on and stays on in the
center of the instrument panel=>
page 157, fig. 133 and tells you
when the front Advanced Airbag on the passenger side has been
turned off .
• A sensor be low the safety belt latch for the front seat passenger
to measure the tension on the safety belt . The tension on the safety
belt and the weight registered by the weight -se nsing mat help the
control unit "decide" whether the front airbag for the front
passenger sea t should be turned off o r not =>
page 147, "Child
restraints on the front seat -some important things to know" .
• A sensor in the safety belt latch for the dr iver and for the front
seat passenger that senses whether that safety be lt is latched or not
and t ransmits this information to the electronic control unit.
& WARNING
Damage to the front pa ssenger seat can prevent the front airbag
fr om worki ng properly .
• Improper repair or di sa ssembly of the front pa ssenger and
dri ver seat will prevent th e Adv an ced Airbag Sy stem from func
tioning properly.
• Rep air s to the front p assenger seat must b e perfor med by qu al
ified and properly tra ined work shop per sonnel .
• Never remo ve the fro nt pa ssenger or dr iver se at from the
v ehi cle.
• Nev er remove th e uphol stery from the fron t pass eng er seat.
• Never disas semble or r emove p arts from the seat or di sconne ct
wires from it . ..
Vehicle care Do-it-yourself service Technical data
Page 250 of 316
___ T_ i_ r_e _s_ a_ n_ d_ w_ h_ e_ e _ ls _________________________________________________ _
Check the tire sidewall (=> page 249,
fig. 164) to determine the designated
load rating for a specific ti re. •
Tire service life
The service life of tires depends on a lot of different things
including proper installation and balancing, correct tire
pressure and driving style.
Tread Wear Indicator (TWll
"' M
J
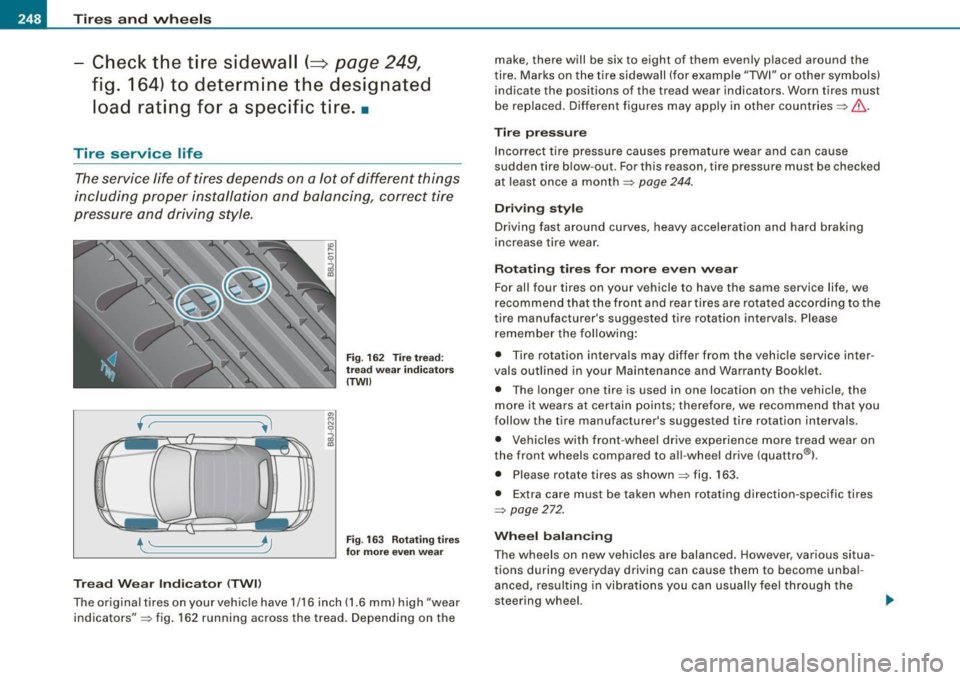
Fig. 162 Tir e tread:
tre ad we ar indi cator s
(TWll
Fig . 163 Rotating tires
for more even wear
The original tires on your veh icle have 1/16 inch (1.6 mm) high "wear
indicators" => fig . 162 running across the tread. Depending on the make, there will be six to eight of them evenly p
laced around the
t ire. Marks on the tire sidewall (for example "TWI" or other symbols)
indicate the positions of the tread wear indicators. Worn tires must
be rep laced. Different figures may apply in other countries =>& .
Tire p ressure
Incorrect tire pressure causes premature wear and can cause
sudden tire blow-out . Forth is reason, tire pressure must be checked
at least once a month
==> page 244.
Driving style
Driving fast around curves, heavy acceleration and hard braking
increase tire wear.
Rotating tires for more even wear
For all four tires on your vehicle to have the same service life, we
recommend that the front and rear tires are rotated according to the
tire manufacturer 's suggested tire rotation intervals. Please
remember the following:
• Tire rotation interva ls may differ from the vehicle service inter
vals outlined in your Maintenance and Warranty Booklet .
• The longer one tire is used in one location on the vehicle, the
more it wears at certain points; therefore, we recommend that you
follow the tire manufacturer's suggested tire rotation intervals.
• Vehicles with front-wheel drive experience more tread wear on
the front wheels compared to a ll-wheel drive (quattro®l .
• Please rotate tires as shown ;;:;:, fig. 163.
• Extra care must be taken when rotating direction -specific tires
==> page 272.
Wheel balancing
The wheels on new vehicles are balanced. However, various situa
tions during everyday driving can cause them to become unbal
anced, resulting in vibrations you can usual ly feel through the
steering wheel. ...