center console AUDI TT ROADSTER 2015 Owners Manual
[x] Cancel search | Manufacturer: AUDI, Model Year: 2015, Model line: TT ROADSTER, Model: AUDI TT ROADSTER 2015Pages: 244, PDF Size: 60.74 MB
Page 46 of 244
44 Convertible top
Convenience opening
.,. Press the unlock but ton m on the remote
control key to unlock the vehicle.
.,. Turn the key in the driver door
once to posi
tion @~
fig. 42.
.,. Within two seconds turn the key a second
t ime and hold it in t his position until the
power top has completely retracted.
Convenience clos ing
.,. Turn the key in the dr iver door once to posi
tion @
~fig. 42.
.,. Within two seconds turn the key a second
time and hold it in this position until the
power top has completely closed .
Opening or clos ing motion stops
immediately
as soon as you re lease the key. For safety rea
sons, it is not possible to activate the
conven
ience feature with the remote control.
A WARNING
When opening and closing the powe r top
make sure to keep yourself a nd others
clear of all moving parts. Risk of injury!
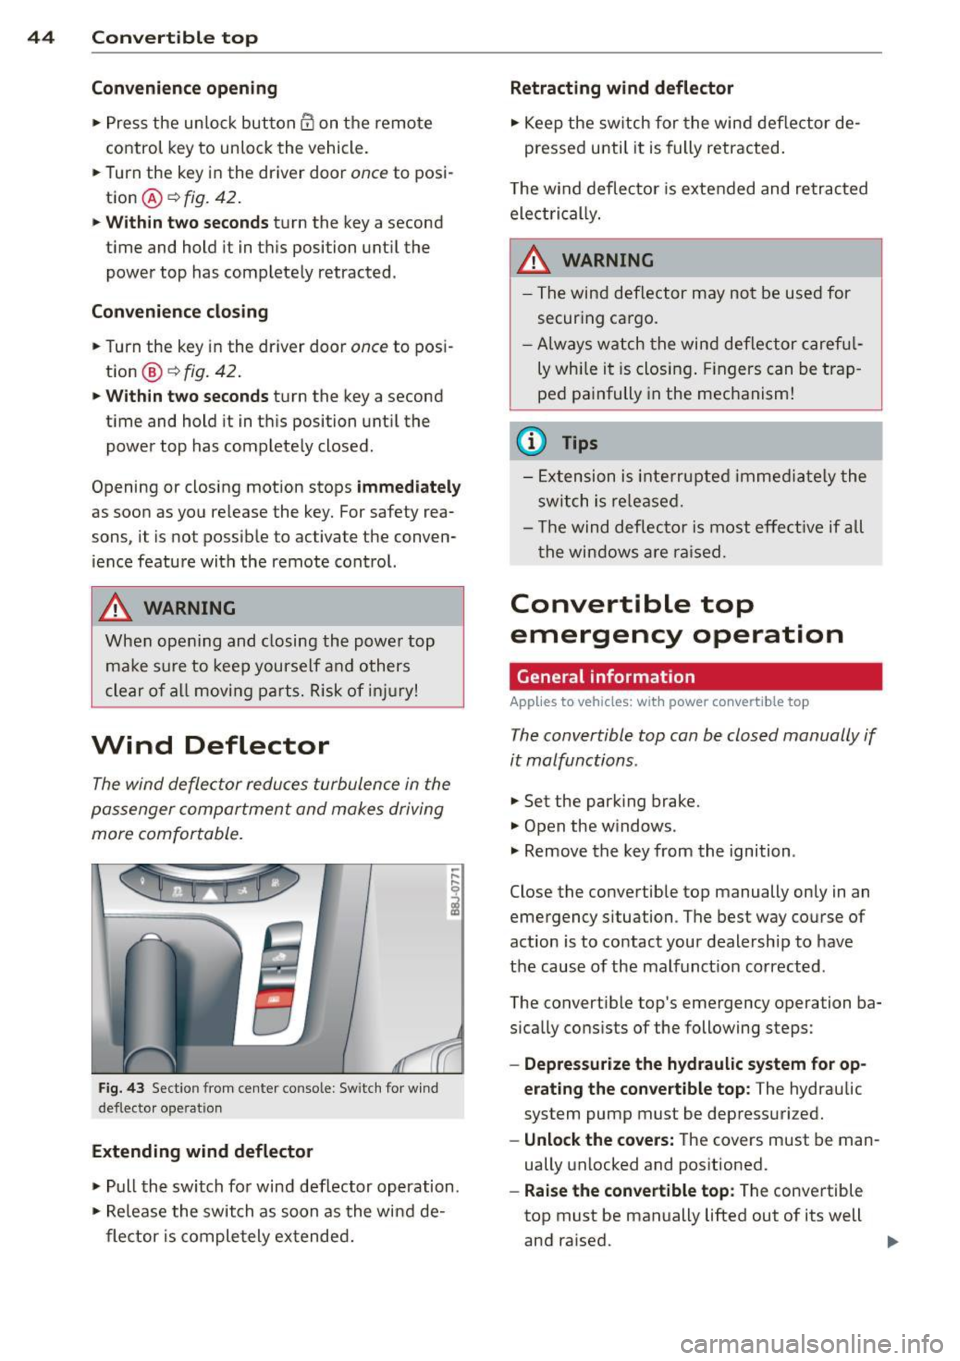
Wind Deflector
The wind deflector reduces turbulence in the
passenger compartment and makes driving
more comfortable.
F ig. 43 Section from center console: Sw itch for w ind
deflecto r operation
Extending wind deflector
.. ,... ,... 0
i
.,. Pull the switch for wind deflector operation.
.,. Re lease the switch as soon as the wind de-
flector is completely extended.
Retracting wind deflector
.,. Keep the switch for the wind deflector de
pressed unti l it is fully retracted .
T he w ind deflector is extended and retracted
electrical ly .
A WARNING
- The wind deflector may not be used for
secur ing ca rgo.
-Al ways watch the wind deflector careful
ly while it is closing. Fingers can be trap
ped painfully in the mechanism!
(D Tips
-Extension is interrupted immediately the
switch is released.
- Th e wind deflector is most effective if all
th e windows are raised.
Convertible top
emergency operation
General information
Applies to vehicles: with power convertible top
-
The convertible top con be closed manually if
it malfunctions.
.,. Set the park ing brake.
.,. Open the w indows.
.,. Remove the key from the ignition .
Close the convertible top manually only in an
emergency situation. The best way course of
action is to contact your dealership to have
the cause of the malfunct ion corrected.
The convert ible top's emergency operation ba
s ically consists of the following steps:
- Oepressurize the hydraulic system for op
erating the convertible top :
The hydraulic
system pump must be depressurized.
- Unlock the covers: The covers must be man
ually unlocked and positioned .
-Raise the convertible top: The convertible
top must be manually lifted out of its well
and ra ised. ..,.
Page 53 of 244
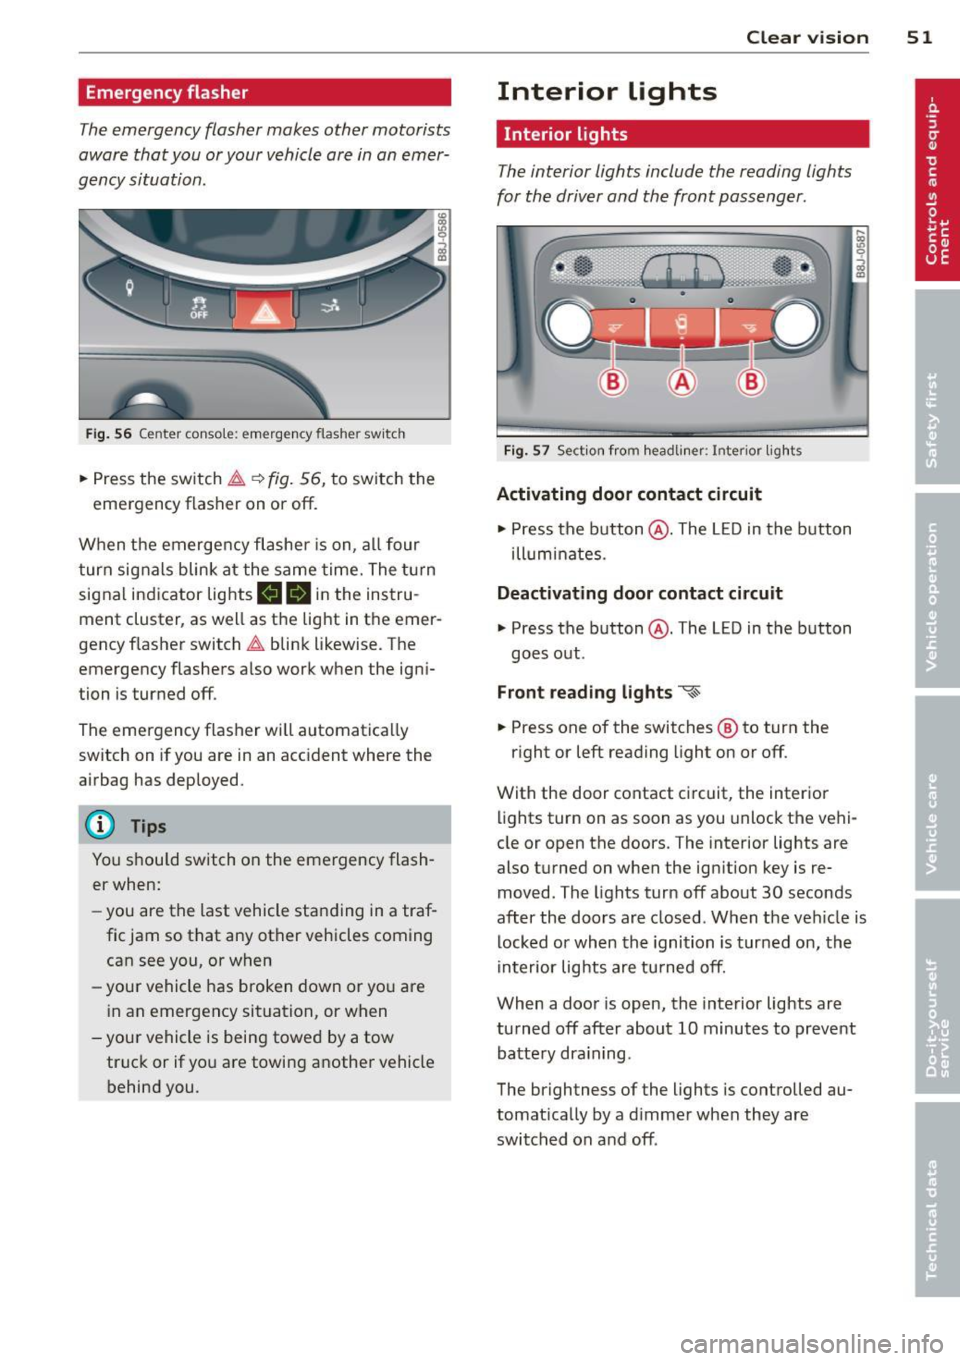
Emergency flasher
The emergency flasher makes other motorists
a w are that you or your vehicle are in an emer
gency situation.
Fi g. 56 Center console: em ergency flasher sw itch
.. Press the switch ~~ fig. 56, to switch the
emergency flasher on or off.
When the emerge ncy flashe r is on, al l four
turn signals blink at the same time. The t urn
signal indicator lights
mlll in the instru
ment cluster, as well as the light in the emer
gency f lasher switch ~ blink likewise. The
emergency flashers a lso work when the igni
tion is turned off.
The emergency flasher will automatica lly
switch on if you are in an acc ident where the
airbag has deployed.
@ Tips
You should switch on the emergency flash
er when:
- you are the last vehicle sta nding in a traf
fic jam so that any other vehicles coming can see you, or when
- your vehicle has broken down or yo u are
i n an emergency situation, or when
-you r vehicle is being towed by a tow
truck or if you are towing a nothe r vehicle
behind you. Clear vi
sion 51
Interior lights
Interior lights
The interior lights include the reading lights
for the driver and the front passenger .
Fig. 57 Section fro m headli ner: Interior light s
Activating door contact circuit
.. Press the button @. The L ED in the button
ill um inates.
Deactivating door contact circuit
.. Press the button @. The LED in the button
goes out .
Front read ing lights ~
.. Press one of the switches ® to turn the
r ight or left reading light on or off.
With the door contact ci rcuit, the inter ior
lights turn on as soon as you unlock the vehi
cle or open the doors. The interior lights are
also turned on when the ignition key is re
moved. The lights turn off about 30 seconds
after the doors are closed . When the veh icle is
locked or when the ignition is turned on, the
in terior lig hts are tu rned off.
When a door is open, the inte rior lights are
tu rned off after about 10 minutes to preve nt
batte ry dra in ing.
The brightness of the lights is controlled au
tomat ica lly by a d immer when they are
switched on and off .
Page 54 of 244
52 Clear vis ion
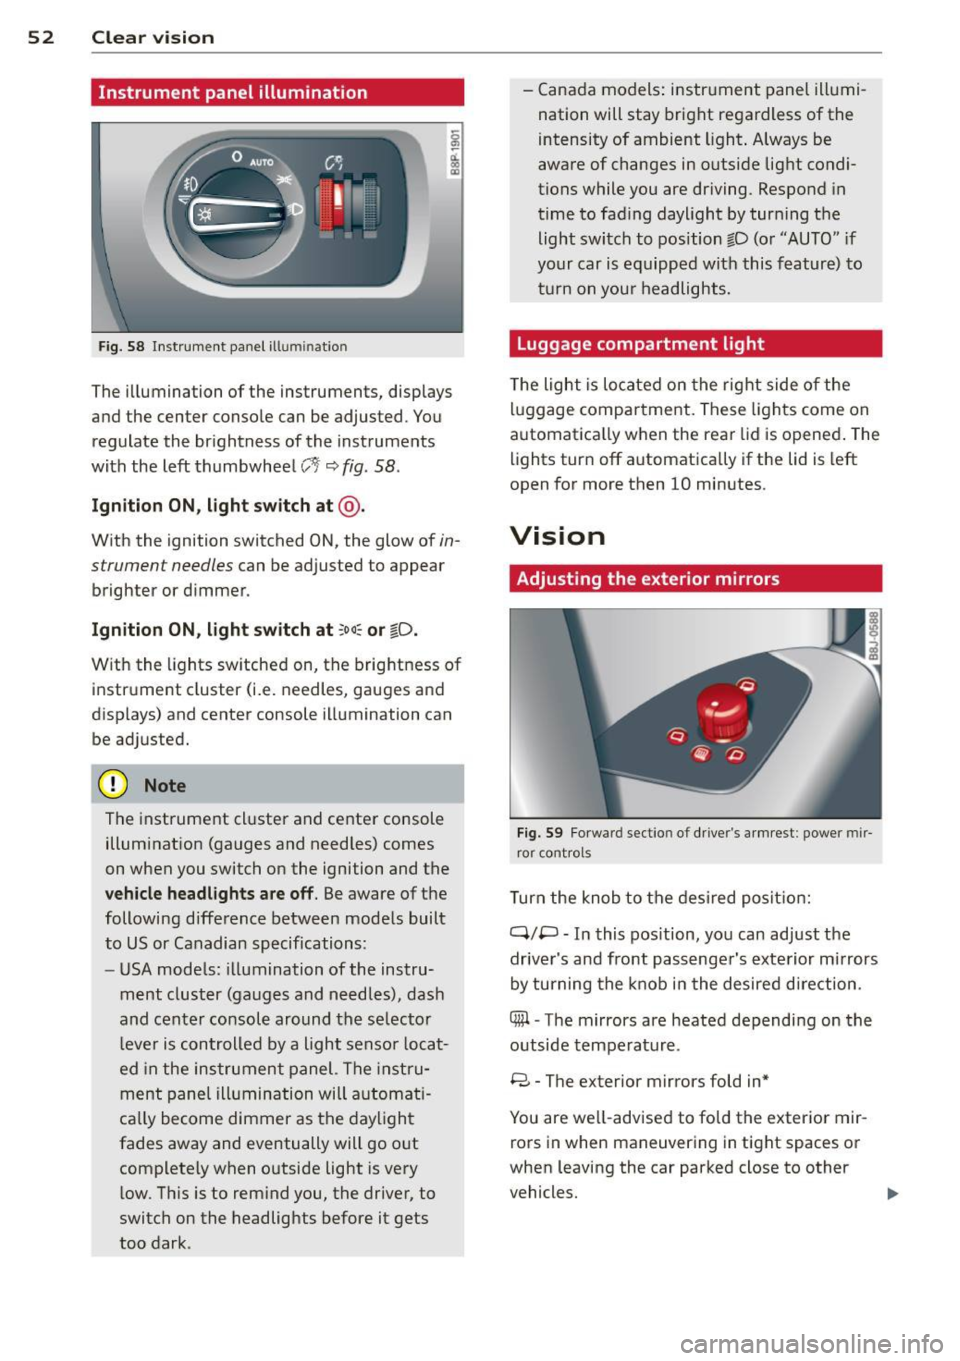
Instrument panel illumination
F ig. 58 Instrument panel ill umination
The illumination of the instruments, displays
and the center console can be adjusted. You
regulate the brightness of the instruments
with the left thumbwheel
CJ:J ~ fig. 58.
Ignition ON, light switch at @ .
With the ignition switched ON, the glow of in
strument needles can be adjusted to appear
brighter or dimmer.
Ignition ON , light switch at ;oo~ or io .
With the l ights sw itched on, the brightness of
instrument cluster (i.e. needles, gauges and
displays) and center console illumination can
be adjusted.
@ Note
The instrument cl uster and cente r console
illumination (gauges and needles) comes
on when you switch on the ignition and the
vehicle headligh ts ar e off . Be aware of the
following difference between mode ls built
to US or Canadian specifications:
- USA mode ls: illumination of the instru
ment cluster (gauges and needles), dash
and center consol e around the se lector
l ever is controlled by a light senso r locat
ed in the instrument panel. The instru
ment pane l illumination will a utomat i
cally become dimmer as the daylight
fades away and eventually will go out
complete ly when outside light is very
l ow . Th is is to rem ind you, the driver, to
switch on the headlights before it gets
too dark . -
Canada models: instrument panel illumi
nation will stay bright regardless of the
intensity of ambient light . Always be
aware of changes in outside light condi
tions while you are driving. Respond in
time to fading daylight by tur ning the
light switch to position fD (o r "AUTO" if
your car is equipped with this feature) to
t ur n on you r headlights.
Luggage compartment light
The light is located on the right side of the
lu ggage compartme nt. These lights come on
automat ica lly when the rear lid is opened . The
lights turn off automatica lly if the lid is left
open for more then 10 minutes.
Vision
Adjusting the exterior mirrors
Fig. 59 Fo rwa rd section of driver's a rmrest: power mir
ror controls
Turn the knob to the desired posit ion:
Q/ P -In this pos ition, you can adjust the
driver's and front passenger's exte rior m irrors
by turning the knob in the desired d irection.
4iil -The mirrors are heated depending on the
outside temperature .
8 -The exterior mirrors fold in*
You are we ll-advised to fold the exterior mir
rors in when maneuvering in tight spaces or
when leaving the car parked close to other
vehicles. ..,,.
Page 66 of 244
64 Seats and storage
A WARNING
Never put waste paper in the ashtray. Hot
ashes or othe r hot objects in the asht ray
co uld set waste paper on fire.
Cigarette Lighter/
socket
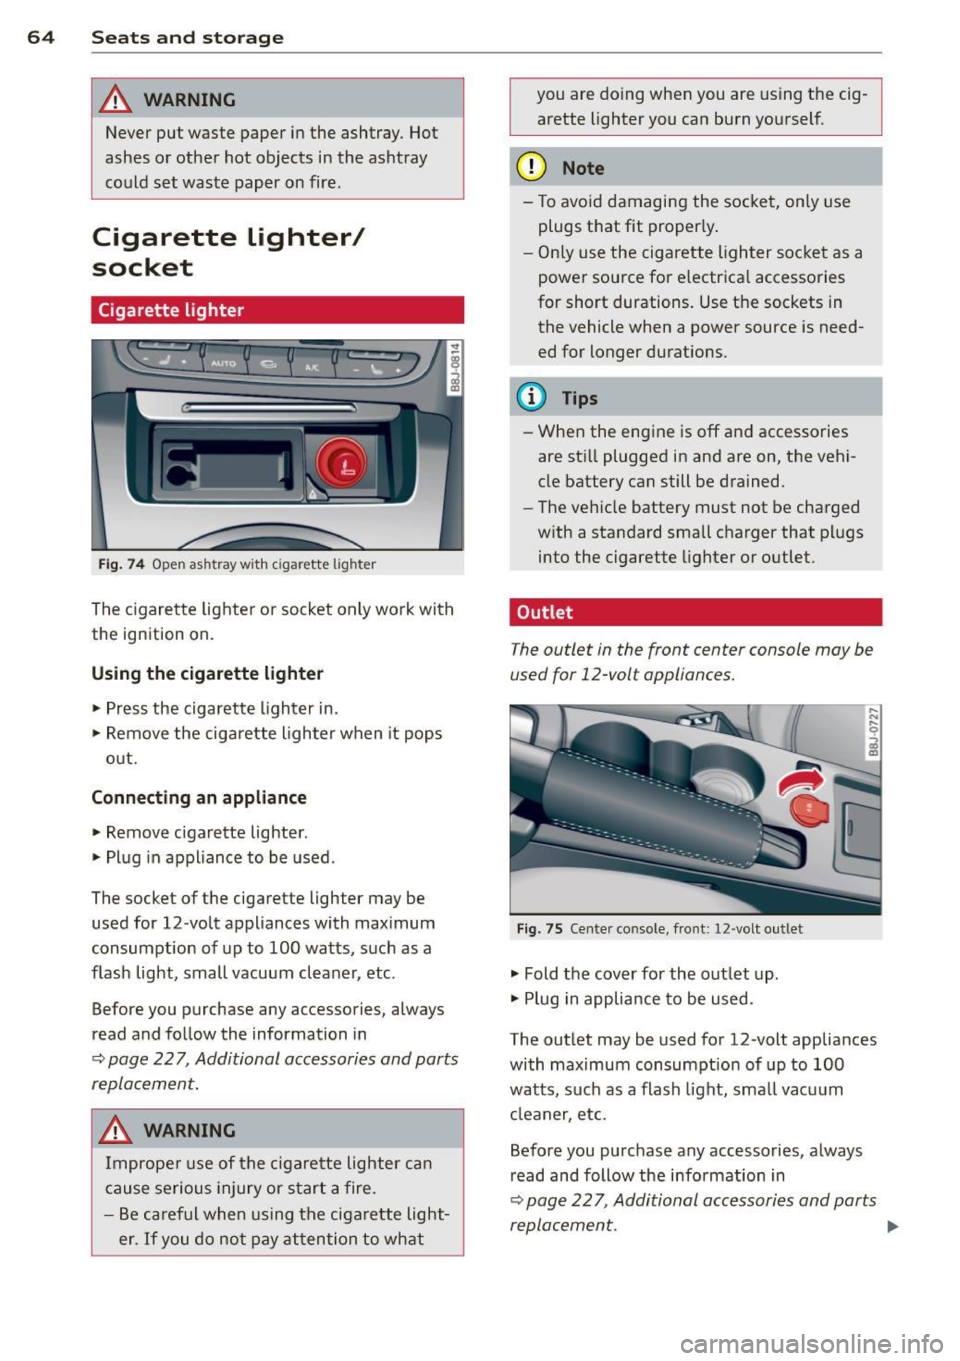
Cigarette lighter
Fi g. 74 O pen ash tray w ith c iga rett e ligh ter
The cigare tte lighte r or socket only work with
the ign ition on.
Using the cigarette lighter • Press the cigarette lighter in.
• Remove the ciga rette lighter when it pops
out.
Conn ecting an appliance
• Remove cigarette lighter .
• Plug in appliance to be used.
The socket of the cigarette lighter may be used for 12 -volt appliances with max imum
consumption of up to 100 watts, such as a
flash light, small vacuum cleaner, etc.
Before you purchase any accessories, always
read and follow the information in
~ page 22 7, Additional accessories and parts
replacement.
A WARNING
Improper use of the cigarette lighter can
cause serious injury or star t a fire.
- Be careful when using the ciga rette light
er.
If you do not pay attention to what you are doing when you are using t
he cig
arette lighter you can burn yourself.
(D Note
- To avoid damagi ng the socket, only use
plugs that fit proper ly .
- Only use the cigarette lighter socket as a
power source for e lectrica l accessories
for short durations. Use the sockets in
the vehicle when a power source is need ed for longer durations .
(D Tips
- When the engine is off and accessories
are sti ll plugged in and are on, the vehi
cle battery can still be drained.
- The vehicle battery must not be charged
w ith a standard small charger that plugs
into the cigarette lighter or outlet .
Outlet
T he outlet in the front center console may be
used for 12-volt appliances.
Fig . 75 Ce nter co nso le, fro nt: 12 -volt out let
• Fold the cover for the outlet up .
• Plug in appliance to be used .
The outlet may be used for 12 -volt appliances
with maximum consumpt ion of up to 100
watts, such as a flash light, small vacuum
cl eaner, etc.
Before you purchase any accessories, always
read and follow the information in
~ page 22 7, Additional accessories and parts
replacement . .,,.
Page 76 of 244
7 4 On the road
@ For the sake of the environment
To avoid unnecessary engine wear and to reduce exhaust emissions, do not let your
veh icle stand and warm up. Be ready to
drive off immediately after start ing your
veh icle. Maintain moderate speed until the
engine is comp letely warm. Remember,
the engine performs best at operating
temperature.
Stopping the engine
• Turn the ign ition key to position@
~ page 72, fig. 81.
&_ WARNING
-Never turn off the engine before the ve
hicle has come to a complete stop. The
full function of the brake booster and the
power steering is not guaranteed. You
must use more force to turn or brake if
necessary. Because you cannot steer and
brake as you usually would, this could
lead to crashes and serious injuries.
- The radiator fan can continue to run for
up to 10 minutes even after you have
turned off the engine and removed the
ignition key . The radiator fan can also
turn on again if the engine coolant heats up because of intense sunlight or heat
build-up in the engine compartment.
(D Note
Do not stop the engine immediate ly after
hard or extended driving. Keep the engine
running for approximately two minutes to
prevent excessive heat build-up.
Parking brake
Parking brake
When the parking brake is set, it prevents the
vehicle from rolling away unintentionally.
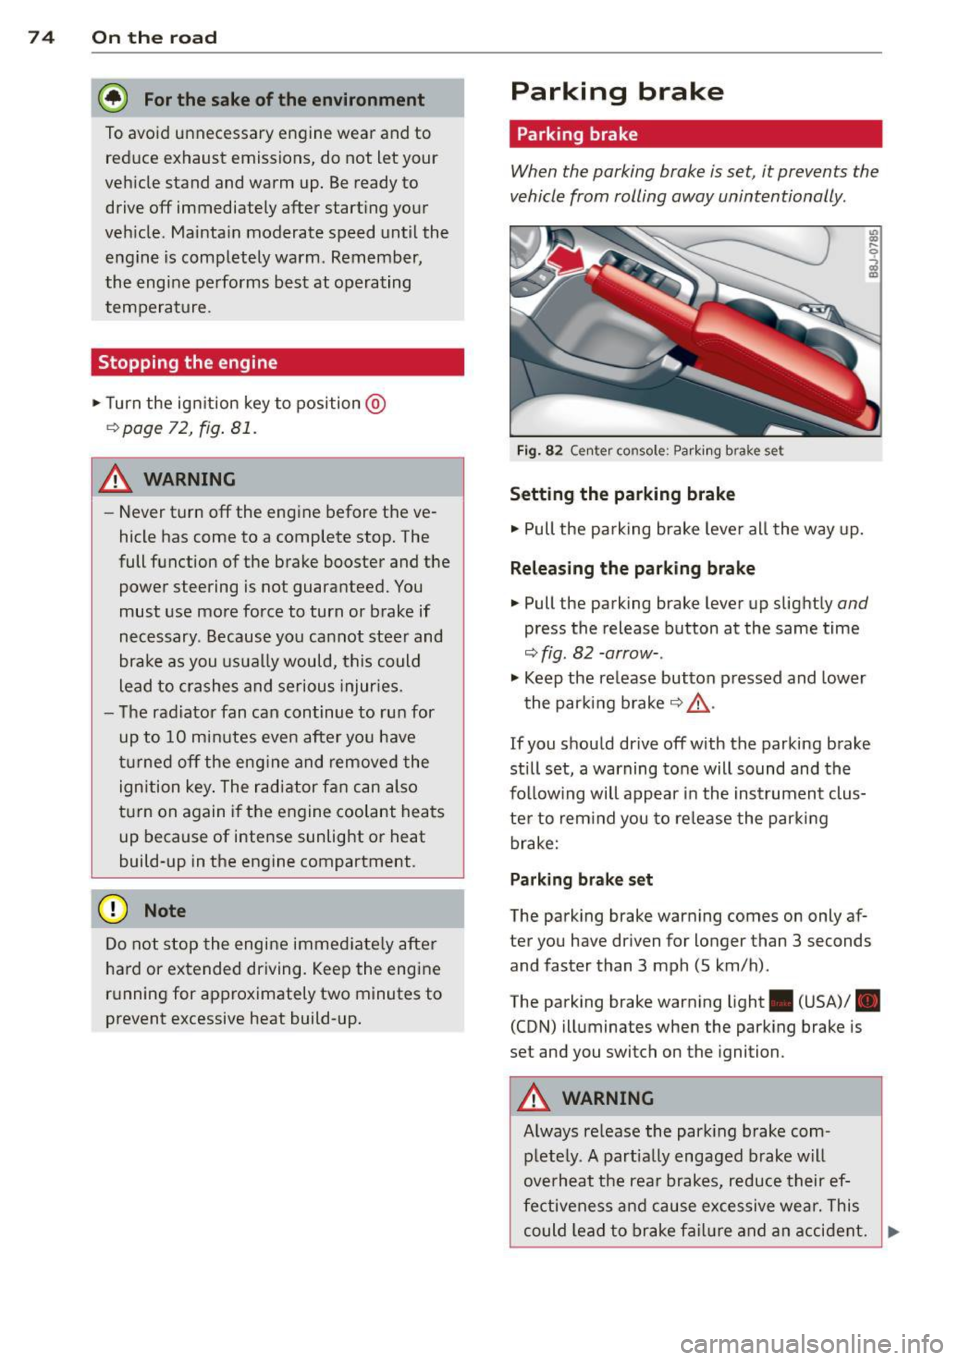
Fi g. 82 Center console: Park ing brake set
Setting the parking brake
• Pull the pa rking brake lever all the way up.
Releasing the parking brake
• Pull the parking brake lever up slightly and
press the release button at the same time
~fig. 82 -arrow-.
• Keep the release button pressed and lower
the parking brake~.&,.
If you should drive off with the parking brake
still set, a warning tone will sound and the
fol low ing will appear in the instrument clus
ter to remind you to release the parking
brake:
Parking brake set
The parking brake warning comes on only af
ter you have driven for longer than 3 seconds
and faster than 3 mph (5 km/h).
The parking brake warning light . (USA)/ .
(CON) illuminates when the parking brake is
set and you switch on the ignition.
&_ WARNING
Always release the park ing brake com-
pletely. A partially engaged brake will
overheat the rear brakes, reduce their ef
fectiveness and cause excessive wear. This
could lead to brake failure and an accident. .,..
Page 81 of 244
Audi magnetic ride
Applies to vehicles: with magnetic ride
Damping can be adjusted to the driver's pref
erence and it adapts automatically to the cur
rent driving situation.
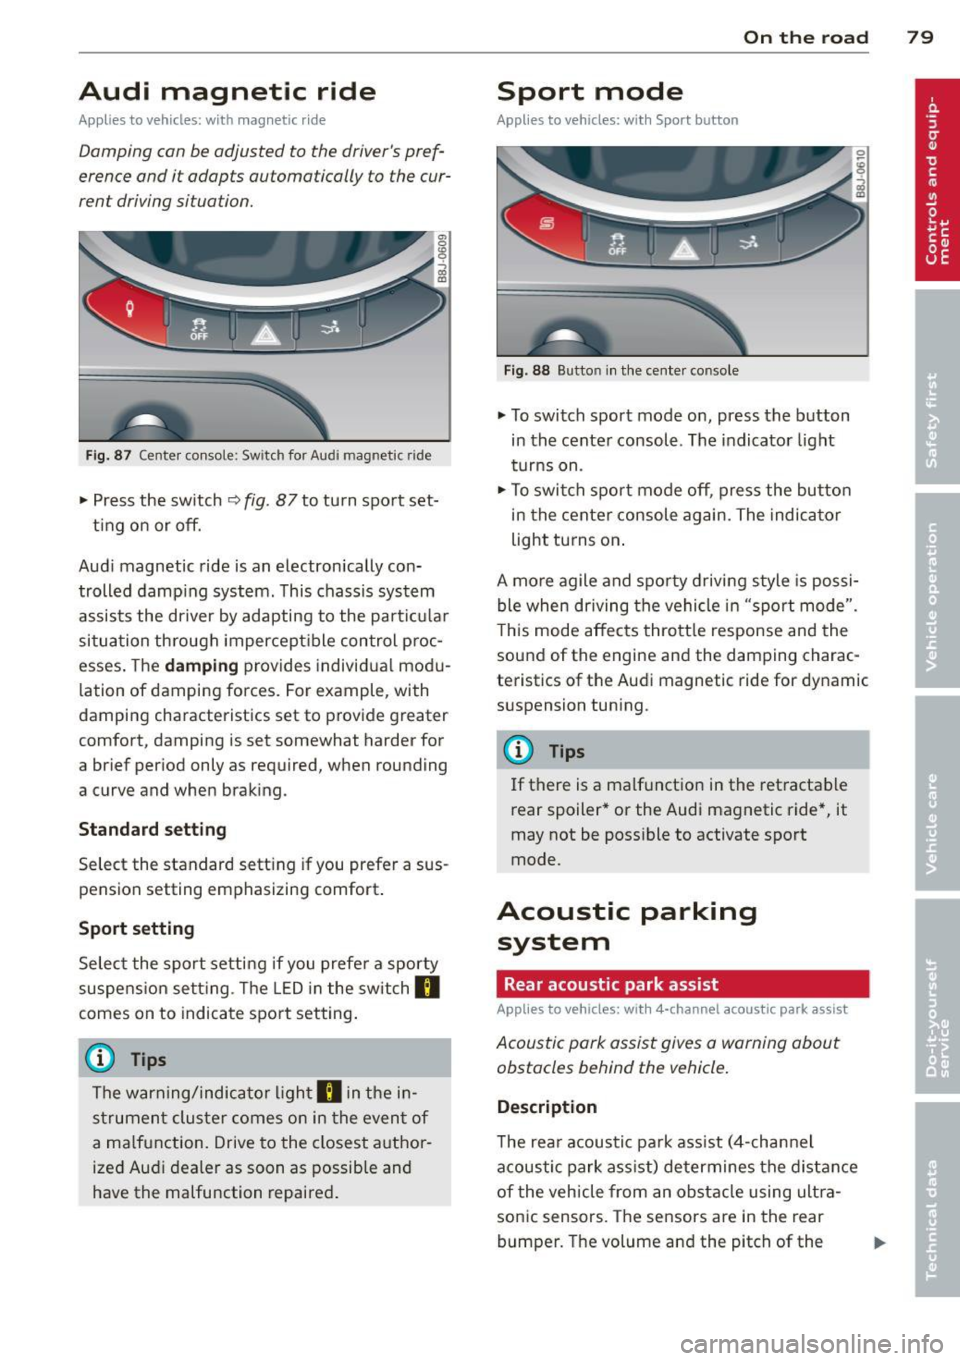
Fig. 87 Ce nter console : Switc h for Au di magnet ic ride
• Press the sw itch Q fig . 87 to tu rn sport set-
t ing on or off.
Aud i magnetic ride is an electronically con
trolled damping system. This chassis system
assists the dr iver by adapting to the particular
situation through imperceptible control proc
esses. The
da mping provides individua l modu
lation of damping forces. For example, with
damping characteristics set to provide greater
comfort, damping is set somewhat harder for
a brief period only
as required, when rounding
a curve and when braking.
St andard setti ng
Select the standard sett ing if you prefer a sus
pension setting emphasizing comfort .
Sport setting
Select the sport setting if you prefer a sporty
suspens ion setting . The LED in the switch
R
comes on to indicate sport setting.
@ T ips
The warning/indicator light R in the in
strument cluster comes on in the event of
a ma lfunction. Drive to the closest author
ized Audi dealer as soon as possible and
have the malfunction repaired.
On th e road 7 9
Sport mode
Applies to vehicles: wit h Sport button
Fig . 88 Butto n in the center console
.,. To switch sport mode on, press the button
in the center console . The indicator light
turns on.
• To switch sport mode off, press the button
in the center console again. The indicator
light turns on .
A more agile and sporty driving style is possi
ble when driving the vehicle in "sport mode".
T his mode affects throttle response and the
sound of the engine and the damping charac
teristics of the Audi magnetic ride for dynamic
suspension tuning .
(1} Tips
If there is a malfunction in the retractable
rear spoiler* or the Audi magnetic ride*, it
may not be poss ible to activate sport
mode.
Acoustic parking system
Rear acoustic park assist
Applies to vehicles: with 4-channe l acoustic park assist
Acoustic park assist gives a warning about
obstacles behind the vehicle.
D es cription
The rear acoustic park assist (4-channel
acoustic park assist) determines the distance
of the vehicle from an obstacle using ultra
sonic sensors. The sensors are in the rear
bumper. The volume and the pitch of the
Page 87 of 244
If you have selected a lower gear than the cur
rent one, the transmission will only shift down
when the engine cannot be overspeeded .
If kick-down is actuated, the transmission
shifts into a lower gear independent ly of
speed and engine rpm .
Steering wheel with Tiptronic controls
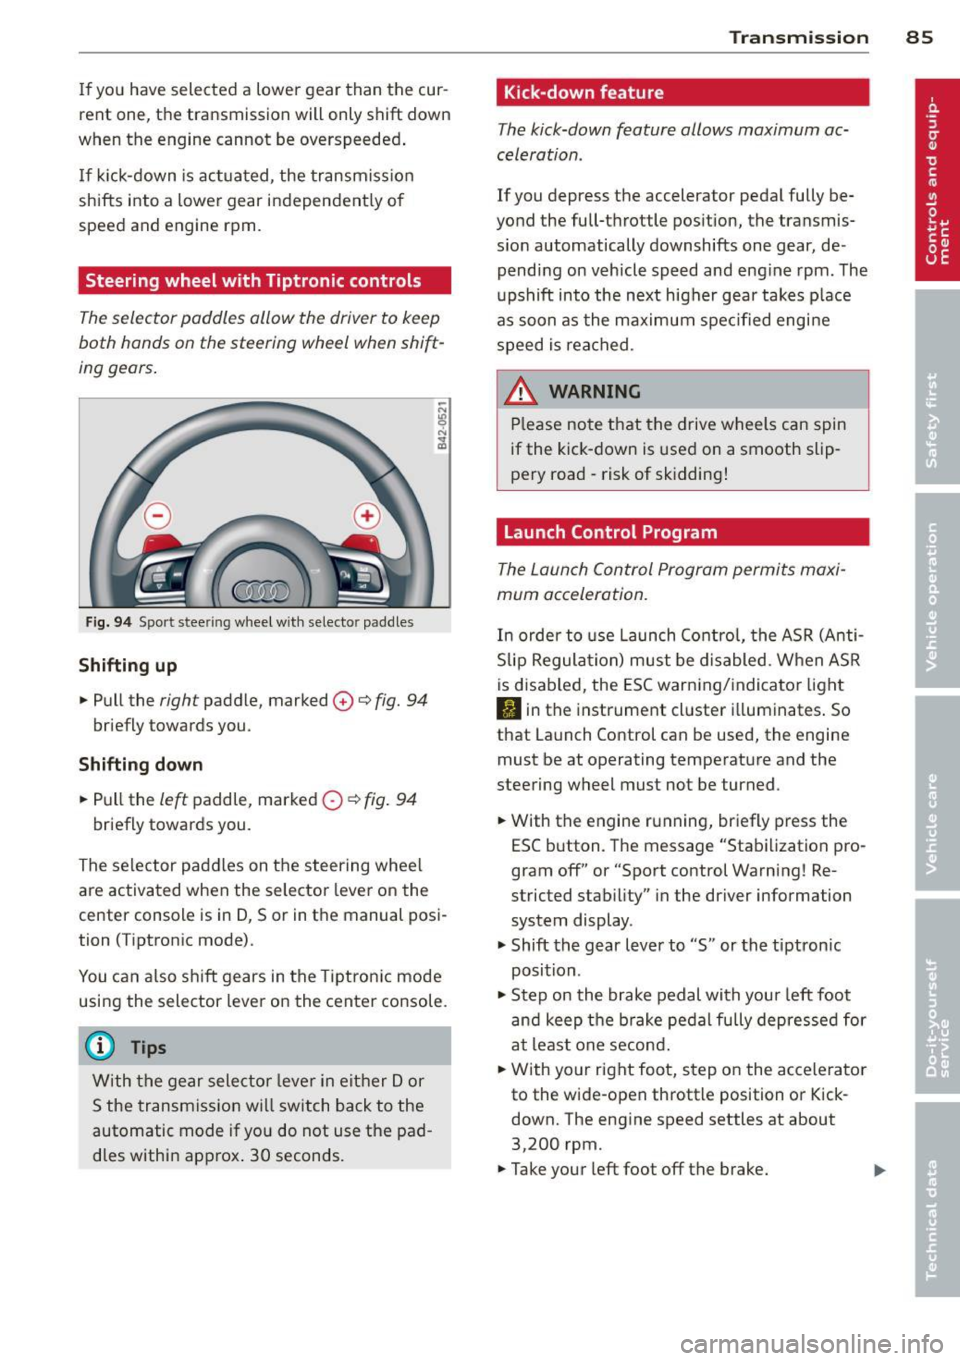
The selector paddles allow the driver to keep
both hands on the steering wheel when shift
ing gears.
Fig. 94 Sport stee ring wheel with selecto r paddles
Shifting up
.,. Pull the right paddle, marked 0 ¢ fig. 94
briefly towards you .
Shifting down
.. Pull the left paddle, marked 0 ¢ fig. 94
briefly towards you.
The selector paddles on the steering wheel
are activated when the selector lever on the
center console is in D, Sor in the manual posi
tion (Tiptronic mode).
You can also shift gears in the Tiptronic mode
using the selector lever on the center console.
@ Tips
With the gear selector lever in either Dor
S the transmission will switch back to the
automatic mode if you do not use the pad
dles within approx . 30 seconds.
Transmission 85
Kick -down feature
The kick-down feature allows maximum ac
celeration .
If you depress the accelerator pedal fully be
yond the full-throttle position, the transmis
sion automatically downshifts one gear, de
pending on vehicle speed and engine rpm. The
upshift into the next higher gear takes place
as soon as the maximum specified engine
speed is reached.
_&. WARNING
Please note that the drive wheels can spin
if the kick-down is used on a smooth slip
pery road -risk of sk idding!
Launch Control Program
The Launch Control Program permits maxi
mum acceleration.
In order to use Launch Control, the ASR (Anti
Slip Regulation) must be disabled. When ASR
is disabled, the ESC warning/indicator light
I) in the instrument cluster illuminates. So
that Launch Control can be used, the engine must be at operating temperature and the
steering wheel must not be turned .
.. With the engine running, briefly press the
ESC button . The message "Stabilization pro
gram off" or "Sport control Warning! Re
stricted stability" in the driver information
system display.
.. Shift the gear lever to "S" or the tiptron ic
position .
.. Step on the brake pedal with your left foot
and keep the brake pedal fully depressed for
at least one second .
.. With your right foot, step on the accelerator
to the wide-open throttle position or Kick
down. The engine speed settles at about
3,200 rpm.
.. Take your left foot off the brake.
Page 125 of 244
_& WARNING
Items stored between the safety belt
buckle and the center console can cause
the sensors in the buckle to send the
wrong informat ion to the electronic con
trol modu le and prevent the Advanced A ir
bag System from working properly.
- Always make sure that noth ing ca n inte r
fere w ith the safety belt buck les and that
t hey are not obstructed.
Knee airbags
Description of knee airbags
The knee airbag system can provide supple
mental protection to properly restrained
front seat occupants.
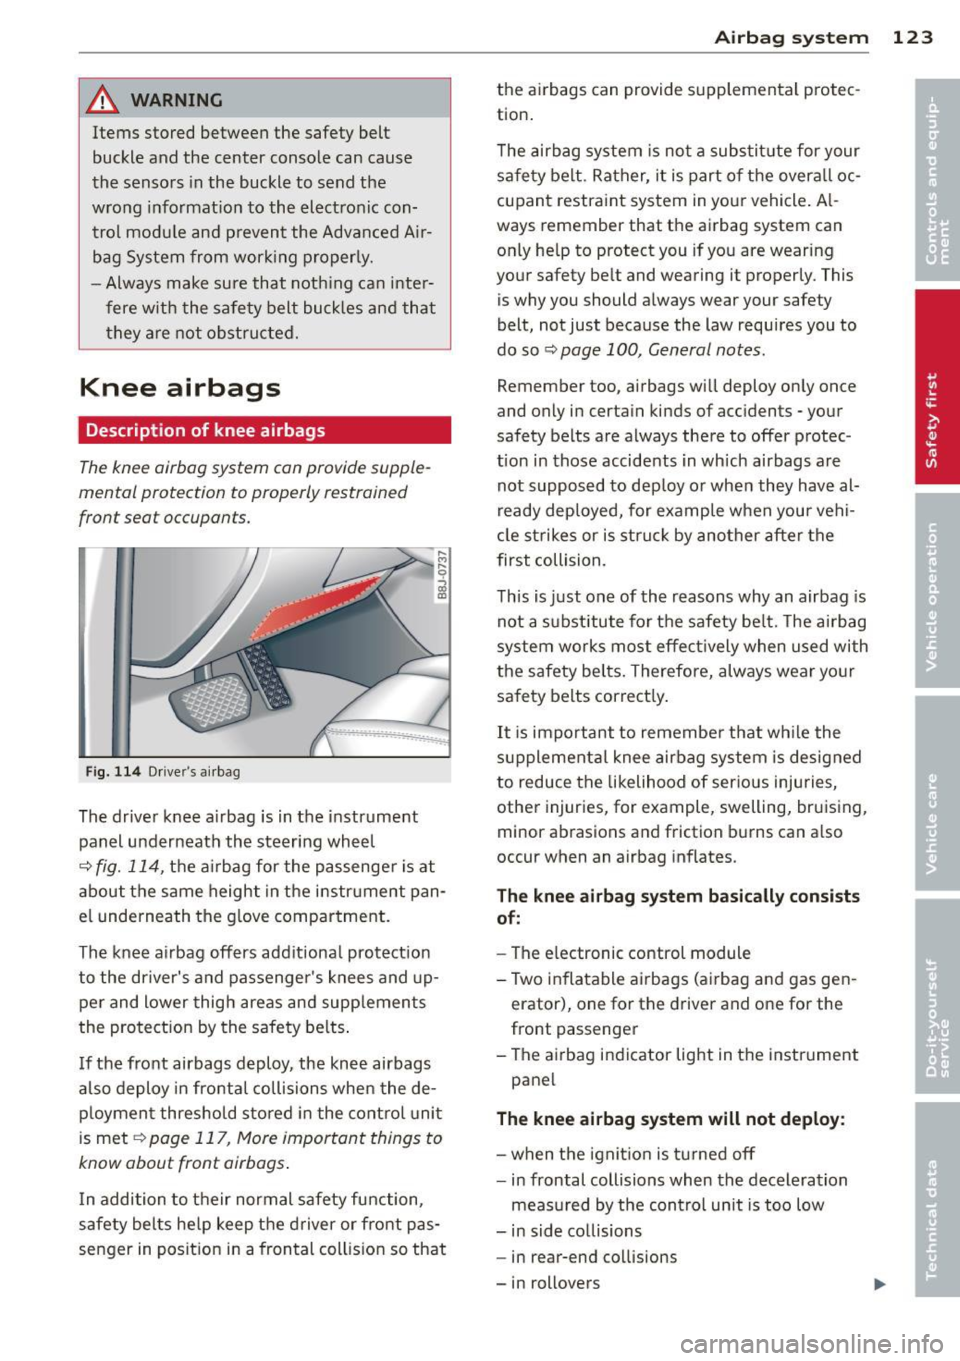
F ig . 11 4 Drive r's a irbag
The driver knee a irbag is in the instrument
panel underneath the steering whee l
~ fig. 114, the airbag for the passenger is at
about the same height in the i nstrument pan
e l underneath the g love compartment.
The knee airbag offers additiona l protection
to the driver's and passenger's knees and up
per and lower thigh areas and supp lements
the protect ion by the safety be lts .
I f the front airbags deploy, the knee airbags
a lso deploy i n frontal collisions when the de
p loyment threshold sto red in the cont ro l uni t
is met ~
page 117, More important things to
know about front airbags .
In addition to their normal safety function,
safety belts he lp keep the driver or front pas
senger in posit ion in a frontal coll is ion so that
A irba g sy stem 123
the ai rbags can provide supplemental protec
tion .
T he airbag system is no t a subs tit ute for your
sa fety be lt . Rather, it is part of the overall oc
cupant restraint system in your vehicle . A l
ways remember that the airbag system can
only he lp to protect you if you are wearing
your safety be lt and wearing it properly. This
is why you should always wear your safety
belt, not just because the law requires you to
do so
r::;, page 100, General notes .
Remember too, airbags will deploy on ly once
and only in certain kinds of accidents -your
safety belts are always there to offer protec
t ion in those accidents in wh ich airbags are
not supposed to dep loy o r when they have al
r eady deployed, for example when your vehi
cl e strikes or is struck by another after the
f irst collision.
This is just one of the reasons why an airbag is
not a s ubstitute fo r the safety be lt. The ai rbag
system works most effect ively when used with
the safety be lts. Therefore, always wear yo ur
sa fety belts correct ly .
It is impo rtant to remembe r that wh ile the
s u pplementa l knee airbag system is designed
to reduce the likelihood of ser ious inju ries,
other injur ies, for example, swelling, bru ising,
minor ab rasions and friction burns can a lso
occur when an airbag inflates.
The knee airbag system basically consists
of:
- The e lectronic control module
- Two in flatable ai rbags (a irbag and gas gen -
erator), one for the d river and one for the
front passenger
- The ai rbag indicator light in the instrument
panel
The knee airbag system will not deploy:
- when the ignit io n is t urned off
- in frontal collisions when the deceleration
meas ured by the control unit is too low
- in side co llisions
- in rear-end collisions
- in rollovers