lock AUDI TT ROADSTER 2015 Owners Manual
[x] Cancel search | Manufacturer: AUDI, Model Year: 2015, Model line: TT ROADSTER, Model: AUDI TT ROADSTER 2015Pages: 244, PDF Size: 60.74 MB
Page 4 of 244
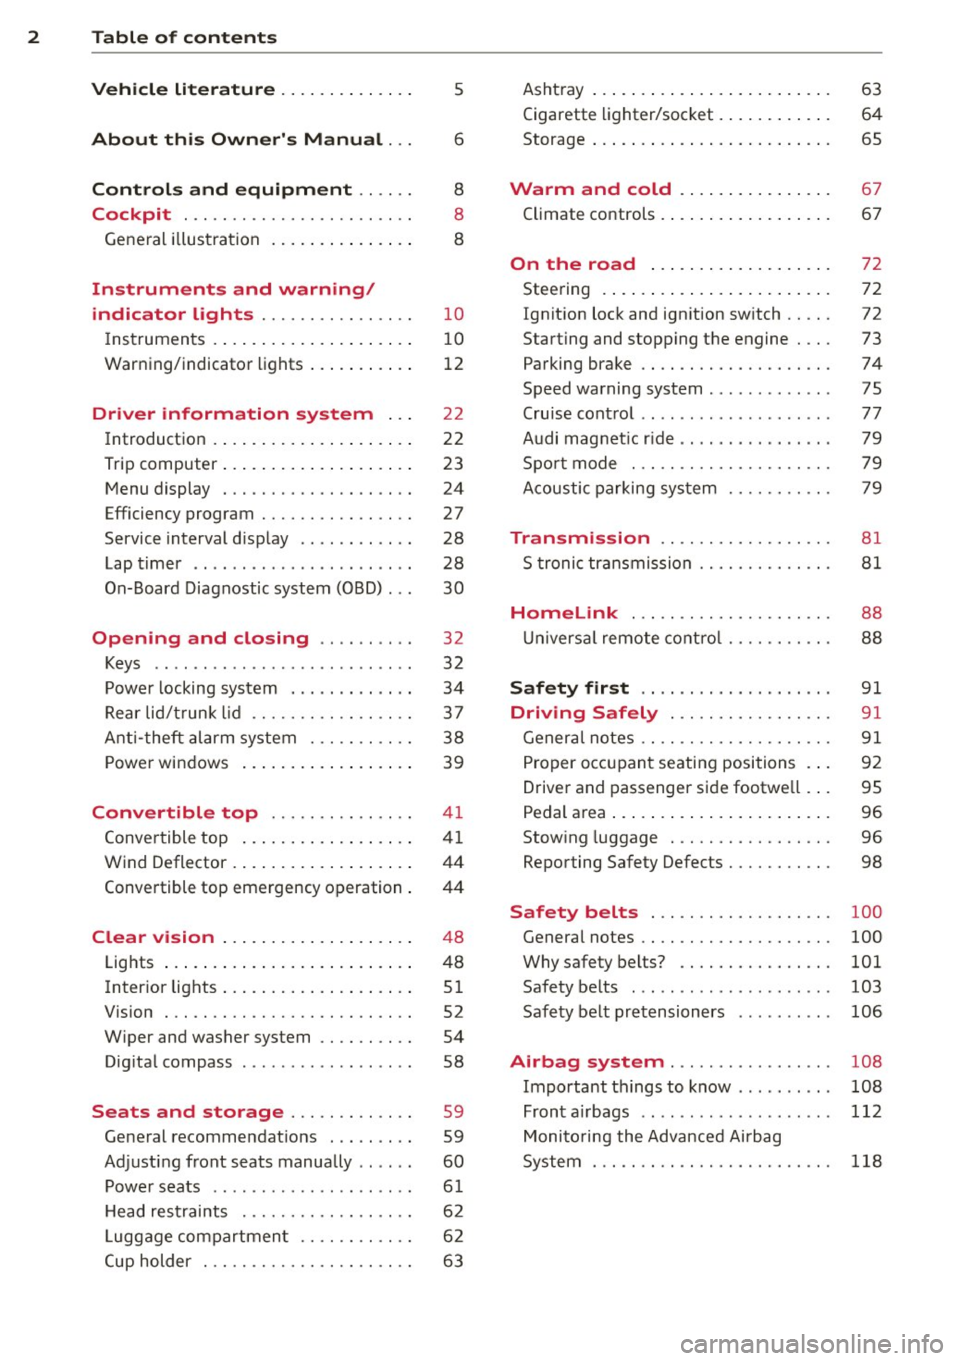
2 Table of contents Vehicle literature .. .. .. .. .. ... .
About this Owner's Manual ...
Controls and equipment .. ... .
Cockpit ................ .... .. . .
General illus tration .... ... .. .. ... .
Instruments and warning/
indicator lights ........ .. .. .. . .
Ins truments . .. .. ..... ... .. .. ... .
War ning/ indi cator lights ... .. ... .. .
Driver information system .. .
Introduct ion . .. .. ..... ... .. .. ... .
Trip computer .. .. ..... ... .. .. ... .
M enu display . ........... .... ... .
Efficiency program ........ .. .. .. . .
Service interval d isp lay ..... ... .. . .
Lap timer .. .......... ........ .. .
On- Board Diagnostic system (OBD) .. .
Opening and closing .. .. .. .. . .
Keys ........................ .. .
P owe r locking system ............ .
R ear lid/ trun k li d ................ .
Ant i- t heft ala rm system ... .. .. .. . .
P owe r win dows .. ..... ... .. .. ... .
Convertible top .............. .
Convertible top ....... ... .. .. ... .
W ind Deflector . .. ..... ... .. .. ... .
Conve rtible top eme rgency o peration .
Clear vision .. .. ..... ... .. .. ... .
Lights ...... .. .. ..... ... .. .. ... .
Inter ior lights .. . ...... ... .. .. ... .
V1s1on . .. ................. .. ... .
W iper and washer system .. .. .. ... .
D ig ita l compass ........... .... .. .
Seats and storage ....... .. .. . .
Ge neral recommendat ions ........ .
Ad just ing front seats manually .. ... .
5
6
8
8
8
1 0
1 0
12
2 2
22
23
24
27
28
28
30
32
32
34
37
3 8
39
4 1
41
44
4 4
4 8
48
51
52
54
58
59 59
60
P owe r seats . . . . . . . . . . . . . . . . . . . . . 6 1
H ead res traints . . . . . . . . . . . . . . . . . . 6 2
L uggage compartmen t . . . . . . . . . . . . 6 2
Cup holder . . . . . . . . . . . . . . . . . . . . . . 63 Asht
ray ... .... .. ... .. ..... .... . .
Cigarette lighter/socket . ..... ... .. .
Storage ... .. .. .. .. ... .. .. .. .. .. .
Warm and cold ... .. ..... .... . .
Climate controls .. .. .... .... ... .. . 63
64
65
67
67
On the road
. . . . . . . . . . . . . . . . . . . 72
Stee ring . ..... .. ... .. ..... ... .. .
Ignition lock and ignition sw itch .. .. .
Starting and stopping the engine ... .
Parking brake ................... .
Speed warning system ............ .
Cru ise cont ro l .. .. ............... .
Audi magnet ic r ide ... ... .... ... .. .
Spo rt m ode .................. .. .
A coustic parking sys tem
Transmission .. .. ........... .. .
S t ronic transmission ........... .. .
72
72
73
74
75
77
79
79
79
81
81
Homelink . . . . . . . . . . . . . . . . . . . . . 88
U nivers al remote control ...... .. .. .
Safety first ................... .
Driving Safely .... .......... .. .
Gener al notes .. .. ............. .. .
P roper occ upan t seating positions . . .
Drive r and passenger side footwe ll .. .
Pedal a rea ..... .. .. ... ..... ... .. .
Stow ing luggage . ............. .. .
Reporting Safety Defects ........ .. .
88
9 1
91
91
92
95
96
96
98
Safety belts . . . . . . . . . . . . . . . . . . . 100
General notes . . . . . . . . . . . . . . . . . . . . 100
Why safety belts? . . . . . . . . . . . . . . . . 101
Safety be lts . . . . . . . . . . . . . . . . . . . . . 103
Safety belt pretensioners . . . . . . . . . . 106
Airbag system . . . . . . . . . . . . . . . . . 108
Important th ings to know . . . . . . . . . . 108
Front air bags .. .. ... .. ....... ... . 112
Moni to ring the Advanced Ai rbag
S ystem . . . . . . . . . . . . . . . . . . . . . . . . .
118
Page 11 of 244
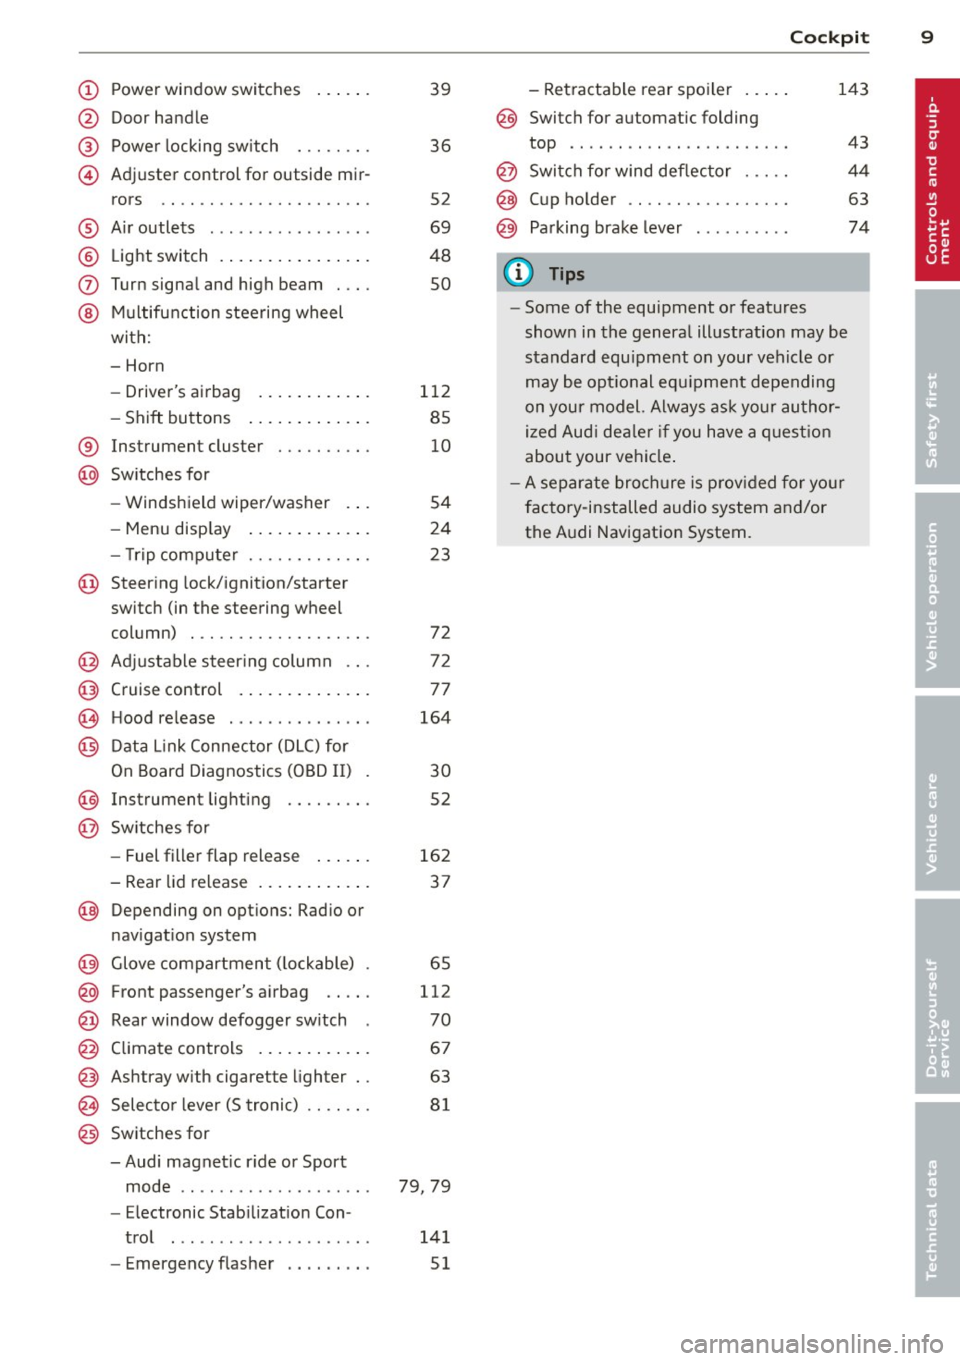
(!) Power window switches
@
®
©
Door handle
Power locking sw itch
Adjuster control for outside mir- rors ... . ............. .... .
® Air outlets ............... . .
@ Light switch . ... .... ... .. .. .
(J) Turn signa l and high beam . .. .
@ Mu ltifunction stee ring wheel
with:
- Horn
- Drive r's ai rbag .... ... .. .. .
- Shift buttons ..... ... .. .. .
® Instrument cluster
@ Sw itches for
- Windshield wiper/washer
- Menu disp lay ..... ... .. .. .
39
36
S2
69
48
so
1 12
85
10
54
24
- T rip computer . . . . . . . . . . . . . 23
© Steering lock/ignition/starter
switch (in the steering wheel
column) . . . . . . . . . . . . . . . . . . . 72
@ Adjustab le s teer ing column . . . 72
@ Cruise control . . . . . . . . . . . . . . 77
€3J H ood re lease . . . . . . . . . . . . . . . 164
@ Data L ink Connector (DLC) for
On Board Diagnostics ( OBD II) 30
@ Instrument lighting . . . . . . . . . 52
@ Switches for
- Fuel filler flap release 162
- Rea r lid re lease . . . . . . . . . . . . 3 7
@ Depending on opt ions: Rad io or
nav igat ion system
@ Glove compar tment ( lockable) 65
@ Front passenger's a irbag . . . . . 112
@ Rear window defogger sw itch 70
@ C limate controls . . . . . . . . . . . . 6 7
@ Ashtray w ith cigarette lighter . . 63
@ Selecto r l ever (S troni c) . . . . . . . 81
@) Switches for
- Audi magnet ic r ide or Sport
mode . . . . . . . . . . . . . . . . . . . . 79, 79
- Electronic Stab ilizat ion Con-
tro l . . . . . . . . . . . . . . . . . . . . . 141
- Emergency flasher . . . . . . . . . 51
Cockpi t 9
- Retractable rear spo iler .. ...
@ Switch for automatic folding 143
top . ... .. .. .. .. . .. .... ... .
@ Swi tch for wind deflector .... .
@ C up ho lder .. .. .. .......... .
@ Pa rking brake lever
(D Tips
- Some of the equipment or features
show n in the genera l illustration may be
standard equ ipme nt on your vehicle or
may be opt ional equ ipment depending
on you r model. Always as k yo ur au tho r
ized Aud i de aler if you have a quest ion
abou t your vehi cle.
- A separate bro ch ure is p rov ided for yo ur
facto ry-installed audio system and/or
the A udi Navigation System. 43
4
4
63
74
Page 13 of 244
Instrument s and warning /indicator lights 11
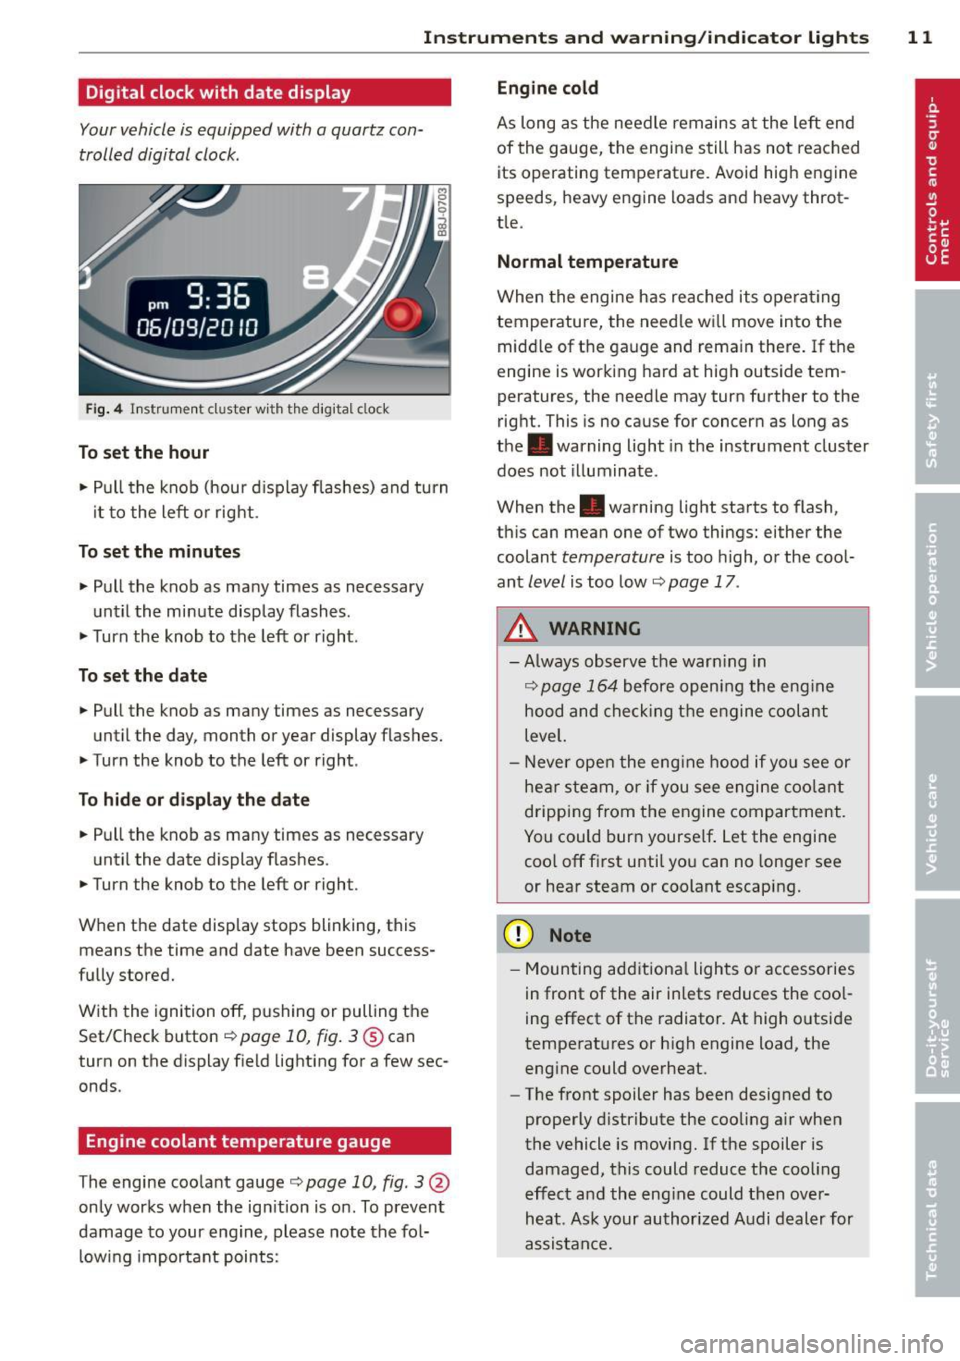
Digital clock with date display
Your vehicle is equipped with a quartz con
trolled digital clock .
Fig. 4 In str um en t cl uste r w it h t he dig ita l cloc k
To set the hour
.. Pull the knob (hou r d isp lay flashes) and turn
i t to the left o r right.
To set the minutes
.. Pull the knob as ma ny times as necessary
un til the mi nute display flash es.
.. Turn the knob to the left or right .
To set the date
.. Pull the knob as many times as necessary
unt il the day, month or year display flashes.
.. Turn the knob to the left or right .
To hide or d isplay the date
.. Pull the knob as many times as necessary
unti l the date display flashes.
.. Turn the knob to the left or right.
When the date disp lay stops blinking, this
means the time and date have been success
fu lly stored.
W ith the ignition off, pushing or pulling the
Set/Check button¢
page 10, fig . 3@ can
turn on the dis play f ie ld lighting for a few sec
onds .
Engine coolant temperature gauge
The engine coo la nt gauge ¢ page 10 , fig. 3@
only works when the ign ition is on. To prevent
damage to your e ngine, please note the fo l
l owing important points:
Engine cold
As long as the nee dle rem ains a t the left end
of the gauge, the engine s till h as not reac hed
its operating temperat ure. Avoid high engine
speeds, heavy engine loads and heavy throt
tle.
Normal temperature
W hen the engine has re ache d its ope rat ing
temperature, the need le w ill move into the
mid dle of t he gauge and rema in there .
If the
engine is working hard at high outside tem
peratures, the needle may turn fu rther to the
right. This is no cause for concern as long as
the . warning light in the instrument cluster
does not illuminate .
When the. warning light sta rts to flash,
th is can mean one of two things: either the
coolant
temperature is too high, o r the coo l
ant
level is too low ¢ page 17 .
A WARNING
--Always obs erv e th e war ning in
¢ page 164 before openi ng the eng ine
h o od and che ck ing t he e ngine coolant
leve l.
- N ever open t he eng ine hood if you see or
he ar steam, or if you see engi ne coo lant
drippin g from t he en gine compar tment .
You could burn yourse lf . Let the engi ne
coo l off fi rst until yo u can n o longe r see
or hea r steam or coolant escap ing.
(D Note
- M ounting ad ditiona l lights or accessories
i n fr ont of the air inlets reduces the coo l
ing effect of t he radiato r. At high o utsi de
tempe rat ures or h igh engine load, the
eng ine could overheat.
- The front spoiler has been designed to
properly d istribute the cooling a ir when
the vehicle is movi ng. If the spoiler is
damaged, this could reduce the coo ling
e ff ect a nd th e eng ine could then ove r
heat . As k yo ur au thori zed A udi deal er for
a ssis tan ce.
Page 15 of 244
Instrument s and warnin g/indic ator ligh ts 13
road, stop the engine, and turn on the
emergency flasher¢
page 51.
-The engine com partment of any motor
vehicle is a potentially hazardous area.
Before you check anything in the engine
compartment, stop the engine and let it
cool down. Always exercise extreme cau
t ion when wor king under the hood
¢ page 164, Working in the engine
compartment
@ Tips
Ma lfunctions or faults w ill be identified e i
ther with a red symbo l (pr iority 1 -Dan
ge r!) o r with a ye llow symbol (pr iority 2 -
Warn ing).
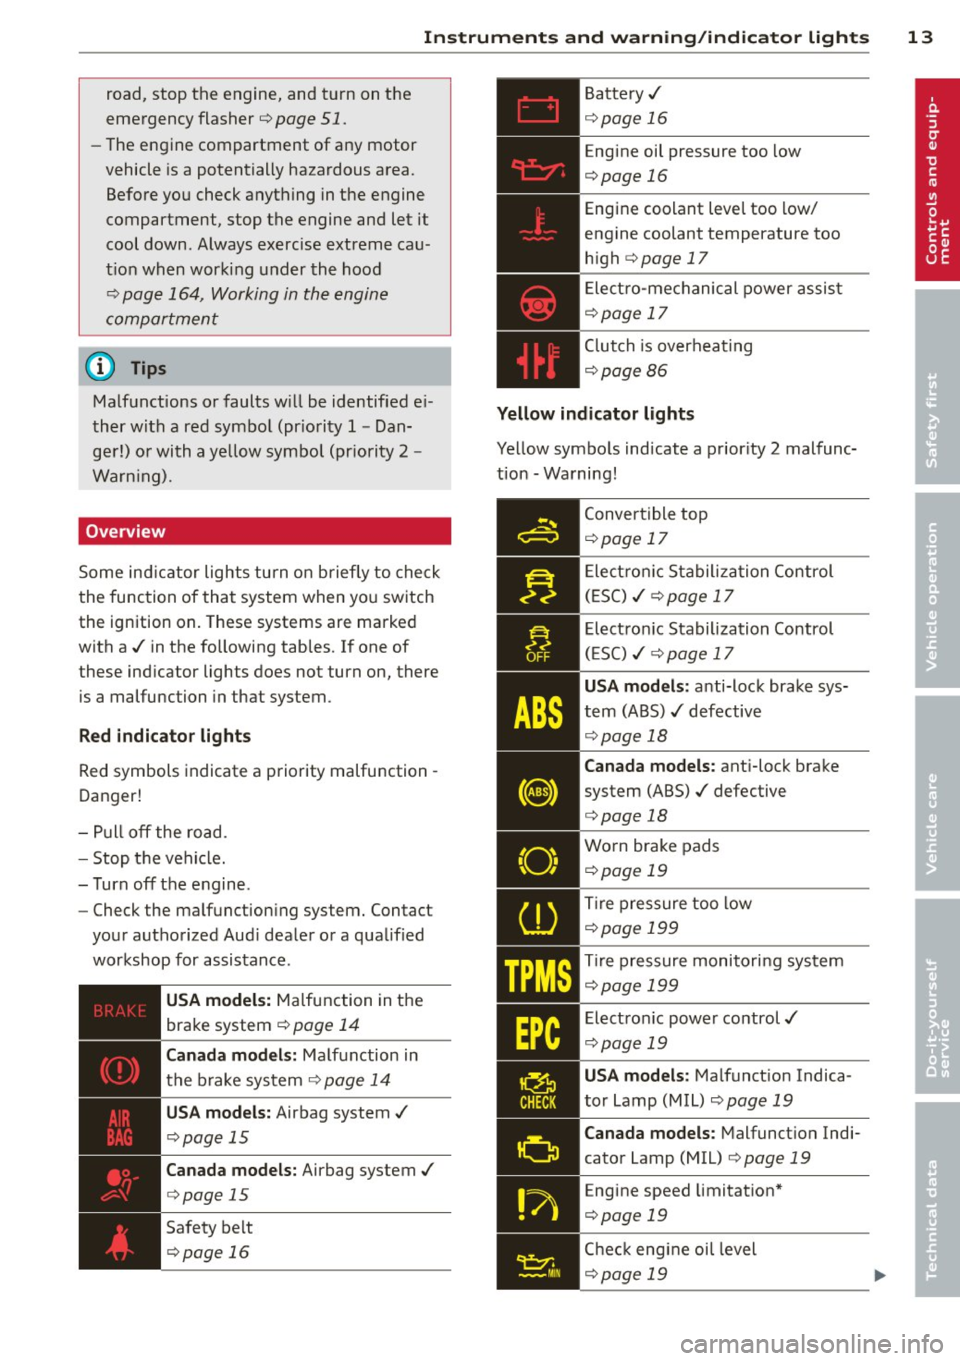
Overview
Some ind icator lights turn on briefly to check
the function of that system when yo u switch
the ignition on. These systems are marked
with a./ in the following tab les. If one of
these ind icator lights does not turn on, there
is a malfunction in that system.
R ed indicator lights
Red symbols indicate a priority malfu nction -
Danger!
- P ull off the road.
- Stop t he vehicle.
- T urn off the engine .
- Check the ma lfunction ing system. Contact
you r authorized Aud i dealer o r a qualified
workshop for assistance .
USA models: Malfunction in the
brake system ¢
page 14
Canada models: Malfunction in
the b rake system ¢
page 14
USA model s: Airbag system ./
¢page 15
Canada models: Airbag system ./
¢page 15
Safety belt
¢page 16
Battery ./
¢page 16
Engine oil pressure too low
¢page 16
Engine coolant leve l too low/
engine coolant temperature too
h igh
¢ page 17
Elect ro-mechanical power assis t
¢page 17
Clutch is overheat ing
¢ page86
Yellow indicator lights
Ye llow symbo ls indicate a prior ity 2 malfunc
tion -Wa rning!
~ .,.,
OFF
ABS
(8)
"O~ I I ~ ,,
(D
TPMS
EPC
~
CHECK
Conver tible top
¢ page 17
Electro ni c Stabiliza tion Control
( E S C) ./ ¢
page 17
Elect ron ic Stabilization Control
( E SC) ./ ¢
page 17
USA models: anti-lock brake sys
t em (ABS) ./ defective
¢page 18
Canada models : anti-lock brake
system (ABS) ./ defective
¢page 18
Worn brake pads
¢page 19
Tire pressure too low
¢page 199
Tire pressure monitoring system
¢page 199
Electro ni c power control./
¢page 19
USA models : Malfunction Indica
to r Lamp (MIL)
¢page 19
Canada models : Malfunction Indi
cator Lamp (MIL)
¢ page 19
Engine speed limitat ion *
¢page 19
Check engine oi l level
¢page 19
Page 17 of 244
Instrument s and warnin g/indic ator ligh ts 15
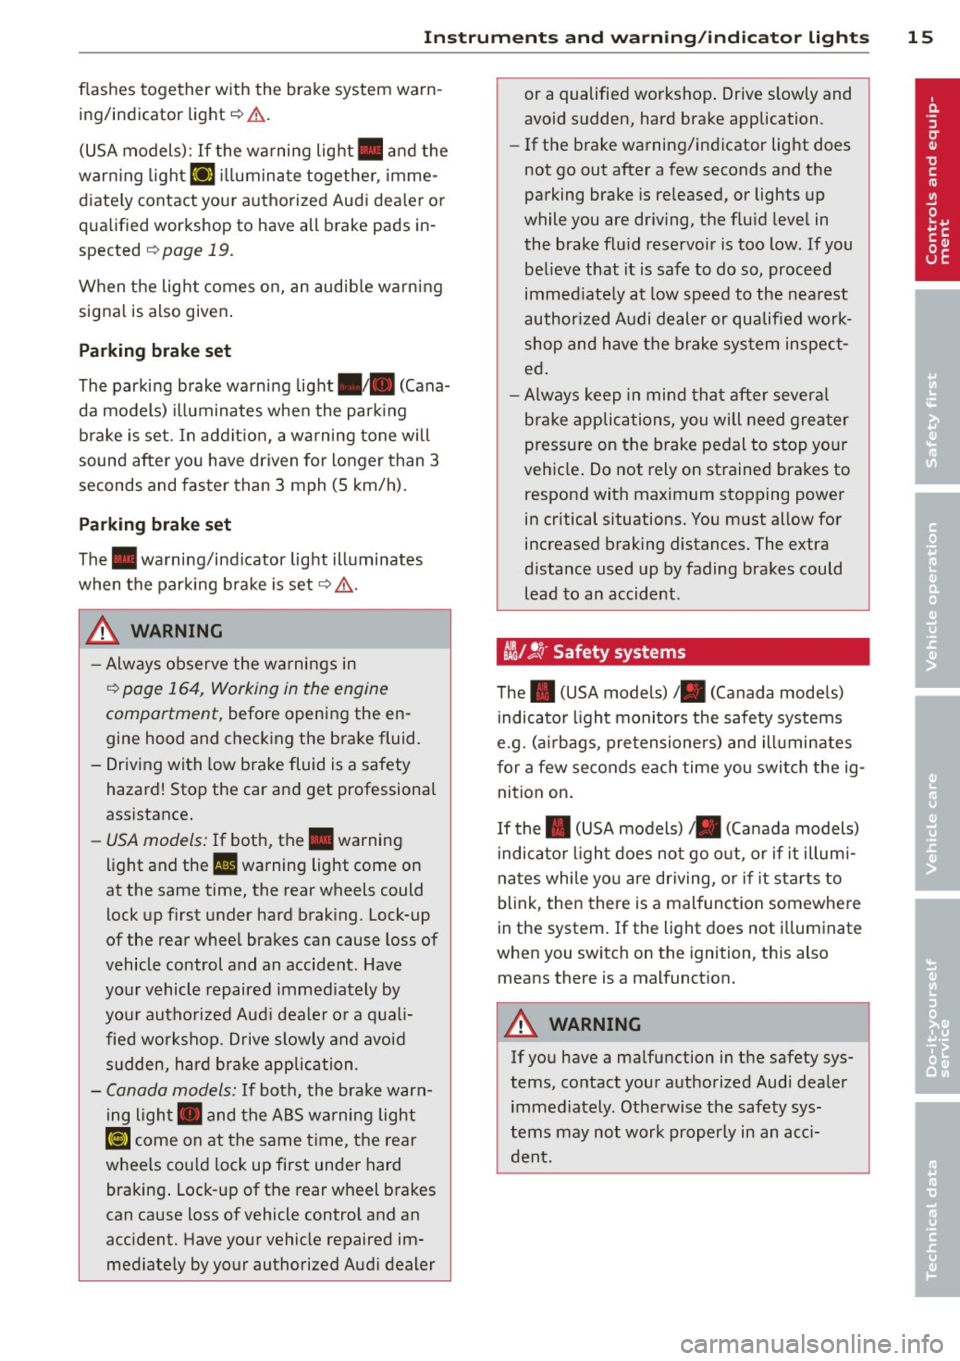
flashes together with the brake system warn
ing/indicator light¢.&,. .
(USA models):
If the warning light . and the
warn ing light
riJ ill umina te together, imme
diate ly contact your authorized Audi dea ler o r
qualified workshop to have all brake pads in
spected
¢ page 19.
When the light comes on, an audib le warn ing
signal is also given .
Parking brak e set
The parking brake warning light./. (Cana
da models) illuminates whe n the park ing
b rake is set. In addit ion, a warning tone will
sound after you have driven for longer than 3
seconds and faster than 3 mph (5 km/h).
Pa rking brak e set
The . warning/ind icator light illuminates
when the parking brake is set¢.&, .
_& WARNING
-Always observe the wa rni ngs in
¢ page 164, Working in the engine
compartment,
before opening the en
gine hood and check ing the brake fluid.
- Driving with low brake fluid is a safety
hazard! Stop the car an d get professiona l
assistance.
- USA models: If both, the. warning
light and the
Ill warning light come on
at the same time, the rear wheels could
lock up first under hard brak ing . Lock-up
of the rear whee l brakes can cause loss of
vehicle control and an accident. Have
yo ur vehicle repaired immed iately by
you r autho rized Aud i dealer o r a quali
fied workshop . D rive slowly and avo id
s u dden, hard brake application .
-Canada models: If both, the brake warn
ing light . and the ABS warning light
[iJ come on at the same t ime, the rear
wheels co uld lock up first unde r hard
braking . Lock -up of the rear wheel brakes
can cause loss o f vehicle control and an
acc ident. Have your vehicle repaired im
med iate ly by your authorized Aud i dealer or a qualified workshop
. Drive slowly and
avoid sudden, hard brake application .
- If the brake warning/indicator light does
not go out after a few seconds and the
parking brake is released, or lights up
while you are dr iving, the f lu id leve l in
the brake flu id reservo ir is too low . If you
be lieve that it is safe to do so, proceed
immed iate ly at low speed to the nearest
author ized Audi dealer or qualified work
shop and have the brake sys tem inspect
ed .
- Always keep in mind that after severa l
brake applications, you will need greater
pressu re on the brake pedal to stop you r
vehicle . Do not rely on strained brakes to
respond with maximum stopping power
in critical s ituations. You must allow for
increased braking distances. The extra
distance used up by fading brakes could lead to an accident.
tli1 ! .'!r Safety systems
The . (USA models) /. (Canada models)
indicato r light monitors the safety systems
e.g. (a irbags, pre tensioners) and ill uminates
f or a few se conds eac h time you swi tch the ig
nition on.
If the . (USA models)/ . (Canada models)
i ndicato r ligh t does no t go o ut, o r if it illum i
na tes while yo u are driving, or if it starts to
blink, then there is a mal function somewhe re
in the system. If the light does not i lluminate
when you switch on the ignition , th is also
means there is a malfunct ion.
_& WARNING
If yo u have a ma lfunction in the safety sys
tems, co ntact your authorized Aud i dea ler
immediately. Otherwise the safety sys
tems may not work properly in an acc i
dent.
Page 20 of 244
18 Instruments and warning/indicator lights
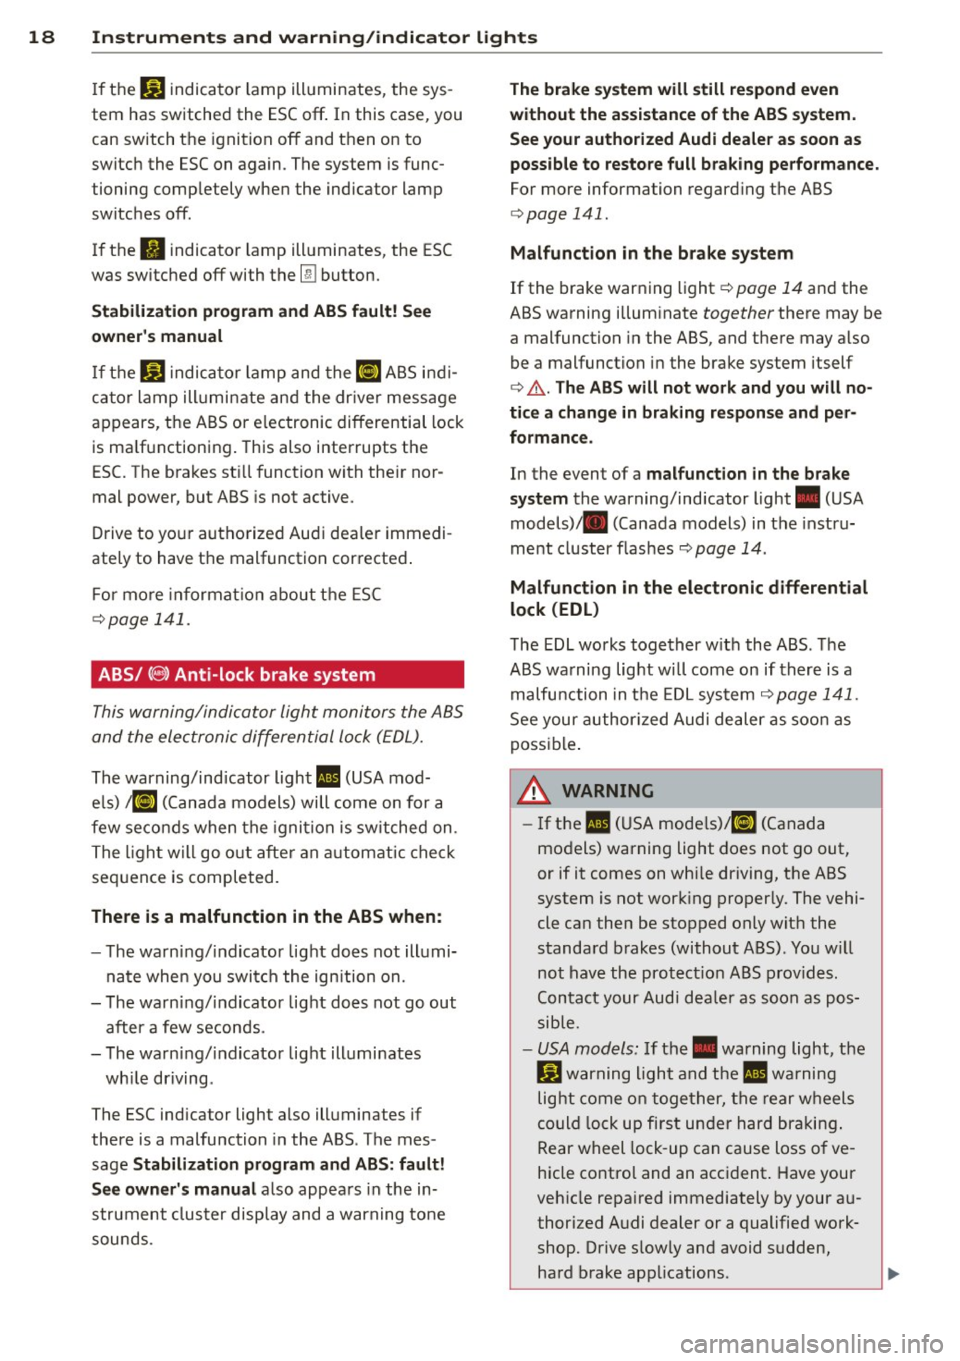
If the J.J.) indicator lamp illuminates, the sys
tem has switched the ESC
off. In this case, you
can switch the ignition
off and then on to
switch the ESC on again. The system is func
tioning completely when the indicator lamp
switches
off .
If the II indicator lamp illuminates, the ESC
was switched
off with the [!I button.
Stabilization program and ABS fault! See
owner 's manual
If the DJ indicator lamp and the riJ ABS indi
cator lamp illuminate and the driver message
appears, the ABS or e lectronic differential lock
is ma lfunctioning. This also interrupts the
ESC. The brakes st ill function with their nor
mal power, but ABS is not active.
Drive to your authorized Audi dea ler immedi
ately to have the malfunction corrected .
For more informat ion about the ESC
<=>page 141.
ABS/ (8 ) Anti-lock brake system
This warning/indicator light monitors the ABS
and the electronic differential lock (EDL).
The warning/indicator light 1111 (USA mod-
e ls)
;riJ (Canada models) will come on for a
few seconds when the ignition is switched on .
The light will go o ut after an automatic check
sequence is completed.
There is a malfunction in the ABS when:
-The warning/indicator light does not illumi
nate when you switch the ign ition on.
- The warning/indicator light does not go out
after a few seconds .
- The warning/indicator light illuminates
wh ile driving .
The ESC indicator light also illuminates if
there is a malfunction in the ABS . The mes
sage
Stabilization program and ABS: fault!
See owner's manual
also appears in the in
strument cluster display and a warning tone
sounds .
The brake system will still respond even
without the assistance of the ABS system.
See your authorized Audi dealer as soon as
possible to restore full braking performance.
For more information regarding the ABS
<=>page 141.
Malfunction in the brake system
If the brake warning light r=> page 14 and the
ABS warning illuminate
together there may be
a malfunction in the ABS, and there may also
be a malfunction in the brake system itself
r=> &.. The ABS will not work and you will no
tice a change in braking response and per
formance.
In the event of a malfunction in the brake
system
the warning/ind icator light . (USA
models)/ . (Canada models) in the instru
ment cluster flashes
r=> page 14 .
Malfunction in the electronic differential
lock (EDL)
The EDL works together w ith the ABS . The
ABS warning light wi ll come on if there is a
malfunction in the EDL system
r=> page 141.
See your authorized Audi dealer as soon as
possible .
_& WARNING
-If the Ill (USA models)/11] (Canada
models) warning light does not go out,
or if it comes on whi le driving, the ABS
system is not work ing properly. The vehi
cle can then be stopped only wit h the
standard brakes (without ABS). You w ill
not have the protect ion ABS provides.
Contact your Audi dea le r as soon as pos
sible.
- USA models: If the . warning light, the
G1 warning light and the 1111 warning
light come on together, the rear wheels
could lock up fi rst under hard braking .
Rear wheel lock -up can cause loss o f ve
hicle control and an accident. Have your
vehicle repaired immediately by your au
thorized Audi dealer or a qualified work
shop. Drive s low ly and avoid sudden,
hard brake applications. ..,.
Page 21 of 244
Instrument s and warnin g/indic ator ligh ts 19
- Canada models:
If the brake warn ing
light ., the
J;.J warning light and the
ABS warning light
riJ come on together,
the rear wheels could lock up first under
hard braking. Rear wheel lock-up can
cause loss of vehicle control and an acci
dent. Have you r vehicle repaired immed i
a tely by your au thorized A udi dealer or a
qualified workshop . Dr ive slowly and
avoid sudden, hard brake applications.
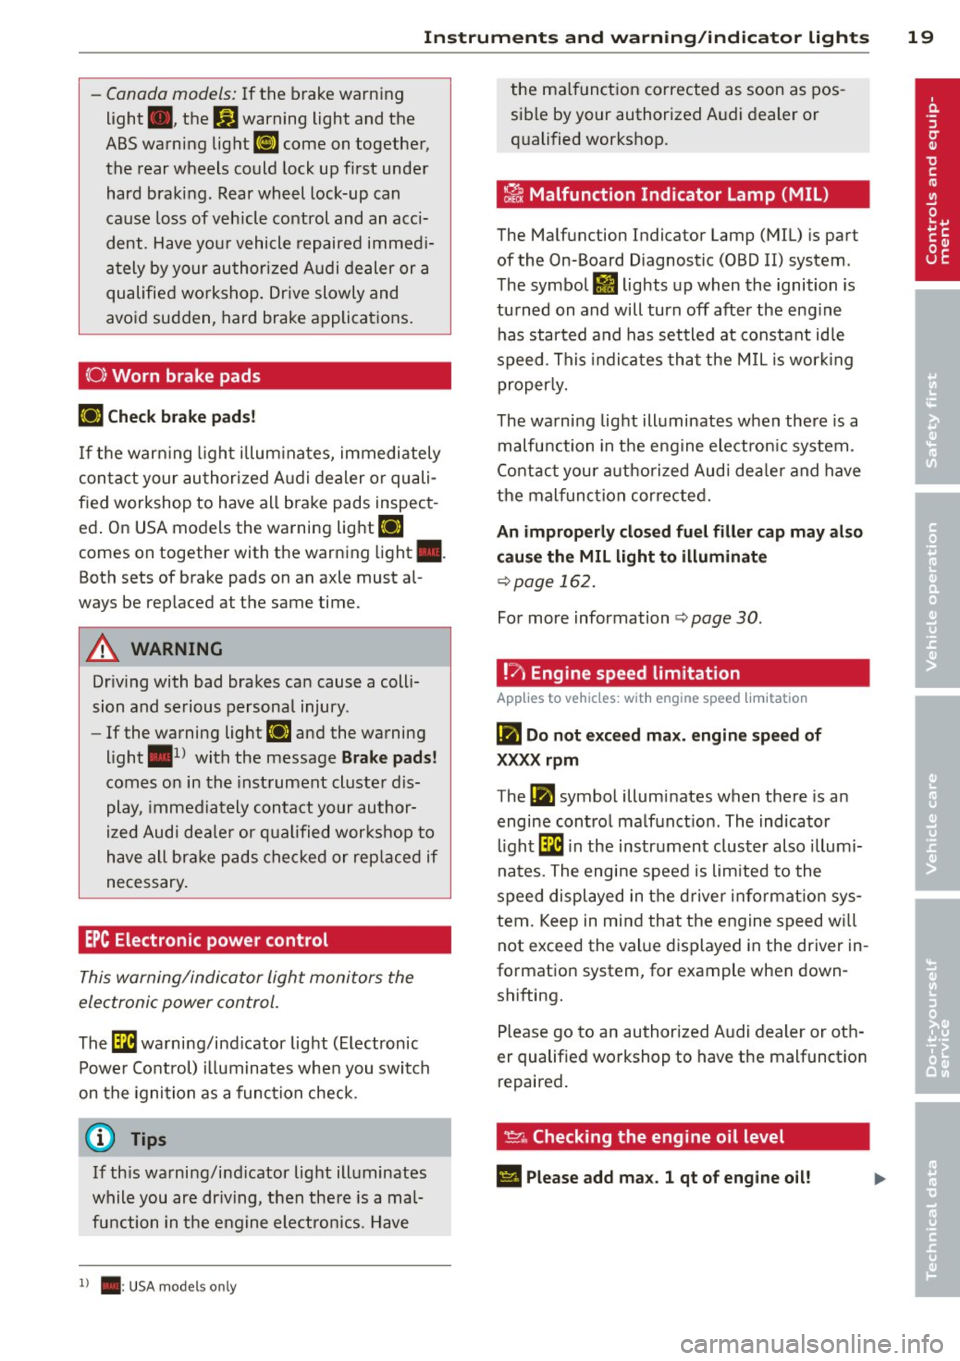
( 0 ) Worn brake pads
llJ Check brake pad s!
If the war ning light illum inates, immediately
contact your au thori zed A udi dealer or quali
fied workshop to have all brake pads inspect
ed . On USA models the warning light
llJ
comes on together with the warning light •.
Both sets of brake pads on an axle must al
ways be rep laced at the same time.
A WARNING
Dr iv ing with bad brakes can cause a coll i
sion and serious personal injury .
-If the warning light llJ and the warning
light
. ll with the message Brake pads!
comes on in the inst rument cluste r dis
play, immediately contact your author
ized Audi dea le r or q ualified wor kshop to
have all br ake pads checked or rep laced if
necessary.
EPC Electronic power control
This warning/indicator light monitors the
electronic power control .
The [m warning/ind icator lig ht ( Electronic
P owe r Control) illuminates when you switch
on the igni tion as a fu nction check .
@ Tips
If this wa rning/i ndicator light ill uminates
while you are dr iving, then the re is a mal
fu nction in the engine elec tron ics. Have
1) .: USA mode ls onl y
the malfunct ion corrected as soon as pos
sible by your authorized A udi dealer or
q ualified works hop.
~ Malfunction Indicator Lamp (MIL)
The Ma lfunction Indicator Lamp (MIL) is part
of the On-Board Diagnostic (OBD II) system .
The symbol
II lights up when the ignition is
turned on and will turn off after the eng ine
has started and has settled at constant id le
speed . This indi cates that the M IL is work ing
properly.
The wa rning lig ht illuminates when the re is a
malfu nction in the eng ine electron ic system .
Contact your a uthorized Audi dea le r and have
t h e mal func tion cor rected.
An improperly closed fuel filler cap may also
cause the MIL light to illuminate
~ page 162.
For more information ~ page 30 .
!?') Engine speed limitation
App lies to veh icles : w it h eng ine speed limitatio n
(II Do not e xceed ma x. engine speed of
XXXX rpm
The (Pl symbol illuminates when there is an
engine con trol malfunct io n. The indicator
li ght
[mi n the instrum ent cluster also illum i
nates. The engi ne speed is limited to the
speed displayed in the d river i nformat ion sys
tem. Keep in mind that the engine speed w ill
not exceed the val ue d isplayed in the driver in
format ion system, for example when down
shifting.
Please go to an authorized A udi dealer or oth
er qualified wo rkshop to have the malfunct ion
repaired .
~ .. Checking the engine oil level
II Please add max . 1 qt of engine oil!
Page 27 of 244
Set Clock ¢ page 2 5
Computer¢ page 25
Acoustic par k assist* ¢ page 79
Speed warning ¢ page 77
Language ¢
page 2 5
Units (distance, fue l consump-
tion, temperature) ¢
page 25
Tire press ure moni toring
c> page 198
Lap timer* c>page 28
Lighting* ¢ page 48
Wiper (service pos it io n)
¢page 56
Window c> page 40
Doors (unlo ck ing and locking
mode, for example Auto- lock)
¢ page 34, c> page 34
Check
Service c> page 28
Chassis numbe r c> page 2 22
Engine oil temperature*
¢
page 26, c> page 26
Registe red keys ¢ page 32
Menu off
All of the messages shown in
vehicles withou t menu display ap-
pe ar o n the display screen.
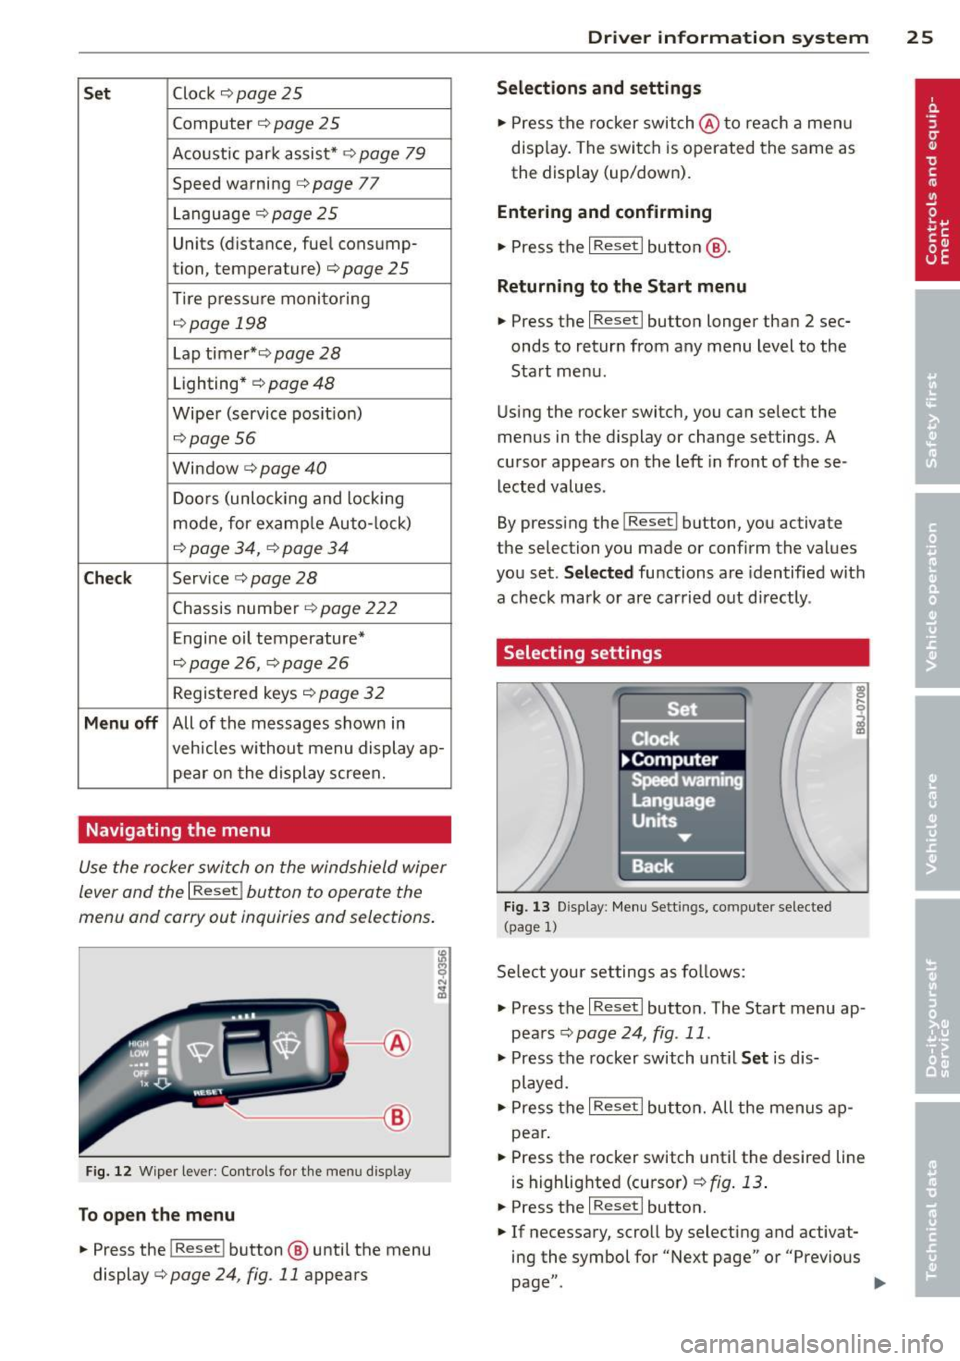
Navigating the menu
Use the rocker switch on the windshield wiper
lever and the
I Reset ! button to operate the
menu and carry out inquiries and selections.
~-- @
Fig. 1 2 Wiper leve r: Controls for the men u disp lay
To open the menu
.. Press the I Reset ! button @ until the menu
display
i=> page 24 , fig . 11 appears
Dr iver in formation system 25
Selections and settings
.. Press the rocker switch @to reac h a men u
disp lay. The swi tch is operated the same as
the display (up/down).
Entering and confirming
.,. Press the I Reset I butto n @ .
Returning to the Start menu
.. Press the I Reset I button longer tha n 2 sec
onds to return from any menu level to the
Sta rt menu .
U sing the rocker switc h, you can select the
menus in the display or change settings. A
cursor appea rs on the left in front of these
lected values .
By pressing the
I Reset! button, you activate
the selection you made or confirm the values
you set.
Selected fu nctions are identified wit h
a check mark or ar e car ried out directly .
Selecting settings
Fig. 13 D isplay: Menu Sett ings, co mpute r selected
(page
l)
Se lect you r settings a s foll ows:
.,. Press the
I Reset I butto n. The Sta rt menu ap
pears ¢
page 24 , fig . 11 .
.. Press the rocker switch unt il Set is dis
played .
.. Press the
I Reset I butto n. All the menu s a p
pe a r .
.. Press the rocker switch until the desire d line
is highlig hted (curso r)
¢ fig . 13 .
.. Press the I Reset I button.
.. If necessary, scro ll by selecting and activat
ing the symbol for "Next page" o r "Previous
page" .
~
Page 34 of 244
32 Opening and clo sing
Opening and closing
Keys
Key set
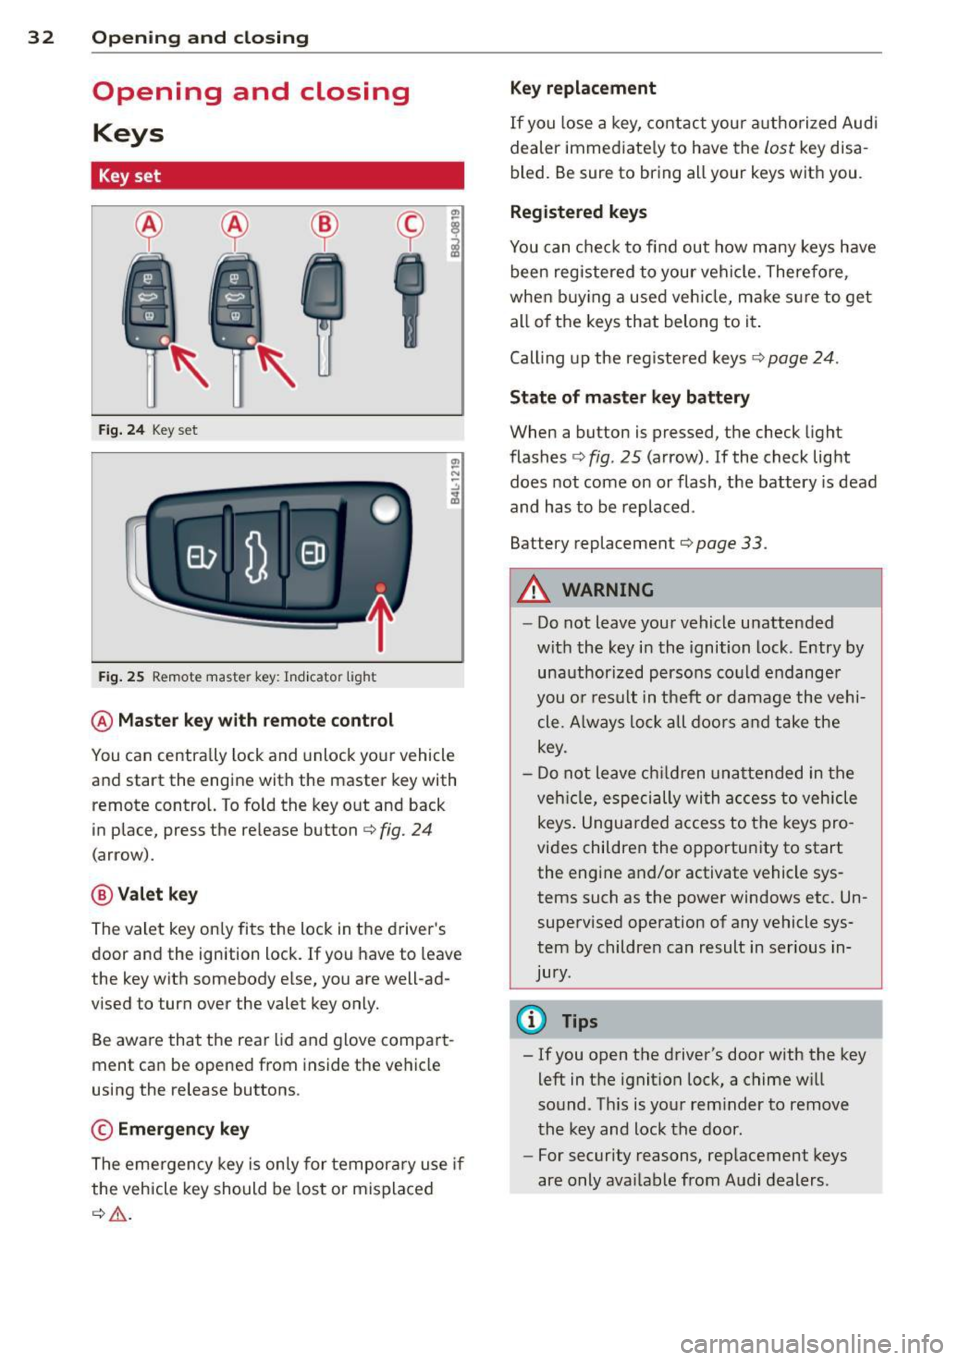
Fig . 2 4 Key set
Fig . 25 Remote master key : Indicator light
@ Ma ster key w ith remote control
You can centrally lock and unlock your vehicle
and start the engine with the master key with
remote control. To fold the key out and back
in place, press the re lease button
c:> fig. 24
(arrow).
@ Valet ke y
The valet key on ly fits the lock in the driver's
door and the ignition lock. If you have to leave
the key with somebody e lse, you are well-ad
vised to turn over the valet key only.
Be aware that the rear lid and glove compart
ment can be opened from inside the vehicle
using the release buttons .
© Emergency k ey
The eme rgency key is only for temporary use if
the vehicle key should be lost or misplaced
c:> & .
Ke y replac ement
If you lose a key, contact you r a uthorized Audi
dealer immed iate ly to have the
Lost key disa
bled. Be sure to bring all your keys with you .
Registered ke ys
You can check to find out how many keys have
been reg istered to your vehicle. Therefore,
when buy ing a used veh icle, make sure to get
all of the keys that belong to it.
Call ing up the reg istered keys
c:> page 24.
St ate of mas ter key b atter y
When a button is pressed, the check light
flashes
c:> fig . 25 (arrow) . If the check light
does not come on or flash, the battery is dead
and has to be replaced .
Battery replacement
c:> page 33.
_& WARNING ........... -
- Do not leave your vehicle unattended
wit h the key in the ignition lock. Entry by
unauthorized persons could endange r
you o r result in theft or damage the vehi
cle. A lways loc k all doors a nd take the
key.
- D o not leave ch ildren unattended in the
veh icle, especially wi th access to vehicle
keys . Unguarded access to the keys pro
vides children the opportunity to start
the engine and/or activate vehicle sys
tems such as the power windows etc. Un supervised operation of any vehicle sys
tem by children can result in ser ious in
jury.
{!) Tips
- If you open the driver's door with the key
left in the ignit ion lock, a chime will
sound . Th is is your rem inder to remove
the key and lock the door.
- For security reasons, rep lacement keys
are only ava ilable from Audi dealers .
Page 35 of 244
Master key with remote control
The remote control allows you to lock or un
lock the vehicle electronically .
The transmitter and battery are located in the
head of the remote control. The receiver is lo
cated inside the vehicle. The maximum effec
tive range depends on several things . Remem
ber, if the battery is wea k, the effective range
decreases.
If you need to replace the remote control, or if
you need to have it repaired, you must see
your author ized Audi dealer. Only then can
you use the key again.
(D Tips
- If the ignition is sw itched on, the remote
control system is deactivated .
- The remote control system can be affect ed by other systems operating in the
same frequency range close to the vehi
cle, such as mobi le telephones, televi
sion broadcasting stations, etc.
- Fo r De clarat ion of Compliance to United
Sta tes FCC and Indus try Canada regula
tions ¢
page 228.
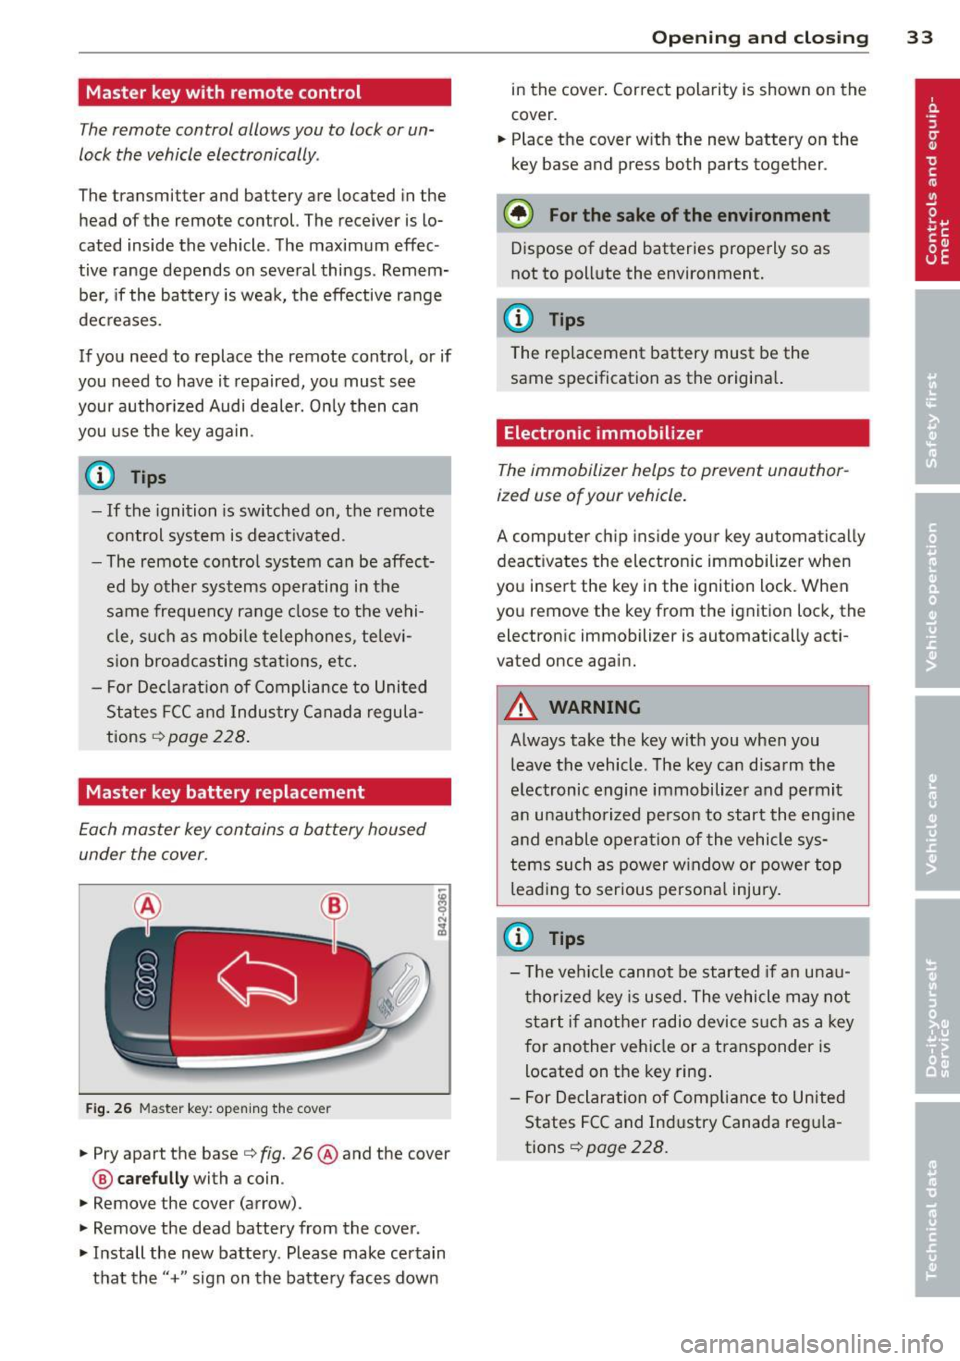
Master key battery replacement
Each master key contains a battery housed
under the cover .
Fig . 26 Maste r key: open ing the cover
.. Pry apart the base¢ fig. 26@and the cover
@ care full y with a coin .
.,. Remove the cover (arrow) .
.,. Remove the dead battery from the cover .
.. Install the new battery . Please make certain
that the" +" sign on the batte ry faces down
Op enin g an d clos ing 33
in the cover . Correct polarity is shown on the
cover .
.. Place the cover with the new battery on the
key base and press both parts together .
@ For the sake of the env ironment
Dispose of dead batteries properly so as
not to pollute the environment.
(D Tips
The replacement battery must be the
same specification as the origina l.
Electronic immobilizer
The immobilizer helps to prevent unauthor
ized use of your vehicle.
A computer chip ins ide your key automatica lly
deactivates the electron ic immobilizer when
you insert the key in the ign ition lock. When
you remove the key from the ignition lock, the
electronic immobilizer is automatically acti
vated once again.
A WARNING
---
Always take the key with you when you leave the vehicle. The key can disarm the
electronic engine immobilizer and permit
an unauthorized person to start the engine
and enable operation of the vehicle sys
tems such as power w indow or power top
leading to serious persona l injury.
(D Tips
- T he ve hicle cannot be started if an unau
thorized key is used. The vehicle may not
start if another radio device s uch as a key
for another vehicle or a transponder is
located on the key ring .
- For Declaration of Compliance to United
States FCC and Industry Canada reg ula
tions¢
page 228 .