ESP BMW 1 SERIES 2013 E82 Owner's Guide
[x] Cancel search | Manufacturer: BMW, Model Year: 2013, Model line: 1 SERIES, Model: BMW 1 SERIES 2013 E82Pages: 288, PDF Size: 6.73 MB
Page 101 of 288
96
ControlsTechnology for driving comfort and safety
Active steering
The concept
Active steering varies the turning angle of the
front wheels in relation to steering wheel move-
ments. It also varies the steering force required
to turn the wheels depending on the speed at
which you are driving.
When you are driving in the low speed range,
e.g. in a town or when parking, the steering
angle is increased, i.e. steering becomes very
direct and less effort is required to turn the
wheels. In the higher speed range, on the other
hand, the steering angle is reduced as the
speed increases. This improves the handling of
your BMW over the entire speed range.
In critical situations, the system can make tar-
geted corrections to th e steering angle pro-
vided by the driver and thus stabilize the vehicle
before the driver intervenes. This stabilizing
intervention is simult aneously deactivated
when DSC is switched off, refer to page 89.
Malfunction
The warning lamps come on. Active
steering is malfunctioning or is tem-
porarily deactivate d. At low speeds,
greater steering wheel movements
are required, whereas at higher speeds the
vehicle reacts more sensitively to steering
wheel movements. Th e stability-enhancing
feature may also be deactivated. Drive cau-
tiously and think well ahead.
Deactivation
Active steering is deacti vated to perform an ini-
tialization. A message indicates that the feature
is deactivated. Initializ ation may take several
minutes.
If the message does not disappear during the
current trip, have the system checked.
Defect
If there is a defect, a corresponding text mes-
sage appears. Have the system checked.
Servotronic
The concept
The Servotronic varies the steering force
required to turn the wh eels relative to the
vehicle speed.
At low speeds, the steering force is strongly
assisted, i.e. less force is needed for steering.
As the vehicle speed increases, the steering
assisting power is reduced.
This system functions automatically.
Malfunctions
The warning lamp lights up. A mes-
sage appears on the Control Display.
Servotronic is malfunctioning or has
failed. Steering response will be different. You
can continue your journey, but moderate your
speed and exercise due caution. Have the
system checked as soon as possible.
Brake Force Display
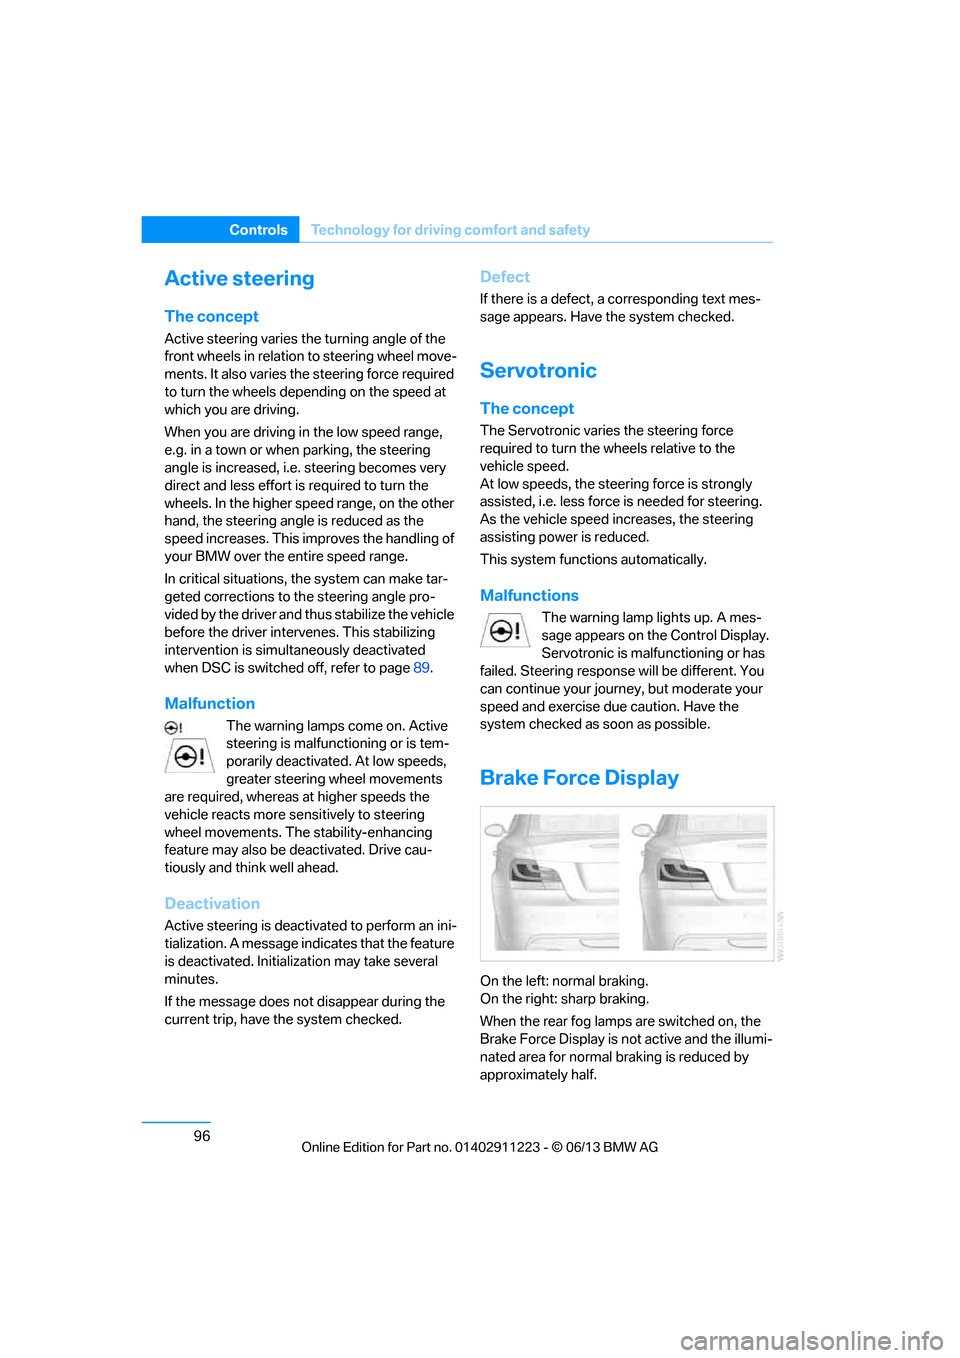
On the left: normal braking.
On the right: sharp braking.
When the rear fog lamps are switched on, the
Brake Force Display is no t active and the illumi-
nated area for normal braking is reduced by
approximately half.
00320051004F004C00510048000300280047004C0057004C005200510003
Page 102 of 288
97
Technology for driving comfort and safety
Controls
Airbags
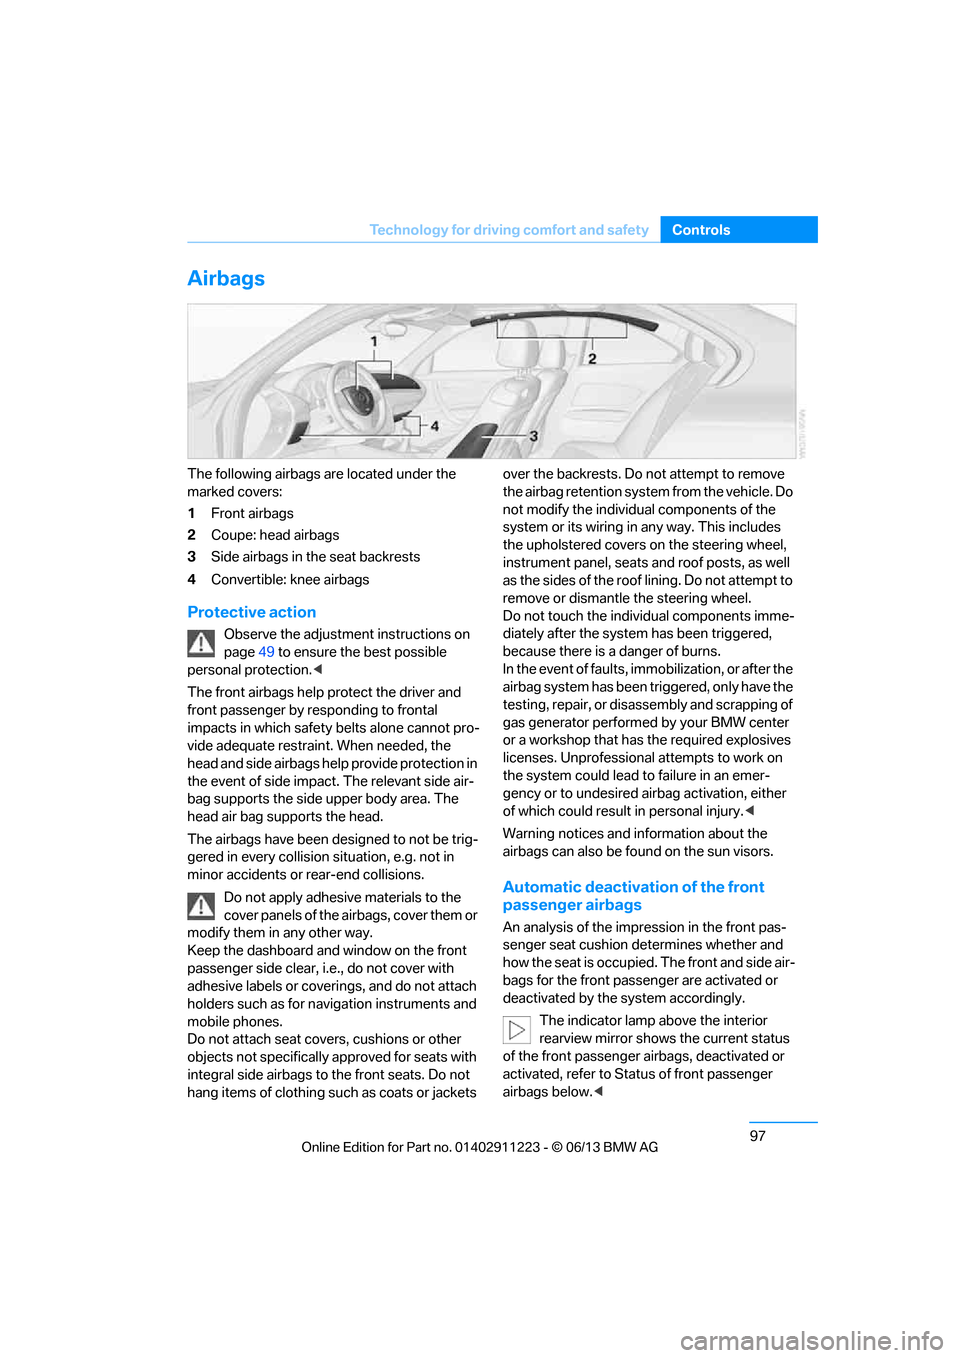
The following airbags are located under the
marked covers:
1
Front airbags
2 Coupe: head airbags
3 Side airbags in the seat backrests
4 Convertible: knee airbags
Protective action
Observe the adjustment instructions on
page 49 to ensure the best possible
personal protection. <
The front airbags help protect the driver and
front passenger by responding to frontal
impacts in which safety belts alone cannot pro-
vide adequate restrain t. When needed, the
head and side airbags help provide protection in
the event of side impact. The relevant side air-
bag supports the side upper body area. The
head air bag supports the head.
The airbags have been designed to not be trig-
gered in every collision si tuation, e.g. not in
minor accidents or rear-end collisions.
Do not apply adhesive materials to the
cover panels of the airbags, cover them or
modify them in any other way.
Keep the dashboard and window on the front
passenger side clear, i. e., do not cover with
adhesive labels or coveri ngs, and do not attach
holders such as for navigation instruments and
mobile phones.
Do not attach seat cove rs, cushions or other
objects not specifically approved for seats with
integral side airbags to the front seats. Do not
hang items of clothing su ch as coats or jackets over the backrests. Do
not attempt to remove
the airbag retention system from the vehicle. Do
not modify the individu al components of the
system or its wiring in any way. This includes
the upholstered covers on the steering wheel,
instrument panel, seats and roof posts, as well
as the sides of the roof lining. Do not attempt to
remove or dismantle the steering wheel.
Do not touch the individual components imme-
diately after the system has been triggered,
because there is a danger of burns.
In the event of faults, immobilization, or after the
airbag system has been triggered, only have the
testing, repair, or disa ssembly and scrapping of
gas generator performed by your BMW center
or a workshop that has the required explosives
licenses. Unprofessional attempts to work on
the system could lead to failure in an emer-
gency or to undesired ai rbag activation, either
of which could result in personal injury. <
Warning notices and information about the
airbags can also be found on the sun visors.
Automatic deactivation of the front
passenger airbags
An analysis of the impr ession in the front pas-
senger seat cushion determines whether and
how the seat is occupied. The front and side air-
bags for the front passe nger are activated or
deactivated by the system accordingly.
The indicator lamp above the interior
rearview mirror shows the current status
of the front passenger ai rbags, deactivated or
activated, refer to Sta tus of front passenger
airbags below. <
00320051004F004C00510048000300280047004C0057004C005200510003
Page 105 of 288
100
ControlsLamps
Lamps
Vehicle equipment
In this chapter, all pr oduction, country, and
optional equipment that is offered in the model
range is described. For this reason, descrip-
tions will be given of some equipment that may
not be available in a vehi cle, for example due to
the special options or national-market version
selected. This also app lies to safety related
functions and systems.
Overview
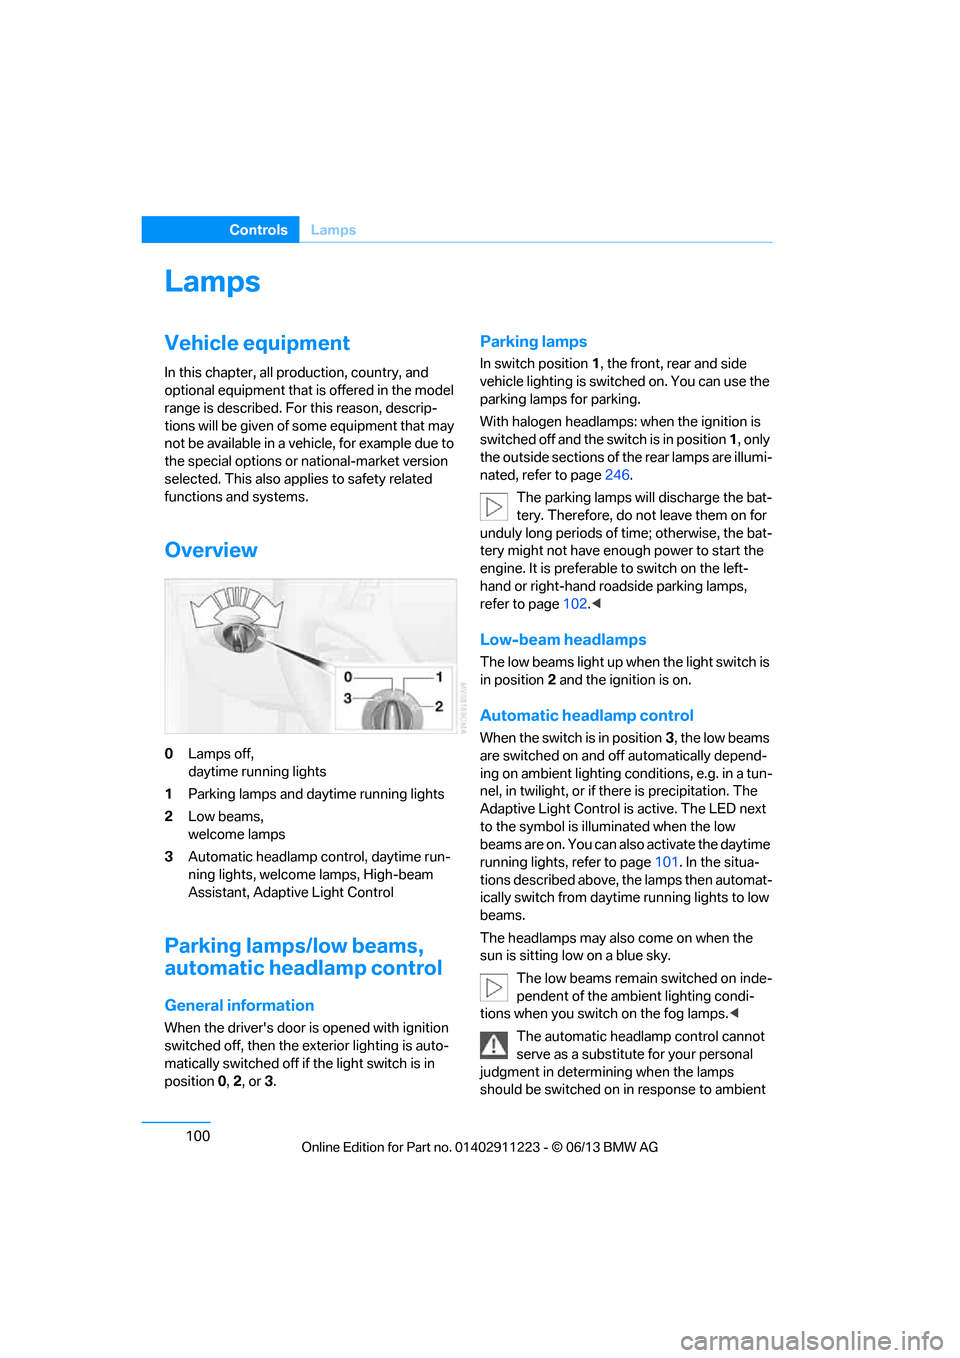
0 Lamps off,
daytime running lights
1 Parking lamps and daytime running lights
2 Low beams,
welcome lamps
3 Automatic headlamp control, daytime run-
ning lights, welcome lamps, High-beam
Assistant, Adaptive Light Control
Parking lamps/low beams,
automatic headlamp control
General information
When the driver's door is opened with ignition
switched off, then the exterior lighting is auto-
matically switched off if the light switch is in
position 0, 2 , or 3.
Parking lamps
In switch position 1, the front, rear and side
vehicle lighting is switch ed on. You can use the
parking lamps for parking.
With halogen headlamps: when the ignition is
switched off and the sw itch is in position 1, only
the outside sections of the rear lamps are illumi-
nated, refer to page 246.
The parking lamps will discharge the bat-
tery. Therefore, do not leave them on for
unduly long periods of time; otherwise, the bat-
tery might not have enou gh power to start the
engine. It is preferable to switch on the left-
hand or right-hand roadside parking lamps,
refer to page 102.<
Low-beam headlamps
The low beams light up wh en the light switch is
in position 2 and the ignition is on.
Automatic headlamp control
When the switch is in position 3, the low beams
are switched on and off automatically depend-
ing on ambient lighting conditions, e.g. in a tun-
nel, in twilight, or if there is precipitation. The
Adaptive Light Control is active. The LED next
to the symbol is illu minated when the low
beams are on. You can also activate the daytime
running lights, refer to page 101. In the situa-
tions described above, the lamps then automat-
ically switch from daytime running lights to low
beams.
The headlamps may also come on when the
sun is sitting low on a blue sky.
The low beams remain switched on inde-
pendent of the ambient lighting condi-
tions when you switch on the fog lamps. <
The automatic headlamp control cannot
serve as a substitute for your personal
judgment in determining when the lamps
should be switched on in response to ambient
00320051004F004C00510048000300280047004C0057004C005200510003
Page 108 of 288
103
Lamps
Controls
and vice versa in response
to oncoming traffic,
traffic ahead of you, and adequate ambient
lighting, e.g. on city streets.
Switching the high beams on and off
manually
Whenever you wish, or when the situation
requires, you can intervene:
> If the High-beam Assistant switches on the
high beams, but you would like to drive with
the low beams, simply switch off the high
beams using the turn signal/high beam
lever. This deacti vates the High-beam
Assistant.
To reactivate the syst em, briefly push the
turn signal/high beam lever toward the high
beams again.
> If the High-beam Assistant switches on the
low beams, but you would like to drive with
the high beams, switch on the high beams
as usual. This deacti vates the system and
the high beams need to be switched off
manually, if necessary.
To reactivate the syst em, briefly push the
turn signal/high beam lever toward the high
beams again.
> Use the headlamp flasher as usual with the
low beams switched on.
System limitations
The High-beam Assistant cannot serve
as a substitute for the driver's personal
judgment of when to use the high beams.
Therefore, manually switch off the high beams
in situations where this is required to avoid a
safety risk.<
The system is not fully fu nctional in situations
such as the following, and driver intervention
may be necessary:
> In very unfavorable weather conditions,
such as fog or heavy precipitation
> In detecting poorly-lit road users, such as
pedestrians, cyclists, horseback riders and
wagons; when driving close to train or ship
traffic; and at animal crossings >
In tight curves, on hilltops or in depressions,
in cross traffic or half-obscured oncoming
traffic on highways
> In poorly lit towns and cities and in the
presence of highly reflective signs
> At low speeds
> When the windshield in front of the interior
rearview mirror is fogged over, dirty or cov-
ered with stickers, etc.
> If the sensor is dirty. Clean the sensor on
the front of the interior r e a r v i e w m i r r o r u s i n g
a cloth moistened with a small amount of
glass cleaner.
Activating via iDrive
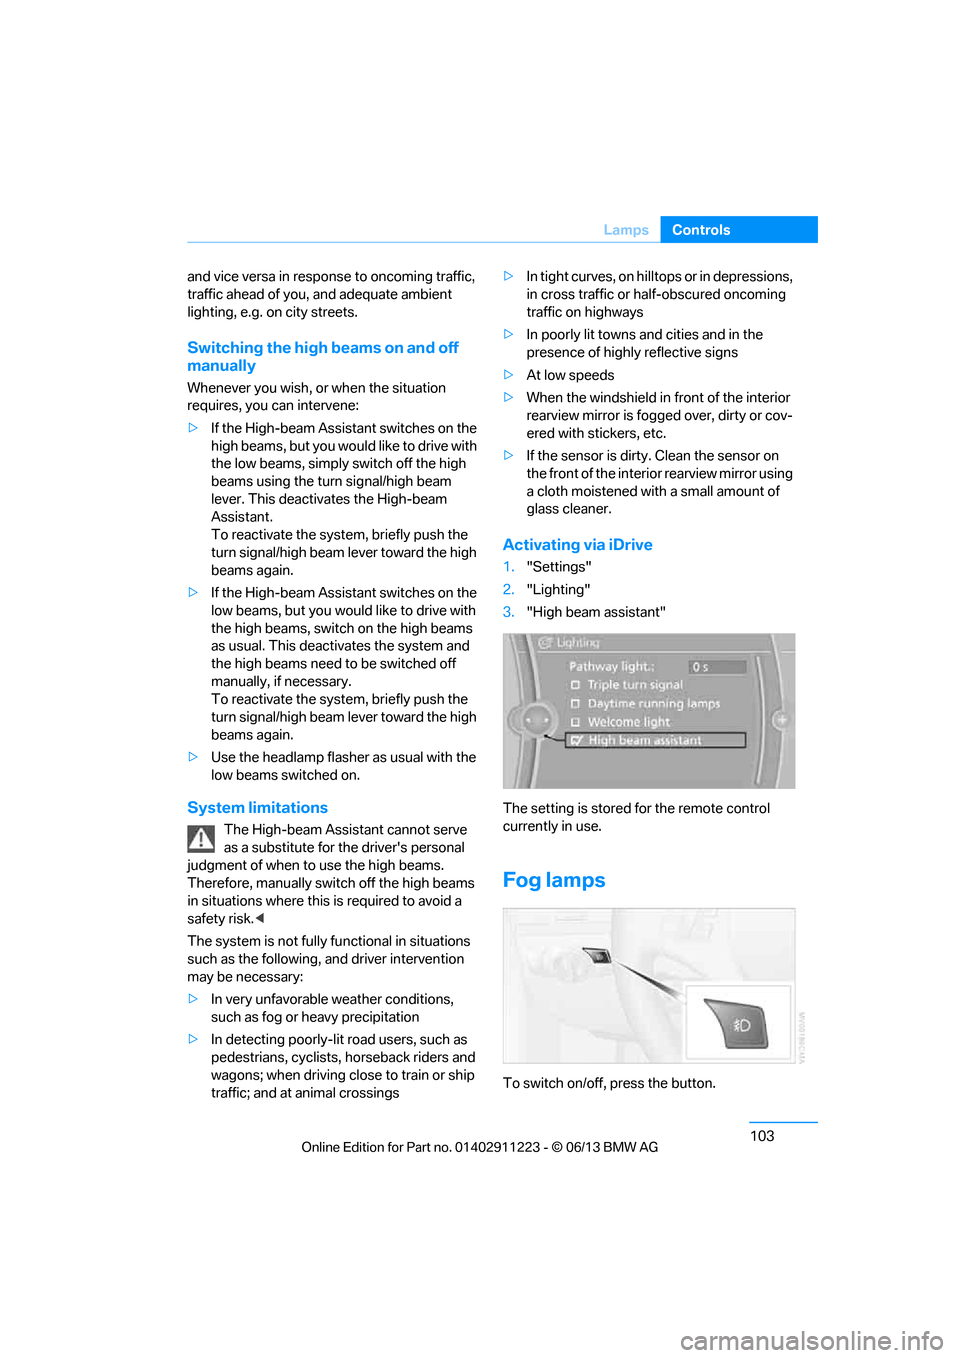
1. "Settings"
2. "Lighting"
3. "High beam assistant"
The setting is stored for the remote control
currently in use.
Fog lamps
To switch on/off, press the button.
00320051004F004C00510048000300280047004C0057004C005200510003
Page 113 of 288
108
ControlsClimate
At the same time, a condensation sensor
controls the program so as to prevent window
condensation as much as possible.
The program is switched off when the air distri-
bution is set manually or the button is pressed
again.
Intensity of the AUTO program
With the AUTO progra m switched on, auto-
matic control of the air volume and air
distribution can be adjusted:
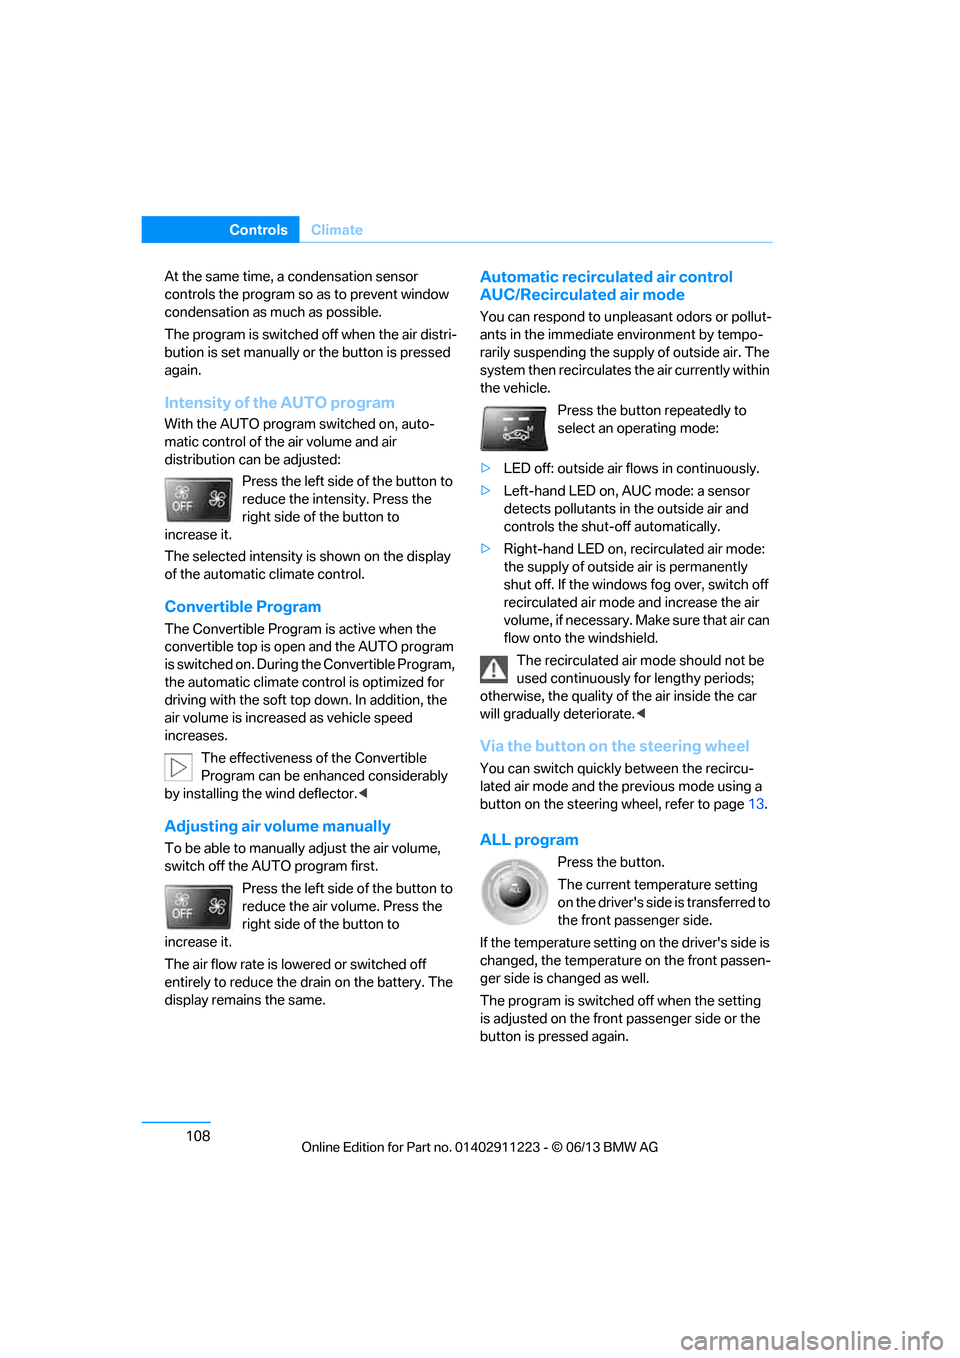
Press the left side of the button to
reduce the intensity. Press the
right side of the button to
increase it.
The selected intensity is shown on the display
of the automatic climate control.
Convertible Program
The Convertible Program is active when the
convertible top is open and the AUTO program
is switched on. During the Convertible Program,
the automatic climate co ntrol is optimized for
driving with the soft top down. In addition, the
air volume is increa sed as vehicle speed
increases.
The effectiveness of the Convertible
Program can be enhanced considerably
by installing the wind deflector. <
Adjusting air volume manually
To be able to manually adjust the air volume,
switch off the AUTO program first.
Press the left side of the button to
reduce the air volume. Press the
right side of the button to
increase it.
The air flow rate is lowered or switched off
entirely to reduce the drain on the battery. The
display remains the same.
Automatic recirculated air control
AUC/Recirculated air mode
You can respond to unpleasant odors or pollut-
ants in the immediate environment by tempo-
rarily suspending the supply of outside air. The
system then recirculates the air currently within
the vehicle.
Press the button repeatedly to
select an operating mode:
> LED off: outside air fl ows in continuously.
> Left-hand LED on, AUC mode: a sensor
detects pollutants in the outside air and
controls the shut-off automatically.
> Right-hand LED on, recirculated air mode:
the supply of outside air is permanently
shut off. If the windows fog over, switch off
recirculated air mode and increase the air
volume, if necessary. Ma ke sure that air can
flow onto the windshield.
The recirculated air mode should not be
used continuously fo r lengthy periods;
otherwise, the quality of the air inside the car
will gradually deteriorate. <
Via the button on the steering wheel
You can switch quickly between the recircu-
lated air mode and the previous mode using a
button on the steering wheel, refer to page 13.
ALL program
Press the button.
The current temperature setting
on the driver's side is transferred to
the front passenger side.
If the temperature setting on the driver's side is
changed, the temperature on the front passen-
ger side is changed as well.
The program is switched off when the setting
is adjusted on the front passenger side or the
button is pressed again.
00320051004F004C00510048000300280047004C0057004C005200510003
Page 115 of 288
110
ControlsClimate
Parked car ventilation
The concept
The parked car ventilation provides ventilation
to the passenger compartment and lowers its
temperature, if necessary.
For any outside temperature, the system can be
switched on or off directly or via a preset
switch-on time. It will re main on for 30 minutes.
Due to its high power consumption, the parked
car ventilation system should not be switched
on twice in a row withou t driving in between to
allow the battery to recharge.
Open the vents so that air can flow out.
They can be operated via iDrive.
Switching on and off directly
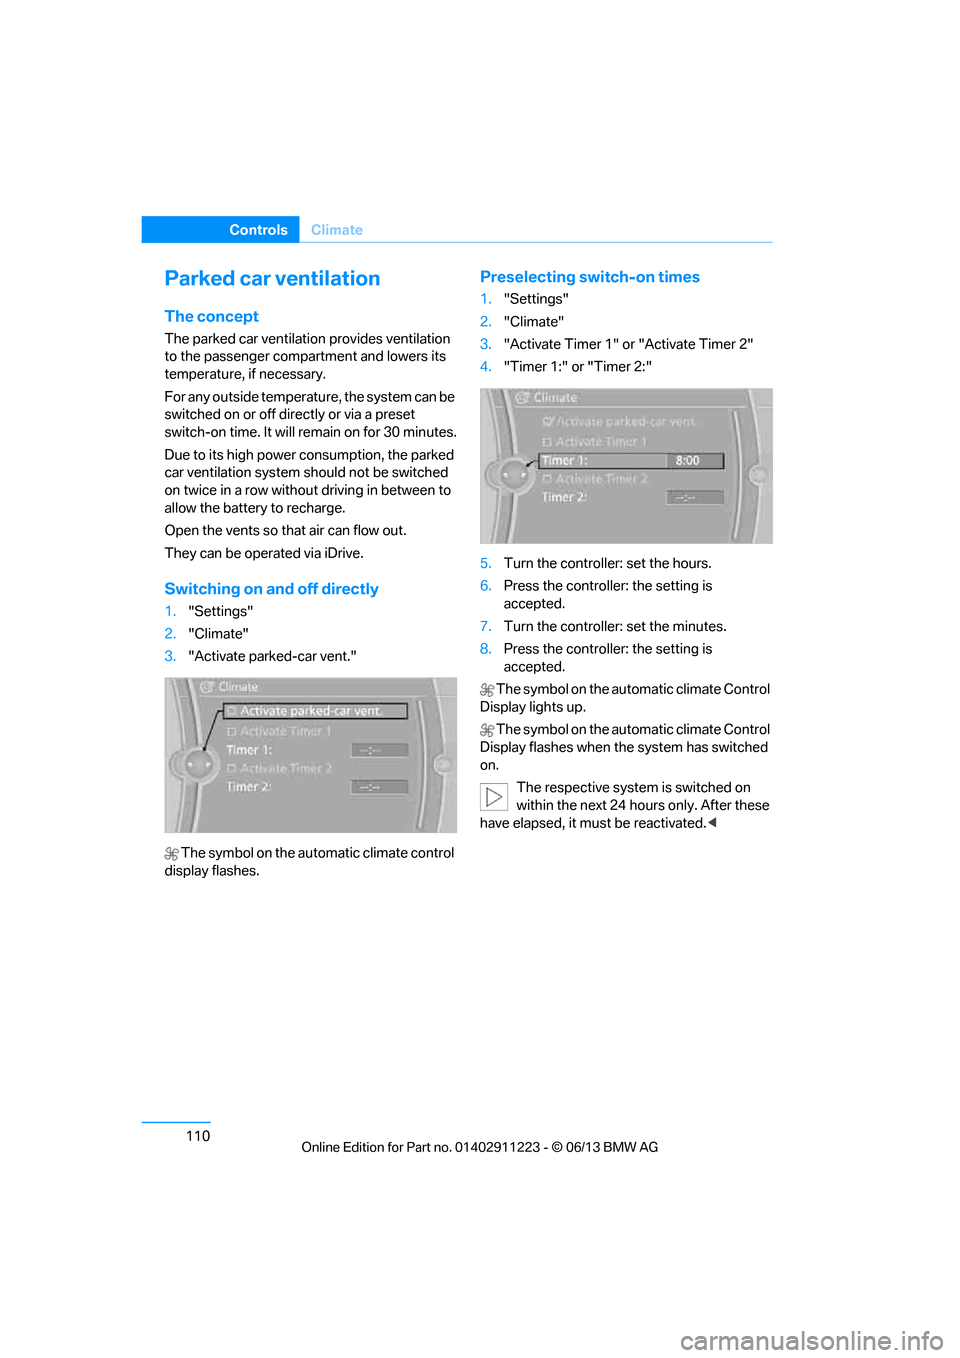
1. "Settings"
2. "Climate"
3. "Activate parked-car vent."
The symbol on the automatic climate control
display flashes.
Preselecting switch-on times
1. "Settings"
2. "Climate"
3. "Activate Timer 1" or "Activate Timer 2"
4. "Timer 1:" or "Timer 2:"
5. Turn the controller: set the hours.
6. Press the controller: the setting is
accepted.
7. Turn the controller: set the minutes.
8. Press the controller: the setting is
accepted.
The symbol on the automatic climate Control
Display lights up.
The symbol on the automatic climate Control
Display flashes when the system has switched
on.
The respective system is switched on
within the next 24 hours only. After these
have elapsed, it must be reactivated. <
00320051004F004C00510048000300280047004C0057004C005200510003
Page 116 of 288
111
Practical interior accessories
Controls
Practical interior accessories
Vehicle equipment
In this chapter, all production, country, and
optional equipment that is offered in the model
range is described. For this reason, descrip-
tions will be given of some equipment that may
not be available in a vehi
cle, for example due to
the special options or national-market version
selected. This also app lies to safety related
functions and systems.
Integrated universal remote
control
The concept
The Integrated universal remote control can be
used to operate up to 3 functions of remote-
controlled devices such as garage door open-
ers or lighting systems. The Integrated univer-
sal remote control thus replaces as many as
three different hand-held transmitters. To oper-
ate them, the buttons on the interior rearview
mirror must be programmed with the desired
functions. Programming requires the hand-held
transmitter for the respective device.
To prevent possible damage or injury,
before programming or using the inte-
grated universal remote control to operate a
device, always inspect the immediate area to
make certain that no people, animals or objects
are within the pivoting or travel range of the
device being operated.
Also follow the safety in structions supplied with
the hand-held transmitter. <
For security reasons, make sure to delete the
stored functions before selling the vehicle, refer
to page 113.
Compatibility
If this symbol appears on the package
or in the instructions supplied with the
device to be operated, you can gener-
ally assume that the devi ce is compatible with
the Integrated univer sal remote control.
For additional questions, please consult:
> Your BMW center.
> www.homelink.com on the Internet.
HomeLink is a registered trademark of Johnson
Controls, Inc.
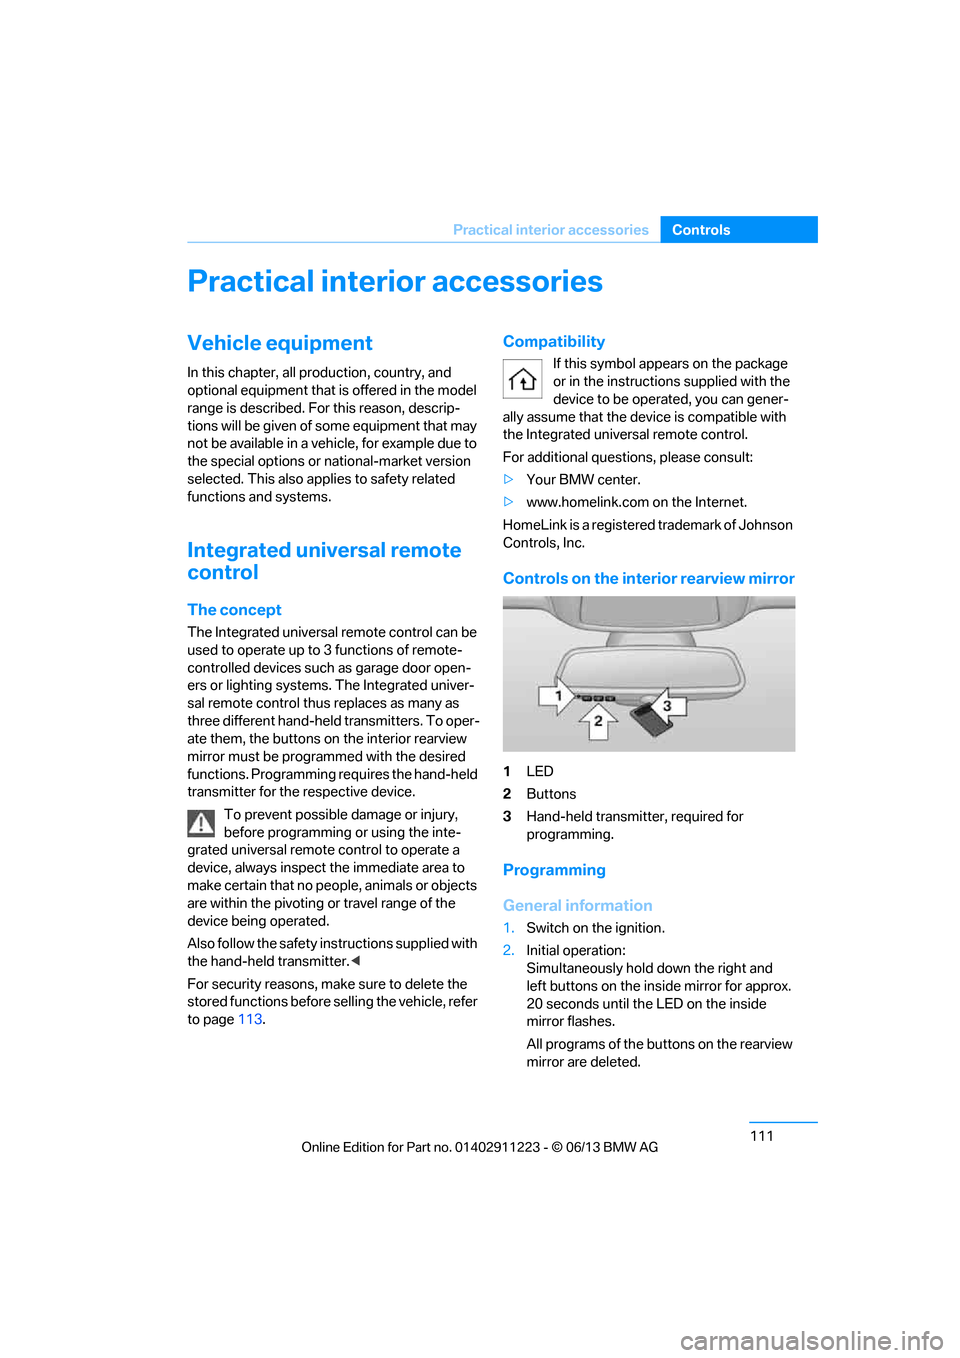
Controls on the inte rior rearview mirror
1LED
2 Buttons
3 Hand-held transmitter, required for
programming.
Programming
General information
1.Switch on the ignition.
2. Initial operation:
Simultaneously hold down the right and
left buttons on the inside mirror for approx.
20 seconds until the LED on the inside
mirror flashes.
All programs of the bu ttons on the rearview
mirror are deleted.
00320051004F004C00510048000300280047004C0057004C005200510003
Page 118 of 288
113
Practical interior accessories
Controls
Canada: if the LED does not flash rapidly
after approx. 60 seconds, alter the distance
and repeat this step or, if the programming
by means of the hand-held transmitter was
interrupted, hold down the button on the
inside mirror and then press and release the
button on the hand-held transmitter several
times, holding it down for 2 seconds each
time.
Operation
To prevent possible
damage or injury,
before programming or using the inte-
grated universal remote control to operate a
device, always inspect the immediate area to
make certain that no people, animals or objects
are within the pivoting or travel range of the
device being operated.
Also follow the safety in structions supplied with
the hand-held transmitter. <
The button on the inside mirror can be used to
operate the device, for example the garage
door, if the engine is running or the ignition is
switched on. To do so , within the reception
range of the device, pr ess the button of the
device until the function is triggered. The LED
on the inside mirror remains lit during transmis-
sion of the radio signal.
Deleting stored functions
Simultaneously hold down the right and left
buttons on the inside mirror for approx. 20 sec-
onds until the LED on the inside mirror flashes
rapidly. All stored functions are deleted. The
functions cannot be de leted individually.
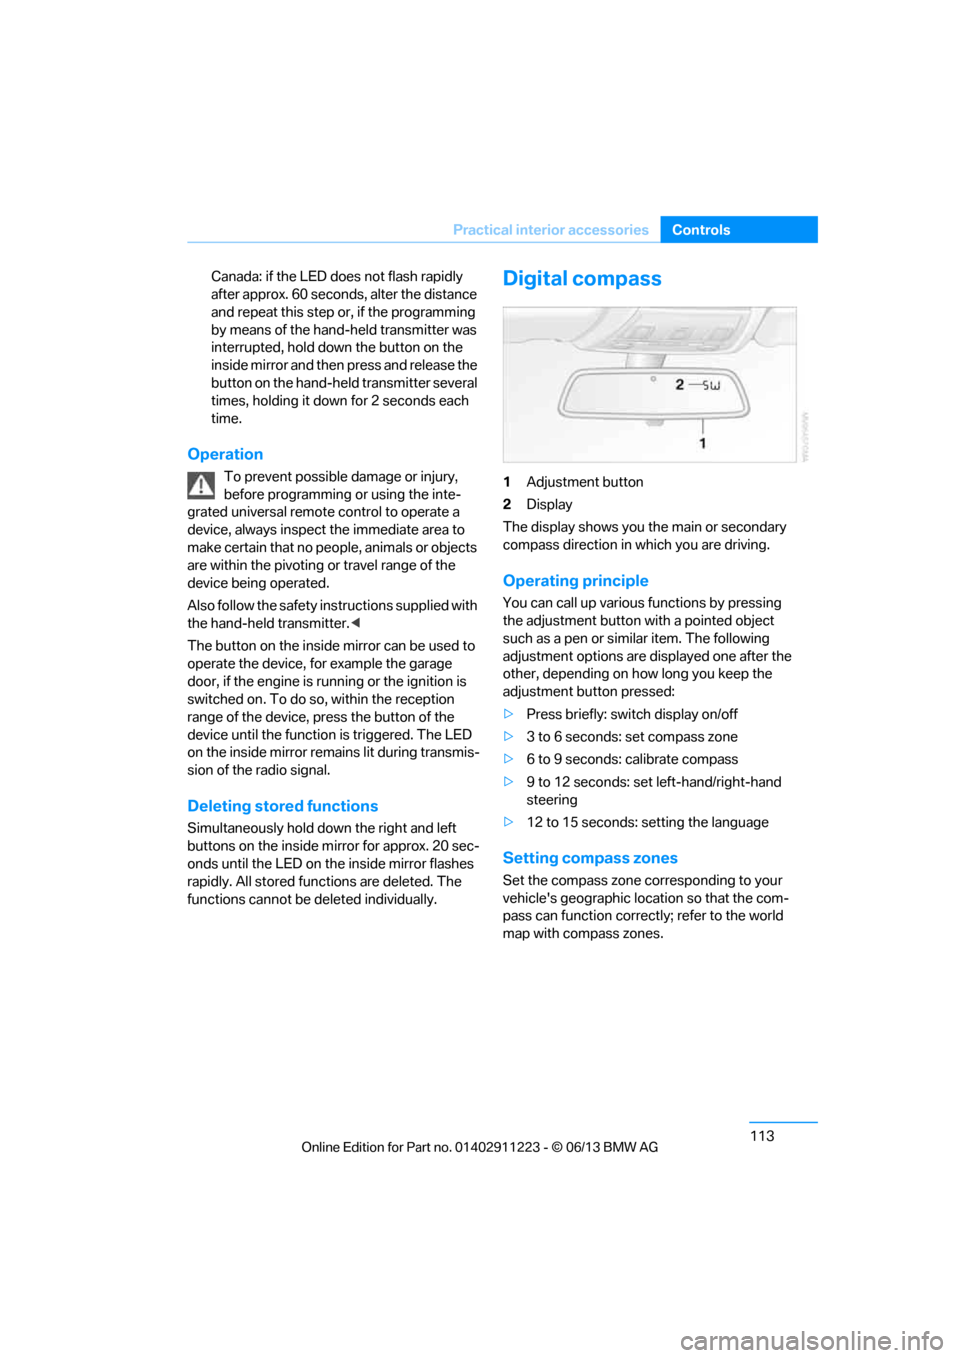
Digital compass
1Adjustment button
2 Display
The display shows you the main or secondary
compass direction in which you are driving.
Operating principle
You can call up various functions by pressing
the adjustment button wi th a pointed object
such as a pen or similar item. The following
adjustment options are displayed one after the
other, depending on how long you keep the
adjustment button pressed:
> Press briefly: switch display on/off
> 3 to 6 seconds: set compass zone
> 6 to 9 seconds: calibrate compass
> 9 to 12 seconds: set left-hand/right-hand
steering
> 12 to 15 seconds: setting the language
Setting compass zones
Set the compass zone co rresponding to your
vehicle's geographic location so that the com-
pass can function correct ly; refer to the world
map with compass zones.
00320051004F004C00510048000300280047004C0057004C005200510003
Page 122 of 288
117
Practical interior accessories
Controls
Lighter
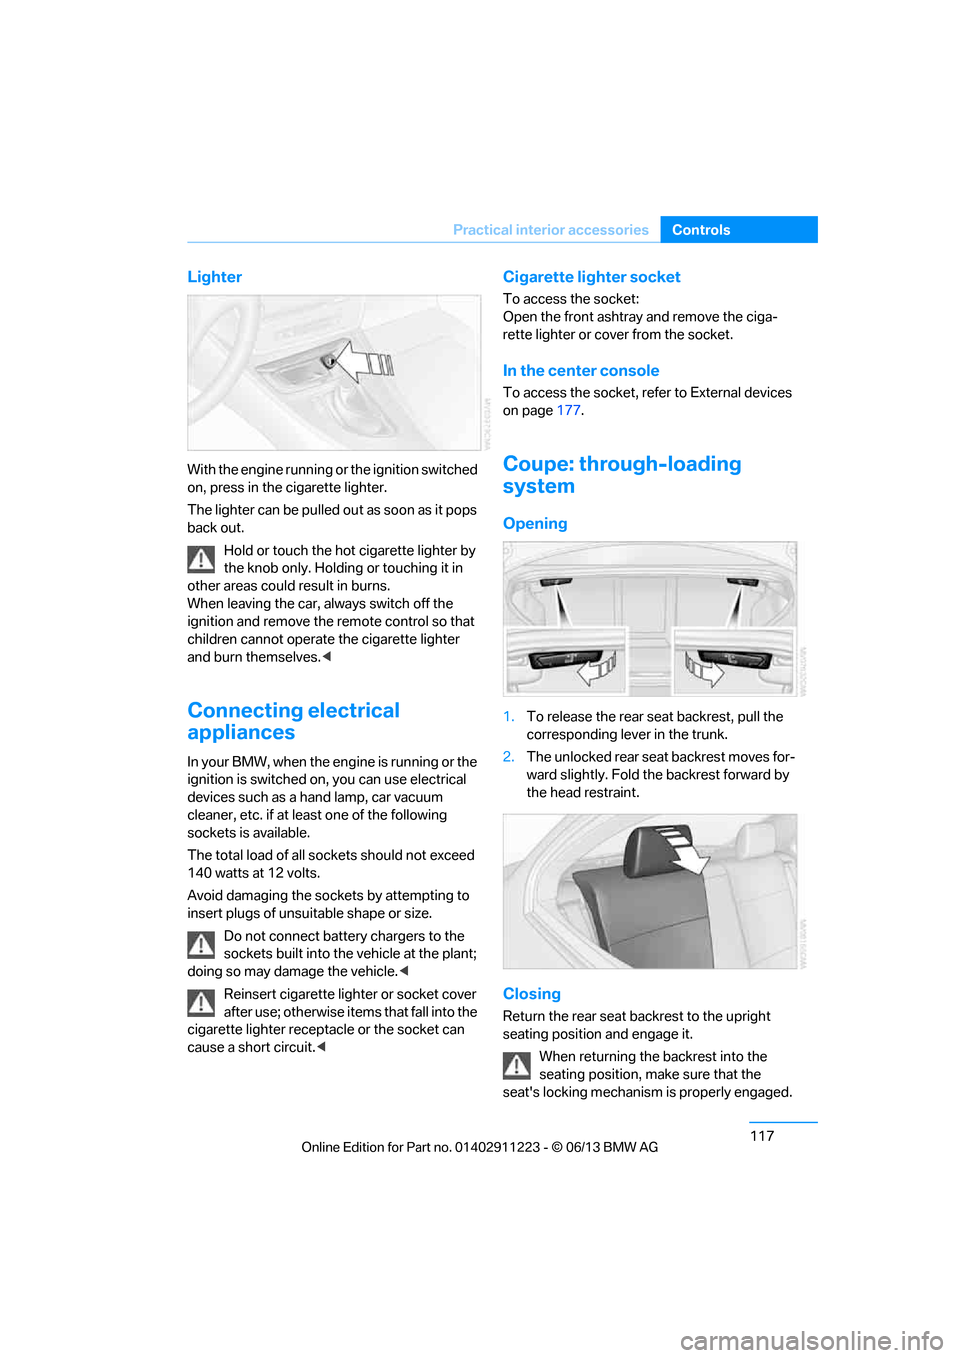
With the engine running or the ignition switched
on, press in the cigarette lighter.
The lighter can be pulled ou
t as soon as it pops
back out.
Hold or touch the hot cigarette lighter by
the knob only. Holding or touching it in
other areas could result in burns.
When leaving the car, always switch off the
ignition and remove the remote control so that
children cannot operate the cigarette lighter
and burn themselves. <
Connecting electrical
appliances
In your BMW, when the engine is running or the
ignition is switched on, you can use electrical
devices such as a hand lamp, car vacuum
cleaner, etc. if at least one of the following
sockets is available.
The total load of all sockets should not exceed
140 watts at 12 volts.
Avoid damaging the sockets by attempting to
insert plugs of unsuitable shape or size.
Do not connect battery chargers to the
sockets built into the vehicle at the plant;
doing so may damage the vehicle. <
Reinsert cigarette lighter or socket cover
after use; otherwise it ems that fall into the
cigarette lighter receptacle or the socket can
cause a short circuit.<
Cigarette lighter socket
To access the socket:
Open the front ashtray and remove the ciga-
rette lighter or cover from the socket.
In the center console
To access the socket, refer to External devices
on page 177.
Coupe: through-loading
system
Opening
1.To release the rear seat backrest, pull the
corresponding lever in the trunk.
2. The unlocked rear seat backrest moves for-
ward slightly. Fold the backrest forward by
the head restraint.
Closing
Return the rear seat backrest to the upright
seating position and engage it.
When returning the backrest into the
seating position, make sure that the
seat's locking mechanism is properly engaged.
00320051004F004C00510048000300280047004C0057004C005200510003
Page 130 of 288
125
Things to remember when driving
Driving tips
Check tire inflation pressure regularly
Check the tire inflation pr
essure at least twice a
month and before embarking on a long journey,
and correct it if necessary.
Low tire inflation pressure causes higher rolling
resistance and thus increases fuel consumption
and tire wear.
Set off immediately
Do not let the engine wa rm up while the car is
still standing, but set off immediately at moder-
ate engine speed. This is the fastest way for the
cold engine to reach its operating temperature.
Drive defensively
Avoid unnecessary acceleration and braking
maneuvers. To do so, keep an adequate dis-
tance between you and th e vehicle in front of
you. A defensive and smooth driving style
keeps fuel consumption down.
Avoid high engine speeds
Use first gear only for dr iving off. In second and
higher gears, accelerate without hesitation or
pauses. When accelerati ng, shift up before
reaching high engine speeds.
When you reach the desi red speed, shift into
the highest applicable ge ar and drive with the
engine speed as low as possible and at a con-
stant speed.
As a rule: driving at low engine speeds lowers
fuel consumption and reduces wear.
Coasting
When approaching a red lig ht, take your foot off
the accelerator and coast to a stop in the high-
est applicable gear.
On a downhill slope, take your foot off the accel-
erator and coast in a suitable gear.
The fuel supply is interrupted when coasting.
Switch off the engine during lengthy
stops
Switch off the engine when stopping for lengthy
periods, e.g. at traffic lights, railroad crossings
or in traffic congestions.
Switch off functions you do not need at
the moment
Functions such as the air conditioner, seat
heating or rear window defroster draw large
amounts of power and consume additional fuel.
Especially in city traffic and in stop-and-go driv-
ing they have a considerable impact. Therefore,
switch these functions off when they are not
really needed.
Have the vehicle serviced
Have the vehicle serviced regularly to achieve
good economy and a long vehicle life. BMW
recommends having the vehicle serviced at
your BMW center. Also note the BMW Mainte-
nance System, refer to page 237.
General driving notes
Close the trunk lid
Only drive with the trunk closed. Failure to
do so may endanger passengers or other
road users or may damage the vehicle in the
event of an accident or a braking and evasive
maneuver. In addition, exhaust gas may flow
into the passenger compartment. <
If special circumstance s make it absolutely
necessary to drive wi th the trunk open:
1. Close all windows and the glass roof.
2. Greatly increase the air volume of the
automatic climate cont rol system, refer to
page 108.
3. Drive cautiously.
00320051004F004C00510048000300280047004C0057004C005200510003