corner BMW 135I COUPE 2008 E82 Owner's Manual
[x] Cancel search | Manufacturer: BMW, Model Year: 2008, Model line: 135I COUPE, Model: BMW 135I COUPE 2008 E82Pages: 260, PDF Size: 8.61 MB
Page 82 of 260
Technology for driving comfort and safety
80
Technology for driving comfort and safety
Park Distance Control PDC*
The concept
The PDC assists you with maneuvering in tight
parking spaces. Acoustic signals and a visual
indicator
warn you of the presence of an object
behind your vehicle. Four ultrasonic sensors in
the bumper measure the distance.
These sensors have a range of approx. 6.5 ft/
2 m. However, an acoustic warning does not
sound until an object is approx. 24 in/60 cm
from the corner sensors, or approx. 5 ft/1.50 m
from the center sensors.
PDC is a parking aid that can indicate
objects when they are approached
slowly, as is usually the case when parking.
Avoid approaching an object at high speed, oth-
erwise physical circumstances may lead to the
system warning being issued too late.<
Switching on automatically
With the engine running or the ignition switched
on, the system is activated after approx. 1 sec-
ond when you engage reverse gear or move the
automatic transmission selector lever to
position R. Wait this short period before driving.
Switching off automatically
After approx. 55 yd/50 m of driving or above
approx. 20 mph/30 km/h, the system switches
off and the LED goes out.
Signal tones
When nearing an object, its position is indicated
correspondingly by an interval tone. As the dis-
tance between vehicle and object decreases,
the intervals between the tones become
shorter. If the distance to the nearest object
falls to below roughly 1 ft/30 cm, then a contin-
uous tone sounds.
An interval tone is interrupted after approx.
3seconds:>If you remain in front of an object that has
been detected by only one of the corner
sensors
>If you are driving parallel to a wall
Malfunction
The indicator lamp in the instrument
cluster comes on. PDC is malfunc-
tioning. A message appears on the
Control Display. Have the system checked.
To avoid this problem, keep the sensors clean
and free of ice or snow in order to ensure that
they will continue to operate effectively. When
using a high-pressure cleaner, do not direct the
jet toward the sensors for lengthy periods and
only spray from a distance of at least 4 in/10 cm.
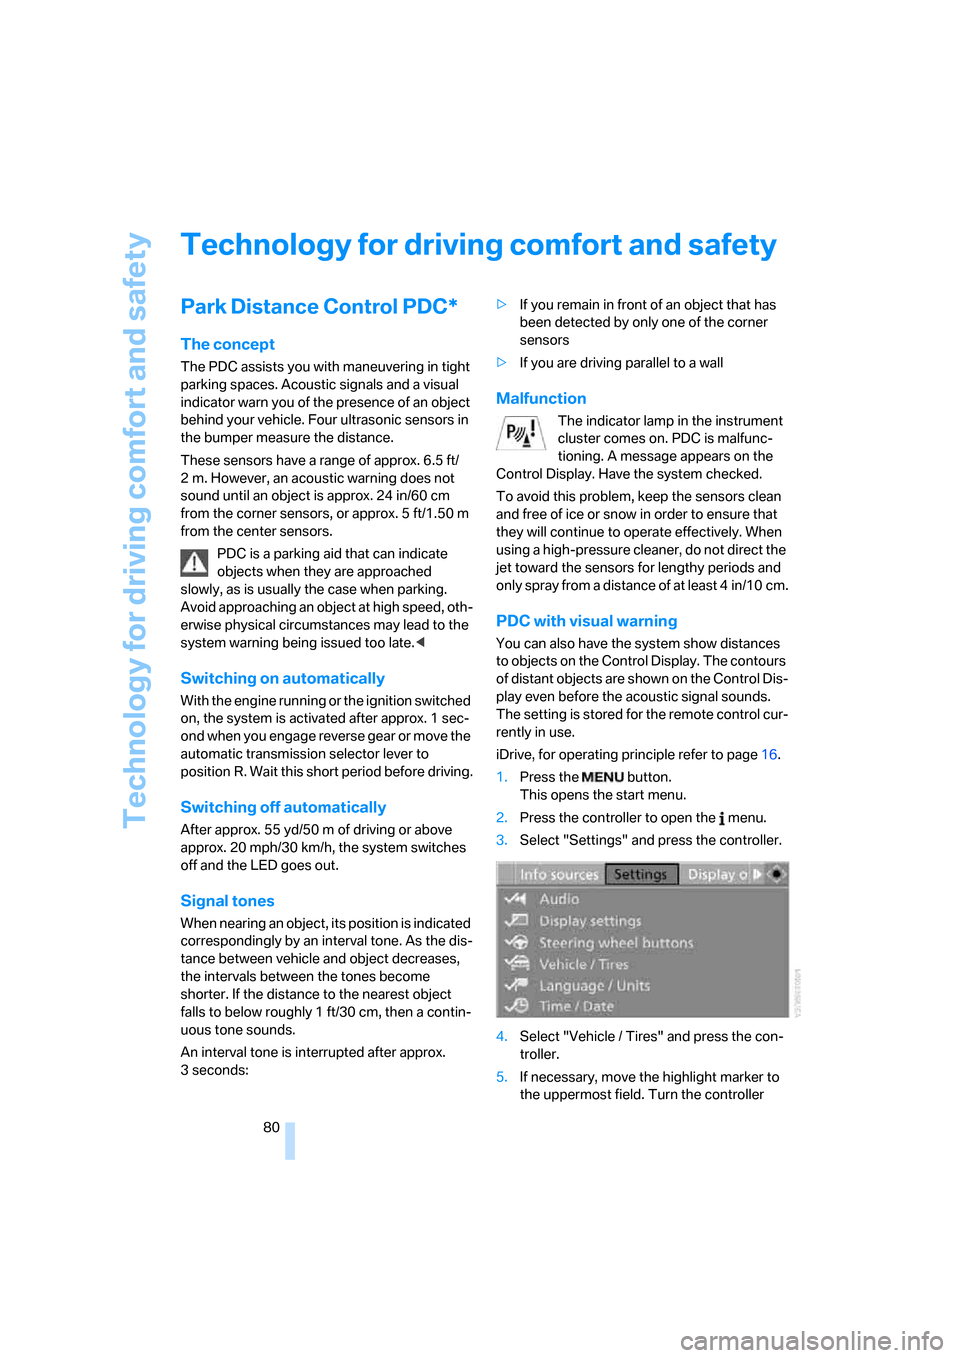
PDC with visual warning
You can also have the system show distances
to objects on the Control Display. The contours
of distant objects are shown on the Control Dis-
play even before the acoustic signal sounds.
The setting is stored for the remote control cur-
rently in use.
iDrive, for operating principle refer to page16.
1.Press the button.
This opens the start menu.
2.Press the controller to open the menu.
3.Select "Settings" and press the controller.
4.Select "Vehicle / Tires" and press the con-
troller.
5.If necessary, move the highlight marker to
the uppermost field. Turn the controller
Page 95 of 260
Controls
93Reference
At a glance
Driving tips
Communications
Navigation
Entertainment
Mobility
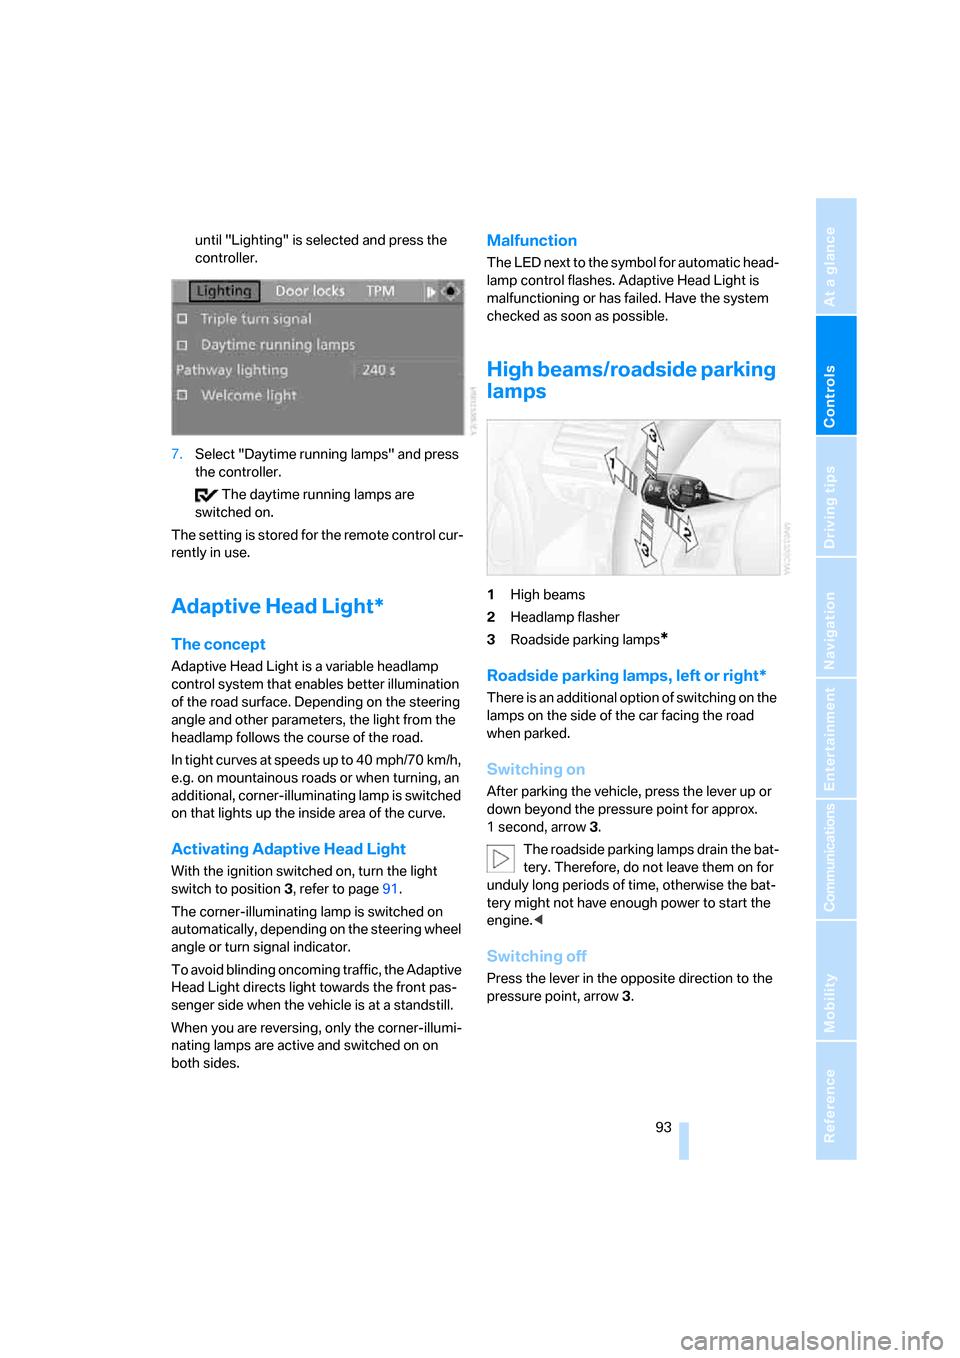
until "Lighting" is selected and press the
controller.
7.Select "Daytime running lamps" and press
the controller.
The daytime running lamps are
switched on.
The setting is stored for the remote control cur-
rently in use.
Adaptive Head Light*
The concept
Adaptive Head Light is a variable headlamp
control system that enables better illumination
of the road surface. Depending on the steering
angle and other parameters, the light from the
headlamp follows the course of the road.
In tight curves at speeds up to 40 mph/70 km/h,
e.g. on mountainous roads or when turning, an
additional, corner-illuminating lamp is switched
on that lights up the inside area of the curve.
Activating Adaptive Head Light
With the ignition switched on, turn the light
switch to position 3, refer to page91.
The corner-illuminating lamp is switched on
automatically, depending on the steering wheel
angle or turn signal indicator.
To avoid blinding oncoming traffic, the Adaptive
Head Light directs light towards the front pas-
senger side when the vehicle is at a standstill.
When you are reversing, only the corner-illumi-
nating lamps are active and switched on on
both sides.
Malfunction
The LED next to the symbol for automatic head-
lamp control flashes. Adaptive Head Light is
malfunctioning or has failed. Have the system
checked as soon as possible.
High beams/roadside parking
lamps
1High beams
2Headlamp flasher
3Roadside parking lamps
*
Roadside parking lamps, left or right*
There is an additional option of switching on the
lamps on the side of the car facing the road
when parked.
Switching on
After parking the vehicle, press the lever up or
down beyond the pressure point for approx.
1 second, arrow 3.
The roadside parking lamps drain the bat-
tery. Therefore, do not leave them on for
unduly long periods of time, otherwise the bat-
tery might not have enough power to start the
engine.<
Switching off
Press the lever in the opposite direction to the
pressure point, arrow 3.
Page 120 of 260
Things to remember when driving
118
Convertible
>Position heavy objects as low and as far for-
ward as possible, ideally directly behind the
respective seat backrests.
>Cover sharp edges and corners.
>For very heavy cargo when the rear seat is
not occupied, secure each safety belt in the
opposite buckle.
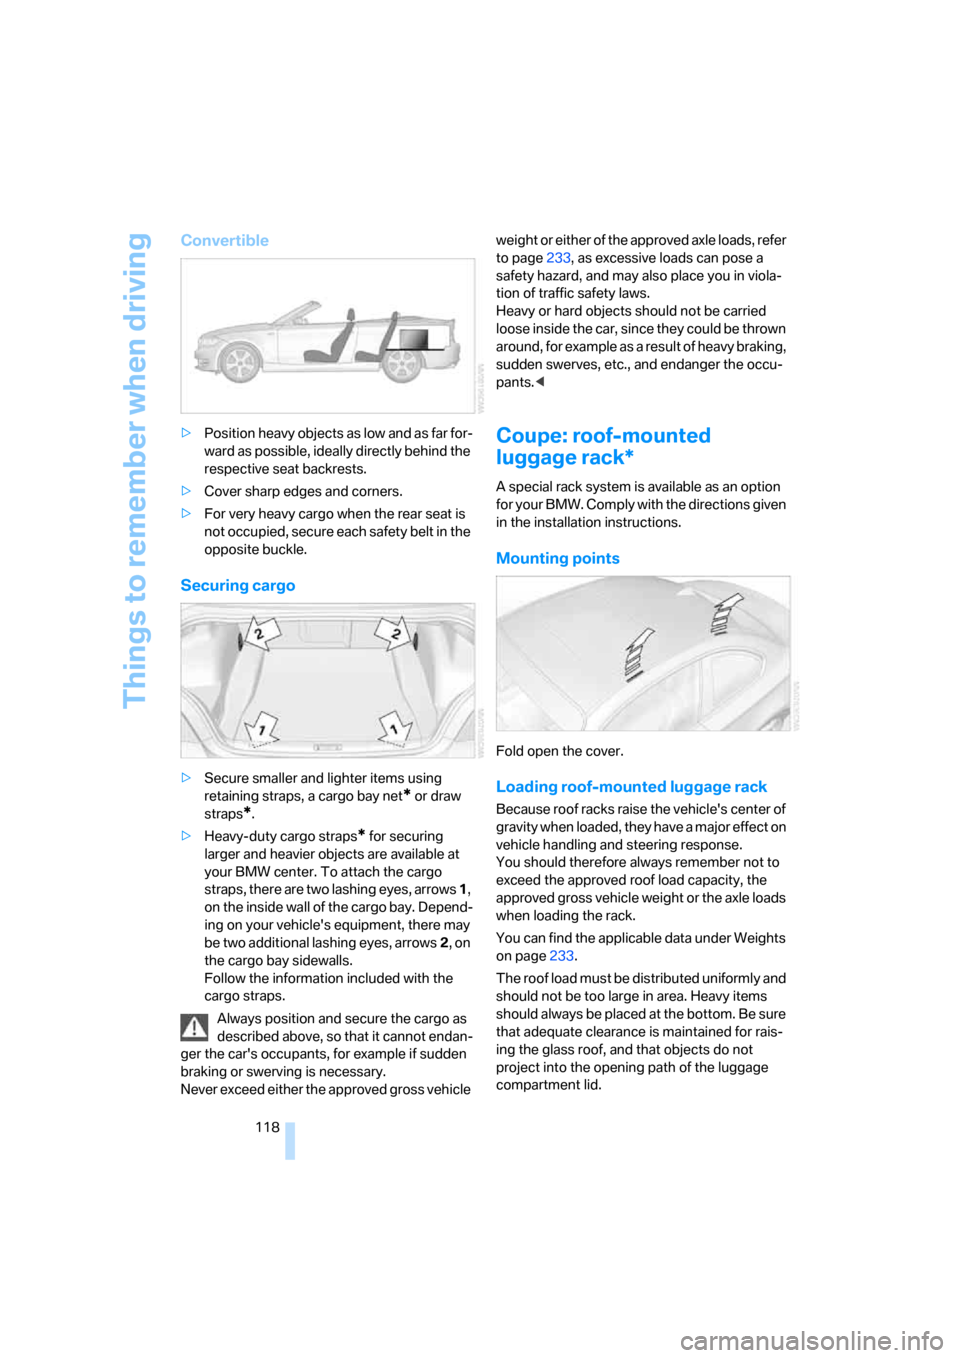
Securing cargo
>Secure smaller and lighter items using
retaining straps, a cargo bay net
* or draw
straps
*.
>Heavy-duty cargo straps
* for securing
larger and heavier objects are available at
your BMW center. To attach the cargo
straps, there are two lashing eyes, arrows 1,
on the inside wall of the cargo bay. Depend-
ing on your vehicle's equipment, there may
be two additional lashing eyes, arrows2, on
the cargo bay sidewalls.
Follow the information included with the
cargo straps.
Always position and secure the cargo as
described above, so that it cannot endan-
ger the car's occupants, for example if sudden
braking or swerving is necessary.
Never exceed either the approved gross vehicle weight or either of the approved axle loads, refer
to page233, as excessive loads can pose a
safety hazard, and may also place you in viola-
tion of traffic safety laws.
Heavy or hard objects should not be carried
loose inside the car, since they could be thrown
around, for example as a result of heavy braking,
sudden swerves, etc., and endanger the occu-
pants.<
Coupe: roof-mounted
luggage rack*
A special rack system is available as an option
f o r y o u r B M W . C o m p l y w i t h t h e d i r e c t i o n s g i v e n
in the installation instructions.
Mounting points
Fold open the cover.
Loading roof-mounted luggage rack
Because roof racks raise the vehicle's center of
gravity when loaded, they have a major effect on
vehicle handling and steering response.
You should therefore always remember not to
exceed the approved roof load capacity, the
approved gross vehicle weight or the axle loads
when loading the rack.
You can find the applicable data under Weights
on page233.
The roof load must be distributed uniformly and
should not be too large in area. Heavy items
should always be placed at the bottom. Be sure
that adequate clearance is maintained for rais-
ing the glass roof, and that objects do not
project into the opening path of the luggage
compartment lid.
Page 121 of 260
Driving tips
119Reference
At a glance
Controls
Communications
Navigation
Entertainment
Mobility
Fasten roof-mounted cargo correctly and
securely to prevent it from shifting or falling off
during the trip.
Drive smoothly. Avoid sudden acceleration and
braking maneuvers. Take corners gently.
Rear-mounted luggage rack*
A rear-mounted luggage rack is available as a
special accessory for your BMW. Comply with
the directions given in the installation instruc-
tions.
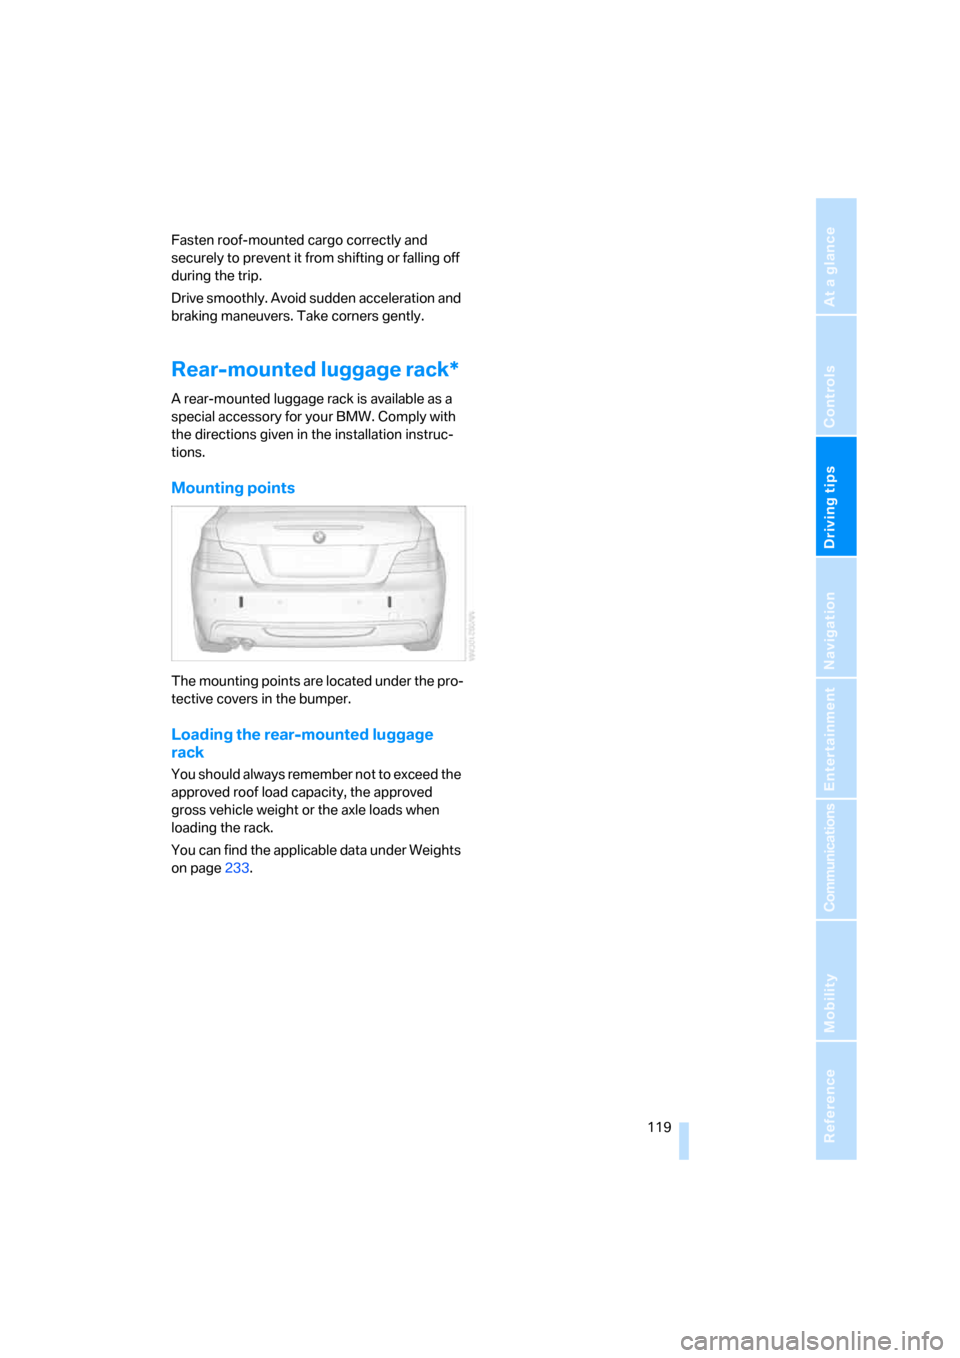
Mounting points
The mounting points are located under the pro-
tective covers in the bumper.
Loading the rear-mounted luggage
rack
You should always remember not to exceed the
approved roof load capacity, the approved
gross vehicle weight or the axle loads when
loading the rack.
You can find the applicable data under Weights
on page233.
Page 220 of 260
Replacing components
218 4.Attach the connector, insert the bulb and
turn it all the way in the opposite direction.
5.Attach the headlamp cover.
Corner-illuminating lamps
H3 bulb, 55 watts
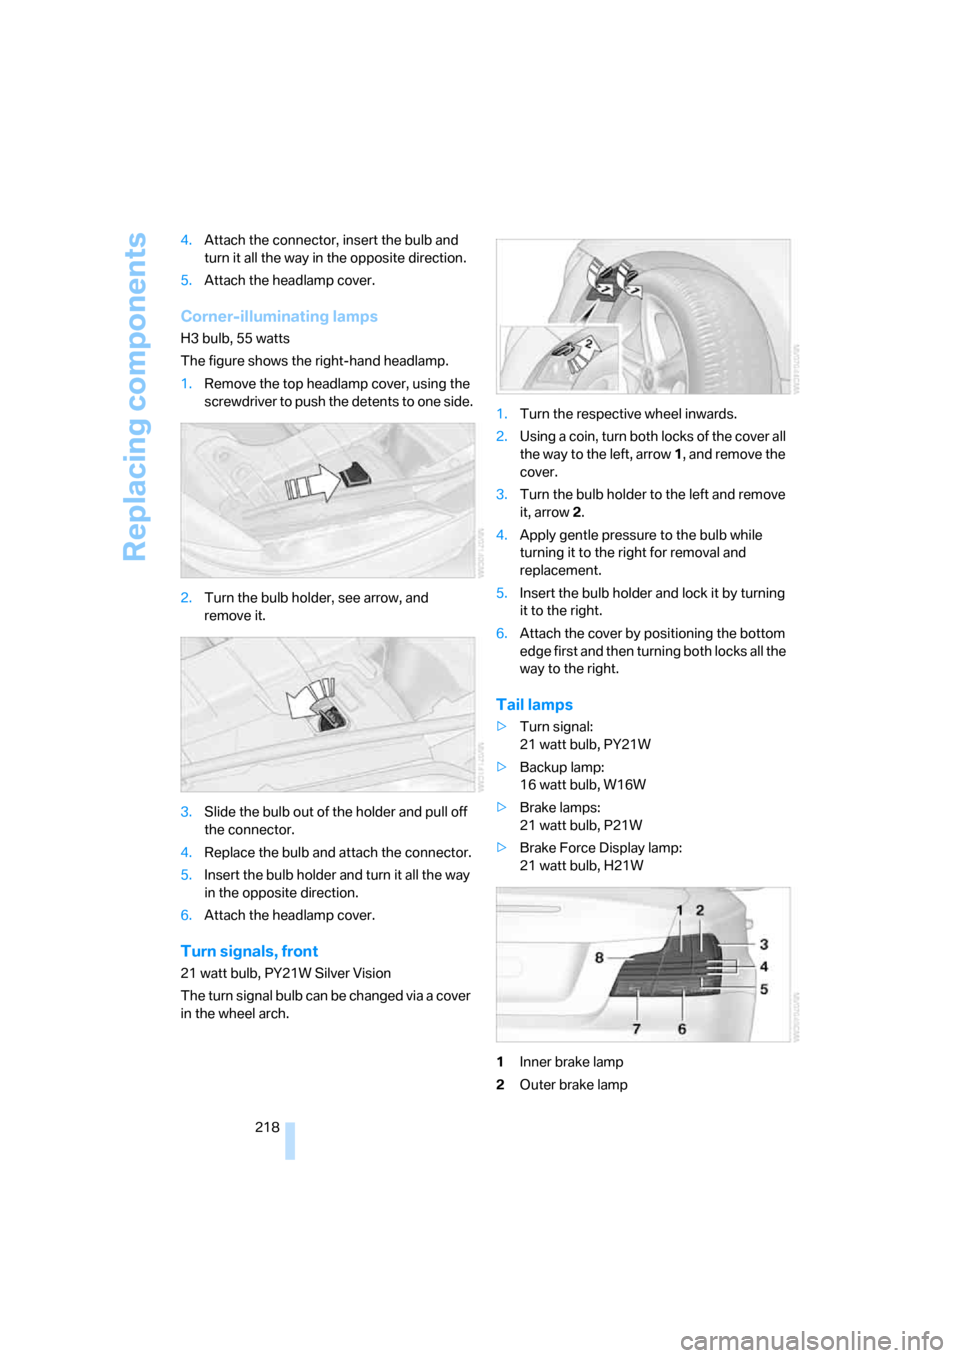
The figure shows the right-hand headlamp.
1.Remove the top headlamp cover, using the
screwdriver to push the detents to one side.
2.Turn the bulb holder, see arrow, and
remove it.
3.Slide the bulb out of the holder and pull off
the connector.
4.Replace the bulb and attach the connector.
5.Insert the bulb holder and turn it all the way
in the opposite direction.
6.Attach the headlamp cover.
Turn signals, front
21 watt bulb, PY21W Silver Vision
The turn signal bulb can be changed via a cover
in the wheel arch.1.Turn the respective wheel inwards.
2.Using a coin, turn both locks of the cover all
the way to the left, arrow 1, and remove the
cover.
3.Turn the bulb holder to the left and remove
it, arrow2.
4.Apply gentle pressure to the bulb while
turning it to the right for removal and
replacement.
5.Insert the bulb holder and lock it by turning
it to the right.
6.Attach the cover by positioning the bottom
edge first and then turning both locks all the
way to the right.
Tail lamps
>Turn signal:
21 watt bulb, PY21W
>Backup lamp:
16 watt bulb, W16W
>Brake lamps:
21 watt bulb, P21W
>Brake Force Display lamp:
21 watt bulb, H21W
1Inner brake lamp
2Outer brake lamp
Page 227 of 260
Mobility
225Reference
At a glance
Controls
Driving tips
Communications
Navigation
Entertainment
windshield wipers may be unavailable. Power
steering assistance is not available when the
engine is not running. Thus, braking and steer-
ing will require increased effort. Active steering
is not active and it will be necessary to turn the
steering wheel further.<
Switch on the hazard warning flashers, depend-
ing on local regulations.
Manual transmission
Gearshift lever in idle position.
Automatic transmission
Selector lever in position N.
Changing the selector lever position, refer to
page61.
Do not exceed a towing speed of 45 mph/
70 km/h and a towing distance of
90 miles/150 km, otherwise the automatic
transmission may be damaged.<
Towing methods
I n s o m e c o u n t r i e s , i t i s i l l e g a l t o t o w y o u r v e h i c l e
with a tow bar or tow rope on public highways.
Please familiarize yourself with the relevant
towing regulations for the country in which you
are driving.
With a tow bar
The towing vehicle must not be lighter
than the towed vehicle, otherwise it may
be impossible to maintain control.<
The tow fittings used should be on the same
side on both vehicles. Should it prove impossi-
ble to avoid mounting the tow bar at an angle,
please observe the following:
>Clearance and maneuvering capability will
be sharply limited during cornering.
>The tow bar will generate lateral forces if it is
attached offset.
Attach the tow bar to the tow fittings only,
as attaching it to other parts of the vehicle
could result in damage.<
With a tow rope
When starting off in the towing vehicle, make
sure that the tow rope is taut.
To avoid jerking and the associated
stresses on vehicle components when
towing, always use nylon ropes or nylon straps.
Attach the tow rope to the tow fittings only, as
attaching it to other parts of the vehicle could
result in damage.<
With a tow truck
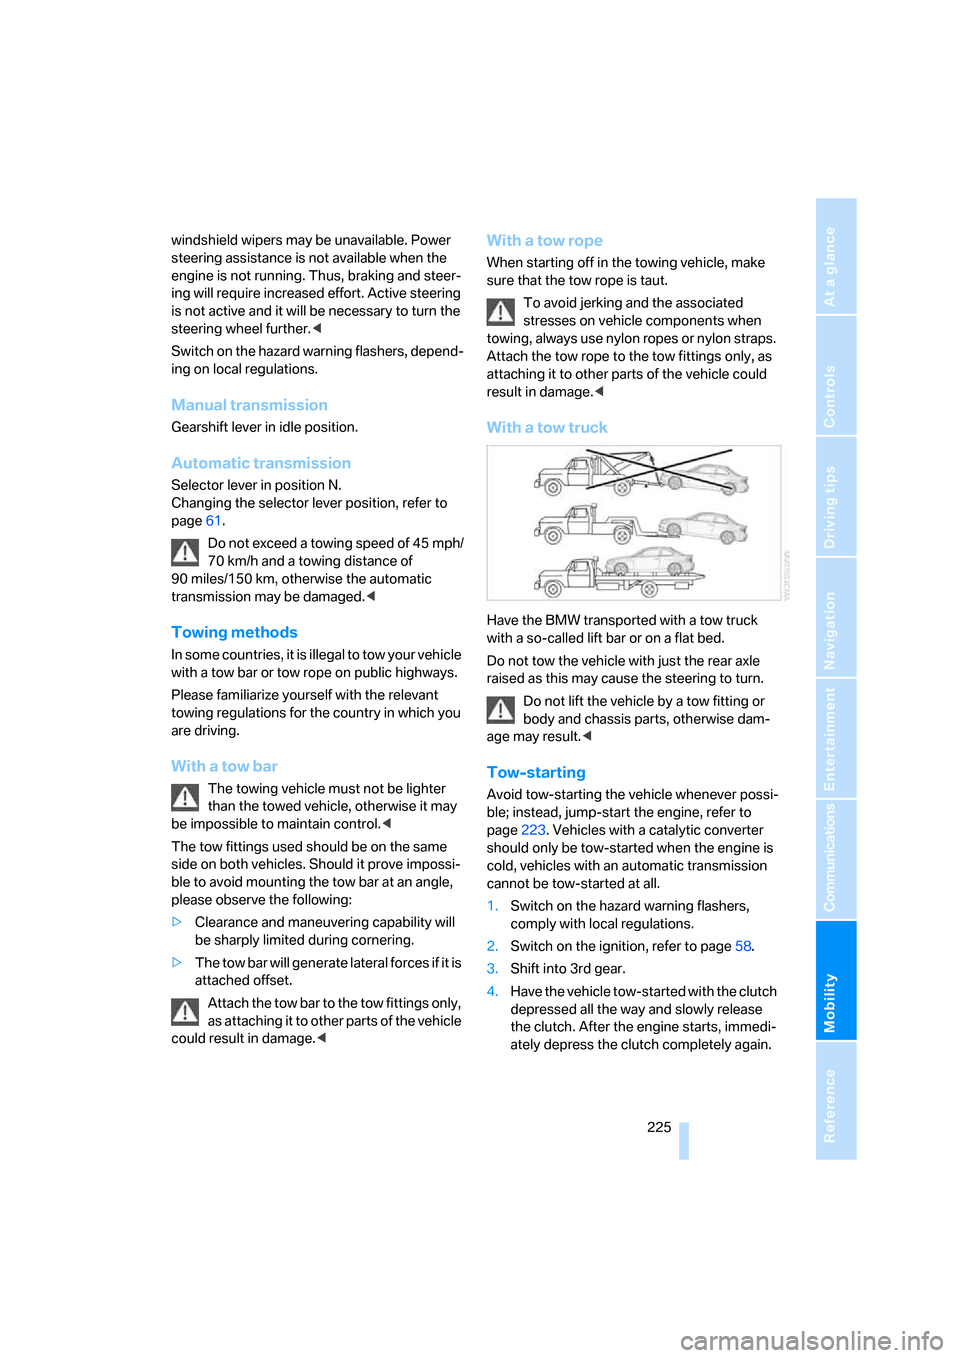
Have the BMW transported with a tow truck
with a so-called lift bar or on a flat bed.
Do not tow the vehicle with just the rear axle
raised as this may cause the steering to turn.
Do not lift the vehicle by a tow fitting or
body and chassis parts, otherwise dam-
age may result.<
Tow-starting
Avoid tow-starting the vehicle whenever possi-
ble; instead, jump-start the engine, refer to
page223. Vehicles with a catalytic converter
should only be tow-started when the engine is
cold, vehicles with an automatic transmission
cannot be tow-started at all.
1.Switch on the hazard warning flashers,
comply with local regulations.
2.Switch on the ignition, refer to page58.
3.Shift into 3rd gear.
4.Have the vehicle tow-started with the clutch
depressed all the way and slowly release
the clutch. After the engine starts, immedi-
ately depress the clutch completely again.
Page 245 of 260
Reference 243
At a glance
Controls
Driving tips
Communications
Navigation
Entertainment
Mobility
Compact disc, refer to
– CD changer163
– CD player163
Compartment for remote
control, refer to Ignition
lock58
Compass104
Computer67
– displays on Control
Display68
– hour signal75
Computer, refer to iDrive16
"Concert hall" for Tone
control152
"Concierge"194
Concierge service194
Condensation, refer to When
the vehicle is parked116
Condition Based Service
CBS214
Configuring settings, refer to
Personal Profile28
Confirmation signals for
locking/unlocking the
vehicle31
Connecting vacuum cleaner,
refer to Connecting
electrical appliances107
Consumption, refer to
Average fuel
consumption68
"Continue guidance to
destination?"137
Control Center, refer to
iDrive16
Control Display16
Controller, refer to iDrive16
Controls and displays10
Convenient access36
– replacing the battery37
Convenient operation
– windows30
– windows with convenient
access36
– with convenient access36
Convenient starting, refer to
Starting the engine59Convertible
– rollover protection
system89
– top40
– wind deflector44
Convertible top
– convenient opening30
Coolant213
– checking level213
– filling213
Coolant temperature67
Cooling, maximum97
Cooling fluid, refer to
Coolant213
Copyright2
Corner-illuminating lamps93
Corner-illuminating lamps,
refer to Adaptive Head
Light93
Cornering lamps, refer to
Adaptive Head Light93
Courtesy lamps94
Cross-hairs in navigation128
Cruise control64
Cruising range68
Cup holders106
Curb weight, refer to
Weights233
Current fuel consumption68
"Current position"144
Current position
– displaying144
– entering132
– storing132
"Customer
Relations"186,194
D
Dashboard, refer to
Cockpit10
Dashboard lighting, refer to
Instrument lighting94
Data
– dimensions231
– sizes231Data, technical230
– capacities234
– engine230
– weights233
"Date"75,76
Date
– setting75
– setting format76
"Date format"76
"Daytime running lamps"93
Daytime running lamps,
switch positions92
DBC Dynamic Brake
Control81
"Deactivated"51
Deactivating front passenger
airbags88
Deadlocking, refer to
Locking30
Decommissioning the vehicle,
refer to Caring for your
vehicle brochure
Defect
– door lock32
– fuel filler door200
– glass roof40
– luggage compartment lid33
Defogging windows99
Defrosting the windows99
Defrosting windshield, refer to
Defrosting windows99
Defrost position, refer to
Defrosting windows99
"Delete address book" in
navigation133
"Delete all numbers" on the
mobile phone185
"Delete data" in
navigation133
"Delete" for mobile
phone185
Destination address
– deleting133
– entering123,127