display BMW 135I COUPE 2011 E82 Owner's Guide
[x] Cancel search | Manufacturer: BMW, Model Year: 2011, Model line: 135I COUPE, Model: BMW 135I COUPE 2011 E82Pages: 256, PDF Size: 8.41 MB
Page 75 of 256
Controls
73Reference
At a glance
Driving tips
Communications
Navigation
Entertainment
Mobility
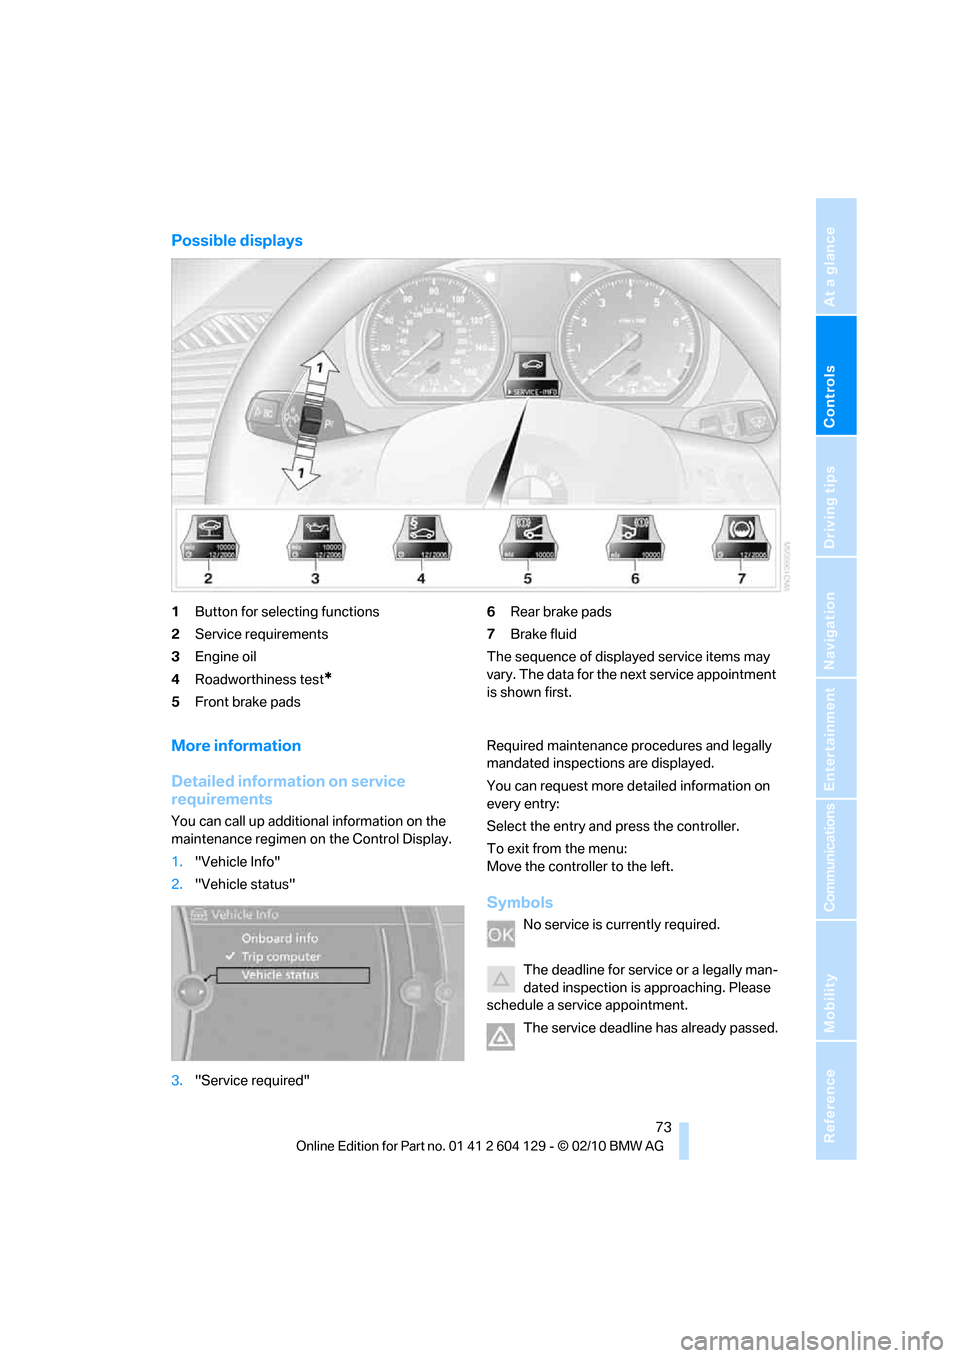
Possible displays
1Button for selecting functions
2Service requirements
3Engine oil
4Roadworthiness test
*
5Front brake pads6Rear brake pads
7Brake fluid
The sequence of displayed service items may
vary. The data for the next service appointment
is shown first.
More information
Detailed information on service
requirements
You can call up additional information on the
maintenance regimen on the Control Display.
1."Vehicle Info"
2."Vehicle status"
3."Service required"Required maintenance procedures and legally
mandated inspections are displayed.
You can request more detailed information on
every entry:
Select the entry and press the controller.
To exit from the menu:
Move the controller to the left.
Symbols
No service is currently required.
The deadline for service or a legally man-
dated inspection is approaching. Please
schedule a service appointment.
The service deadline has already passed.
Page 76 of 256
Controls overview
74
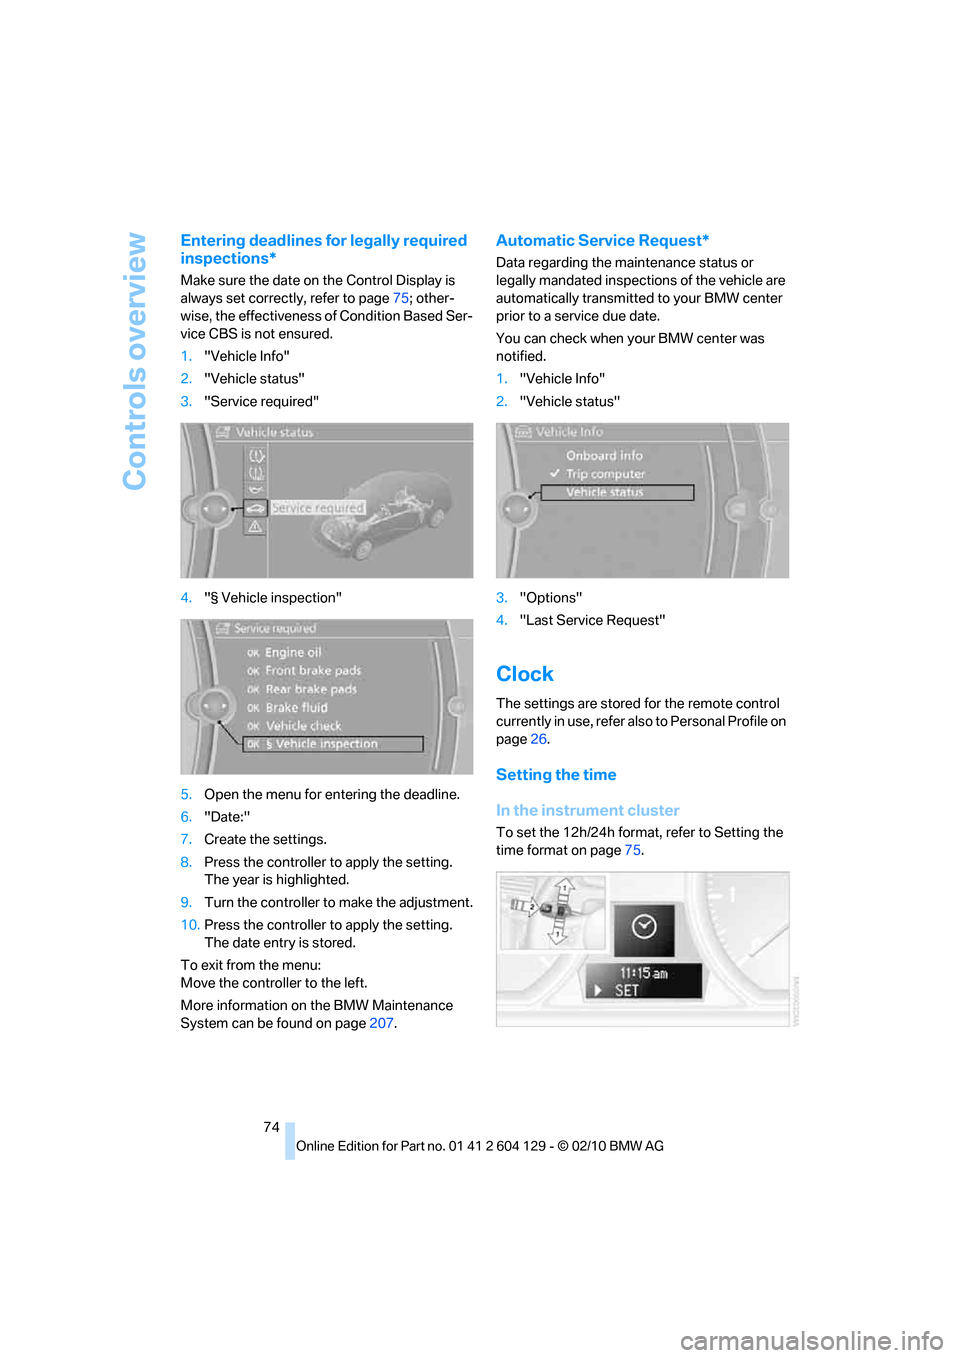
Entering deadlines for legally required
inspections*
Make sure the date on the Control Display is
always set correctly, refer to page75; other-
wise, the effectiveness of Condition Based Ser-
vice CBS is not ensured.
1."Vehicle Info"
2."Vehicle status"
3."Service required"
4."§ Vehicle inspection"
5.Open the menu for entering the deadline.
6."Date:"
7.Create the settings.
8.Press the controller to apply the setting.
The year is highlighted.
9.Turn the controller to make the adjustment.
10.Press the controller to apply the setting.
The date entry is stored.
To exit from the menu:
Move the controller to the left.
More information on the BMW Maintenance
System can be found on page207.
Automatic Service Request*
Data regarding the maintenance status or
legally mandated inspections of the vehicle are
automatically transmitted to your BMW center
prior to a service due date.
You can check when your BMW center was
notified.
1."Vehicle Info"
2."Vehicle status"
3."Options"
4."Last Service Request"
Clock
The settings are stored for the remote control
currently in use, refer also to Personal Profile on
page26.
Setting the time
In the instrument cluster
To set the 12h/24h format, refer to Setting the
time format on page75.
Page 77 of 256
Controls
75Reference
At a glance
Driving tips
Communications
Navigation
Entertainment
Mobility
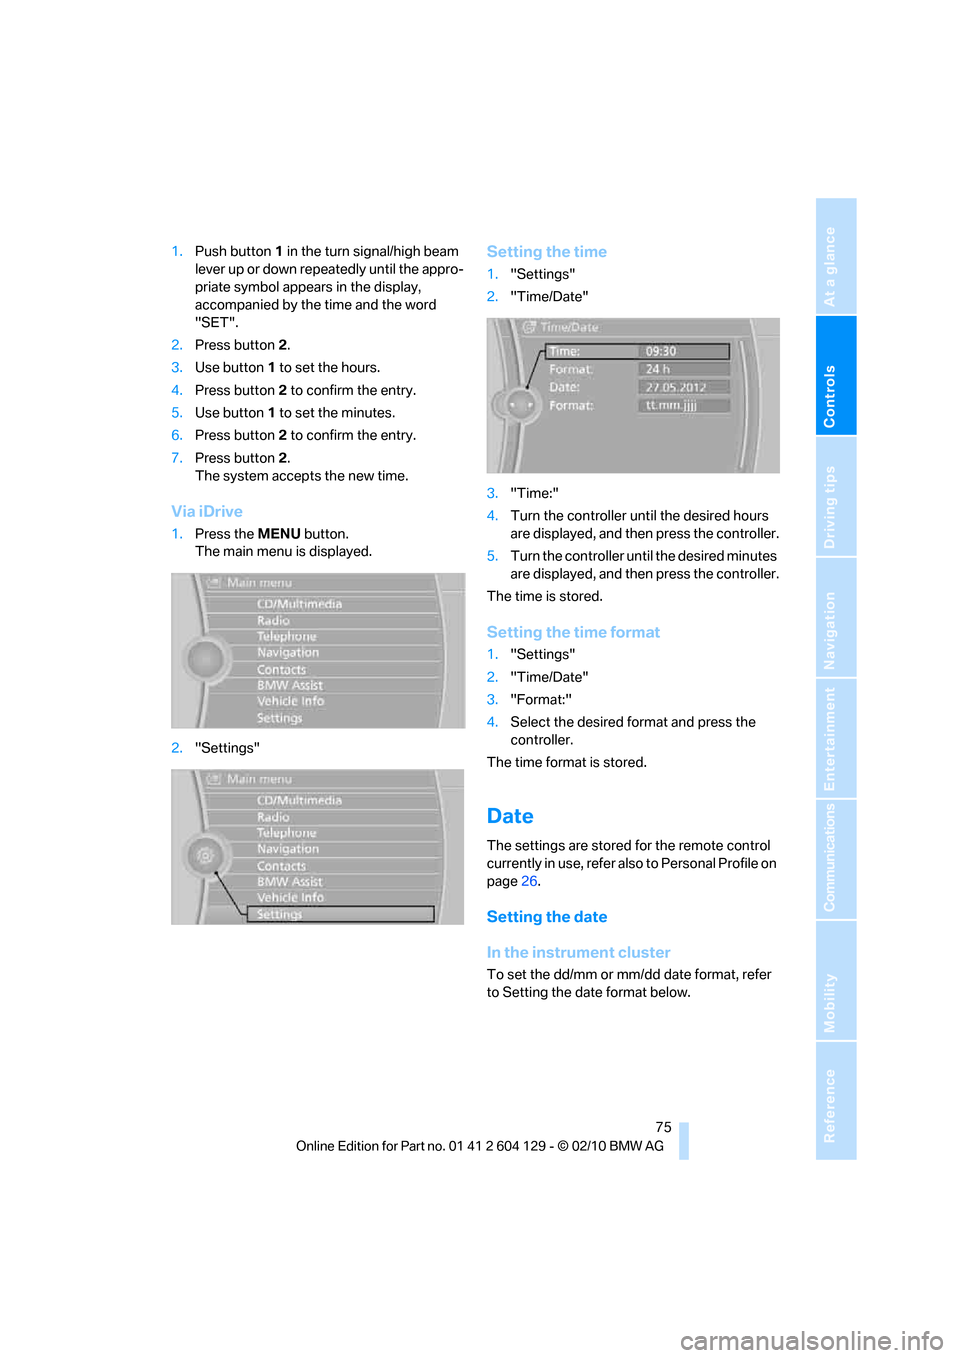
1.Push button 1 in the turn signal/high beam
lever up or down repeatedly until the appro-
priate symbol appears in the display,
accompanied by the time and the word
"SET".
2.Press button2.
3.Use button 1 to set the hours.
4.Press button2 to confirm the entry.
5.Use button 1 to set the minutes.
6.Press button2 to confirm the entry.
7.Press button2.
The system accepts the new time.
Via iDrive
1.Press the MENU button.
The main menu is displayed.
2."Settings"
Setting the time
1."Settings"
2."Time/Date"
3."Time:"
4.Turn the controller until the desired hours
are displayed, and then press the controller.
5.Turn the controller until the desired minutes
are displayed, and then press the controller.
The time is stored.
Setting the time format
1."Settings"
2."Time/Date"
3."Format:"
4.Select the desired format and press the
controller.
The time format is stored.
Date
The settings are stored for the remote control
currently in use, refer also to Personal Profile on
page26.
Setting the date
In the instrument cluster
To set the dd/mm or mm/dd date format, refer
to Setting the date format below.
Page 78 of 256
Controls overview
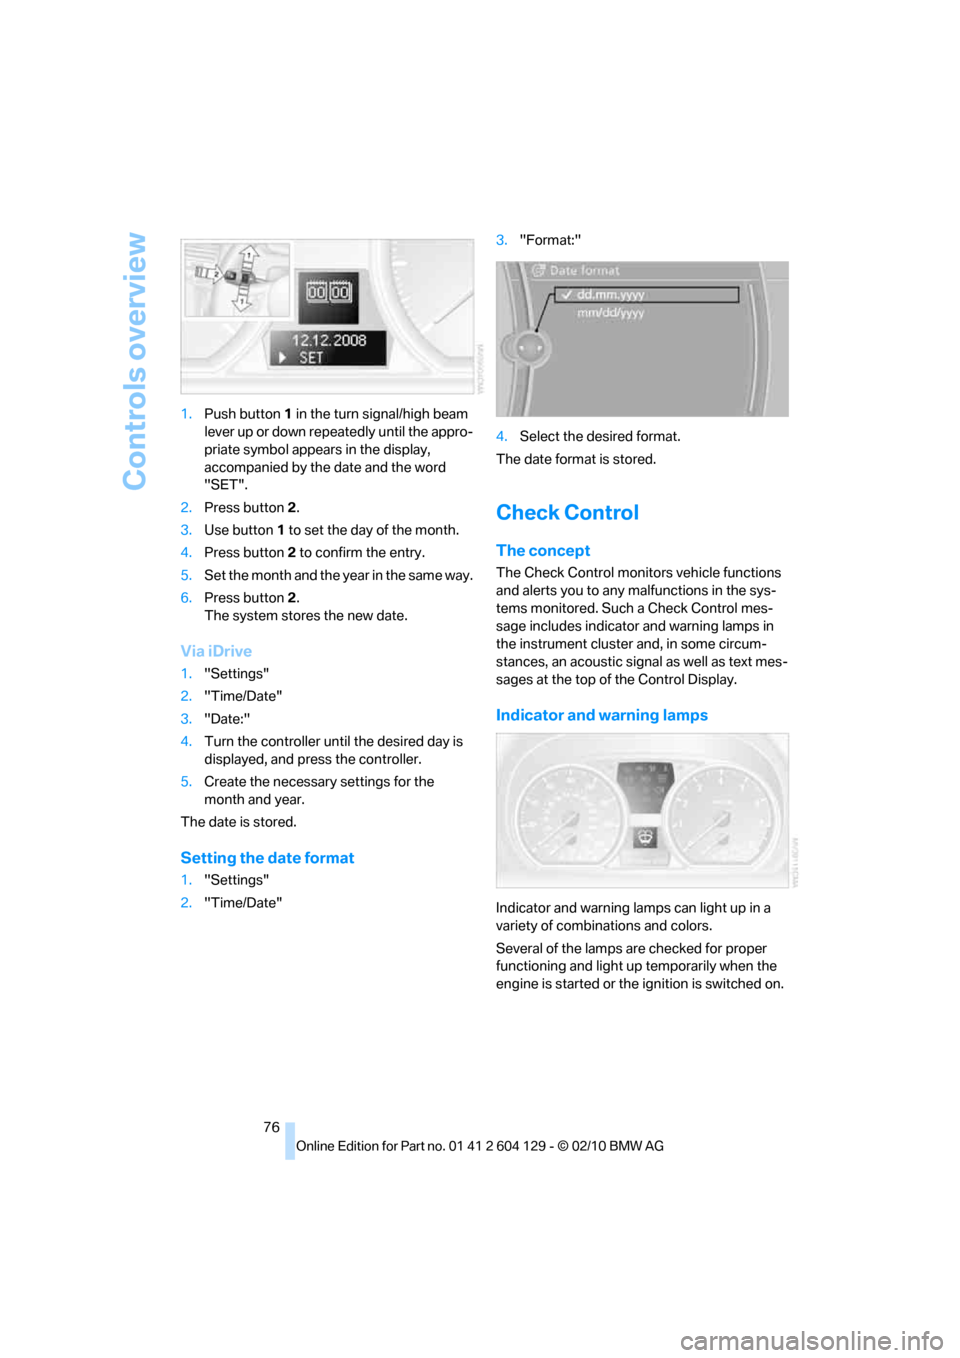
76 1.Push button 1 in the turn signal/high beam
lever up or down repeatedly until the appro-
priate symbol appears in the display,
accompanied by the date and the word
"SET".
2.Press button2.
3.Use button 1 to set the day of the month.
4.Press button2 to confirm the entry.
5.Set the month and the year in the same way.
6.Press button2.
The system stores the new date.
Via iDrive
1."Settings"
2."Time/Date"
3."Date:"
4.Turn the controller until the desired day is
displayed, and press the controller.
5.Create the necessary settings for the
month and year.
The date is stored.
Setting the date format
1."Settings"
2."Time/Date"3."Format:"
4.Select the desired format.
The date format is stored.
Check Control
The concept
The Check Control monitors vehicle functions
and alerts you to any malfunctions in the sys-
tems monitored. Such a Check Control mes-
sage includes indicator and warning lamps in
the instrument cluster and, in some circum-
stances, an acoustic signal as well as text mes-
sages at the top of the Control Display.
Indicator and warning lamps
Indicator and warning lamps can light up in a
variety of combinations and colors.
Several of the lamps are checked for proper
functioning and light up temporarily when the
engine is started or the ignition is switched on.
Page 79 of 256
Controls
77Reference
At a glance
Driving tips
Communications
Navigation
Entertainment
Mobility
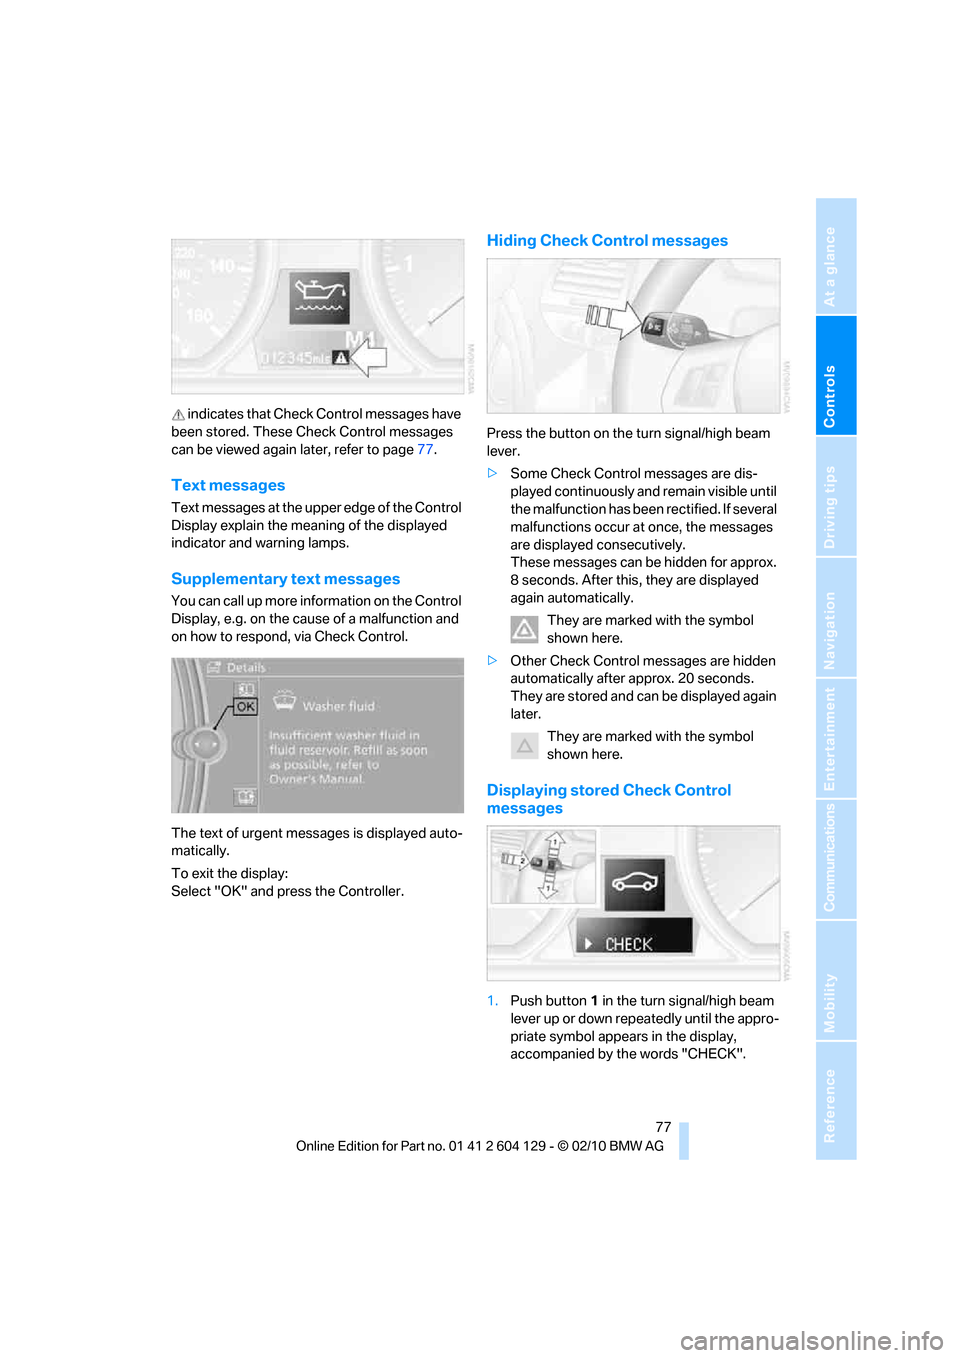
indicates that Check Control messages have
been stored. These Check Control messages
can be viewed again later, refer to page77.
Text messages
Text messages at the upper edge of the Control
Display explain the meaning of the displayed
indicator and warning lamps.
Supplementary text messages
You can call up more information on the Control
Display, e.g. on the cause of a malfunction and
on how to respond, via Check Control.
The text of urgent messages is displayed auto-
matically.
To exit the display:
Select "OK" and press the Controller.
Hiding Check Control messages
Press the button on the turn signal/high beam
lever.
>Some Check Control messages are dis-
played continuously and remain visible until
the malfunction has been rectified. If several
malfunctions occur at once, the messages
are displayed consecutively.
These messages can be hidden for approx.
8 seconds. After this, they are displayed
again automatically.
They are marked with the symbol
shown here.
>Other Check Control messages are hidden
automatically after approx. 20 seconds.
They are stored and can be displayed again
later.
They are marked with the symbol
shown here.
Displaying stored Check Control
messages
1.Push button 1 in the turn signal/high beam
lever up or down repeatedly until the appro-
priate symbol appears in the display,
accompanied by the words "CHECK".
Page 80 of 256
Controls overview
78 2.Press button2.
"CHECK OK" appears if there are no Check
Control messages. If a Check Control mes-
sage has been stored, the corresponding
lamp comes on. It is accompanied by a text
message on the Control Display.
3.Push button 1 to check for other messages.
4.Press button2.
The display again shows the outside tem-
perature and the time.
Via iDrive
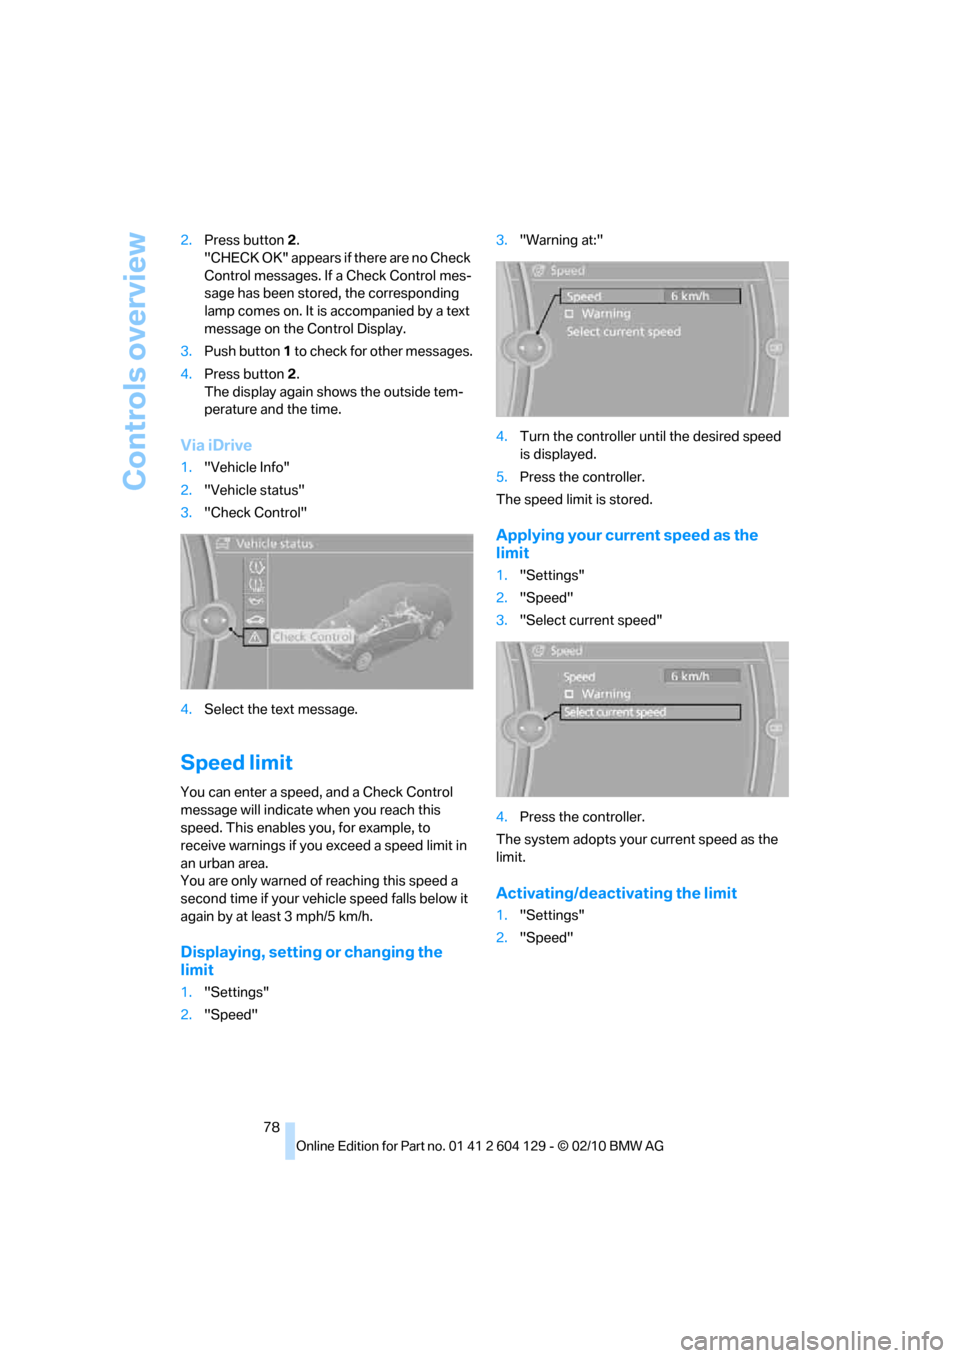
1."Vehicle Info"
2."Vehicle status"
3."Check Control"
4.Select the text message.
Speed limit
You can enter a speed, and a Check Control
message will indicate when you reach this
speed. This enables you, for example, to
receive warnings if you exceed a speed limit in
an urban area.
You are only warned of reaching this speed a
second time if your vehicle speed falls below it
again by at least 3 mph/5 km/h.
Displaying, setting or changing the
limit
1."Settings"
2."Speed"3."Warning at:"
4.Turn the controller until the desired speed
is displayed.
5.Press the controller.
The speed limit is stored.
Applying your current speed as the
limit
1."Settings"
2."Speed"
3."Select current speed"
4.Press the controller.
The system adopts your current speed as the
limit.
Activating/deactivating the limit
1."Settings"
2."Speed"
Page 81 of 256
Controls
79Reference
At a glance
Driving tips
Communications
Navigation
Entertainment
Mobility
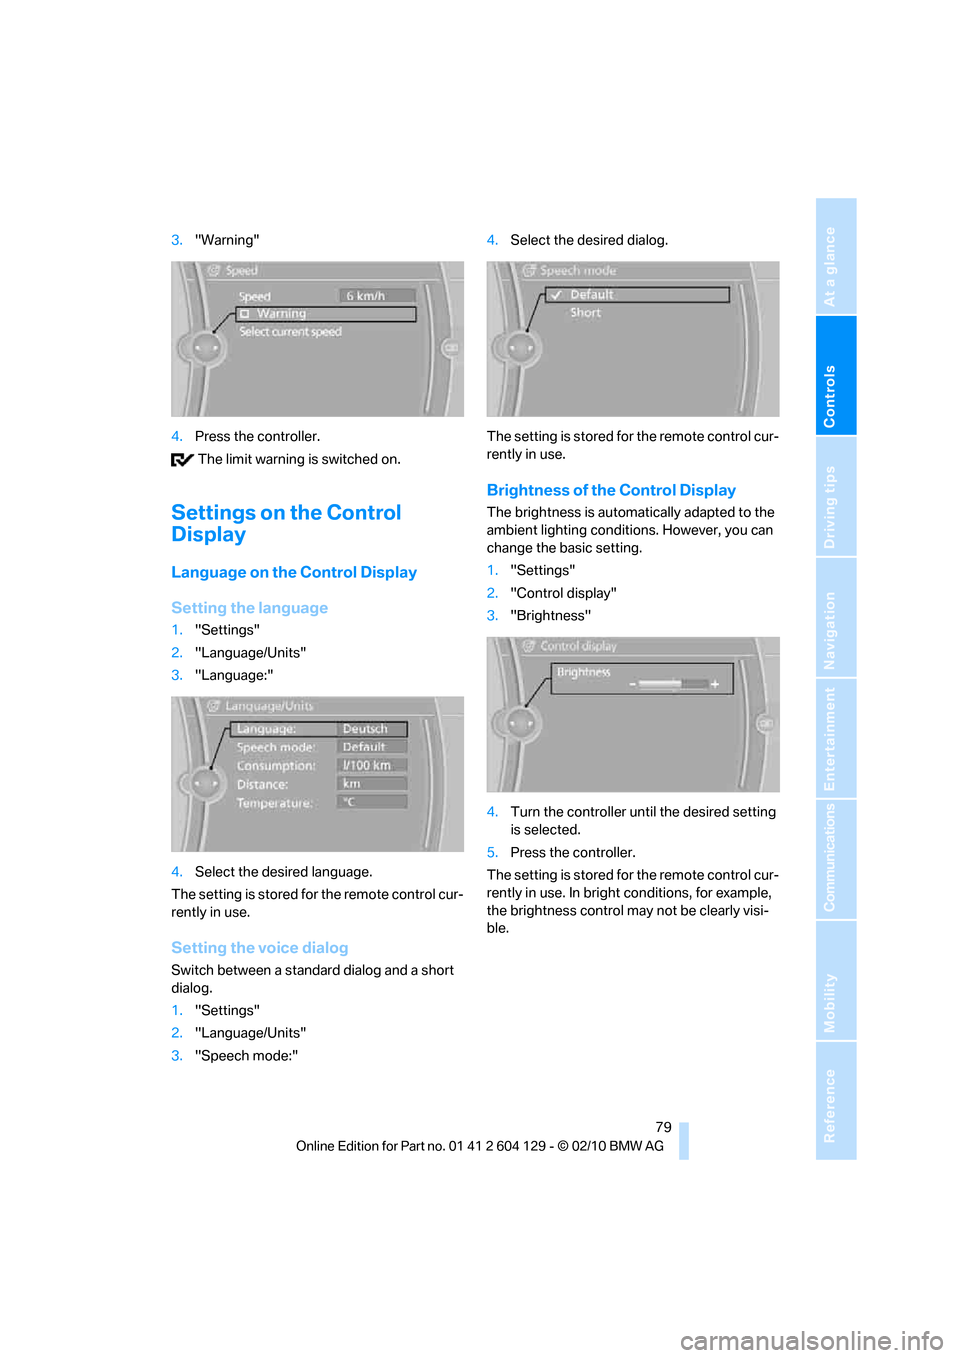
3."Warning"
4.Press the controller.
The limit warning is switched on.
Settings on the Control
Display
Language on the Control Display
Setting the language
1."Settings"
2."Language/Units"
3."Language:"
4.Select the desired language.
The setting is stored for the remote control cur-
rently in use.
Setting the voice dialog
Switch between a standard dialog and a short
dialog.
1."Settings"
2."Language/Units"
3."Speech mode:"4.Select the desired dialog.
The setting is stored for the remote control cur-
rently in use.
Brightness of the Control Display
The brightness is automatically adapted to the
ambient lighting conditions. However, you can
change the basic setting.
1."Settings"
2."Control display"
3."Brightness"
4.Turn the controller until the desired setting
is selected.
5.Press the controller.
The setting is stored for the remote control cur-
rently in use. In bright conditions, for example,
the brightness control may not be clearly visi-
ble.
Page 82 of 256
Technology for driving comfort and safety
80
Technology for driving comfort and safety
Park Distance Control PDC*
The concept
The PDC assists you with maneuvering in tight
parking spaces. Acoustic signals and a visual
indicator
warn you of the presence of an object
behind your vehicle. Four ultrasonic sensors in
the bumper measure the distance.
These sensors have a range of approx. 6.5 ft/
2 m. However, an acoustic warning does not
sound until an object is approx. 2 ft/60 cm from
the corner sensors, or approx. 5 ft/1.50 m from
the center sensors.
PDC is a parking aid that can indicate
objects when they are approached
slowly, as is usually the case when parking.
Avoid approaching an object at high speed; oth-
erwise, physical circumstances may lead to the
system warning being issued too late.<
Switching on automatically
With the engine running or the ignition switched
on, the system is activated after approx. second
when you engage reverse gear or move the
automatic transmission selector lever to
position R. Wait this short period before driving.
Switching off automatically
After approx. 55 yd/50 m of driving or above
approx. 20 mph/30 km/h, the system switches
off and the LED goes out.
Signal tones
When nearing an object, its position is indicated
correspondingly by an interval tone. As the dis-
tance between vehicle and object decreases,
the intervals between the tones become
shorter. If the distance to the nearest object
falls to below roughly 1 ft/30 cm, then a contin-
uous tone sounds.
An interval tone is interrupted after approx.
3seconds:>If you stop in front of an object that has been
detected by only one of the corner sensors
>If you are driving parallel to a wall
Malfunction
The indicator lamp in the instrument
cluster comes on. PDC is malfunc-
tioning. A message appears on the
Control Display. Have the system checked.
To avoid this problem, keep the sensors clean
and free of ice or snow in order to ensure that
they will continue to operate effectively. When
using a high-pressure cleaner, do not spray the
sensors for extended periods of time and only
from a distance of at least 1 ft/30 cm.
PDC with visual warning
The approach of the vehicle to an object is
shown on the Control Display. Objects that are
farther away are displayed on the Control Dis-
play before a signal tone sounds. The display
appears on the Control Display as soon as PDC
is activated.
System limitations
Even with PDC, final responsibility for
estimating the distance between the
vehicle and any obstructions always remains
with the driver. Even when sensors are pro-
vided, there is a blind spot in which objects can
no longer be detected. The system is also sub-
ject to the physical limits that apply to all forms
of ultrasonic measurement, such as those
encountered with trailer towbars and hitches,
thin or wedge-shaped objects, etc. Low objects
that have already been displayed, e.g. curbs,
can disappear again from the detection area of
the sensors before or after a continuous tone
sounds. Higher, protruding objects, e.g. ledges,
cannot be detected. Loud sound sources out-
side or inside the car can drown out the PDC
signal. Therefore, always drive cautiously; oth-
erwise, there is a risk of personal injury or prop-
erty damage.<
Page 84 of 256
Technology for driving comfort and safety
82 >When driving uphill on snow-covered roads,
in slush or on unplowed, snow-covered
roads
>When rocking a stuck vehicle free or start-
ing off in deep snow or on loose ground
>When driving with snow chains
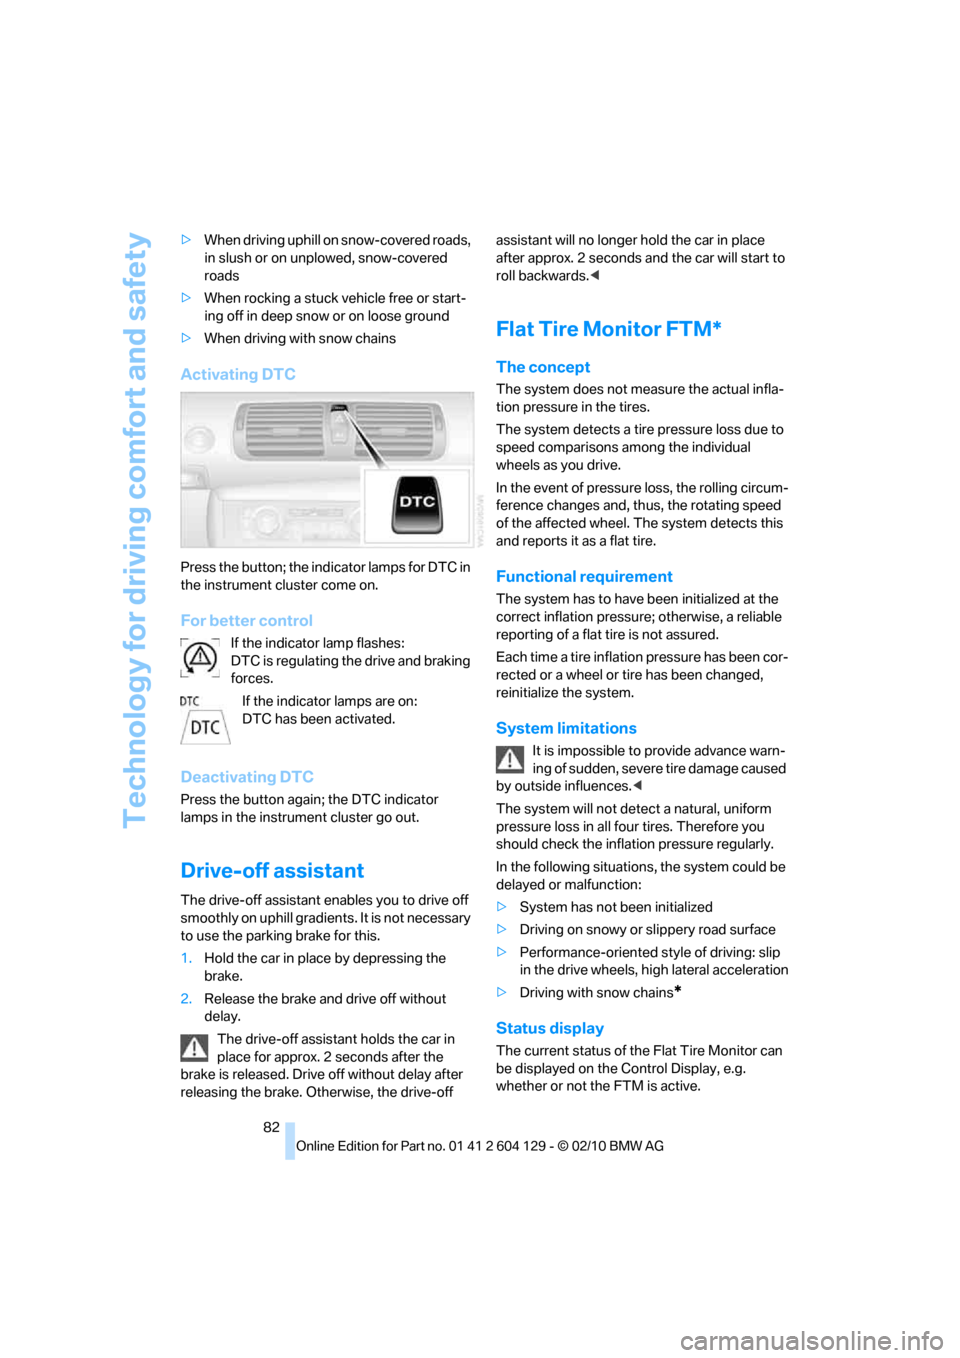
Activating DTC
Press the button; the indicator lamps for DTC in
the instrument cluster come on.
For better control
If the indicator lamp flashes:
DTC is regulating the drive and braking
forces.
If the indicator lamps are on:
DTC has been activated.
Deactivating DTC
Press the button again; the DTC indicator
lamps in the instrument cluster go out.
Drive-off assistant
The drive-off assistant enables you to drive off
smoothly on uphill gradients. It is not necessary
to use the parking brake for this.
1.Hold the car in place by depressing the
brake.
2.Release the brake and drive off without
delay.
The drive-off assistant holds the car in
place for approx. 2 seconds after the
brake is released. Drive off without delay after
releasing the brake. Otherwise, the drive-off assistant will no longer hold the car in place
after approx. 2 seconds and the car will start to
roll backwards.<
Flat Tire Monitor FTM*
The concept
The system does not measure the actual infla-
tion pressure in the tires.
The system detects a tire pressure loss due to
speed comparisons among the individual
wheels as you drive.
In the event of pressure loss, the rolling circum-
ference changes and, thus, the rotating speed
of the affected wheel. The system detects this
and reports it as a flat tire.
Functional requirement
The system has to have been initialized at the
correct inflation pressure; otherwise, a reliable
reporting of a flat tire is not assured.
Each time a tire inflation pressure has been cor-
rected or a wheel or tire has been changed,
reinitialize the system.
System limitations
It is impossible to provide advance warn-
ing of sudden, severe tire damage caused
by outside influences.<
The system will not detect a natural, uniform
pressure loss in all four tires. Therefore you
should check the inflation pressure regularly.
In the following situations, the system could be
delayed or malfunction:
>System has not been initialized
>Driving on snowy or slippery road surface
>Performance-oriented style of driving: slip
in the drive wheels, high lateral acceleration
>Driving with snow chains
*
Status display
The current status of the Flat Tire Monitor can
be displayed on the Control Display, e.g.
whether or not the FTM is active.
Page 85 of 256
Controls
83Reference
At a glance
Driving tips
Communications
Navigation
Entertainment
Mobility
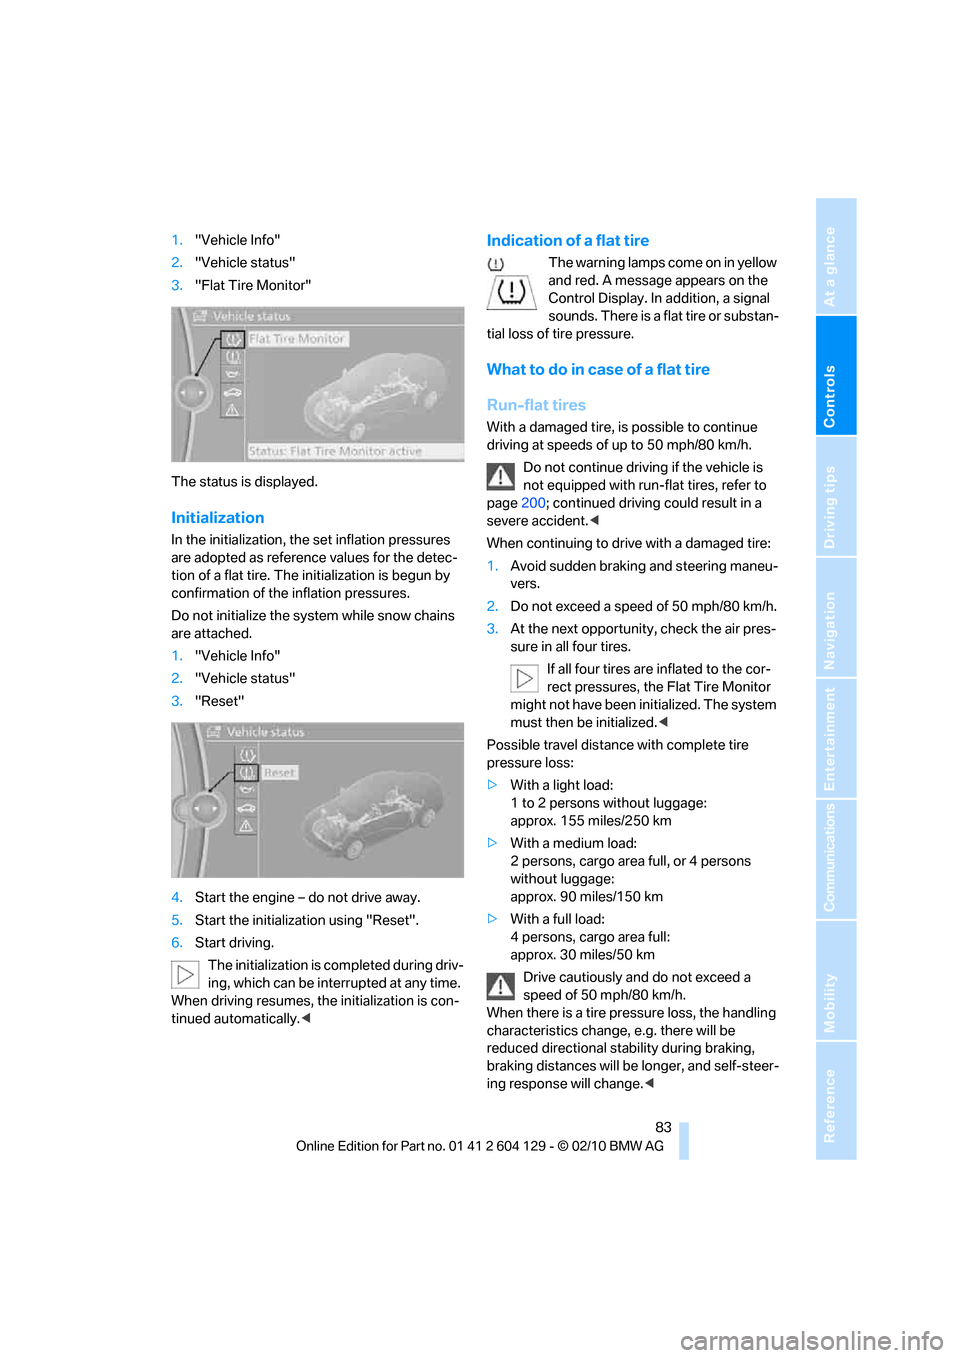
1."Vehicle Info"
2."Vehicle status"
3."Flat Tire Monitor"
The status is displayed.
Initialization
In the initialization, the set inflation pressures
are adopted as reference values for the detec-
tion of a flat tire. The initialization is begun by
confirmation of the inflation pressures.
Do not initialize the system while snow chains
are attached.
1."Vehicle Info"
2."Vehicle status"
3."Reset"
4.Start the engine – do not drive away.
5.Start the initialization using "Reset".
6.Start driving.
The initialization is completed during driv-
ing, which can be interrupted at any time.
When driving resumes, the initialization is con-
tinued automatically.<
Indication of a flat tire
The warning lamps come on in yellow
and red. A message appears on the
Control Display. In addition, a signal
sounds. There is a flat tire or substan-
tial loss of tire pressure.
What to do in case of a flat tire
Run-flat tires
With a damaged tire, is possible to continue
driving at speeds of up to 50 mph/80 km/h.
Do not continue driving if the vehicle is
not equipped with run-flat tires, refer to
page200; continued driving could result in a
severe accident.<
When continuing to drive with a damaged tire:
1.Avoid sudden braking and steering maneu-
vers.
2.Do not exceed a speed of 50 mph/80 km/h.
3.At the next opportunity, check the air pres-
sure in all four tires.
If all four tires are inflated to the cor-
rect pressures, the Flat Tire Monitor
might not have been initialized. The system
must then be initialized.<
Possible travel distance with complete tire
pressure loss:
>With a light load:
1 to 2 persons without luggage:
approx. 155 miles/250 km
>With a medium load:
2 persons, cargo area full, or 4 persons
without luggage:
approx. 90 miles/150 km
>With a full load:
4 persons, cargo area full:
approx. 30 miles/50 km
Drive cautiously and do not exceed a
speed of 50 mph/80 km/h.
When there is a tire pressure loss, the handling
characteristics change, e.g. there will be
reduced directional stability during braking,
braking distances will be longer, and self-steer-
ing response will change.<