cooling BMW 2 SERIES 2014 F22 Owner's Manual
[x] Cancel search | Manufacturer: BMW, Model Year: 2014, Model line: 2 SERIES, Model: BMW 2 SERIES 2014 F22Pages: 228, PDF Size: 5.73 MB
Page 70 of 228
▷The engine is not yet at operating temper‐
ature.▷The wheels are at a sharp angle or the
steering wheel is being turned.▷After driving in reverse.▷Fogging of the windows when the auto‐
matic climate control is switched on.▷Vehicle battery is heavily discharged.▷At higher elevations.▷The engine compartment lid is unlocked.▷The parking assistant is activated.▷Stop-and-go traffic.▷The selector lever is in position N, M/S or
R.▷Use of fuel with high ethanol content.
Starting the engine
The engine starts automatically under the fol‐
lowing conditions:
▷Steptronic transmission:
By releasing the brake pedal.▷Manual transmission:
The clutch pedal is pressed.
After the engine starts, accelerate as usual.
Safety mode
After the engine switches off automatically, it
will not start again automatically if any one of
the following conditions are met.
▷The driver's safety belt is unbuckled and
the driver's door is open.▷The hood was unlocked.
Some indicator lights light up for a varied
length of time.
The engine can only be started via the Start/
Stop button.
Note
Even if driving off was not intended, the deacti‐
vated engine starts up automatically in the fol‐
lowing situations:▷Excessive warming of the car's interior
when the cooling function is switched on.▷The steering wheel is turned.▷Steptronic transmission: change from se‐
lector lever position D to R, N or M/S.▷Steptronic transmission: change from se‐
lector lever position P to N, D, R or M/S.▷The vehicle begins rolling.▷Fogging of the windows when the auto‐
matic climate control is switched on.▷Vehicle battery is heavily discharged.▷Excessive cooling of the car's interior when
the heating is switched on.▷Low brake vacuum pressure; this can oc‐
cur, e.g., if the brake pedal is depressed a
number of times in succession.
Activating/deactivating the system
manually
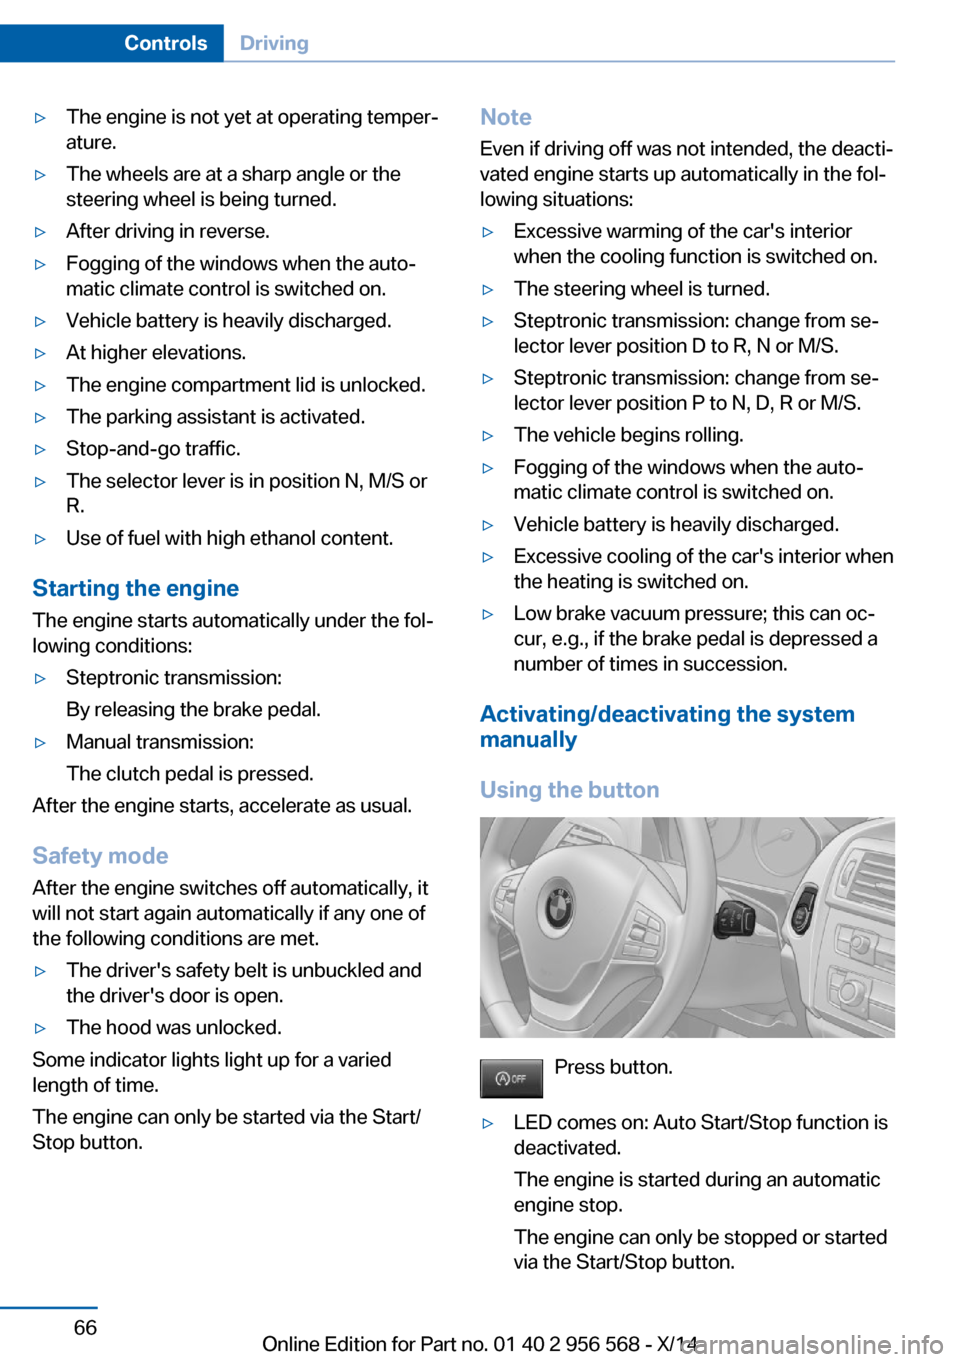
Using the button
Press button.
▷LED comes on: Auto Start/Stop function is
deactivated.
The engine is started during an automatic
engine stop.
The engine can only be stopped or started
via the Start/Stop button.Seite 66ControlsDriving66
Online Edition for Part no. 01 40 2 956 568 - X/14
Page 132 of 228
Climate controlVehicle features and options
This chapter describes all standard, country-
specific and optional features offered with the
series. It also describes features that are notnecessarily available in your car, e. g., due to
the selected options or country versions. This
also applies to safety-related functions and
systems.
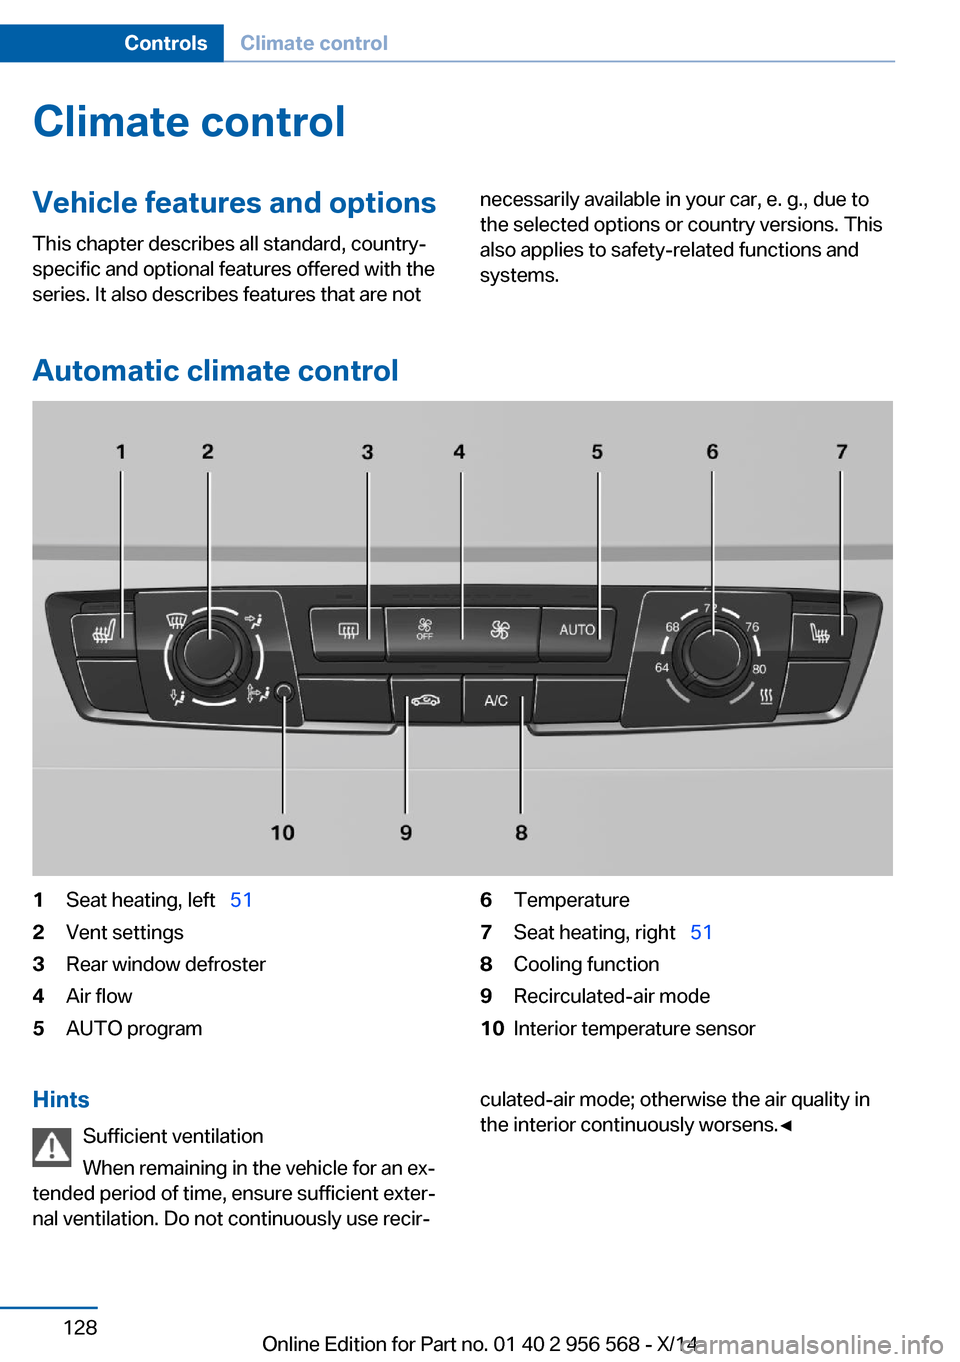
Automatic climate control
1Seat heating, left 512Vent settings3Rear window defroster4Air flow5AUTO program6Temperature7Seat heating, right 518Cooling function9Recirculated-air mode10Interior temperature sensorHints
Sufficient ventilation
When remaining in the vehicle for an ex‐
tended period of time, ensure sufficient exter‐
nal ventilation. Do not continuously use recir‐culated-air mode; otherwise the air quality in
the interior continuously worsens.◀Seite 128ControlsClimate control128
Online Edition for Part no. 01 40 2 956 568 - X/14
Page 133 of 228
Climate control functions in detail
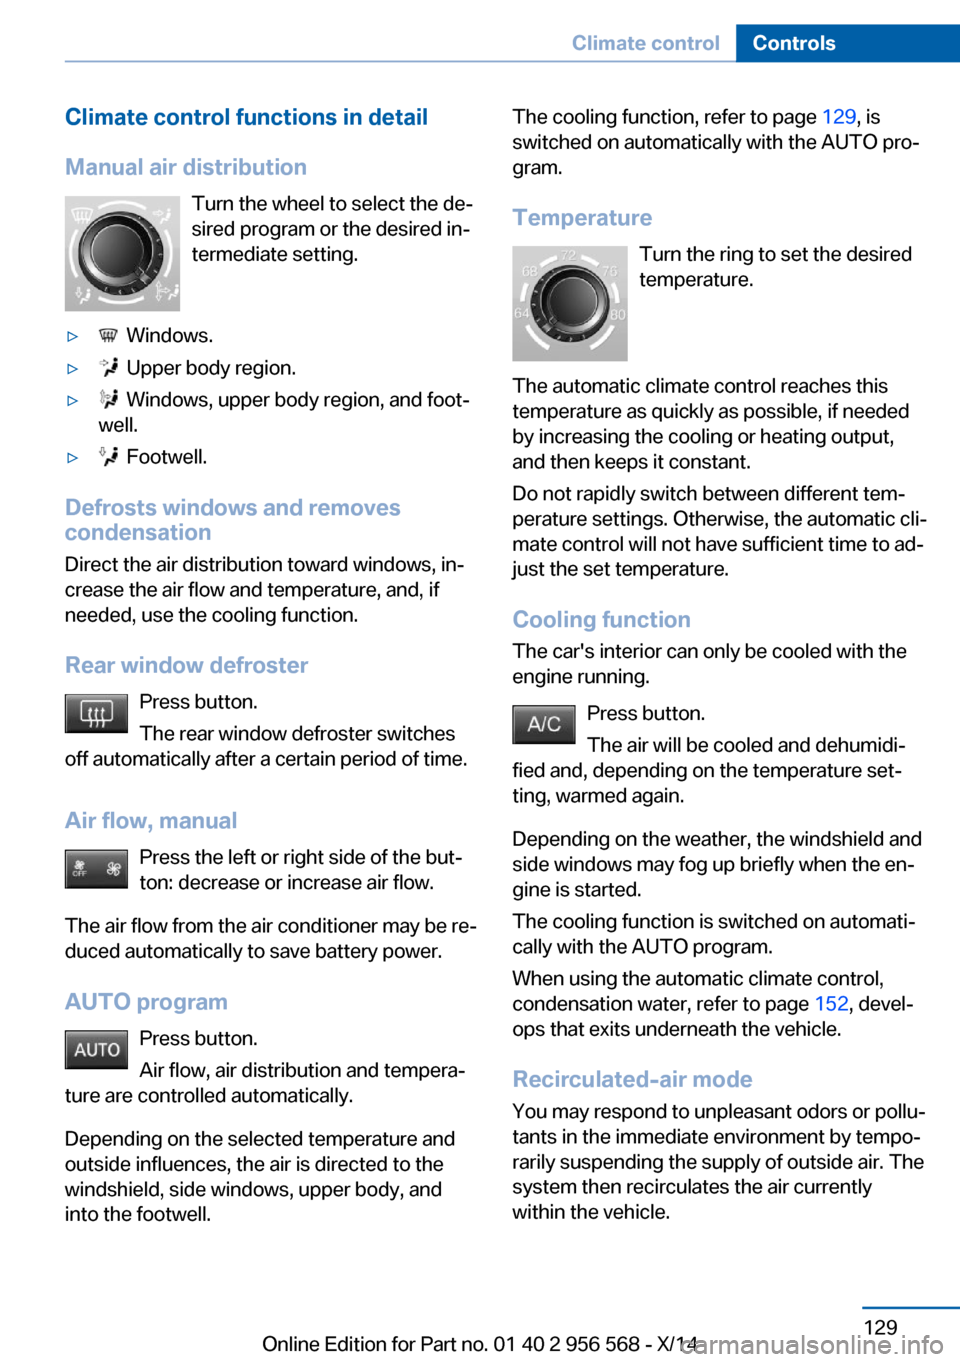
Manual air distribution Turn the wheel to select the de‐
sired program or the desired in‐
termediate setting.▷ Windows.▷ Upper body region.▷ Windows, upper body region, and foot‐
well.▷ Footwell.
Defrosts windows and removes
condensation
Direct the air distribution toward windows, in‐
crease the air flow and temperature, and, if
needed, use the cooling function.
Rear window defroster Press button.
The rear window defroster switches
off automatically after a certain period of time.
Air flow, manual Press the left or right side of the but‐
ton: decrease or increase air flow.
The air flow from the air conditioner may be re‐
duced automatically to save battery power.
AUTO program Press button.
Air flow, air distribution and tempera‐
ture are controlled automatically.
Depending on the selected temperature and
outside influences, the air is directed to the
windshield, side windows, upper body, and
into the footwell.
The cooling function, refer to page 129, is
switched on automatically with the AUTO pro‐
gram.
Temperature Turn the ring to set the desired
temperature.
The automatic climate control reaches this
temperature as quickly as possible, if needed
by increasing the cooling or heating output,
and then keeps it constant.
Do not rapidly switch between different tem‐
perature settings. Otherwise, the automatic cli‐
mate control will not have sufficient time to ad‐
just the set temperature.
Cooling function The car's interior can only be cooled with the
engine running.
Press button.
The air will be cooled and dehumidi‐
fied and, depending on the temperature set‐
ting, warmed again.
Depending on the weather, the windshield and
side windows may fog up briefly when the en‐
gine is started.
The cooling function is switched on automati‐
cally with the AUTO program.
When using the automatic climate control,
condensation water, refer to page 152, devel‐
ops that exits underneath the vehicle.
Recirculated-air mode You may respond to unpleasant odors or pollu‐
tants in the immediate environment by tempo‐
rarily suspending the supply of outside air. The
system then recirculates the air currently within the vehicle.Seite 129Climate controlControls129
Online Edition for Part no. 01 40 2 956 568 - X/14
Page 135 of 228
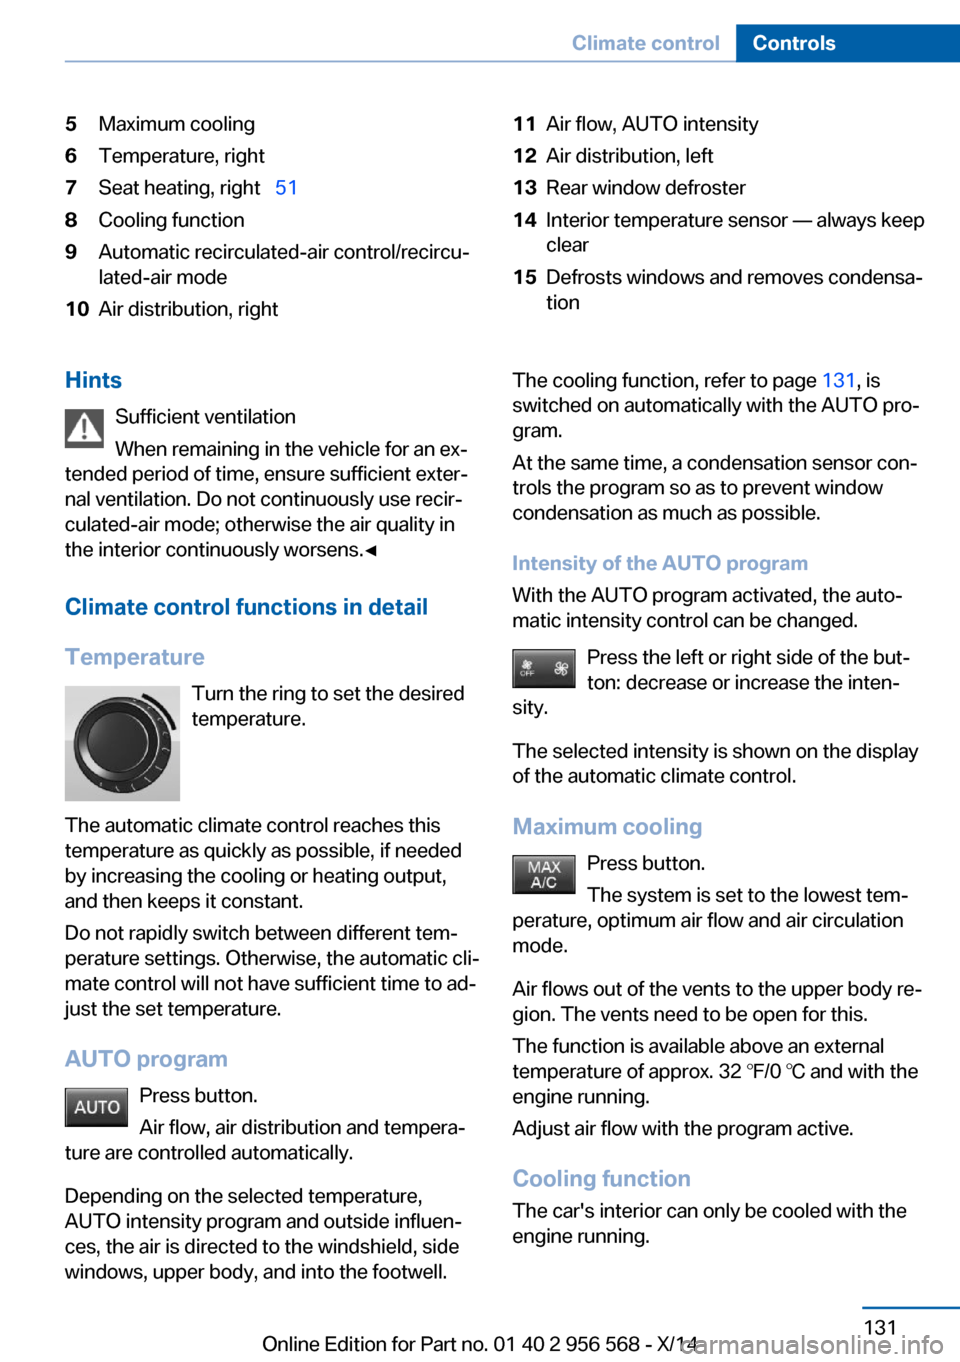
5Maximum cooling6Temperature, right7Seat heating, right 518Cooling function9Automatic recirculated-air control/recircu‐
lated-air mode10Air distribution, right11Air flow, AUTO intensity12Air distribution, left13Rear window defroster14Interior temperature sensor — always keep
clear15Defrosts windows and removes condensa‐
tionHints
Sufficient ventilation
When remaining in the vehicle for an ex‐
tended period of time, ensure sufficient exter‐
nal ventilation. Do not continuously use recir‐
culated-air mode; otherwise the air quality in
the interior continuously worsens.◀
Climate control functions in detail
Temperature Turn the ring to set the desired
temperature.
The automatic climate control reaches this
temperature as quickly as possible, if needed
by increasing the cooling or heating output,
and then keeps it constant.
Do not rapidly switch between different tem‐
perature settings. Otherwise, the automatic cli‐
mate control will not have sufficient time to ad‐
just the set temperature.
AUTO program Press button.
Air flow, air distribution and tempera‐
ture are controlled automatically.
Depending on the selected temperature,
AUTO intensity program and outside influen‐ ces, the air is directed to the windshield, side
windows, upper body, and into the footwell.The cooling function, refer to page 131, is
switched on automatically with the AUTO pro‐
gram.
At the same time, a condensation sensor con‐
trols the program so as to prevent window
condensation as much as possible.
Intensity of the AUTO program
With the AUTO program activated, the auto‐
matic intensity control can be changed.
Press the left or right side of the but‐
ton: decrease or increase the inten‐
sity.
The selected intensity is shown on the display
of the automatic climate control.
Maximum cooling Press button.
The system is set to the lowest tem‐
perature, optimum air flow and air circulation
mode.
Air flows out of the vents to the upper body re‐
gion. The vents need to be open for this.
The function is available above an external
temperature of approx. 32 ℉/0 ℃ and with the
engine running.
Adjust air flow with the program active.
Cooling function
The car's interior can only be cooled with the
engine running.Seite 131Climate controlControls131
Online Edition for Part no. 01 40 2 956 568 - X/14
Page 136 of 228
Press button.
The air will be cooled and dehumidi‐
fied and, depending on the temperature set‐
ting, warmed again.
Depending on the weather, the windshield and
side windows may fog up briefly when the en‐
gine is started.
The cooling function is switched on automati‐
cally with the AUTO program.
When using the automatic climate control,
condensation water, refer to page 152, devel‐
ops that exits underneath the vehicle.
Automatic recirculated-air control/
recirculated-air mode
You may respond to unpleasant odors or pollu‐
tants in the immediate environment by tempo‐
rarily suspending the supply of outside air. The
system then recirculates the air currently
within the vehicle.
Press button repeatedly to select an
operating mode:▷LEDs off: outside air flows in continuously.▷Left LED on, automatic recirculated-air
control: a sensor detects pollutants in the
outside air and shuts off automatically.▷Right LED on, recirculated-air mode: the
supply of outside air into the vehicle is per‐
manently blocked.
Recirculated air mode switches off automati‐
cally at low external temperatures after a cer‐
tain amount of time in order to avoid window
fogging.
If the windows are fogged over, reel off the re‐
circulated-air mode and press the AUTO but‐
ton to utilize the condensation sensor. Make
sure that air can flow to the windshield.
Sufficient ventilation
When remaining in the vehicle for an ex‐
tended period of time, ensure sufficient exter‐
nal ventilation. Do not continuously use recir‐
culated-air mode; otherwise the air quality in
the interior continuously worsens.◀
Manual air distribution Press button repeatedly to select a
program:▷Upper body region.▷Upper body region and footwell.▷Footwell.▷Windows and footwell: driver's side only.▷Windows, upper body region and footwell:
driver's side only.
If the windows are fogged over, press the
AUTO button to utilize the condensation sen‐
sor.
Air flow, manual
To manually adjust air flow turn off AUTO pro‐
gram first.
Press the left or right side of the but‐
ton: decrease or increase air flow.
The selected air flow is shown on the display of
the automatic climate control.
The air flow of the automatic climate control
may be reduced automatically to save battery
power.
Rear window defroster Press button.
The rear window defroster switches
off automatically after a certain period of time.
Defrosts windows and removes
condensation
Press button.
Ice and condensation are quickly re‐
moved from the windshield and the front side
windows.
Seite 132ControlsClimate control132
Online Edition for Part no. 01 40 2 956 568 - X/14
Page 137 of 228
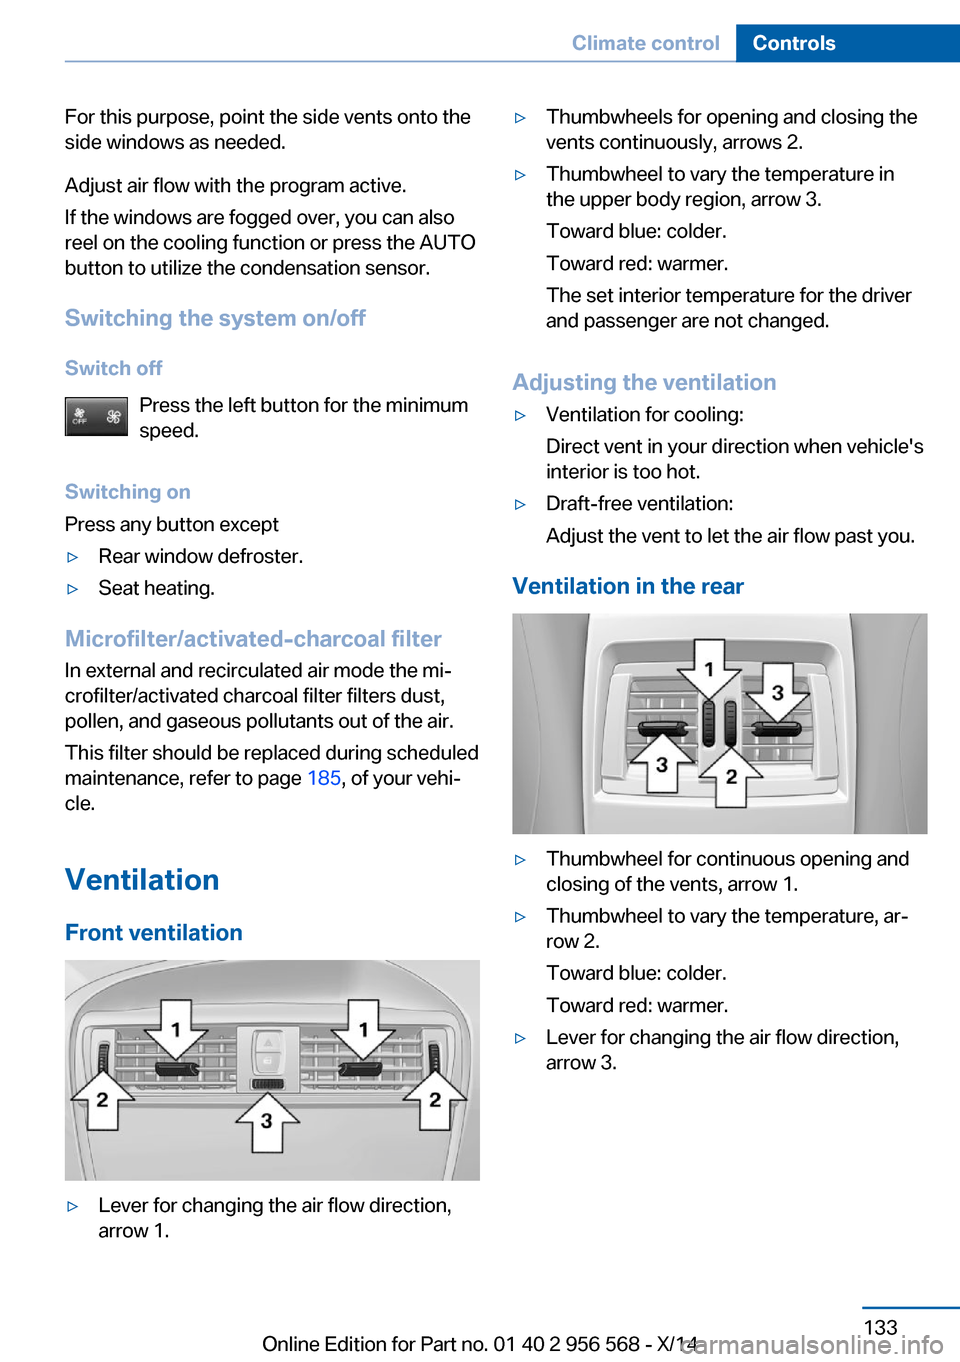
For this purpose, point the side vents onto the
side windows as needed.
Adjust air flow with the program active.
If the windows are fogged over, you can also
reel on the cooling function or press the AUTO
button to utilize the condensation sensor.
Switching the system on/off Switch off Press the left button for the minimum
speed.
Switching on
Press any button except▷Rear window defroster.▷Seat heating.
Microfilter/activated-charcoal filter
In external and recirculated air mode the mi‐
crofilter/activated charcoal filter filters dust,
pollen, and gaseous pollutants out of the air.
This filter should be replaced during scheduled
maintenance, refer to page 185, of your vehi‐
cle.
Ventilation
Front ventilation
▷Lever for changing the air flow direction,
arrow 1.▷Thumbwheels for opening and closing the
vents continuously, arrows 2.▷Thumbwheel to vary the temperature in
the upper body region, arrow 3.
Toward blue: colder.
Toward red: warmer.
The set interior temperature for the driver
and passenger are not changed.
Adjusting the ventilation
▷Ventilation for cooling:
Direct vent in your direction when vehicle's
interior is too hot.▷Draft-free ventilation:
Adjust the vent to let the air flow past you.
Ventilation in the rear
▷Thumbwheel for continuous opening and
closing of the vents, arrow 1.▷Thumbwheel to vary the temperature, ar‐
row 2.
Toward blue: colder.
Toward red: warmer.▷Lever for changing the air flow direction,
arrow 3.Seite 133Climate controlControls133
Online Edition for Part no. 01 40 2 956 568 - X/14
Page 162 of 228
The achieved extended range is displayed in
the instrument cluster as bonus range.
At a glance
The system includes the following
EfficientDynamics functions and displays:▷ECO PRO bonus range, refer to page 158.▷ECO PRO tips driving instruction, refer to
page 159▷ECO PRO climate control, refer to
page 158.▷ECO PRO coasting driving status, refer to
page 160.▷ECO PRO driving style analysis, refer to
page 161.
Activate ECO PRO
Press button repeatedly until ECO
PRO is displayed in the instrument
cluster.
Configuring ECO PRO
Via the Driving Dynamics Control
1.Activate ECO PRO.2."Configure ECO PRO"3.Configure the program.
Via the iDrive
1."Settings"2."ECO PRO mode"
Or
1."Settings"2."Driving mode"3."Configure ECO PRO"
Configure the program.
ECO PRO Tip
▷"Tip at:":
Adjust the ECO PRO speed.▷"ECO PRO speed warning":
The output is reduced once the set ECO
PRO speed is reached.
Coasting
Fuel-efficiency can be optimized by disengag‐
ing the engine and Coasting, refer to
page 160, with the engine idling.
This function is only available in ECO PRO
mode.
ECO PRO climate control
"ECO PRO climate control"
Climate control is set to be fuel-efficient.
By making a slight change to the set tempera‐
ture, or slowly adjusting the rate of heating or
cooling of the car's interior, fuel consumption
can be economized.
The mirror heating is made available when out‐
side temperatures are very cold.
ECO PRO potential Shows potential savings with the current set‐
tings in percentages.
Display in the instrument cluster
ECO PRO bonus range An adjusted driving style helps
you extend your driving range.
This may be displayed as the
bonus range in the instrument
cluster.
The bonus range is shown in the range display.
The bonus range is automatically reset every
time the vehicle is refueled.
Seite 158Driving tipsSaving fuel158
Online Edition for Part no. 01 40 2 956 568 - X/14
Page 188 of 228
CoolantVehicle features and optionsThis chapter describes all standard, country-
specific and optional features offered with the
series. It also describes features that are not
necessarily available in your car, e. g., due to
the selected options or country versions. This
also applies to safety-related functions and
systems.
Hints Danger of burns from hot engine
Do not open the cooling system while
the engine is hot; otherwise, esliding coolant
may cause burns.◀
Suitable additives
Only use suitable additives; otherwise,
engine damage may occur. The additives are
harmful to your health.◀
Coolant consists of water and additives.
Not all commercially available additives are
suitable for the vehicle. Information about the
suitable additives are available from the service
center.
Coolant level
General information Depending on the engine installation, the cool‐
ant reservoir is located on the right side or the
left side of the engine compartment.
Checking1.Let the engine cool.2.The coolant level is correct if it lies be‐
tween the minimum and maximum marks.The marks are on the side of the coolant
reservoir.SymbolMeaningMaximumMinimum
Adding
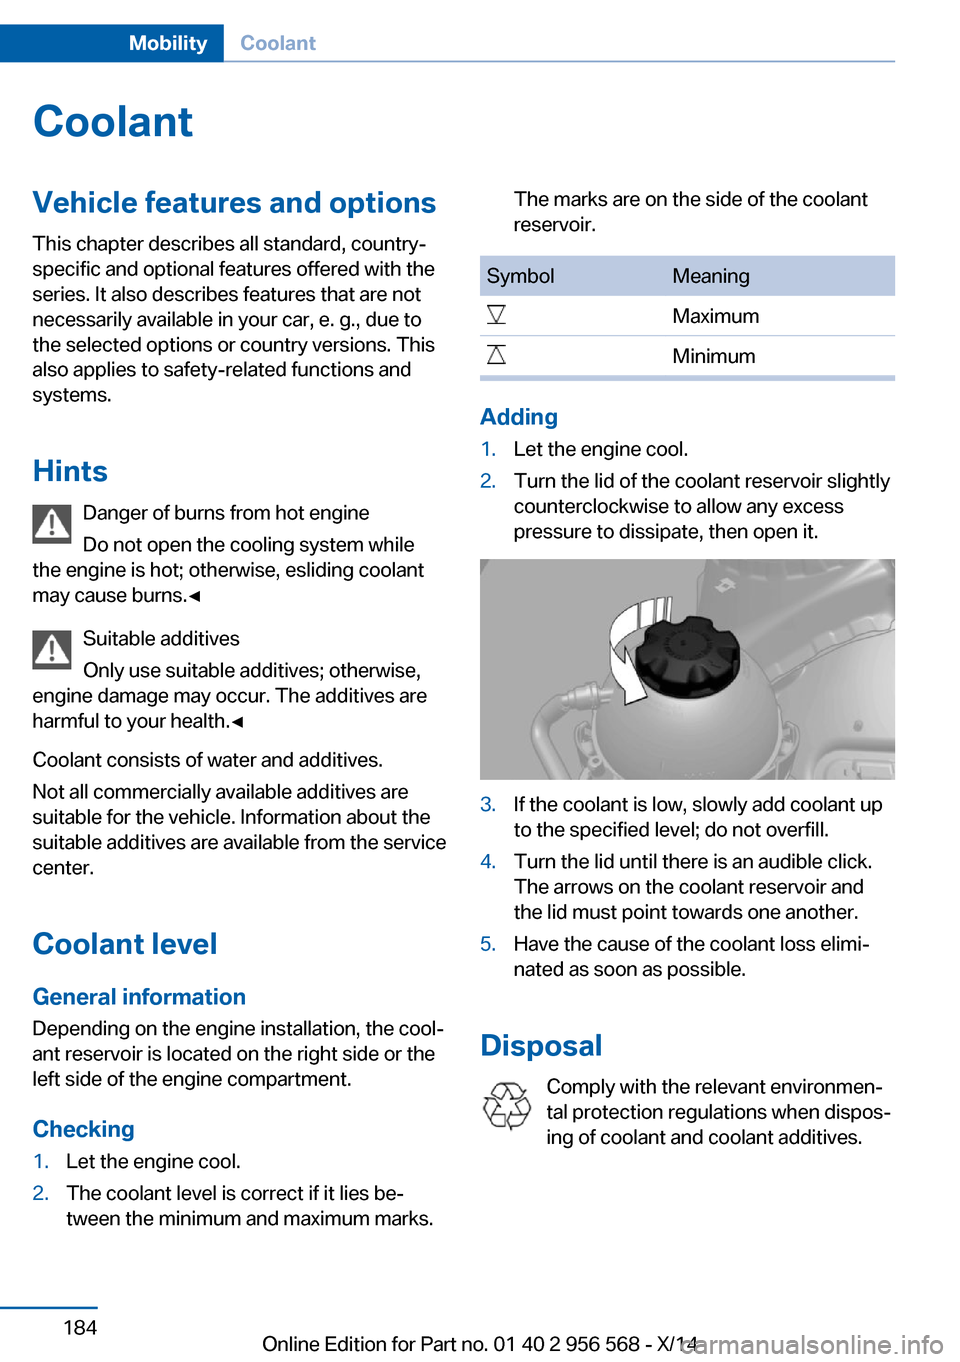
1.Let the engine cool.2.Turn the lid of the coolant reservoir slightly
counterclockwise to allow any excess
pressure to dissipate, then open it.3.If the coolant is low, slowly add coolant up
to the specified level; do not overfill.4.Turn the lid until there is an audible click.
The arrows on the coolant reservoir and
the lid must point towards one another.5.Have the cause of the coolant loss elimi‐
nated as soon as possible.
Disposal
Comply with the relevant environmen‐
tal protection regulations when dispos‐
ing of coolant and coolant additives.
Seite 184MobilityCoolant184
Online Edition for Part no. 01 40 2 956 568 - X/14
Page 218 of 228
Everything from A to Z
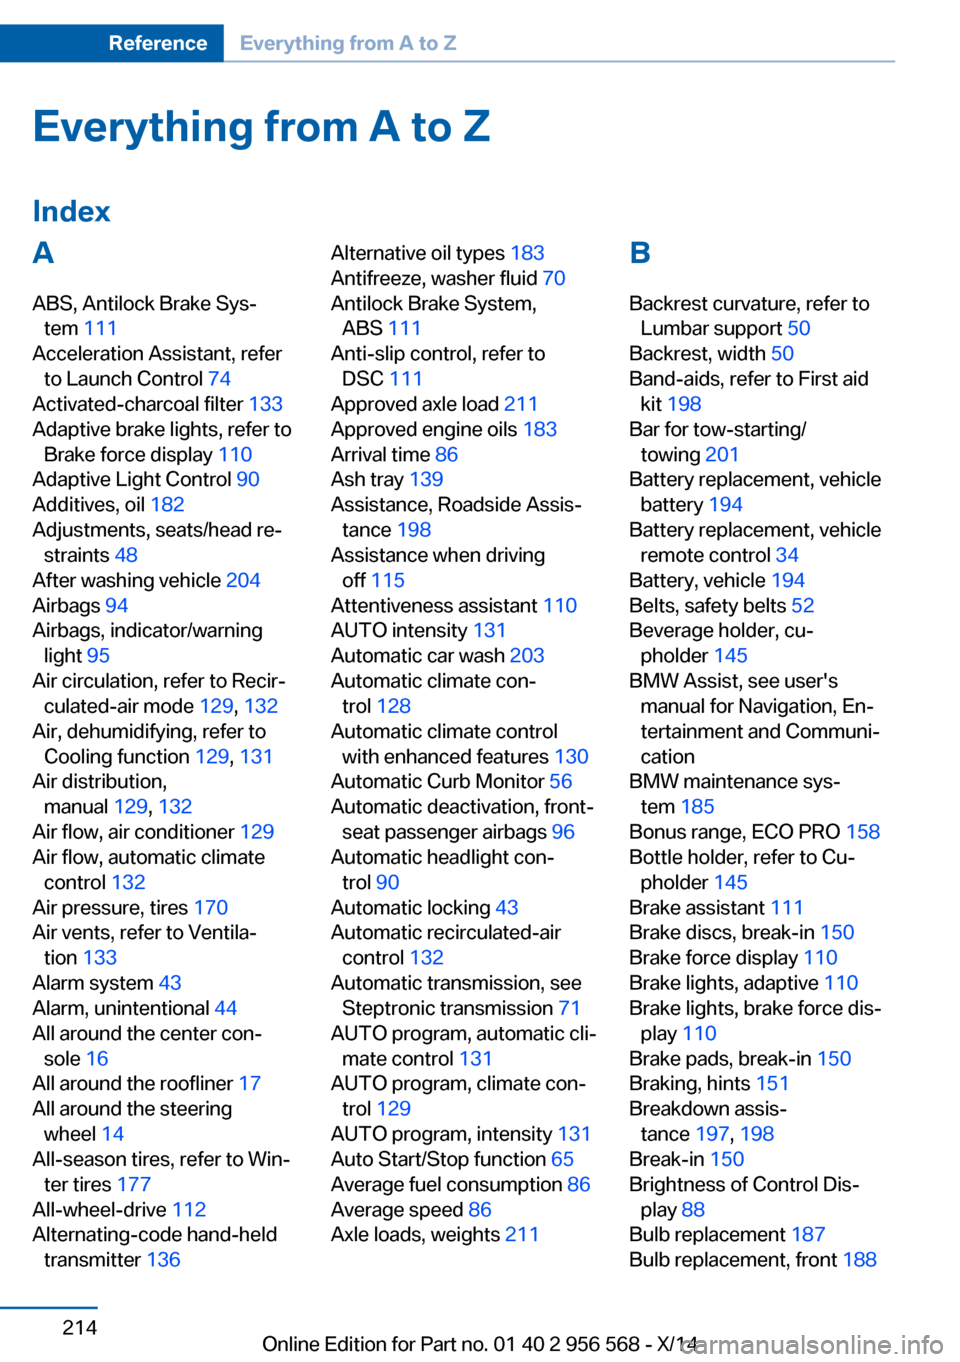
IndexA ABS, Antilock Brake Sys‐ tem 111
Acceleration Assistant, refer to Launch Control 74
Activated-charcoal filter 133
Adaptive brake lights, refer to Brake force display 110
Adaptive Light Control 90
Additives, oil 182
Adjustments, seats/head re‐ straints 48
After washing vehicle 204
Airbags 94
Airbags, indicator/warning light 95
Air circulation, refer to Recir‐ culated-air mode 129, 132
Air, dehumidifying, refer to Cooling function 129, 131
Air distribution, manual 129, 132
Air flow, air conditioner 129
Air flow, automatic climate control 132
Air pressure, tires 170
Air vents, refer to Ventila‐ tion 133
Alarm system 43
Alarm, unintentional 44
All around the center con‐ sole 16
All around the roofliner 17
All around the steering wheel 14
All-season tires, refer to Win‐ ter tires 177
All-wheel-drive 112
Alternating-code hand-held transmitter 136 Alternative oil types 183
Antifreeze, washer fluid 70
Antilock Brake System, ABS 111
Anti-slip control, refer to DSC 111
Approved axle load 211
Approved engine oils 183
Arrival time 86
Ash tray 139
Assistance, Roadside Assis‐ tance 198
Assistance when driving off 115
Attentiveness assistant 110
AUTO intensity 131
Automatic car wash 203
Automatic climate con‐ trol 128
Automatic climate control with enhanced features 130
Automatic Curb Monitor 56
Automatic deactivation, front- seat passenger airbags 96
Automatic headlight con‐ trol 90
Automatic locking 43
Automatic recirculated-air control 132
Automatic transmission, see Steptronic transmission 71
AUTO program, automatic cli‐ mate control 131
AUTO program, climate con‐ trol 129
AUTO program, intensity 131
Auto Start/Stop function 65
Average fuel consumption 86
Average speed 86
Axle loads, weights 211 B
Backrest curvature, refer to Lumbar support 50
Backrest, width 50
Band-aids, refer to First aid kit 198
Bar for tow-starting/ towing 201
Battery replacement, vehicle battery 194
Battery replacement, vehicle remote control 34
Battery, vehicle 194
Belts, safety belts 52
Beverage holder, cu‐ pholder 145
BMW Assist, see user's manual for Navigation, En‐
tertainment and Communi‐
cation
BMW maintenance sys‐ tem 185
Bonus range, ECO PRO 158
Bottle holder, refer to Cu‐ pholder 145
Brake assistant 111
Brake discs, break-in 150
Brake force display 110
Brake lights, adaptive 110
Brake lights, brake force dis‐ play 110
Brake pads, break-in 150
Braking, hints 151
Breakdown assis‐ tance 197, 198
Break-in 150
Brightness of Control Dis‐ play 88
Bulb replacement 187
Bulb replacement, front 188 Seite 214ReferenceEverything from A to Z214
Online Edition for Part no. 01 40 2 956 568 - X/14
Page 219 of 228
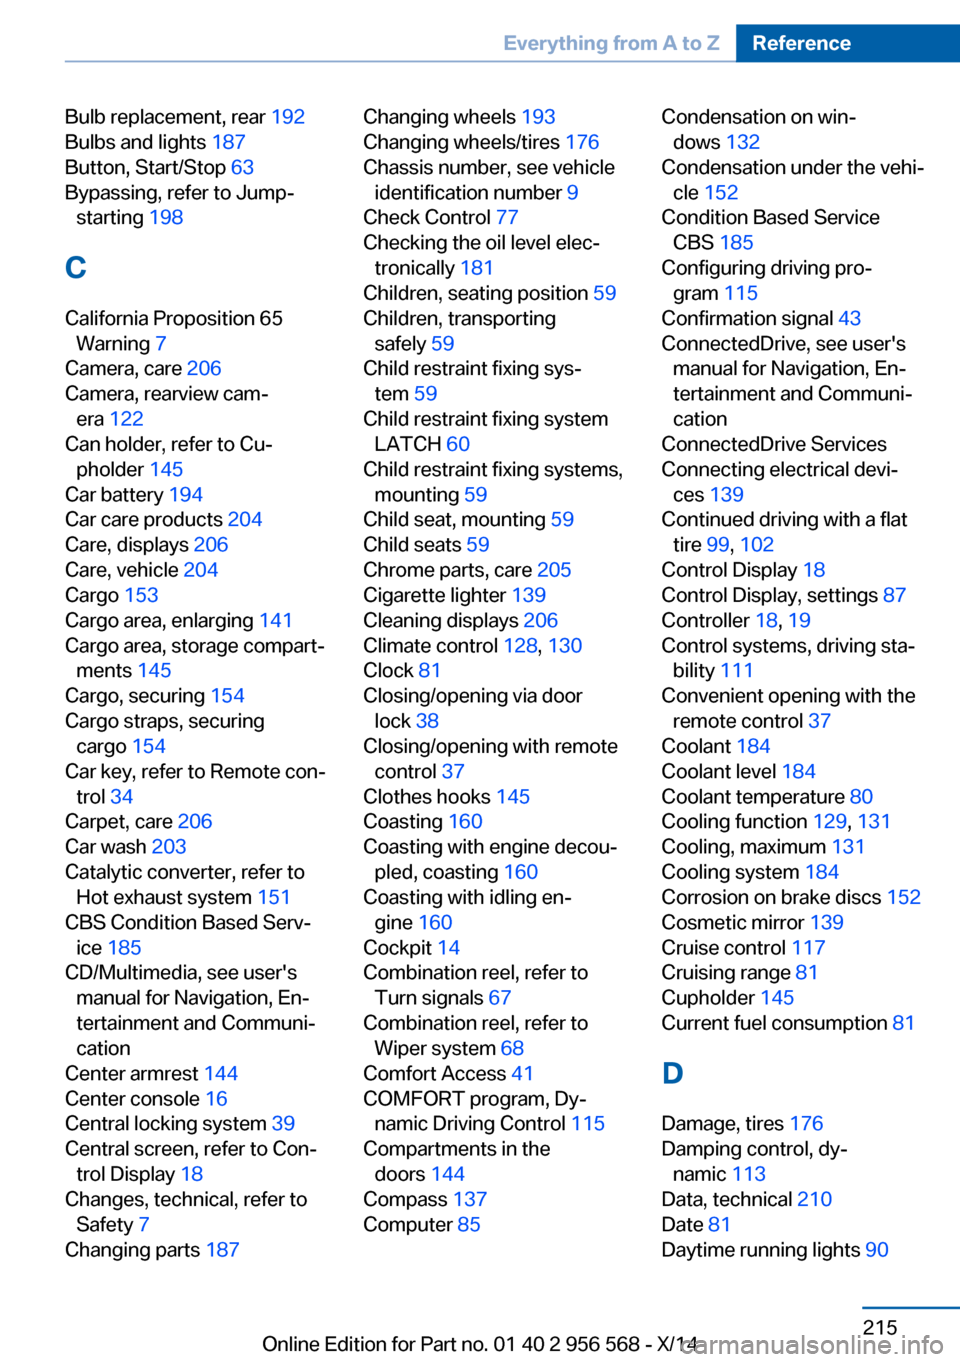
Bulb replacement, rear 192
Bulbs and lights 187
Button, Start/Stop 63
Bypassing, refer to Jump- starting 198
C
California Proposition 65 Warning 7
Camera, care 206
Camera, rearview cam‐ era 122
Can holder, refer to Cu‐ pholder 145
Car battery 194
Car care products 204
Care, displays 206
Care, vehicle 204
Cargo 153
Cargo area, enlarging 141
Cargo area, storage compart‐ ments 145
Cargo, securing 154
Cargo straps, securing cargo 154
Car key, refer to Remote con‐ trol 34
Carpet, care 206
Car wash 203
Catalytic converter, refer to Hot exhaust system 151
CBS Condition Based Serv‐ ice 185
CD/Multimedia, see user's manual for Navigation, En‐
tertainment and Communi‐
cation
Center armrest 144
Center console 16
Central locking system 39
Central screen, refer to Con‐ trol Display 18
Changes, technical, refer to Safety 7
Changing parts 187 Changing wheels 193
Changing wheels/tires 176
Chassis number, see vehicle identification number 9
Check Control 77
Checking the oil level elec‐ tronically 181
Children, seating position 59
Children, transporting safely 59
Child restraint fixing sys‐ tem 59
Child restraint fixing system LATCH 60
Child restraint fixing systems, mounting 59
Child seat, mounting 59
Child seats 59
Chrome parts, care 205
Cigarette lighter 139
Cleaning displays 206
Climate control 128, 130
Clock 81
Closing/opening via door lock 38
Closing/opening with remote control 37
Clothes hooks 145
Coasting 160
Coasting with engine decou‐ pled, coasting 160
Coasting with idling en‐ gine 160
Cockpit 14
Combination reel, refer to Turn signals 67
Combination reel, refer to Wiper system 68
Comfort Access 41
COMFORT program, Dy‐ namic Driving Control 115
Compartments in the doors 144
Compass 137
Computer 85 Condensation on win‐
dows 132
Condensation under the vehi‐ cle 152
Condition Based Service CBS 185
Configuring driving pro‐ gram 115
Confirmation signal 43
ConnectedDrive, see user's manual for Navigation, En‐
tertainment and Communi‐
cation
ConnectedDrive Services
Connecting electrical devi‐ ces 139
Continued driving with a flat tire 99, 102
Control Display 18
Control Display, settings 87
Controller 18, 19
Control systems, driving sta‐ bility 111
Convenient opening with the remote control 37
Coolant 184
Coolant level 184
Coolant temperature 80
Cooling function 129, 131
Cooling, maximum 131
Cooling system 184
Corrosion on brake discs 152
Cosmetic mirror 139
Cruise control 117
Cruising range 81
Cupholder 145
Current fuel consumption 81
D
Damage, tires 176
Damping control, dy‐ namic 113
Data, technical 210
Date 81
Daytime running lights 90 Seite 215Everything from A to ZReference215
Online Edition for Part no. 01 40 2 956 568 - X/14