fold seats BMW 3 SERIES 2010 Owners Manual
[x] Cancel search | Manufacturer: BMW, Model Year: 2010, Model line: 3 SERIES, Model: BMW 3 SERIES 2010Pages: 274, PDF Size: 8.69 MB
Page 46 of 274
Adjustments
44
Front active head restraints
In a rear collision of a sufficient strength, the
active head restraint reduces the distance to
the head.
Do not use seat or head restraint covers
that could impair the function of the active
head restraint. Otherwise, the protective func-
tion of the active head restraint will not be
ensured and its full potential in reducing the risk
of injury in the event of a rear collision may not
be realized.
In the event of malfunctions, deactivation or
triggering of the active head restraints, have the
testing, repair and removal executed only by a
BMW center or a workshop that works accord-
ing to repair procedures of BMW with corre-
spondingly trained personnel and that has the
required explosives licenses. Unprofessional
attempts to work on the system could lead to
failure in an emergency or to undesired airbag
activation, either of which could result in per-
sonal injury.<
For technical reasons, the head restraint
cannot be removed.<
Front seats
Height adjustment
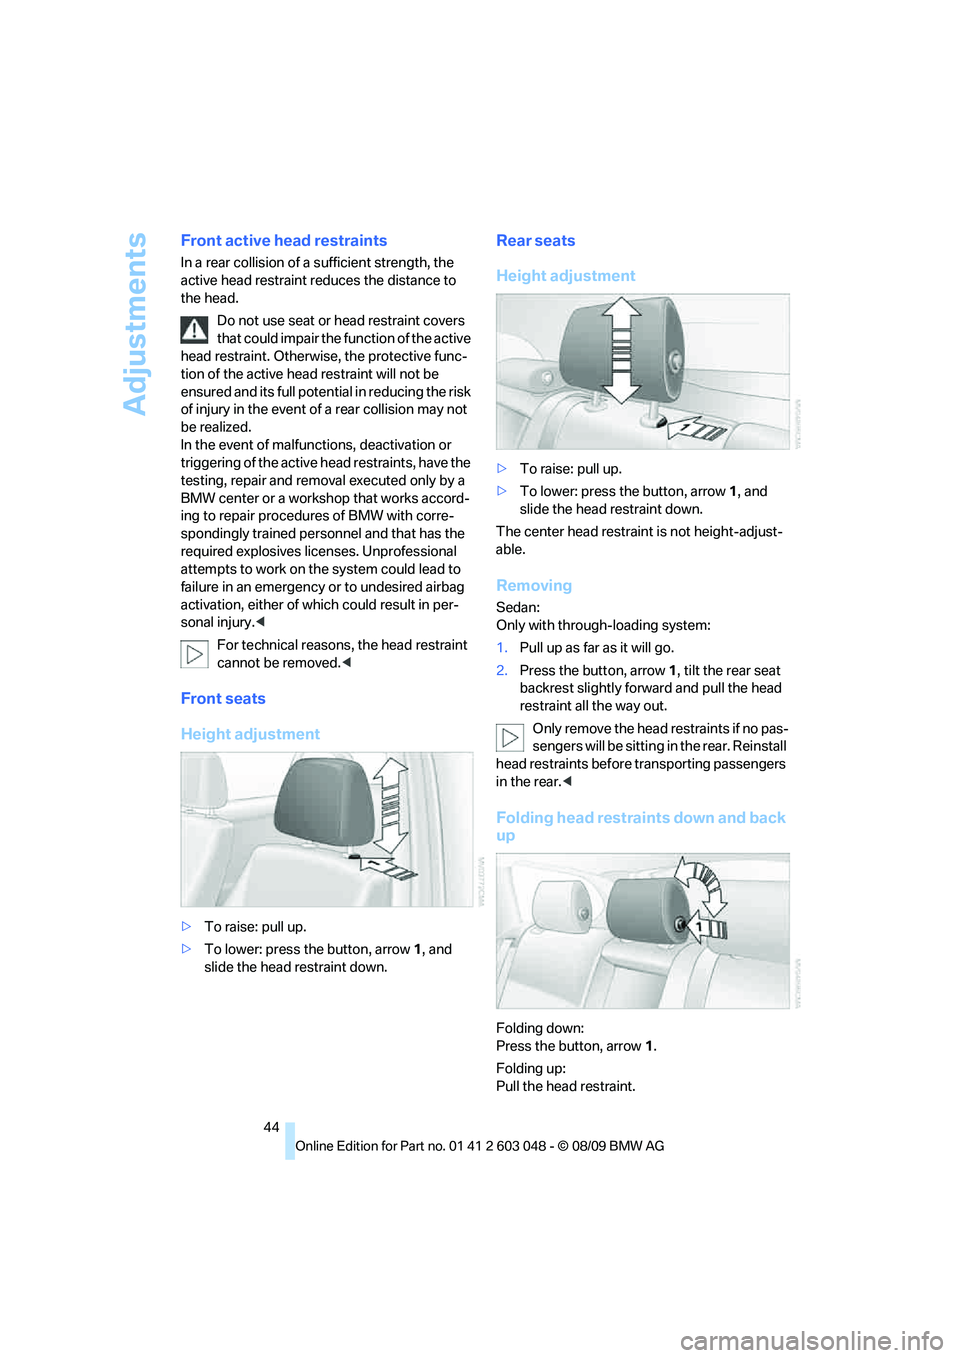
>To raise: pull up.
>To lower: press the button, arrow1, and
slide the head restraint down.
Rear seats
Height adjustment
>To raise: pull up.
>To lower: press the button, arrow1, and
slide the head restraint down.
The center head restraint is not height-adjust-
able.
Removing
Sedan:
Only with through-loading system:
1.Pull up as far as it will go.
2.Press the button, arrow 1, tilt the rear seat
backrest slightly forward and pull the head
restraint all the way out.
O nly remove the head restraints if no pas-
sengers will be sitting in the rear. Reinstall
head restraints before transporting passengers
in the rear.<
Folding head restraints down and back
up
Folding down:
Press the button, arrow1.
Folding up:
Pull the head restraint.
Page 47 of 274
Controls
45Reference
At a glance
Driving tips
Communications
Navigation
Entertainment
Mobility
Depending on the equipment version, it may be
possible to fold down the outer rear head
restraints as well.
Only fold the head restraints down if no
passengers will be sitting in the rear. Fold
up the head restraints before transporting pas-
sengers in the rear.<
Heated seats*
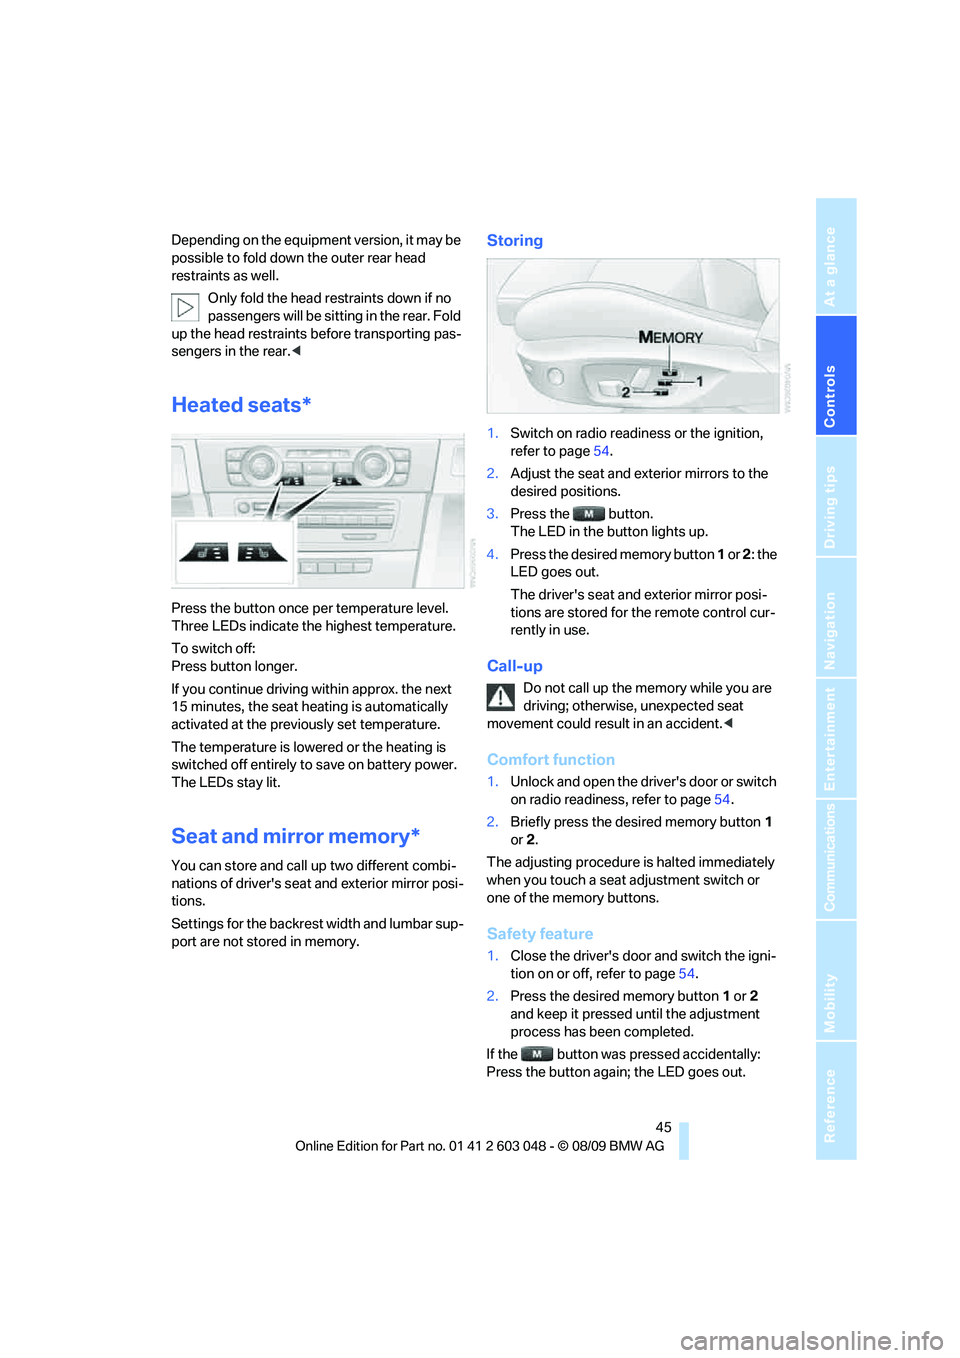
Press the button once per temperature level.
Three LEDs indicate the highest temperature.
To switch off:
Press button longer.
If you continue driving within approx. the next
15 minutes, the seat heating is automatically
activated at the previously set temperature.
The temperature is lowered or the heating is
switched off entirely to save on battery power.
The LEDs stay lit.
Seat and mirror memory*
You can store and call up two different combi-
nations of driver's seat and exterior mirror posi-
tions.
Settings for the backrest width and lumbar sup-
port are not stored in memory.
Storing
1.Switch on radio readiness or the ignition,
refer to page54.
2.Adjust the seat and exterior mirrors to the
desired positions.
3.Press the button.
The LED in the button lights up.
4.Press the desired memory button 1 or 2: the
LED goes out.
The driver's seat and exterior mirror posi-
tions are stored for the remote control cur-
rently in use.
Call-up
Do not call up the memory while you are
driving; otherwise, unexpected seat
movement could result in an accident.<
Comfort function
1.Unlock and open the driver's door or switch
on radio readiness, refer to page54.
2.Briefly press the desired memory button1
or 2.
The adjusting procedure is halted immediately
when you touch a seat adjustment switch or
one of the memory buttons.
Safety feature
1.Close the driver's door and switch the igni-
tion on or off, refer to page54.
2.Press the desired memory button1 or2
and keep it pressed until the adjustment
process has been completed.
If the button was pressed accidentally:
Press the button again; the LED goes out.
Page 113 of 274
Controls
111Reference
At a glance
Driving tips
Communications
Navigation
Entertainment
Mobility
Partition net
Do not let the partition net retract; other-
wise, there is a risk of danger and the par-
tition net could be damaged.<
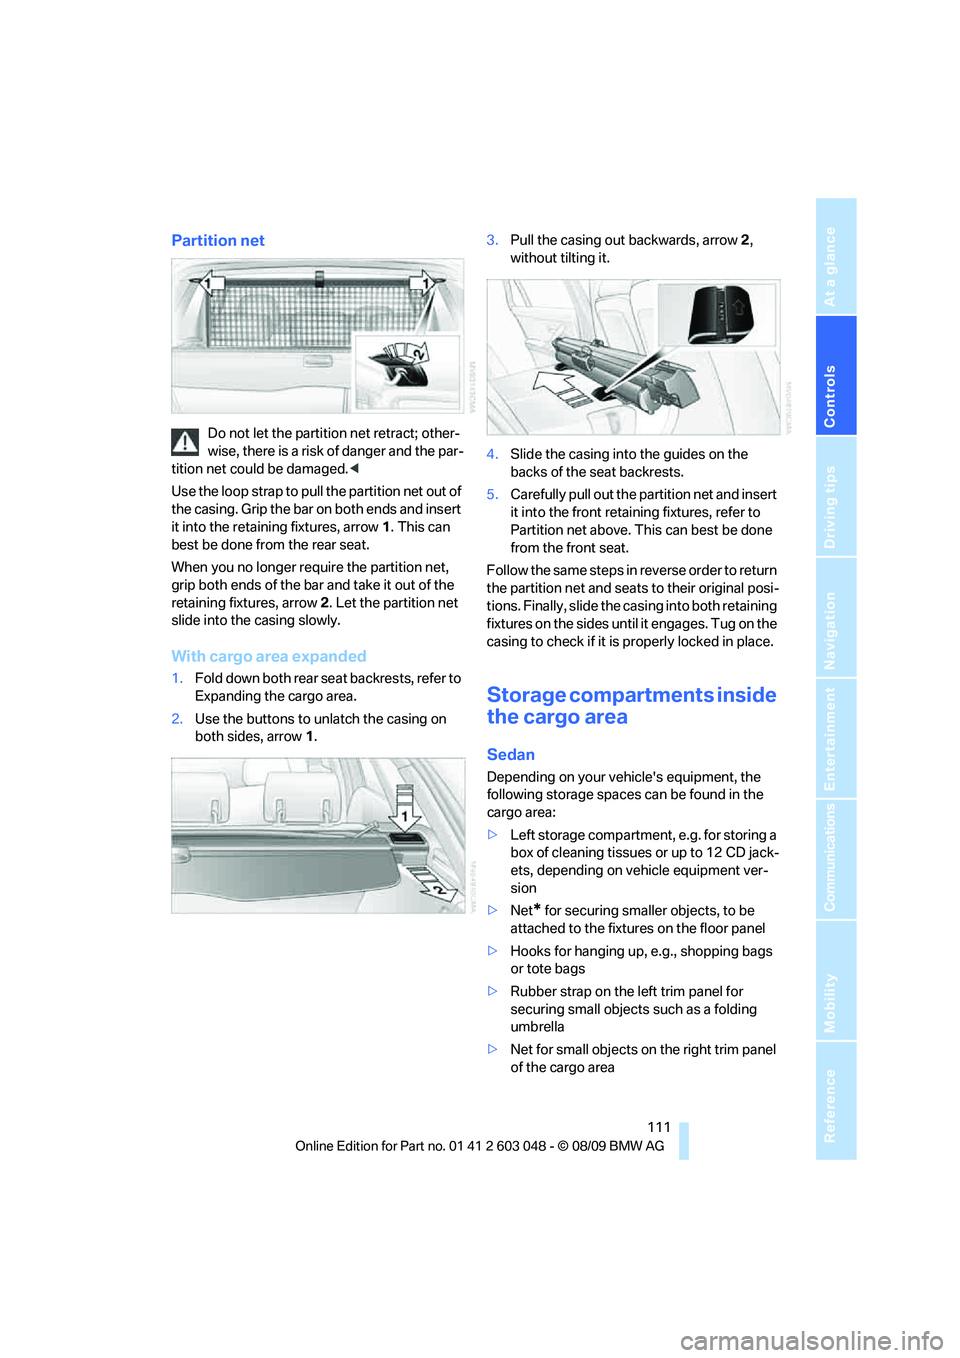
Use the loop strap to pull the partition net out of
the casing. Grip the bar on both ends and insert
it into the retaining fixtures, arrow 1. This can
best be done from the rear seat.
When you no longer require the partition net,
grip both ends of the bar and take it out of the
retaining fixtures, arrow 2. Let the partition net
slide into the casing slowly.
With cargo area expanded
1.Fold down both rear seat backrests, refer to
Expanding the cargo area.
2.Use the buttons to unlatch the casing on
both sides, arrow 1.3.Pull the casing out backwards, arrow 2,
without tilting it.
4.Slide the casing into the guides on the
backs of the seat backrests.
5.Carefully pull out the partition net and insert
it into the front retaining fixtures, refer to
Partition net above. This can best be done
from the front seat.
Follow the same steps in reverse order to return
the partition net and seats to their original posi-
tions. Finally, slide the casing into both retaining
fixtures on the sides until it engages. Tug on the
casing to check if it is properly locked in place.
Storage compartments inside
the cargo area
Sedan
Depending on your vehicle's equipment, the
following storage spaces can be found in the
cargo area:
>Left storage compartment, e.g. for storing a
box of cleaning tissues or up to 12 CD jack-
ets, depending on vehicle equipment ver-
sion
>Net
* for securing smaller objects, to be
attached to the fixtures on the floor panel
>Hooks for hanging up, e.g., shopping bags
or tote bags
>Rubber strap on the left trim panel for
securing small objects such as a folding
umbrella
>Net for small objects on the right trim panel
of the cargo area
Page 115 of 274
Controls
113Reference
At a glance
Driving tips
Communications
Navigation
Entertainment
Mobility
Loading
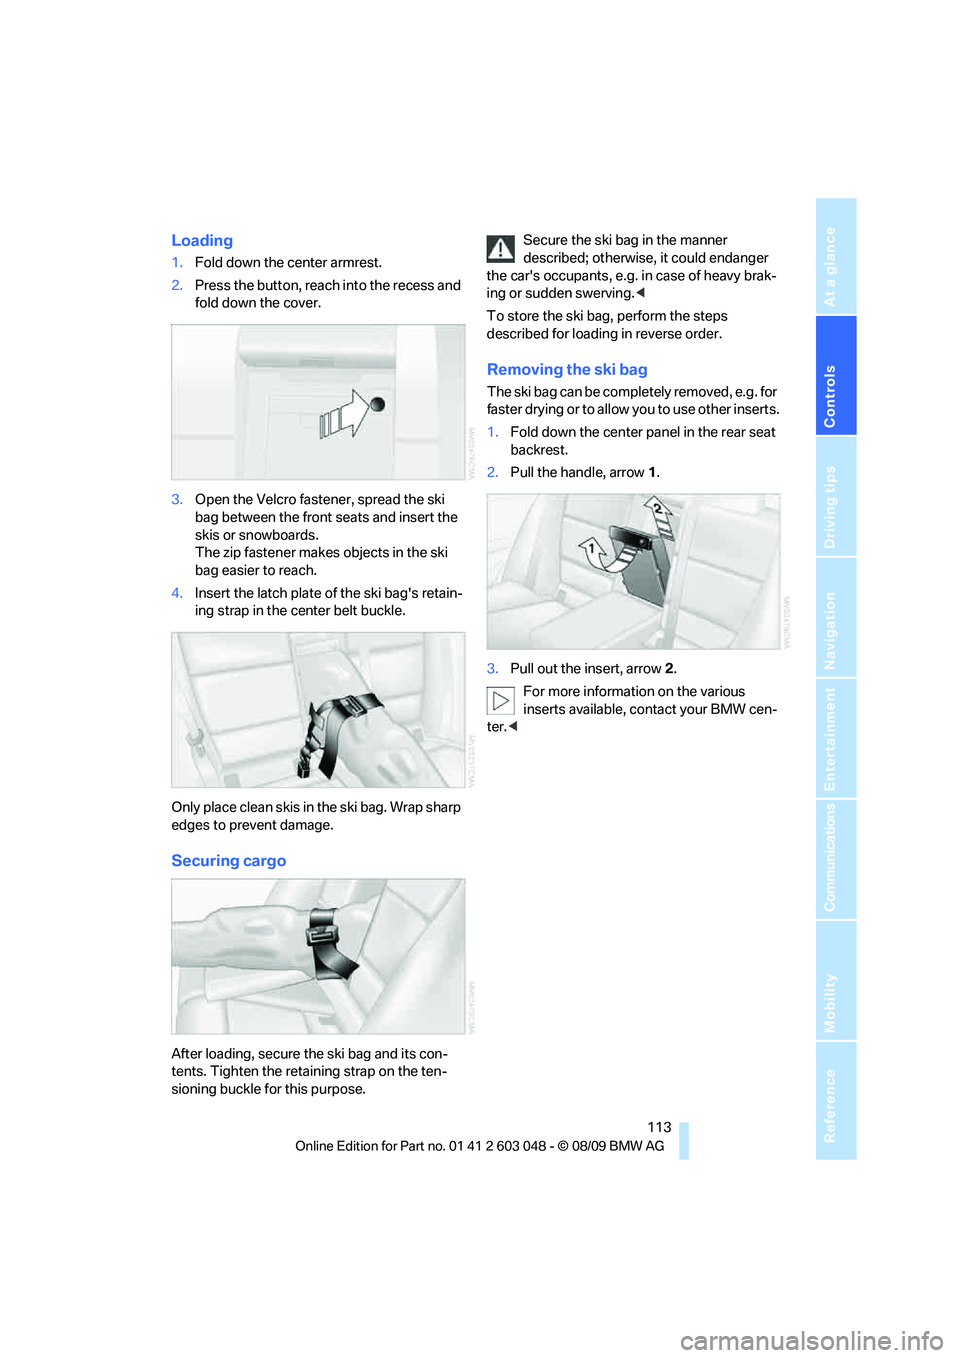
1.Fold down the center armrest.
2.Press the button, reach into the recess and
fold down the cover.
3.Open the Velcro fastener, spread the ski
bag between the front seats and insert the
skis or snowboards.
The zip fastener makes objects in the ski
bag easier to reach.
4.Insert the latch plate of the ski bag's retain-
ing strap in the center belt buckle.
Only place clean skis in the ski bag. Wrap sharp
edges to prevent damage.
Securing cargo
After loading, secure the ski bag and its con-
tents. Tighten the retaining strap on the ten-
sioning buckle for this purpose.Secure the ski bag in the manner
described; otherwise, it could endanger
the car's occupants, e.g. in case of heavy brak-
ing or sudden swerving.<
To store the ski bag, perform the steps
described for loading in reverse order.
Removing the ski bag
The ski bag can be completely removed, e.g. for
faster drying or to allow you to use other inserts.
1.Fold down the center panel in the rear seat
backrest.
2.Pull the handle, arrow1.
3.Pull out the insert, arrow 2.
For more information on the various
inserts available, contact your BMW cen-
ter.<
Page 258 of 274
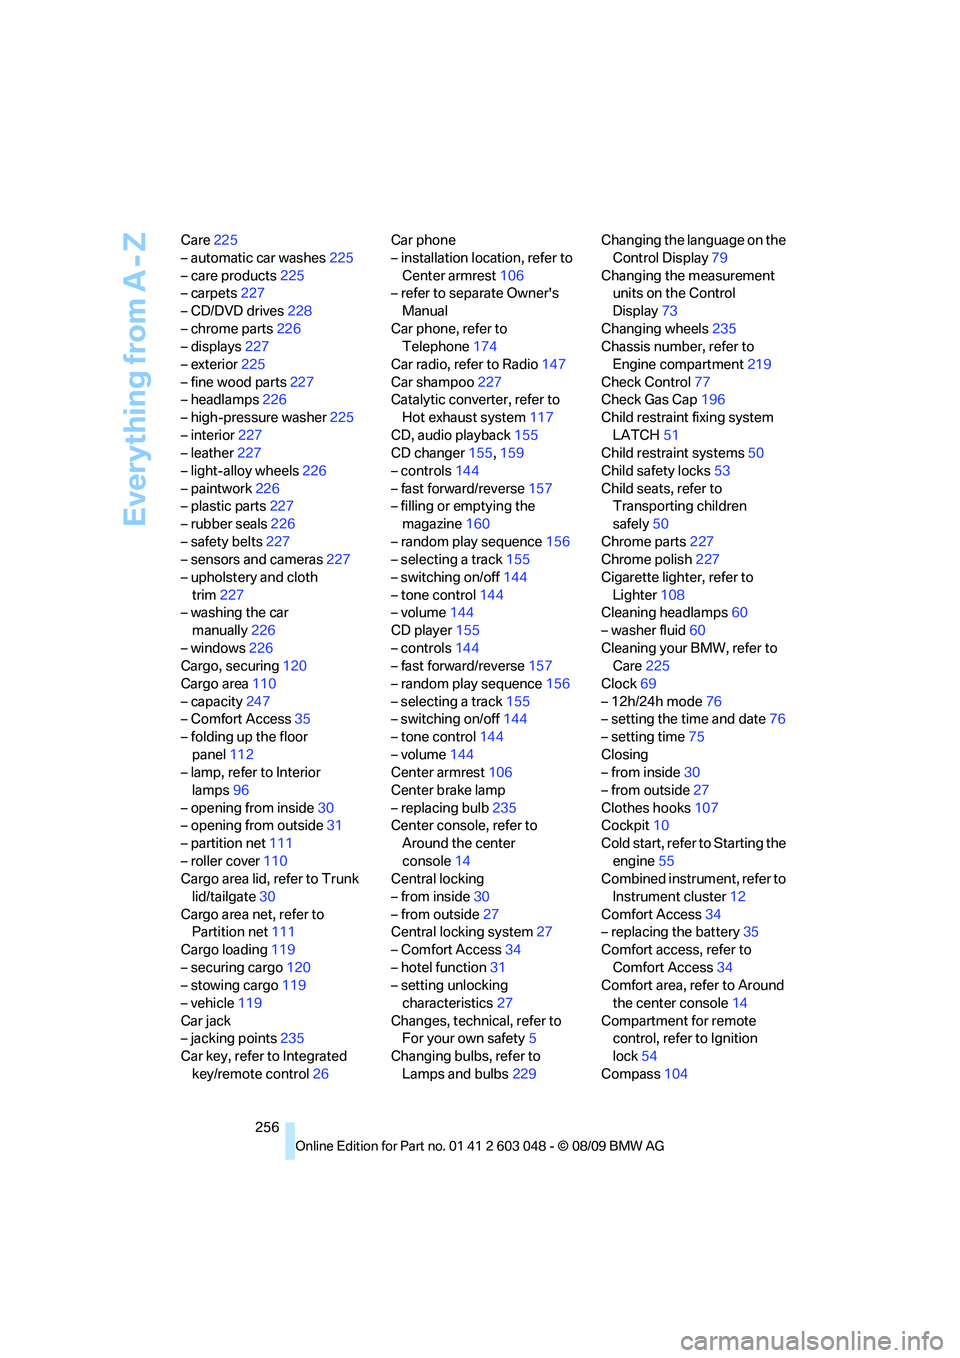
Everything from A - Z
256 Care225
– automatic car washes225
– care products225
– carpets227
– CD/DVD drives228
– chrome parts226
– displays227
– exterior225
– fine wood parts227
– headlamps226
– high-pressure washer225
– interior227
– leather227
– light-alloy wheels226
– paintwork226
– plastic parts227
– rubber seals226
– safety belts227
– sensors and cameras227
– upholstery and cloth
trim227
– washing the car
manually226
– windows226
Cargo, securing120
Cargo area110
– capacity247
– Comfort Access35
– folding up the floor
panel112
– lamp, refer to Interior
lamps96
– opening from inside30
– opening from outside31
– partition net111
– roller cover110
Cargo area lid, refer to Trunk
lid/tailgate30
Cargo area net, refer to
Partition net111
Cargo loading119
– securing cargo120
– stowing cargo119
– vehicle119
Car jack
– jacking points235
Car key, refer to Integrated
key/remote control26Car phone
– installation location, refer to
Center armrest106
– refer to separate Owner's
Manual
Car phone, refer to
Telephone174
Car radio, refer to Radio147
Car shampoo
227
Catalytic converter, refer to
Hot exhaust system117
CD, audio playback155
CD changer155,159
– controls144
– fast forward/reverse157
– filling or emptying the
magazine160
– random play sequence156
– selecting a track155
– switching on/off144
– tone control144
– volume144
CD player155
– controls144
– fast forward/reverse157
– random play sequence156
– selecting a track155
– switching on/off144
– tone control144
– volume144
Center armrest106
Center brake lamp
– replacing bulb235
Center console, refer to
Around the center
console14
Central locking
– from inside30
– from outside27
Central locking system27
– Comfort Access34
– hotel function31
– setting unlocking
characteristics27
Changes, technical, refer to
For your own safety5
Changing bulbs, refer to
Lamps and bulbs229Changing the language on the
Control Display79
Changing the measurement
units on the Control
Display73
Changing wheels235
Chassis number, refer to
Engine compartment219
Check Control77
Check Gas Cap196
Child restraint fixing system
LATCH51
Child restraint systems50
Child safety locks53
Child seats, refer to
Transporting children
safely50
Chrome parts227
Chrome polish227
Cigarette lighter, refer to
Lighter108
Cleaning headlamps60
– washer fluid60
Cleaning your BMW, refer to
Care225
Clock69
– 12h/24h mode76
– setting the time and date76
– setting time75
Closing
– from inside30
– from outside27
Clothes hooks107
Cockpit10
Cold start, refer to Starting the
engine55
Combined instrument, refer to
Instrument cluster12
Comfort Access34
– replacing the battery35
Comfort access, refer to
Comfort Access34
Comfort area, refer to Around
the center console14
Compartment for remote
control, refer to Ignition
lock54
Compass104
Page 266 of 274
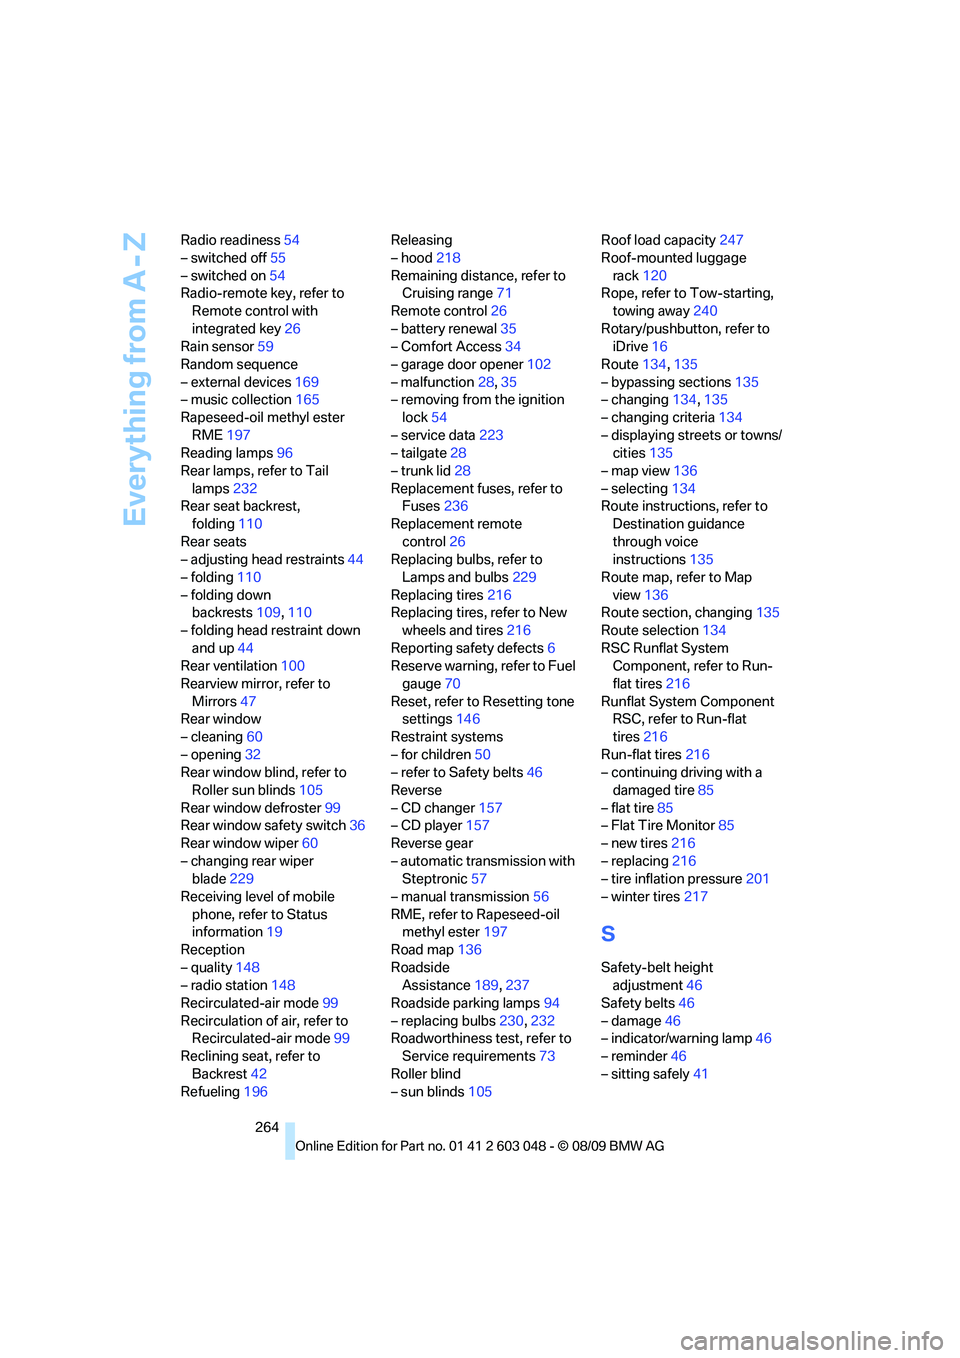
Everything from A - Z
264 Radio readiness54
– switched off55
– switched on54
Radio-remote key, refer to
Remote control with
integrated key26
Rain sensor59
Random sequence
– external devices169
– music collection165
Rapeseed-oil methyl ester
RME197
Reading lamps96
Rear lamps, refer to Tail
lamps232
Rear seat backrest,
folding110
Rear seats
– adjusting head restraints44
– folding110
– folding down
backrests109,110
– folding head restraint down
and up44
Rear ventilation100
Rearview mirror, refer to
Mirrors47
Rear window
– cleaning60
– opening32
Rear window blind, refer to
Roller sun blinds105
Rear window defroster99
Rear window safety switch36
Rear window wiper60
– changing rear wiper
blade229
Receiving level of mobile
phone, refer to Status
information19
Reception
– quality148
– radio station148
Recirculated-air mode99
Recirculation of air, refer to
Recirculated-air mode99
Reclining seat, refer to
Backrest42
Refueling196Releasing
– hood218
Remaining distance, refer to
Cruising range71
Remote control26
– battery renewal35
– Comfort Access34
– garage door opener102
– malfunction28,35
– removing from the ignition
lock54
– service data223
– tailgate28
– trunk lid28
Replacement fuses, refer to
Fuses236
Replacement remote
control26
Replacing bulbs, refer to
Lamps and bulbs229
Replacing tires216
Replacing tires, refer to New
wheels and tires216
Reporting safety defects6
Reserve warning, refer to Fuel
gauge70
Reset, refer to Resetting tone
settings146
Restraint systems
– for children50
– refer to Safety belts46
Reverse
– CD changer157
– CD player157
Reverse gear
– automatic transmission with
Steptronic57
– manual transmission56
RME, refer to Rapeseed-oil
methyl ester197
Road map136
Roadside
Assistance189,237
Roadside parking lamps94
– replacing bulbs230,232
Roadworthiness test, refer to
Service requirements73
Roller blind
– sun blinds105Roof load capacity247
Roof-mounted luggage
rack120
Rope, refer to Tow-starting,
towing away240
Rotary/pushbutton, refer to
iDrive16
Route134,135
– bypassing sections135
– changing134,135
– changing criteria134
– displaying streets or towns/
cities135
– map view136
– selecting134
Route instructions, refer to
Destination guidance
through voice
instructions135
Route map, refer to Map
view136
Route section, changing
135
Route selection134
RSC Runflat System
Component, refer to Run-
flat tires216
Runflat System Component
RSC, refer to Run-flat
tires216
Run-flat tires216
– continuing driving with a
damaged tire85
– flat tire85
– Flat Tire Monitor85
– new tires216
– replacing216
– tire inflation pressure201
– winter tires217
S
Safety-belt height
adjustment46
Safety belts46
– damage46
– indicator/warning lamp46
– reminder46
– sitting safely41