child lock BMW 3 SERIES 2011 Owners Manual
[x] Cancel search | Manufacturer: BMW, Model Year: 2011, Model line: 3 SERIES, Model: BMW 3 SERIES 2011Pages: 325, PDF Size: 12.94 MB
Page 41 of 325
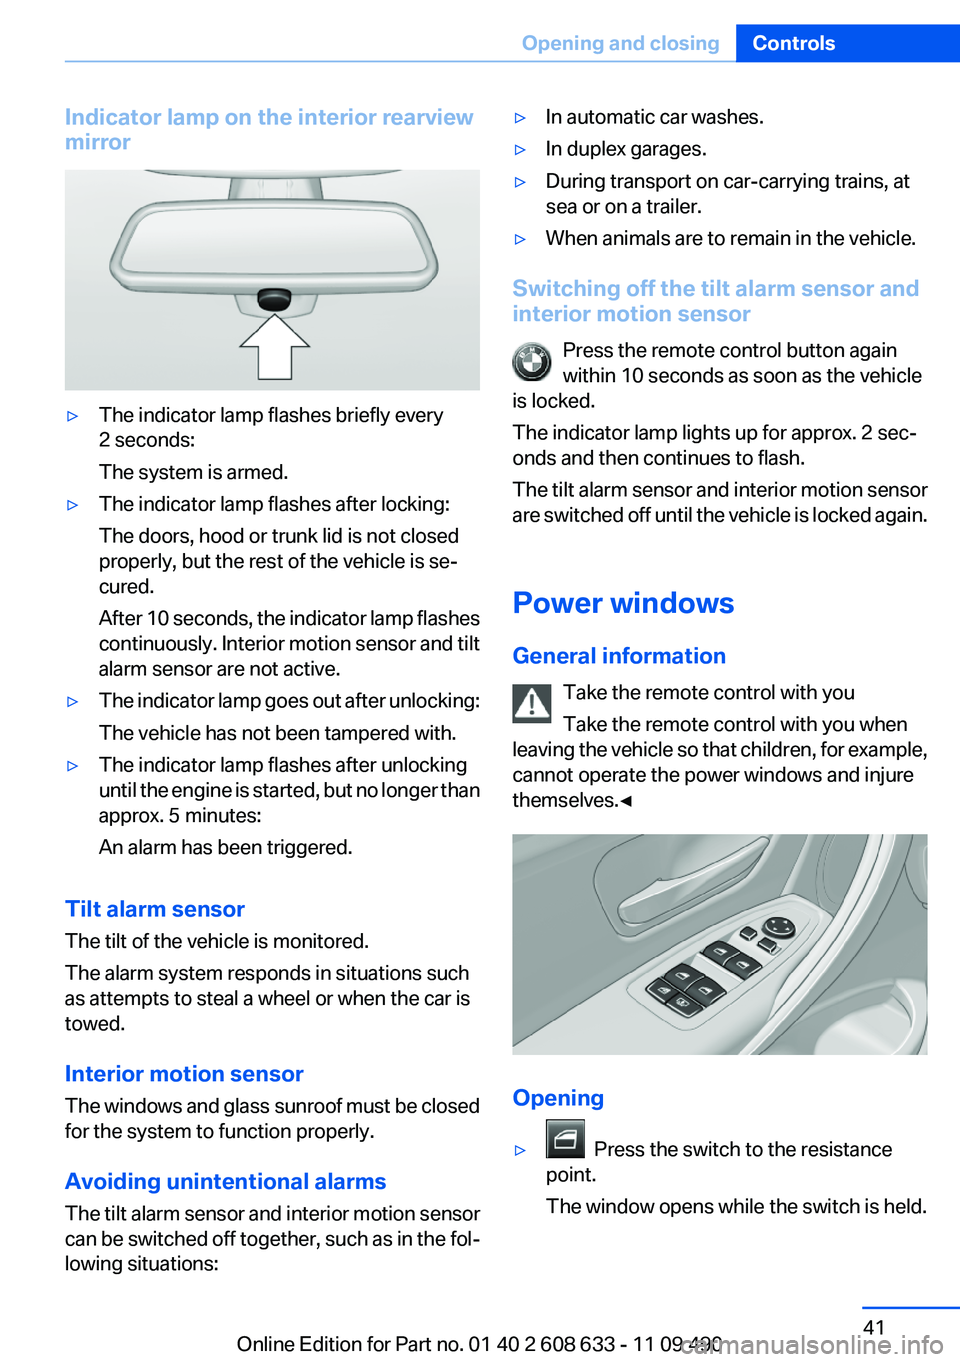
Indicator lamp on the interior rearview
mirror
▷The indicator lamp flashes briefly every
2 seconds:
The system is armed.
▷The indicator lamp flashes after locking:
The doors, hood or trunk lid is not closed
properly, but the rest of the vehicle is se‐
cured.
After 10 seconds, the indicator lamp flashes
continuously. Interior motion sensor and tilt
alarm sensor are not active.
▷The indicator lamp goes out after unlocking:
The vehicle has not been tampered with.
▷The indicator lamp flashes after unlocking
until the engine is started, but no longer than
approx. 5 minutes:
An alarm has been triggered.
Tilt alarm sensor
The tilt of the vehicle is monitored.
The alarm system responds in situations such
as attempts to steal a wheel or when the car is
towed.
Interior motion sensor
The windows and glass sunroof must be closed
for the system to function properly.
Avoiding unintentional alarms
The tilt alarm sensor and interior motion sensor
can be switched off together, such as in the fol‐
lowing situations:
▷In automatic car washes.
▷In duplex garages.
▷During transport on car-carrying trains, at
sea or on a trailer.
▷When animals are to remain in the vehicle.
Switching off the tilt alarm sensor and
interior motion sensor
Press the remote control button again
within 10 seconds as soon as the vehicle
is locked.
The indicator lamp lights up for approx. 2 sec‐
onds and then continues to flash.
The tilt alarm sensor and interior motion sensor
are switched off until the vehicle is locked again.
Power windows
General information
Take the remote control with you
Take the remote control with you when
leaving the vehicle so that children, for example,
cannot operate the power windows and injure
themselves.◀
Opening
▷ Press the switch to the resistance
point.
The window opens while the switch is held.
Seite 41
Opening and closingControls
41Online Edition for Part no. 01 40 2 608 633 - 11 09 490
Page 43 of 325
Roller sunblinds
Roller sunblind for rear window
General information
If you are no longer able to move the roller sun‐
blind for the rear window after having activated
it a number of times in a row, the system is
blocked for a limited time to prevent overheat‐
ing. Let the system cool.
The roller sunblind for the rear window cannot
be moved at low interior temperatures.
Extending or retracting roller blind for
rear window
Press the button.
Roller sunblinds for the rear side
windows
Pull out the roller sunblind at the loop and hook
it onto the bracket.
Do not open the window while the roller
sunblind is raised.
Do not open the window while the roller sunblind
is raised; otherwise, there is a risk of damage at
high speeds that may result in personal injury.◀
Glass sunroof, powered
General information
The glass sunroof is operational when the igni‐
tion is switched on.
Danger of pinching
Monitor the closing process and make
sure that the closing path of the glass sunroof is
clear; otherwise, injuries may result.◀
Take the remote control with you
Take the remote control with you when
leaving the vehicle so that children, for example,
cannot operate the roof and injure themselves.◀
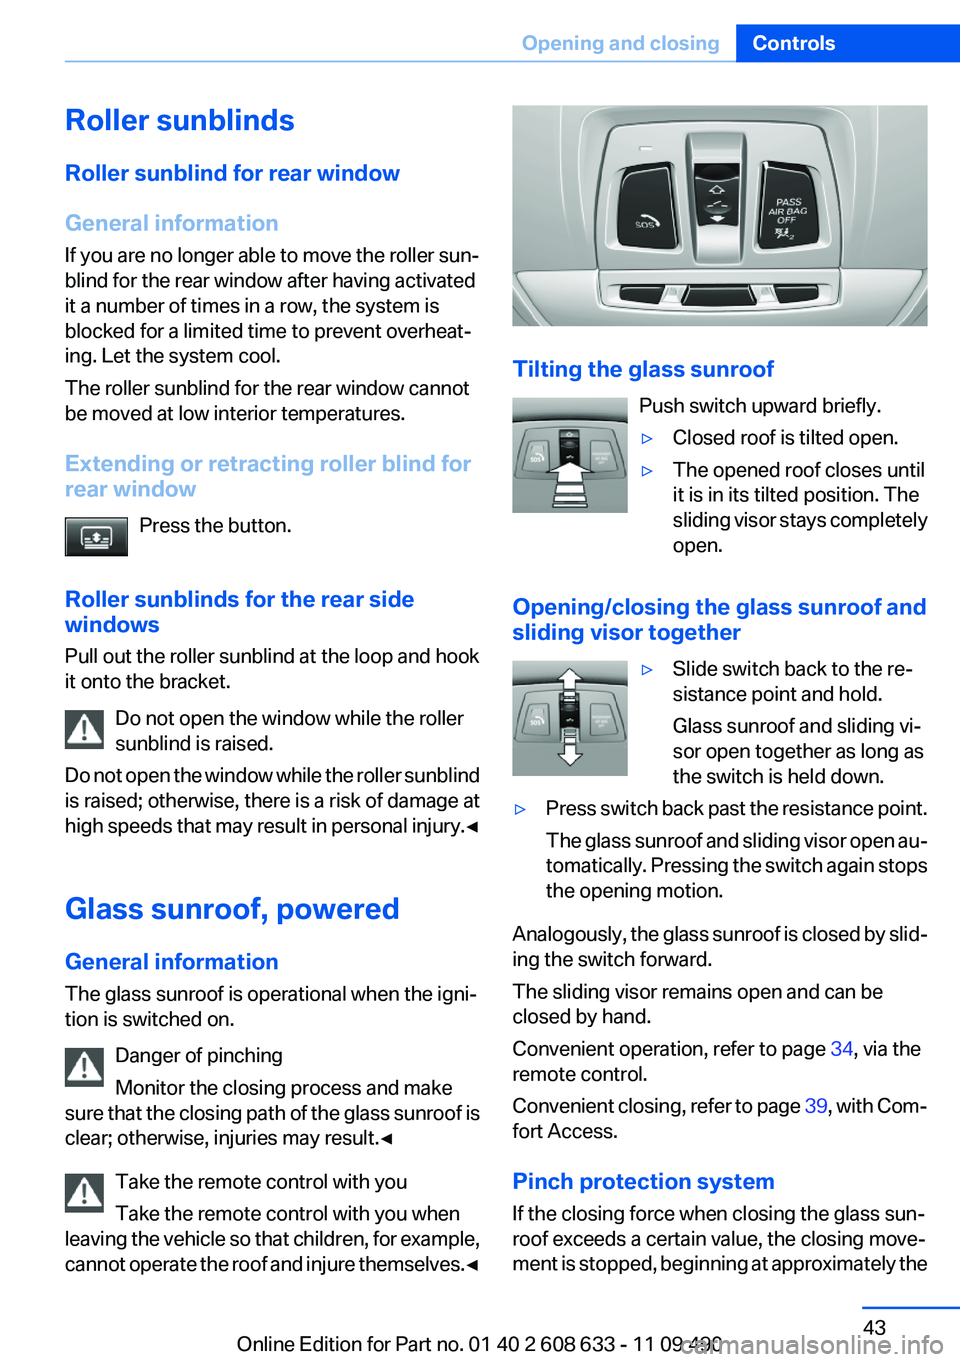
Tilting the glass sunroof
Push switch upward briefly.
▷Closed roof is tilted open.
▷The opened roof closes until
it is in its tilted position. The
sliding visor stays completely
open.
Opening/closing the glass sunroof and
sliding visor together
▷Slide switch back to the re‐
sistance point and hold.
Glass sunroof and sliding vi‐
sor open together as long as
the switch is held down.
▷Press switch back past the resistance point.
The glass sunroof and sliding visor open au‐
tomatically. Pressing the switch again stops
the opening motion.
Analogously, the glass sunroof is closed by slid‐
ing the switch forward.
The sliding visor remains open and can be
closed by hand.
Convenient operation, refer to page 34, via the
remote control.
Convenient closing, refer to page 39, with Com‐
fort Access.
Pinch protection system
If the closing force when closing the glass sun‐
roof exceeds a certain value, the closing move‐
ment is stopped, beginning at approximately the
Seite 43
Opening and closingControls
43Online Edition for Part no. 01 40 2 608 633 - 11 09 490
Page 55 of 325
Transporting children safely
Vehicle equipment
All standard, country-specific and optional
equipment that is offered in the model series is
described in this chapter. Therefore, equipment
is also described that is not available in a vehicle,
e. g., because of the selected optional equip‐
ment or country variant. This also applies for
safety-related functions and systems.
The right place for children
Note
Children in the vehicle
Do not leave children unattended in the
vehicle; otherwise, they could endanger them‐
selves and other persons, e.g., by opening the
doors.◀
Children should always be in the rear
Accident research shows that the safest place
for children is in the back seat.
Transporting children in the rear
Only transport children younger than
13 years of age or shorter than 5 ft/150 cm in the
rear in child restraint fixing systems provided in
accordance with the age, weight and size of the
child; otherwise, there is an increased risk of in‐
jury in an accident.
Children 13 years of age or older must wear a
safety belt as soon as a suitable child restraint
fixing system can no longer be used, due to their
age, weight and size.◀
Children on the front passenger seat
Should it ever be necessary to use a child re‐
straint fixing system in the front passenger seat,
make sure that the front, knee and side airbags
on the front passenger side are deactivated. Au‐
tomatic deactivation of front passenger airbags,
refer to page 93.
Deactivating the front passenger airbags
If a child restraint fixing system is used in
the front passenger seat, the front passenger
airbags must be deactivated; otherwise, there is
an increased risk of injury to the child when the
airbags are triggered, even with a child restraint
fixing system.◀
Installing child restraint fixing
systems
Before mounting
Before mounting child restraint fixing systems,
ensure that the rear seat backrests are locked.
Notes
Manufacturer's information for child re‐
straint fixing systems
To select, mount and use child restraint fixing
systems, observe the information provided by
the system manufacturer; otherwise, the pro‐
tective effect can be impaired.◀
On the front passenger seat
Deactivating airbags
After installing a child restraint fixing system in
the front passenger seat, make sure that the
front, knee and side airbags on the front pas‐
senger side are deactivated.
Deactivate the front passenger airbags auto‐
matically, refer to page 93.
Deactivating the front passenger airbags
If a child restraint fixing system is used in
the front passenger seat, the front passenger
airbags must be deactivated; otherwise, there is
Seite 55
Transporting children safelyControls
55Online Edition for Part no. 01 40 2 608 633 - 11 09 490
Page 56 of 325
an increased risk of injury to the child when the
airbags are triggered, even with a child restraint
fixing system.◀
Seat position and height
Before installing a child restraint fixing system,
move the front passenger seat as far back as
possible and adjust its height to the highest po‐
sition to obtain the best possible position for the
belt and to offer optimal protection in the event
of an accident.
Do not change the seat position and height after
this.
Backrest width
Adjustable backrest width: before installing a
child restraint fixing system in the front passen‐
ger seat, open the backrest width completely.
Do not change the backrest width again and do
not call up a memory position.
Backrest width for the child seat
Before installing a child restraint fixing
system in the front passenger seat, the backrest
width must be opened completely. Do not
change the adjustment after this; otherwise, the
stability of the child seat will be reduced.◀
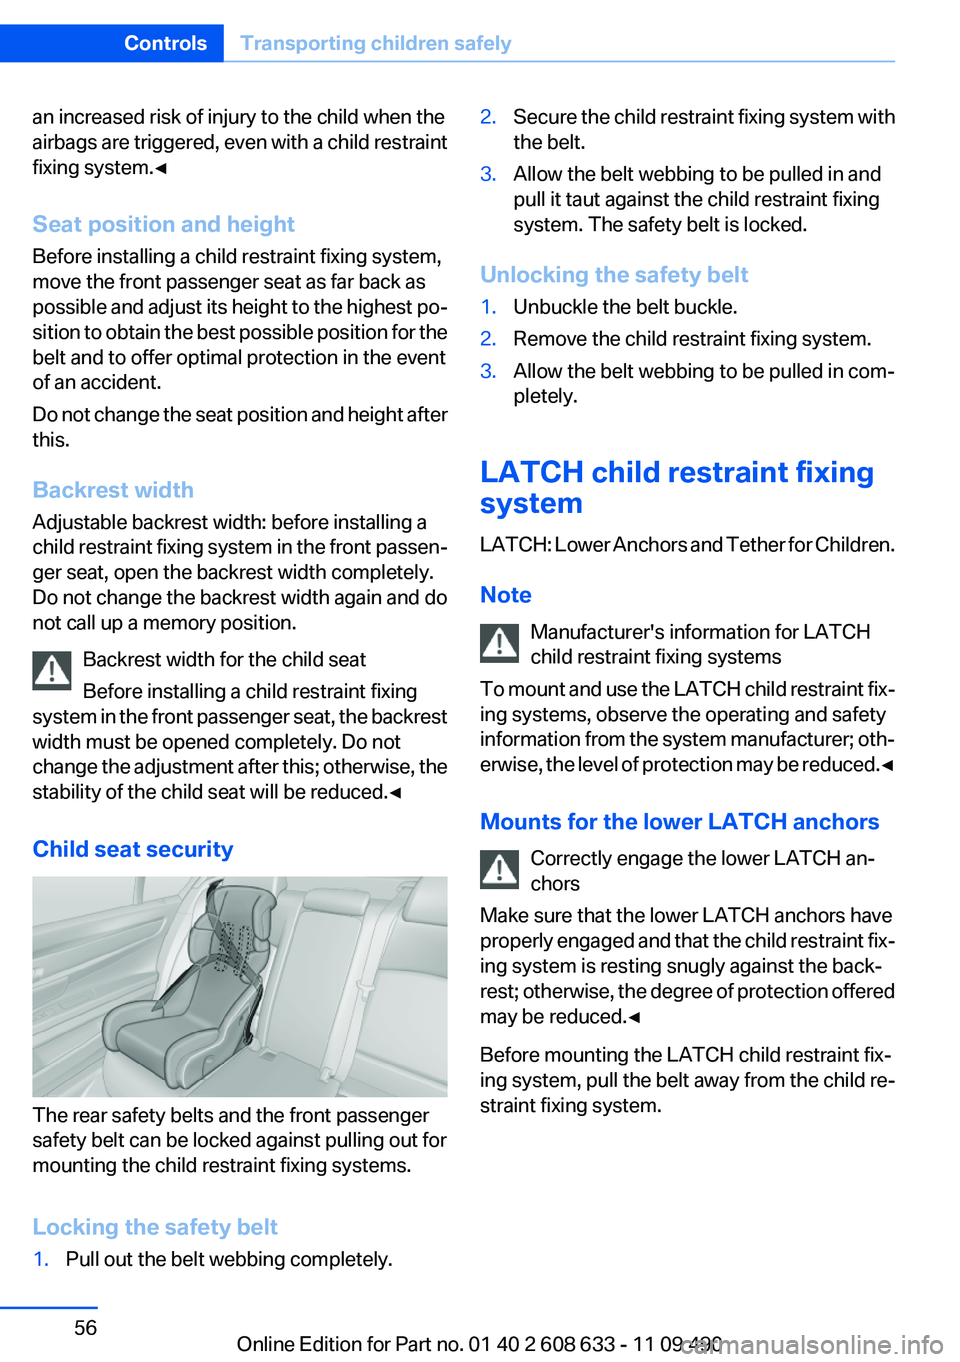
Child seat security
The rear safety belts and the front passenger
safety belt can be locked against pulling out for
mounting the child restraint fixing systems.
Locking the safety belt
1.Pull out the belt webbing completely.
2.Secure the child restraint fixing system with
the belt.
3.Allow the belt webbing to be pulled in and
pull it taut against the child restraint fixing
system. The safety belt is locked.
Unlocking the safety belt
1.Unbuckle the belt buckle.
2.Remove the child restraint fixing system.
3.Allow the belt webbing to be pulled in com‐
pletely.
LATCH child restraint fixing
system
LATCH: Lower Anchors and Tether for Children.
Note
Manufacturer's information for LATCH
child restraint fixing systems
To mount and use the LATCH child restraint fix‐
ing systems, observe the operating and safety
information from the system manufacturer; oth‐
erwise, the level of protection may be reduced.◀
Mounts for the lower LATCH anchors
Correctly engage the lower LATCH an‐
chors
Make sure that the lower LATCH anchors have
properly engaged and that the child restraint fix‐
ing system is resting snugly against the back‐
rest; otherwise, the degree of protection offered
may be reduced.◀
Before mounting the LATCH child restraint fix‐
ing system, pull the belt away from the child re‐
straint fixing system.
Seite 56
ControlsTransporting children safely
56Online Edition for Part no. 01 40 2 608 633 - 11 09 490
Page 58 of 325
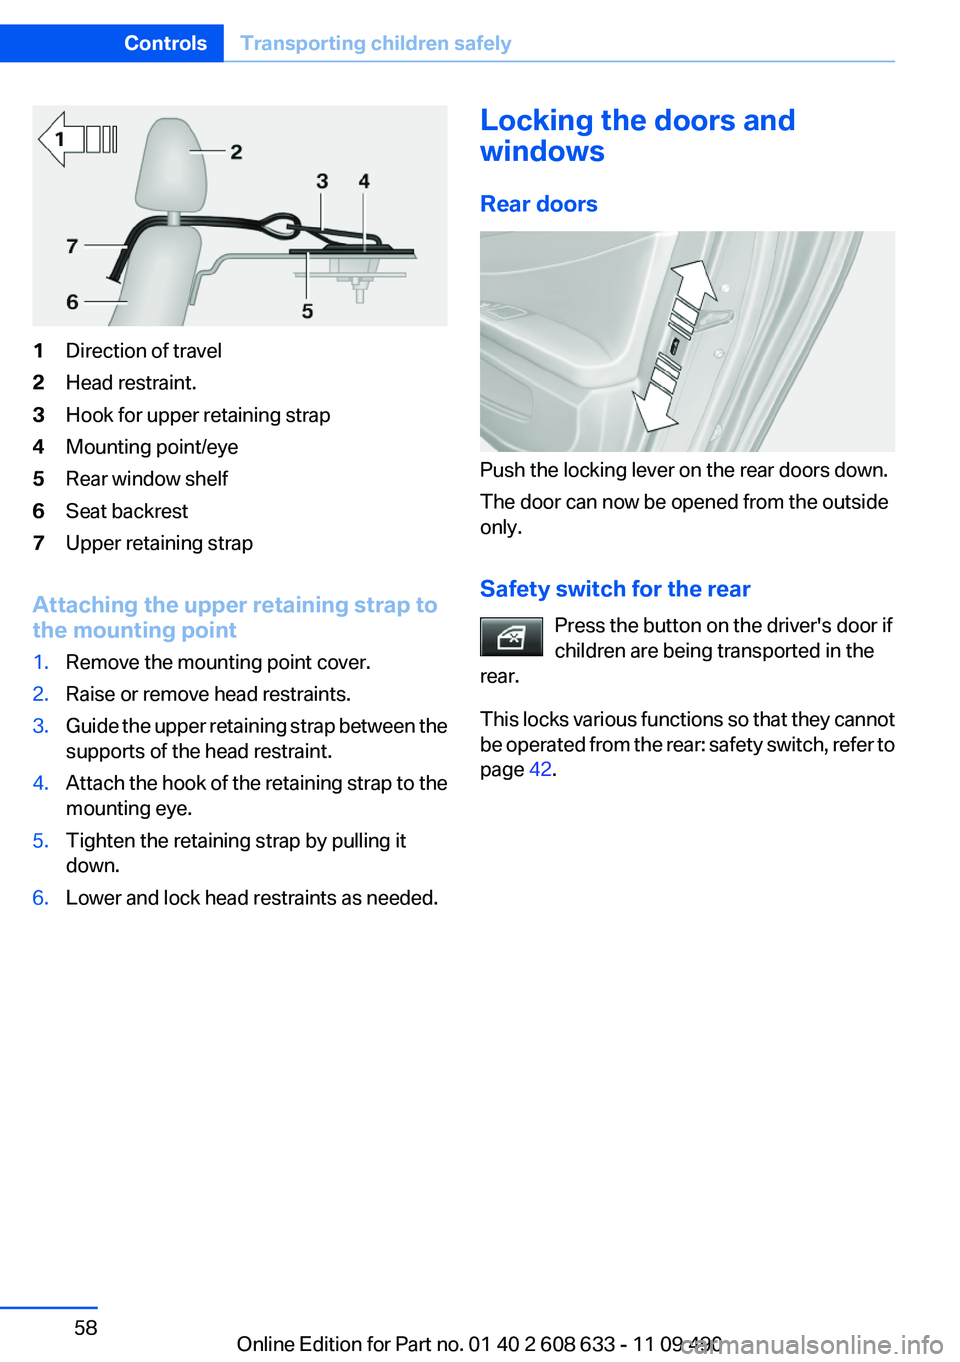
1Direction of travel
2Head restraint.
3Hook for upper retaining strap
4Mounting point/eye
5Rear window shelf
6Seat backrest
7Upper retaining strap
Attaching the upper retaining strap to
the mounting point
1.Remove the mounting point cover.
2.Raise or remove head restraints.
3.Guide the upper retaining strap between the
supports of the head restraint.
4.Attach the hook of the retaining strap to the
mounting eye.
5.Tighten the retaining strap by pulling it
down.
6.Lower and lock head restraints as needed.
Locking the doors and
windows
Rear doors
Push the locking lever on the rear doors down.
The door can now be opened from the outside
only.
Safety switch for the rear
Press the button on the driver's door if
children are being transported in the
rear.
This locks various functions so that they cannot
be operated from the rear: safety switch, refer to
page 42.
Seite 58
ControlsTransporting children safely
58Online Edition for Part no. 01 40 2 608 633 - 11 09 490
Page 315 of 325
Blinds, sun protection 43
Bluetooth audio 213
Bluetooth connection, activat‐
ing/deactivating 222, 229
BMW Assist 250
BMW Homepage 6
BMW Internet page 6
BMW Maintenance Sys‐
tem 277
BMW Search 252
Bottle holder, refer to Cu‐
pholder 150
Brake assistant 104
Brake discs, breaking in 156
Brake force display 102
Brake lamps, brake force dis‐
play 102
Brake lights, adaptive 102
Brake pads, breaking in 156
Braking, notes 157
Breakdown assis‐
tance 290, 291
Breaking in 156
Brightness of Control Dis‐
play 85
Bulb replacement 279
Bulb replacement, front 280
Bulb replacement, halogen
headlamps 280
Bulb replacement, rear 285
Bulb replacement, xenon
headlamps 283
Bulbs and lamps 279
Button, RES 111
Button, Start/Stop 59
Bypassing, refer to starting
aid 291
C
Calendar 243
California Proposition 65
Warning 7
Camera, backup camera 125
Camera, care 299
Camera, Side View 128
Camera, Top View 127
Can holder, refer to Cu‐
pholder 150
Car battery 287
Car care products 297
Care, displays 299
Care, vehicle 297
Cargo 159
Cargo area, enlarging 146
Cargo area lid 37
Cargo area, storage compart‐
ments 151
Cargo straps, securing
cargo 160
Car key, refer to Remote con‐
trol 30
Carpet, care 298
Car wash 296
Catalytic converter, refer to
Hot exhaust system 156
CBS Condition Based Serv‐
ice 277
CD/DVD 198
CDs, storing 205
Cell phone 220, 228
Center armrest 149
Center console 14
Central locking system 33
Central screen, refer to Control
Display 16
Changes, technical, refer to
Safety 6
Changing parts 279
Changing wheels 287
Changing wheels/tires 269
Check Control 73
Children, seating position 55
Children, transporting
safely 55
Child restraint fixing sys‐
tem 55
Child restraint fixing system
LATCH 56
Child restraint fixing systems,
mounting 55
Child safety locks 58
Child seat, mounting 55
Child seats 55
Chrome parts, care 298
Cigarette lighter 145
Cleaning, displays 299
Climate control 134, 136
Clock 76
Closing/opening from in‐
side 37
Closing/opening via door
lock 36
Closing/opening with remote
control 34
Clothes hooks 151
Collision warning 115, 117
Combination switch, refer to
Turn signals 64
Combination switch, refer to
Wiper system 65
Comfort Access 38
COMFORT program, Dynamic
Driving Control 107
Compartments in the
doors 149
Compass 143
Computer 81
Concierge service 251
Condensation on win‐
dows 138
Condensation under the vehi‐
cle 158
Condition Based Service
CBS 277
Confirmation signal 35
Contacts 239, 0
Control Display 16
Control Display, settings 83
Controller 16, 17
Control systems, driving sta‐
bility 104
Convenient opening 34
Coolant 276
Coolant temperature 76
Cooling function 135, 137
Cooling, maximum 137
Cooling system 276
Seite 315
Everything from A to ZReference
315Online Edition for Part no. 01 40 2 608 633 - 11 09 490
Page 318 of 325
I
Ice warning, refer to External
temperature warning 76
Icy roads, refer to External
temperature warning 76
Identification marks, tires 267
Identification number, refer to
Important features in the en‐
gine compartment 272
iDrive 16
Ignition key, refer to Remote
control 30
Ignition off 59
Ignition on 59
Indication of a flat tire 95, 98
Individual air distribu‐
tion 135, 138
Individual settings, refer to
Personal Profile 31
Inflation pressure, tires 263
Inflation pressure warning
FTM, tires 97
Info display, refer to Com‐
puter 81
Information on the navigation
data 183
Initializing, Flat Tire Monitor
FTM 98
Initializing, Tire Pressure Mon‐
itor TPM 95
Instrument cluster 70
Instrument cluster, electronic
displays 72
Instrument lighting 89
Integrated key 30
Integrated universal remote
control 141
Intensity, AUTO program 137
Interactive map 173
Interior equipment 141
Interior lamps 90
Interior lamps via remote con‐
trol 35
Interior motion sensor 41
Interior rearview mirror 53
Interior rearview mirror, auto‐
matic dimming feature 53
Interior rearview mirror, com‐
pass 143
Intermediate destinations 175
Internet page 6
Intersection, entering for navi‐
gation 169
Interval display, service re‐
quirements 77
iPod/iPhone 210
J
Jacking points for the vehicle
jack 287
Jack, refer to Vehicle jack 287
Joystick, automatic transmis‐
sion 67
K
Key/remote control 30
Keyless Go, refer to Comfort
Access 38
Key Memory, refer to Personal
Profile 31
Kickdown, automatic trans‐
mission 67
Knee airbag 91
L
Lamp replacement 279
Lamp replacement, front 280
Lamp replacement, rear 285
Lamps 86
Lamps and bulbs 279
Lane departure warning 99
Lane margin, warning 99
Language on Control Dis‐
play 84
Lashing eyes, securing
cargo 160
LATCH child restraint fixing
system 56
Leather, care 297
LEDs, light-emitting di‐
odes 280
Length, vehicle 303
Letters and numbers, enter‐
ing 22
Light-alloy wheels, care 298
Light control 88
Light-emitting diodes,
LEDs 280
Lighter 145
Lighting 86
Lighting via remote control 35
Light switch 86
Load 159
Loading 159
Lock, door 36
Locking/unlocking from in‐
side 37
Locking/unlocking via door
lock 36
Locking/unlocking with re‐
mote control 34
Locking, automatic 37
Locking, central 33
Lock, power window 42
Locks, doors, and win‐
dows 58
Low beams 86
Low beams, automatic, refer to
High-beam Assistant 88
Lower back support 47
Luggage rack, refer to Roof-
mounted luggage rack 160
Lumbar support 47
M
Maintenance 277
Maintenance require‐
ments 277
Maintenance, service require‐
ments 77
Maintenance system,
BMW 277
Seite 318
ReferenceEverything from A to Z
318Online Edition for Part no. 01 40 2 608 633 - 11 09 490
Page 319 of 325
Malfunction displays, refer to
Check Control 73
Manual air distribu‐
tion 135, 138
Manual air flow 135
Manual air volume 138
Manual mode, transmis‐
sion 68
Manual operation, backup
camera 124
Manual operation, door
lock 37
Manual operation, exterior mir‐
rors 52
Manual operation, fuel filler
flap 260
Manual operation, Park Dis‐
tance Control PDC 122
Manual operation, Side
View 128
Manual operation, Top
View 126
Manual transmission 67
Map, destination entry 173
Map in split screen 180
Map view 178
Marking on approved
tires 270
Marking, run-flat tires 271
Master key, refer to Remote
control 30
Maximum cooling 137
Maximum speed, display 79
Maximum speed, winter
tires 270
Measure, units of 85
Medical kit 291
Memory, seat, mirror 51
Menu, EfficientDynamics 164
Menu in instrument cluster 80
Menus, operating, iDrive 16
Menus, refer to iDrive operat‐
ing concept 18
Message list, traffic bulle‐
tins 180
Messages 241
Messages, refer to Check
Control 73
Microfilter 136, 139
Minimum tread, tires 269
Mirror 52
Mirror memory 51
Mobile communication devi‐
ces in the vehicle 157
Mobile phone 220, 228
Mode, ECO PRO 163
Modifications, technical, refer
to Safety 6
Moisture in headlamp 280
Monitor, refer to Control Dis‐
play 16
Mounting of child restraint fix‐
ing systems 55
MP3 player 210
Multifunction steering wheel,
buttons 12
Music collection 205
Music search 207
Music, storing 205
N
Navigation 168
Navigation data 183
Neck restraints, front, refer to
Head restraints 49
Neck restraints, rear, refer to
Head restraints 50
New wheels and tires 269
No Passing Information 79
Notes 245
Number of cylinders, en‐
gine 303
Nylon rope for tow-starting/
towing 294
O
OBD Onboard Diagnos‐
tics 278
Obstacle marking, backup
camera 125
Odometer 76
Office 238
Oil 274
Oil, adding 274
Oil additives 275
Oil change 275
Oil change interval, service re‐
quirements 77
Oil filler neck 274
Oil types, alternative 275
Oil types, approved 275
Old batteries, disposal 288
Onboard Diagnostics
OBD 278
Onboard monitor, refer to
Control Display 16
Onboard vehicle tool kit 279
Opening/closing from in‐
side 37
Opening/closing via door
lock 36
Opening/closing with remote
control 34
Operating concept, iDrive 16
Optional equipment, standard
equipment 6
Outside air, refer to Automatic
recirculated-air control 138
Overheating of engine, refer to
Coolant temperature 76
P
Paint, vehicle 297
Pairing, mobile
phone 220, 229
Panic mode 35
Parallel parking assistant 130
Park Distance Control
PDC 121
Parked-car ventilation 139
Parked vehicle, condensa‐
tion 158
Parking aid, refer to PDC 121
Parking assistant 130
Parking brake 63
Seite 319
Everything from A to ZReference
319Online Edition for Part no. 01 40 2 608 633 - 11 09 490
Page 322 of 325
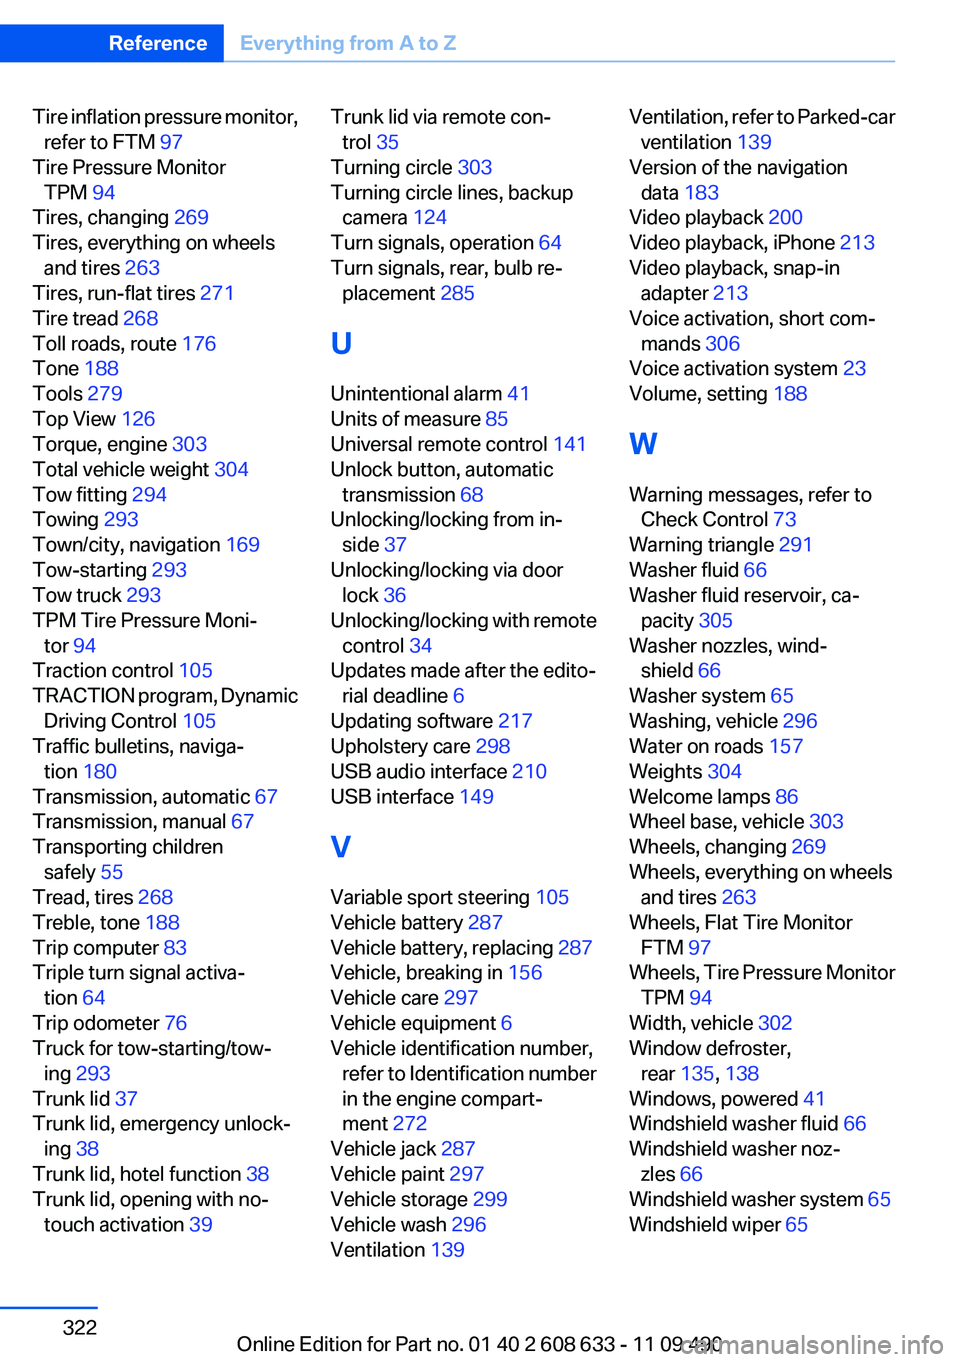
Tire inflation pressure monitor,
refer to FTM 97
Tire Pressure Monitor
TPM 94
Tires, changing 269
Tires, everything on wheels
and tires 263
Tires, run-flat tires 271
Tire tread 268
Toll roads, route 176
Tone 188
Tools 279
Top View 126
Torque, engine 303
Total vehicle weight 304
Tow fitting 294
Towing 293
Town/city, navigation 169
Tow-starting 293
Tow truck 293
TPM Tire Pressure Moni‐
tor 94
Traction control 105
TRACTION program, Dynamic
Driving Control 105
Traffic bulletins, naviga‐
tion 180
Transmission, automatic 67
Transmission, manual 67
Transporting children
safely 55
Tread, tires 268
Treble, tone 188
Trip computer 83
Triple turn signal activa‐
tion 64
Trip odometer 76
Truck for tow-starting/tow‐
ing 293
Trunk lid 37
Trunk lid, emergency unlock‐
ing 38
Trunk lid, hotel function 38
Trunk lid, opening with no-
touch activation 39
Trunk lid via remote con‐
trol 35
Turning circle 303
Turning circle lines, backup
camera 124
Turn signals, operation 64
Turn signals, rear, bulb re‐
placement 285
U
Unintentional alarm 41
Units of measure 85
Universal remote control 141
Unlock button, automatic
transmission 68
Unlocking/locking from in‐
side 37
Unlocking/locking via door
lock 36
Unlocking/locking with remote
control 34
Updates made after the edito‐
rial deadline 6
Updating software 217
Upholstery care 298
USB audio interface 210
USB interface 149
V
Variable sport steering 105
Vehicle battery 287
Vehicle battery, replacing 287
Vehicle, breaking in 156
Vehicle care 297
Vehicle equipment 6
Vehicle identification number,
refer to Identification number
in the engine compart‐
ment 272
Vehicle jack 287
Vehicle paint 297
Vehicle storage 299
Vehicle wash 296
Ventilation 139
Ventilation, refer to Parked-car
ventilation 139
Version of the navigation
data 183
Video playback 200
Video playback, iPhone 213
Video playback, snap-in
adapter 213
Voice activation, short com‐
mands 306
Voice activation system 23
Volume, setting 188
W
Warning messages, refer to
Check Control 73
Warning triangle 291
Washer fluid 66
Washer fluid reservoir, ca‐
pacity 305
Washer nozzles, wind‐
shield 66
Washer system 65
Washing, vehicle 296
Water on roads 157
Weights 304
Welcome lamps 86
Wheel base, vehicle 303
Wheels, changing 269
Wheels, everything on wheels
and tires 263
Wheels, Flat Tire Monitor
FTM 97
Wheels, Tire Pressure Monitor
TPM 94
Width, vehicle 302
Window defroster,
rear 135, 138
Windows, powered 41
Windshield washer fluid 66
Windshield washer noz‐
zles 66
Windshield washer system 65
Windshield wiper 65
Seite 322
ReferenceEverything from A to Z
322Online Edition for Part no. 01 40 2 608 633 - 11 09 490