Warning lamps BMW 3 SERIES CONVERTIBLE 2013 E93 Owner's Manual
[x] Cancel search | Manufacturer: BMW, Model Year: 2013, Model line: 3 SERIES CONVERTIBLE, Model: BMW 3 SERIES CONVERTIBLE 2013 E93Pages: 311, PDF Size: 7.05 MB
Page 19 of 311
14
At a glanceDashboard
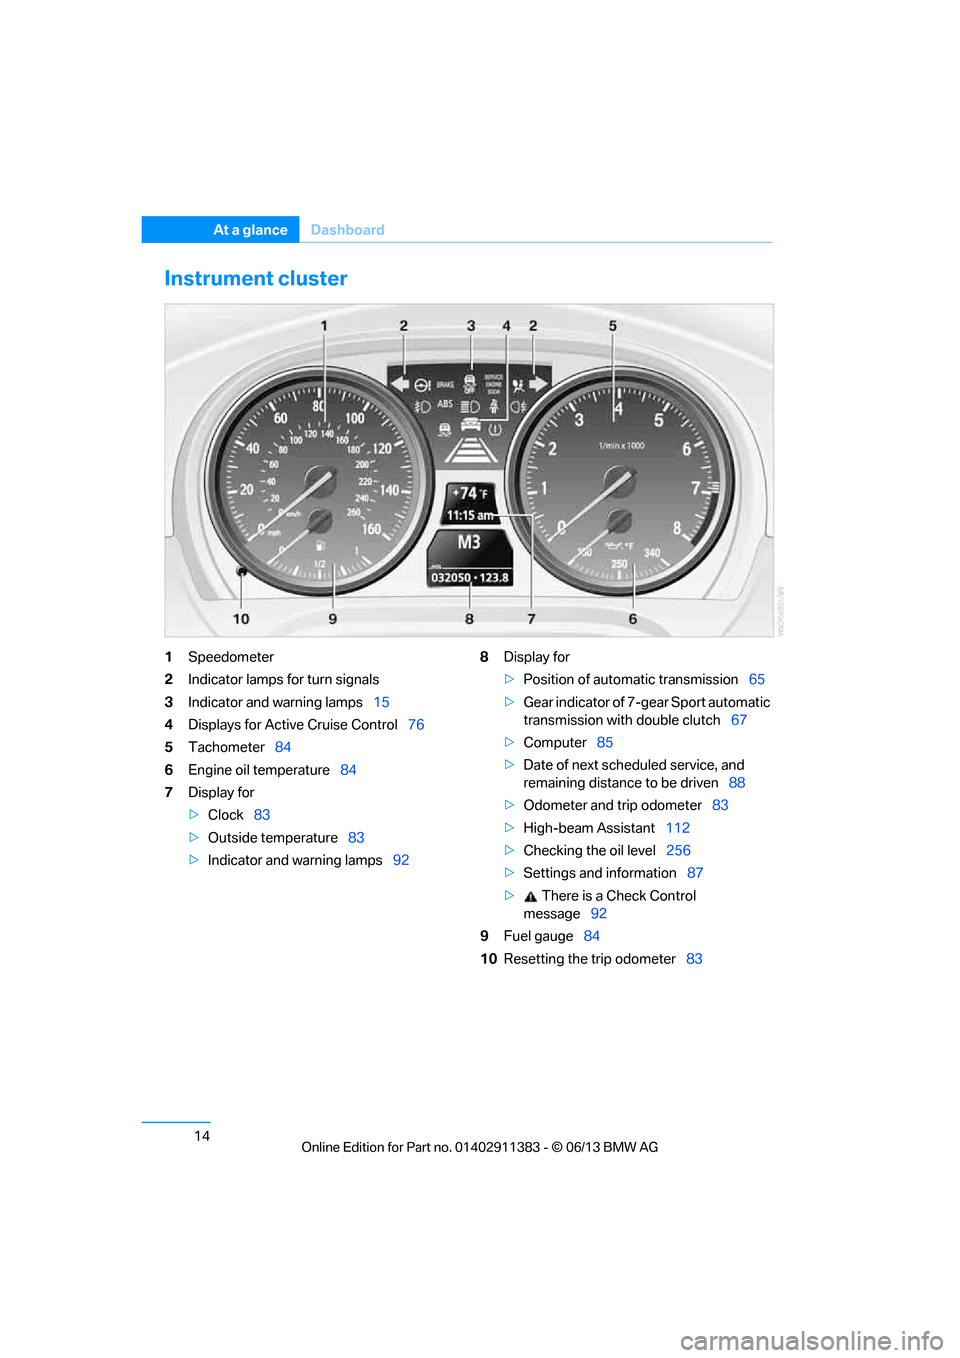
Instrument cluster
1Speedometer
2 Indicator lamps for turn signals
3 Indicator and warning lamps 15
4 Displays for Active Cruise Control 76
5 Tachometer 84
6 Engine oil temperature 84
7 Display for
>Clock 83
> Outside temperature 83
> Indicator and warning lamps 928
Display for
>Position of automatic transmission 65
> Gear indicator of 7-gear Sport automatic
transmission with double clutch 67
> Computer 85
> Date of next scheduled service, and
remaining distance to be driven 88
> Odometer and trip odometer 83
> High-beam Assistant 112
> Checking the oil level 256
> Settings and information 87
> There is a Check Control
message 92
9 Fuel gauge 84
10 Resetting the trip odometer 83
00320051004F004C00510048000300280047004C0057004C005200510003
Page 20 of 311
15
Dashboard
At a glance
Indicator and warning lamps
The concept
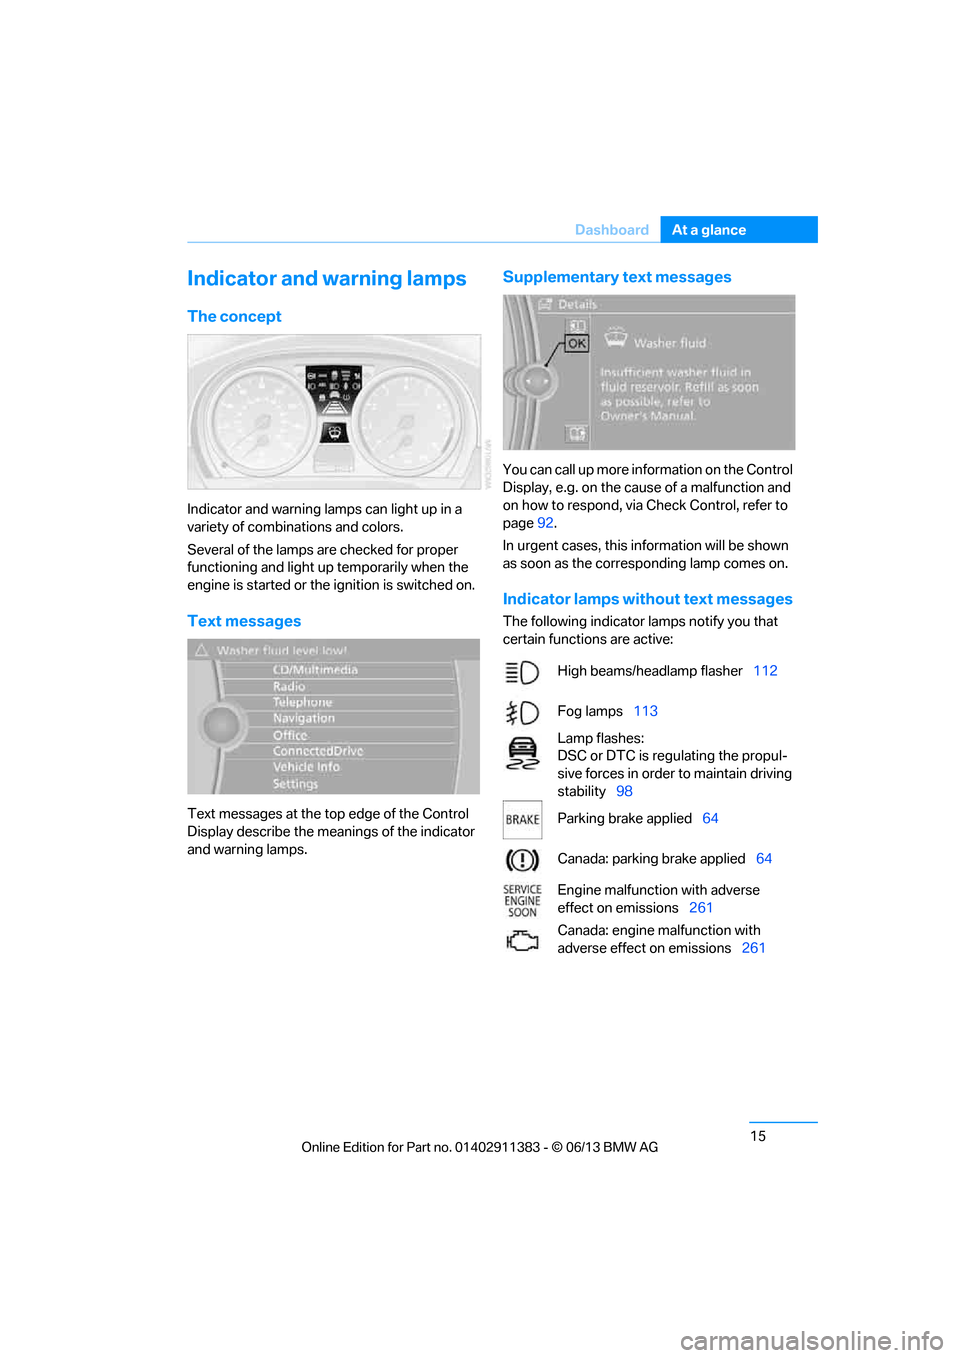
Indicator and warning lamps can light up in a
variety of combinations and colors.
Several of the lamps are checked for proper
functioning and light up temporarily when the
engine is started or the ignition is switched on.
Text messages
Text messages at the to
p edge of the Control
Display describe the mean ings of the indicator
and warning lamps.
Supplementary text messages
You can call up more information on the Control
Display, e.g. on the cause of a malfunction and
on how to respond, via Check Control, refer to
page 92.
In urgent cases, this information will be shown
as soon as the corresponding lamp comes on.
Indicator lamps without text messages
The following indicator lamps notify you that
certain functions are active:
High beams/headlamp flasher 112
Fog lamps 113
Lamp flashes:
DSC or DTC is regulating the propul-
sive forces in order to maintain driving
stability 98
Parking brake applied 64
Canada: parking brake applied 64
Engine malfunction with adverse
effect on emissions 261
Canada: engine malfunction with
adverse effect on emissions 261
00320051004F004C00510048000300280047004C0057004C005200510003
Page 38 of 311
33
Opening and closing
Controls
Personal Profile settings
For more information on
specific settings, refer
to the specified pages.
> Assignment of programmable memory
keys, refer to page 25
> Response of the central locking system
when the car is unlocked, refer to page 34
> Automatic locking of th e vehicle, refer to
page 36
> Automatic call-up of the driver's seat
position, refer to page 53
> Triple turn signal activation, refer to
page 72
> Settings for the display on the Control
Display and in the instrument cluster:
>12h/24h format of the clock, refer to
page 91
> Date format, refer to page 92
> Brightness of the Control Display, refer
to page 95
> Language on the Control Display, refer
to page 95
> Units of measure, refer to page 88
> Show visual warning for Park Distance
Control PDC, refer to page 97
> Light settings:
>Welcome lamps, refer to page 111
> Pathway lighting, refer to page 111
> Daytime running lights, refer to
page 111
> High-beam Assistant, refer to page 112
> Automatic climate control: activating/deac-
tivating AUTO program, air conditioning
and automatic recirculated air control,
setting temperature, air volume and
distribution, refer to page 116 ff
> Entertainment:
>Setting tone controls, refer to page 167
> Speed-dependent volume control, refer
to page 168
Central locking system
The concept
The central locking system functions when the
driver's door is closed.
The system simultaneously engages and
releases the locks on the following:
>Doors
> Trunk lid
> Fuel filler flap
> Convertible: glove compartment
Operating from outside
>Via the remote control
> Using the door lock
> In cars with Comfort Access, via the handles
on the driver's door and the front passenger
door
At the same time as locking and unlocking via
the remote control:
> Welcome lights, the inte rior light, and the
courtesy lighting are switched on and off.
> Alarm system, refer to page 38, is armed or
disarmed.
Operating from inside
By means of the button fo r central locking, refer
to page 36.
In the event of a sufficiently severe accident,
the central locking syst em unlocks automati-
cally. In addition, the hazard warning flashers
and interior lamps come on.
Opening and closing:
Using the remote control
Persons or animals in a parked vehicle
could lock the doors from the inside. You
should therefore take th e remote control with
you when you leave the ve hicle so that the latter
can be opened from outside. <
00320051004F004C00510048000300280047004C0057004C005200510003
Page 46 of 311
41
Opening and closing
Controls
Unlocking the trunk lid separately
Press the button on the ou
tside of the trunk lid.
This corresponds to pressing the button.
If the vehicle detects that a remote
control has been accide ntally left inside
the locked vehicle's trunk after the trunk lid is
closed, the lid will reopen. The hazard warning
flashers flash and a signal sounds. <
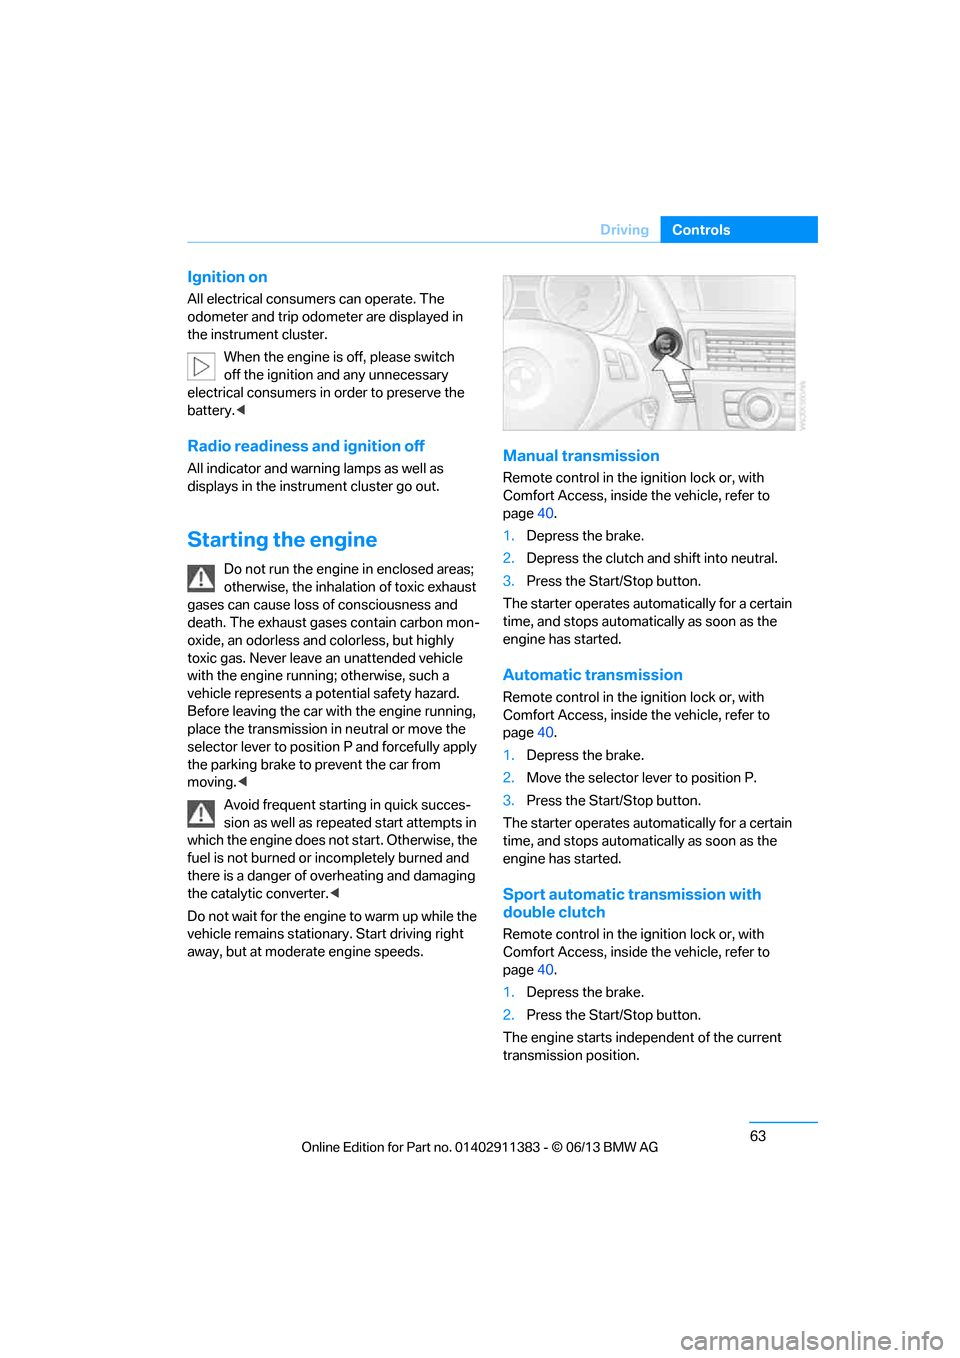
Switching on radio readiness
Pressing the Start/Stop button switches on
radio readiness.
Do not depress the brake or the clutch; other-
wise, the engine will start immediately.
Starting the engine
The engine can be started or the ignition can be
switched on when a remote control is inside the
vehicle. It is not necessa ry to insert a remote
control into the ignition lock, refer to page 62.
Switching off the engine in cars with
automatic transmission
The engine can only be switched off when the
selector lever is in po sition P, refer to page 64.
To switch the engine off when the selector lever
is in position N, the remote control must be in
the ignition lock.
Malfunction
Local radio waves can in terfere with the func-
tion of Comfort Access, for example when a
mobile phone is in the immediate vicinity of the
remote control or by when a mobile phone is
being charged in the vehicle.
If this happens, open or close the vehicle via the
buttons on the remote co ntrol or using the inte-
grated key. To start the engine afterward, insert
the remote control into the ignition lock.
Warning lamps
The warning lamp in the instrument
cluster lights up when you attempt to
start the engine: the engine cannot
be started. The remote co ntrol is not inside the
vehicle or is malfunctioning. Take the remote contro
l with you inside the
vehicle or have it checked. If necessary, insert
another remote control in to the ignition lock.
The warning lamp in the instrument
cluster lights up wh ile the engine is
running: the remote control is no
longer inside the vehicle. After the engine is
switched off, the engine can only be restarted
within approx. 10 seconds.
The indicator lamp in the instrument
cluster lights up and a message
appears on the Control Display:
replace the battery in the remote control.
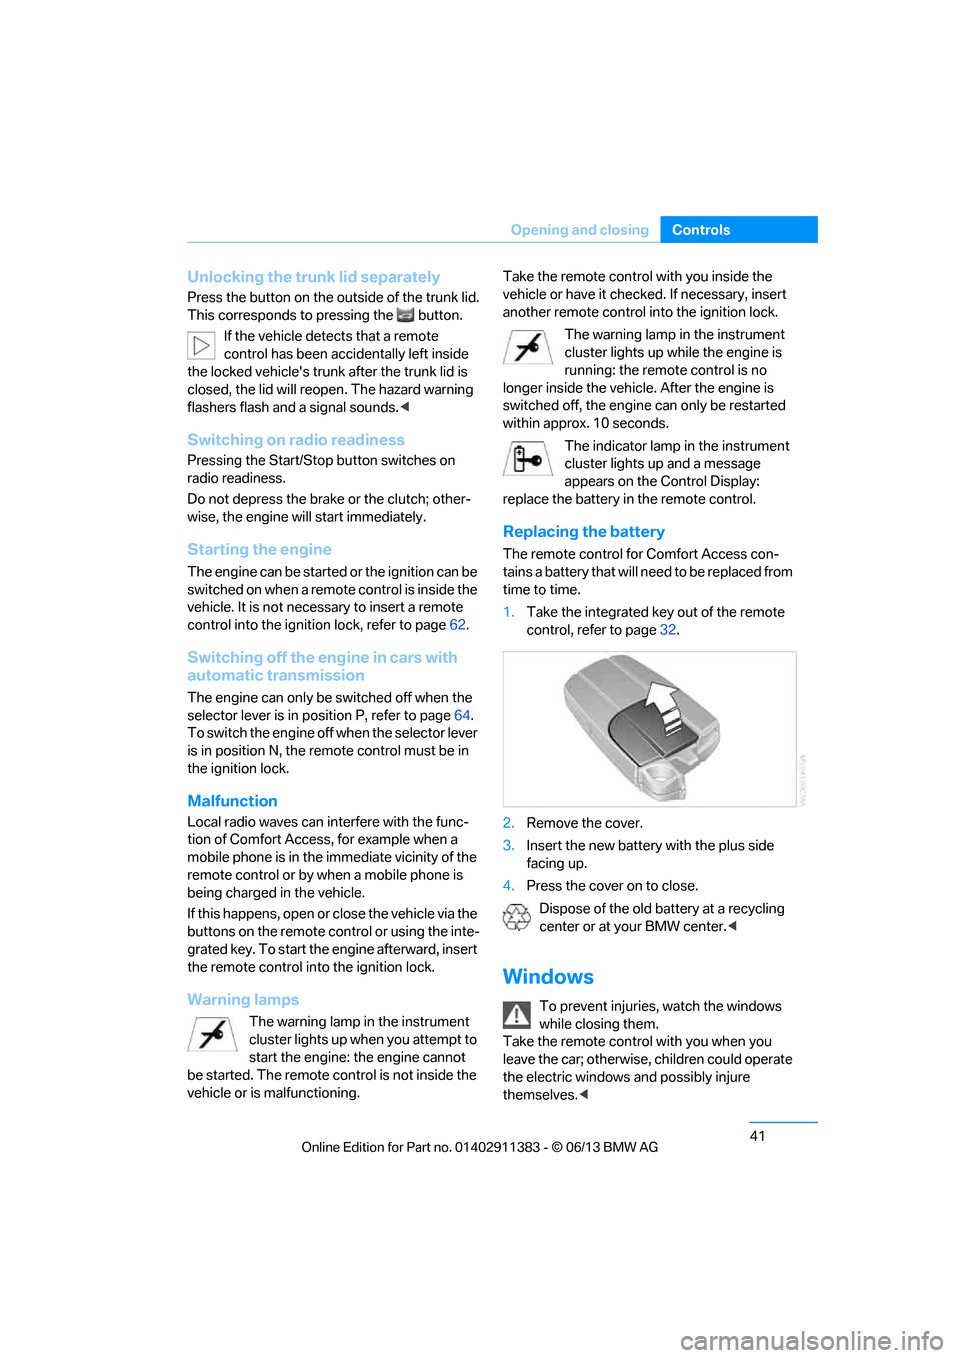
Replacing the battery
The remote control for Comfort Access con-
tains a battery that will need to be replaced from
time to time.
1. Take the integrated ke y out of the remote
control, refer to page 32.
2. Remove the cover.
3. Insert the new battery with the plus side
facing up.
4. Press the cover on to close.
Dispose of the old battery at a recycling
center or at your BMW center. <
Windows
To prevent injuries, watch the windows
while closing them.
Take the remote contro l with you when you
leave the car; otherwise, children could operate
the electric windows and possibly injure
themselves. <
00320051004F004C00510048000300280047004C0057004C005200510003
Page 68 of 311
63
Driving
Controls
Ignition on
All electrical consumers can operate. The
odometer and trip odometer are displayed in
the instrument cluster.
When the engine is off, please switch
off the ignition and any unnecessary
electrical consumers in order to preserve the
battery. <
Radio readiness and ignition off
All indicator and warning lamps as well as
displays in the instrument cluster go out.
Starting the engine
Do not run the engine in enclosed areas;
otherwise, the inhalation of toxic exhaust
gases can cause loss of consciousness and
death. The exhaust gases contain carbon mon-
oxide, an odorless and colorless, but highly
toxic gas. Never leave an unattended vehicle
with the engine running; otherwise, such a
vehicle represents a po tential safety hazard.
Before leaving the car with the engine running,
place the transmission in neutral or move the
selector lever to positi on P and forcefully apply
the parking brake to prevent the car from
moving. <
Avoid frequent starting in quick succes-
sion as well as repeat ed start attempts in
which the engine does not start. Otherwise, the
fuel is not burned or incompletely burned and
there is a danger of overheating and damaging
the catalytic converter. <
Do not wait for the engine to warm up while the
vehicle remains stationary. Start driving right
away, but at moderate engine speeds.
Manual transmission
Remote control in the ignition lock or, with
Comfort Access, inside the vehicle, refer to
page 40.
1. Depress the brake.
2. Depress the clutch and shift into neutral.
3. Press the Start/Stop button.
The starter operates automatically for a certain
time, and stops automati cally as soon as the
engine has started.
Automatic transmission
Remote control in the ignition lock or, with
Comfort Access, inside the vehicle, refer to
page 40.
1. Depress the brake.
2. Move the selector lever to position P.
3. Press the Start/Stop button.
The starter operates automatically for a certain
time, and stops automati cally as soon as the
engine has started.
Sport automatic transmission with
double clutch
Remote control in the ignition lock or, with
Comfort Access, inside the vehicle, refer to
page 40.
1. Depress the brake.
2. Press the Start/Stop button.
The engine starts independent of the current
transmission position.
00320051004F004C00510048000300280047004C0057004C005200510003
Page 81 of 311
76
ControlsDriving
Cruise control is not deactivated by depressing
the accelerator pedal. Once the accelerator
pedal is released, the stored speed is achieved
again and maintained.
Warning lamp
The warning lamp lights up when
cruise control is deactivated due to
control intervention by the DSC, for
example. A message appears on the Control
Display.
Resuming a previously stored speed
Press the button, arrow 4.
The last stored speed is resumed and
maintained.
In the following instance s, the stored speed is
deleted and can no longer be resumed:
> When driving stability control systems are
intervening.
> In cars with manual transmission: when you
shift gears very slowly or shift to neutral.
> In cars with automati c transmission: when
you engage selector lever position N.
> In cars with Sport automatic transmission
with double clutch: when you engage
selector lever position N.
> When the ignition is switched off
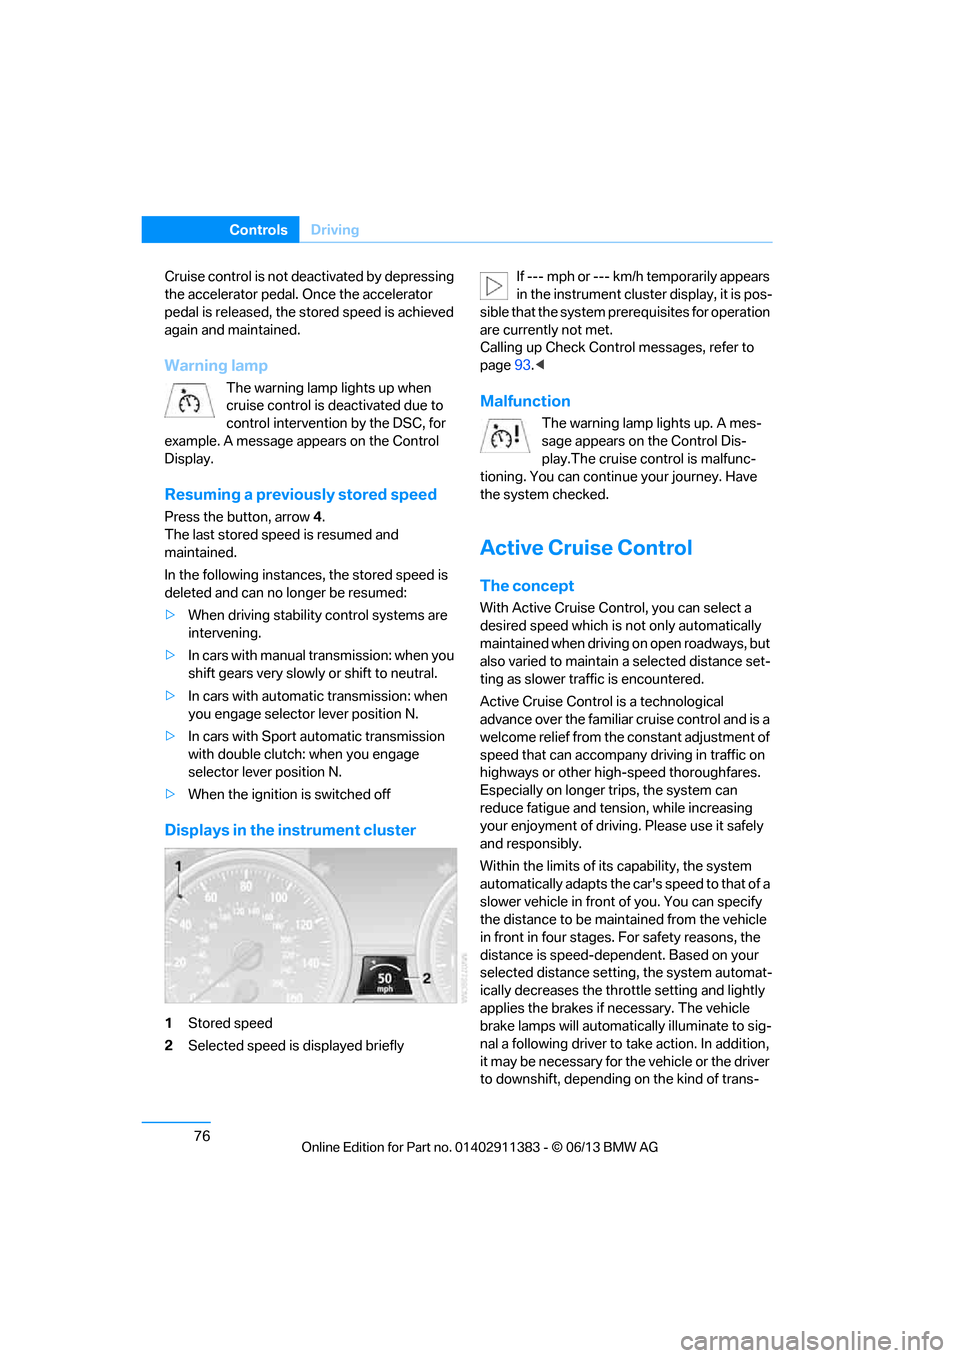
Displays in the instrument cluster
1Stored speed
2 Selected speed is displayed briefly If --- mph or --- km/h temporarily appears
in the instrument cluster display, it is pos-
sible that the system prerequisites for operation
are currently not met.
Calling up Check Contro l messages, refer to
page 93.<
Malfunction
The warning lamp lights up. A mes-
sage appears on the Control Dis-
play.The cruise control is malfunc-
tioning. You can continue your journey. Have
the system checked.
Active Cruise Control
The concept
With Active Cruise Cont rol, you can select a
desired speed which is not only automatically
maintained when driving on open roadways, but
also varied to maintain a select ed distance set-
ting as slower traffic is encountered.
Active Cruise Control is a technological
advance over the familiar cruise control and is a
welcome relief from the constant adjustment of
speed that can accompany driving in traffic on
highways or other high-speed thoroughfares.
Especially on longer trips, the system can
reduce fatigue and tens ion, while increasing
your enjoyment of driving. Please use it safely
and responsibly.
Within the limits of its capability, the system
automatically adapts the ca r's speed to that of a
slower vehicle in front of you. You can specify
the distance to be main tained from the vehicle
in front in four stages. For safety reasons, the
distance is speed-depe ndent. Based on your
selected distance setting, the system automat-
ically decreases the thro ttle setting and lightly
applies the brakes if necessary. The vehicle
brake lamps will automati cally illuminate to sig-
nal a following driver to take action. In addition,
it may be necessary for the vehicle or the driver
to downshift, depending on the kind of trans-
00320051004F004C00510048000300280047004C0057004C005200510003
Page 85 of 311
80
ControlsDriving
3Selected distance to vehicle ahead
The indicator lights up as soon as the
system is activated.
4 Selected desired speed is temporarily
displayed
If --- mph or --- km/h temporarily appears
in the instrument cluster display, it is pos-
sible that the system prerequisites for operation
are currently not met. Calling up Check Control
messages, refer to page 93.<
Warning lamps
The indicator 2 flashes in red; a
signal sounds.
The system indicates that you
must brake and/or maneuver the
vehicle yourself. Active Cruise
Control cannot automatically restore the dis-
tance to the vehicle ahead.
This indicator does not release you from your
responsibility to adapt your desired speed and
driving style to prevailing driving conditions.
The indicator 2 flashes in yellow.
The prerequisites for operating
Active Cruise Control are not met,
e.g. as a result of ABS or DSC
interventions. Active Cruise Con-
trol is deactivated. Yo u can reactivate the sys-
tem, if desired, by briefly pressing or pulling the
lever when road and traffic conditions permit. It
is not possible to resume a stored speed.
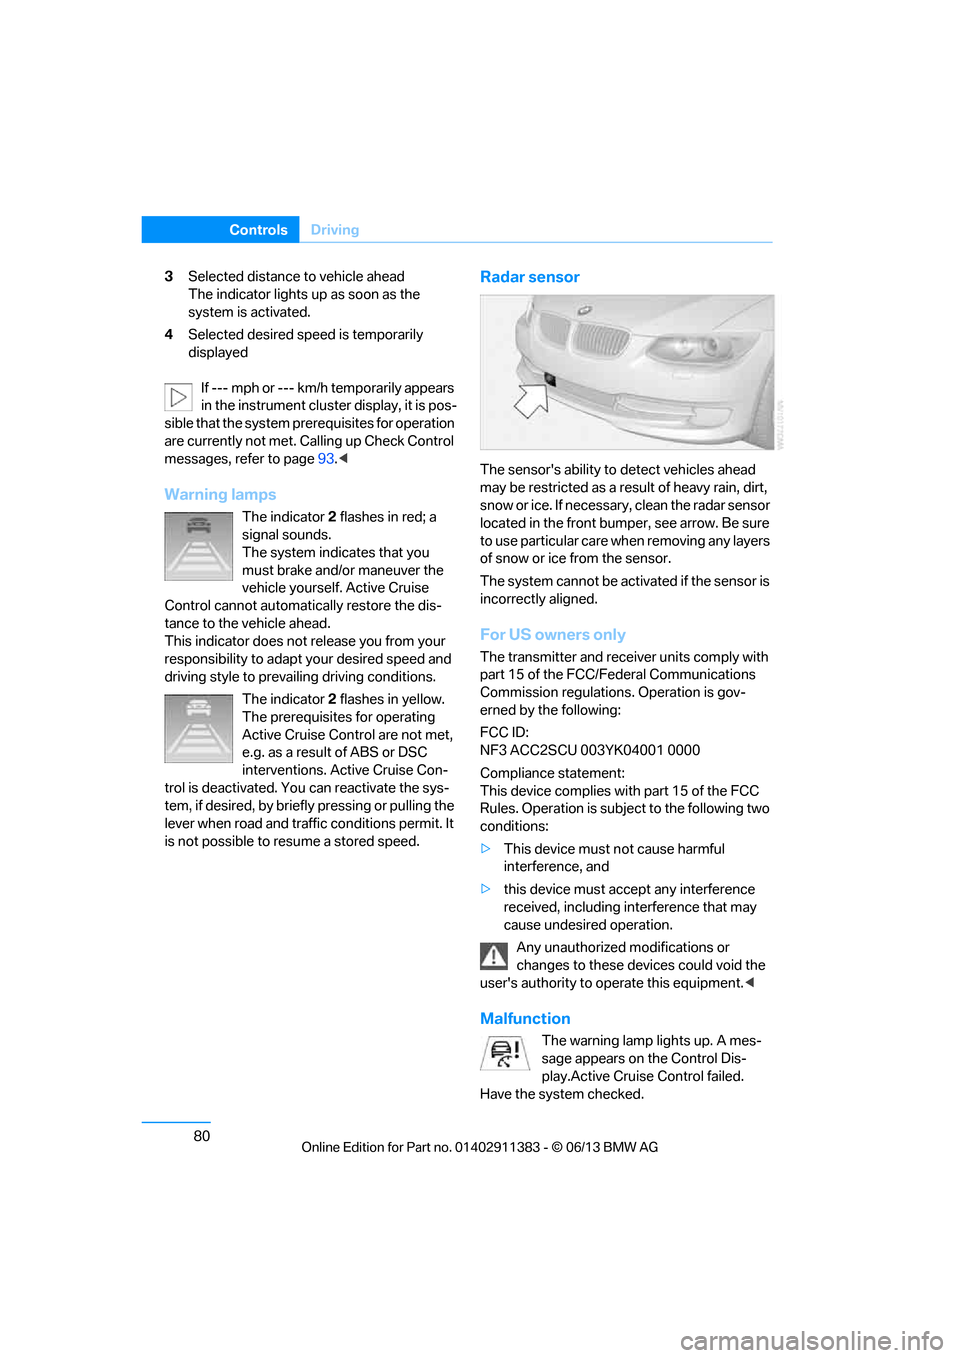
Radar sensor
The sensor's ability to detect vehicles ahead
may be restricted as a result of heavy rain, dirt,
snow or ice. If necessary, clean the radar sensor
located in the front bump er, see arrow. Be sure
to use particular care when removing any layers
of snow or ice from the sensor.
The system cannot be acti vated if the sensor is
incorrectly aligned.
For US owners only
The transmitter and receiver units comply with
part 15 of the FCC/Federal Communications
Commission regulations. Operation is gov-
erned by the following:
FCC ID:
NF3 ACC2SCU 003YK04001 0000
Compliance statement:
This device complies wi th part 15 of the FCC
Rules. Operation is subj ect to the following two
conditions:
> This device must not cause harmful
interference, and
> this device must accept any interference
received, including in terference that may
cause undesired operation.
Any unauthorized modifications or
changes to these devi ces could void the
user's authority to operate this equipment. <
Malfunction
The warning lamp lights up. A mes-
sage appears on the Control Dis-
play.Active Cruise Control failed.
Have the system checked.
00320051004F004C00510048000300280047004C0057004C005200510003
Page 97 of 311
92
ControlsControls overview
Date
The settings are stored for the remote control
currently in use, refer also to Personal Profile on
page32.
Setting the date
In the instrument cluster
To set the dd/mm or mm/dd date format, refer
to Setting the date format below.
1. Push button 1 in the turn signal/high beam
lever up or down repe atedly until the appro-
priate symbol appear s in the display,
accompanied by the date and the word
"SET".
2. Press button 2.
3. Use button 1 to set the day of the month.
4. Press button 2 to confirm the entry.
5. Set the month and the ye a r i n t he s a m e w a y .
6. Press button 2.
The system stores the new date.
Via iDrive
1. "Settings"
2. "Time/Date"
3. "Date:"
4. Turn the controller until the desired day is
displayed, and press the controller.
5. Create the necessary settings for the
month and year.
The date is stored.
Setting the date format
1. "Settings"
2. "Time/Date"
3. "Format:"
4. Select the desired format.
The date format is stored.
Check Control
The concept
The Check Control monitors vehicle functions
and alerts you to any malfunctions in the sys-
tems monitored. Such a Check Control mes-
sage includes indicato r and warning lamps in
the instrument cluster and, in some circum-
stances, an acoustic signal as well as text
messages at the top of the Control Display.
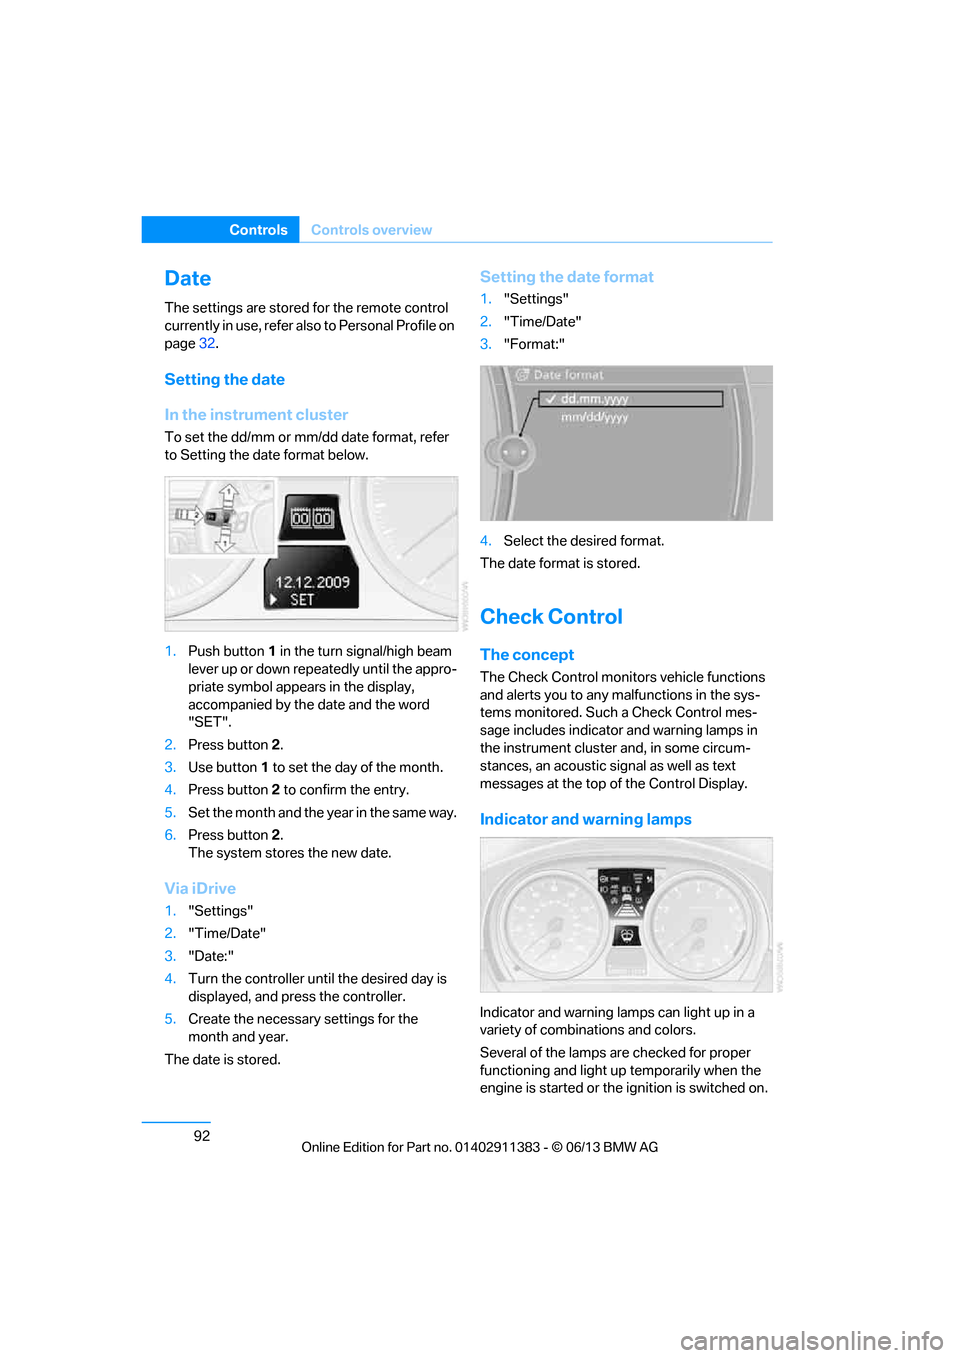
Indicator and warning lamps
Indicator and warning lamps can light up in a
variety of combinations and colors.
Several of the lamps are checked for proper
functioning and light up temporarily when the
engine is started or the ignition is switched on.
00320051004F004C00510048000300280047004C0057004C005200510003
Page 98 of 311
93
Controls overview
Controls
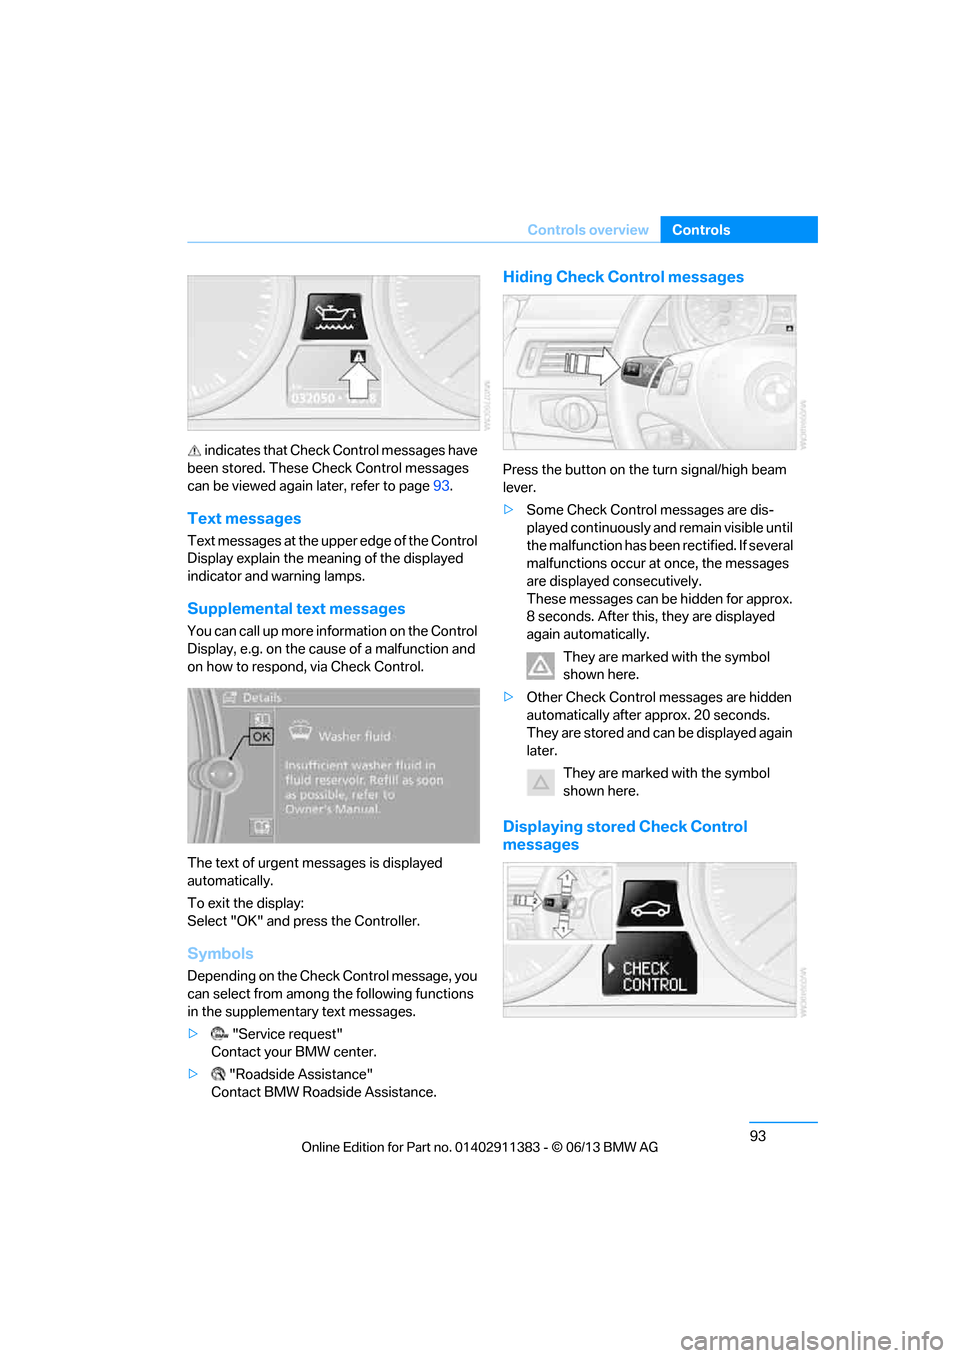
indicates that Check Control messages have
been stored. These Check Control messages
can be viewed again later, refer to page93.
Text messages
Text messages at the uppe r edge of the Control
Display explain the meaning of the displayed
indicator and warning lamps.
Supplemental text messages
You can call up more information on the Control
Display, e.g. on the cause of a malfunction and
on how to respond, via Check Control.
The text of urgent messages is displayed
automatically.
To exit the display:
Select "OK" and press the Controller.
Symbols
Depending on the Check Control message, you
can select from among the following functions
in the supplementary text messages.
> "Service request"
Contact your BMW center.
> "Roadside Assistance"
Contact BMW Roadside Assistance.
Hiding Check Control messages
Press the button on the turn signal/high beam
lever.
> Some Check Control messages are dis-
played continuously an d remain visible until
the malfunction has been rectified. If several
malfunctions occur at once, the messages
are displayed consecutively.
These messages can be hidden for approx.
8 seconds. After this, they are displayed
again automatically.
They are marked with the symbol
shown here.
> Other Check Control messages are hidden
automatically after approx. 20 seconds.
They are stored and can be displayed again
later.
They are marked with the symbol
shown here.
Displaying stored Check Control
messages
00320051004F004C00510048000300280047004C0057004C005200510003
Page 106 of 311
101
Technology for driving comfort and safety
Controls
1.
"Vehicle Info"
2. "Vehicle status"
3. "Reset"
4. Start the engine – do not drive away.
5. Start the initialization by selecting "Reset".
6. Start driving.
The initialization is completed during driv-
ing, which can be interrupted at any time.
When driving resumes, the initialization is con-
tinued automatically. <
Indication of a flat tire
The warning lamps light up in yellow
and red. A message appears on the
Control Display. In addition, an
acoustic signal sounds. There is a flat
tire or a major loss in tire pressure.
1. Reduce speed and stop the vehicle with
caution. Avoid sudden braking and steering
maneuvers.
If the vehicle is not equipped with run-flat
tires, do not continue driving; continuing
to drive can result in serious accidents.<
When a flat tire is re ported, the Dynamic Stabil-
ity Control DSC is activated.
Actions in the event of a flat tire
Run-flat tires
With a damaged tire, is possible to continue
driving at speeds of up to 50 mph/80 km/h.
When driving with a damaged tire: 1.
Avoid sudden braking and steering
maneuvers.
2. Do not exceed a speed of 50 mph/80 km/h.
3. At the next opportunity, check the inflation
pressure in all four tires.
If the inflation pressure in all four tires is cor-
rect, the Flat Tire Monitor might not have
been initialized. The system must then be
initialized.
Possible driving distance with complete loss of
tire pressure:
The distance it is possible to drive with a flat tire
depends on the load and the stress on the vehi-
cle while driving.
With an average load, it may be possible to drive
for approx. 50 miles/80 km.
When driving with damaged tires, the handling
characteristics change, e. g. the vehicle will skid
sooner when braking, braking distances will be
longer, or self-steerin g response will change.
Adapt your driving style accordingly. Avoid
turning abruptly and driving over obstacles
such as curbs, potholes, etc.
Since the possible drivin g distance depends to
a considerable degree on the strain exerted on
the vehicle while driving, it can be shorter or,
with a gentle driving style, can also be longer,
depending on the speed, road condition, out-
side temperature, vehicle load, etc.
Drive cautiously and do not exceed a
speed of 50 mph/80 km/h.
When there is a tire pr essure loss, the handling
characteristics change, e.g. there will be
reduced directional stability during braking,
braking distances will be longer, and self-
steering response will change. <
Vibrations or loud noises while driving can
indicate final failure of the tire. Reduce
your speed and bring the vehicle to a stop;
otherwise, tire components may become
detached, which could result in an accident. Do
not continue driving; instead, contact your
BMW center. <
00320051004F004C00510048000300280047004C0057004C005200510003