stop start BMW 3 SERIES SEDAN 2013 F30 Owner's Manual
[x] Cancel search | Manufacturer: BMW, Model Year: 2013, Model line: 3 SERIES SEDAN, Model: BMW 3 SERIES SEDAN 2013 F30Pages: 248, PDF Size: 5.21 MB
Page 19 of 248
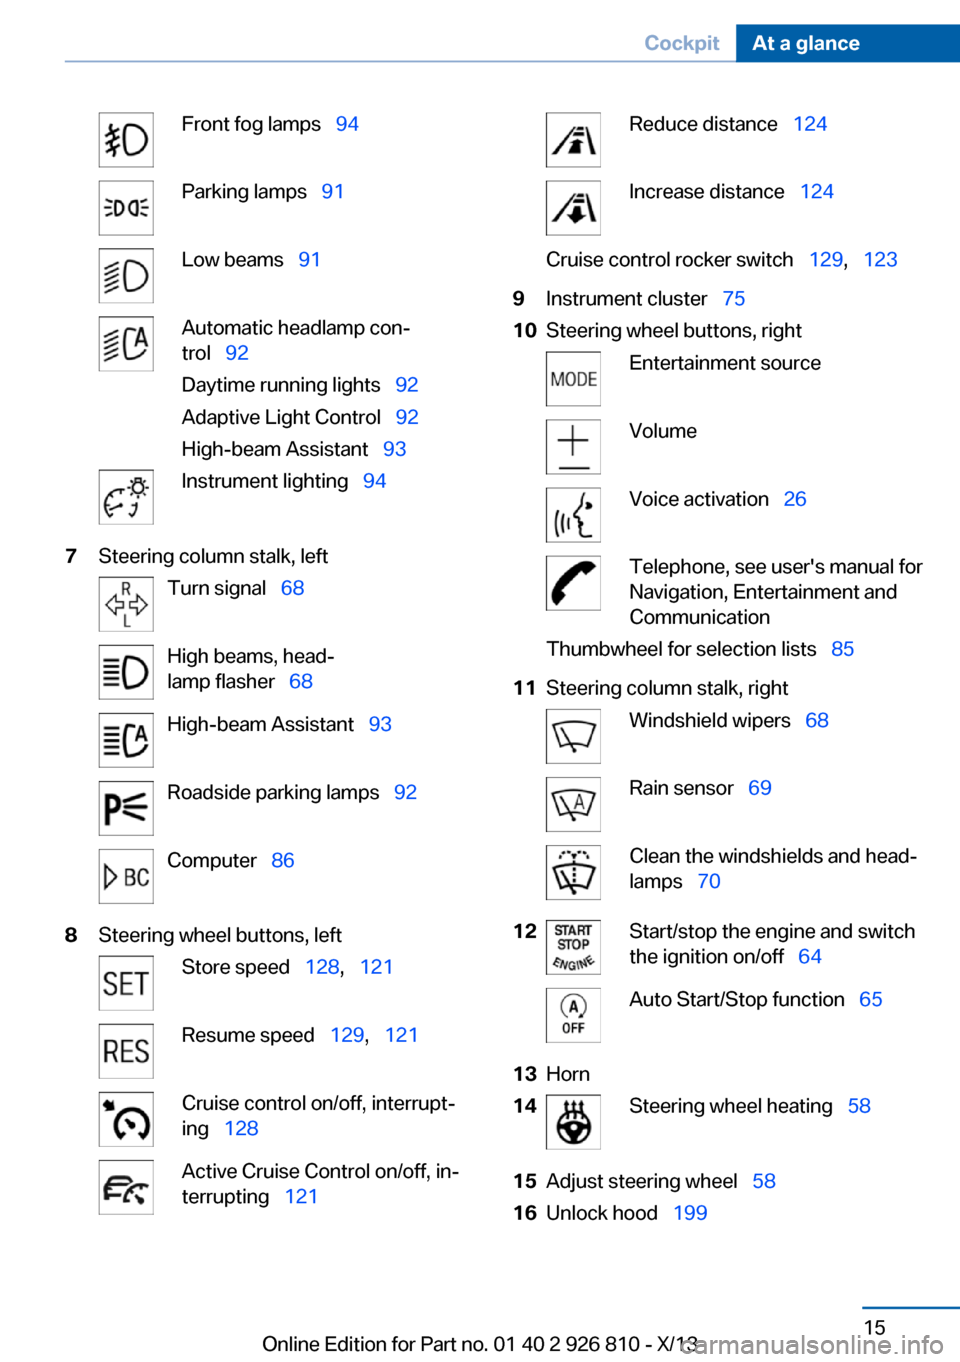
Front fog lamps‚Äā‚ÄÖ94Parking lamps‚Äā‚ÄÖ91Low beams‚Äā‚ÄÖ91Automatic headlamp con‚Äź
trol‚Äā‚ÄÖ 92
Daytime running lights‚Äā‚ÄÖ 92
Adaptive Light Control‚Äā‚ÄÖ 92
High-beam Assistant‚Äā‚ÄÖ 93Instrument lighting‚Äā‚ÄÖ947Steering column stalk, leftTurn signal‚Äā‚ÄÖ68High beams, head‚Äź
lamp flasher‚Äā‚ÄÖ 68High-beam Assistant‚Äā‚ÄÖ 93Roadside parking lamps‚Äā‚ÄÖ 92Computer‚Äā‚ÄÖ868Steering wheel buttons, leftStore speed‚Äā‚ÄÖ 128,‚Äā‚ÄÖ121Resume speed‚Äā‚ÄÖ 129,‚Äā‚ÄÖ121Cruise control on/off, interrupt‚Äź
ing‚Äā‚ÄÖ 128Active Cruise Control on/off, in‚Äź
terrupting‚Äā‚ÄÖ 121Reduce distance‚Äā‚ÄÖ 124Increase distance‚Äā‚ÄÖ 124Cruise control rocker switch‚Äā‚ÄÖ 129,‚Äā‚ÄÖ1239Instrument cluster‚Äā‚ÄÖ 7510Steering wheel buttons, rightEntertainment sourceVolumeVoice activation‚Äā‚ÄÖ26Telephone, see user's manual for
Navigation, Entertainment and
CommunicationThumbwheel for selection lists‚Äā‚ÄÖ 8511Steering column stalk, rightWindshield wipers‚Äā‚ÄÖ68Rain sensor‚Äā‚ÄÖ69Clean the windshields and head‚Äź
lamps‚Äā‚ÄÖ 7012Start/stop the engine and switch
the ignition on/off‚Äā‚ÄÖ 64Auto Start/Stop function‚Äā‚ÄÖ 6513Horn14Steering wheel heating‚Äā‚ÄÖ5815Adjust steering wheel‚Äā‚ÄÖ5816Unlock hood‚Äā‚ÄÖ199Seite 15CockpitAt a glance15
Online Edition for Part no. 01 40 2 926 810 - X/13
Page 39 of 248
Take the used battery to a recycling
center or to your service center.
New remote controls New remote controls are available from the
service center.
Loss of the remote controls Lost remote controls can be blocked by your
service center.
Emergency detection of remote
control
It is possible to switch on the ignition or start
the engine in situations such as the following:‚Ė∑Interference of radio transmission to re‚Äź
mote control by external sources.‚Ė∑Discharged battery in the remote control.‚Ė∑Interference of radio transmission by mo‚Äź
bile devices in close proximity to the re‚Äź
mote control.‚Ė∑Interference of radio transmission by
charger while charging items such as mo‚Äź
bile devices in the vehicle.
A Check Control message is displayed if an at‚Äź
tempt is made to switch on the ignition or start
the engine.
Starting the engine with emergency
detection of the remote control
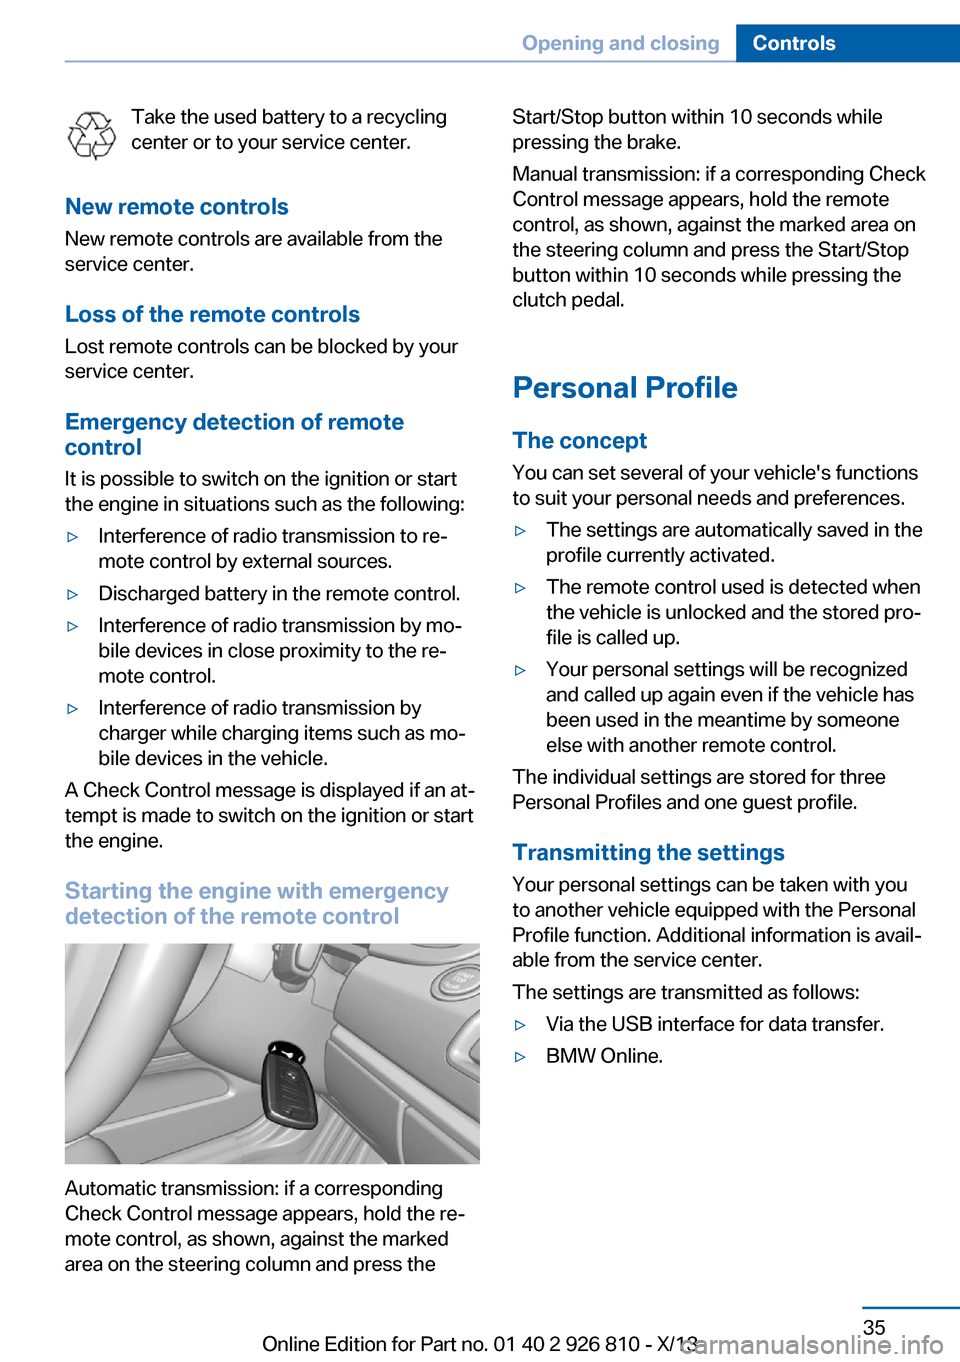
Automatic transmission: if a corresponding
Check Control message appears, hold the re‚Äź
mote control, as shown, against the marked
area on the steering column and press the
Start/Stop button within 10 seconds while
pressing the brake.
Manual transmission: if a corresponding Check
Control message appears, hold the remote
control, as shown, against the marked area on
the steering column and press the Start/Stop
button within 10 seconds while pressing the
clutch pedal.
Personal Profile
The concept You can set several of your vehicle's functions
to suit your personal needs and preferences.‚Ė∑The settings are automatically saved in the
profile currently activated.‚Ė∑The remote control used is detected when
the vehicle is unlocked and the stored pro‚Äź
file is called up.‚Ė∑Your personal settings will be recognized
and called up again even if the vehicle has
been used in the meantime by someone
else with another remote control.
The individual settings are stored for three
Personal Profiles and one guest profile.
Transmitting the settings
Your personal settings can be taken with you
to another vehicle equipped with the Personal
Profile function. Additional information is avail‚Äź
able from the service center.
The settings are transmitted as follows:
‚Ė∑Via the USB interface for data transfer.‚Ė∑BMW Online.Seite 35Opening and closingControls35
Online Edition for Part no. 01 40 2 926 810 - X/13
Page 60 of 248
General information
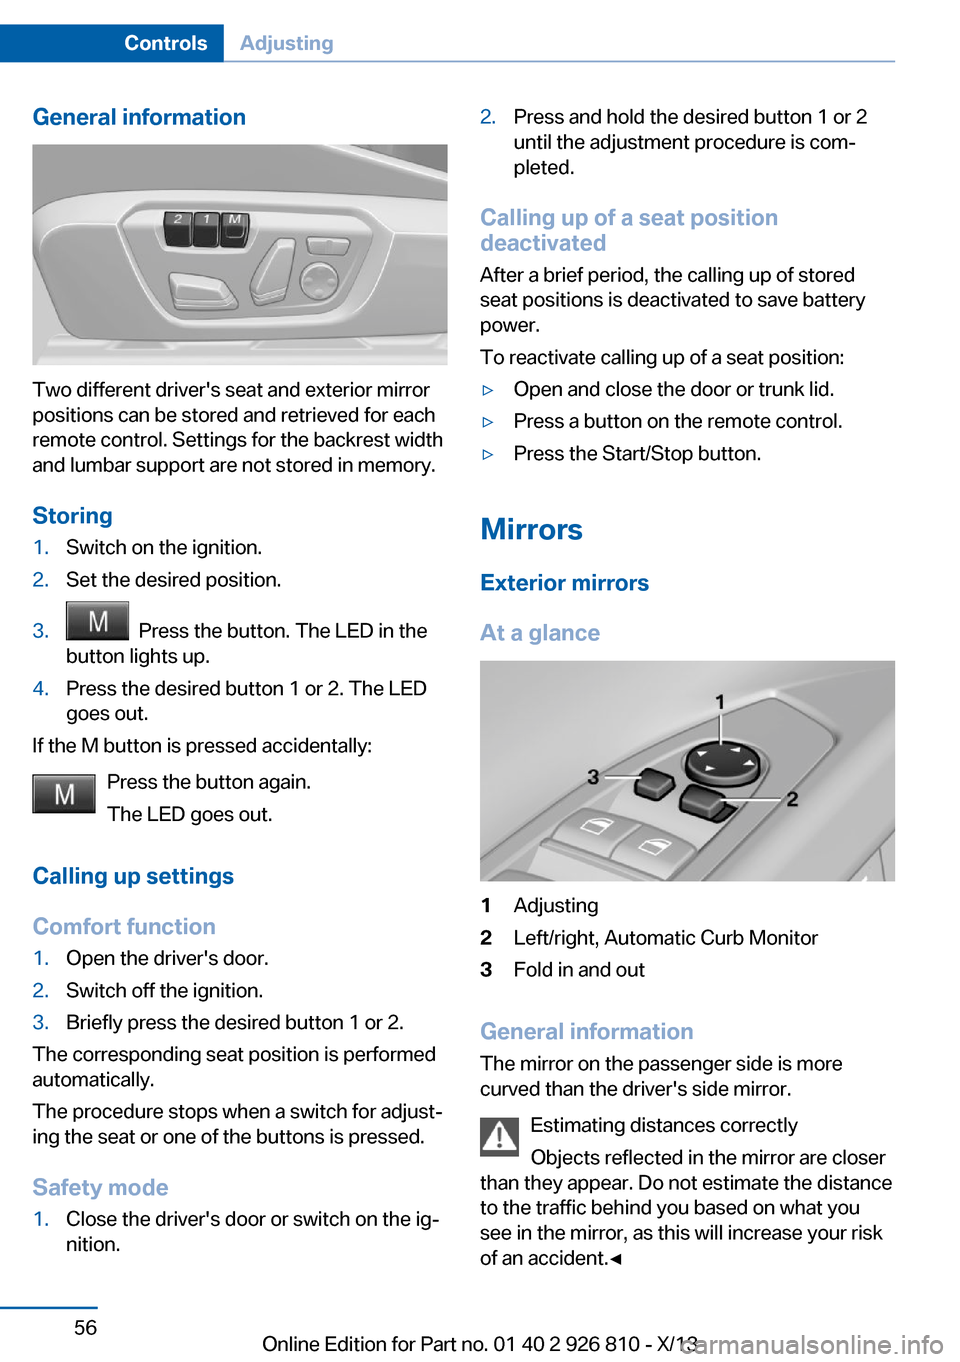
Two different driver's seat and exterior mirror
positions can be stored and retrieved for each
remote control. Settings for the backrest width
and lumbar support are not stored in memory.
Storing
1.Switch on the ignition.2.Set the desired position.3. Press the button. The LED in the
button lights up.4.Press the desired button 1 or 2. The LED
goes out.
If the M button is pressed accidentally:
Press the button again.
The LED goes out.
Calling up settings
Comfort function
1.Open the driver's door.2.Switch off the ignition.3.Briefly press the desired button 1 or 2.
The corresponding seat position is performed
automatically.
The procedure stops when a switch for adjust‚Äź
ing the seat or one of the buttons is pressed.
Safety mode
1.Close the driver's door or switch on the ig‚Äź
nition.2.Press and hold the desired button 1 or 2
until the adjustment procedure is com‚Äź
pleted.
Calling up of a seat position
deactivated
After a brief period, the calling up of stored
seat positions is deactivated to save battery
power.
To reactivate calling up of a seat position:
‚Ė∑Open and close the door or trunk lid.‚Ė∑Press a button on the remote control.‚Ė∑Press the Start/Stop button.
Mirrors
Exterior mirrors
At a glance
1Adjusting2Left/right, Automatic Curb Monitor3Fold in and out
General information
The mirror on the passenger side is more
curved than the driver's side mirror.
Estimating distances correctly
Objects reflected in the mirror are closer
than they appear. Do not estimate the distance
to the traffic behind you based on what you
see in the mirror, as this will increase your risk
of an accident.‚óÄ
Seite 56ControlsAdjusting56
Online Edition for Part no. 01 40 2 926 810 - X/13
Page 67 of 248
DrivingVehicle equipment
All standard, country-specific and optional
equipment that is offered in the model series is
described in this chapter. Therefore, equip‚Äź
ment is also described that is not available in a
vehicle, e. g., because of the selected optional
equipment or country variant. This also applies
for safety-related functions and systems.
Start/Stop button The concept Pressing the Start/Stop button
switches the ignition on or off
and starts the engine.
Automatic transmission: The
engine starts if the brake is de‚Äź
pressed while pressing the Start/Stop button.
Manual transmission: the engine starts if the
clutch pedal is depressed when the Start/Stop
button is pressed.
Ignition onAutomatic transmission: Press the Start/Stop
button but do not depress the brake.
Manual-shift transmission: press the Start/
Stop button, and do not press on the clutch
pedal at the same time.
All vehicle systems are ready for operation.
Most of the indicator and warning lamps in the
instrument cluster light up for varying lengths
of time.
To save battery power when the engine is off,
switch off the ignition and any unnecessary
electronic systems/power consumers.Note
If the engine is switched off and the ignition is
switched on, the system automatically
switches to the radio ready state when the
door is opened if the lights are switched off or
the daytime running lights are switched on.
Ignition off
Automatic transmission: Press the Start/Stop
button again, but do not depress the brake.
Manual-shift transmission: press the Start/
Stop button again, and do not press on the
clutch pedal at the same time.
All indicator lamps in the instrument cluster go
out.
To save battery power when the engine is off,
switch off the ignition and any unnecessary
electronic systems/power consumers.
Transmission position P with the ignition
off
When ignition is switched off, selector lever
position P is engaged automatically. When in
an automatic car wash, for example, ensure
that the ignition is not switched off acciden‚Äź
tally.‚óÄ
The ignition automatically cuts off while the
vehicle is stationary and the engine is stopped:‚Ė∑When locking the vehicle, and when the
low beams are activated.‚Ė∑Shortly before the battery is discharged
completely, so that the engine can still be
started. This function is only available
when the low beams are switched off.‚Ė∑When opening or closing the driver door, if
the driver's seat belt is unbuckled and the
low beams are switched off.‚Ė∑While the driver's seat belt is unbuckled, if
the driver's door is open and the low
beams are switched off.Seite 63DrivingControls63
Online Edition for Part no. 01 40 2 926 810 - X/13
Page 68 of 248
When the ignition is switched off, by opening
or closing the driver's door or unbuckling the
driver's seat belt, the radio ready state remains
active.
Radio ready state
Activate radio ready state:‚Ė∑When the engine is running: press the
Start/Stop button.
Some electronic systems/power consumers
remain ready for operation.
The radio ready state switches off automati‚Äź
cally:
‚Ė∑After approx. 8 minutes.‚Ė∑When the vehicle is locked using the cen‚Äź
tral locking system.‚Ė∑Shortly before the battery is discharged
completely, so that the engine can still be
started.
Starting the engine
Hints Enclosed areas
Do not let the engine run in enclosed
areas, since breathing in exhaust fumes may
lead to loss of consciousness and death. The
exhaust gases contain carbon monoxide, an
odorless and colorless, but highly toxic gas.‚óÄ
Unattended vehicle
Do not leave the vehicle unattended with
the engine running; doing so poses a risk of
danger.
Before leaving the vehicle with the engine run‚Äź
ning, set the parking brake and place the trans‚Äź
mission in selector lever position P or neutral
to prevent the vehicle from moving.‚óÄ
Repeated starting in quick succession
Avoid repeated unsuccessful attempts to
start the vehicle or starting the vehicle several
times in quick succession. Otherwise, the fuel
is not burned or is inadequately burned, posing
a risk of overheating and damage to the cata‚Äź
lytic converter.‚óÄ
Do not wait for the engine to warm-up while
the vehicle remains stationary. Start driving at
moderate engine speeds.
Diesel engine
If the engine is cold and temperatures are be‚Äź
low approx. 32 ‚ĄČ/0 ‚ĄÉ, the start process may
be delayed somewhat due to automatic pre‚Äź
heating.
A Check Control message is displayed.
Automatic transmission
Starting the engine1.Depress the brake pedal.2.Press the Start/Stop button.
The ignition is activated automatically for a
certain time and is stopped as soon as the en‚Äź
gine starts.
Manual transmission
Starting the engine
1.Depress the brake pedal.2.Press on the clutch pedal and shift to neu‚Äź
tral.3.Press the Start/Stop button.
The ignition is activated automatically for a
certain time and is stopped as soon as the en‚Äź
gine starts.
Seite 64ControlsDriving64
Online Edition for Part no. 01 40 2 926 810 - X/13
Page 69 of 248
Engine stop
Hints Take the remote control with youTake the remote control with you when
leaving the vehicle so that children, for exam‚Äź
ple, cannot start the engine.‚óÄ
Set the parking brake and further secure
the vehicle as required
Set the parking brake firmly when parking; oth‚Äź
erwise, the vehicle could roll. On steep upward
and downward inclines, further secure the ve‚Äź
hicle, for example, by turning the steering
wheel in the direction of the curb. ‚óÄ
Before driving into a car wash
In order for the vehicle to be able to roll into a
car wash, pay attention to the information re‚Äź
garding Washing in automatic car washes, re‚Äź
fer to page 223.
Automatic transmission
Switching off the engine1.Engage transmission position P with the
vehicle stopped.2.Press the Start/Stop button.
The engine is switched off.
The radio ready state is switched on.3.Set the parking brake.
Manual transmission
Switching off the engine
1.With the vehicle at a standstill, press the
Start/Stop button.2.Shift into first gear or reverse.3.Set the parking brake.Automatic Engine Start/Stop
Function
The concept The Auto Start/Stop function helps save fuel.
The system switches off the engine during a
stop, e.g., in traffic congestion or at traffic
lights. The ignition remains switched on. The
engine starts again automatically for driving
off.
Certain vehicle components may experience
additional wear as a result of this system.
Automatic mode
The Auto Start/Stop function is operational af‚Äź
ter each engine start.
This function is activated at speeds faster than
about 3 mph, approx. 5 km/h.
Engine stop
The engine is switched off automatically dur‚Äź
ing a stop under the following conditions:
Manual transmission:‚Ė∑Neutral is engaged and the clutch pedal is
not pressed.‚Ė∑The driver's seat belt is buckled or the driv‚Äź
er's door is closed.
Automatic transmission:
‚Ė∑The selector lever is in transmission posi‚Äź
tion D.‚Ė∑Brake pedal remains depressed while the
vehicle is stopped.‚Ė∑The driver's seat belt is buckled or the driv‚Äź
er's door is closed.
The air volume of the air conditioner is reduced
when the engine is switched off.
Seite 65DrivingControls65
Online Edition for Part no. 01 40 2 926 810 - X/13
Page 70 of 248
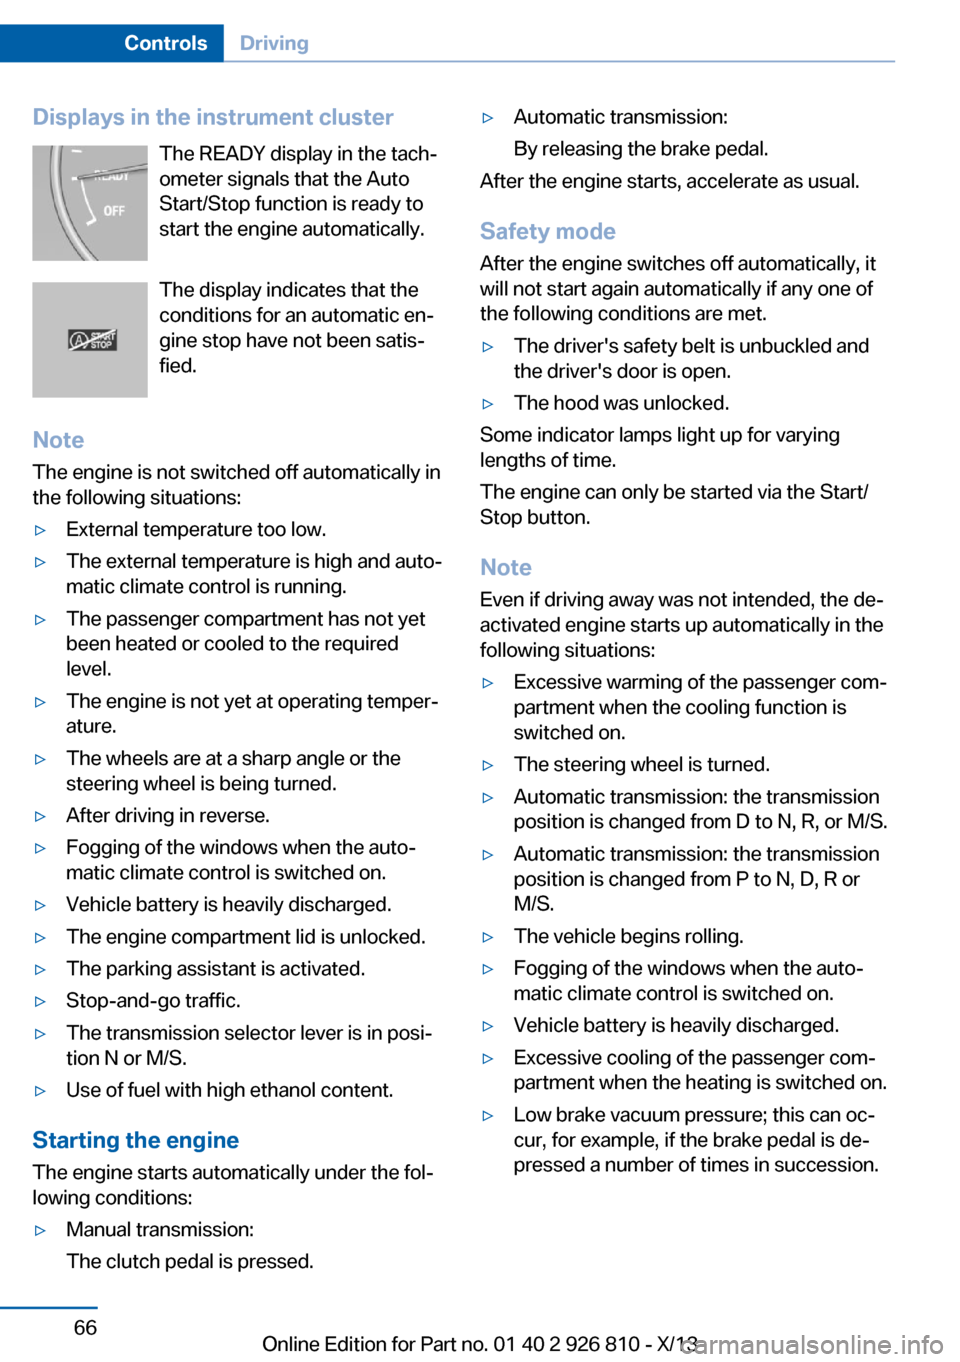
Displays in the instrument clusterThe READY display in the tach‚Äź
ometer signals that the Auto
Start/Stop function is ready to
start the engine automatically.
The display indicates that the
conditions for an automatic en‚Äź
gine stop have not been satis‚Äź
fied.
Note The engine is not switched off automatically in
the following situations:‚Ė∑External temperature too low.‚Ė∑The external temperature is high and auto‚Äź
matic climate control is running.‚Ė∑The passenger compartment has not yet
been heated or cooled to the required
level.‚Ė∑The engine is not yet at operating temper‚Äź
ature.‚Ė∑The wheels are at a sharp angle or the
steering wheel is being turned.‚Ė∑After driving in reverse.‚Ė∑Fogging of the windows when the auto‚Äź
matic climate control is switched on.‚Ė∑Vehicle battery is heavily discharged.‚Ė∑The engine compartment lid is unlocked.‚Ė∑The parking assistant is activated.‚Ė∑Stop-and-go traffic.‚Ė∑The transmission selector lever is in posi‚Äź
tion N or M/S.‚Ė∑Use of fuel with high ethanol content.
Starting the engine
The engine starts automatically under the fol‚Äź
lowing conditions:
‚Ė∑Manual transmission:
The clutch pedal is pressed.‚Ė∑Automatic transmission:
By releasing the brake pedal.
After the engine starts, accelerate as usual.
Safety mode
After the engine switches off automatically, it
will not start again automatically if any one of
the following conditions are met.
‚Ė∑The driver's safety belt is unbuckled and
the driver's door is open.‚Ė∑The hood was unlocked.
Some indicator lamps light up for varying
lengths of time.
The engine can only be started via the Start/
Stop button.
Note Even if driving away was not intended, the de‚Äź
activated engine starts up automatically in the
following situations:
‚Ė∑Excessive warming of the passenger com‚Äź
partment when the cooling function is
switched on.‚Ė∑The steering wheel is turned.‚Ė∑Automatic transmission: the transmission
position is changed from D to N, R, or M/S.‚Ė∑Automatic transmission: the transmission
position is changed from P to N, D, R or
M/S.‚Ė∑The vehicle begins rolling.‚Ė∑Fogging of the windows when the auto‚Äź
matic climate control is switched on.‚Ė∑Vehicle battery is heavily discharged.‚Ė∑Excessive cooling of the passenger com‚Äź
partment when the heating is switched on.‚Ė∑Low brake vacuum pressure; this can oc‚Äź
cur, for example, if the brake pedal is de‚Äź
pressed a number of times in succession.Seite 66ControlsDriving66
Online Edition for Part no. 01 40 2 926 810 - X/13
Page 71 of 248
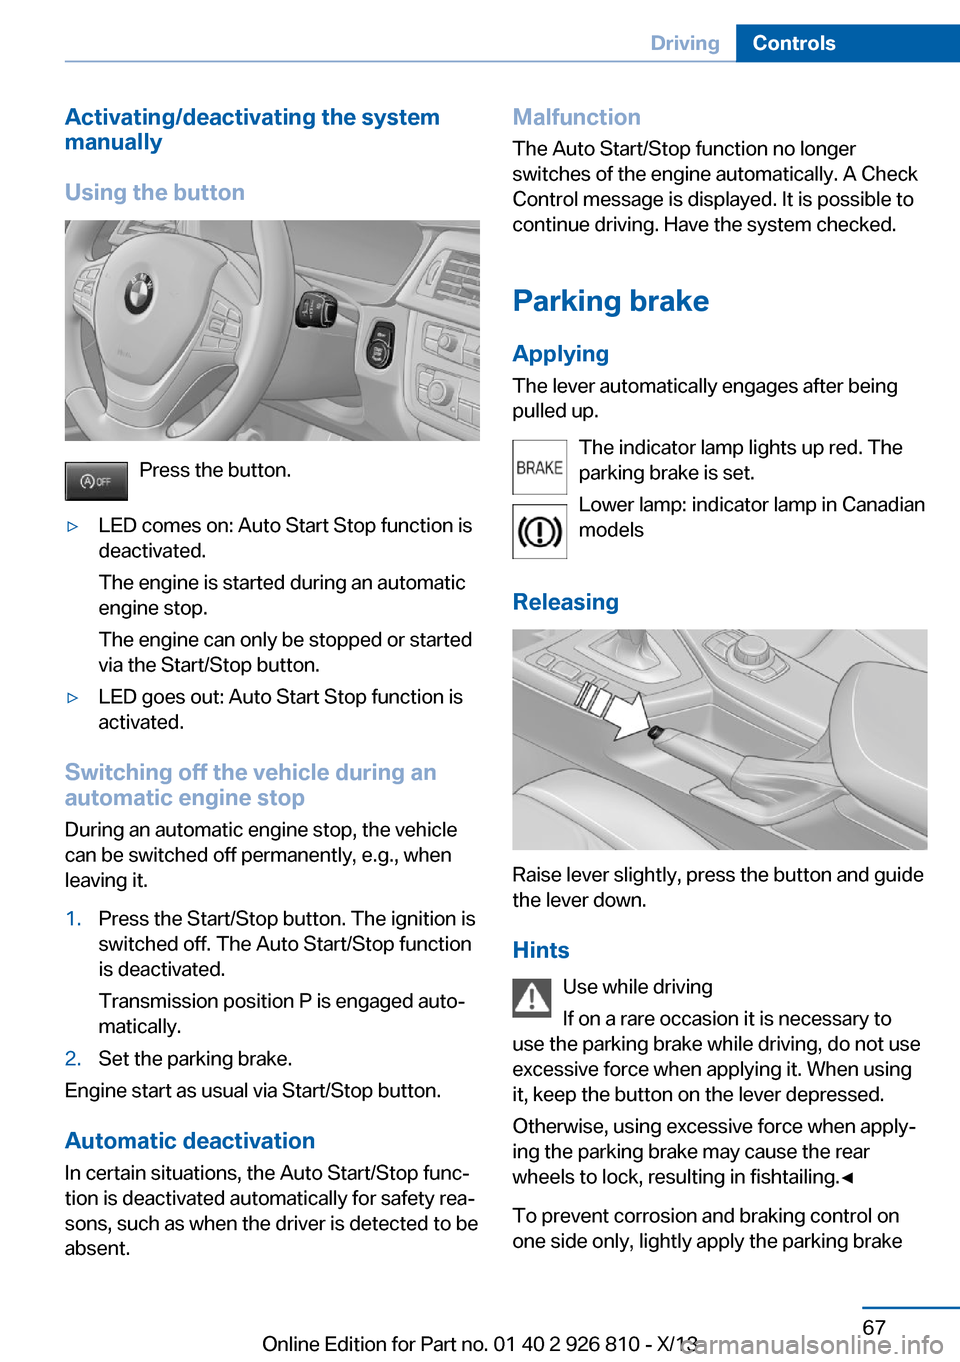
Activating/deactivating the system
manually
Using the button
Press the button.
‚Ė∑LED comes on: Auto Start Stop function is
deactivated.
The engine is started during an automatic
engine stop.
The engine can only be stopped or started
via the Start/Stop button.‚Ė∑LED goes out: Auto Start Stop function is
activated.
Switching off the vehicle during an
automatic engine stop
During an automatic engine stop, the vehicle
can be switched off permanently, e.g., when
leaving it.
1.Press the Start/Stop button. The ignition is
switched off. The Auto Start/Stop function
is deactivated.
Transmission position P is engaged auto‚Äź
matically.2.Set the parking brake.
Engine start as usual via Start/Stop button.
Automatic deactivation
In certain situations, the Auto Start/Stop func‚Äź
tion is deactivated automatically for safety rea‚Äź
sons, such as when the driver is detected to be
absent.
Malfunction
The Auto Start/Stop function no longer
switches of the engine automatically. A Check
Control message is displayed. It is possible to
continue driving. Have the system checked.
Parking brake Applying
The lever automatically engages after being
pulled up.
The indicator lamp lights up red. The
parking brake is set.
Lower lamp: indicator lamp in Canadian
models
Releasing
Raise lever slightly, press the button and guide
the lever down.
Hints Use while driving
If on a rare occasion it is necessary to
use the parking brake while driving, do not use
excessive force when applying it. When using
it, keep the button on the lever depressed.
Otherwise, using excessive force when apply‚Äź
ing the parking brake may cause the rear
wheels to lock, resulting in fishtailing.‚óÄ
To prevent corrosion and braking control on
one side only, lightly apply the parking brake
Seite 67DrivingControls67
Online Edition for Part no. 01 40 2 926 810 - X/13
Page 104 of 248
All wheels green
System is active and will issue a warning rela‚Äź
tive to the tire inflation pressures stored during
the last reset.
One wheel is yellow
A flat tire or major drop in inflation pressure in
the indicated tire.
All wheels are yellow A flat tire or major drop in inflation pressure in
several tires.
Wheels, gray
The system cannot detect a flat tire. Reasons
for this may be:‚Ė∑The system is being reset.‚Ė∑Malfunction.
Carry out reset
Reset the system after each correction of the
tire inflation pressure and after every tire or
wheel change.
1."Vehicle Info"2."Vehicle status"3. "Perform reset"4.Start the engine - do not drive away.5.Carry out the reset with "Perform reset".6.Drive away.
The tires are shown in gray and the status is
displayed.
After driving faster than 19 mph/30 km/h for a
short period, the tire inflation pressures set are
accepted as reference values. The reset is
completed automatically during driving.
After a successfully completed Reset, the
wheels on the Control Display are shown in
green and "Tire Pressure Monitor (TPM)
active" is displayed.
The trip can be interrupted at any time. If you
drive away again, the reset resumes automati‚Äź
cally.
Low tire pressure message The yellow warning lamp lights up. A
Check Control message is displayed.‚Ė∑There is a flat tire or a major loss in
tire inflation pressure.‚Ė∑No reset was performed for the system.
The system therefore issues a warning
based on the tire inflation pressures before
the last reset.1.Reduce your speed and stop cautiously.
Avoid sudden braking and steering maneu‚Äź
vers.2.Check whether the vehicle is fitted with
regular tires or run-flat tires.
Run-flat tires, refer to page 197, are la‚Äź
beled with a circular symbol containing the
letters RSC marked on the tire sidewall.
Do not continue driving without run-flat
tires
Do not continue driving if the vehicle is not
equipped with run-flat tires; continued driving
may result in serious accidents.‚óÄ
When a low inflation pressure is indicated,
DSC Dynamic Stability Control is switched on
if necessary.
Actions in the event of a flat tire
Normal tires
1.Identify the damaged tire.
Do this by checking the air pressure in all
four tires.
If the tire inflation pressure in all four tires
is correct, it is possible that a reset was not
carried out for the Tire Pressure Monitor.
Then perform the reset.Seite 100ControlsSafety100
Online Edition for Part no. 01 40 2 926 810 - X/13
Page 106 of 248
MalfunctionThe yellow warning lamp flashes andthen lights up continuously. A Check
Control message is displayed. No flat
tire or loss of tire pressure can be detected.
Display in the following situations:‚Ė∑A wheel without TPM electronics is fitted:
have the service center check it if neces‚Äź
sary.‚Ė∑Malfunction: have the system checked by
your service center.‚Ė∑TPM was unable to complete the reset.
Reset the system again.‚Ė∑Disturbance by systems or devices with
the same radio frequency: after leaving the
area of the disturbance, the system auto‚Äź
matically becomes active again.
Declaration according to NHTSA/
FMVSS 138 Tire Pressure Monitoring
System
Each tire, including the spare (if provided)
should be checked monthly when cold and in‚Äź
flated to the inflation pressure recommended
by the vehicle manufacturer on the vehicle
placard or tire inflation pressure label. (If your
vehicle has tires of a different size than the size
indicated on the vehicle placard or tire inflation
pressure label, you should determine the
proper tire inflation pressure for those tires.)
As an added safety feature, your vehicle has
been equipped with a tire pressure monitoring
system (TPMS) that illuminates a low tire pres‚Äź
sure telltale when one or more of your tires is
significantly under-inflated. Accordingly, when
the low tire pressure telltale illuminates, you
should stop and check your tires as soon as
possible, and inflate them to the proper pres‚Äź
sure. Driving on a significantly under-inflated
tire causes the tire to overheat and can lead to
tire failure. Under-inflation also reduces fuel ef‚Äź
ficiency and tire tread life, and may affect the
vehicle's handling and stopping ability. Please
note that the TPMS is not a substitute for
proper tire maintenance, and it is the driver's
responsibility to maintain correct tire pressure,
even if under-inflation has not reached the
level to trigger illumination of the TPMS low
tire pressure telltale. Your vehicle has also
been equipped with a TPMS malfunction indi‚Äź
cator to indicate when the system is not oper‚Äź
ating properly. The TPMS malfunction indica‚Äź
tor is combined with the low tire pressure
telltale. When the system detects a malfunc‚Äź
tion, the telltale will flash for approximately one
minute and then remain continuously illumi‚Äź
nated. This sequence will continue upon sub‚Äź
sequent vehicle start-ups as long as the mal‚Äź
function exists. When the malfunction indicator
is illuminated, the system may not be able to
detect or signal low tire pressure as intended.
TPMS malfunctions may occur for a variety of
reasons, including the installation of replace‚Äź
ment or alternate tires or wheels on the vehicle
that prevent the TPMS from functioning prop‚Äź
erly. Always check the TPMS malfunction tell‚Äź
tale after replacing one or more tires or wheels
on your vehicle to ensure that the replacement
or alternate tires and wheels allow the TPMS
to continue to function properly.
FTM Flat Tire Monitor The conceptThe system detects a pressure loss on the ba‚Äźsis of speed differences between the individual
wheels while driving.
In the event of a pressure loss, the diameter
and therefore the rotational speed of the corre‚Äź
sponding wheel change. This is detected and
reported as a flat tire.
The system does not measure the actual infla‚Äź
tion pressure in the tires.
Functional requirements
The system must have been initialized when
the tire inflation pressure was correct; other‚Äź
wise, reliable signaling of a flat tire is not en‚ÄźSeite 102ControlsSafety102
Online Edition for Part no. 01 40 2 926 810 - X/13