vent BMW 3 SERIES SPORTS WAGON 2014 F31 Owner's Manual
[x] Cancel search | Manufacturer: BMW, Model Year: 2014, Model line: 3 SERIES SPORTS WAGON, Model: BMW 3 SERIES SPORTS WAGON 2014 F31Pages: 253, PDF Size: 6.35 MB
Page 12 of 253
pounds. Wash your hands after handling. Used
engine oil contains chemicals that have caused
cancer in laboratory animals. Always protect
your skin by washing thoroughly with soap and
water.
Service and warranty
We recommend that you read this publication
thoroughly. Your vehicle is covered by the fol‐
lowing warranties:▷New Vehicle Limited Warranty.▷Rust Perforation Limited Warranty.▷Federal Emissions System Defect War‐
ranty.▷Federal Emissions Performance Warranty.▷California Emission Control System Lim‐
ited Warranty.
Detailed information about these warranties is
listed in the Service and Warranty Information
Booklet for US models or in the Warranty and
Service Guide Booklet for Canadian models.
Your vehicle has been specifically adapted and
designed to meet the particular operating con‐
ditions and homologation requirements in your
country and continental region in order to de‐
liver the full driving pleasure while the vehicle
is operated under those conditions. If you wish
to operate your vehicle in another country or
region, you may be required to adapt your ve‐
hicle to meet different prevailing operating
conditions and homologation requirements.
You should also be aware of any applicable
warranty limitations or exclusions for such
country or region. In such case, please contact
Customer Relations for further information.
Maintenance
Maintain the vehicle regularly to sustain the
road safety, operational reliability and the New
Vehicle Limited Warranty.
Specifications for required maintenance meas‐
ures:
▷BMW Maintenance system▷Service and Warranty Information Booklet
for US models▷Warranty and Service Guide Booklet for
Canadian models
If the vehicle is not maintained according to
these specifications, this could result in seri‐
ous damage to the vehicle. Such damage is
not covered by the BMW New Vehicle Limited
Warranty.
Data memory
Many electronic components on your vehicle
are equipped with data memories that tempo‐
rarily or permanently store technical informa‐
tion about the condition of the vehicle, events
and faults. This technical information generally
records the state of a component, a module, a system or the environment:
▷Operating mode of system components, fill
levels for instance.▷Status messages for the vehicle and from
its individual components, e.g., wheel rota‐
tion speed/vehicle speed, deceleration,
transverse acceleration.▷Malfunctions and faults in important sys‐
tem components, e.g., lights and brakes.▷Responses by the vehicle to special situa‐
tions such as airbag deployment or engag‐
ing the stability control system.▷Ambient conditions, such as temperature.
This data is purely technical in nature and is
used to detect and correct faults and to opti‐
mize vehicle functions. Motion profiles over
routes traveled cannot be created from this
data. When service offerings are used, e.g., re‐
pair services, service processes, warranty
claims, quality assurance, this technical infor‐
mation can be read out from the event and
fault memories by the service personnel, in‐
cluding the manufacturer, using special diag‐
nostic tools. You can obtain further information
there if you need it. After an error is corrected,
Seite 8Notes8
Online Edition for Part no. 01 40 2 956 752 - X/14
Page 13 of 253
the information in the fault memory is deleted
or overwritten on a continuous basis.
With the vehicle in use there are situations
where you can associate these technical data
with individuals if combined with other infor‐
mation, e.g., an accident report, damage to the
vehicle, eye witness accounts — possibly with
the assistance of an expert.
Additional functions that are contractually
agreed with the customer - such as vehicle
emergency locating - you can transmit certain
vehicle data from the vehicle.
Event Data Recorder EDR
This vehicle is equipped with an event data re‐
corder EDR. The main purpose of an EDR is to
record, in certain crash or near crash-like situa‐
tions, such as an air bag deployment or hitting
a road obstacle, data that will assist in under‐
standing how a vehicle’s systems performed.
The EDR is designed to record data related to
vehicle dynamics and safety systems for a
short period of time, typically 30 seconds or
less.
The EDR in this vehicle is designed to record
such data as:▷How various systems in your vehicle were
operating.▷Whether or not the driver and passenger
safety belts were fastened.▷How far, if at all, the driver was depressing
the accelerator and/or brake pedal.▷How fast the vehicle was traveling.
These data can help provide a better under‐
standing of the circumstances in which
crashes and injuries occur.
EDR data are recorded by your vehicle only if a
nontrivial crash situation occurs; no data are
recorded by the EDR under normal driving
conditions and no personal data, e.g., name,
gender, age, and crash location, are recorded.
However, other parties, such as law enforce‐
ment, could combine the EDR data with the
type of personally identifying data routinely ac‐
quired during a crash investigation.
To read data recorded by an EDR, special
equipment is required, and access to the vehi‐
cle or the EDR is needed. In addition to the ve‐
hicle manufacturer, other parties, such as law
enforcement, that have the special equipment,
can read the information if they have access to
the vehicle or the EDR.
Vehicle identification
number
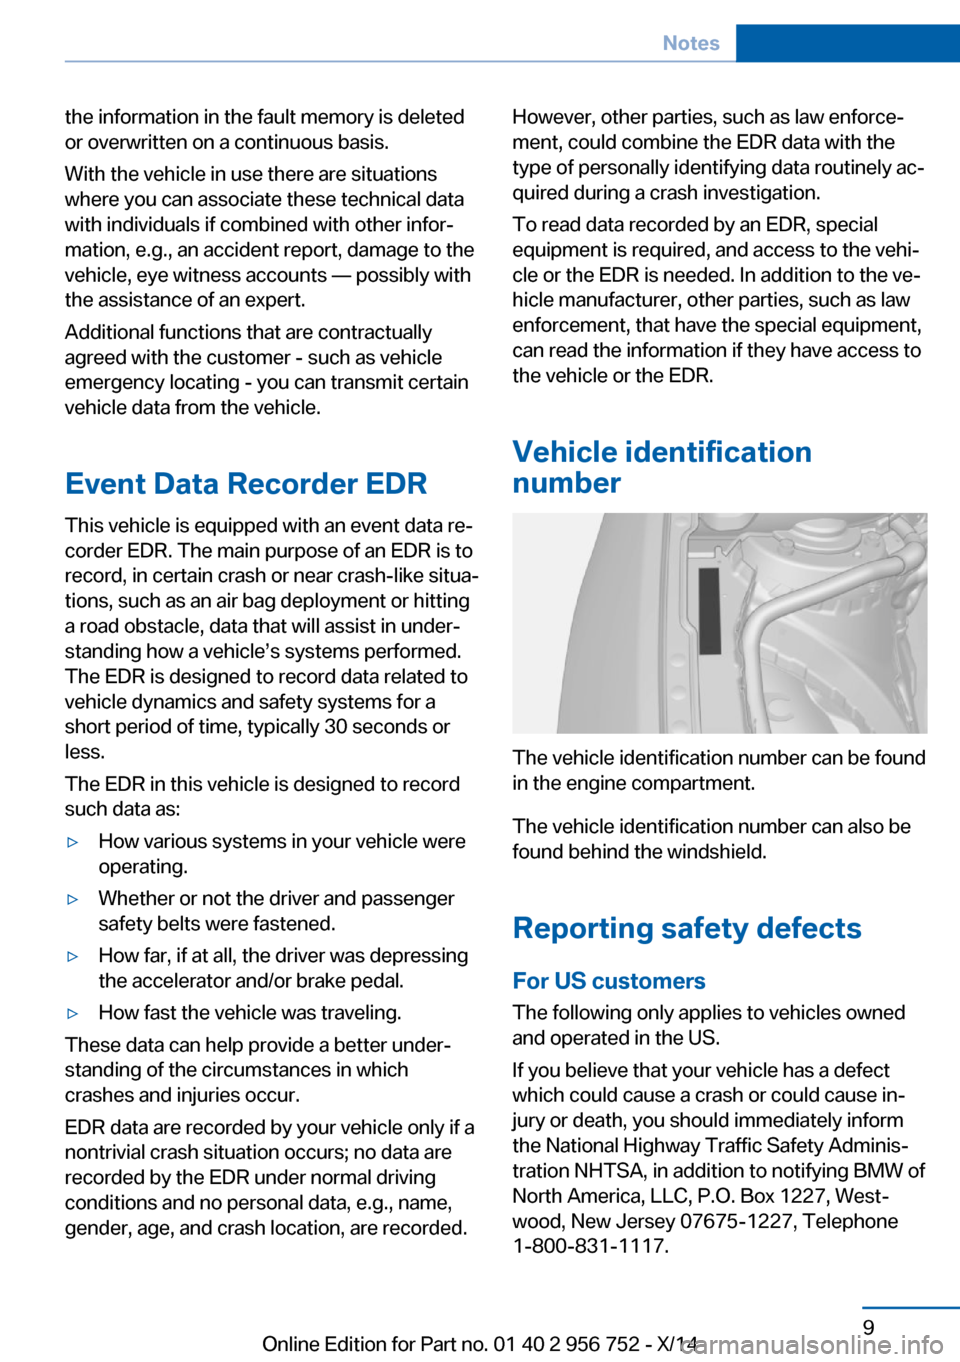
The vehicle identification number can be found
in the engine compartment.
The vehicle identification number can also be
found behind the windshield.
Reporting safety defects
For US customers The following only applies to vehicles owned
and operated in the US.
If you believe that your vehicle has a defect
which could cause a crash or could cause in‐
jury or death, you should immediately inform
the National Highway Traffic Safety Adminis‐
tration NHTSA, in addition to notifying BMW of
North America, LLC, P.O. Box 1227, West‐
wood, New Jersey 07675-1227, Telephone
1-800-831-1117.
Seite 9Notes9
Online Edition for Part no. 01 40 2 956 752 - X/14
Page 14 of 253
If NHTSA receives similar complaints, it may
open an investigation, and if it finds that a
safety defect exists in a group of vehicles, it
may order a recall and remedy campaign.
However, NHTSA cannot become involved in
individual problems between you, your dealer,
or BMW of North America, LLC.
To contact NHTSA, you may call the Vehicle
Safety Hotline toll-free at 1-888-327-4236
(TTY: 1-800-424-9153); go to http://
www.safercar.gov; or write to: Administrator,
NHTSA, 400 Seventh Street, SW., Washing‐
ton, DC 20590. You can also obtain other in‐
formation about motor vehicle safety from
http://www.safercar.gov.
For Canadian customers
Canadian customers who wish to report a
safety-related defect to Transport Canada, De‐
fect Investigations and Recalls, may call the
toll-free hotline 1-800-333-0510. You can also
obtain other information about motor vehicle
safety from http://www.tc.gc.ca/roadsafety.Seite 10Notes10
Online Edition for Part no. 01 40 2 956 752 - X/14
Page 20 of 253
16Unlock hood 202
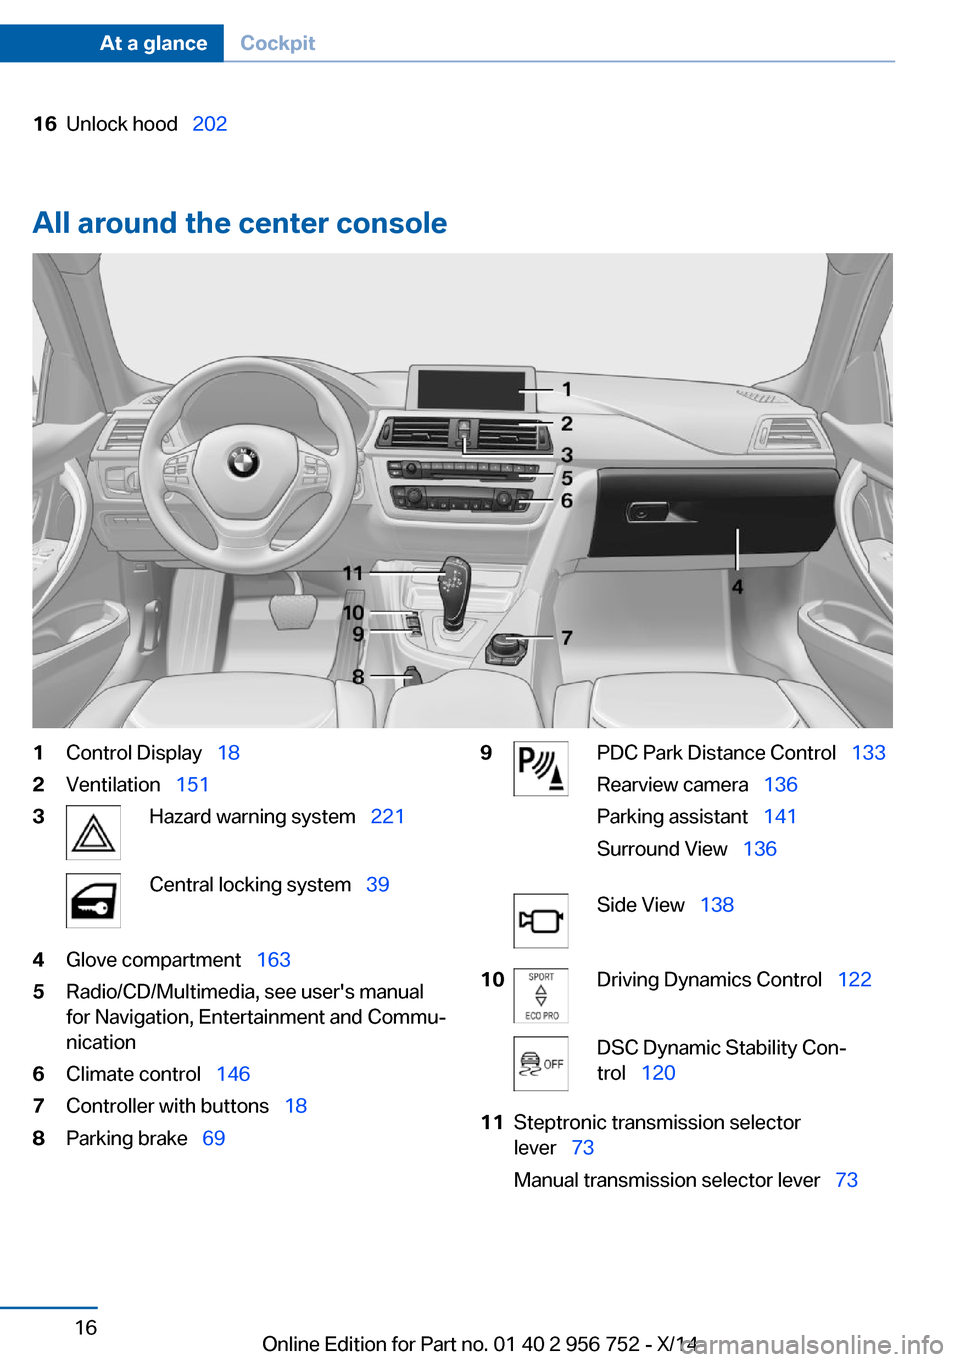
All around the center console
1Control Display 182Ventilation 1513Hazard warning system 221Central locking system 394Glove compartment 1635Radio/CD/Multimedia, see user's manual
for Navigation, Entertainment and Commu‐
nication6Climate control 1467Controller with buttons 188Parking brake 699PDC Park Distance Control 133
Rearview camera 136
Parking assistant 141
Surround View 136Side View 13810Driving Dynamics Control 122DSC Dynamic Stability Con‐
trol 12011Steptronic transmission selector
lever 73
Manual transmission selector lever 73Seite 16At a glanceCockpit16
Online Edition for Part no. 01 40 2 956 752 - X/14
Page 32 of 253
This can unnecessarily delay the establish‐
ment of a phone connection.
Instead, use the SOS button, refer to
page 221, close to the interior mirror.
Environmental conditions▷Say the commands, numbers, and letters
smoothly and with normal volume, empha‐
sis, and speed.▷Always say commands in the language of
the voice activation system.▷Keep the doors, windows, and glass sun‐
roof closed to prevent noise interference.▷Avoid making other noise in the vehicle
while speaking.Seite 28At a glanceVoice activation system28
Online Edition for Part no. 01 40 2 956 752 - X/14
Page 43 of 253
Remove the key before pulling the door
handle
Before pulling the outside door handle, remove
the key to avoid damaging the paintwork and
the key.◀
Unlock or lock the driver's door via the door
lock using the integrated key, refer to page 34.
The other doors must be unlocked or locked
from the inside.
Alarm system
The alarm system is not armed if the vehicle is
locked with the integrated key.
The alarm system is triggered when the door is
opened, if the vehicle was unlocked via the door lock.
In order to terminate this alarm, unlock vehicle
with the remote control or reel on the ignition,
if needed, through emergency detection of the
remote control, refer to page 35.
From the inside
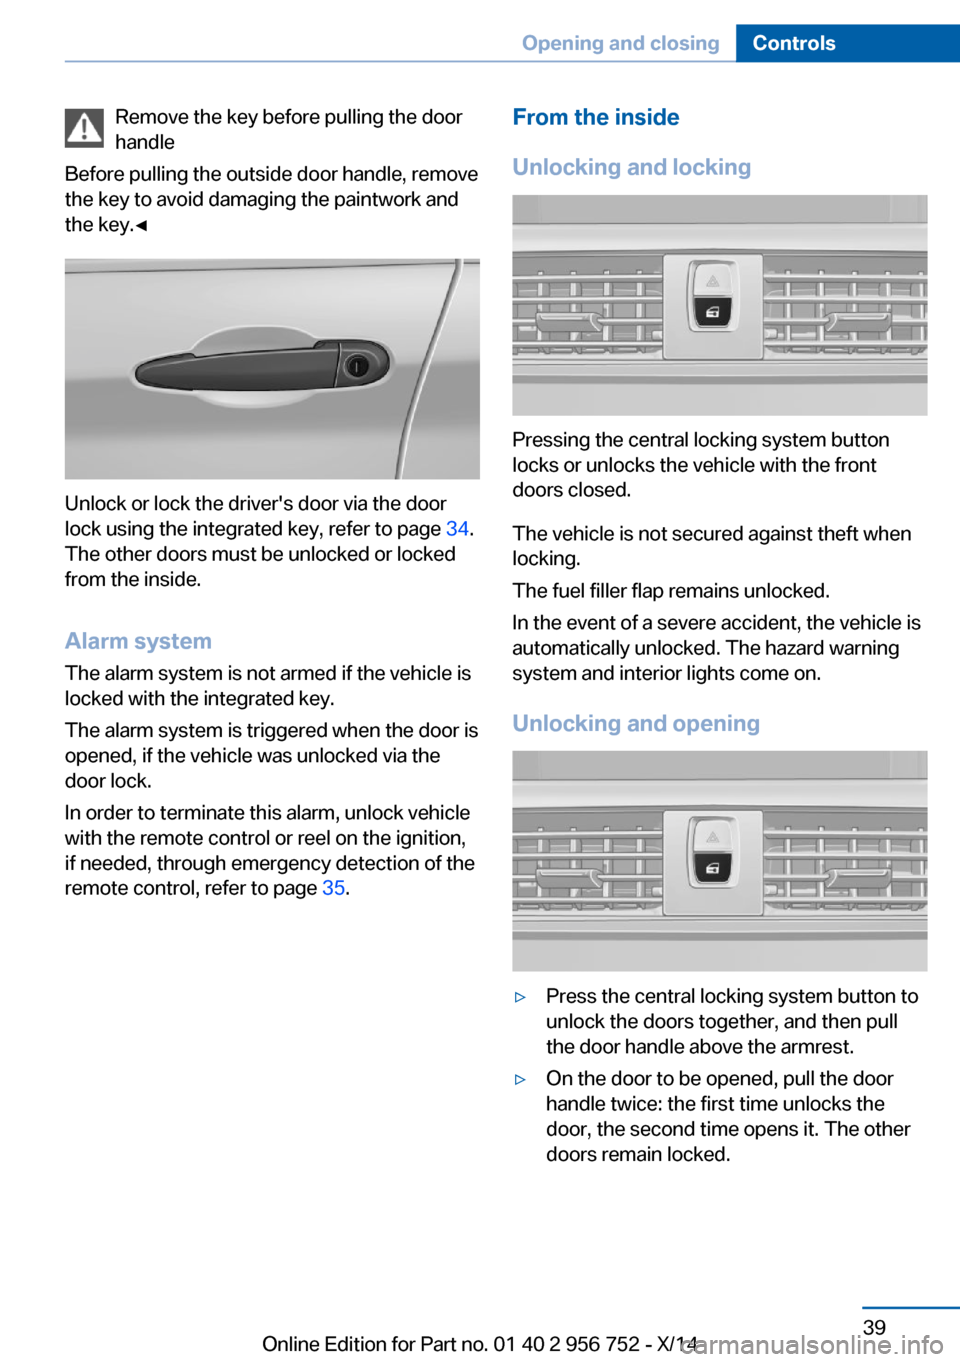
Unlocking and locking
Pressing the central locking system button
locks or unlocks the vehicle with the front
doors closed.
The vehicle is not secured against theft when
locking.
The fuel filler flap remains unlocked.
In the event of a severe accident, the vehicle is
automatically unlocked. The hazard warning
system and interior lights come on.
Unlocking and opening
▷Press the central locking system button to
unlock the doors together, and then pull
the door handle above the armrest.▷On the door to be opened, pull the door
handle twice: the first time unlocks the
door, the second time opens it. The other
doors remain locked.Seite 39Opening and closingControls39
Online Edition for Part no. 01 40 2 956 752 - X/14
Page 45 of 253
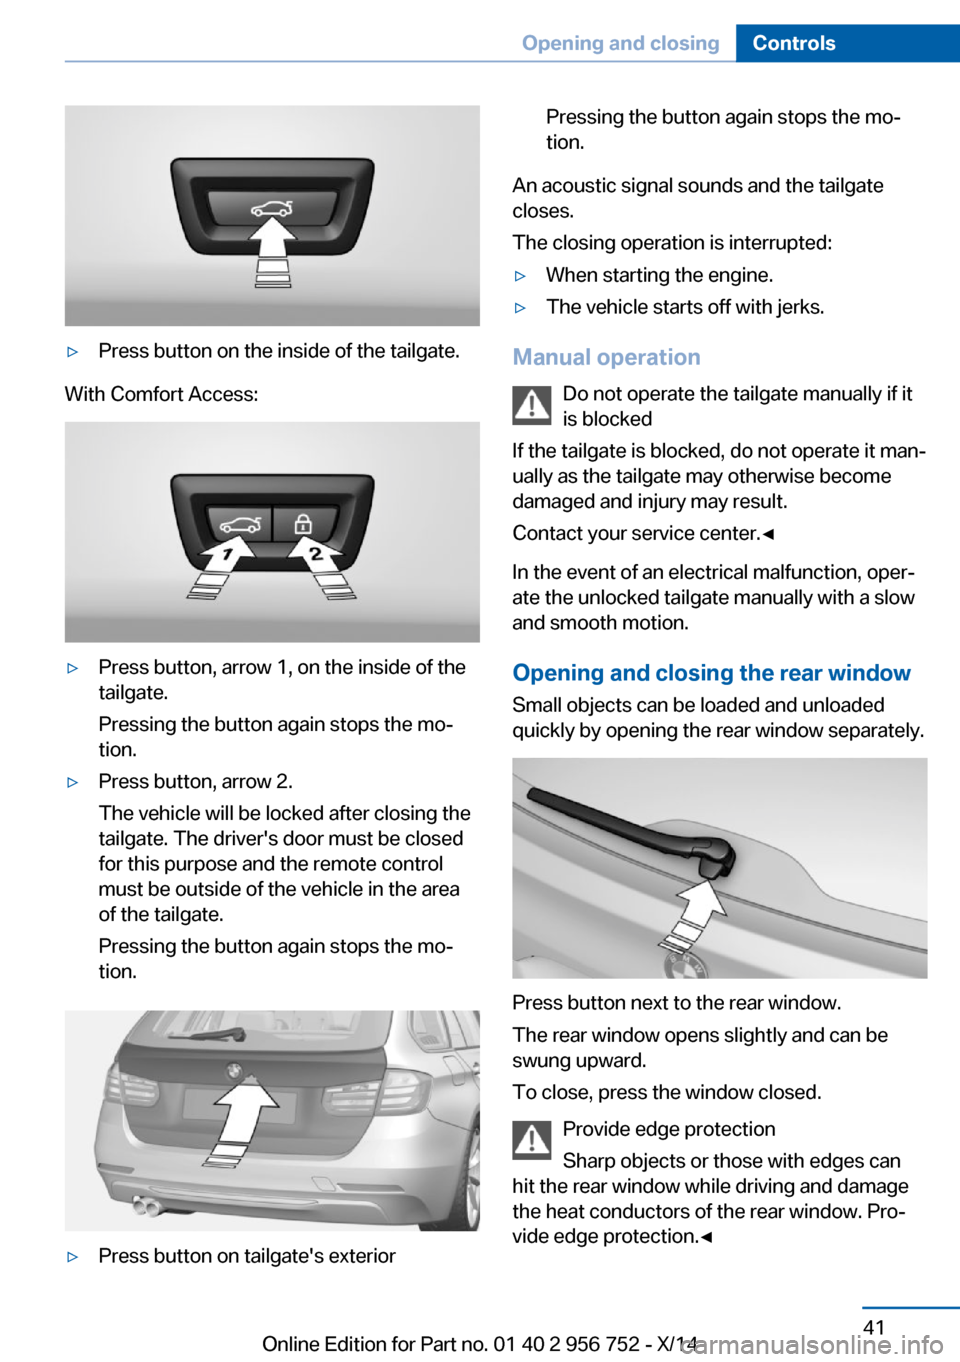
▷Press button on the inside of the tailgate.
With Comfort Access:
▷Press button, arrow 1, on the inside of the
tailgate.
Pressing the button again stops the mo‐
tion.▷Press button, arrow 2.
The vehicle will be locked after closing the
tailgate. The driver's door must be closed
for this purpose and the remote control
must be outside of the vehicle in the area
of the tailgate.
Pressing the button again stops the mo‐
tion.▷Press button on tailgate's exteriorPressing the button again stops the mo‐
tion.
An acoustic signal sounds and the tailgate
closes.
The closing operation is interrupted:
▷When starting the engine.▷The vehicle starts off with jerks.
Manual operation
Do not operate the tailgate manually if it
is blocked
If the tailgate is blocked, do not operate it man‐
ually as the tailgate may otherwise become
damaged and injury may result.
Contact your service center.◀
In the event of an electrical malfunction, oper‐
ate the unlocked tailgate manually with a slow
and smooth motion.
Opening and closing the rear window
Small objects can be loaded and unloaded
quickly by opening the rear window separately.
Press button next to the rear window.
The rear window opens slightly and can be
swung upward.
To close, press the window closed.
Provide edge protection
Sharp objects or those with edges can
hit the rear window while driving and damage
the heat conductors of the rear window. Pro‐
vide edge protection.◀
Seite 41Opening and closingControls41
Online Edition for Part no. 01 40 2 956 752 - X/14
Page 47 of 253
In addition to locking, the windows and the
glass sunroof close and the exterior mirrors
fold in.
Unlocking the tailgate separately
Press button on tailgate's exterior
This corresponds with pressing the button on
the remote control.
The situation of the doors does not change.
Note the opening height of the tailgate
The tailgate swings back and up when it
opens. Ensure that there is sufficient clearance
when the tailgate opens; otherwise, damage
may result.◀
Do not place the remote control in the
cargo area
Take the remote control with you and do not
leave it in the cargo area; otherwise, the re‐
mote control is locked inside the vehicle when
the tailgate is closed.◀
Opening and closing the tailgate with
no-touch activation
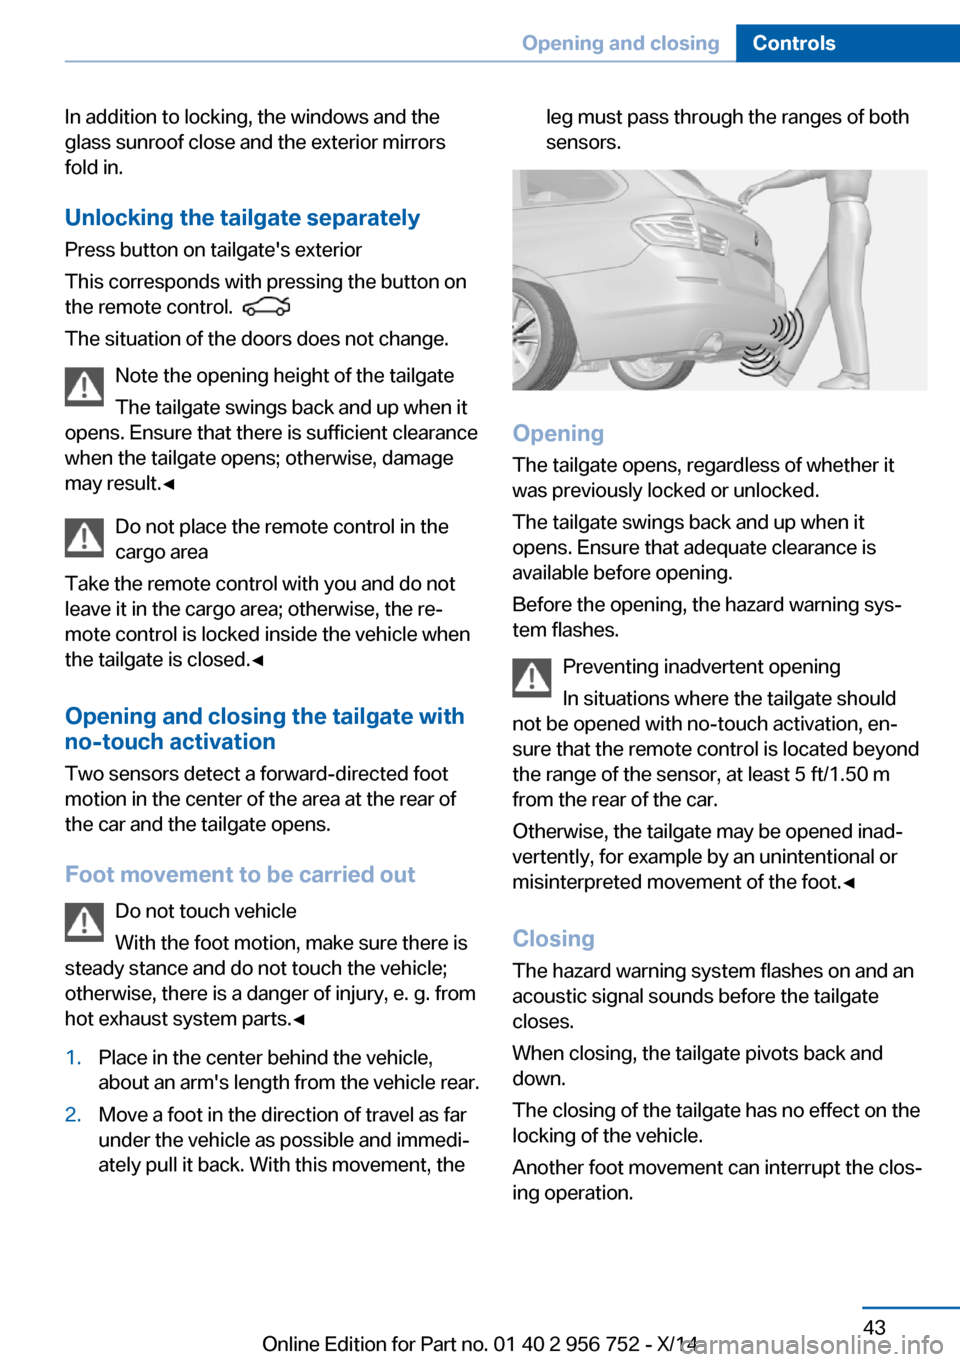
Two sensors detect a forward-directed foot
motion in the center of the area at the rear of
the car and the tailgate opens.
Foot movement to be carried out Do not touch vehicle
With the foot motion, make sure there is
steady stance and do not touch the vehicle; otherwise, there is a danger of injury, e. g. from
hot exhaust system parts.◀
1.Place in the center behind the vehicle,
about an arm's length from the vehicle rear.2.Move a foot in the direction of travel as far
under the vehicle as possible and immedi‐
ately pull it back. With this movement, theleg must pass through the ranges of both
sensors.
Opening
The tailgate opens, regardless of whether it
was previously locked or unlocked.
The tailgate swings back and up when it
opens. Ensure that adequate clearance is
available before opening.
Before the opening, the hazard warning sys‐
tem flashes.
Preventing inadvertent opening
In situations where the tailgate should
not be opened with no-touch activation, en‐
sure that the remote control is located beyond
the range of the sensor, at least 5 ft/1.50 m
from the rear of the car.
Otherwise, the tailgate may be opened inad‐
vertently, for example by an unintentional or
misinterpreted movement of the foot.◀
ClosingThe hazard warning system flashes on and an
acoustic signal sounds before the tailgate
closes.
When closing, the tailgate pivots back and
down.
The closing of the tailgate has no effect on the
locking of the vehicle.
Another foot movement can interrupt the clos‐
ing operation.
Seite 43Opening and closingControls43
Online Edition for Part no. 01 40 2 956 752 - X/14
Page 51 of 253
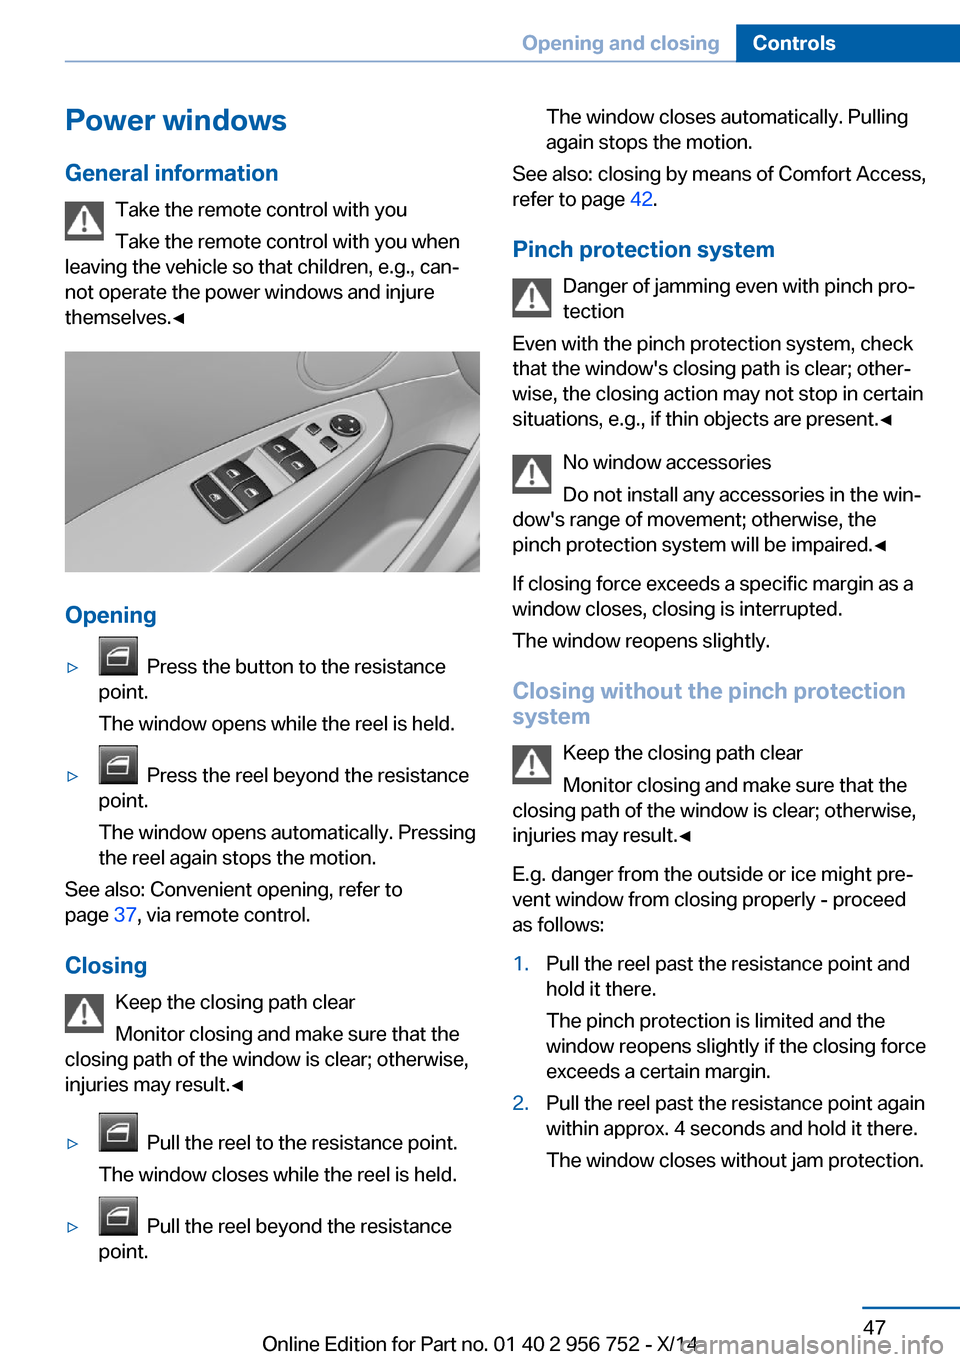
Power windows
General information Take the remote control with you
Take the remote control with you when
leaving the vehicle so that children, e.g., can‐
not operate the power windows and injure
themselves.◀
Opening
▷ Press the button to the resistance
point.
The window opens while the reel is held.▷ Press the reel beyond the resistance
point.
The window opens automatically. Pressing
the reel again stops the motion.
See also: Convenient opening, refer to
page 37, via remote control.
Closing Keep the closing path clear
Monitor closing and make sure that the
closing path of the window is clear; otherwise,
injuries may result.◀
▷ Pull the reel to the resistance point.
The window closes while the reel is held.▷ Pull the reel beyond the resistance
point.The window closes automatically. Pulling
again stops the motion.
See also: closing by means of Comfort Access,
refer to page 42.
Pinch protection system Danger of jamming even with pinch pro‐
tection
Even with the pinch protection system, check
that the window's closing path is clear; other‐
wise, the closing action may not stop in certain
situations, e.g., if thin objects are present.◀
No window accessories
Do not install any accessories in the win‐
dow's range of movement; otherwise, the
pinch protection system will be impaired.◀
If closing force exceeds a specific margin as a
window closes, closing is interrupted.
The window reopens slightly.
Closing without the pinch protection
system
Keep the closing path clear
Monitor closing and make sure that the
closing path of the window is clear; otherwise,
injuries may result.◀
E.g. danger from the outside or ice might pre‐
vent window from closing properly - proceed
as follows:
1.Pull the reel past the resistance point and
hold it there.
The pinch protection is limited and the
window reopens slightly if the closing force
exceeds a certain margin.2.Pull the reel past the resistance point again
within approx. 4 seconds and hold it there.
The window closes without jam protection.Seite 47Opening and closingControls47
Online Edition for Part no. 01 40 2 956 752 - X/14
Page 52 of 253
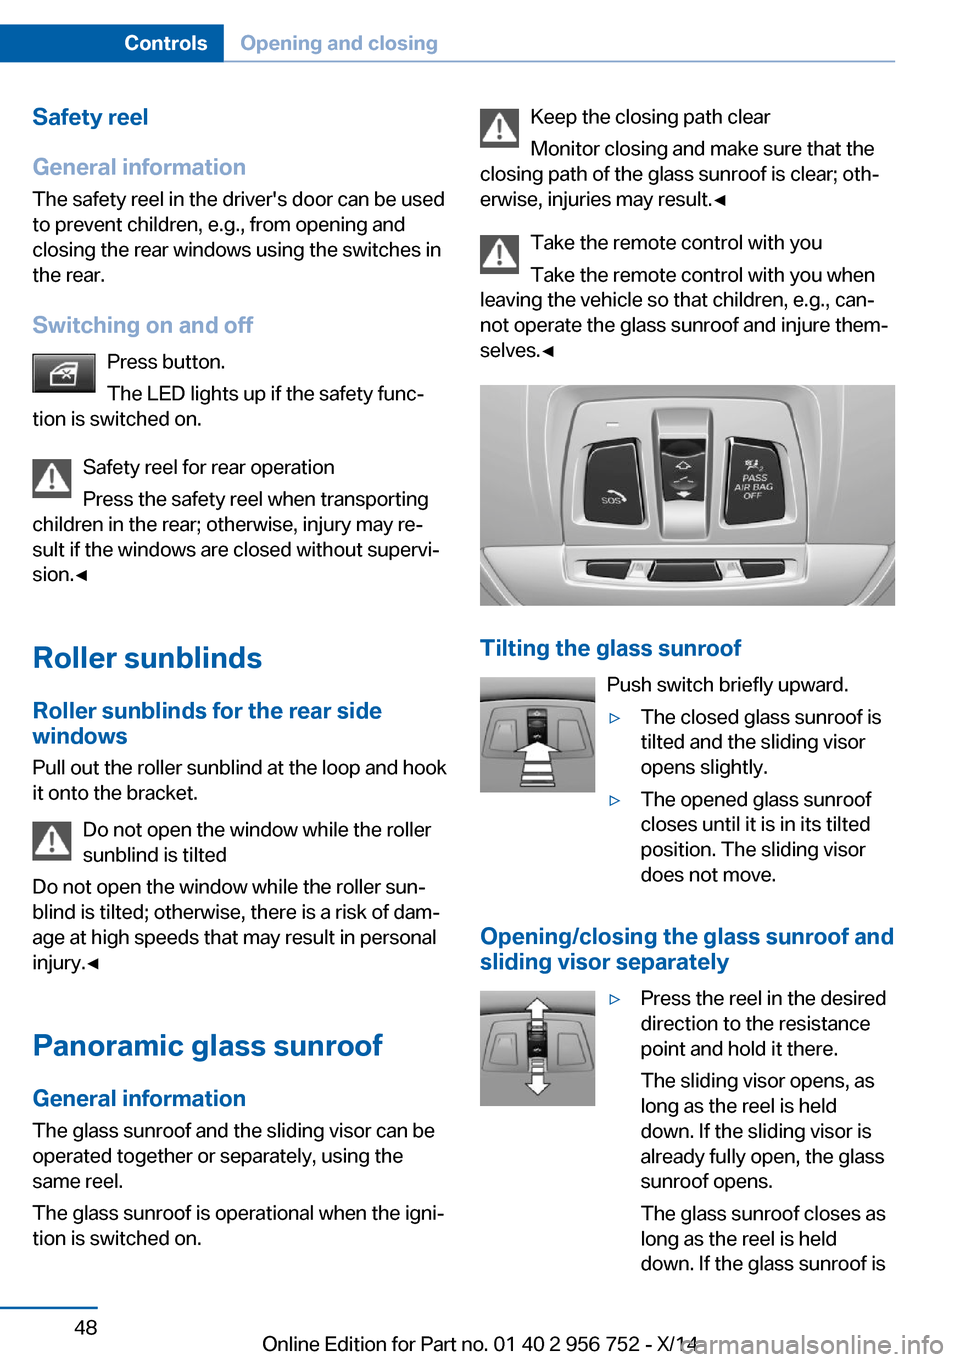
Safety reel
General information
The safety reel in the driver's door can be used
to prevent children, e.g., from opening and
closing the rear windows using the switches in
the rear.
Switching on and off Press button.
The LED lights up if the safety func‐
tion is switched on.
Safety reel for rear operation
Press the safety reel when transporting
children in the rear; otherwise, injury may re‐
sult if the windows are closed without supervi‐
sion.◀
Roller sunblinds
Roller sunblinds for the rear side
windows
Pull out the roller sunblind at the loop and hook
it onto the bracket.
Do not open the window while the roller
sunblind is tilted
Do not open the window while the roller sun‐
blind is tilted; otherwise, there is a risk of dam‐
age at high speeds that may result in personal
injury.◀
Panoramic glass sunroof
General information
The glass sunroof and the sliding visor can be
operated together or separately, using the same reel.
The glass sunroof is operational when the igni‐
tion is switched on.Keep the closing path clear
Monitor closing and make sure that the
closing path of the glass sunroof is clear; oth‐
erwise, injuries may result.◀
Take the remote control with you
Take the remote control with you when
leaving the vehicle so that children, e.g., can‐
not operate the glass sunroof and injure them‐
selves.◀
Tilting the glass sunroof
Push switch briefly upward.
▷The closed glass sunroof is
tilted and the sliding visor
opens slightly.▷The opened glass sunroof
closes until it is in its tilted
position. The sliding visor
does not move.
Opening/closing the glass sunroof and
sliding visor separately
▷Press the reel in the desired
direction to the resistance
point and hold it there.
The sliding visor opens, as
long as the reel is held
down. If the sliding visor is
already fully open, the glass
sunroof opens.
The glass sunroof closes as
long as the reel is held
down. If the glass sunroof isSeite 48ControlsOpening and closing48
Online Edition for Part no. 01 40 2 956 752 - X/14