climate control BMW 3 SERIES SPORTS WAGON 2016 F31 User Guide
[x] Cancel search | Manufacturer: BMW, Model Year: 2016, Model line: 3 SERIES SPORTS WAGON, Model: BMW 3 SERIES SPORTS WAGON 2016 F31Pages: 255, PDF Size: 5.6 MB
Page 155 of 255
Defrosts windows and removes
condensation
Press button.
Ice and condensation are quickly re‐
moved from the windshield and the front side
windows.
For this purpose, point the side vents onto the
side windows as needed.
Adjust air flow with the program active.
If the windows are fogged over, you can also
switch on the cooling function or press the AUTO button to utilize the condensation sen‐
sor.
Switching the system on/off Switch off Press the left button for the minimum
speed.
Switching on
Press any button except▷Rear window defroster.▷Seat heating.
Microfilter/activated-charcoal filter
In external and recirculated air mode the mi‐
crofilter/activated charcoal filter filters dust,
pollen, and gaseous pollutants out of the air.
This filter should be replaced during scheduled
maintenance, refer to page 210, of your vehi‐
cle.
Ventilation
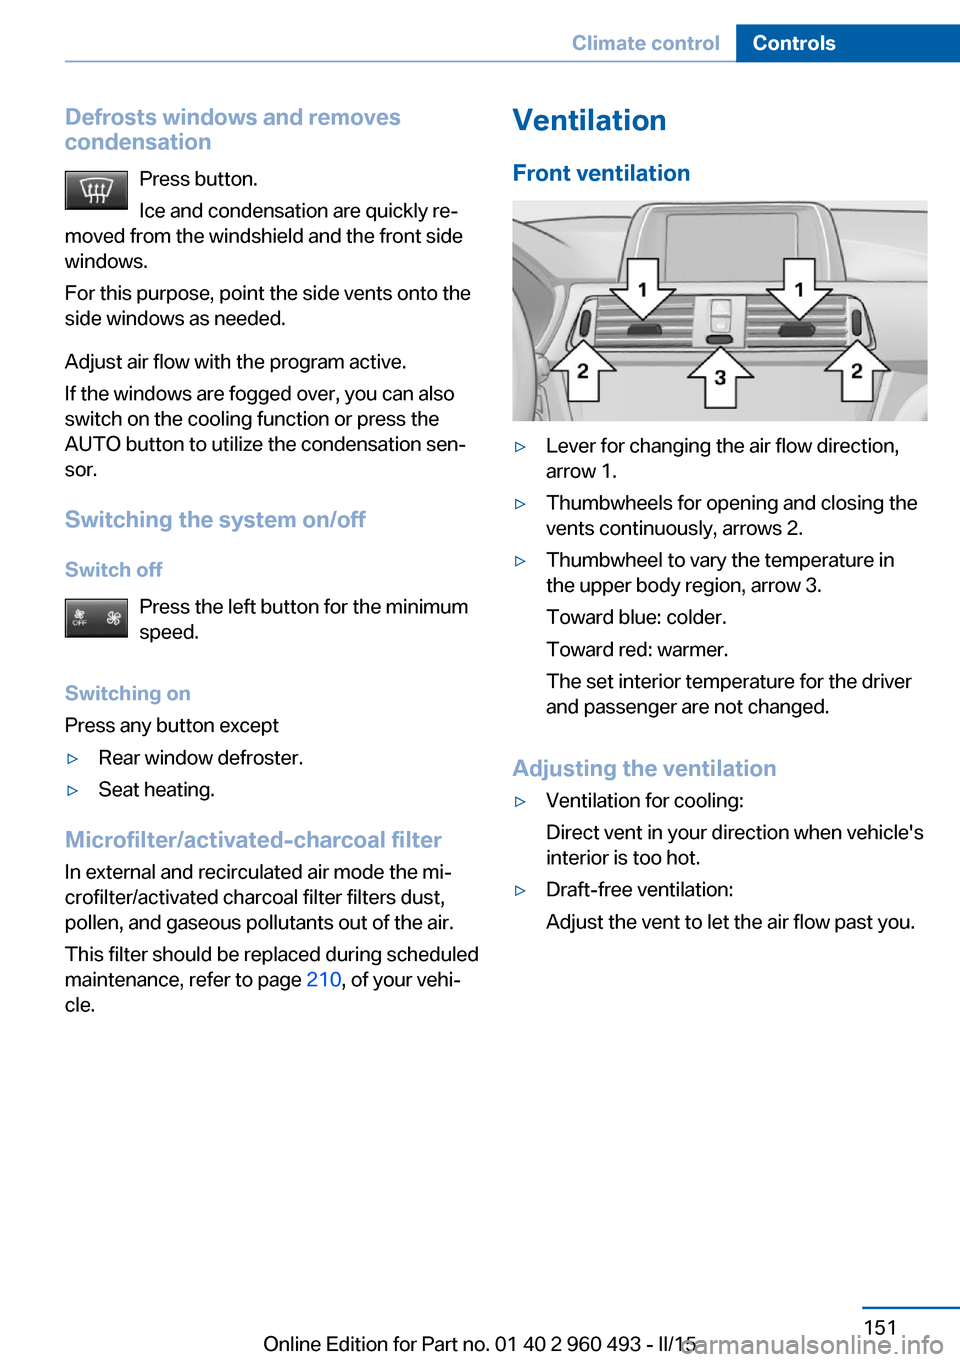
Front ventilation▷Lever for changing the air flow direction,
arrow 1.▷Thumbwheels for opening and closing the
vents continuously, arrows 2.▷Thumbwheel to vary the temperature in
the upper body region, arrow 3.
Toward blue: colder.
Toward red: warmer.
The set interior temperature for the driver
and passenger are not changed.
Adjusting the ventilation
▷Ventilation for cooling:
Direct vent in your direction when vehicle's
interior is too hot.▷Draft-free ventilation:
Adjust the vent to let the air flow past you.Seite 151Climate controlControls151
Online Edition for Part no. 01 40 2 960 493 - II/15
Page 156 of 255
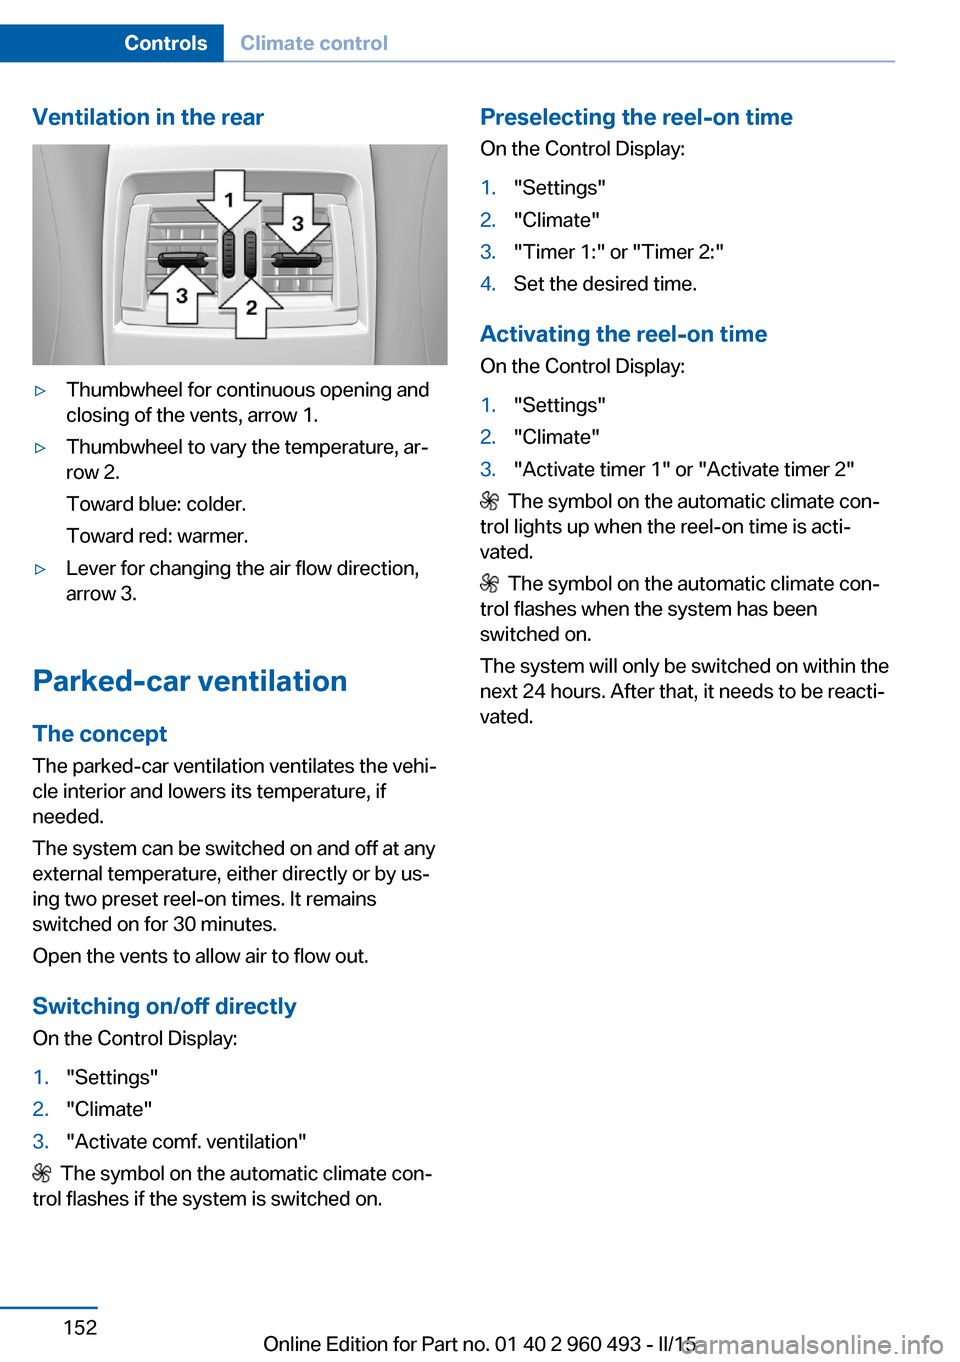
Ventilation in the rear▷Thumbwheel for continuous opening and
closing of the vents, arrow 1.▷Thumbwheel to vary the temperature, ar‐
row 2.
Toward blue: colder.
Toward red: warmer.▷Lever for changing the air flow direction,
arrow 3.
Parked-car ventilation
The concept The parked-car ventilation ventilates the vehi‐
cle interior and lowers its temperature, if
needed.
The system can be switched on and off at any
external temperature, either directly or by us‐
ing two preset reel-on times. It remains
switched on for 30 minutes.
Open the vents to allow air to flow out.
Switching on/off directly
On the Control Display:
1."Settings"2."Climate"3."Activate comf. ventilation"
The symbol on the automatic climate con‐
trol flashes if the system is switched on.
Preselecting the reel-on time
On the Control Display:1."Settings"2."Climate"3."Timer 1:" or "Timer 2:"4.Set the desired time.
Activating the reel-on time
On the Control Display:
1."Settings"2."Climate"3."Activate timer 1" or "Activate timer 2"
The symbol on the automatic climate con‐
trol lights up when the reel-on time is acti‐
vated.
The symbol on the automatic climate con‐
trol flashes when the system has been
switched on.
The system will only be switched on within the
next 24 hours. After that, it needs to be reacti‐
vated.
Seite 152ControlsClimate control152
Online Edition for Part no. 01 40 2 960 493 - II/15
Page 176 of 255
In certain braking situations, the perforated
brake discs can cause functional problems.
However, this has no effect on the perform‐
ance and operational reliability of the brake.
Objects within the range of movement
of the pedals
No objects in the area around the pedals
Keep floor mats, carpets, and any other
objects out of the pedal area; otherwise, the
function of the pedals could be impeded while
driving and create the risk of an accident.
Do not place additional floor mats over existing
mats or other objects.
Only use floor mats that have been approved
for the vehicle and can be properly attached to
floor.
Ensure that the floor mats are securely fas‐
tened again after they were removed for clean‐
ing, e.g.◀
Driving in wet conditions When roads are wet, salted, or in heavy rain,
press brake pedal ever so gently every few
miles.
Ensure that this action does not endanger other traffic.
The heat generated in this process helps dry
the brake discs and pads.
In this way braking efficiency will be available
when you need it.
Hills Avoid stressing the brakes
Avoid placing excessive stress on the
brake system. Light but consistent brake pres‐
sure can lead to high temperatures, brakes
wearing out and possibly even brake failure.◀Do not drive in neutral
Do not drive in neutral or with the engine
stopped, as doing so disables engine braking.
In addition, steering and brake assist are un‐
available with the engine stopped.◀
Drive long or steep downhill gradients in the
gear that requires least braking efforts. Other‐
wise the brakes may overheat and reduce
brake efficiency.
You can increase the engine's braking effect
by shifting down, going all the way to first gear,
if needed.
Brake disc corrosion
Brake disc corrosion and contamination of the
brake pads are favored by:▷Low mileage.▷Extended periods when the vehicle is not
used at all.▷Infrequent use of the brakes.
Corrosion will built up when the maximum
pressure applied to the brake pads during
braking is not reached - thus discs don't get
cleaned.
Corrosion buildup on the brake discs will cause
a pulsating effect on the brakes in their re‐
sponse - generally that cannot be corrected.
Condensation under the parked
vehicle
When using the automatic climate control,
condensation water develops collecting under‐
neath the vehicle.
These traces of water under the vehicle are
normal.
Seite 172Driving tipsThings to remember when driving172
Online Edition for Part no. 01 40 2 960 493 - II/15
Page 182 of 255
The achieved extended range is displayed in
the instrument cluster as bonus range.
Overview
The system includes the following
EfficientDynamics functions and displays:▷ECO PRO bonus range, refer to page 178.▷ECO PRO tips driving instruction, refer to
page 179▷ECO PRO climate control, refer to
page 178.▷ECO PRO coasting driving status, refer to
page 180.▷ECO PRO driving style analysis, refer to
page 181.
Activate ECO PRO
Press button repeatedly until ECO
PRO is displayed in the instrument
cluster.
Configuring ECO PRO
Via the Driving Dynamics Control
1.Activate ECO PRO.2."Configure ECO PRO"3.Configure the program.
Via the iDrive
1."Settings"2."ECO PRO mode"
Or
1."Settings"2."Driving mode"3."Configure ECO PRO"
Configure the program.
ECO PRO Tip
▷"Tip at:":
Adjust the ECO PRO speed.▷"ECO PRO speed warning":
The output is reduced once the set ECO
PRO speed is reached.
Coasting
Fuel-efficiency can be optimized by disengag‐
ing the engine and Coasting, refer to
page 180, with the engine idling.
This function is only available in ECO PRO
mode.
ECO PRO climate control
"ECO PRO climate control"
Climate control is set to be fuel-efficient.
By making a slight change to the set tempera‐
ture, or slowly adjusting the rate of heating or
cooling of the car's interior, fuel consumption
can be economized.
The mirror heating is made available when out‐
side temperatures are very cold.
ECO PRO potential Shows potential savings with the current set‐
tings in percentages.
Display in the instrument cluster
ECO PRO bonus range An adjusted driving style helps
you extend your driving range.
This may be displayed as the
bonus range in the instrument
cluster.
The bonus range is shown in the range display.
The bonus range is automatically reset every
time the vehicle is refueled.
Seite 178Driving tipsSaving fuel178
Online Edition for Part no. 01 40 2 960 493 - II/15
Page 184 of 255
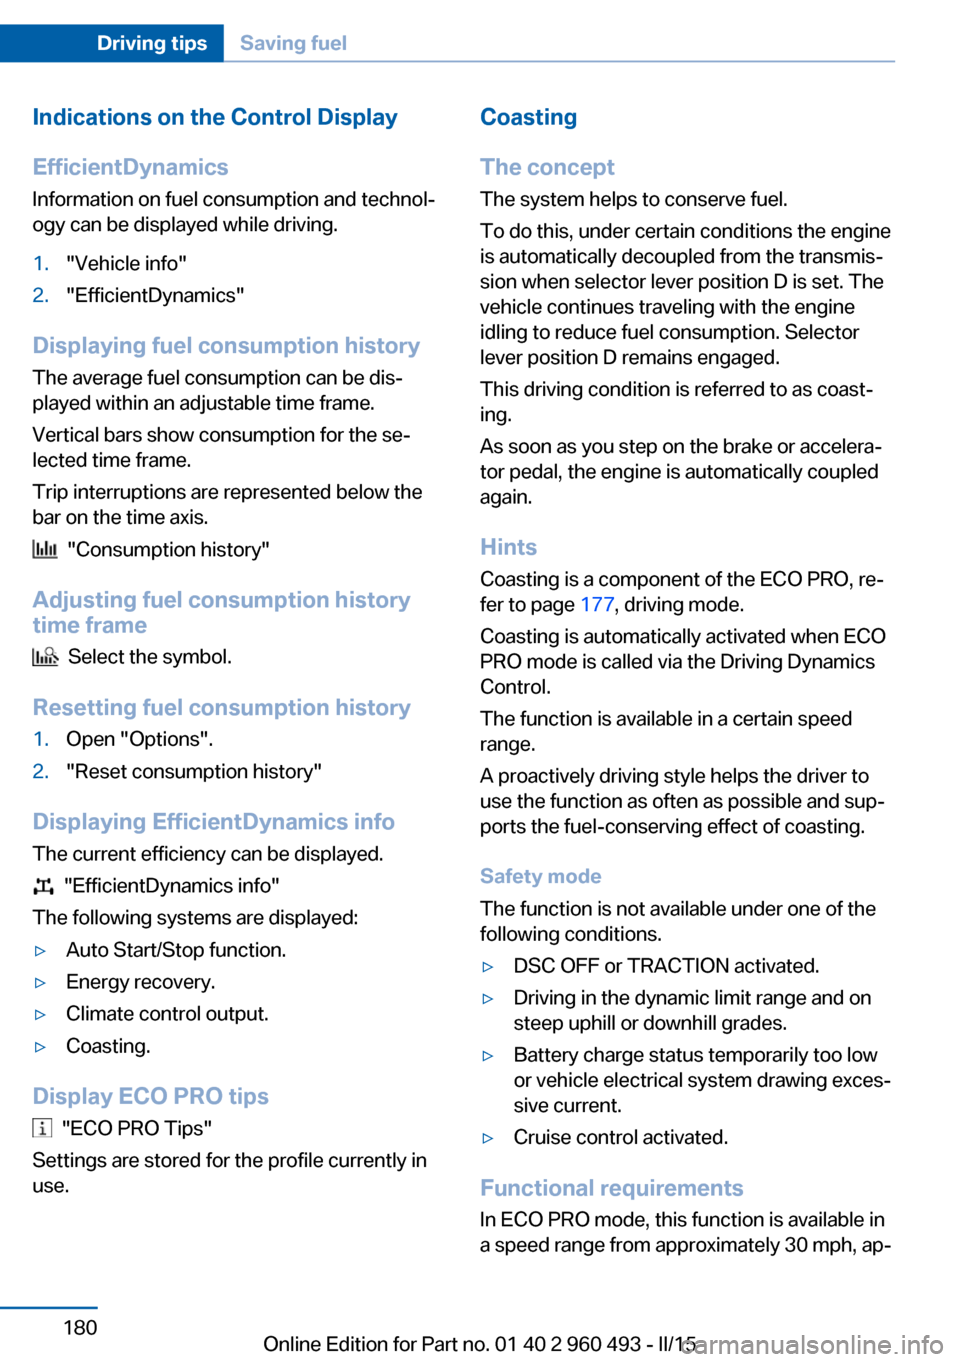
Indications on the Control DisplayEfficientDynamics Information on fuel consumption and technol‐
ogy can be displayed while driving.1."Vehicle info"2."EfficientDynamics"
Displaying fuel consumption history
The average fuel consumption can be dis‐
played within an adjustable time frame.
Vertical bars show consumption for the se‐
lected time frame.
Trip interruptions are represented below the
bar on the time axis.
"Consumption history"
Adjusting fuel consumption history time frame
Select the symbol.
Resetting fuel consumption history
1.Open "Options".2."Reset consumption history"
Displaying EfficientDynamics info
The current efficiency can be displayed.
"EfficientDynamics info"
The following systems are displayed:
▷Auto Start/Stop function.▷Energy recovery.▷Climate control output.▷Coasting.
Display ECO PRO tips
"ECO PRO Tips"
Settings are stored for the profile currently in
use.
Coasting
The concept The system helps to conserve fuel.
To do this, under certain conditions the engine
is automatically decoupled from the transmis‐
sion when selector lever position D is set. The
vehicle continues traveling with the engine idling to reduce fuel consumption. Selector
lever position D remains engaged.
This driving condition is referred to as coast‐
ing.
As soon as you step on the brake or accelera‐
tor pedal, the engine is automatically coupled
again.
Hints
Coasting is a component of the ECO PRO, re‐
fer to page 177, driving mode.
Coasting is automatically activated when ECO
PRO mode is called via the Driving Dynamics
Control.
The function is available in a certain speed
range.
A proactively driving style helps the driver to
use the function as often as possible and sup‐
ports the fuel-conserving effect of coasting.
Safety mode
The function is not available under one of the
following conditions.▷DSC OFF or TRACTION activated.▷Driving in the dynamic limit range and on
steep uphill or downhill grades.▷Battery charge status temporarily too low
or vehicle electrical system drawing exces‐
sive current.▷Cruise control activated.
Functional requirements
In ECO PRO mode, this function is available in
a speed range from approximately 30 mph, ap‐
Seite 180Driving tipsSaving fuel180
Online Edition for Part no. 01 40 2 960 493 - II/15
Page 200 of 255
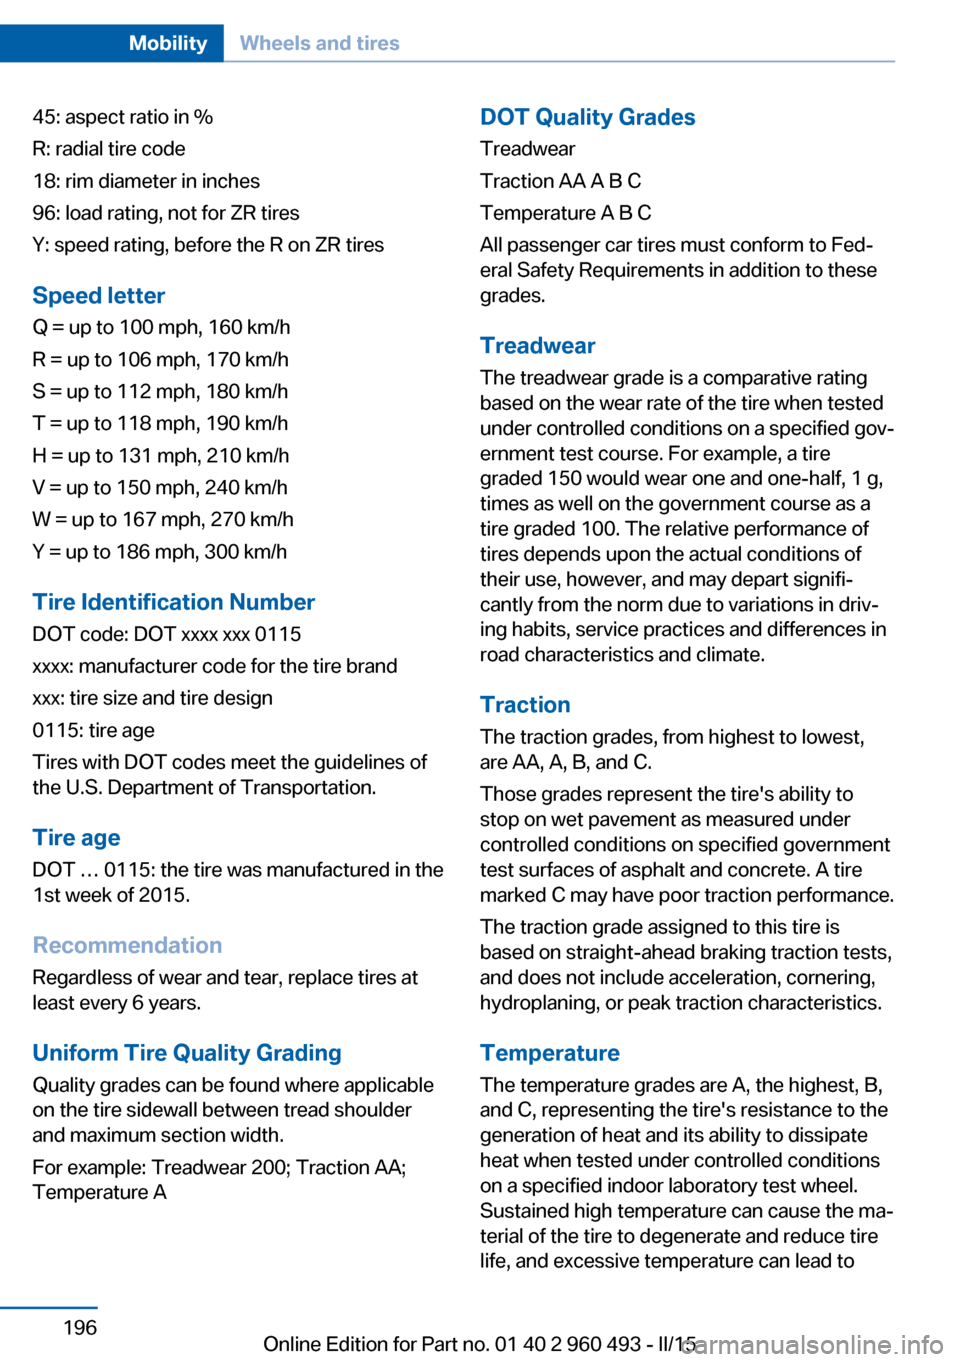
45: aspect ratio in %
R: radial tire code
18: rim diameter in inches
96: load rating, not for ZR tires
Y: speed rating, before the R on ZR tires
Speed letter
Q = up to 100 mph, 160 km/h
R = up to 106 mph, 170 km/h
S = up to 112 mph, 180 km/h
T = up to 118 mph, 190 km/h
H = up to 131 mph, 210 km/h
V = up to 150 mph, 240 km/h
W = up to 167 mph, 270 km/h
Y = up to 186 mph, 300 km/h
Tire Identification NumberDOT code: DOT xxxx xxx 0115
xxxx: manufacturer code for the tire brand
xxx: tire size and tire design
0115: tire age
Tires with DOT codes meet the guidelines of
the U.S. Department of Transportation.
Tire age DOT … 0115: the tire was manufactured in the
1st week of 2015.
Recommendation
Regardless of wear and tear, replace tires at
least every 6 years.
Uniform Tire Quality Grading Quality grades can be found where applicable
on the tire sidewall between tread shoulder
and maximum section width.
For example: Treadwear 200; Traction AA;
Temperature ADOT Quality Grades
Treadwear
Traction AA A B C
Temperature A B C
All passenger car tires must conform to Fed‐
eral Safety Requirements in addition to these
grades.
Treadwear The treadwear grade is a comparative rating
based on the wear rate of the tire when tested
under controlled conditions on a specified gov‐
ernment test course. For example, a tire
graded 150 would wear one and one-half, 1 g,
times as well on the government course as a
tire graded 100. The relative performance of
tires depends upon the actual conditions of
their use, however, and may depart signifi‐
cantly from the norm due to variations in driv‐
ing habits, service practices and differences in
road characteristics and climate.
Traction
The traction grades, from highest to lowest,
are AA, A, B, and C.
Those grades represent the tire's ability to
stop on wet pavement as measured under
controlled conditions on specified government
test surfaces of asphalt and concrete. A tire
marked C may have poor traction performance.
The traction grade assigned to this tire is
based on straight-ahead braking traction tests,
and does not include acceleration, cornering,
hydroplaning, or peak traction characteristics.
Temperature The temperature grades are A, the highest, B,
and C, representing the tire's resistance to the
generation of heat and its ability to dissipate
heat when tested under controlled conditions
on a specified indoor laboratory test wheel.
Sustained high temperature can cause the ma‐
terial of the tire to degenerate and reduce tire
life, and excessive temperature can lead toSeite 196MobilityWheels and tires196
Online Edition for Part no. 01 40 2 960 493 - II/15
Page 244 of 255
Everything from A to Z
IndexA ABS, Antilock Brake Sys‐ tem 120
ACC, Active Cruise Control with Stop & Go 125
Acceleration Assistant, refer to Launch Control 76
Accessories and parts 7
Activated-charcoal filter 151
Active Blind Spot Detec‐ tion 117
Active Cruise Control with Stop & Go, ACC 125
Adaptive brake lights, refer to Brake force display 118
Adaptive Light Control 94
Additives, oil 208
Adjustments, seats/head re‐ straints 51
After washing vehicle 231
Airbags 98
Airbags, indicator/warning light 99
Air circulation, refer to Recir‐ culated-air mode 147, 150
Air, dehumidifying, refer to Cooling function 147, 150
Air distribution, manual 147, 150
Air flow, air conditioner 147
Air flow, automatic climate control 150
Air pressure, tires 193
Air vents, refer to Ventila‐ tion 151
Alarm system 46
Alarm, unintentional 47
All around the center con‐ sole 16
All around the roofliner 17 All around the steering
wheel 14
All-season tires, refer to Win‐ ter tires 199
All-wheel-drive 121
Alternating-code hand-held transmitter 154
Alternative oil types 208
Ambient light 97
Antifreeze, washer fluid 73
Antilock Brake System, ABS 120
Anti-slip control, refer to DSC 120
Approved axle load 237
Approved engine oils, see Suitable engine oil
types 208
Arrival time 89
Ash tray 157
Assistance when driving off 124
Assist system information, on Control Display 91
Attentiveness assistant 119
AUTO intensity 149
Automatic car wash 230
Automatic climate con‐ trol 146
Automatic climate control with enhanced features 148
Automatic Cruise Control with Stop & Go 125
Automatic Curb Monitor 59
Automatic deactivation, front- seat passenger airbags 100
Automatic headlight con‐ trol 94
Automatic locking 45
Automatic recirculated-air control 150 Automatic tailgate 40
Automatic transmission, see Steptronic transmission 73
AUTO program, automatic cli‐ mate control 149
AUTO program, climate con‐ trol 147
AUTO program, intensity 149
Auto Start/Stop function 67
Average fuel consumption 88
Average speed 88
Axle loads, weights 237
B Backrest curvature, refer to Lumbar support 53
Backrest, width 53
Band-aids, refer to First aid kit 225
Bar for tow-starting/ towing 228
Battery replacement, vehicle battery 221
Battery replacement, vehicle remote control 35
Battery, vehicle 221
Belts, safety belts 54
Beverage holder, cu‐ pholder 165
Blinds, sun protection 48
BMW Advanced Diesel 189
BMW Assist, see user's manual for Navigation, En‐
tertainment and Communi‐
cation
BMW Driver’s Guide App 6
BMW Homepage 6
BMW Internet page 6
BMW maintenance sys‐ tem 210 Seite 240ReferenceEverything from A to Z240
Online Edition for Part no. 01 40 2 960 493 - II/15
Page 245 of 255
Bonus range, ECO PRO 178
Bottle holder, refer to Cu‐ pholders 165
Brake assistant 120
Brake discs, break-in 170
Brake force display 118
Brake lights, adaptive 118
Brake lights, brake force dis‐ play 118
Brake pads, break-in 170
Braking, hints 171
Breakdown assistance 224
Break-in 170
Brightness of Control Dis‐ play 91
Bulb replacement 213
Bulb replacement, front 214
Bulb replacement, halogen headlights 214
Bulb replacement, rear 218
Bulb replacement, xenon headlights 216
Bulbs and lights 213
Button, RES 128
Button, Start/Stop 65
Bypassing, refer to Jump- starting 225
C
California Proposition 65 Warning 7
Camera lenses, care 233
Camera, rearview cam‐ era 136
Camera, Side View 139
Camera, Top View 140
Can holder, refer to Cuphold‐ ers 165
Car battery 221
Car care products 231
Care, displays 233
Care, vehicle 231
Cargo 173
Cargo area 159
Cargo area, enlarging 160 Cargo area partition net 161
Cargo area, storage compart‐ ments 165
Cargo cover 159
Cargo, securing 174
Cargo straps, securing cargo 174
Car key, refer to Remote con‐ trol 34
Carpet, care 233
Car wash 230
Catalytic converter, refer to Hot exhaust system 171
CBS Condition Based Serv‐ ice 210
CD/Multimedia, see user's manual for Navigation, En‐
tertainment and Communi‐
cation
Center armrest 164
Center console 16
Central locking system 40
Central screen, refer to Con‐ trol Display 18
Changes, technical, refer to Safety 7
Changing parts 212
Changing wheels 221
Changing wheels/tires 198
Chassis number, see vehicle identification number 9
Check Control 79
Checking the engine oil level electronically 206
Checking the oil level elec‐ tronically 206
Children, seating position 61
Children, transporting safely 61
Child restraint fixing sys‐ tem 61
Child restraint fixing system LATCH 63
Child restraint fixing systems, mounting 61
Child safety locks 64 Child seat, mounting 61
Child seats 61
Chrome parts, care 232
Cigarette lighter 157
Cleaning displays 233
Climate control 146, 148
Clock 83
Closing/opening via door lock 39
Closing/opening with remote control 37
Closing the tailgate with no- touch activation 43
Clothes hooks 165
Coasting 180
Coasting with engine decou‐ pled, coasting 180
Coasting with idling en‐ gine 180
Cockpit 14
Cold starting, refer to Starting the engine 66
Combination reel, refer to Turn signals 70
Combination switch, refer to Wiper system 70
Comfort Access 42
COMFORT program, Dy‐ namic Driving Control 123
Compartments in the doors 164
Compass 155
Compressor 199
Computer, refer to On-board computer 87
Condensation on win‐ dows 151
Condensation under the vehi‐ cle 172
Condition Based Service CBS 210
Configuring driving pro‐ gram 124
Confirmation signal 45
ConnectedDrive, see user's manual for Navigation, En‐Seite 241Everything from A to ZReference241
Online Edition for Part no. 01 40 2 960 493 - II/15