weight BMW 320i 2003 Owners Manual
[x] Cancel search | Manufacturer: BMW, Model Year: 2003, Model line: 320i, Model: BMW 320i 2003Pages: 166, PDF Size: 3.16 MB
Page 5 of 166
5
Notes
Status at time of printing
BMW pursues a policy of continuous,
ongoing development conceived to
ensure that our vehicles continue to
embody the highest quality and safety
standards combined with advanced,
state-of-the-art technology. For this
reason, the features described in this
Owner's Manual could differ from those
on your vehicle. Nor can errors and
omissions be entirely ruled out. You are
therefore asked to appreciate that no
claims can be recognized on the basis
of the data, illustrations or descriptions
in this Owner's Manual.
For your own safety
Use unleaded gasoline only. Fuels
containing up to and including
10 % ethanol or other oxygenates with
up to 2.8 % oxygen by weight – that is,
15 % MTBE or 3 % methanol plus an
equivalent amount of co-solvent – will
not void the applicable warranties
respecting defects in materials or work-
manship. Field experience has indi-
cated significant differences in fuel
quality – volatility, composition, addi-
tives, etc. among gasolines offered for
sale in the United States and Canada.
The use of poor-quality fuels may result
in driveability, starting and stalling
problems, especially under certain
environmental conditions, such as high
ambient temperature and high altitude.
Should you encounter driveability prob-
lems which you suspect could be
related to the fuel you are using, we
recommend that you respond by
switching to a recognized high-quality
brand.
Failure to comply with these recom-
mendations may result in unscheduled
maintenance.
Obey all applicable safety rules when
handling gasoline.
<
Important safety information!
For your own safety, use genuine
parts and accessories approved by
BMW.
When you purchase accessories tested
and approved by BMW and Original
BMW Parts, you simultaneously acquire
the assurance that they have been thor-
oughly tested by BMW to ensure opti-
mum performance when installed on
your vehicle.
BMW warrants these parts to be free
from defects in material and workman-
ship.
BMW will not accept any liability for
damage resulting from installation of
parts and accessories not approved by
BMW.
BMW cannot test every product on the
market to determine whether it can be
used on a BMW safely and without risk
to either the vehicle, its operation, or its
occupants.
Original BMW Parts, BMW Accessories
and other products approved by BMW,
together with professional advice on
using these items, are available from all
BMW centers.
Installation and operation of non-BMW
approved accessories such as alarms,
radios, amplifiers, radar detectors,
wheels, suspension components, brake
Page 10 of 166
Contents
Operation, maintenance
Special operating instructions:
Break-in procedures114
Driving notes115
Antilock Brake System
(ABS)115
Brake system116
Wheels and tires:
Tire inflation pressure117
Tire condition117
Tire replacement118
Wheel and tire
combinations120
Winter tires120
In the engine compartment:
Hood122
Engine compartment
essentials124
Washer fluids126
Engine oil126
Coolant128
Brake fluid129
Maintenance:
The BMW Maintenance
System130
Laws and regulations:
California Proposition 65
warning131
OBD interface socket131
Owner service procedures
Replacement procedures:
Onboard tool kit136
Windshield wiper blades136
Lamps and bulbs137
Changing a wheel141
Run Flat tires*145
Battery146
Fuses146
Giving and receiving
assistance:
Jump-starting147
Towing the vehicle148
Technical data
Engine data152
Dimensions153
Weights154
Capacities155
Page 45 of 166
45
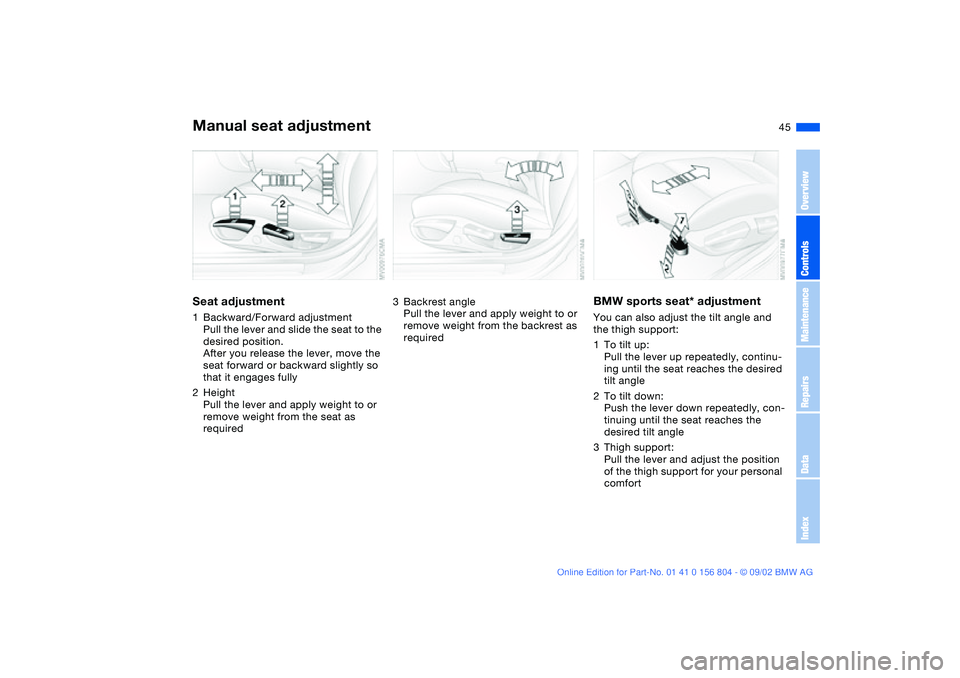
Manual seat adjustmentSeat adjustment1Backward/Forward adjustment
Pull the lever and slide the seat to the
desired position.
After you release the lever, move the
seat forward or backward slightly so
that it engages fully
2Height
Pull the lever and apply weight to or
remove weight from the seat as
required
3Backrest angle
Pull the lever and apply weight to or
remove weight from the backrest as
required
BMW sports seat* adjustmentYou can also adjust the tilt angle and
the thigh support:
1To tilt up:
Pull the lever up repeatedly, continu-
ing until the seat reaches the desired
tilt angle
2To tilt down:
Push the lever down repeatedly, con-
tinuing until the seat reaches the
desired tilt angle
3Thigh support:
Pull the lever and adjust the position
of the thigh support for your personal
comfort
OverviewControlsMaintenanceRepairsDataIndex
Page 56 of 166
56
Before installing any child-
restraint device or child seat,
please read the following:
Never install a rear-facing child-
restraint system in the front passenger
seat of this vehicle.
Your vehicle is equipped with an airbag
supplemental restraint system for the
front passenger. Because the backrest
on any rear-facing child-restraint sys-
tem – of the kind designed for infants
under 1 year and 20 lbs/9 kg – would
be within the airbag's deployment
range, you should never mount such a
device in the front passenger seat,
since the impact of the airbag against
the child-restraint's backrest could lead
to serious or fatal injuries.
If it is necessary for a child – not an
infant – to ride in the front seat, certain
precautions should be taken. First,
move the passenger seat as far away
from the dashboard as possible. This
important precaution is intended to
maximize the distance between the air-
bag and the child. Older children
should be tightly secured with a safety
belt after they have outgrown a booster
seat that is appropriate for their age,
height, and weight. Younger children
should be secured in an appropriate
forward-facing child-restraint system
that has first been properly installed
with a safety belt.
Never install a rear-facing child-
restraint system in the front passenger
seat.
We strongly urge you to carefully read
and comply with the instructions for
installation and use provided by the
child-restraint's manufacturer whenever
you use such a device.
Do not attempt to modify child-restraint
systems. If you do this, the protection
provided by these systems could be
impaired.
Always ensure that all occupants – of all
ages – remain properly and securely
restrained at all times.<
All rear seating positions in your vehicle
meet the recommendations of
SAE J1819, an industry-recommended
practice for securing child-restraint sys-
tems in motor vehicles.
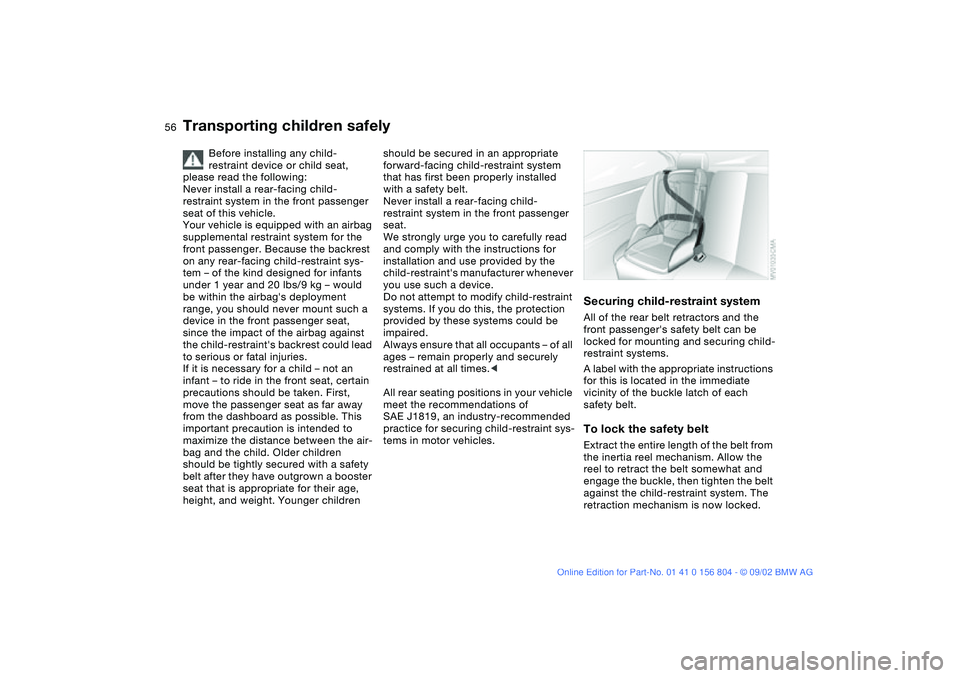
Securing child-restraint systemAll of the rear belt retractors and the
front passenger's safety belt can be
locked for mounting and securing child-
restraint systems.
A label with the appropriate instructions
for this is located in the immediate
vicinity of the buckle latch of each
safety belt.To lock the safety beltExtract the entire length of the belt from
the inertia reel mechanism. Allow the
reel to retract the belt somewhat and
engage the buckle, then tighten the belt
against the child-restraint system. The
retraction mechanism is now locked.
Transporting children safely
Page 108 of 166
108
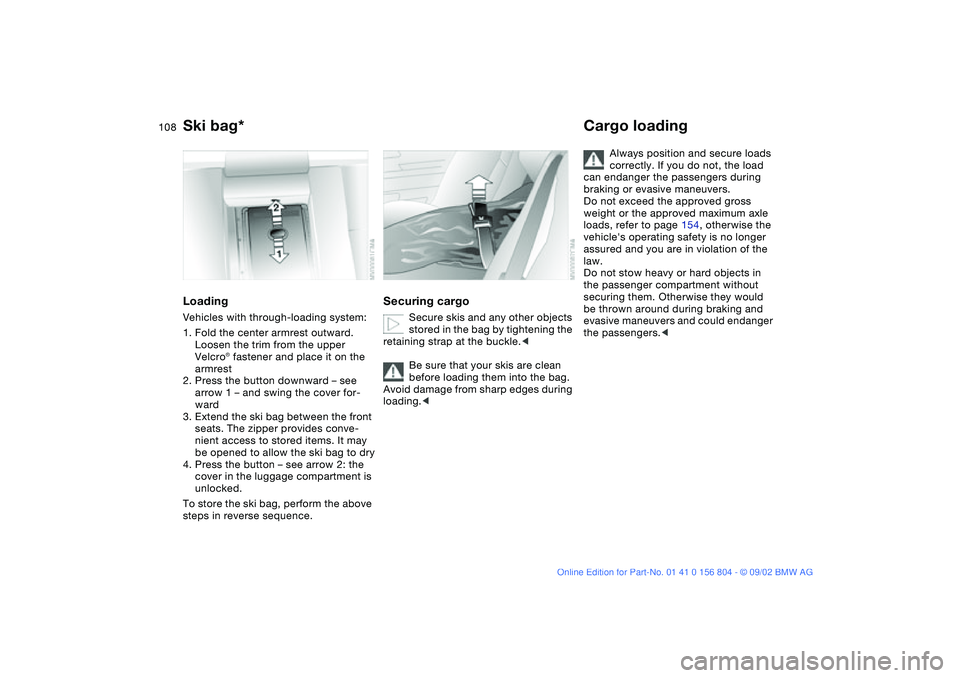
LoadingVehicles with through-loading system:
1. Fold the center armrest outward.
Loosen the trim from the upper
Velcro® fastener and place it on the
armrest
2. Press the button downward – see
arrow 1 – and swing the cover for-
ward
3. Extend the ski bag between the front
seats. The zipper provides conve-
nient access to stored items. It may
be opened to allow the ski bag to dry
4. Press the button – see arrow 2: the
cover in the luggage compartment is
unlocked.
To store the ski bag, perform the above
steps in reverse sequence.
Securing cargo
Secure skis and any other objects
stored in the bag by tightening the
retaining strap at the buckle.<
Be sure that your skis are clean
before loading them into the bag.
Avoid damage from sharp edges during
loading.<
Cargo loading
Always position and secure loads
correctly. If you do not, the load
can endanger the passengers during
braking or evasive maneuvers.
Do not exceed the approved gross
weight or the approved maximum axle
loads, refer to page 154, otherwise the
vehicle's operating safety is no longer
assured and you are in violation of the
law.
Do not stow heavy or hard objects in
the passenger compartment without
securing them. Otherwise they would
be thrown around during braking and
evasive maneuvers and could endanger
the passengers.<
Ski bag*
Page 110 of 166
110
Roof-mounted luggage rack*A special roof-rack system is available
as an optional extra for your BMW.
Please observe the precautions
included with the installation instruc-
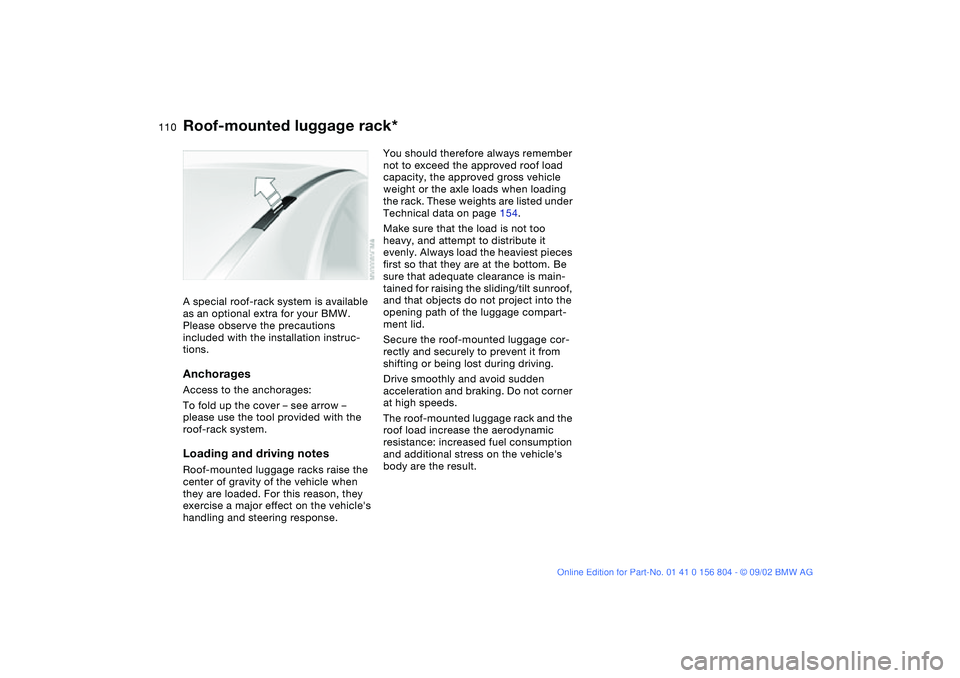
tions.AnchoragesAccess to the anchorages:
To fold up the cover – see arrow –
please use the tool provided with the
roof-rack system.Loading and driving notesRoof-mounted luggage racks raise the
center of gravity of the vehicle when
they are loaded. For this reason, they
exercise a major effect on the vehicle's
handling and steering response.
You should therefore always remember
not to exceed the approved roof load
capacity, the approved gross vehicle
weight or the axle loads when loading
the rack. These weights are listed under
Technical data on page 154.
Make sure that the load is not too
heavy, and attempt to distribute it
evenly. Always load the heaviest pieces
first so that they are at the bottom. Be
sure that adequate clearance is main-
tained for raising the sliding/tilt sunroof,
and that objects do not project into the
opening path of the luggage compart-
ment lid.
Secure the roof-mounted luggage cor-
rectly and securely to prevent it from
shifting or being lost during driving.
Drive smoothly and avoid sudden
acceleration and braking. Do not corner
at high speeds.
The roof-mounted luggage rack and the
roof load increase the aerodynamic
resistance: increased fuel consumption
and additional stress on the vehicle's
body are the result.
Page 154 of 166
154
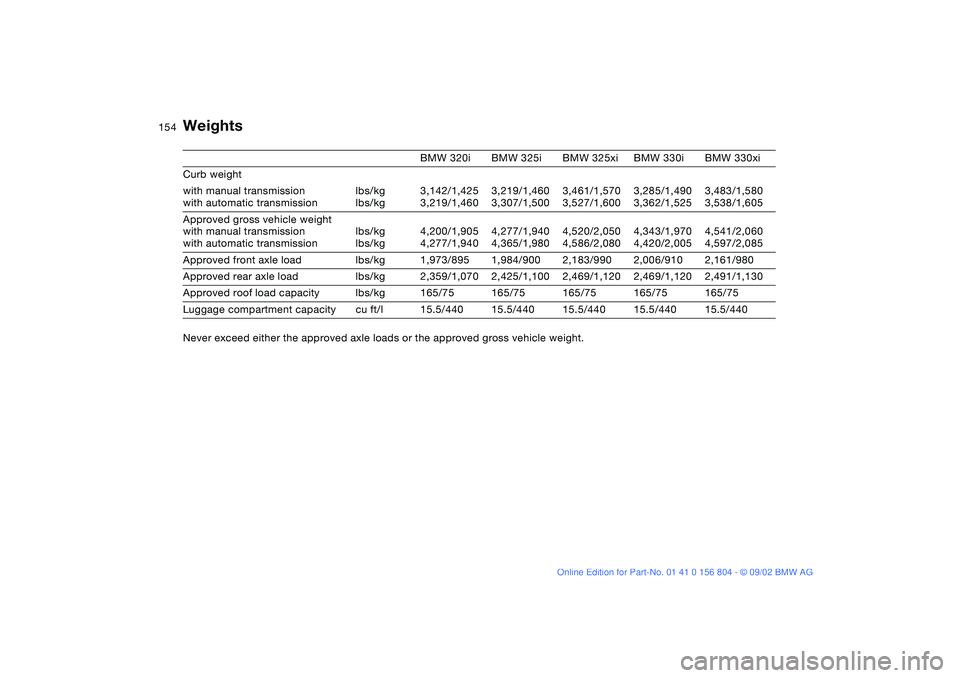
Weights
BMW 320i BMW 325i BMW 325xi BMW 330i BMW 330xi
Curb weight
with manual transmission
with automatic transmissionlbs/kg
lbs/kg3,142/1,425
3,219/1,4603,219/1,460
3,307/1,5003,461/1,570
3,527/1,6003,285/1,490
3,362/1,5253,483/1,580
3,538/1,605
Approved gross vehicle weight
with manual transmission
with automatic transmissionlbs/kg
lbs/kg4,200/1,905
4,277/1,9404,277/1,940
4,365/1,9804,520/2,050
4,586/2,0804,343/1,970
4,420/2,0054,541/2,060
4,597/2,085
Approved front axle load lbs/kg 1,973/895 1,984/900 2,183/990 2,006/910 2,161/980
Approved rear axle load lbs/kg 2,359/1,070 2,425/1,100 2,469/1,120 2,469/1,120 2,491/1,130
Approved roof load capacity lbs/kg 165/75 165/75 165/75 165/75 165/75
Luggage compartment capacity cu ft/l 15.5/440 15.5/440 15.5/440 15.5/440 15.5/440
Never exceed either the approved axle loads or the approved gross vehicle weight.
Page 159 of 166
Everything from A to Z
159
Clock 74
setting, refer also to the
radio or onboard com-
puter Owner's Manual
Cockpit 14
Code, refer to the Owner's
Manual for Radio
Coin box 102
Compartments 102
Compression ratio 152
Computer 75
Condensation, removing
from windows 95, 98
Consumption 76
display 72
Coolant 128, 155
Cooling system 155
Copyright 4
Cornering Brake Control
(CBC) 18, 115
Cruise control 69
Cup holder, see Beverage
holder 102
Curb weight 154
Cushion height 153
D
Data
dimensions 153
engine 152
technical 152
weights 154Daytime driving lamps 89
DBC Dynamic Brake
Control 115
Defrost position 95, 98
Defrosting
rear window 94, 99
windows 95, 98
Digital clock 74
Dimensions 153
Dipstick, engine oil 126
Displacement 152
Display lighting 90
Displays 16
Distance warning 77
Divided rear backrest 106
Door key 30
Door lock buttons 34
Doors
emergency operation 33
unlocking and locking 31
Driving notes 115
DSC Dynamic Stability
Control 18, 19, 80
DTC Dynamic Traction
Control 80
Dynamic Brake Control
(DBC) 115
Dynamic Stability Control
(DSC) 18, 19, 80
Dynamic Traction Control
(DTC) 80E
Electric power windows 40
Electrical accessories, fail-
ure 146
Electrical malfunction
fuel filler door 24
sliding/tilt sunroof 43
Emergency operation
doors 33
fuel filler door 24
sliding/tilt sunroof 43
Emergency release
luggage compartment
lid 37
Emissions, minimum, refer
to Energy control 71
Energy control 71
Engine
starting 60
switching off 62
Engine compartment 124
Engine coolant 155
adding 128
temperature gauge 72
Engine data 152Engine oil
adding 126
capacity 155
consumption 126
pressure 18
quality 127
types 127
viscosity 127
Engine oil level 19
check 126
Engine speed 152
Environmentally-friendly
driving, refer to Energy
control 71
Exterior mirrors 51
Eyelet, towing 148
F
Failure messages 73
False alarm, avoiding 39
Fault displays 73
First-aid kit 23
Flashlight 102
Flat tire 117, 141
Flat Tire Monitor 86
Fog lamps 91
Folding rear backrest 106
Follow me home lamps 89
Front fog lamps 91
Front seat adjustment 44
Frost protection
radiator 128
OverviewControlsMaintenanceRepairsDataIndex
Page 160 of 166
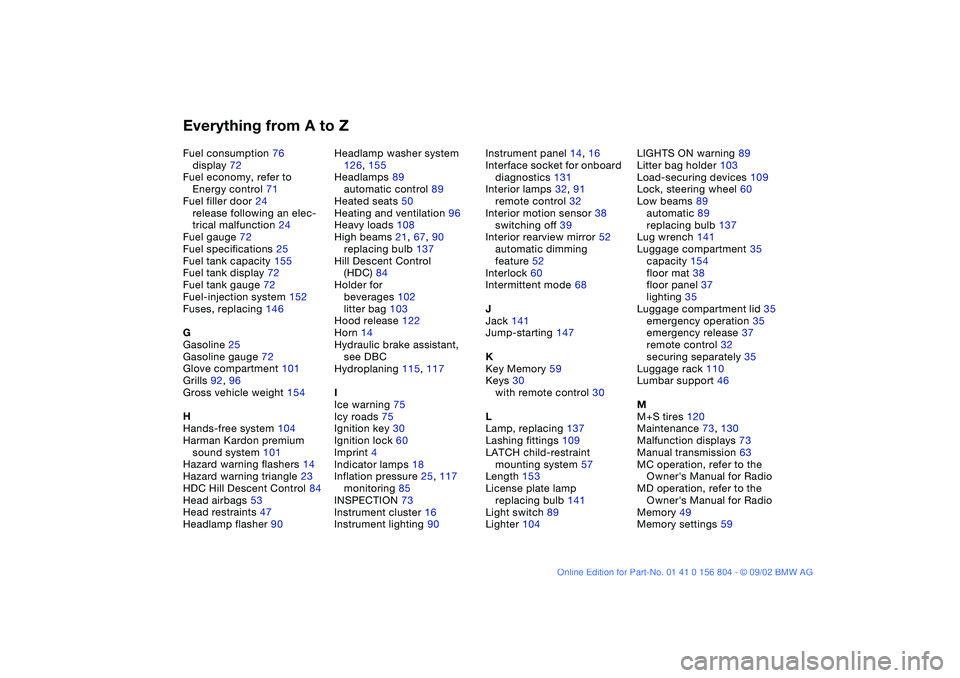
Everything from A to ZFuel consumption 76
display 72
Fuel economy, refer to
Energy control 71
Fuel filler door 24
release following an elec-
trical malfunction 24
Fuel gauge 72
Fuel specifications 25
Fuel tank capacity 155
Fuel tank display 72
Fuel tank gauge 72
Fuel-injection system 152
Fuses, replacing 146
G
Gasoline 25
Gasoline gauge 72
Glove compartment 101
Grills 92, 96
Gross vehicle weight 154
H
Hands-free system 104
Harman Kardon premium
sound system 101
Hazard warning flashers 14
Hazard warning triangle 23
HDC Hill Descent Control 84
Head airbags 53
Head restraints 47
Headlamp flasher 90Headlamp washer system
126, 155
Headlamps 89
automatic control 89
Heated seats 50
Heating and ventilation 96
Heavy loads 108
High beams 21, 67, 90
replacing bulb 137
Hill Descent Control
(HDC) 84
Holder for
beverages 102
litter bag 103
Hood release 122
Horn 14
Hydraulic brake assistant,
see DBC
Hydroplaning 115, 117
I
Ice warning 75
Icy roads 75
Ignition key 30
Ignition lock 60
Imprint 4
Indicator lamps 18
Inflation pressure 25, 117
monitoring 85
INSPECTION 73
Instrument cluster 16
Instrument lighting 90Instrument panel 14, 16
Interface socket for onboard
diagnostics 131
Interior lamps 32, 91
remote control 32
Interior motion sensor 38
switching off 39
Interior rearview mirror 52
automatic dimming
feature 52
Interlock 60
Intermittent mode 68
J
Jack 141
Jump-starting 147
K
Key Memory 59
Keys 30
with remote control 30
L
Lamp, replacing 137
Lashing fittings 109
LATCH child-restraint
mounting system 57
Length 153
License plate lamp
replacing bulb 141
Light switch 89
Lighter 104LIGHTS ON warning 89
Litter bag holder 103
Load-securing devices 109
Lock, steering wheel 60
Low beams 89
automatic 89
replacing bulb 137
Lug wrench 141
Luggage compartment 35
capacity 154
floor mat 38
floor panel 37
lighting 35
Luggage compartment lid 35
emergency operation 35
emergency release 37
remote control 32
securing separately 35
Luggage rack 110
Lumbar support 46
M
M+S tires 120
Maintenance 73, 130
Malfunction displays 73
Manual transmission 63
MC operation, refer to the
Owner's Manual for Radio
MD operation, refer to the
Owner's Manual for Radio
Memory 49
Memory settings 59
Page 162 of 166
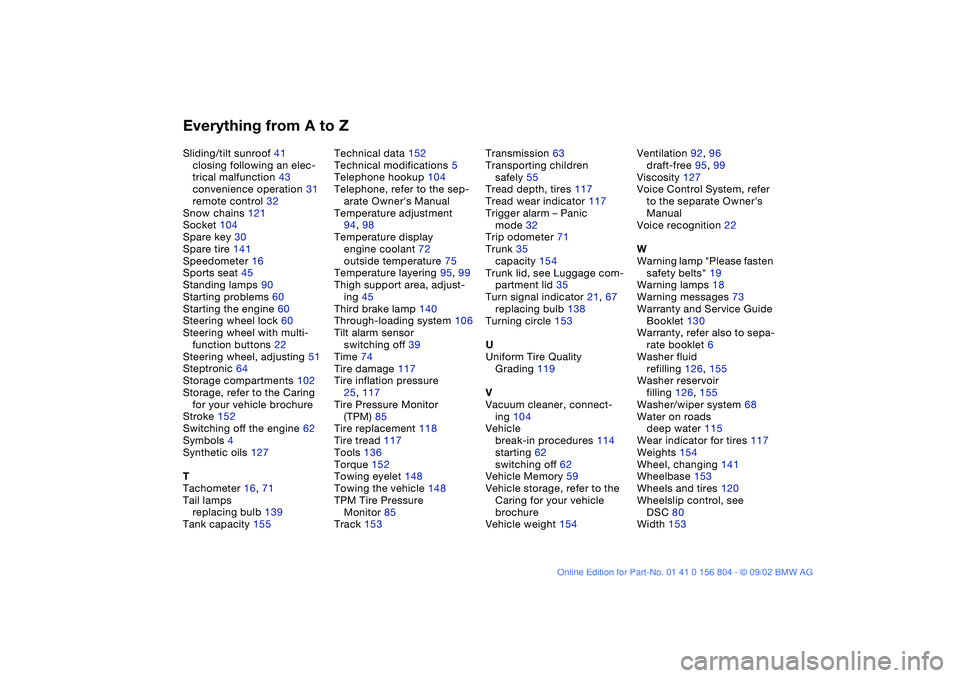
Everything from A to ZSliding/tilt sunroof 41
closing following an elec-
trical malfunction 43
convenience operation 31
remote control 32
Snow chains 121
Socket 104
Spare key 30
Spare tire 141
Speedometer 16
Sports seat 45
Standing lamps 90
Starting problems 60
Starting the engine 60
Steering wheel lock 60
Steering wheel with multi-
function buttons 22
Steering wheel, adjusting 51
Steptronic 64
Storage compartments 102
Storage, refer to the Caring
for your vehicle brochure
Stroke 152
Switching off the engine 62
Symbols 4
Synthetic oils 127
T
Tachometer 16, 71
Tail lamps
replacing bulb 139
Tank capacity 155Technical data 152
Technical modifications 5
Telephone hookup 104
Telephone, refer to the sep-
arate Owner's Manual
Temperature adjustment
94, 98
Temperature display
engine coolant 72
outside temperature 75
Temperature layering 95, 99
Thigh support area, adjust-
ing 45
Third brake lamp 140
Through-loading system 106
Tilt alarm sensor
switching off 39
Time 74
Tire damage 117
Tire inflation pressure
25, 117
Tire Pressure Monitor
(TPM) 85
Tire replacement 118
Tire tread 117
Tools 136
Torque 152
Towing eyelet 148
Towing the vehicle 148
TPM Tire Pressure
Monitor 85
Track 153Transmission 63
Transporting children
safely 55
Tread depth, tires 117
Tread wear indicator 117
Trigger alarm – Panic
mode 32
Trip odometer 71
Trunk 35
capacity 154
Trunk lid, see Luggage com-
partment lid 35
Turn signal indicator 21, 67
replacing bulb 138
Turning circle 153
U
Uniform Tire Quality
Grading 119
V
Vacuum cleaner, connect-
ing 104
Vehicle
break-in procedures 114
starting 62
switching off 62
Vehicle Memory 59
Vehicle storage, refer to the
Caring for your vehicle
brochure
Vehicle weight 154Ventilation 92, 96
draft-free 95, 99
Viscosity 127
Voice Control System, refer
to the separate Owner's
Manual
Voice recognition 22
W
Warning lamp "Please fasten
safety belts" 19
Warning lamps 18
Warning messages 73
Warranty and Service Guide
Booklet 130
Warranty, refer also to sepa-
rate booklet 6
Washer fluid
refilling 126, 155
Washer reservoir
filling 126, 155
Washer/wiper system 68
Water on roads
deep water 115
Wear indicator for tires 117
Weights 154
Wheel, changing 141
Wheelbase 153
Wheels and tires 120
Wheelslip control, see
DSC 80
Width 153